
Want a gunner build that is fully capable of handling Haz 5.5 but is incredibly lazy? Look no further!
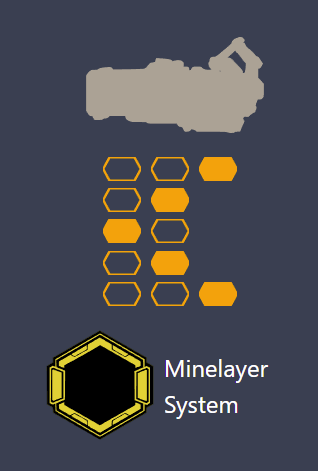
“Hurricane” Guided Rocket System — Minelayer System 32123
“Minelayer System is the worst OC!” —Anonymous
Forget those players, they don’t understand how lazy you are! You probably are skipping this block of text right now. If you did, this is your kind of build.
This loadout is focused on AoE damage; out-performing the mighty Carpet Bomber OC.
Lazy dude approved.
Solo Hazard 5 capable.
You wish you were this lazy.
Your objective is simple: Get those missiles into the ground!
Tier 1: Increased Blast Radius vs. anything else
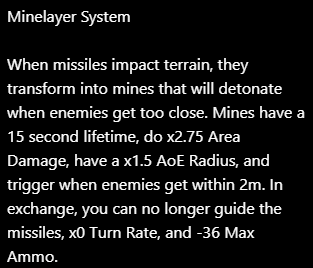
A blast radius of 2m is increased by x1.5 as a mine, making it: 3m
You know what else has a blast radius of 3m? Your lazy friendly “EPC Mining” driller. Did you notice that big crater they leave behind while EPC mining? That’s the range of your mines with this loadout.
Missile Belt doesn’t give enough ammo to make it worth it.
Pressurized Gas Cylinders is grotesquely anti-AoE.
Tier 2: Anti-Tank Missiles vs. Bigger Jet Engine
Squeal in joy at the mayhem you release. The extra x2 armor breaking will shred your enemies apart and leave them vulnerable. And you just lazily sat there, staring at them. It will also maximize your damage output. (see Tier 5)
Bigger Jet Engines will make your missiles fast. Being that unlazy is illegal. It will also lower your damage output (see Tier 5).
Tier 3: Nano Missiles vs. Improved Feed Mechanism
Reloading more often and shooting faster with Improved Feed Mechanism is something a smooth-brained active player will do.
What do we want? To reload less often (especially in dire times). Also, this adds an additional +18 missiles per resupply. Laziness wins.
Shooting slower will also passively control your ammo wasting habits make you use less energy because you won’t have to lift your shooting finger too often.
Tier 4: Zip Fuel vs. Shrapnel Load
Being all about AoE means that we don’t care about weak spots and we don’t care about Shrapnel Load. If the enemy takes damage, you hit the “weak spot”.
Also, the +4 area damage translates to +11 area damage as a mine. Boom boom!
Tier 5: Nitroglycerin Compound vs. anything else
Shooting from across the room, in safety, made you stronger.
Every 0.75 seconds that a missile is in the air, it gains +1 area damage (+2.75 as a mine), capping at +10 area damage (+27.5 as a mine) per missile. This is doubled against armor.
Nano Missiles (Tier 2) will make the most of this tier.
Napalm-Infused Rounds lowers your damage output, so it’s not needed.
Uncontrolled Decompression is a gamble that can be discarded. (See BRT7 Burst Fire Gun)
Results
As a mine:
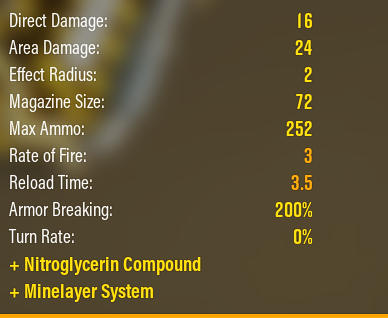
Area damage: 66 to 83.5
AoE Radius: 3m
1 missile will vaporize a load of swarmers.
2 missiles will delete a cloud of grunts.
3 missiles will remove the pack of slashers.
4 missiles will hurt the guard’s feelings.
But we’re too lazy to calculate and count. Just plant your mines and get back to lazily wandering the cave.
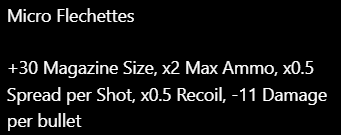
BRT7 Burst Fire Gun — Micro Flechettes 13221
“Micro Flechettes is cringe!” —rando
The yang of the lazy gunner’s yin.
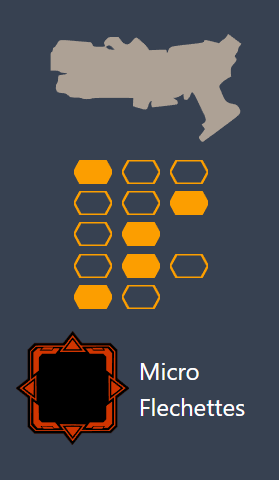
Complete with all-purpose Stun capabilities, you will buy yourself time and space (the essential elements that make a lazy gunner).
With ammo to waste and pseudo-sniper range, you will find this to be a great backup weapon and tool.
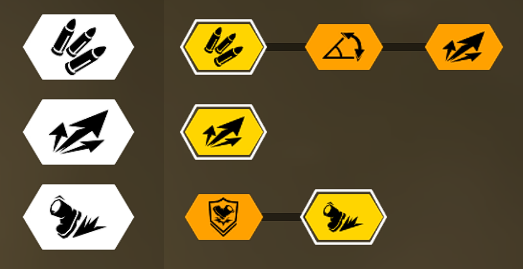
Tier 1: High Velocity Rounds vs. anything else
Damage is the only thing that makes sense for this tier. Without it, this gun is a pea-shooter.
We’re already sniper-tastic without Floating Barrel. No need to sacrifice the damage boost.
You’ll never make full use out of Blowthrough Rounds. Remember, we’re lazily using the rocket launcher.
Tier 2: Disabled Safety vs. anything else
Shooting bursts faster means less time pointing at a single target. Also, you increase your chances to successfully stun your target because of the concentrated attack.
Recoil Dampener isn’t noticeable.
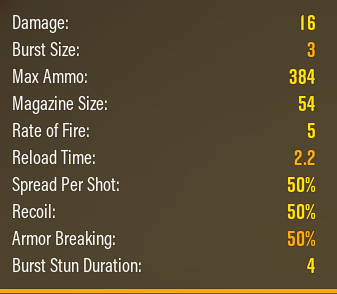
Quickfire Ejector would be nice, but we have 54 bullets in our mags. We won’t need to reload often.
Tier 3: Increased Caliber Rounds vs. High Capacity Magazine
Let’s take a moment to laugh at the High Capacity Magazine:
HA! HA! HA!
Would you really notice +12 ammo? And what about +6 ammo per resupply? Embarrassing!
Let’s setup to increase our damage output by +3.
Tier 4: Expanded Ammo Bags vs. anything else
“But what about that ‘Anti-Air’ stuff you talked about?”
Yes, we don’t need Hollow-Point Bullets. Stunning will give us the time to take out most mactera.
We can’t make any use out of Hardened Rounds. Our damage output is too low for this. Besides, we have our rocket launcher for this.
With more ammo, we can stun more enemies. That’s how the lazy gunners do.
Tier 5: Burst Stun vs. Longer Burst
This is where the “Stun” lives. Go with stun. You will always need stun.
Longer bursts will only waste your ammo faster. Take stun.
Results
Total ammo: 438 (146 bursts)
Potential total stun time: 584 seconds
Ammo per resupply: 219
Great for Mactera, Web Spitters, Acid Spitters, Menaces, and stunning anything else vulnerable to stun.
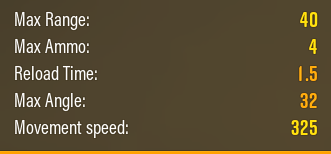
Zipline Launcher — 112
Let’s face it, the Zipline is the laziest mode of transportation in Deep Rock Galactic.
There’s not much to say here.
Tier 1: Expanded Ammo Bags is the only way to get more zips per resupply.
Tier 2: Reinforced Cable increases range and is our only option.
Tier 3: Increased Motor Traction makes ziplines less boring to ride.
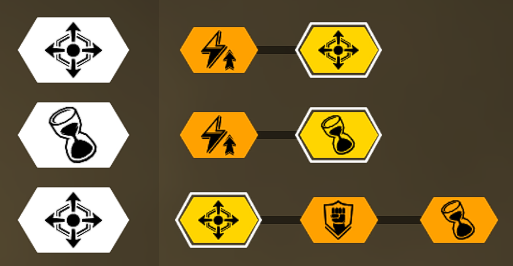
Shield Generator — 221
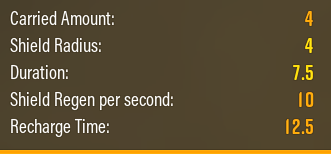
Strangely enough, the area denial is so effective that you’ll forget about your shield most of the time, unless you need to perform an emergency rescue operation. Or create a barrier to prevent the advancement of targets.
Recharge speed is 12.5 seconds by default. Gunners, lazy or not: we don’t need to reduce this.
Tier 1: Improved Projector for bigger shields. Our only logical option.
Tier 2: Larger Capacitors for longer lasting shields. Our only logical option.
Tier 3: Supercharged Coils for even bigger shields, more valuable than a few seconds of extra shield effects or 1.5 seconds of extra shielding.
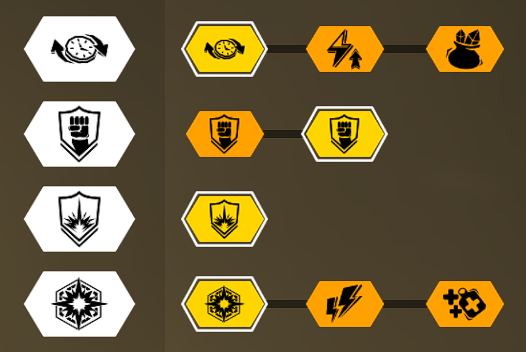
“Barracuda” Armor Rig — 1211
The armor loadout is built for defense. If anything creeps on you during your massive area denial techniques with the minelayer system and knocks out your shield, your armor will pop them with the finishing blow.
Tier 1: Improved Generator will speed up the time it takes to get your shield up and ready for Tier 4.
Tier 2: Healthy, the one-size-fits-all choice.
Tier 3: Do we have a choice? Take whatever is here.
Tier 4: Shockwave. Pow! Laziness strikes again! Deals a small amount of damage that may destroy your nearby enemies.
Cluster Grenade
The gunner has three grenade choices:
One that misses and doesn’t bounce.
A second that obscures the battlefield and burns allies for a little while.
And the ideal choice: One that blows up everywhere, doing great damage and gambles a chance at stunning your target(s).
A truely lazy gunner will go for the Cluster Grenades.
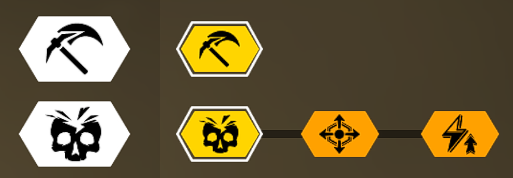
Pickaxe
Your pickaxe will be the only major damage dealer to bigger enemies, such as Praetorians and Oppressors. There’s not much to explain for this topic beyond this.
Perks
For anyone who is curious on what I personally use as my perks:
Passive:
Resupplier: Get back into the action fast and with nearly a full bar of health.
Thorns: Delete Naedocyte annoyances quickly and punish any creature capable of getting past your minefield.
It’s a Bug Thing: Free Gold and Nitra without having to slow down or waste ammo.
Active:
Dash: A must have for every self-respecting dwarf. Helps you quickly get back to being lazy.
Beast Master: Confuse enemies and help allies with the lovable Steeve. Stunning grunts with the BRT7 is ideal to prevent taking unnecessary damage while recruiting Steeve.
General Strategy with The Lazy Gunner
As the lazy gunner, your role is to create an area of denial for enemies.
Mine over matter
Try to look for the paths that enemies tend to follow and plant your mines strategically. There are several things to note about mines:
1) Mines take about 1 second until they are armed, so place mines a fair distance in front of your targets.
2) Mines cannot be laid on top of each other. This is not super restrictive, but you will need to spread your mines about to get the most out of them.
3) You want to lay your mines out a fair distance away from you to get some extra oomph out of the Nitroglycerin Rounds loadout choice.
4) Mines stay around for 15 seconds before they self-destruct. It doesn’t sound like long, but in the heat of the moment, it feels like those mines are there eternally.
Mine your distance
If you feel like you’re about to be surrounded and wrecked, start shooting mines at your feet before the cloud of enemies create a hitbox so large that mines fail to deploy (meaning they hit an enemy directly).
The output damage is usually fair enough to make most enemies disappear.
This small gun of mine
Use the BRT7 for stunning. For example, hitting that fast approaching Slasher (to turn into Steeve) or shooting the nearby Praetorian to give yourself space to move.
The BRT7 is very useful as an anti-air if you focus your attack at the weak spot of the target. Goo Bombers are totally susceptible to stun, which will prevent them from making a mess on the battlefield. Your team will thank you.
The unusually large range of the BRT7 also allows you to help allies in the distance if you see them in danger. This includes targetting distant web spitters and acid spitters. Also this includes clearing threats such as Leeches and Stabber Vines.
Mine if I Mine?
Going back to the minelayer system, it is always helpful to setup some mines around anything that will distract you from combat, such as mining minerals, gathering Aquarqs or compressed gold (We’re rich!), or reviving an ally.
These moments leave you vulnerable to the most annoying threats. Using some hindsight and having a nasty greeting prepared for them will leave you feeling cozy with health.
Conclusion
I’ve never really liked the Gunner class prior to discovering this build. Focusing an attack at a very small group of enemies seems impractical.
With this build, I’ve managed to layout such a strong area of denial to enemies that I’ve had free time within a wave to mine, rescue others, pet steeve, and point at mushrooms or goo sacks. I even forget that I have grenades or can also use shields at times.
I thought I was being a goof until I saw that I commonly surpassed or rivaled Engineer death machines or chaotic drillers in the amount of total kills.
I know this is a good build and I wanted to share this with the community. The minelayer system is a hidden gem that is commonly overlooked. Check it out and roast me if you disagree (keep it clean please).
Hope you enjoy the post for Deep Rock Galactic Best Gunner Build & Mine Layer System, If you think we should update the post or something is wrong please let us know via comment and we will fix it how fast as possible! Thank you and have a great day!
- Check All Deep Rock Galactic Posts List



Leave a Reply