
This guide describes the base building mechanics of the game and recommendations on how to build said bases, from initial layout to logistics and upkeep.
Introduction
There are very few sources of information for players who wish to harm themselves with the process of base construction in this game. The goal of this guide is to make this horrible process more accessible to players, improve the general quality of bunker bases throughout the game world, and to give people who otherwise would have never thought about base building a glimpse into our hellish realm.
Before you decide to become a base builder in Foxhole, if you wish to even do so, I have a few warnings you should recognize:
- Building in this game demands an extreme amount of your time and seldom rewards you outside of the “fun” of the process.
- Building mechanics in this game are very unpolished and frustrating, and they likely will not be improved for some time.
- Other players *WILL* hinder your ability to build and may undo many hours of work simply because they are jerks or do not know any better. Griefing bunkers is generally not considered to be against the rules of the game by the devs.
- You should expect that other players will not repair your bunker during artillery barrage or come to assist when you are getting PVE-ed, especially when you have population problems. it’s not because they *want* your bunker to die, they just don’t care.
- Not only do the devs care very little about the building mechanics in this game, they will permanently ban you if they think your game activity is too “RP-oriented” (whatever that means). In general, the foxhole devs are rather thin-skinned and inexperienced, so I would not recommend becoming too invested in the game itself, especially if you are playing alone.
Base building is truly a path of self-harm. I do not recommend anybody do any of this, especially if you plan on working alone (as I do).
The Official Foxhole Wiki – [fandom.com] and the Foxhole subreddit – [reddit.com] are also good sources of information, although I have found that information there is often incomplete or out of date. I will do my best to update this guide as often as I can. Please bother me in the comments or dms if you spot any errors or see anything that could be improved.
What is structural Integrity?
Before even thinking about building anything, it is important to understand the Structural Integrity (SI) mechanic:
In this game, a single bunker is any number of bunker PIECES (i.e. the square and triangle pieces that you can piece together and dig) connected together and not separated by trenches. The health of the bunker is the product of the sum of the health contributions of each bunker piece and the SI of your bunker. The SI of a 1-piece bunker is always at 100% which decreases exponentially as more pieces are added on, with every type of bunker addition having a different SI reduction multiplier (at some point I will produce a chart with each bunker/garrison/etc. type). Because a single-piece bunker is considered to have 100% SI instead of its multiplier value, there is always a significant drop in “SI-efficiency” from a 1-piece to 2-piece bunker.
In other words, adding bunker pieces will increase the health pool of the bunker but will yield diminishing returns, and after a certain point, additional pieces will begin to REDUCE the overall health of your bunker.
For example, if a T1 bunker piece contributes 100 health points, a bunker comprised of two T1 bunker pieces will have 144 health points, because the structural integrity decreases when combining two bunker pieces. However, if you upgrade the bunker to T2, structural integrity is improved and the health of each bunker piece increases, producing a bunker with 223 health points.
Another aspect which impacts structural integrity is the construction of additional structures in the bunker piece, such as garrisons, generators, and observation bunkers. The functions of these will be explained in a later section, but understand that constructing these onto bunkers will also reduce its structural integrity further and by different amounts.
Eventually, I will make a detailed addition with all of the specific SI modifier values. (WIP: currently on strike)
Selecting a Location
This is an important step of the process which will influence your work for the remainder of your time spent in the current war. You are free to choose any open spot at the front, if you can even find one, although you risk your base simply being PVE’d by a solo tank player during construction because nobody bothers to go to your base. Alternatively, you could choose a location at the very rear where resources are plentiful and safety is guaranteed, although your base will either never get used or be steamrolled at the end of the war when pop has plummeted.
If you intend on constructing a concrete monstrosity that stands for weeks, halts offensives, and turns the tide of war, it is essential that you choose a location with a balance of the two extremes I mentioned above, among other aspects. Here are some things to keep in mind:
- ALWAYS ensure that your bunker core is placed along a road. Without road access, logistics becomes a massive pain, and nobody will help you resupply your base when the enemy comes.
- ALWAYS place your bunker complex in a strategically important area; its purpose is not to preserve itself, but to protect other important structures or locations on the map. This can be anything from a relic base/town base, a choke point (valleys or bridges), or even a road intersection.
- Ideally, place your bunker base near mines, fields, refineries, factories, or seaports. Not only are these structures important to defend, this will make supplying your bunker easier. However, such luxuries may not be available if your bunker intends to protect a remote relic base. In any case, having an understanding of where the nearest sources of certain resources are located is essential.
- Understand that terrain and obstacles can hinder your ability to build. It is best to avoid trees, hilly terrain, and other obstacles. Sometimes, rocks or buildings can be used to your advantage, but more often than not, they will serve to be a weakness of your bunker base.
It can be difficult to find a location to place your bunker, especially on Shard 1 where all of the massive clans will have built massive bunkers in every important region on the map within a few hours of the beginning of the war, but these bunkers will inevitably become destroyed, and people are ALWAYS needed to jump at the opportunity to construct bunkers in newly occupied regions.
The Bunker Core
As the name implies, this is the core of your bunker base. It is the square piece with the ramp that you spawn in and the area which needs to be accessed in order to resupply the bunker and manage unlocks. As was mentioned in the previous section, it should be located along a road so that it can be accessed by trucks to resupply the bunker, or by armed vehicles to rearm themselves. Also remember that this is the location at which players will spawn and resupply, so make it easy for people to walk to and from the bunker core. This will make it more likely that players will actually spawn here and use your bunker.
You are free to vary the shape of your core, but there are many in-game requirements to keep in mind and some preferences that I have that you should consider. A bunker core must be comprised of at least six (6) connected (not by trenches) bunker pieces, and the square piece that you intend on turning into the actual bunker core piece (the bit with the ramp) must be constructed with a Construction Vehicle (CV) and MUST BE TIER 1 in order to build. Keep in mind that the rest of your bunker base must be connected to your bunker core in order for garrisons and such to be constructed.
I advise against constructing your bunker core larger than the necessary six pieces. This will result in a greater bunker footprint and reduced structural integrity, making your bunker more vulnerable to artillery, A larger core also takes up space nearby which could be used for garrisons to protect your bunker or allow vehicles to access your bunker. I would also strongly advise against constructing any garrisons, generators, and observation bunkers on the core itself, as they will also reduce the structural integrity of your core.
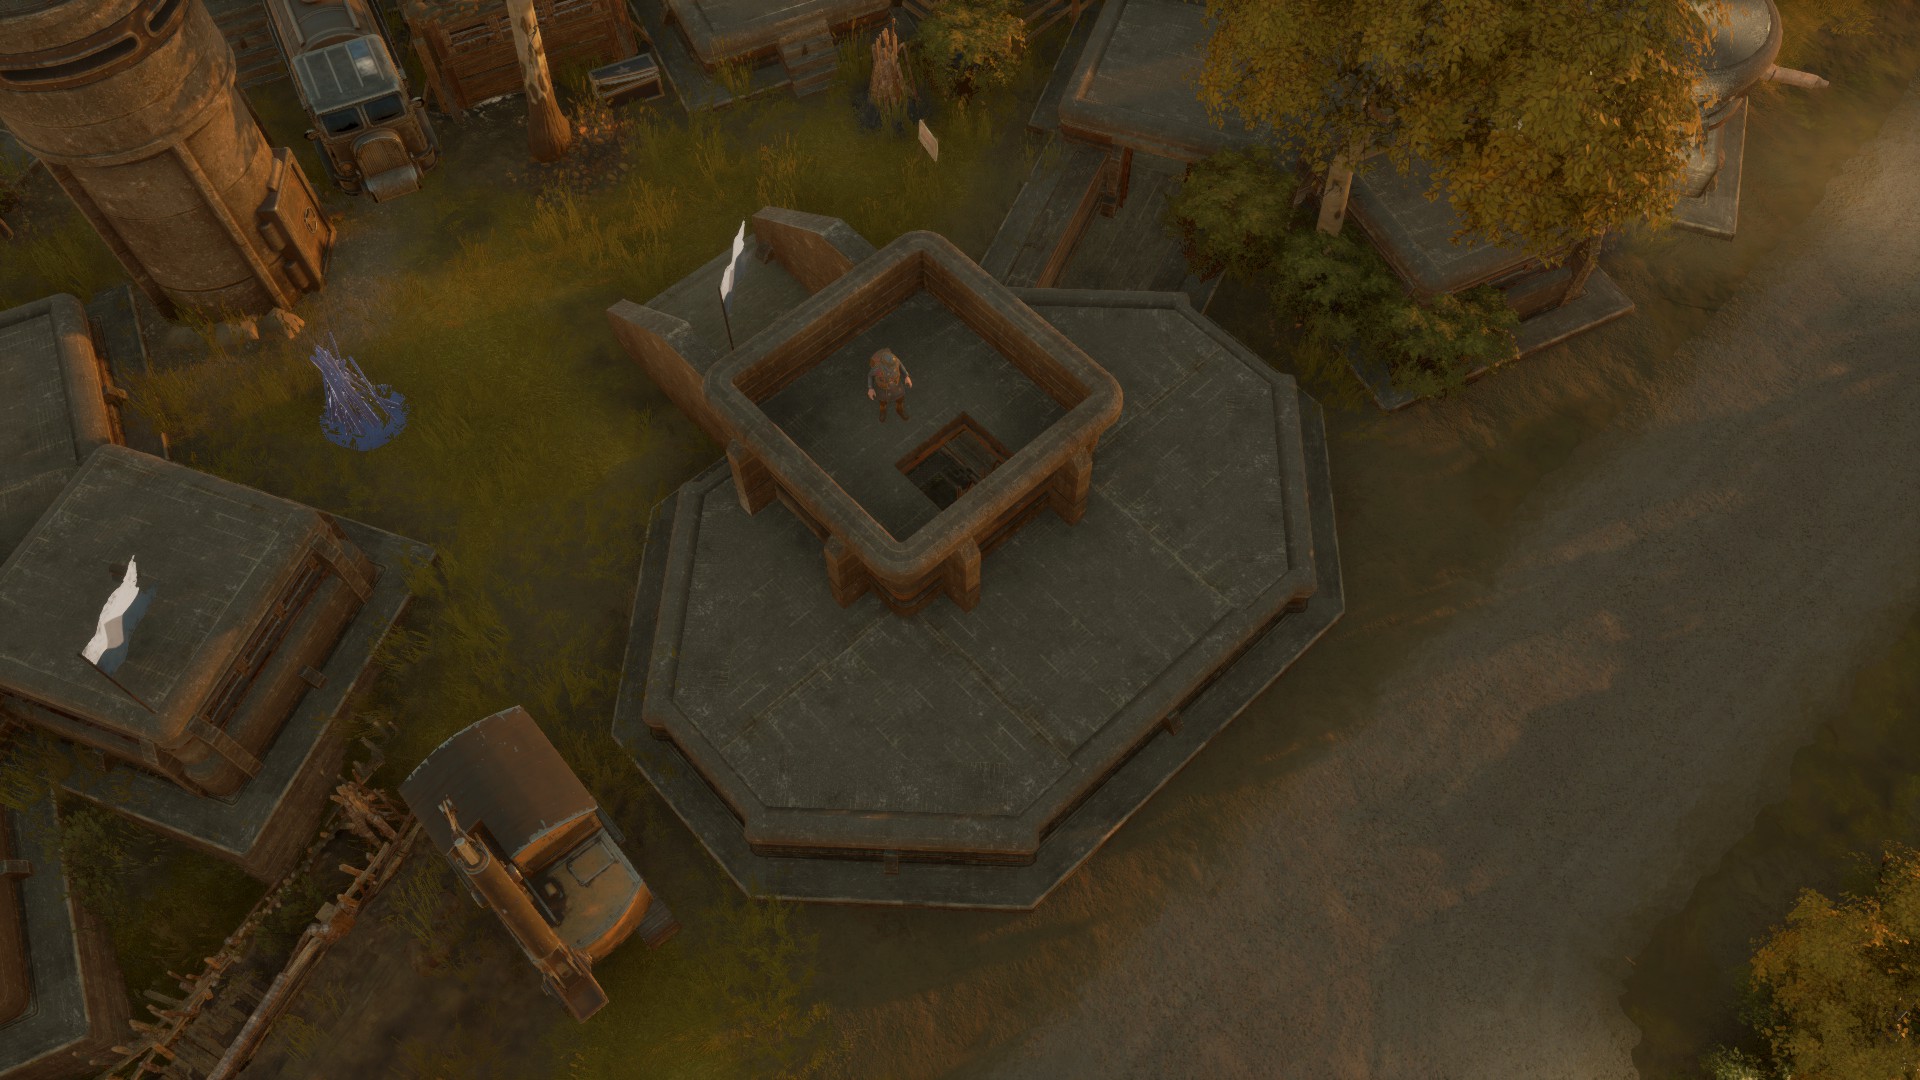
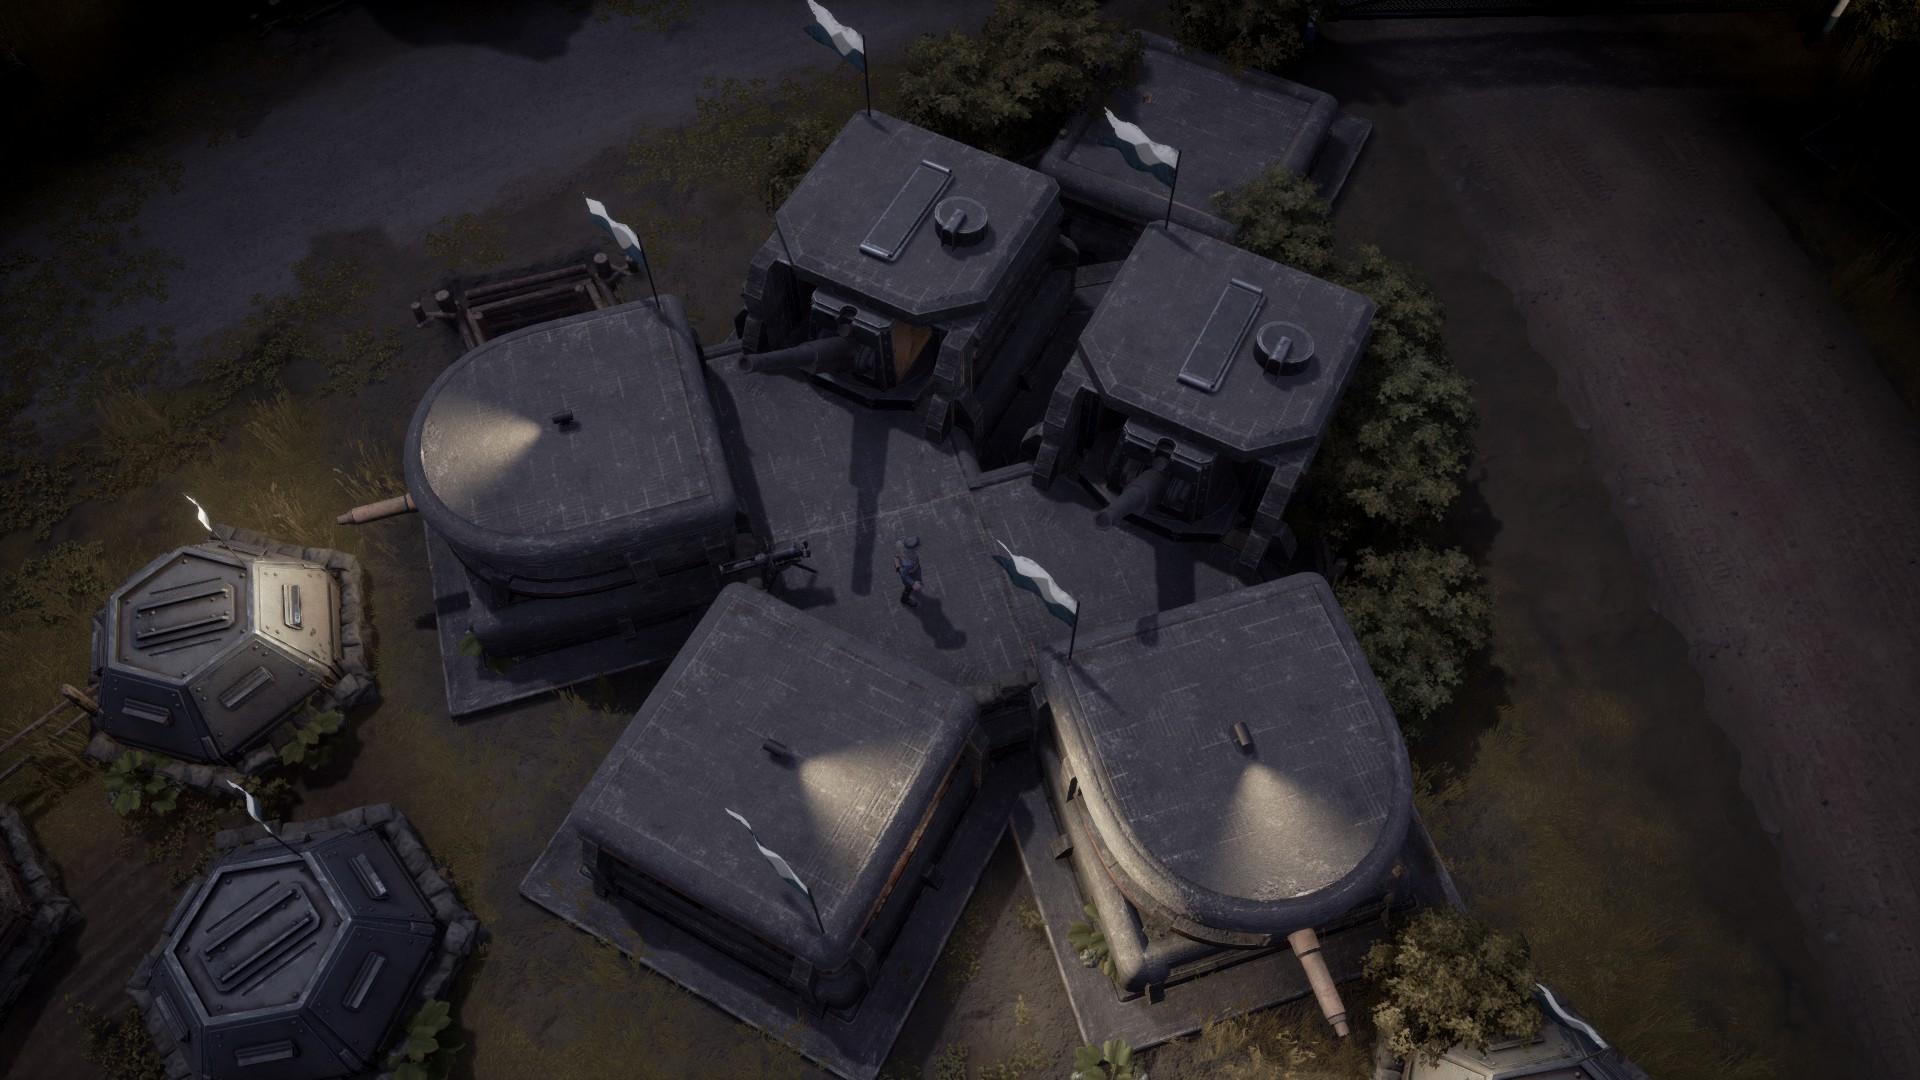
Below is the style of bunker core I, among many other builders, (almost) ALWAYS construct with minimal variations. It is the minimum size and with corner pieces to further shrink the footprint. This design also enables vehicles to access the structure from the other side if the ramp is pointed away from the road. A crane (which has been temporarily removed for clarity) can also be placed on top of the bunker, reducing clutter around your bunker.
However, in some circumstances, it may better suit your building area or situation to construct a slightly different shape, still comprised of six total pieces. Some even prefer to use ONLY corner pieces (aside from the core piece), or to build a large “snake” to make connecting it to other bunkers easier. However, such designs increase the outer perimeter of the bunker, resulting in slightly more AoE damage taken by artillery.
Base Upgrades
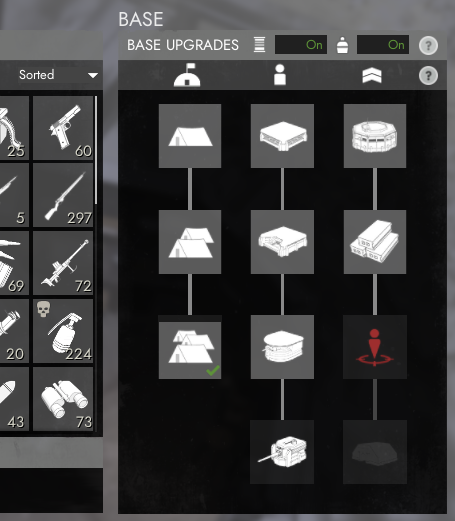
Upgrade progress can be seen on the right side of the bunker base menu (seen below). Upgrade progress is furthered by “player activity”, which the devs have not fully explained. However, it is known that the most important aspect to this is the number of players who have set their spawn at this bunker, followed by the amount of supplies brought to and contained within the bunker base. It is also suspected that player proximity, respawning, and the assembly of items can impact the speed, but the most important aspect is simply setting player spawns.
Voting is another important part of unlocking base upgrades. Although doing so is not believed to add to “player activity”, voting ensures that the player activity you contribute is focused onto a single item instead of being split among the other unlocks by default. You can only vote on a base upgrade if it is actively being unlocked and a green checkmark inside of the square indicates that you have done so. Completed base upgrades are shown in solid white squares, and upgrades in progress are shown as partially filled squares, with progress indicated by the dark background being filled in by the lighter background. Unavailable upgrades are similar to the incomplete upgrades, but the icon will also be subdued. Some upgrade icons will be filled in with red in stead of white, indicating that the required number of bunker modifications (see: Bunker Modifications) have not been met.
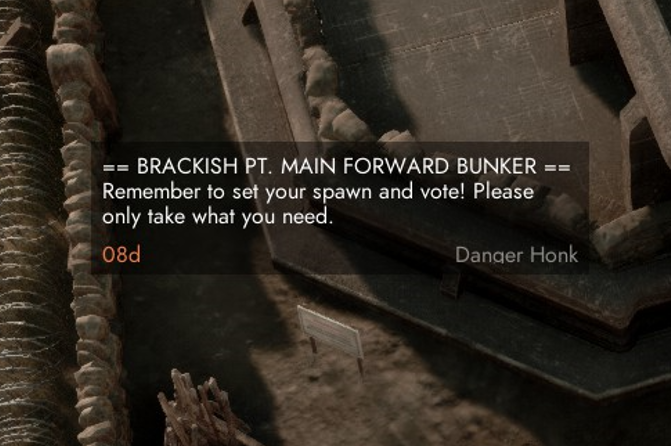
In order to encourage players to set their spawn and vote for the appropriate upgrades, I recommend that you leave a sign by your bunker base core that asks players to do so (and what exactly to vote for). Remember to not place the sign too close to the bunker base, as that will obstruct access to the bunker base.
Below is a table of each upgrade and the approximate amount of time it will take with only one player with a spawn set, with upgrade times decreasing with additional players or other “player activity”. They are listed in the order in which I (and many others) recommend they are completed, although this order can be tweaked to suit your situation.
| Upgrade | Unlock Time | Function |
|---|---|---|
| Provisional Garrison (Tier 1 AI) | <30 minutes | AI with sufficient player activity |
| Small Garrison (Tier 2 AI) | <24 hours | AI without player activity + No decay with supplies |
| Rifle Garrison (RG) | <30 minutes | Allows RG construction |
| Large Garrison (T3 AI) | <72 hours | Reduces upkeep supply cost |
| Machine Gun Garrison (MG) | <1 hour | Allows MG construction |
| Anti-Tank Gun Garrison (ATG) | <24 hours | Allows ATG construction |
| Observation Bunkers (OB) | <1 hour | Allows OB construction |
| Concrete Structures | <24 hours | Allows T3 bunker construction |
| Howitzer Garrison (HG) | <72 hours | Allows HG construction |
| Deployment Point | <72 hours | Allows players to deploy here from the home region |
| Advanced Bunkers | <72 hours | Allows SC/IC construction |
Please note that if you log out of the game, your “player activity” is not counted and the timer will be paused if you are the only person there. To expedite the unlock process, some like to leave the game running overnight with your character sitting in the corner of your bunker core. However, if you do this, I recommend at least turning down your graphics settings, turning off your monitors, and turning on a “power saver” mode of some sort for the sake of your computer/peripherals.
Pillboxes and Watchtowers
Pillboxes and watchtowers are incredibly cheap to construct and are very effective. Although I do not recommend their inclusion in large, advanced, bunker bases, they are incredibly useful for securing town perimeters and logistics routes, as well as for protecting the build area during the construction of a bunker base (see: Concrete). If you decide to use them, remember to place a lot more than you think you need, as they have rather low health.
All three (Rifle, Machine Gun, and Anti-Tank) types of pillboxes are useful, and people often place all three in roughly equal proportions wherever they are needed in the absence of garrison structures (change up your R/MG/AT pillbox proportions to suit your build area, tech level, population, etc.). Friendly infantry can enter these pillboxes for protection and the pillboxes will automatically shoot enemies if AI is enabled.
Watchtowers provide map information (the location of enemies and friendlies) within 80 meters of the tower to those with radios. Spam these everywhere you need them with overlapping range.
Garrisons and Observation Bunkers
Rifle Garrisons
Rifle Garrisons (RGs) will shoot at any enemy infantry and lightly armored vehicles in any direction within ~30 meters if AI is active. If players are able to access the interior of the garrison, they can enter the second floor of the structure (by pressing Q by default) which gives a better view of the surrounding area and makes shooting into trenches easier. The AI is still functional when a player is inside.
Machine Gun Garrisons
Machine Gun Garrisons (MGs) have a narrow field of fire (~90°) and, similar to the RG, will shoot at any enemy infantry and lightly armored vehicles within ~35 meters if AI is active. They can deal with large quantities of infantry, but due to their inflexibility, I recommend that you only use them in special circumstances, such as in the case of a bunker built in a choke point (e.g. bridges, between mountains, etc.) where you want to concentrate fire into a smaller area.
Anti-Tank Gun Garrisons
Anti-Tank Gun Garrisons (ATGs) can only be constructed on Tier 2 bunkers. They have a wide (~180°) field of fire and will shoot at any vehicles within ~30 meters if AI is active. However, ATGs have an additional “retaliation” or “aggro” range of ~50 meters within which ATGs can shoot back at vehicles the bunker has received damage from. ATGs are very effective at deterring attack by vehicles, especially in the early-mid war. Although the retaliation range is greater than any other tanks in the game, the shape of your bunker may allow tanks to attack from outside of this range. Keep this in mind as you construct your bunkers. Additionally, be wary of blind spots produced by ATGs at sharp turns along your perimeter where ATGs are unable to fire. A clever enemy tank can rush to this position and PvE your bunkers from there.
Howitzer Garrisons
Howitzer Garrisons (HGs) can only be constructed on Tier 3 bunkers. They have a ~120° field of fire and a range of ~400 meters. They can shoot at any enemy (infantry, vehicles, emplacements, pillboxes, and even other garrisons) in retaliation to incoming bunker damage (e.g. HE grenades, rockets, tank shells, and artillery). HGs are incredibly effective at deterring attack by any means.
Observation Bunker
Observation Bunkers (OB, Observation Tower, etc.) are essentially the same as watch towers but with double the range (~160 meters) which can be further increased by bunker modifications.
Trenches
Within the confines of your bunker base, the only purpose of trenches is to serve as utility lines and connect your various bunkers to your bunker core. Alternatively, they may also serve as a means for players to leave your core and enter other bunkers without being exposed to artillery. Ideally, they should not be designed to be fought from.
However, outside of your bunker complex, they are incredibly valuable, as they can provide cover for your infantry and expand your area of influence. I highly recommend that for every trench you construct, you place barbed wire facing the enemy and sandbags facing behind, in order to make the trench difficult to use for the enemy. However, I would advise against constructing too many outside of the range of your garrisons until the last minute, as these trenches can be used as cover against your garrisons during PvE attacks.
Octagonal trenches are also highly recommended (required, basically) if you wish to include an artillery battery in your bunker. They allow these guns to be maintained with bunker supplies (see: Upkeep and Maintenance).
Electricity
Engine Room
Engine Rooms (or Generators) provide electricity to your bunker base with the aid of utility pipes. They must be filled with diesel to function (maximum capacity of 200) and, when full, will provide power for 48 hours. Electricity is necessary for garrisons to function at night, with sufficient power indicated by a searchlight on top of the garrison.
They produce 3000W of electricity and will distribute this electricity equally to every bunker piece requiring electricity within 20 utility pipe connections. All T2 and T3 garrisons (except for the HG) require 600W of energy. The OB requires 1000W of energy.
Because engine rooms significantly impact the structural integrity of bunkers (even at T3), it is recommended that you keep engine bunkers separate from your garrison bunkers (see: Layout and Construction).
There are two main methods regarding the placement of engine rooms and the amount of connections used in your bunker. Some prefer the idea of interconnected bunkers with plentiful electricity in centralized locations, making refueling simpler. However, without stringent planning, this can easily lead to very wasteful fuel/space usage, as the 20-pipe range of generators results in a “gradient” of electricity near the edge of the range of your generator hubs. Others prefer a more decentralized placement of engine bunkers near the garrison bunkers they power. This can make refueling less convenient, but significantly improves your fuel/space efficiency and makes your energy grid less susceptible to complete failure.
Observation Bunker Segregation
I recommend that you DO NOT connect this (and accompanying engine room) to any other bunkers with utility pipes, as the OB requires 1000W of electricity instead of the typical 600W. Because engine rooms provide equal energy to all bunkers, this would mean that you would have to supply every garrison with >1000W of electricity in order for your OB to function. Although overproduction of electricity is important for resilience during attack, this would mean that any loss in power generation bringing the average garrison energy supply below 1000W will disable the OB.
Other Bunker Modifications
Aside from garrisons, OB/engines, and bunker cores, other modifications can be made to a bunker piece. They can all be accessed from the same menu, but are often grouped into two (albeit, poorly named) categories:
Add-ons
For the lack of a better term, “add-on” modifications constitute all of the various bits you can tack onto your bunker (or trench, see: Trenches) that can enable/impair movement or provide cover/firing positions (and pipes, see: Electricity). These provide no change in health, integrity, or upkeep of your bunker, but are very important for the defense of your bunker base.
Although most add-ons are self-explanatory, there are a few important things to remember. First of all, sandbags will make it impossible for a single player to vault on top of a bunker without assistance. Always place these facing outward (opposite of what you would typically do for a trench) to give friendly infantry cover and to prevent the enemy from climbing over your bunkers. Secondly, keep in mind that doors/firing ports will block the placement of infrastructure modifications on the wall they are placed. If you intend on placing an infrastructure modification in a bunker piece, ensure that there is at least one featureless wall.
Infrastructure
The function of these modifications is to not only enable you to unlock more bunker base upgrades, but to also provide your bunker base with bonuses. For example, some reduce the shirt cost of deployment, some increase the fire rate of ATG, some increase the range of the OB, etc. and will apply to any relevant structures within 40 (?) bunker pieces. They do not effect the health, integrity, or upkeep of your bunker, but the bonuses these modifications provide have a maximum value:
| Type | Bonus | Max |
|---|---|---|
| Garrison | -1% Deployment Shirt Cost | – 10% |
| Garrison | +2% ATG Rate and -2% HG Response Time | +/-40% |
| Command | -1% SC/IC Electricity Use | – 20% |
| Command | +1% OB Range | + 20% |
Some of these, like bunker base upgrades, require a certain number of garrison/command infrastructure modifications in order to be built. For example, to build infrastructure to get the ATG/HG bonus, one must construct 10 shirt bonus modifications (bunks, lockers, and latrine) first. However, once the second garrison modification is unlocked, you are free to replace all of your garrison modifications with the ATG/HG bonus if you have limited space, as they still count towards the initial garrison modification requirement. I recommend that the ATG/HG and OB bonuses are maxed out before considering the SC/IC and supply bonuses.
As was previously mentioned, these modifications can be placed anywhere that a firing port or door can be placed so long as there is no door or firing port in the way. However, unlike firing ports or doors, only one of these can be placed in each bunker piece.
Layout and Construction
Generally speaking, I recommend that RGs are placed along and within your bunker base with their fields of fire strongly overlapping. Although they have a significant field of fire, they can only handle a small number of enemies at once, so they can be vulnerable to mammon rushes by large numbers of infantry. When using MGs, the easiest method of PvE against them is to simply approach the MG using its blind spots with infantry armed with HE grenades, so remember to cover their blind spots with RGs.
ATGs should be placed along the perimeter (of which there may be multiple layers) of your bunker base, pointed outward (obviously) or wherever you expect the enemy to approach. Their main purpose is to deter the use of vehicles against your bunker base. It is not necessary that their fields of fire overlap strongly, as they are sufficient alone, although more is always better. Some like to place multiple facing roads or within choke points.
HGs, should you choose to plan far ahead and include these within your bunker base, should be placed behind other garrison pieces as part of the same bunker so that they will retaliate when your RGs/ATGs are attacked. I prefer to construct at least as many HGs per bunker as there are ATGs at the perimeter. If you have built a very large bunker base, it may also be beneficial to construct dedicated counterartillery bunkers.
When placing your bunkers and trenches, I recommend that you place all (or at least most) of your desired “footprints” (the sticks and string) before you begin digging. This is because when you are constructing very compact bunker layouts, complete bunkers can prevent you from placing other bunker pieces nearby, as the “hitbox” of complete bunkers are larger than the footprints. In the case that you fear enemy attack before the completion of concrete, I also recommend that you avoid placing any garrisons and to entirely rely upon pillboxes. This is because destroyed garrisons do not leave behind a rubble “footprint” which can simply be rebuilt and may require you to completely demolish your bunker base to re-place your garrison pieces.
Below are some bunker shapes/designs that I use and recommend:
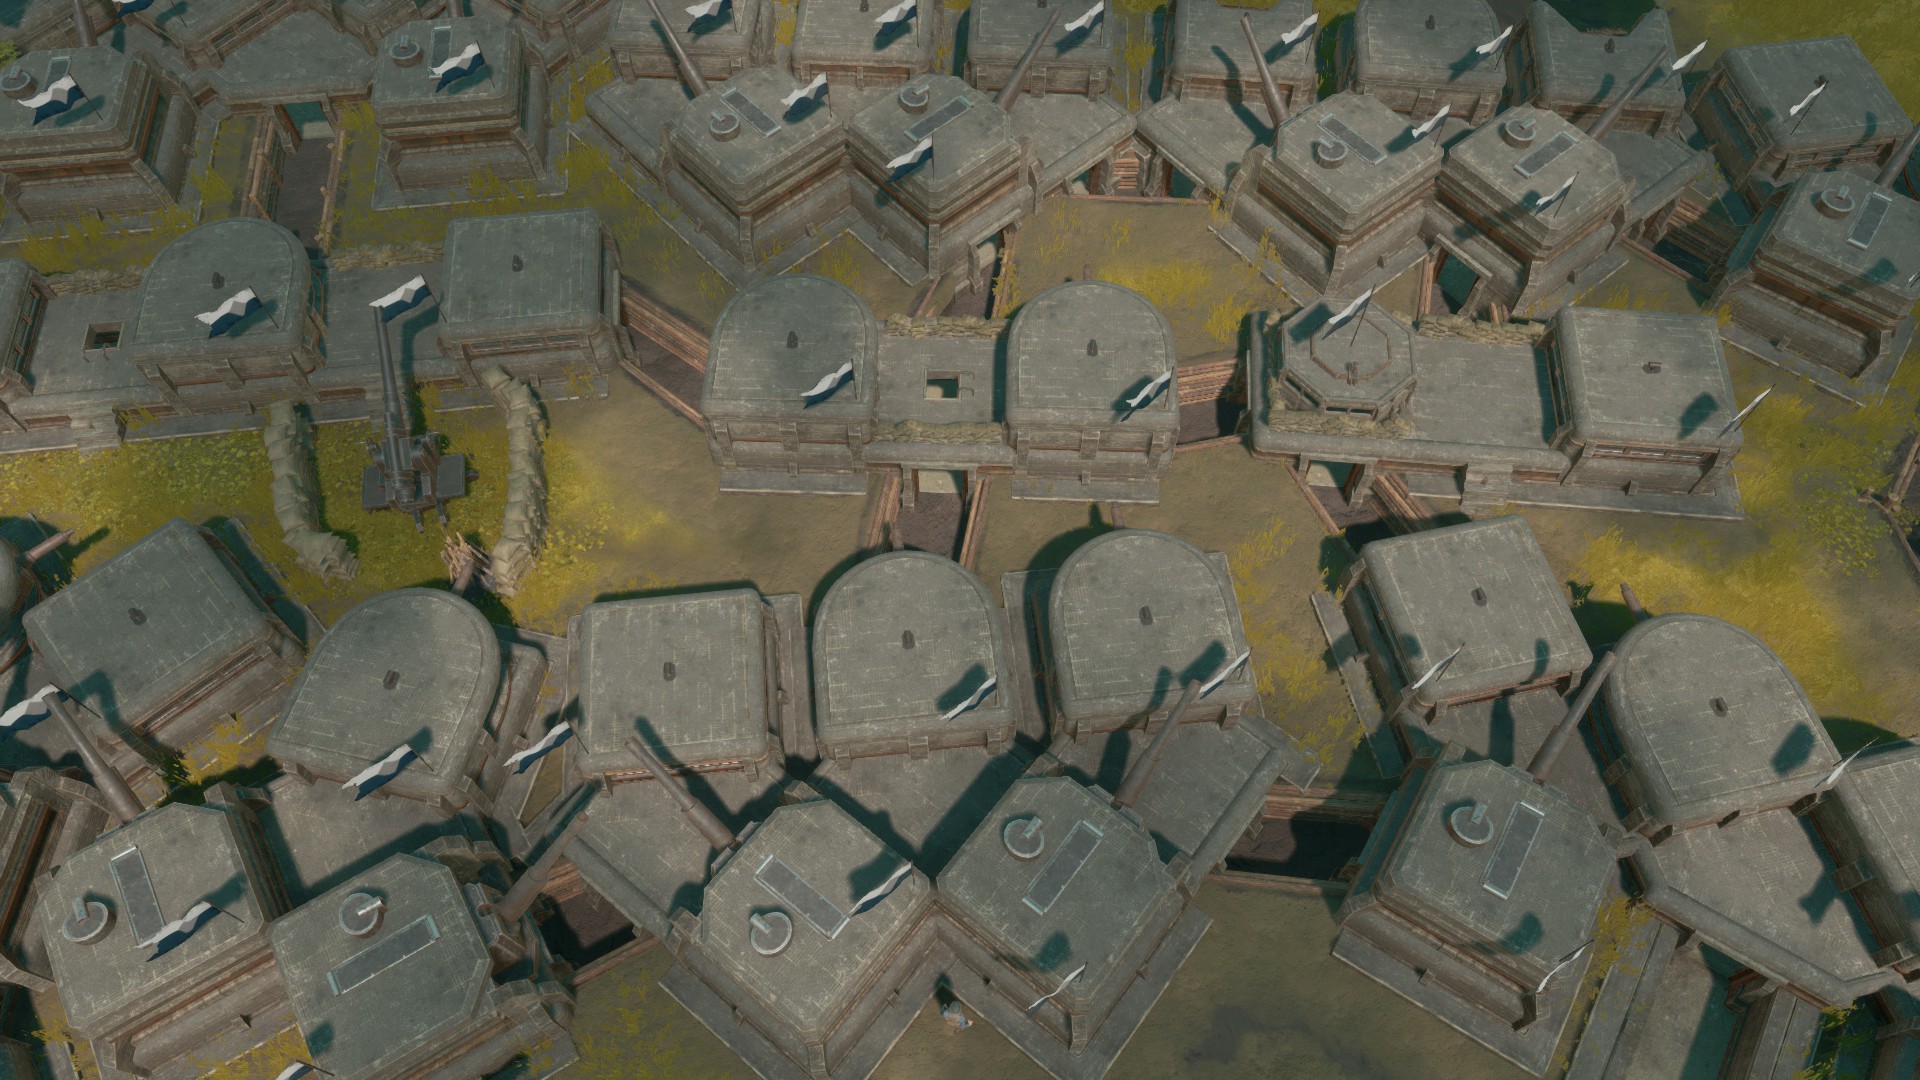
The 1×3
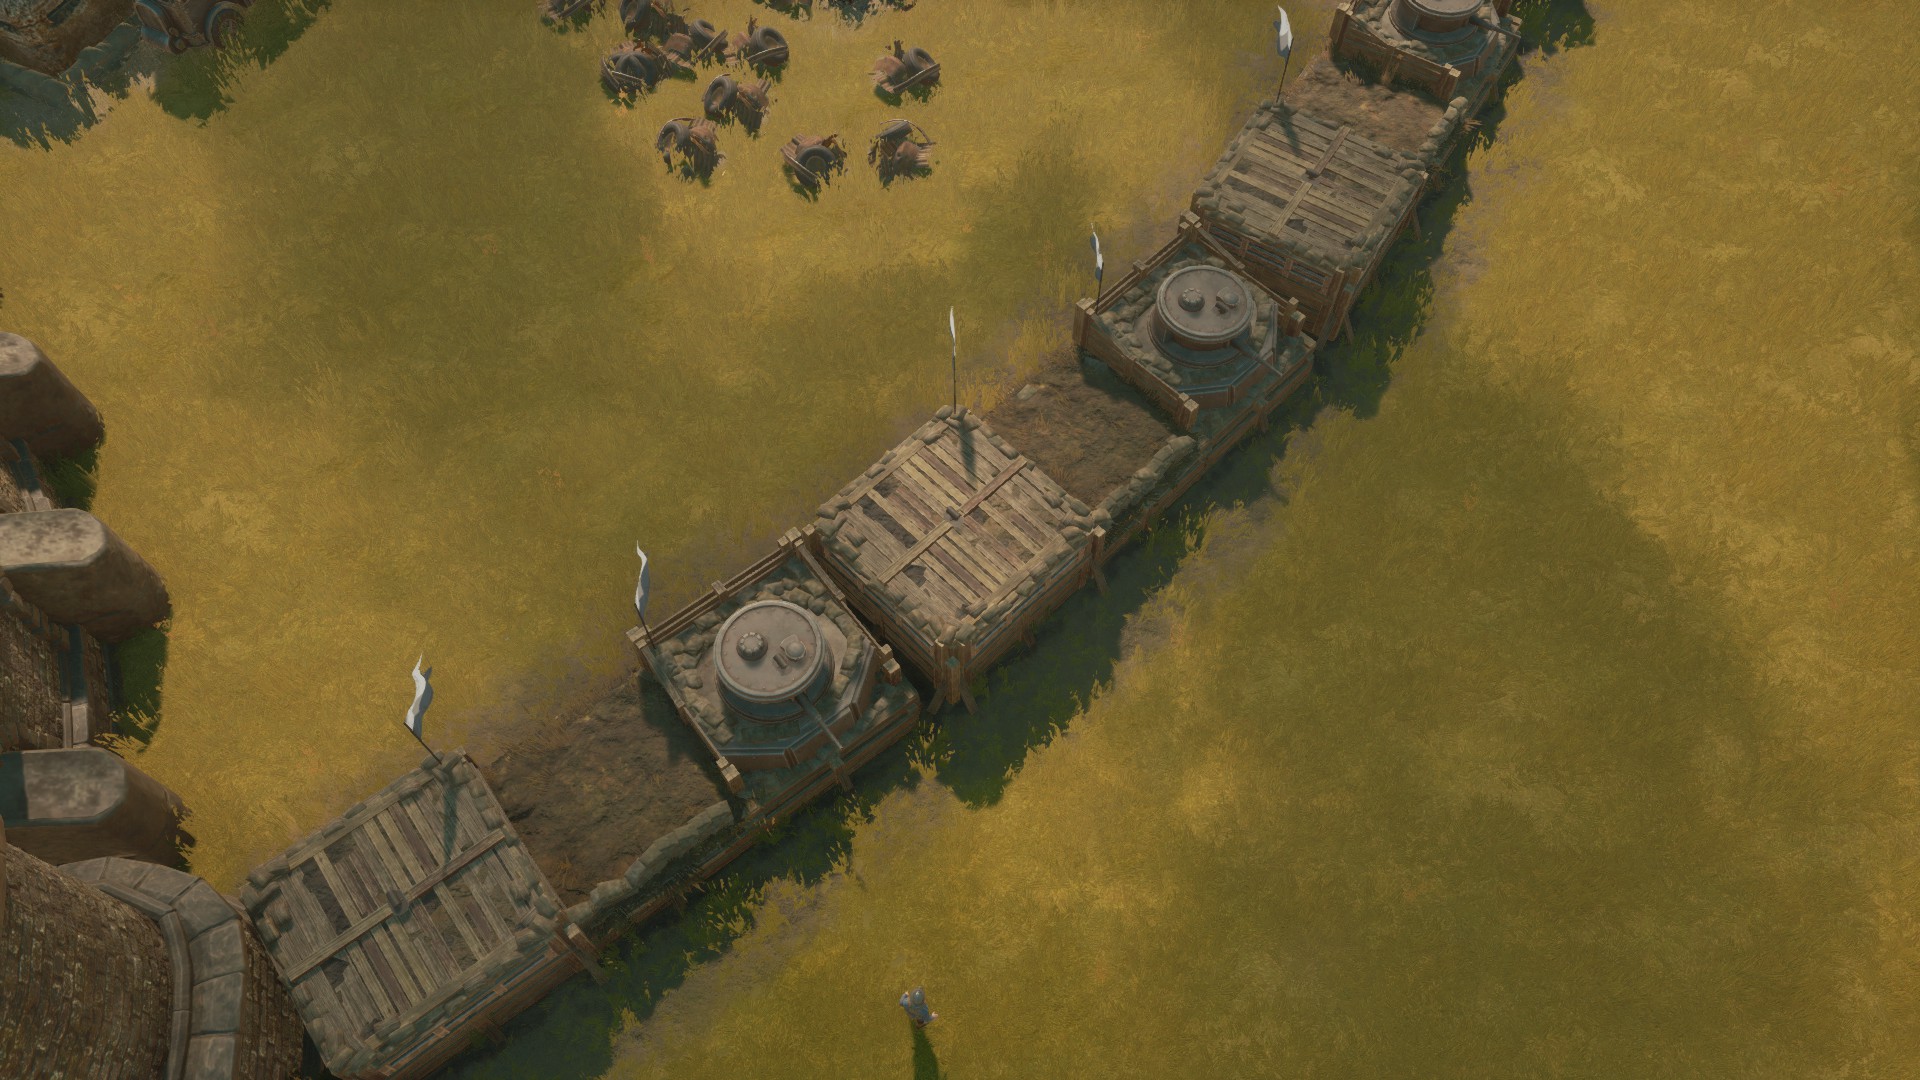
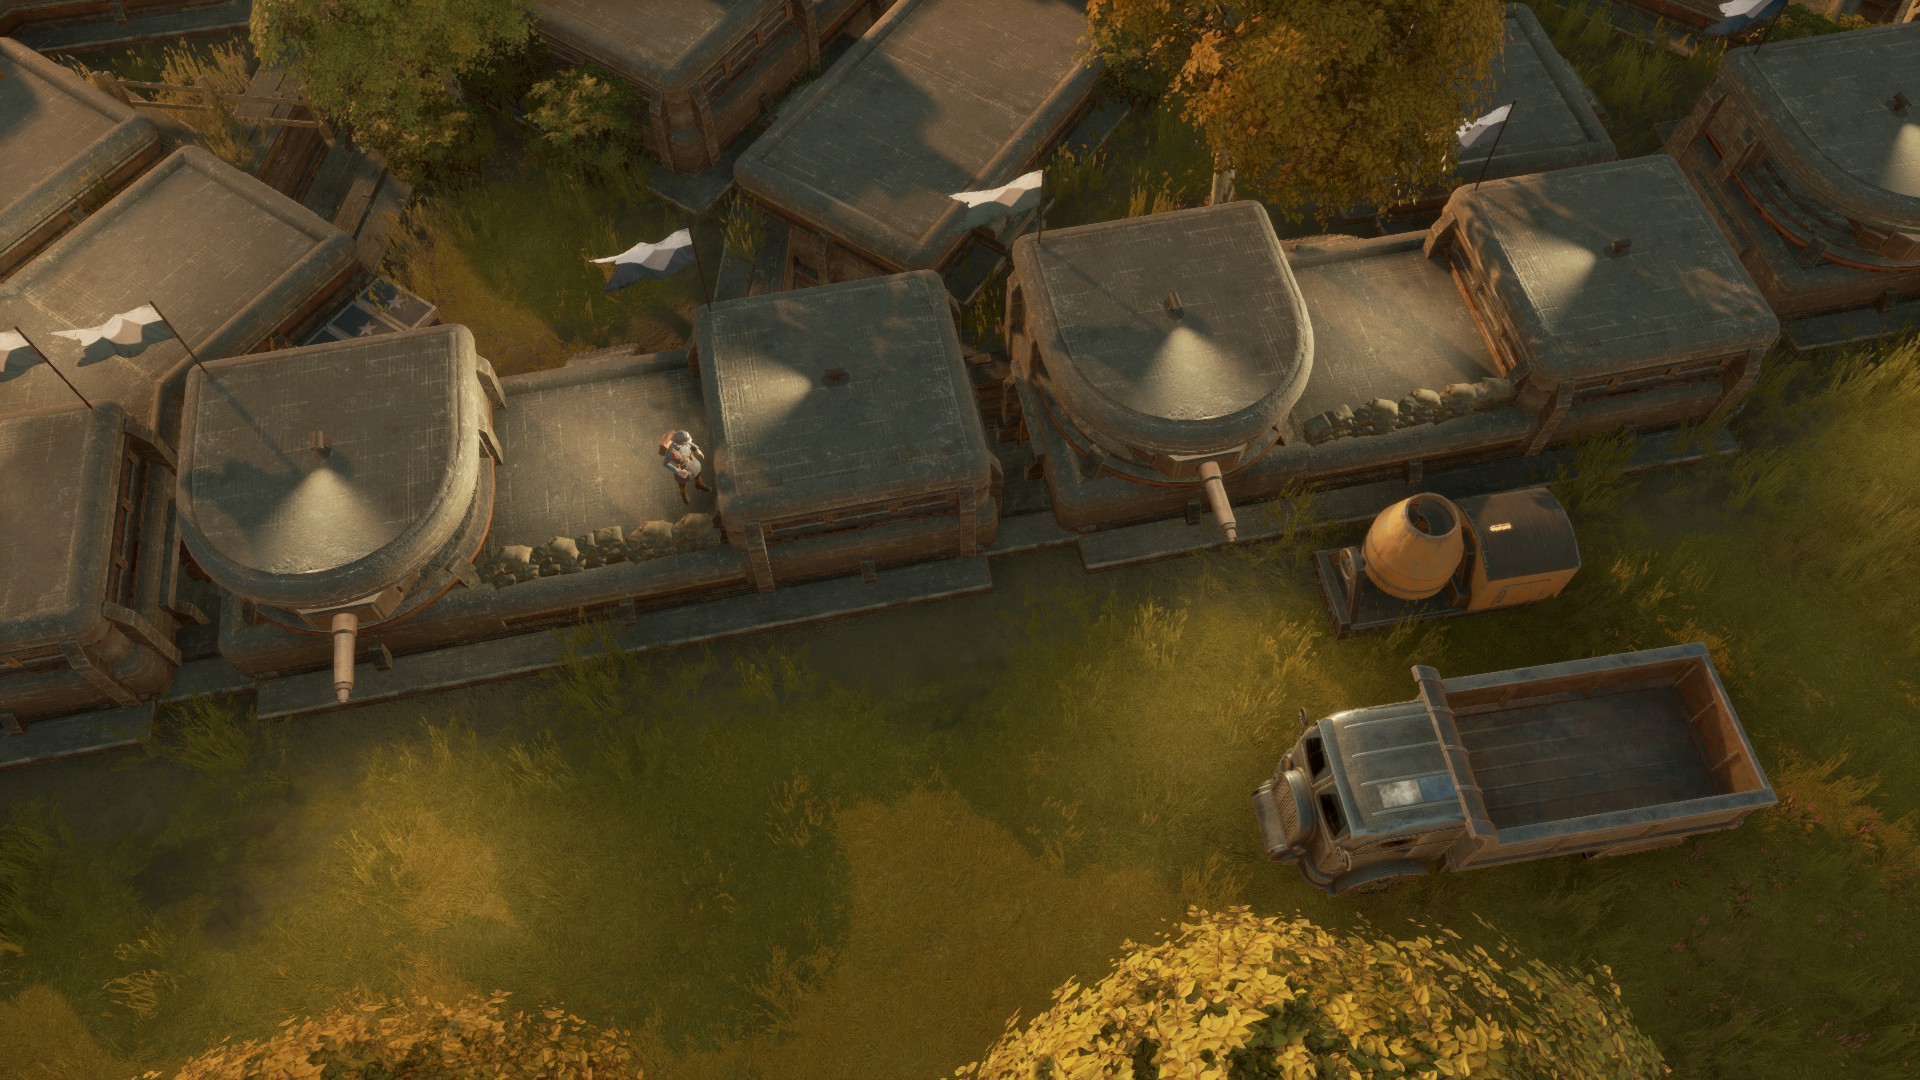
The “bread and butter”, “pierogi and smetana”, “rice and miso soup”, of front line expedient bunker bases. When in doubt, build a load of these. Not only do they give the two garrisons (usually RG+RG, or RG+ATG) a decent combined health pool, they provide an elevated firing platform for friendlies and forms a pretty effective one-way wall. Below is one example (built by the builders at Blemish near the end of War 24 on Shard 2):
They are also pretty effective for protecting the “rear” or interior of a bunker base from partisans where HGs are less necessary, as they don’t take up very much space and do not require very many resources to maintain. Below is an example I built during War 24 on Shard 2:
Engine Bunkers
Because engine bunkers significantly impact SI, keep them separate from your garrison bunkers. Generally speaking, there are two schools of thought in the construction of engine bunkers. Some prefer to construct 1×1 engine bunkers to maximize the health of individual pieces. However, I prefer to construct 1×3 bunkers with two engines for greater bunker health. Although this latter bunker design is less space-efficient and results in less health per bunker piece, they are much less susceptible to AoE damage by artillery. Some may even prefer to turn the third bunker piece into a RG, as the additional health (and garrison protection) will offset the slight decrease in SI at tier 3.
If further space-efficiency is desired, 1×2 structures with two engines are sometimes constructed. Although not the best by any means, this may be the best option in many cases (see: Expedience)
Observation Bunkers
I recommend that you build an observation bunker (or two) separate from all of your other bunkers near the center of your bunker base (near your core), as they are not only an essential structure, but also impact structural integrity. I prefer to construct the OB as part of a 1×3 with its dedicated engine room (and maybe even a RG), although some prefer to construct the two pieces as separate bunkers.
Counter-Artillery
The purpose of counter-artillery bunkers is to serve as a strong deterrent against bombardment of your bunker base. Such structures may be unnecessary in relatively small bunker bases where the HGs built as part of the perimeter defenses are close enough to the interior structures (the core, OBs, etc.) in order to protect them. However, in incredibly large or “thin-skinned” bunker bases, the it may become possible to bombard the interior structures without hitting any of the HG-equipped bunkers. This warrants the construction of counter-artillery structures.
These things can be any shape or size you prefer, with guns pointed in the direction you believe attacks will come from. Below is an example from the REHAB Barronswall base during War 24 on Shard 2 that I found interesting while I was running logi:
Personally, I seldom construct dedicated counter-artillery structures (as my solo-bases are rarely large enough to warrant them), but I would have considered a 4HG structure with a 2 or 4-corner center.
Cont.
The Corner Piece
WIP
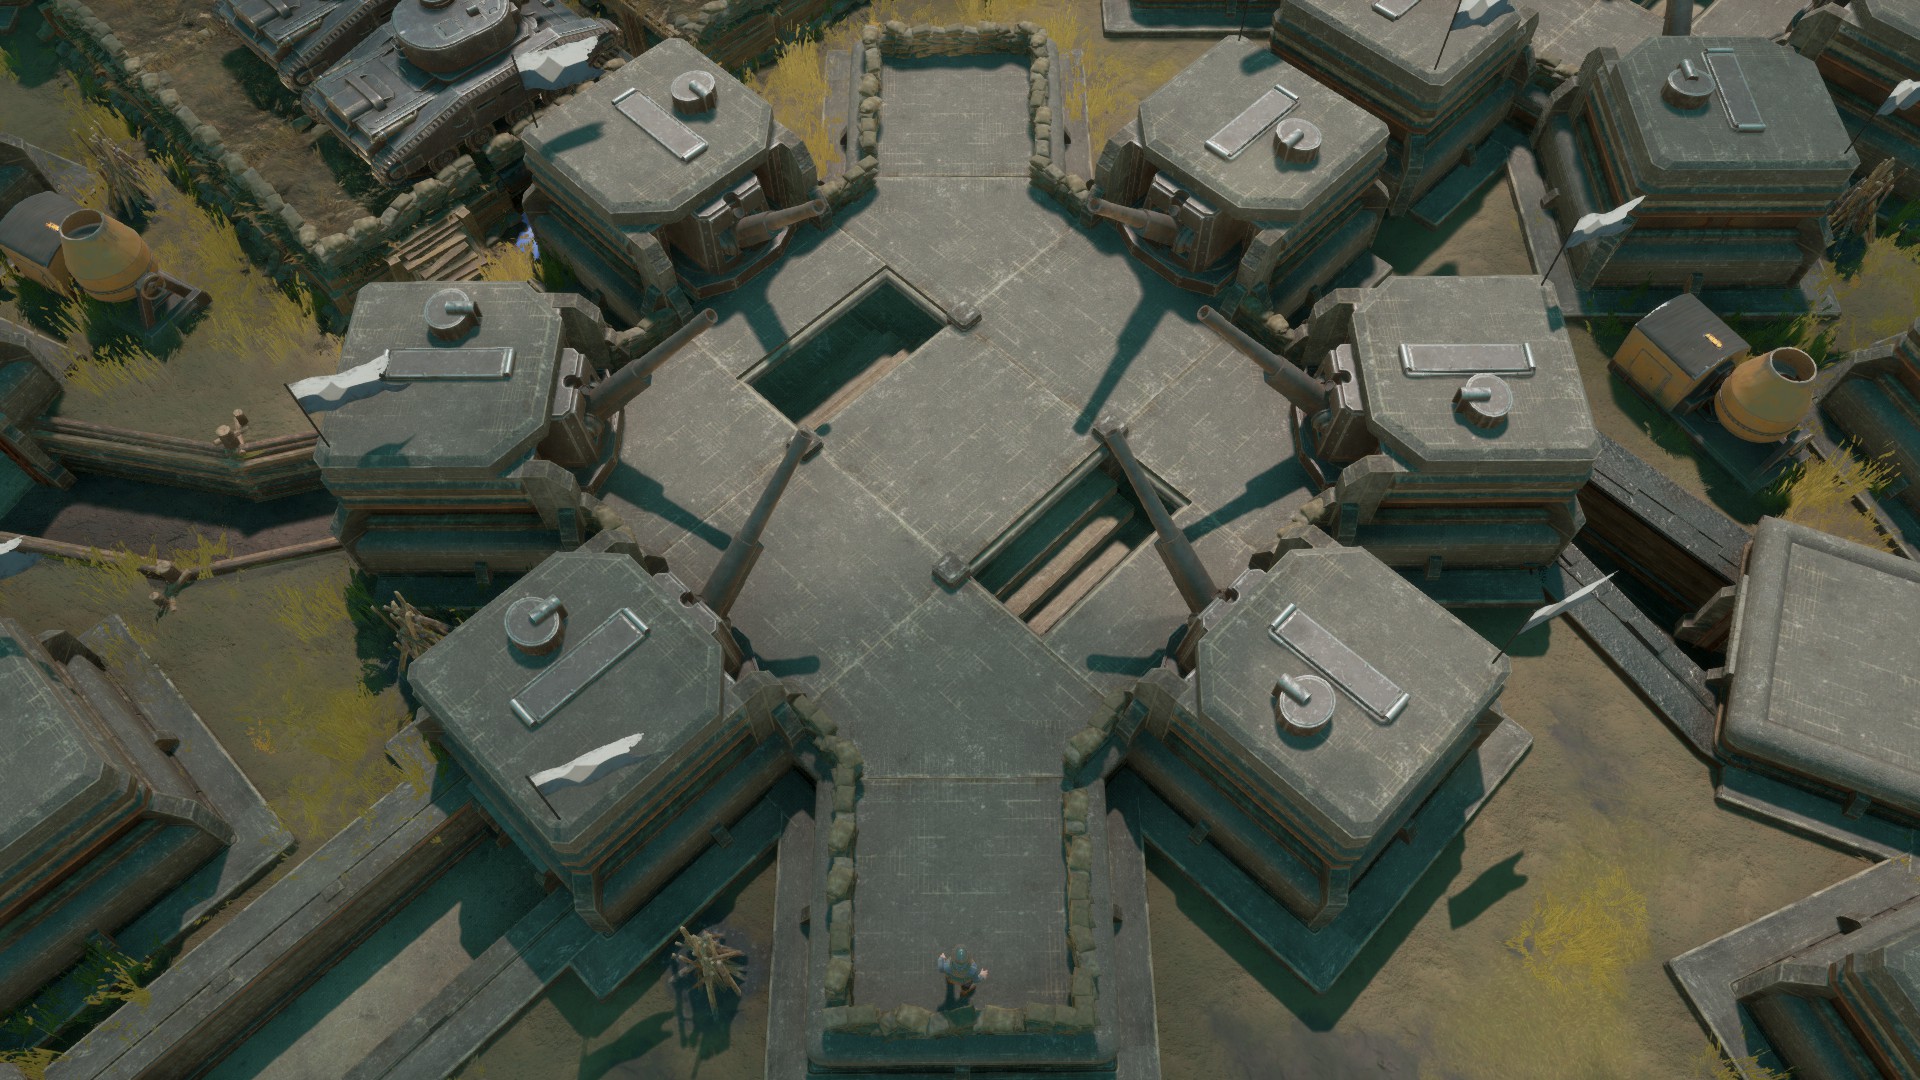
The 5-garrison “Meta”
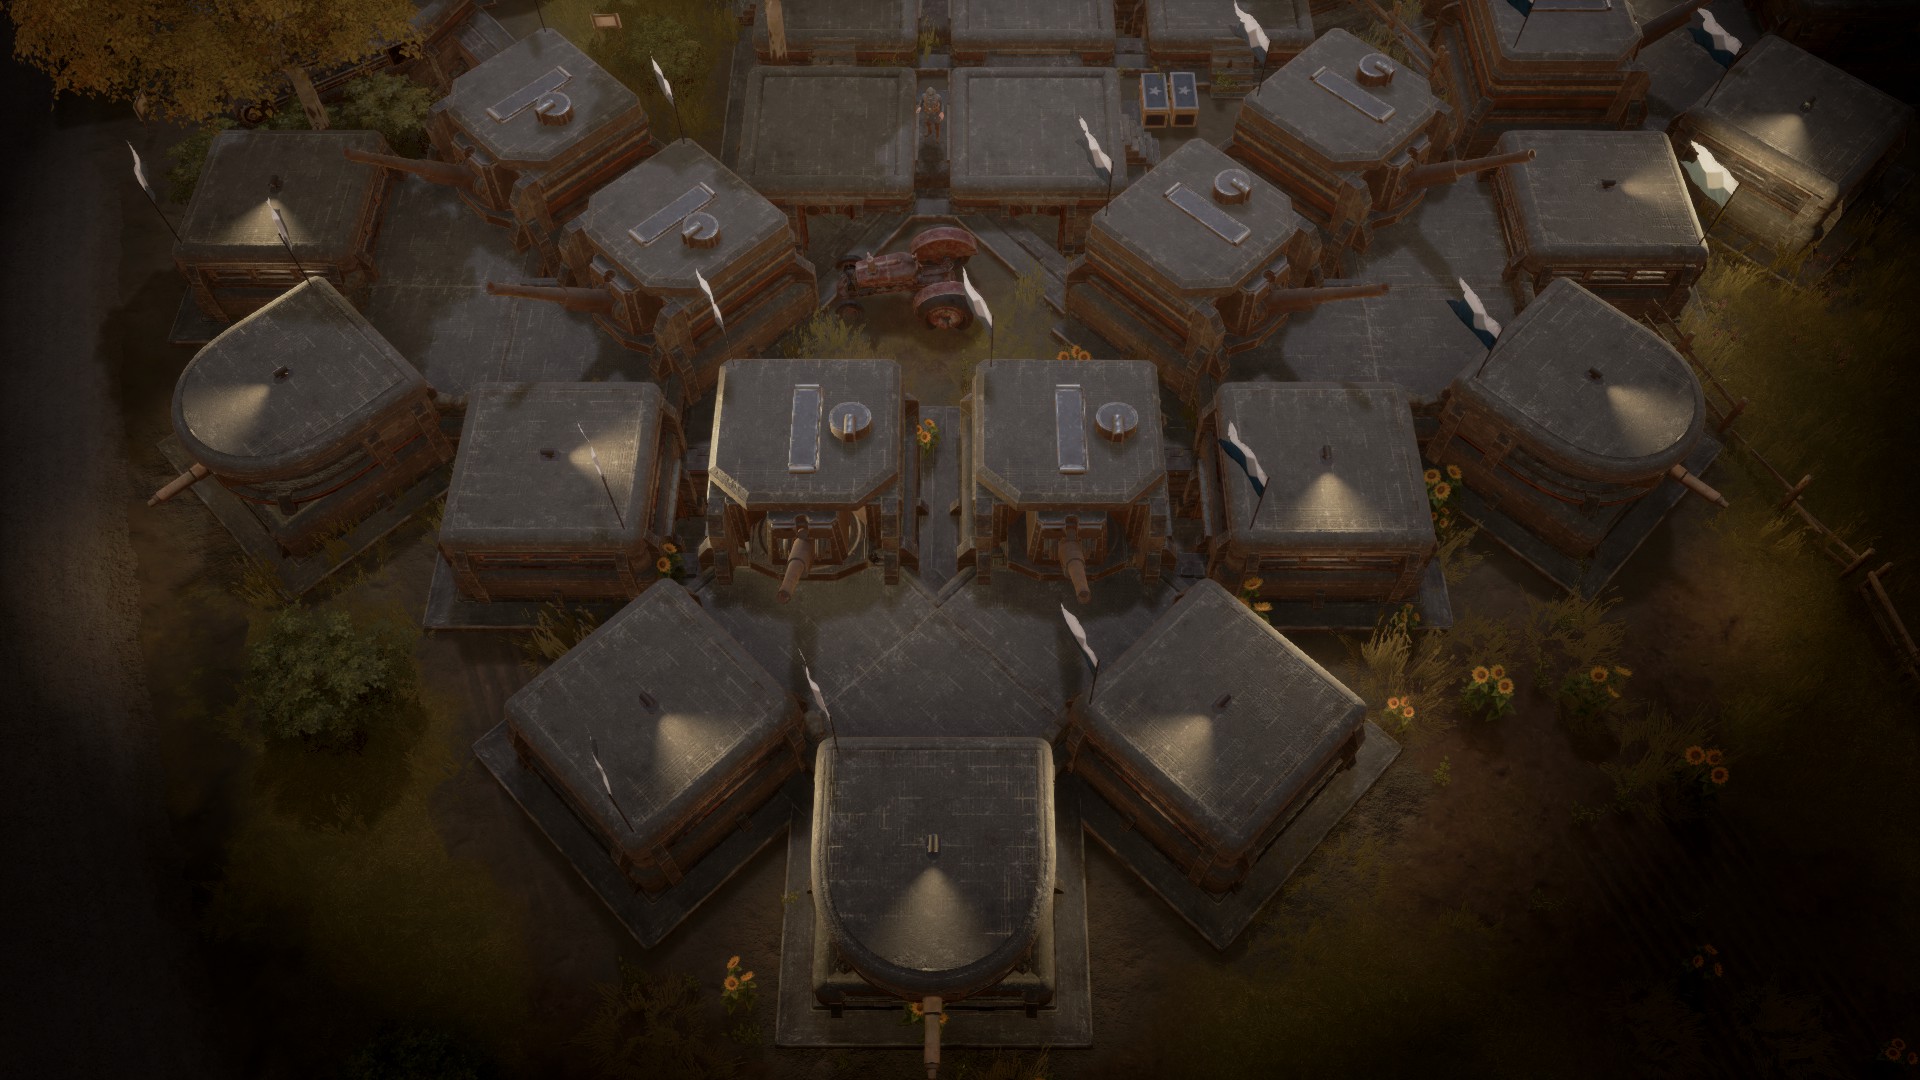
If you have ever seen a big fancy concrete bunker base built on a relic or town base with extra maintenance range, you have likely seen some of these before. There are two variations of this structure that I am aware of.
First is the most common type. It is characterized by the square bunker piece at its center. The square piece in the center can be turned into a bunker ramp piece, allowing friendlies to easily access the interior, but also slightly reducing the repair cost of the bunker (whilst maintaining the same bunker health). Some also construct a ladder in this piece. Below is an example (built by the BAMBI regiment – “Bunker and major building individuals”):
The second is much less common (as far as I know, I am the only person who builds these), but is one I personally prefer. It is characterized by the triangle bunker piece at its center. Below is an example of mine with two ATG and one RG in the center from War 24 on Shard 2. Note the much narrower space between the two HGs that allows it to fit between these two roads:
It is much more compact, allowing you to fit more of these in your bunker base than the more popular design. A small downside is that the garrisons on the side are slightly recessed, reducing their field of fire across the center piece if they are RGs. Below is another example I built during War 24 on Shard 2, showcasing the compact shape/garrison density these can achieve:
Both designs provide an accessible platform in the center for infantry, although it is much more obvious on the former design.
Either way, the basic principle is the same. Two (or one, for better integrity) HGs in the rear with three RG+ATG at the front. I will alternate between 2 ATG-1 RG and 1 ATG-2 RG depending on the situation or stage in the war. Some may even opt to have an RG and MG on the sides with an ATG in the center if the situation requires it.
Even Bigger
WIP
A Note about Expedience
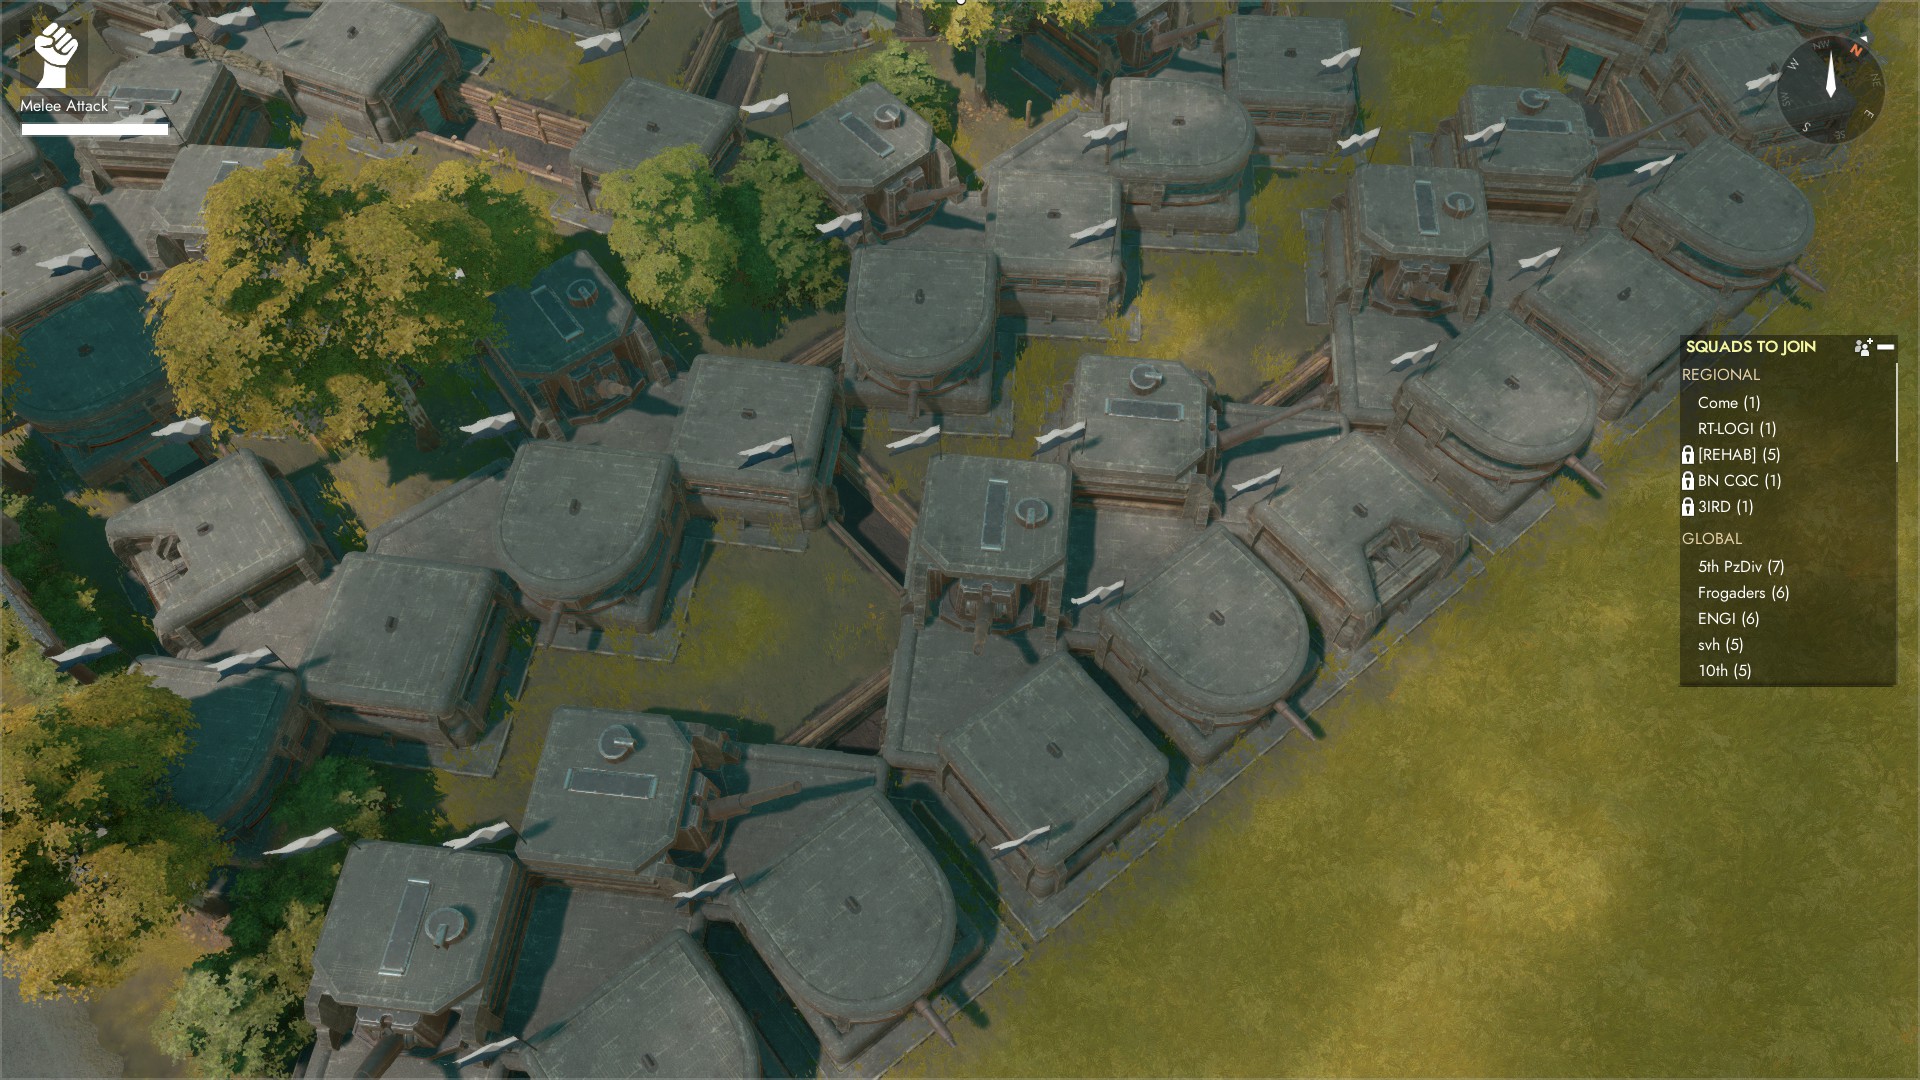
With all of the very pretty, photogenic, symmetric, and closely-packed bunker bases, one may become obsessive about such features (as I am). Do not fall for this trap (as I often do). Oftentimes, spending time worrying about how pretty your base will look will only weaken the final product. A moderately rough and unoptimized bunker base with a greater quantity of structures will always win out against a bunker base that belongs on a math textbook cover. Any weaknesses in its design will be drowned out by the noise and chaos in your defenses. Below are some good examples from the REHAB Barronswall relic fort:
Note that among the chaos, you can still spot many strong bunker motifs, namely the 1×3 and corner piece structures.
Concrete
Upgrading your bunkers to Tier 3 (T3, Concrete) is quite an ordeal. In order to do so, components need to be brought to your build site in large quantities, turned into concrete using a concrete mixer, and brought to each bunker piece on foot where it can be used to construct the upgrade, just like with bmats used for T2.
Deciding to Upgrade
If you expect that your bunker will face frequent enemy attacks within the next day or two, I recommend that you do not upgrade garrisons to T3. However, if artillery is not a significant threat, it may be beneficial to begin upgrading interior structures (the core, engines, interior defences, etc.) ASAP while keeping your outer garrison bunkers as T2. Although it may be tempting to upgrade your outer garrisons after these inner redundant defenses have been complete, any competent and organized enemy will take the opportunity to destroy the wet pieces. However, if you don’t think your enemy at that location is very well organized or competent, and you have decent support from friendlies, upgrading your outer bunkers one piece at a time may be a viable option.
Components
Acquiring components can be difficult, especially if there is already a large regiment presence who is keeping up with mines and fields. Clans are very possessive and will often teamkill you or mass-report you for using certain mines or fields, which the devs don’t consider to be against the rules. Because of this, the limiting factor for T3 upgrades tends to be components. I personally recommend only collecting components during “off-hours” when players are asleep (0400 to 1600 UTC) or when the least proportion of players are doing logistics (2300 to 1100 UTC). This means that fields will be less trafficked and there are less people stopping by mines. Of course, other people will have the same idea, so coordinate with people in chat so that everyone can work together instead of having shouting matches. Inb4 “you gave away my secret!”
Please always remember to refuel the mine whenever you stop by. Don’t be that jerk who takes all of the components from a mine without refueling the mine. If the truck is out of diesel, please refill it, or at least let someone know who has taken on this task.
The best method for bringing components to your bunker base is using a flatbed truck if you have a crane at the component source and your base (which you should at all times). This allows you to carry the largest amount of components with each trip and the resource containers can be easily left at your base where they can be pulled into a dump truck. However, if the quantity of available components is rather small and you need to make frequent trips to carry small quantities of components from mines/fields, a dump truck is recommended for this purpose. They can only carry 2000 components (compared to 5000 in a flatbed), but they are much faster.
When storing components at your base, I recommend the use of resource containers even if you are not using a flatbed. Not only are they faster to pull from than your bunker core (300 at a time instead of 60), they do not show up on the map view as part of your base inventory, deterring other players from taking your components. As a further deterrent, I prefer to place the containers a fair bit off of the road where they are not visible to people driving by.
Mixing and Handling Concrete
To make concrete, components are added into the concrete mixer, where every 10 components are turned into 1 concrete every 20 seconds. When the concrete mixer contains any items, it cannot be packaged and moved, and components that are in the process of being mixed cannot be removed.
Many builders (nearly all of them) make the mistake of placing their mixer in a central location and dumping all of their components into it immediately. Because concrete does not stack, the best method for bringing concrete to bunker pieces is to frequently move your concrete mixer close to where you intend on using them and to drive the components to the mixer using a truck (such as in the 1×3 example image above). Remember to only put in as many components as you will need, as the mixer cannot be moved with items inside. The “access” range of the concrete mixer is rather significant, so sometimes you can access the concrete mixer from the inside of a trench or bunker. Ideally, using this to your advantage, you will be able to build and access the mixer inventory without having to walk at all. This makes the T3 upgrade process incredibly easy.
When working alone, I prefer to have two mixers (or maybe more, depending on resource availability and how quickly I need to work) working simultaneously, and more can always be added if you have additional help from others. Just make sure that you have properly informed them of your process; you don’t want to find some Pte putting 10000 components into a mixer at the edge of your base.
Waiting
Once complete, the bunker piece will take 24 (real life) hours to “dry”, during which the SI/health of the bunker will slowly improve. During this “wet” stage, the SI/health of bunker pieces begin lower than T1. Because of this, it is important that your bunker is protected against partisans by pillboxes. Some also prefer to upgrade individual bunkers in pieces, spreading out the SI debuff over a longer period of time. Upgrades can only be built on these bunkers once the 24 hour “drying” period has fully elapsed, with the HG requiring another 24 hour “drying” period after its construction.
Effect on Base Design
Some will be tempted to alter their base design to accommodate the use of concrete mixers throughout the interior of the base, making the upgrade process much simpler. I do not recommend compromising the quality of your base for the sake of saving a few button presses on concrete day. However, some do prefer to construct their base in layers, beginning at the center, where the next layer is added on once the previous layer is fully T3. This allows room for a concrete mixer along the constantly growing outside perimeter of the base and produces a relatively dense pattern of bunkers.
Storm Cannons and Intelligence Centers
WIP
Upkeep and Maintenance
Every bunker base requires supplies in order to prevent the decay of structures. Generally speaking, there is a ~24 hour “grace period” following the construction of a bunker during which decay will not occur and supplies are not consumed. However, following the grace period, these structures will take damage and, eventually, completely disappear.
Bunker Supplies
Bunker supplies (Bsups) are used to prevent the decay of bunkers and trenches. With the Tier 3 AI (Large Garrison) upgrade, each trench and bunker piece will consume one per hour. However, when your bunker base is supplied with Garrison Supplies, they will not be consumed. They cost the same as Garrison supplies and are useful when you wish to only maintain bunker structures without pillboxes.
Garrison Supplies
Garrison Supplies (Gsups) are used to prevent the decay of all structures. This includes the previously mentioned bunkers and trenches, as well as pillboxes, watchtowers, sandbags, barbed wire, tank traps, storage boxes, shipping containers, concrete mixers, field guns, and emplaced guns (when placed outside of trenches).
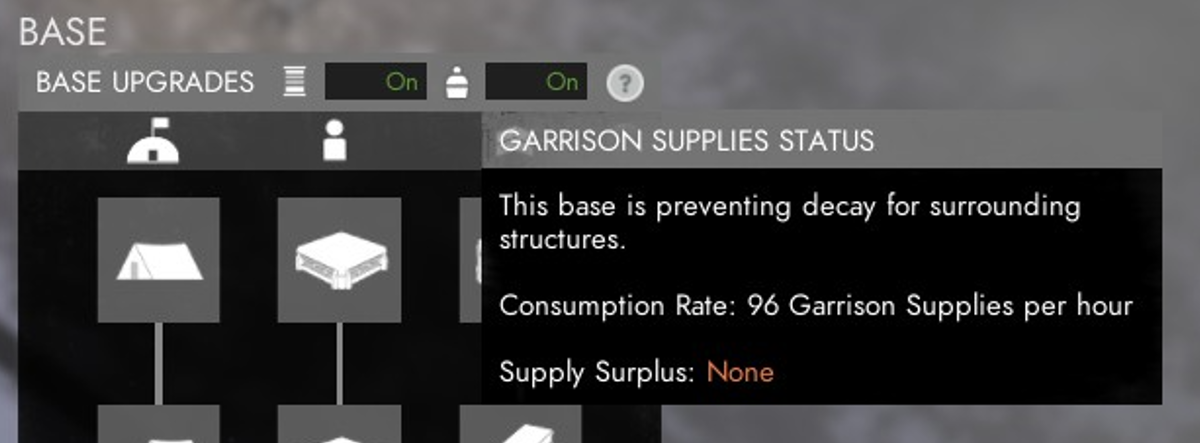
How many do I need?
At the upper right of your screen, you will see how many supplies are consumed per hour (if your bunker contains supplies). Take this number and multiply it by however many hours you wish for your bunker to continue standing to calculate how many supplies you need. This applies to town bases and relic bases as well. If you want to get all of your supply work done in one go, at most, I would recommend producing and stockpiling enough for a week. Of course, there is nothing wrong with adding more supplies to your base that you manufactured yourself and got the scrap for from neglected fields on your own, but other players will sometimes get very upset that you have more gsups than they do and act upon their frustrations.
Fuel
Engine rooms need fuel. The best way to store a bunch of fuel at your bunker base is in the form of a fuel truck; ideally one that you fill yourself (or was given to you). Do NOT take fuel trucks at important locations (i.e. seaports, mines, depots, bases) unless there there happens to be an absolute MVP legend actively filling them as a public service and using that location as a parking lot.
Once you bring the full fuel truck to your base, immediately block the truck in with storage boxes. This will prevent people from just taking your valuable fuel truck and driving it into the ocean. If you are able, retrieve another fuel truck to serve as an easily changeable one so the one that is blocked in can serve as an emergency supply.
Repair
Unlike building, there is no limit on how many people can repair a single structure (that we know of). However, when under attack, bunker bases ALWAYS run short on basic materials (bmats). Of course, we can partially attribute this to poor planning/supply, but the biggest culprit in my experience is the tendency for noob logi drivers to pull supplies from your bunker base instead of the gosh darn storage depot that’s right next door.
In order to mitigate this problem, I recommend the placement of storage boxes throughout your bunker base (maybe even hidden in bushes) filled with 1500 bmats each, ready for deployment at the beginning of an enemy offensive. “That’s hoarding, you Kulak!”, some may criticize, although a few thousand bmats stored at a bunker base is not at all extreme and will help the longevity of your bunker base during attack significantly. If you do not do this, and do not have people constantly resupplying your base because you have no friends (like me), your base will constantly have zero bmats. In reality, it’s the parasites who pull from your base because they are too lazy to drive to the nearby refinery with 50k public bmats to grab the stuff they need who actually belong in the RP bunker base gulag.
Dealing with Players “Helping”
You will always get some very excited and genuinely uninformed new player or a bunch of dirty alt accounts placing bunkers that obstruct fields of fire or irreversibly turning your T2 bunkers into concrete backwards-facing ATGs. There are a few ways to combat this. First of all, ALWAYS RESERVE YOUR BUNKERS. This reservation lasts for 48 hours and can be constantly refreshed, which should usually be enough for anyone with the time to build in this game. Secondly, place mines, trenches, or other obstacles around your bunkers. This will make it slightly more difficult for noobs or griefers to build additional pieces onto your bunkers that ruin their SI, block their fields of fire, etc. and ruin your bunker base. Although this usually isn’t a problem to the sides and behind, people will sometimes attach tumors onto the front of your bunkers if given the chance.
Conclusion
If all of this information has somehow not yet disinterested you or convinced you to NOT build in this game, actually going out and building in-game certainly may. However, if you still do enjoy this process, whatever your reason, you are on your way to becoming a valuable piece of the war machine. If, however, you have been turned away, I hope you at least leave with an appreciation for, or at least a better understanding of, what base building in Foxhole is like.
If I have missed anything or made any errors, please let me know through the comments or dms.
Known Exploitable Bugs
Here I will list any unintended game mechanics that can be used to your advantage. Although I am not a fan of using in-game exploits, I personally believe that the best way to deal with them is to spread the information as far as possible. Not only does this give people who already use an exploit less of an advantage, it helps gets the attention of the developers who will hopefully go about fixing them.
- Blueprints are immune to artillery splash damage and will prevent splash damage from travelling through them. This means that you can protect structures from artillery splash damage with things such as wall/fence blueprints. Doing so will significantly improve a structure’s “effective health” during artillery barrage.
This is all for Foxhole How to Build Bunker Base Guide hope you enjoy the post. If you believe we forget or we should update the post please let us know via comment, we will try our best to fix how fast is possible! Have a great day!
- Check All Foxhole Posts List

Awesome guide. Any chance of an update with inferno upon us?
Excellent guide, thank you!
Answered many of my questions, but I’d love more info on the strengths and weaknesses of BBs vs FOBs.