You’ve played all the levels, P-ranked Minos Prime, and now what…
One more unlock – start Cybergrind on level 25.
This guide is a compilation of everything useful to beating Cybergrind. It will cover advanced maneuvers, weapon tech, kill priority, and boosting frames. Merry Christmas.
Movement
I will be splitting this section into three loose groups, horizontal, vertical, and damage boosting. Conserving stamina is key to long encounters, so things like Dash Jumping and Sliding on low stamina are discouraged. Being on the ground near enemies is a bad idea. Stay on high ground or in the air.
Horizontal
Dashing
You can dash in 8 directions defaulting to in front of you, this will consume a third of your stamina bar. Dashing will halt your descent and speed. Dashing will also give you an almost unnoticeable amount invincibility frames(1/5 of a second).
Sliding
Sliding increases your speed and makes your hitbox smaller. You can change directions immediately by sliding again. Spamming slide will increase your speed. You do not regenerate stamina while sliding.
Dash Storage
Dashing and immediately Sliding will extend your Dash’s invulnerability to the entire Slide and the Slides and immediately after. Safe blood collection and easy overload damage.
Dash Jumping
Jumping immediately after a dash will consume two-thirds of your stamina bar and send you flying into the direction your moving. After that you’re kind of screwed unless you…
Slide Jump
Ultrakill’s bhop – slide and jump. Do it again and again to increase your speed. Don’t keep holding W because…
Air Control
Pretty simple: pressing the movement keys in the air will decrease your momentum.
Vertical
Jumping
Simple enough
Wall Jumps and Wall Sliding
You get three jumps; easy height. Your falling speed adds to your Wall Slide speed.
Ground Slamming
Incredible downward speed. Completing it creates a shockwave that consumes a third of your stamina bar. Can be canceled by Dashing.
Slam Jump
Jump immediately after hitting the ground to cancel the shockwave and deplete no stamina. This will send you higher and higher based on the amount of time you’ve fallen.
Slam Slide
Slide after the shockwave for a increase in speed or more preferably for a Slide Jump.
Slam Storage
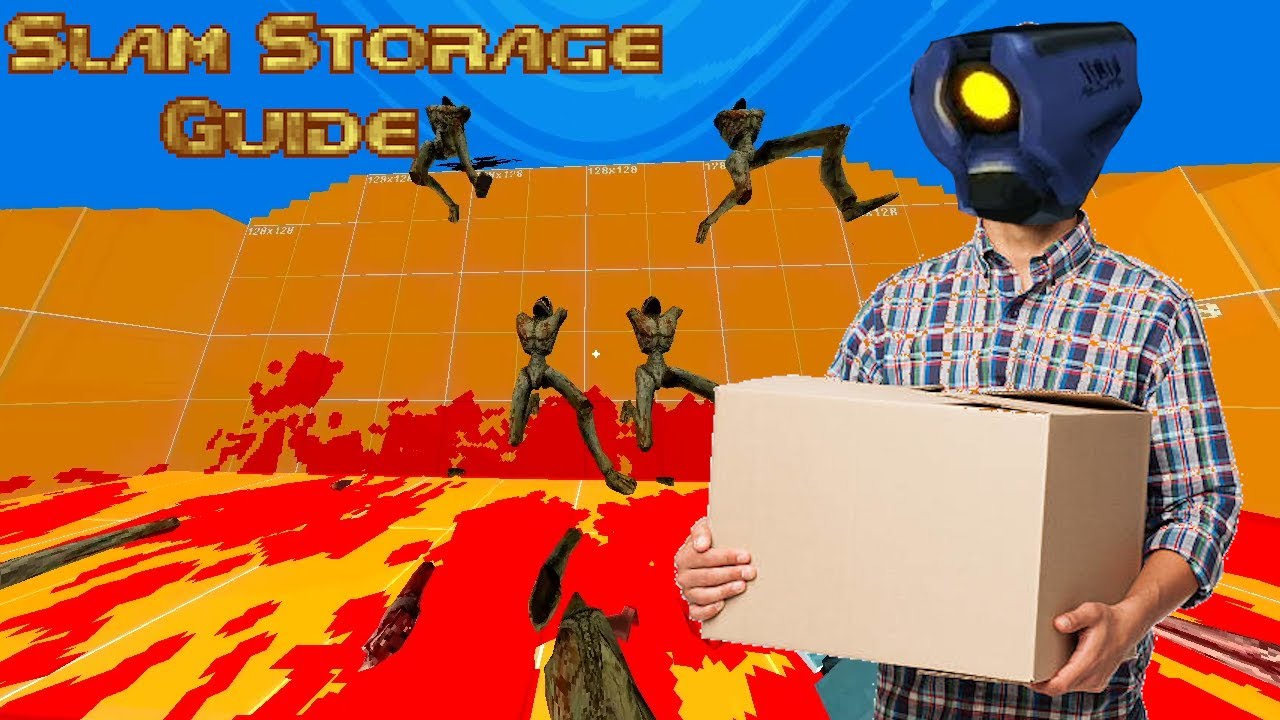
Used heavily past 40. Jump and Slide on a wall to get into a Slam state. The longer you’re in this state the higher the following Slam Jump will be. Jumping after will fling you a mile up. Perfect for fighting Mindflayers with minimal interruption. Start preemptively Slam Storaging for multiple Mindflayers and to avoid everything else on higher rounds. Do this before ending a round to avoid the spawn lag and enemies messing up your jump. Slamming while grappling will also put you into a Slam state.
Whiplash
it really makes you feel like spiderman
A great way to get to Virtues, Malicious Faces, and Mindflayers. The Whiplash can keep you in the air forever as long as you have a target, even if they’re light. You can still dodge projectiles by dashing. You can also jump while hooked on heavy enemies and on light enemies when pulled in fully. The Whiplash can be cast out as long as you like unless it intersects a wall.
Damage Boosting
You’ve fallen off the map and you can’t Whiplash back.
Halt your descent by dashing and…
Overload Jump
Over-pump the Pump Charge and fire in the opposite direction. This should send you back. The most reliable jump to get back on ground. Cost: 50 HP
Core Boost
Slide down a wall and throw a core down this will give yourself a vertical boost. Cost: 35 HP
You really messed up and you’re about to hit the kill box. How to you fix it?
The ULTRABOOST
The fastest explosive jump in the game
Dash to adjust your speed and charge a core to align it with your falling speed. Toss the core in the direction your moving and shoot it with the Malicious Railcannon. With any luck this should get you back on ground or in a position to do so. Practice thoroughly before using. Cost: 35-50 HP
Jamblast
A mid-air Dash Jump. Overload the Pump Charge. Look forward and perform the same Dash Jump timing, dash and fire. It should deal 33 damage if done properly. A more niche horizontal jump that may come in handy if you can’t latch onto a target or don’t have the 50 health for an Overload jump.
Wiki: https://ultrakill.fandom.com/wiki/Movement_Guide – [fandom.com]
HerbMessiah’s Guide Playlist:

Weapon Tech
This section will be covering all the useful knowledge on the weapons I have. First things first…
Default Revolvers
Primary Fire
Deals good damage depending on where you hit. Good fire rate.
Piercer
Charges a Piercing Shot that deals more damage. Fast recharge. Sadly, lacks the potential of its Slab counter-part.
Marksman
Same primary fire, but alt-fires…
COINS
Coins boost damage and can clear eight enemies if you Splitshot them. Coin damage is too specific to be more useful than explosions, but the Slab Piercer’s charge can one-shot almost every boss and Railcoining can wipe out any group if they’re in a straight line. A coin can be tossed into a Malicious Face’s beam to instakill it. Coins can also be punched to ramp up damage on bosses. There are a lot of details and I don’t want to write a book so…

Slab Revolvers
Primary Fire
Lots of damage but doesn’t headshot. Slow fire rate. Longer switch to speed. Can’t abuse weapon switching to make it shoot faster. Best weapon for blood besides the Railcannons.
Slab Piercer
pocket railcannon
Amazing damage for a long charge and recharge. Hits multiple times. Instakills almost every boss when it hits enough coins. Don’t forget to use it.
Slab Marksman
If you want more single target damage. Hits multiple times on Splitshots instead of targeting two enemies. Can’t Splitshot or shoot cores as fast, making Default Marksman/Slab Piercer Meta.
Shotguns
Shotgun swapping
Increases the fire rate of the shotgun by using two at once. You will get the +QUICKSWAP style bonus if you do it properly.
Projectile Boost
Fairly well known – fire and parry. You even get a style bonus. A better core eject with sniping capabilities.
Combining Tech
Do both of the above, you can only successfully do it three times in a row due to punch cooldown.
Shotgun Parry
The Shotgun can act as the Feedbacker and Parry some enemy attacks, refilling your health. Not related to Projectile Boosting.
Core Eject
discount marksman
Charge the core to shoot it further. Snipe the core with a revolver to double its damage and blast radius, instakilling schisms and taking down a Cerberus in three. Coins target cores. Can swap weapons to reload instantly. Great for keeping distance and fodder.
Pump Charge
META
One pump: not too useful.
Two pumps: high burst damage that can kill a schism and doesn’t explode in your face.
Three pumps: explodes dealing excellent damage and fires devastating pellets. Cost: 50 HP
There is a way to avoid the self damage by abusing the Dash’s invulnerability frames. Fire and dash away immediately and continue moving in that direction to avoid the outer blast. Can be used to deflect projectiles. Practice thoroughly.
Nailguns
Consistent and accurate damage from mid-range. Generally not too useful apart from killing MFs from a distance and finishing enemies. Overheating doubles your damage for a second with a terrible accuracy penalty. Can only fire for 4 seconds and takes 30 second refill.
I made a pretty thorough guide on it:
https://steamcommunity.com/sharedfiles/filedetails/?id=2637997365 – [steamcommunity.com]
Railcannons
Malicious Variant
Second biggest AOE in the game. Instantly kills fodder. Quick explosive damage.
NUKE
Snipe a core with a Malicious Railcannon to double the beam’s radius and damage. Use the dash’s invulnerability to avoid the huge blast. Railcannons have a near instant swap speed, this feature is very useful for creating a close consistent Nuke. Great for reflecting projectiles back at enemies.
Electric Variant
Pierces everything but a Hideous Mass’ shell. Kills Virtues instantly and enrages Malicious Faces.
Railcoining
Toss a coin through an enemy and fire through at the coin. This reflects back and doubles(x2.25) the base damage almost killing a Cerberus. More coins can be added by tossing the coins in front and behind the enemy. Incredible damage for enemies in straight lines.
Coin Adding
An easy four coin setup. Start with a two coin setup and toss more coins in immediately after firing. This can almost septuple(x6.75) the base damage with the two extra coins(5 hits + coin damage). Despite that, it’s hard to get that much setup time making it pretty useless.
Screwdriver
immortality for eight seconds
Fires a hard to hit projectile that stops Mindflayer teleportation and creates a blood fountain. Deals more damage than the Electric variant over eight seconds(x1.28). Pretty useless if you’re not hard-damaged or going to be hard-damaged. The Electric variant is better for damage. Only useful for dog-fighting Mindflayers with Virtue spam.
Arms
Knuckleblaster
Deals the same damage as a Slab revolver shot. The blast can dispel projectiles. Extra damage during shotgun attacks. Default arm for Cybergrind, because of the Shotgun Swap and punch combo being able to kill Malicious Faces and deal as much damage as an Electric Railcannon shot. Punches have aim-assist.
Feedbacker
Refills health and sends back an explosion on most projectiles. Pull out if you wanna play with an Insurrectionist or Projectile Boost.
Here are the numbers:
https://docs.google.com/spreadsheets/d/15rW4hQ5uN8lQajn0VWnZy2xVw2u1mLoIenR_WSmB7zY/edit#gid=1645733557 – [google.com]
Kill Priority
This section will cover the Cybergrind enemies in a ranked list. Don’t follow this ranking too strictly. Do what’s convenient.
Mindflayer
V2’s girlfriend
All of her attacks deal 30-35 damage. The second most bullet-spongy enemy in the game and she doesn’t give you much blood. Her melee can be parried; her laser cannot. Her projectiles home in on you hard and her self-destruct deals 50 damage. Mindflayers don’t spawn every round. There is some sort of a cooldown.
Strategies:
-Slam storage into the sky and dogfight her with the whiplash.
-Deflect her projectiles with the Knuckleblaster.
-Hit her with a Screwdriver to stop her from teleporting, take off a third of her health, and fix the blood problem. Blood flows down like a cone, so you’ll get most of it if you’re dogfighting her.
-Railcoining, Overpumping, and shooting coins with the Slab’s alt-fire will deal significant damage.
-Listen for her sound ques.
-But the most effective strategy would be exploding her right before she shoots her five orbs. Getting the timing right will deflect her projectiles back instakilling her. The bigger the explosion the better. The Malicious Variant fired at a coin during a slam storage flight while listening for her attack and up-close Overpumping are probably the most consistent ways of killing her.
Stalkers
A free wave if too many spawn. Try to get them away from Insurrectionists, Hideous Masses, and Mindflayers. If you know how to play safe they’re not too much of a problem. Kill them with the Malicious Railcannon, the Slab Revolver, and Projectile-Boosts. Getting caught in their sand explosion deals 10 damage and turns all your damage into hard damage.
Weaknesses:
-Speedrunning
-Not getting hit
-Keeping bloodbags
-Using knockback and groundslams
-Parrying for health
Virtues
After three attacks they turn red and target you with better accuracy. Designed to be killed first.
Pick your poison:
-One coin one Slab Piercer alt-fire.
-A single overpump blast. The corpse will give you a boost away to the next one.
-Two seconds of fire from the Nailgun.
-For sniping: a Electric Railcannon shot.
-For several: A Nuke can instakill the ones closest to the middle and leave the others very weak.
Hideous Mass
Public Enemy #1
Can deal 60 damage with his Mortar attack and Harpoon you, disabling your jump. Kill as soon as safely possible. His belly and tail are three times more vulnerable than his armor. I don’t know how explosive attacks work on him, but they don’t seem too effective. If you shoot his weak spots he has a little less health than a Cerberus. You can still heal off his shell. The Harpoon can be removed by shooting his tail or hitting his Harpoon with the Knuckleblaster(sometimes it won’t come off). Harpoons retract after an attack or two. Don’t get harpooned and knocked off the map. The Whiplash might stay on him even if fully pulled in. On the plus side, you can’t get back to back HM waves.
Easy damage:
-Overpumping and shooting the pellets at a weak spot will take out half of his health.
-A Slab Piercer alt-fired at a couple coins can instakill, but due to some coin issues it doesn’t target the right weak spot, instead hitting the shell. If it worked correctly or targeted his tail this technique would be meta, but it still can kill during the second phase(only if the coin wants to target him).
-The Slab Piercer on its own can deal significant damage at any range. Pair this with the Electric Railcannon and you can safely snipe one.
-But the fastest kills utilize enemies, especially…
MALICIOUS FACES
friends 🙂
The weakest and most helpful boss. Look for the ones in a beam state. A single shotgun swap punch combo kills them (only at Shotgun Parry distance). The more damage you deal to them the more likely they’ll do a beam attack. Even though explosive damage doesn’t deal any damage to MFs, explosives will reflect their Hell Bullet attack, instakilling or enraging. Groups of them are dangerous though, use the Nailgun, Railcannon, or Slab Piercer if you can’t get up close. Coins can potentially save time by Chargebacking their beam instakilling if you can predict where they’ll shoot. Ground-Slamming does extra damage.
Uses:
-The hell bullet and beam attack can decimate other enemies.
-Shooting a core into the beam will give you a free Nuke.
-Easy beam parry for health.
-Can crush almost anything.
-Whiplash anchor.
Insurrectionists
Dodge all of his attacks until your safe enough to fight him. Learn to parry his attacks for massive damage, a stun, and health. His direct and overhead swings are pretty consistent when learned (move backwards to increase the parry window). Watch him and listen to his ques. Don’t let stalkers near him. Tankiest enemy. Keep him on fire for the huge damage bonus. You can grapple him while he’s jumping for height.
Bugs:
-He sometimes lays on the ground when you slam storage into the air. This bug saved me a lot. He can recover from this.
-His jump sometimes messes up making him fall into the void.
-The whiplash will sometimes stay on him even if you’re fully pulled in.
-His hitbox doesn’t match his touchbox when stunned. He also clips into the wall.
-Lighting him on fire is a bit broken.
Streetcleaners and Drones
Both have slow attacks. Both die instantly to coins. Both can take some enemies with them. Drones can be cleared using Slam Storaging and Splitshotting coins while falling.
Fodder
They won’t shoot unless close enough. Loners on pillars make good bloodbags. Get them packed up and blow them up.
Swordsmachines and Cerberi
Surprisingly similar
Both have a deadly ranged attack. Both are damage-sponges with grounded moves. Both will chase you off a cliff. Usually the last ones left. Overloading is a fast way to clear large groups of them.
Swordsmachine
More HP, smaller hitbox, and easy parries. Shotgun and Maurice weakness. Will take a break in the middle of combat. Fires shotgun at ghosts. Awfully good at sword throwing.
Cerberus
Very slow, weaker attacks, and no easy parries. No weaknesses. Speeds up when his pal dies. Enraged groups are like bunch of loud cannons. Can throw his apple through walls.
Performance
If you are lucky enough to have a good PC you might not even have to worry about this, but for lots of us frames will drop when enemies numbers start rising.
Solutions
-Try playing on a lower resolution
-Mess with the Performance Settings options
-Open task manager(ctrl+alt+delete) and close some programs you’re not using
-Turning the bloodstain chance down
-Nuke fodder before your PC combusts
Visual Clarity
First two things to note is to use settings that you are comfortable with and these are just my preferences. Turning down the PSX Settings(specifically Vertex Warping, Downscaling and Dithering) will help you see far away enemies. Using Enemy Silhouettes will also help. Camera Tilt and Screenskake are some settings to consider changing. Ultrakill is a very close-quarters game so think about raising your mouse sensitivity and FOV. The Standard HUD is sometimes not enough, the mouse HUD is good for telling how much health and stamina you have quickly.
Binds
Changing binds is a difficult process, so do it early. The only problematic binds are the Whiplash’s, because you need to be able to use it while moving. I bound it to my extra mouse button.
Misc.
Health
You regenerate health by bathing in fresh blood or parrying with the Shotgun or Feedbacker. Gib enemies to get the most blood. Try to always stay at max health.
Best weapons for getting blood:
-The Slab revolver is the best choice, because you have to hit only one hitscan and the Slab spews the most blood out of enemies apart from the Railcannons. Charged shots have a larger hitbox.
-The Knuckleblaster. Same logic, but punches have also aim-assist.
-The Screwdriver keeps you at max health and gets you there in a split second. Blood comes out as a cone.
Hard Damage
One-third of your total damage comes back as hard damage. Hard damage lowers your max health to incentivize you to avoid getting hit and easily regenerating. Hard damage fades after about 5 seconds if you don’t get hit again. Self damage doesn’t count.
Wait it out by:
-Using Slam Storage or Dash Storage
-Finding high ground cover
-Hiding on the side of the map
-Using the Screwdriver
-or just don’t get hit lol
Other strategies:
Off-arena camping is a strategy that involves abusing the whiplash on MFs, Cerberi, and SMs to stay on the side of the map longer for its relative safeness of having less enemies shooting you(abusing corners further reduces enemies). The next step is to explode everything that chased you and finish the Malicious Faces last. Useful on higher rounds with plenty of ground enemies.
Some pointers:
- The game will take more than 25 minutes. The hardest part of the run is playing consistently for that long.
- Listen for sound cues.
- Be prepared for lag spikes.
- Keep calm, especially when reaching a new high score.
- Know your own skill.
- Note every time you get hit.
- Watch the pros. Try to understand what they do.
- MAKE SURE MAJOR ASSISTS ARE COMPLETELY OFF.
- Play fast.
- Don’t get too discouraged after a bad run.
- It’s called the Cybergrind for a reason.
Good luck, I hope some of you can make it to the top and feel the satisfaction of climbing the endless mountain.
Here are the numbers:
https://docs.google.com/spreadsheets/d/15rW4hQ5uN8lQajn0VWnZy2xVw2u1mLoIenR_WSmB7zY/edit#gid=1645733557 – [google.com]
The Violent Leaderboard:
https://steamcommunity.com/stats/1229490/leaderboards/5816999 – [steamcommunity.com]
Wiki: https://ultrakill.fandom.com/wiki/Movement_Guide – [fandom.com]
HerbMessiah’s Guide Playlist:

Hope you enjoy the post for ULTRAKILL How to Beat Crybergrind & Gameplay Tips, If you think we should update the post or something is wrong please let us know via comment and we will fix it how fast as possible! Thank you and have a great day!
- Check All ULTRAKILL Posts List


Leave a Reply