Foreword
The purpose of this guide is to help out modders coming from Fusion, as there are some big changes to the way shading works. I am still trying to understand it myself, and still have a lot to learn, but hopefully this guide will help you with the basics and get you started with modding Serious Sam 4.
What is ARM?
ARM is short for Ambient Occlusion, Roughness and Metalness, and it’s the fancy new way lighting interacts with models in Serious Sam 4. Each term corresponds with a texture’s RGB Channels, so if you want to make your own ARM textures, you’ll need a program like Photoshop or GIMP.
Let’s take a look at a look at what an ARM texture looks like and how it’s set up:
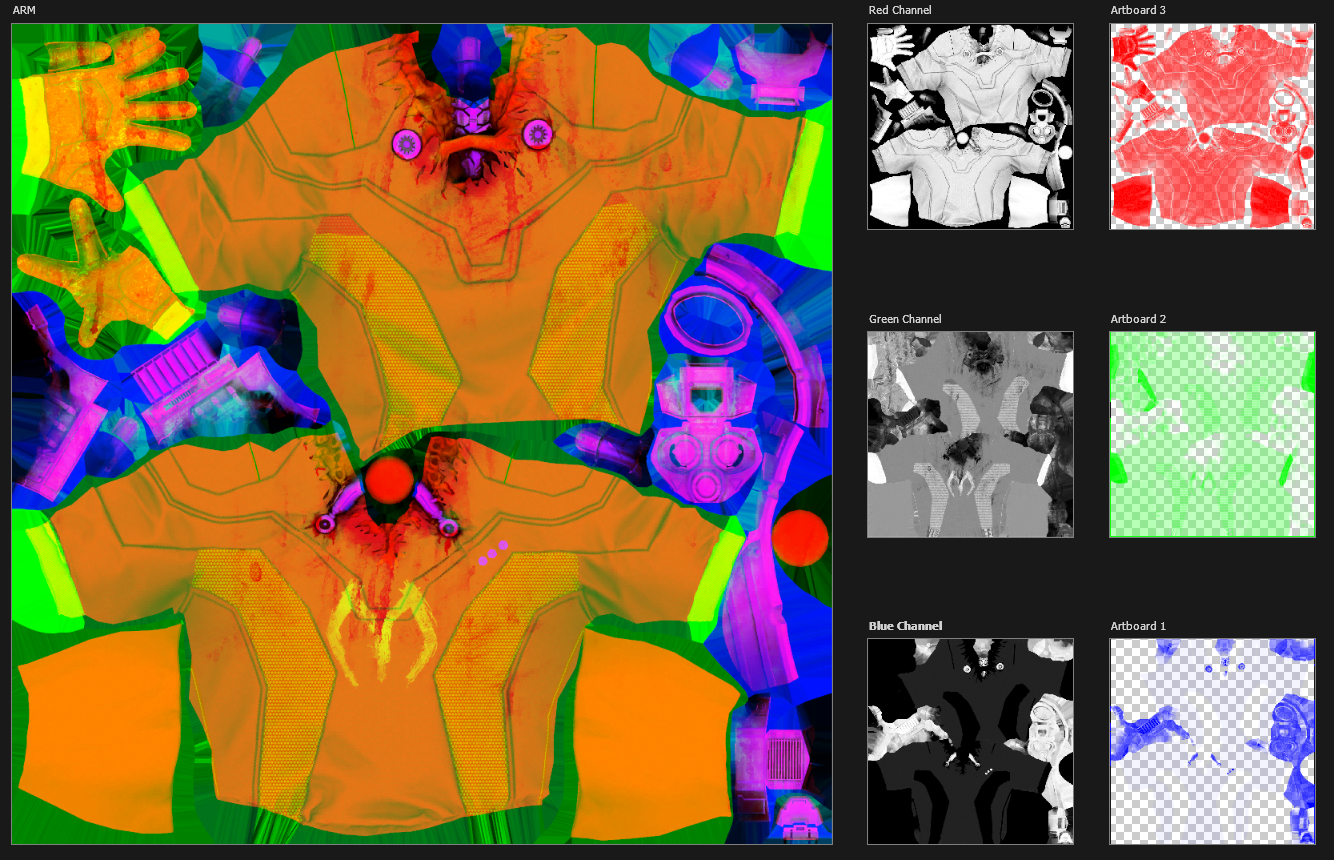
*The big image is a Beheaded Rocketeer’s ARM texture. The middle column is how each channel looks like inside the ARM texture, and on the right is each channel used as a mask for the corresponding color (purely to help you visualize) .
If you’re not familiar with what each term is:
- Ambient Occlusion (Red) – Basically adds shadows to the model
- Roughness (Green) – Controls how smooth or rough a surface is. Similar to Gloss.
- Metalness (Blue) – Controls how metallic or non-metallic a surface is. Similar to Specularity.
I recommend you Google those for yourself if you want a better understanding. If not, and you just want to import a model, then keep reading.
Node Shaders
Now, let’s open up a model and see how everything is set up.
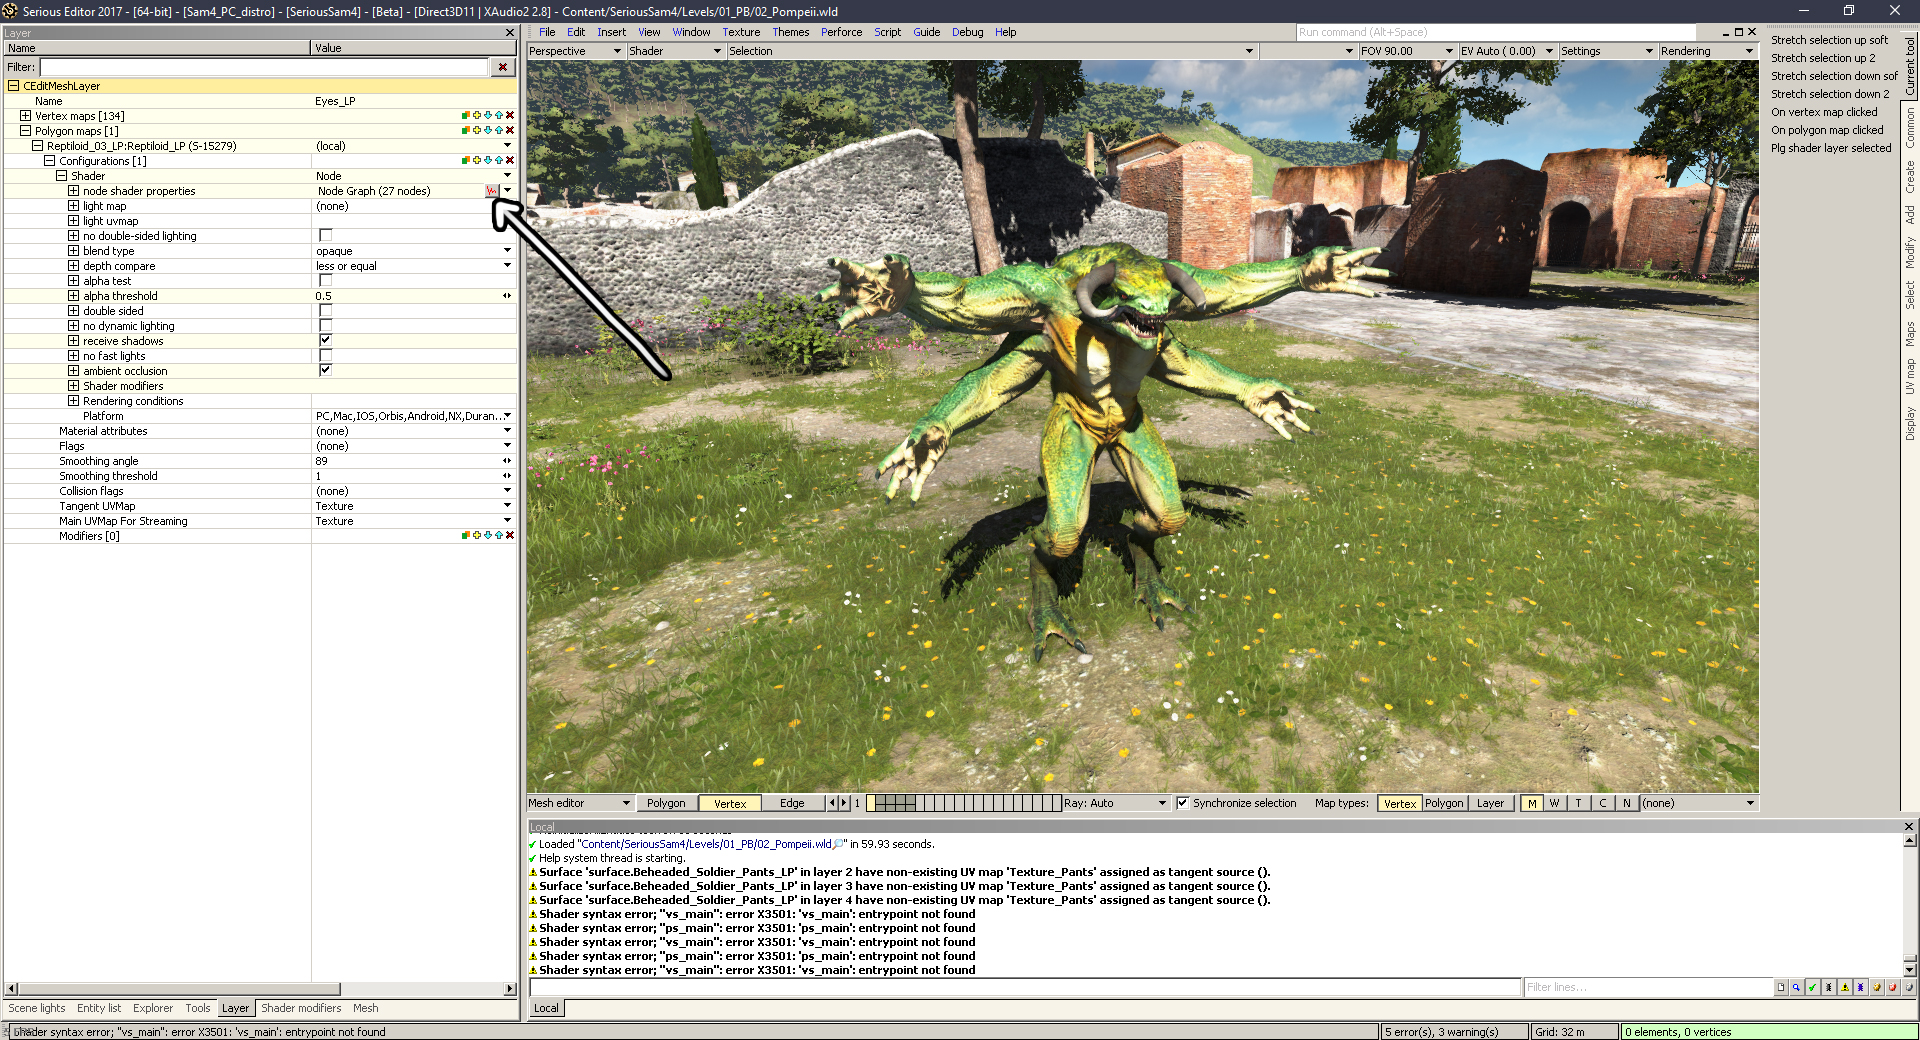
Your might be confused here, coming from Fusion 2017, and you might happen to click on this interesting button with a little graph on it.
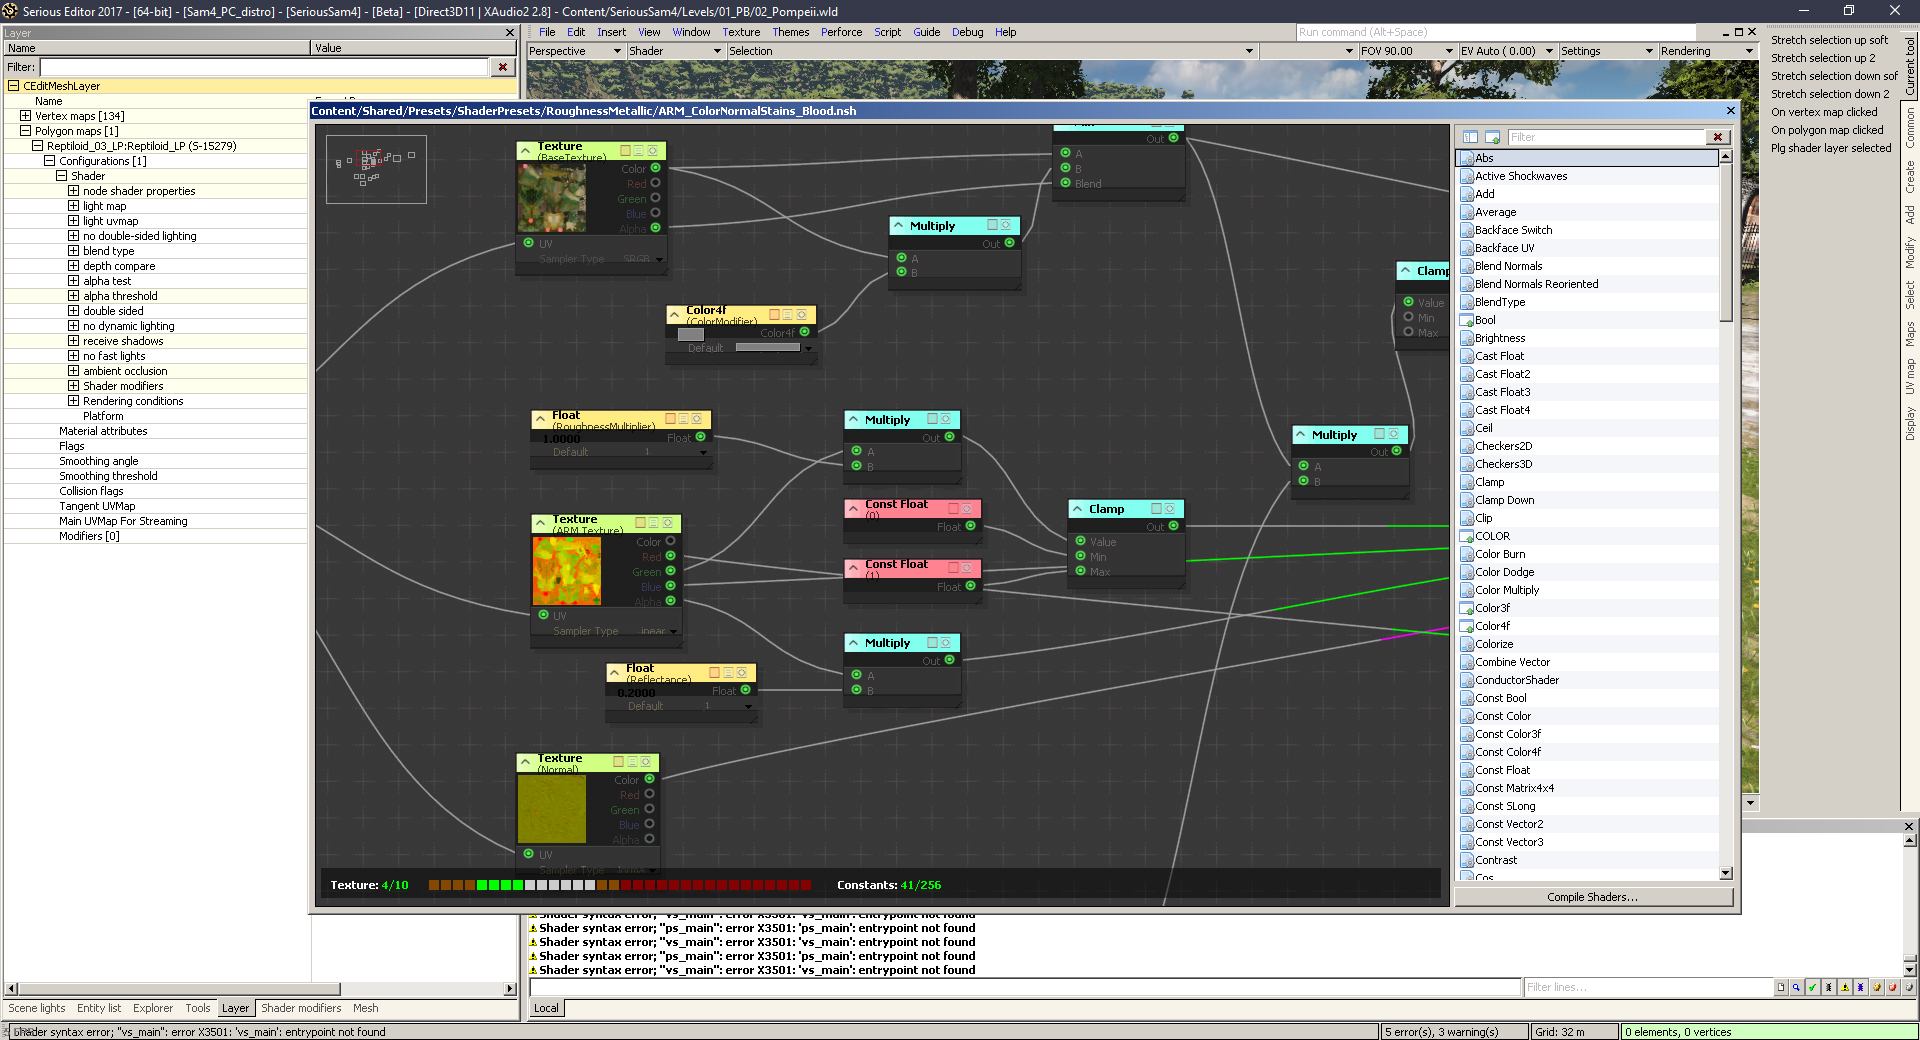
You might be very confused and overwhelmed by this weird web of boxes. But don’t worry, you won’t have to use this system for basic things like enemies and weapons. The important thing here is the name on top: ARM_ColorNormalStains_Blood.nsh.
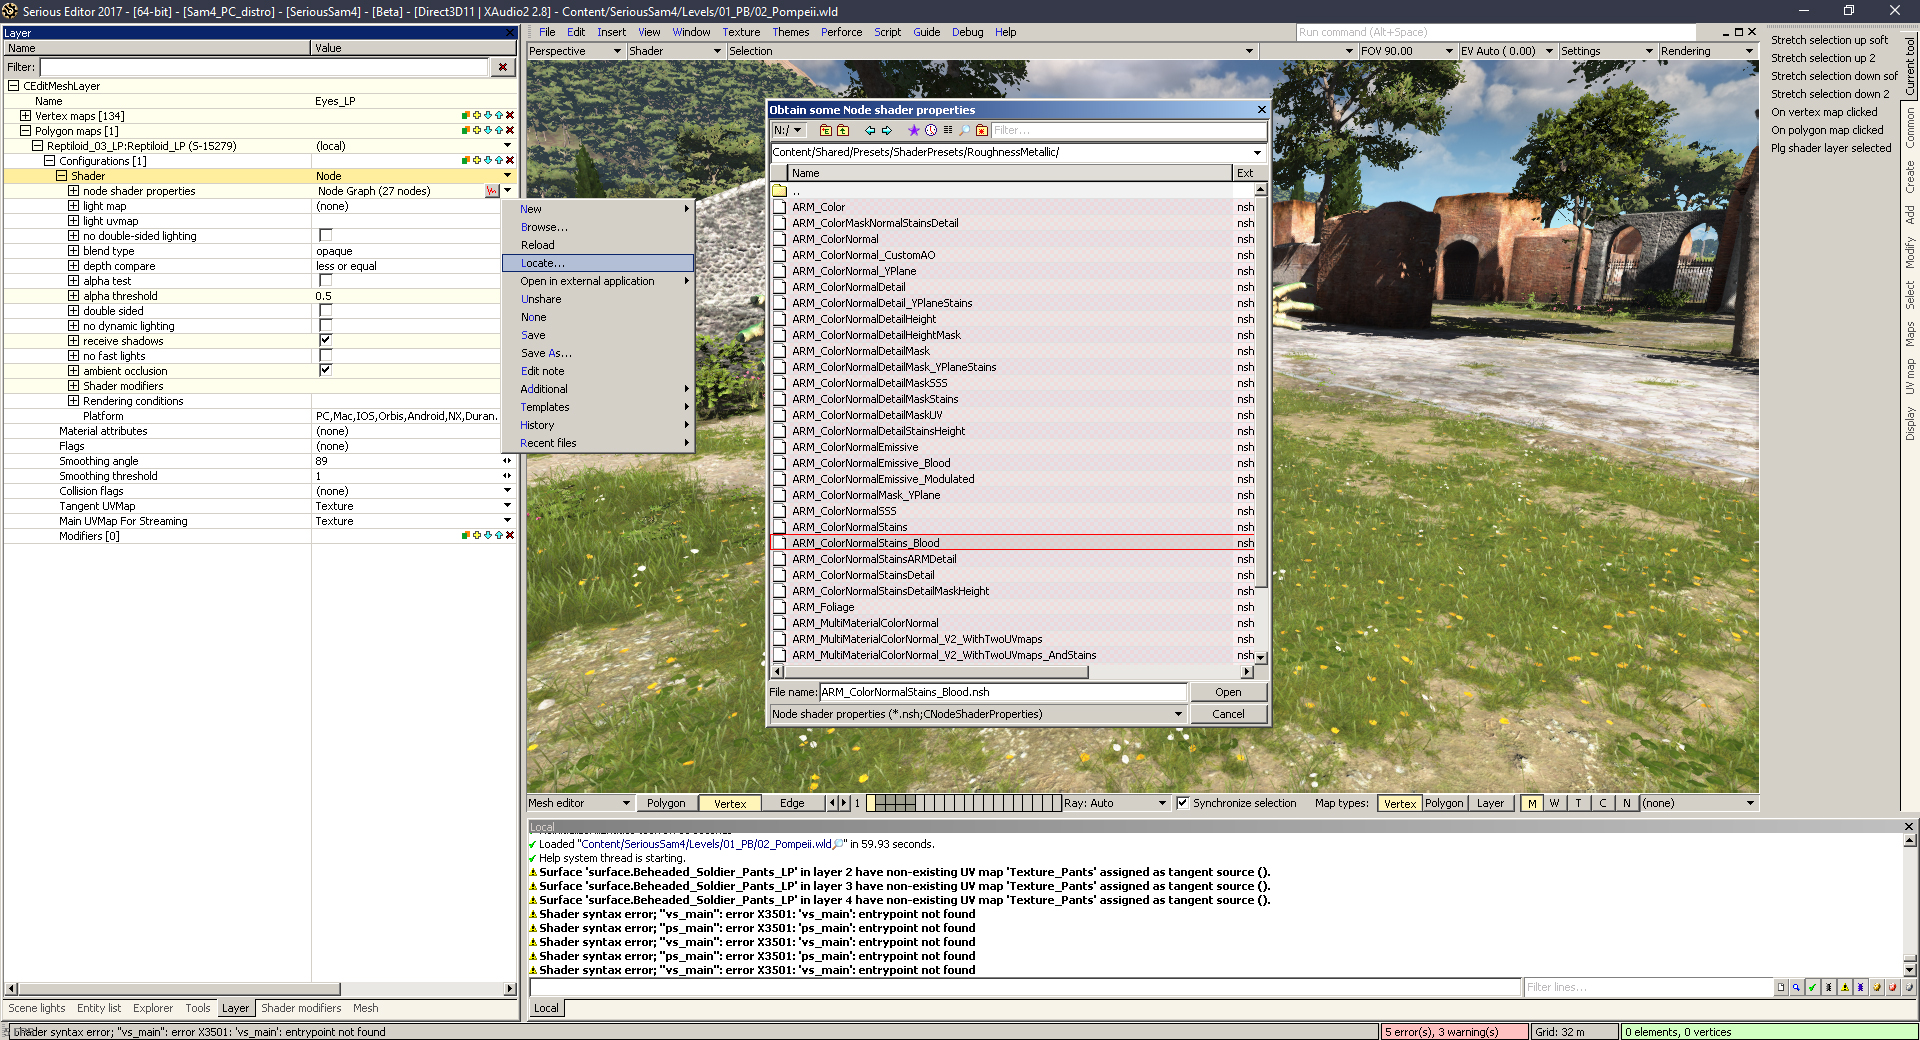
Now, back to the previous screen, if you click on the downward arrow next to the graph icon, then click “Locate” you will get a menu with a bunch of node presets. These are basically combinations of different properties a layer can have, but the most basic one is ARM_ColorNormal. For enemies, you might want to use ARM_ColorNormalStains_Blood, as that will enable the wound overlay when an enemy is damaged.
You should look at different models and see what node shaders they use. For example, if I want an enemy with glowing bits, I open the Khnum model, and notice that he uses ARM_ColorNormalEmissive_Blood
Basic Setup
Let’s see how and where textures are applied.
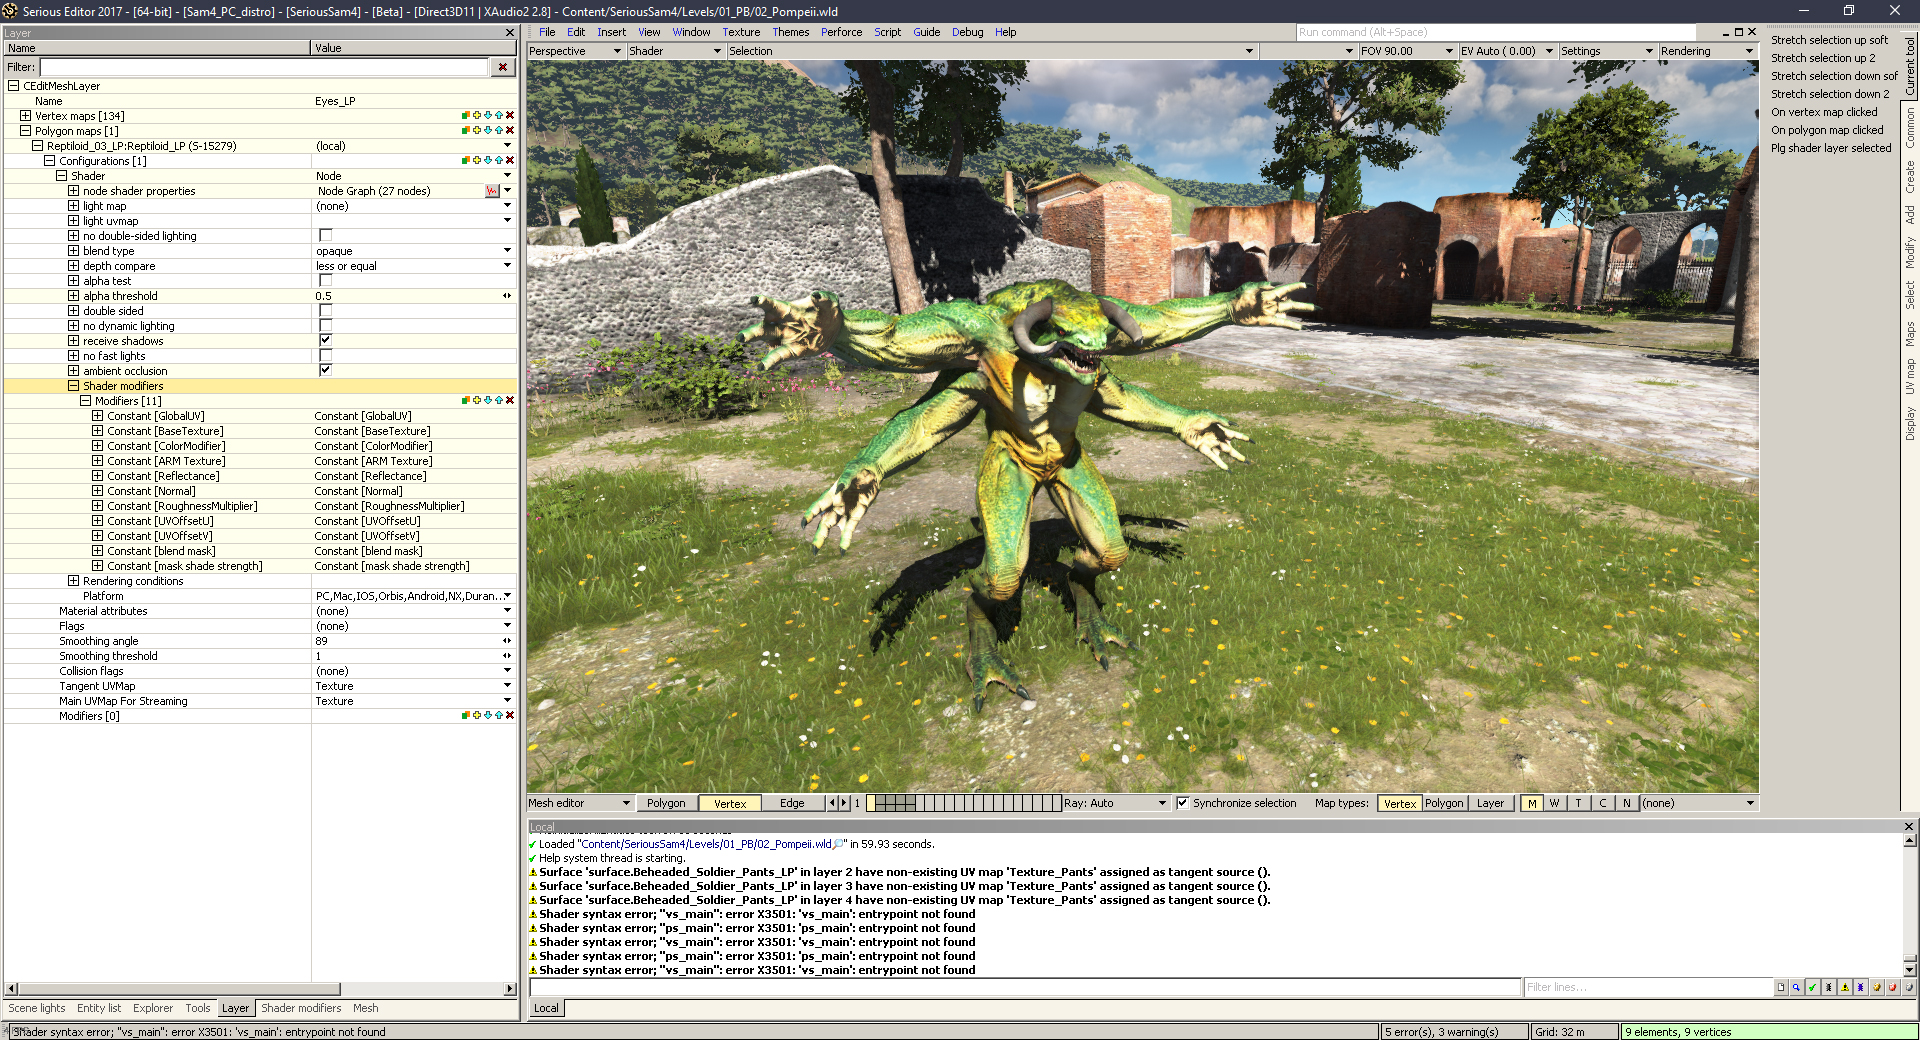
Going back to the mesh menu, click on Shader Modifiers and you’ll get a bunch of constants.
- Global UV – Here you set what UVMap all the textures use
- Base Texture – Put your Diffuse map/CM here
- Color Modifier – Can adjust your diffuse texture’s brightnes, hue and saturation.
- ARM Texture – Put your ARM texture here
- Reflectance – I’m not sure about this one, something to do with the model’s shine.
- Normal – Put your Normalmap here
- Roughness Multiplier = 0 = No Roughness, 1 = Full Roughness
- UV Offset U – Moves your UVMap right/left
- UV Offset V – Moves your UVMap up/down
- blend mask – You need to have a texture here to enable blood showing up on your enemy model. You can just use Content/Shared/Textures/Default/DefaultGrescale.tex
- mask shade strenght – I also have no idea what this does.
All this should be familiar, since it’s very similar to the Standard Shader from Fusion, just structured differently.
Hope you enjoy the post for Serious Sam 4 Basics of Shaders, If you think we should update the post or something is wrong please let us know via comment and we will fix it how fast as possible! Thank you and have a great day!

Leave a Reply