Hopefully everything you need to know to begin the worst day of your afterlife
Preface
Hi, I’m Kat and this is my first ever guide, so just know going into this that it might be terrible. This guide is also over Have a Nice Death, a game this is currently in it’s earliest state of early access at the time of writing this, so literally everything in this guide could become outdated, and I can not guarantee that I will update this guide. This guide is also a work in progress, at the time of writing this guide I have yet to unlock everything so there may be sections missing or ones that are not fully developed. One more thing, this guide may contain spoilers for things like bosses or unlocks, so if you don’t want those things spoiled be careful when you’re reading. I’ll try my hardest to give a warning before anything too spoliery.
What is this guide?
As of right now, there is very little online information regarding a lot of things inside Have a Nice Death. This guide aims to provide a reference to everything you’d ever want to know and also provide tips or personal insights, so let’s get started.
Welcome to Death Inc
I’m stepping in for the CEO to greet you to your new position here at Death Inc, your job is simple: Help the boss through his burnout and get his subordinates in check. Remember to keep your spirits down, and have a nice death.
Have a Nice Death, just like other games in it’s genre, is relatively simple to pick up but hard to master. Your goal is to slay every sorrow, of which there are 5, along the way you’ll be picking up weapons and upgrades to help make the task a little more manageable. We’re going to start with going over the basics in a little more depth.
The Basics
Movement Controls
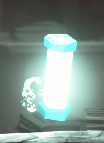
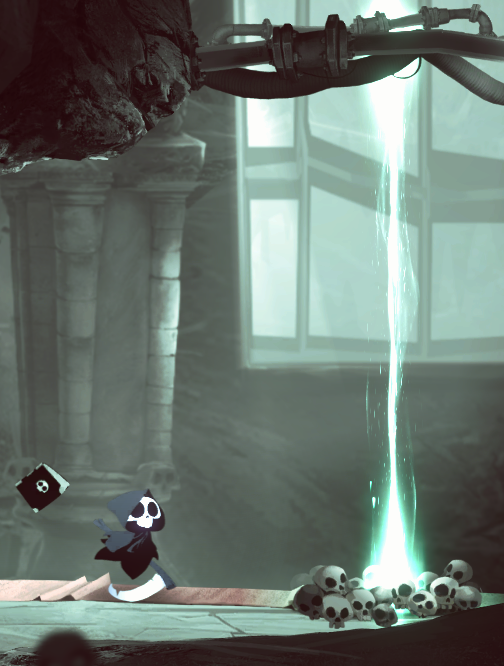
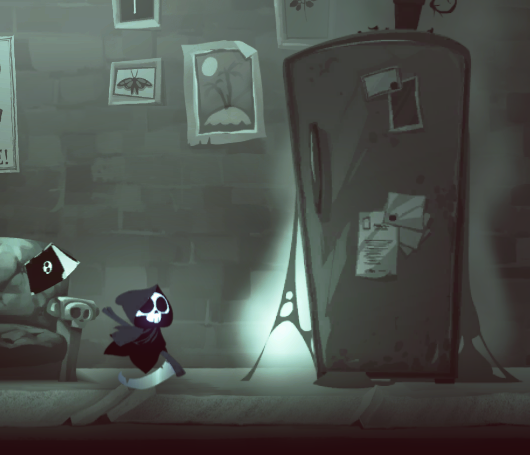
The first thing you’ll want to know is how to move around, WASD on keyboard and mouse and the Left Analog Stick on controllers. You’ll usually be moving Left and Right but there are occasions where you’ll need to move Up or Down, for example the beams of light located throughout the level, one of which is pictured to the right, can only be traversed by moving Up.
You can jump by pressing Spacebar on keyboard and mouse or the A button (X on PS4). Your jump height is based on how long you hold down the jump button, so if you want a small hop you can tap the button or if you want a big jump you can hold it down. It’s also important to know that if you jump into a ledge or a semi-solid platform, like the one above the beam in the picture, you’ll automatically pull yourself up onto it. The jump button is also the button you’ll use to advance text boxes.
You can dash by pressing Left Shift on keyboard and mouse or by pressing the Left Trigger on controllers. Dashing is not only fast, but also gives you a small period of invulnerability which makes it very useful during combat. You can also smash through doors by dashing.
There are certain objects throughout the game that need to be interacted with and to do that you can press F on your keyboard or the Right Trigger on controllers. Things like pickups and the elevator at the end of each floor need to be interacted with this way.
Combat Controls
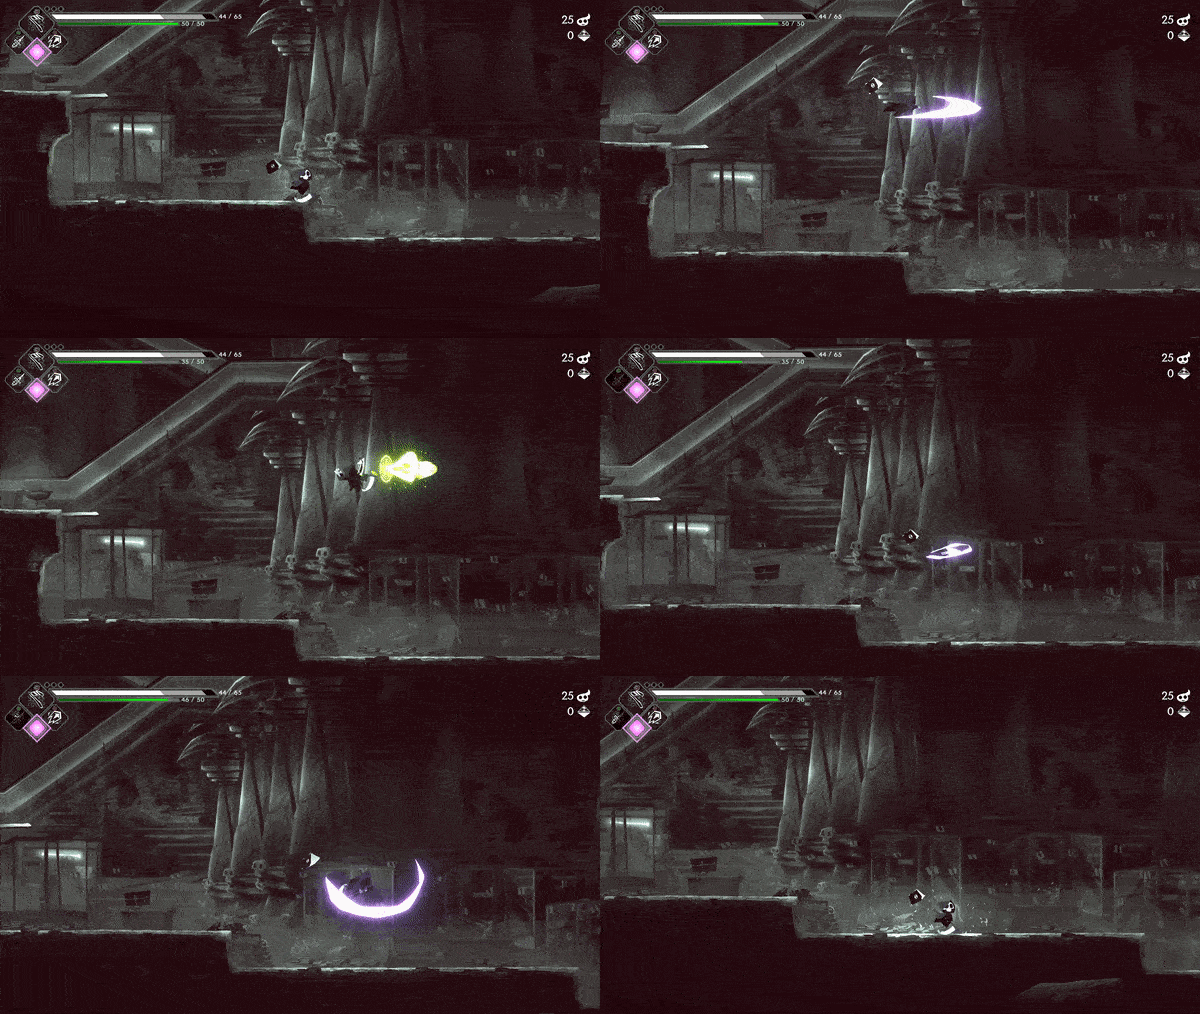
Death’s weapon of choice is his Scythe, which you can swing by pressing left click on keyboard and mouse or the X button (or Square for PS4 controllers). If you repeatedly swing with the scythe you’ll start chaining up to 4 attacks together, you can change the direction of these swings by holding either Left or Right. The Scythe can also be swung midair, and by holding Up and attacking with it, you’ll be sent up into the air. You can only do this once before you hit the ground again but it’s a great way to deal with floating enemies. While in the air you can come back to the ground quickly by holding Down and attacking with the scythe, and by doing that on the ground you’ll do a special attack, the scythe is one of the few weapons with a special attack so keep that in mind.
The scythe isn’t the only weapon you can use however, you can find other weapons out in the halls of Death Inc, and you can carry two of them along with your scythe. One of them can be used with Right Click or the Y button (Triangle for PS4) and the other with Middle Mouse or the B button (Circle on PS4). You can switch which weapon is on which button by pausing the game, navigating to the control room tab, and pressing G on your keyboard or the Y button on your controller. Weapons that Death swings himself that aren’t the scythe are called Cloak attacks, and ones that come out of Pitbook (the book that follows you) are spells. It’s important to note that unlike with Scythe and Cloak attacks, certain spells come out depending on the direction that Pitbook is facing and not the direction Death is facing. This means that after you turn around, you might have to wait for Pitbook to change direction before casting your spell.
All of your weapons and spells have one other thing to offer and that is their Fury attack. You can fill up the fury meter, which is located below your weapons in the top left of the screen, by attacking enemies. Once the affectionately nicknamed Anger Diamond is full, you can unleash a fury attack by holding Q on keyboard / the Left Trigger on controllers, as well as the button of the weapon you want to do the attack with. Each weapon has it’s own unique Fury attack, so when deciding what weapons you want to use you might also want to look at it’s Fury attack.
Health, Mana, and Healing
Your health bar is the big white bar to the right of your weapons, and is pictured below. If your health drops to 0, you will die and be sent back to your office. After you take a hit, some or even all of the damage you take will be converted to injuries, which is the grey portion of the health bar. Injuries are the damage you take that can be healed by using basic healing items like Animas (which you can hold 3 of, they are shown to the top left of your health bar and can be used by pressing E on the keyboard or the Left Bumper on controller) or with lifesteal effects. Health that isn’t converted to injuries is harder to restore, and requires a pure heal. Pure heals are special in not only do they heal missing health and not just injuries, but they heal the missing part of your health bar first, and then injuries. This means that there are situations where you can combine a pure heal with a basic heal to your injuries to top yourself off. There is also a special Anima which is golden, this Anima when used will give you a pure heal so naturally these ones are rarer and more desireable than the basic blue one.
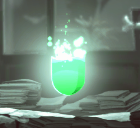
The mana bar is the green bar below the health bar, mana is required to cast spells and will automatically start regenerating over time. Each spell has it’s own mana cost and you can cast the spell as long as you have at least 1 mana. If you empty the mana bar there will be a long delay before the mana bar begins to regenerate, so early on in a run it’s important to keep track of the mana cost of your spells to avoid accidentally emptying the bar and not being able to cast spells for awhile.
Soulary and Prismium
This should be everything you need to know to get started on your journey through the halls of Death Inc, however there’s still a lot more to learn. If you ever need a refresher on the basics, Pitbook has all the information written down for you. All you have to do is pause the game, and navigate to the Employee Handbook tab.
Combat
Encounters and their Rewards
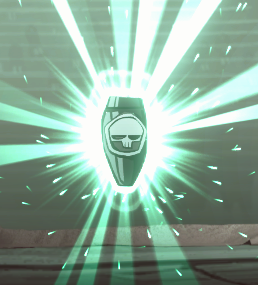
Defeating enemies is encouraged for progression, as the more enemies you kill, the more gold ingots you’ll get at the end of your run. We’ll go over what you can do with gold ingots in the next section.
Using your Weapons and Creating Combos
Generally the Scythe will be your main weapon but there are times where you may have a combination of cloak weapons or spells that you’ll be using in place of it. Whether this is the case or not, you’re going to want to use the weapons in your possession. Cloak weapons usually have a cooldown and some have multiple charges, upgrading the weapons tend to increase the amount of charges they have and decrease the cooldown. Spells on the other hand are usually only limited by their mana cost, the most powerful spells do have cooldowns though so make sure you look carefully at the stats on your weapon. Your weapons may also have other effects, like granting all your weapons crit chance or infusing them with lifesteal.
You can mix your weapons in with either Scythe attacks or other weapon attacks to start creating a combo. While you’re attacking, it’s important to remember you won’t be able to dash until you let the animation for your attack finish, so make sure you’re safe before committing to a combo. The major benefit of creating combos is that you can chain these attacks together for quite awhile, as new Cloak attacks reset your scythe attacks including even your aerial ones. Usually you only get four Aerial attacks with the scythe, but by mixing in just one other weapon you can get another four Aerial attacks. You can also mix spells into your combo if you’re quick enough, but keep in mind they don’t reset your Scythe attacks like Cloak attacks do.
Growing in Strength
As your trek through Death Inc goes on for long enough, you’ll be given the opportunity to grow Death in strength. We’ve already talked about how you can grow your health and mana bar, but we’ve only just briefly talked about acquiring weapons, obtaining curses, and upgrading your weapons.
Obtaining and Upgrading Weapons
At the beginning of the game you don’t have very many unique weapons that you can find and use, but this can be fixed by spending Gold Ingots to unlock new ones. At the end of every run, whether you die or beat the final sorrow, you’ll be sent back to your office. In your office you’ll meet Joe, who you can talk with to unlock new weapons and food, we’ll talk about food along with the break room later on in this guide. Each unlock from Joe has a gold ingot cost, and you’ll get gold ingots by finishing runs or by finding a gold ingot pickup in game. Some unlocks can’t be purchased until you accomplish a certain task in game, but each one can be discounted by completing a specific objective which is tracked below the name of the unlock.
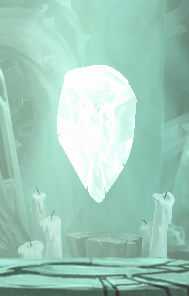
If you choose to upgrade your scythe, keep in mind that you can also transform the scythe into a different version at the cost of some prismium. The transformations are tiered, so for the tier one Diss Scythe, you can get it for just one prismium, however if you want either the tier two Twinsies or Sickles, you’ll first need to transform into the Diss Scythe. Transformations can only be purchased with prismium, which means if you’re planning on using the scythe for your run you’ll have to keep this cost in mind and decide whether or not you’ll be able to get the prsimium and soulary necessary to use it as your main weapon.
Curses
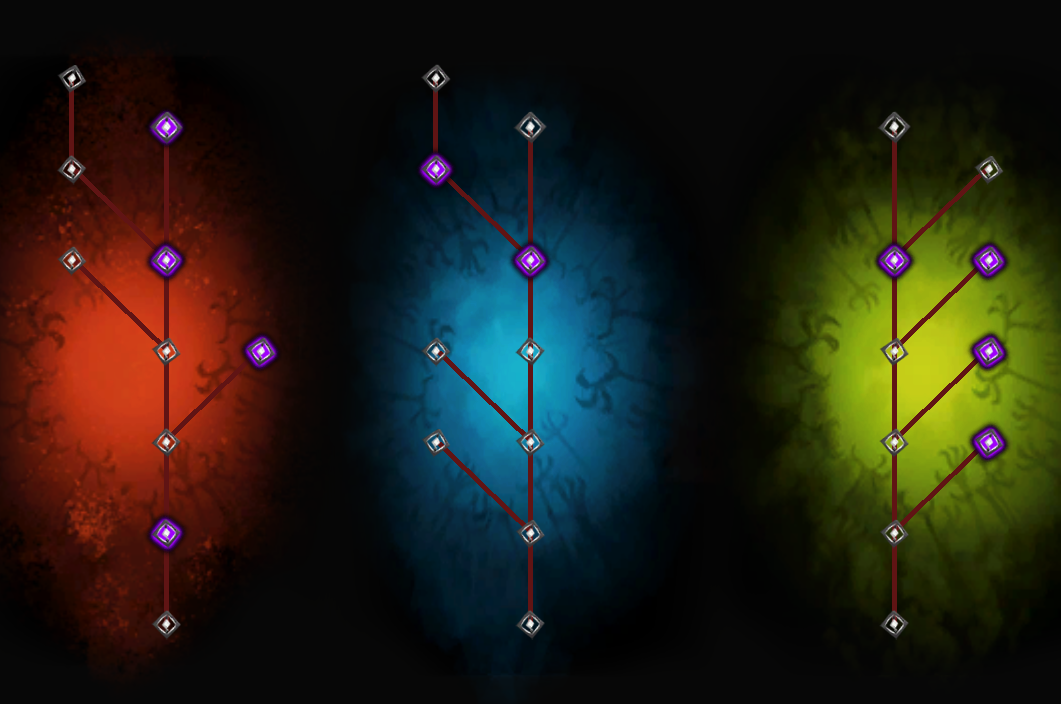
Given out by Health and Safety Inspector Mr. O’sah, curses are special buffs that make Death just a bit stronger. Each curse falls into one of three trees, I call them Cloak and Scythe (Red), Defense (Blue), and Spells (Green). Each of these trees are randomized each run, and you can view your own trees by pausing the game, and navigating to the Curses tab. If you have obtained any curses, they will show up on the tree and all of your benefits (and drawbacks) will show up on the right side of the menu. The purple nodes on the tree are Curses that come with a downside, these downsides can range from negligible to game altering so make sure you’re ready to face the consequences. Alternatively, you can nullify the effects of a curse’s drawback if you use an anti-curse so if you have these make sure you use them. If you don’t like the choices you’re given you can use a Curse Reroll on any of your options to reroll it, this will only reroll the curse you used it on. Both the Curse Reroll and Nullifier can be found as pickups throughout the game. The name’s I’ve given the trees suggest what they focus on: The red one focuses more on Scythe and Cloak upgrades, the Blue one focuses more on defensive upgrades like more health or defense, and the Green tree focuses more on your spells, by giving you increased mana or spell damage. It’s important to note that damage increases on the Red tree will not affect your spells, so if you’re using spells as your main source of damage don’t focus too much on the red tree.
Mr O’sah has certain rooms that he’s guaranteed to show up in, I’d like to eventually update this guide with every single one of them but for now I have two in the Hall of Eternity, and one in the Industrial Pollution Department. Also note that Mr O’sah will show up every time you kill a Thanager or Sorrow.
Hall of Eternity:
Industrial Pollution:
The Floors of Death Inc
Navigating the Workplace
As a new hire you’re not expected to know how to get everywhere right away, but it can be a little difficult to understand where exactly you’re going. This section of the guide is here to explain what floors are what.
Overview on Floors
When you select what floor to go to with the elevator, what you’re actually selecting is what reward you want to receive from the floor. Usually the floor’s reward is in a special room so you’ll know when you’ve gotten it. Keep in mind that the floors won’t always give you what you want, the most notable floor that does this is the Prismium Deposit.
Soulary Deposit
The reward for the Soulary Deposit is a ball of soulary, swipe it with your scythe to collect the stored sum of soulary. You may find similar looking balls throughout the halls and if you hit them with your scythe you may receive a bit of soulary.
Prismium Deposit
The reward for the Prismium Deposit is a chance at receiving a prismium. Note that you may instead get a different reward, I commonly receive a ball of soulary.
Soulary/Prismium Department
The reward for the Soulary/Prismium Department is either going to be a prismium deposit, or a ball of soulary. I would take a prismium deposit over this floor, but I’d take this floor over a Soulary Deposit
Equipment Storage
The reward for Equipment Storage is a cairn, which contains a random weapon. This floor is great if you’re getting unlucky and need another weapon, or if you want to try and get a different one.
Vault
The reward for the Vault I believe can be anything, if you don’t need anything specific this floor could be a good gamble, although I wouldn’t rely on this one too often.
Vita-Mana Department
The reward for the Vita-Mana Department is either a health pickup or a mana pickup, which will increase the corresponding bar by ten. Personally I love this floor, having more health is always great and extra mana doesn’t hurt.
Curse-Reroll Department
The reward for the Curse-Reroll Department is a Curse Reroll or a Curse Nullifier. I don’t tend to gravitate to this floor if it’s an option, though there are times where it’s net me a really good curse because i went and picked up the reroll
HR Office – T. O’Sah
The reward for this floor is receiving a curse from O’Sah. This is another really good floor to go to, curses can massively increase your strength so it’s never a bad idea to stop by O’sah.
Hazardous Floor
Hazard floors are pretty special, I’m not entirely sure of what exactly they offer but I have noticed a few things:
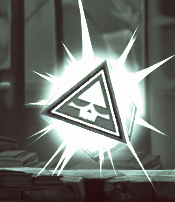
Second, encounters also seem to have a higher chance of rewarding prismiums. I tend to get 1-2 from Hazard floors at least once if I visit them in a run, on top of that about half the hazard floors I’ve been to have had prismium deposits as the floor’s reward.
I tend to stop by this floor a lot, they can be risky but the rewards are plentiful here.
Shop
This floor is a shop, you can purchase items with soulary and expand the selection items with prismium. Once again, make sure you buy before you expand as the stock will refresh when you invest a prismium.
Control Room
The Control Room is where you’ll upgrade your weapons and transform the Scythe. This floor is a huge deal, save up soulary and prismium for this floor as the weapon upgrades are vital to becoming strong enough to defeat the sorrows.
Thanager’s Office
The Thanager’s Office is where you’ll fight the department’s Thanager, these are optional minibosses that reward you with a curse, soulary, and sometimes a pickup or weapon. Taking them on can be very rewarding.
Sorrow’s Office
The most important floor is the Sorrow’s Office. This is where you’ll fight the final boss of the department, and you’ll be rewarded with a curse and soulary. You need to defeat all five in order to beat your run.
The Break-Room
You’ll be sent to the Break-Room after every Sorrow (except the last one of course). You can relax and take a break, listen to what some of your fellow employees have to say, but the most important thing about the Break-Room is the fridge. After each sorrow the food item in the fridge will be random, standing under it will tell you what it does, and you can unlock more with Gold Ingots. Remember that once you take a food from the fridge, you won’t be able to get another one until your next run so make sure you get the most out of it.
Pickups
Overview
This section of the guide is here to provide a brief description of what each pickup does, and a picture so you can easily identify it if you find one in your run.
Health and Mana

Small and Large Koffee
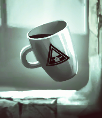
Injury and Mana-Regen Pills

Health Tablet
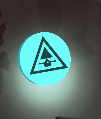
Lifesteal Pickup

Gold Ingots
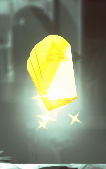
Fury Card

Prismium Shield
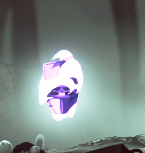
Prismium and Big Soulary

Weapons
Overview
Now I would really love to document every single weapon in this guide, and I plan on doing it eventually but right now I’m not only missing a weapon, but I’m also going to have to play the game a lot more than I currently have in order to get all the stats for each weapon. So for right now, I’m going to start with just the four basic scythes.
Speculation: Weapon Rarity
I’d like to really quickly say that this portion is not fact, this is just speculation I’ve come up with by noting which weapons I tend to pick up. Until the information here is confirmed to be true I will leave this disclaimer here.
Each weapon in Have a Nice Death has a rarity, which you can observe based on the color of it’s background in the control room page. The rarity of the weapon will determine how often you see it in runs, I believe it goes as follows: Grey weapons are the most common ones followed by Green weapons, Blue weapons are rarer than the green ones and Purple weapons are even rarer. Finally the rarest weapons are Gold. Weapon rarity also seems to be proportional to the strength of the weapon, but keep in mind even common weapons can be used to great effect. Below is the Gold rarity Star Raving Mad.
The Scythe
Death’s signature weapon, a symbol that will forever be etched into history
Stats at level three: 20 Damage, 10% Crit Chance, Unleashes gusts of wind with each attack
The basic scythe is actually not a bad weapon, which is surprising considering it’s always the first weapon of your run. Curses that increase the raw damage is going to be a huge increase to your power (this goes for all scythes), generally though I’d recommend upgrading to at least the Diss Scythe.
Diss Scythe
Who would’ve thought all you need to do to make a weapon better is add some string?
Stats at level three: 25 damage, Long Range, Premium Three
I still can’t decide whether this one is my favorite, or if Twinsies is my favorite, regardless this Scythe is a monster. It has long range so you don’t have to put yourself in melee range of enemies to do damage and Premium Three ensures that the scythe will always be doing respectable damage. This Scythes attacks are also super fun to use, the only downsides to this weapon are it’s long attack animations and lack of aerial attacks, but besides that this is just an overall great weapon.
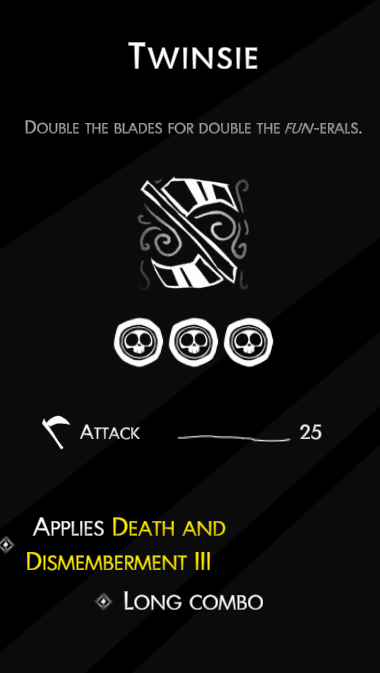
Twinsies
Two is always better than one after all.
Stats at level three: 25 damage, Death and Dismemberment Three, Long Combo
I’m going to be honest with you my opinion on this weapon might be biased because this is the first weapon I beat the game with, that said I think this is probably the best scythe in the game. Long combos even in the air let’s you keep your combo going practically forever, and no other scythe can rack up damage like this thing can. The one downside to this weapon is that it’s really easy to miss your Fury. Pick this up if you plan on using your Scythe a lot.
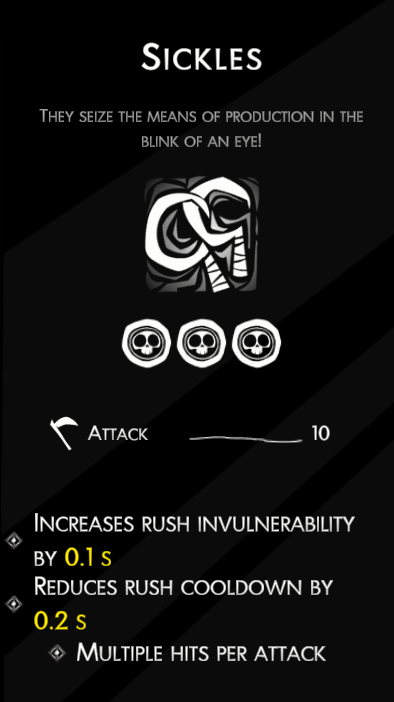
Sickles
Fastest scythes in the west.
Stats at level three: 10 Damage, Increashes rush invulnerability by 0.1 second, Reduces rush cooldown by 0.2 seconds, multiple hits per attack
I don’t like this scythe. I might be missing something but this feels like a downgrade. It’s bonuses to rush are almost negligible and the damage output on this weapon is extremely low even with the multi-hit attacks. The one thing I can give this scythe credit for is it’s fury, it does a lot of damage really fast, but when you don’t have fury this thing hits for less damage than the standard scythe. Again I might be using it wrong but I can’t see myself recommending this over Twinsies or even the Diss Scythe.
Keywords
Overview
When you’re looking at a curse, or even a weapon, it may have a keyword. Keywords have different meanings and I’d like to go over a few of the more common ones here.
Weapon Keywords
Each of the weapon types have keywords that correspond to them. Scythe attacks are affected by curses using the keyword “Scythe”, and other weapon attacks that aren’t spells (Cloak Attacks) will be affected by curses using the keyword “Cloak”. Finally, your spells will be affected by curses using the keyword “Spells”.
Infuse
Infuse means that all your weapons, whenever you attack with them, will produce the effect of whatever is infused on it. For example if you get the Infuse Lifesteal curse, all of your weapons will heal your injuries as you hit with them.
Retaliate
If a curse has the Retaliate keyword, that means it’s effect will trigger whenever you are hit by something. For example if you have the curse “Retaliate, permanently gain 1 max health” that means you will gain one max health for your run whenever you are hit by anything.
Termination
Termination effects trigger whenever you slay an enemy, for example if you have the curse “Terminations launch a homing dart” that means that whenever you slay an enemy, a homing dart will be launched at another enemy.
Retrain
The Retrain keyword grants you bonus damage whenever you use different weapons in your combos. The Retrain keyword also has higher levels, so be on the lookout for that.
Critical
The Critical keyword lets your weapons do double damage, instead of their normal damage. Usually the Critical keyword is also accompanied by a percentage, which is the chance of your attack being a critical hit instead of a normal one.
Life Insurance
This keyword gives you bonus damage if the enemy has full hp. This keyword also has multiple levels, but at level one you’ll be dealing ten extra damage so the effect is actually pretty noticeable.
I will be adding more keywords later on, I hope to eventually have them all listed here.
Thank you for choosing Death Inc
That should hopefully be everything you need to know to master your job here at Death Inc, and remember to make every day the worst day ever!
I’d like to thank you for reading my guide, I know it’s not even close to finished yet but I wanted to get something out there as I really love this game, and I want the people who play it to have something they can look at for information. I’m planning on updating this when I have time, hopefully this will be complete with all the information I hope to put here. I’d love feedback and suggestions, I’ll be reading comments whenever I can. I’ll be seeing you soon, Have a Nice Death everyone.
This is all for Have a Nice Death The Death Inc Employee Handbook + Movement Controls Walkthrough hope you enjoy the post. If you believe we forget or we should update the post please let us know via comment, we will try our best to fix how fast is possible! Have a great day!
- Check All Have a Nice Death Posts List








Leave a Reply