If you have any question regarding the guide, or achievements, or have any errors in the guide that you would like to let me know, please do so in the comments.
Good luck!
Important
- This guide became much more larger than I anticipated, and I sincerely apologise for that, but if you’re playing this game for the first time, I highly suggest going through this guide first before starting your playthrough. I’ve marked and hidden big spoilers so you don’t have to worry about that. It will give you a good understanding on how to tackle the achievements.
- Achievements under each specific sections of this guide are listed from earliest/easiest to achieve (top) to longest/hardest to achieve (bottom). Meaning, on a specific section of this guide (e.g. Combat related achievements) you can get the achievements that are at the top relatively more early in the game compared to the ones at the bottom. This is true except for a few achievements that are interlinked with other.
- This guide is designed to be done with a playthrough on Nightmare difficulty so that you can earn the nightmare difficulty related achievement “Inquisitor” on that same playthrough.
- You will need to do 2 playthroughs of the game to get all the achievements. 66 achievements can be earned on your main playthrough on Nightmare difficulty, the remaining 3 can be earned on a new playthrough on Casual difficulty (lowest difficulty) with multiple trials turned on. See the last 3 achievements in this guide for more information.
- Do not lower the difficulty at any point during your main playthrough before finishing the main story and earning the “Inquisitor” achievement. Reducing the difficulty before earning this achievement will void that achievement for that whole playthrough.
- A small, mini guide for Nightmare difficulty is added in the relevant section of the “Inquisitor” achievement.
- There are some side quests (mainly non-fetch quests that involve people) that need do be done in a specific way to get some achievements, so I recommend you CTRL + F and search side quest names on this guide to see if you need to be aware of how to properly complete them. I’ve used spoiler tags so you don’t need to worry about unnecessary spoilers.
- Some trials related achievements require you to combat certain enemies, enter certain areas, and do other specific tasks with specific trials modifiers active, so please refer to the trials part of this guide for detailed explanations on how to do them.
Main Story Related Achievements
The Wrath of Heaven
Finish the prologue.
Main story related and cannot be missed. You simply need to complete the prologue of the game.
Speak Only the Word
Gain access to a major city for the Inquisition.
Main story related and cannot be missed. Unlocks when you visit Val Royeaux for the first time.
Opposition in All Things
Close the Breach.
Main story related and cannot be missed. You will earn this achievement near the beginning of the “In Your Heart Shall Burn” main quest.
In Your Heart Shall Burn
Survive an attack on the Inquisition.
Main story related and cannot be missed. You will earn this achievement at the end of the “In Your Heart Shall Burn” main quest.
Wicked Eyes and Wicked Hearts
Make an impression on the Orlesian court.
Cannot be missed. You will earn this achievement at the end of “Wicked Eyes and Wicked Hearts” main quest.
Belle of the Ball
Gain the full approval of the Orlesian court.
Missable
After you enter the Winter Palace, you will see a bar on the top right corner indicating your Court Approval amount (hereby referred as CA in this guide). The starting amount changes depending on your Inquisitor’s race, and class. The starting amount can change between (25-45 CA). If you managed to reach 0CA, the quest will fail. The maximum amount you can earn is +100CA. You can definitely earn +100CA before the quest ends, but you only get this achievement if you finish the quest with +100CA. Many actions, dialogue choices, side quests that you do inside the Winter Palace can increase or decrease this amount.
There are also restricted areas which you must go through that will drain your CA gradually for trespassing. Returning to a neutral/open area will stop the drain and increase the CA amount (if it had been decreased), but only by 1 point. So an extremely defensive strategy would be returning to a neutral area whenever your CA amount drops by 1 while accessing a restricted area (only if it’s a short restricted segment though, otherwise this would be impossible). However, you don’t need to worry too much about loosing CA in restricted areas at the beginning of this quest. Just be quick. I personally used “Fade Step” ability with a mage to travel faster.
If you want, you can make a save at the beginning of a restricted area and explore and familiarise yourself with the area without worrying about CA. Whenever you’re done, reload and continue the quest quickly.
While doing the quest, make sure to make a lot of saves. And don’t be afraid to quicksave before doing any dialog and quickload if you lose CA. Dialogue that favours politics, wittiness, scheming, and anything that supports “The Grand Game” will mostly yield CA. Special dialogue options that use “Underworld Knowledge” and “Nobility Knowledge” Inquisition perks always yield +CA, so acquire them before the quest.
The side quests “The Great Blackmail Hunt”, “Throwing Away Money”, and “Herd of Stone Halla” all of which can be acquired in this quest have a chance to give a good amount of +CA as well.
Near the end of the quest, you have a chance to dance with the Grand Duchess Florianne de Chalons. Accept the dance and keep choosing the dialogue option in the middle on the right side of the dialogue wheel to earn good amounts of +CA.
There are two instances where you have to return to ballroom when a bell rings. In both of these times, wait until the bell rings for the 2nd time (Inquisitor will comment and say it’s the 2nd time the bell rang and that you’re fashionably late now) and enter the ballroom for +10CA each time.
This can be a bit of a tricky achievement. It’s not difficult by any means, but you need to time everything and be quick near the end since the last section of this quest is taken in a restricted area which gradually decreases your CA. So even if you managed to get +100CA early on, you have to keep it at that level when finishing this quest because you have to finish the quest with +100CA to get this achievement. When you get the objective to enter the Royal Wing, this is near the end of this quest. Make sure you have +100CA and make a save and enter the restricted area. Keep going until you make it to the point of no return shown below. Make sure to complete any side quests acquired inside the Winter Palace before proceeding from this point.
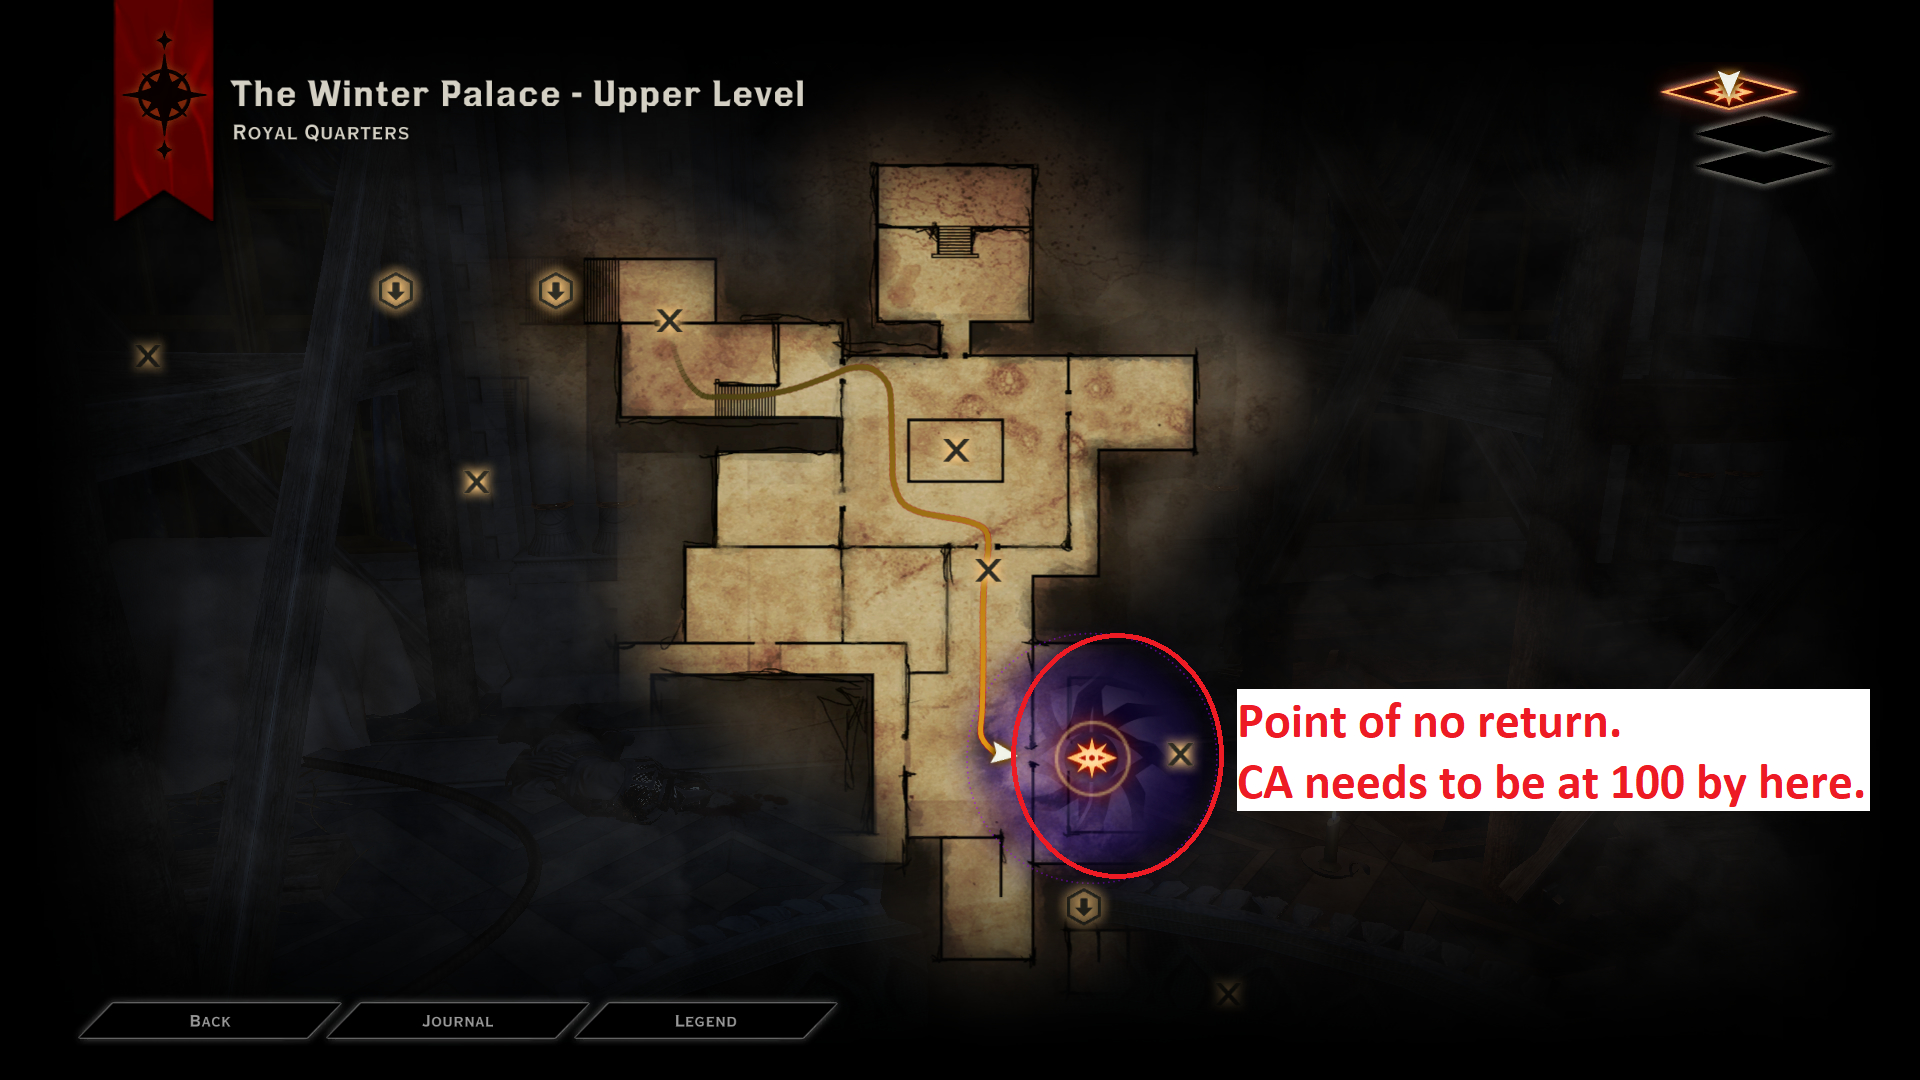
Luckily there’s a neutral area nearby (shown below) so go there if you drop you CA level to 99 to get it back to 100.
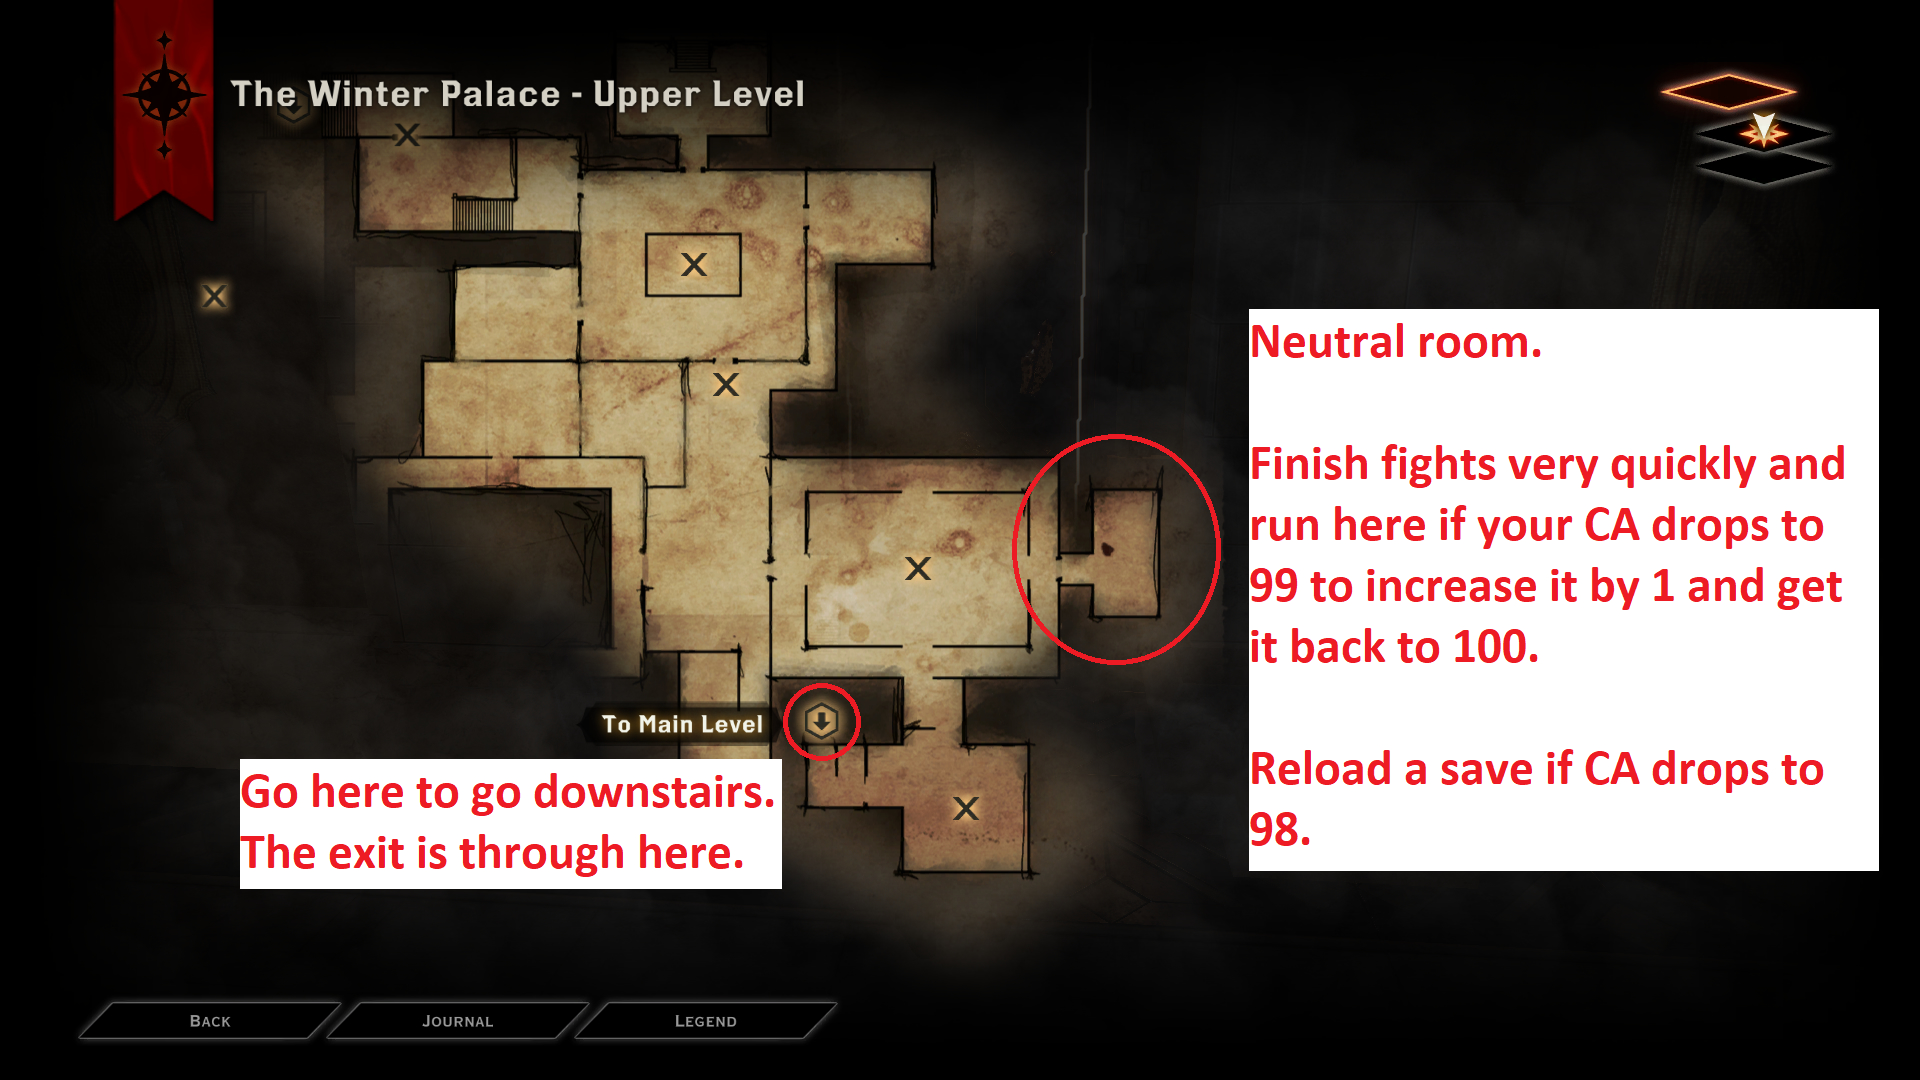
After reaching downstairs, head straight to the exit shown below. If your CA drops to 99 again, go back to the neutral area upstairs to get it back to 100.
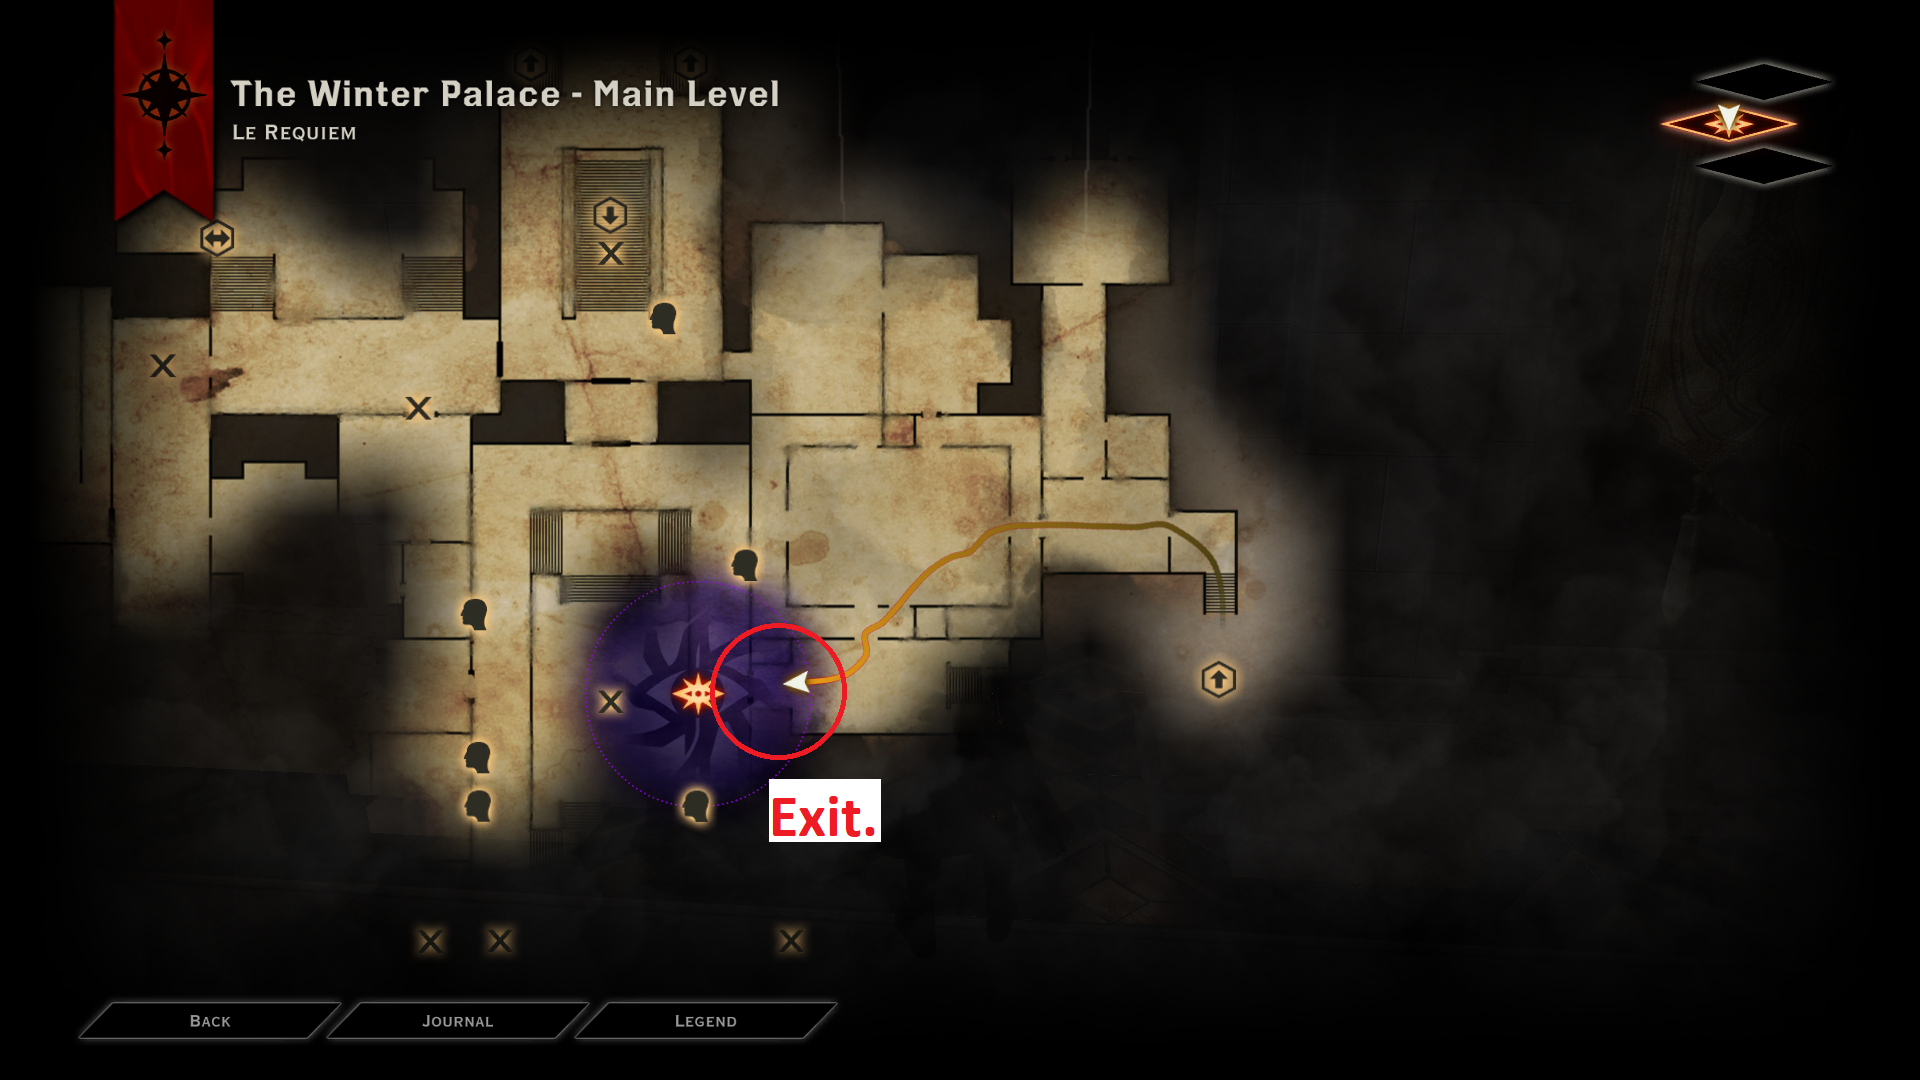
After exiting through the door, a cutscene will play and you have to choose the “I’ll talk with Florianne.” dialogue option if you want to get this achievement. After choosing the correct dialogue option, the achievement will pop up. Keep in mind this dialogue choice affects the outcome of this main quest. So if you want a different outcome, make a save before this cutscene, earn the achievement, load the save, and choose the dialogue you want.
Note: If you want a more in-depth walkthrough which includes how to do the side quests given inside this main quest, refer thedragonage.fandom.com – https://dragonage.fandom.com/wiki/Wicked_Eyes_and_Wicked_Heartswiki page.
Here Lies the Abyss
Face your fears in the Fade.
Cannot be missed. You will earn this achievement at the end of “Here Lies the Abyss” main quest
What Pride Had Wrought
Reach an ancient ruin before your enemies.
Cannot be missed. You will earn this achievement at the end of “What Pride Had Wrought” main quest.
On Burning Wings
Recruit a powerful ally to even the score.
Missable
During the “What Pride Had Wrought” main quest, you will be given a chance to chose who to drink from a well. The choice will be between yourself and another person. Choose yourself as the person to drink from the well. After that, the current main quest will be completed and you will begin the next main quest called “The Final Piece”. Continue on with that quest and you will earn this achievement near the end of that quest.
Note: If you do not wish for your Inquisitor to drink from the well, make a save before the choice and go through with you drinking from the well. After earning the achievement, reload back to the save you made before and continue on however you want.
Doom upon All the World
End the threat once and for all.
Cannot be missed. You will earn this achievement at the end of “Doom Upon All the World” main quest.
Combat Related Achievements
Synergized
Trigger a cross-class combo with a character you control in single-player mode.
You need to use an ability to apply a status effect (i.e. Stun, Sleep, Freeze, or Paralyze) on an enemy and then immediately use a Detonator ability (e.g. “Long Shot”, “Mighty Blow”, “Twin Fangs”, etc) on that same enemy. This can be easily be done during the prologue. After recruiting Solas and Varric to your party, use Solas’s “Winter’s Grasp” on an enemy and freeze it, then use Varric’s “Long Shot” ability on that frozen enemy to shatter the enemy and trigger the combo. Cross class combos will also trigger naturally while playing through the game.
Hard Hitter
Land a single blow in excess of 1,000 damage in single-player mode.
You can easily earn this even in early stages. You simply need a high damage ability with a high damage weapon. Critical attacks count for this as well. Your damage output increases alongside your level, so you will definitely be dealing 1,000+ damage hits naturally at higher levels. Which is how I got it.
Below are a few attack combinations you can use to try and deal more than 1,000 damage early in the game. Keep in mind that dealing more than 1,000 damage with a companion counts for this as well. So you can use your companions to get this even if your Inquisitor doesn’t have these abilities.
Rogue
- “Full Draw” (Archery) + “First Blood” (Archery) + High damage bow + Enemy at full health
Mage
- “Fire Mine” (Inferno) + High damage staff + Enemy
- Fully charged “Spirit Blade” (99 charges) (Knight-Enchanter) + “Amplified Blade” (Upgrade – “Spirit Blade”) (Knight-Enchanter) + High damage staff + Enemy (Bonus damage if it has a Barrier/Guard)
- “Fade Cloak” (Knight-Enchanter) + “Decloaking Blast” (Upgrade – “Fade Cloak”) (Knight-Enchanter) + High damage staff + Enemy
Warrior
- “Shield Bash” (Weapon and Shield) + “Ring the Bell” (Upgrade – “Shield Bash”) (Weapon and Shield) + High damage one armed weapon + Shield + Enemy with full Guard
Invincible
Defeat 2,500 enemies in single-player mode.
Note: This achievement counts all the demons that you defeat in single player throughout all of your playthroughs. So if you’re planning on doing multiple playthroughs, you can easily earn this achievement.
You will encounter many enemies throughout the game. Keep fighting every enemy whenever you get the chance. I recommend finishing up the main story and the DLC (except Trespasser) first before grinding enemies for this because you encounter a lot of enemies in the during these quests.
Keep in mind that there are many areas have some enemy factions that always spawn so always explore the map and fight them. Travelling to another area and coming back will respawn these enemies. So if you haven’t earned this achievement after finishing the game, you can use the above method to increase your count.
Demonslayer
Defeat 1,000 demons in single-player mode.
Note: This achievement counts all the demons that you defeat in single player throughout all of your playthroughs. So if you’re planning on doing multiple playthroughs, you can easily earn this achievement.
You need to defeat 1,000 demons throughout all single player playthroughs to get this achievement. If you’re planning on completing most of the side quests, closing all the fade rifts (which you will have to do to get “Marked for Greatness” achievement), and exploring all the areas, you can easily earn this in a single playthrough.
Fade rifts are usually the easiest ways to get demon kills. All the different types of enemies that spawn from fade rifts count for this achievement. Simply keep closing fade rifts to rack up demon kills.
However, I do recommend keeping one fade rift with high demon spawn count open as a fail-safe if you want to earn this achievement in a single playthrough. If by the end of the game, you still haven’t earned this achievement, go to that remaining open fade rift and kill its demons that spawn in both waves. However, make sure that you do not close the fade rift. After killing all its demons, simply walk away from the fade rift. Keep walking away from the rift until you pass a boundary shown by bright green smoke. Passing this boundary will reset the rift and its enemies. Going back near the same rift will spawn enemies again. Keep repeating this process and you can farm demons very easily.
Combat Related Achievements (Continued)
Wyrmslayer
Kill a high dragon in single-player mode.
See the “Dragons’ Bane” achievement below.
Dragons’ Bane
Slay 10 high dragons in single-player mode.
High dragons are difficult bosses that you can find in wilderness areas. There are 10 different high dragons in the base game. 1 more was added after the Jaws of Hakkon DLC which brings the total count to 11 in the GOTY edition of the game. Killing 10 of these 11 high dragons will unlock this achievement. Killing 1 will unlock the “Wyrmslayer” achievement above. The game counts high dragons killed throughout all single player playthroughs.
I will write the locations of these dragons, processes to unlock those locations (if needed), and their basic information. However, I will not write a guide on how to eliminate them since that would make this guide much more larger than it already is. Just keep in mind that these are very difficult on Nightmare difficulty and should not be tried at lower levels (other than the 2 dragons that are needed for trials related achievements which I have explained in their relevant section).
Note: If you do need a guide on how to defeat them, thedragonage.fandom.com – https://dragonage.fandom.com/wiki/Dragon_Hunterhas the list of dragons and on their individual pages you can find useful strategies against them.
Fereldan Frostback (level 12) – Hinterlands
Note: This dragon must be defeated at level 16 while a trial modifier is enabled to earn another achievement. Otherwise you will need to do another playthrough to earn that achievement. Check the “Trial of the Empress” achievement to learn more.
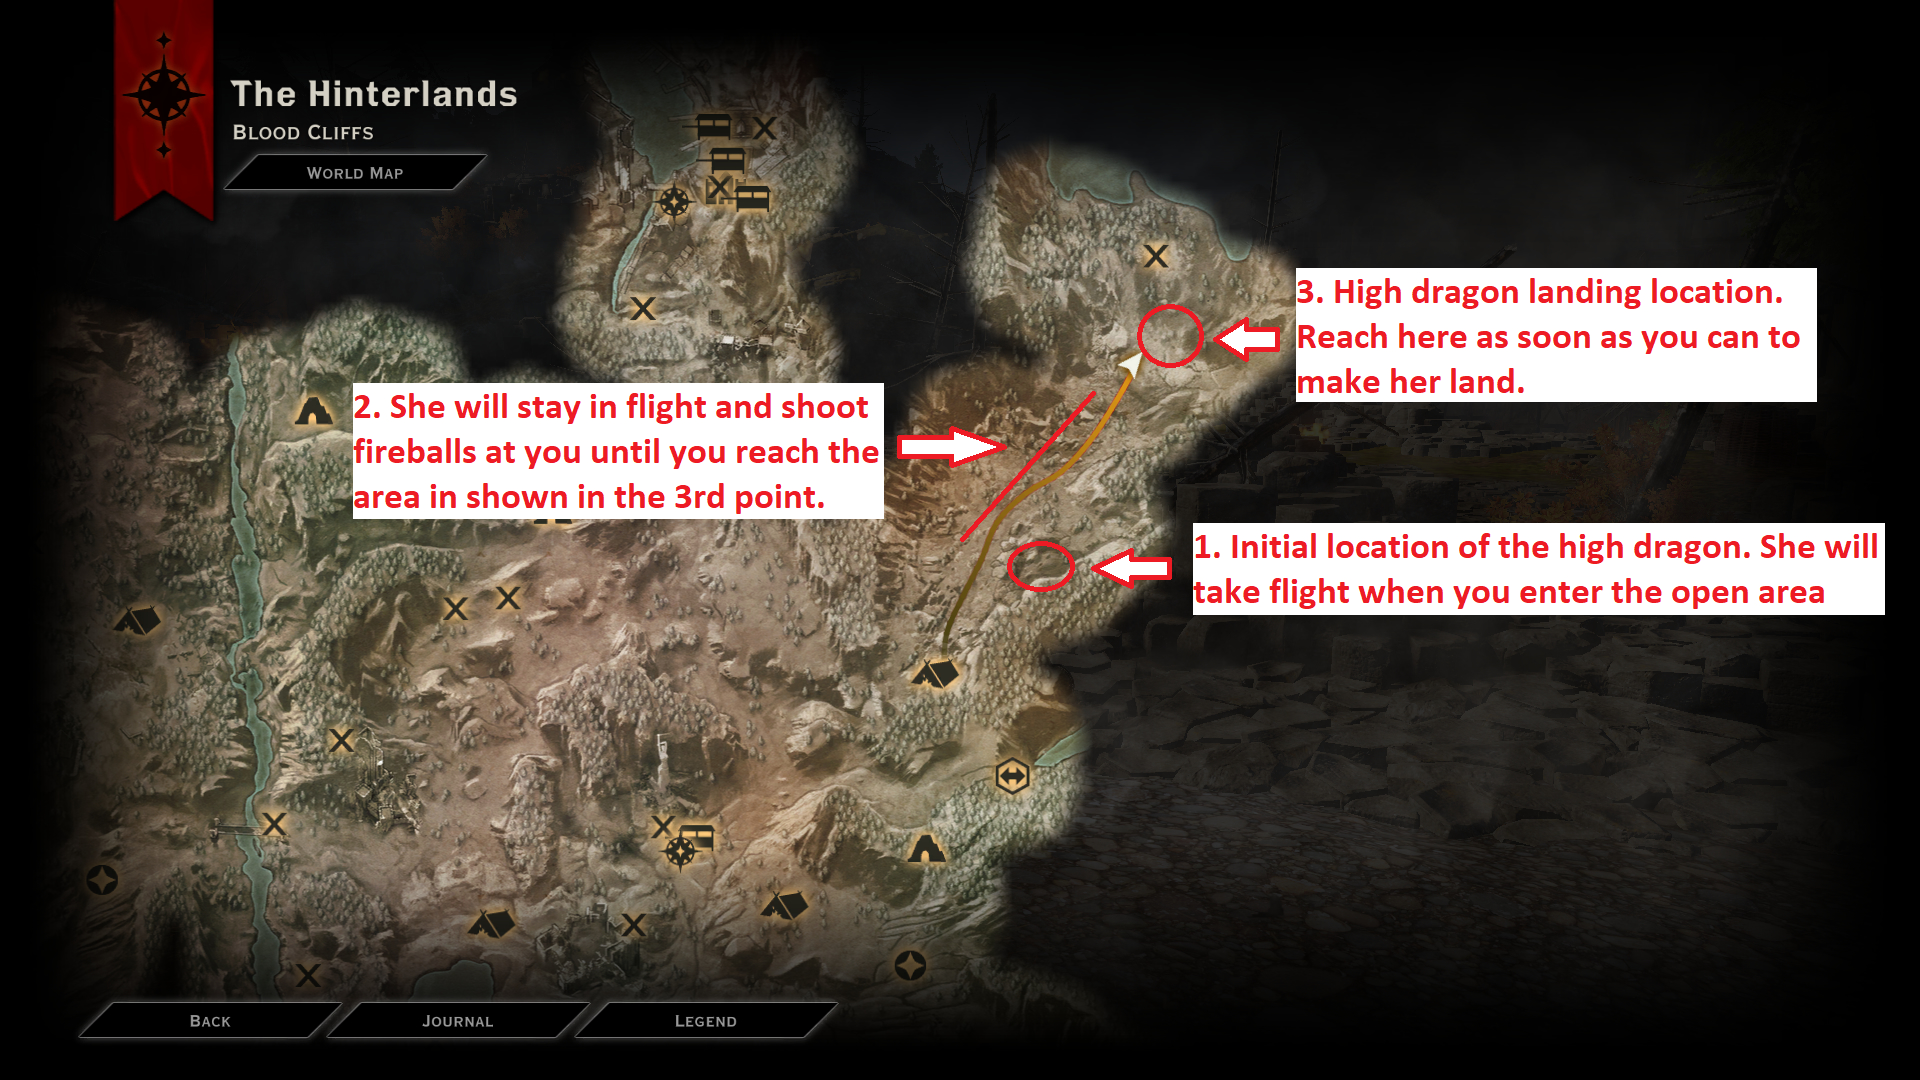
Damage type dealt: Fire
Resistance: Fire damage
Weakness: Cold damage
Northern Hunter (level 13) – Crestwood
You will automatically be given the “Still Waters” side quest while entering Crestwood for the first time. By continuing on with that quest, you will have to drain the nearby lake by opening up the nearby dam. After opening the dam, the dragon will wake up and spawn in the southern part of the map.
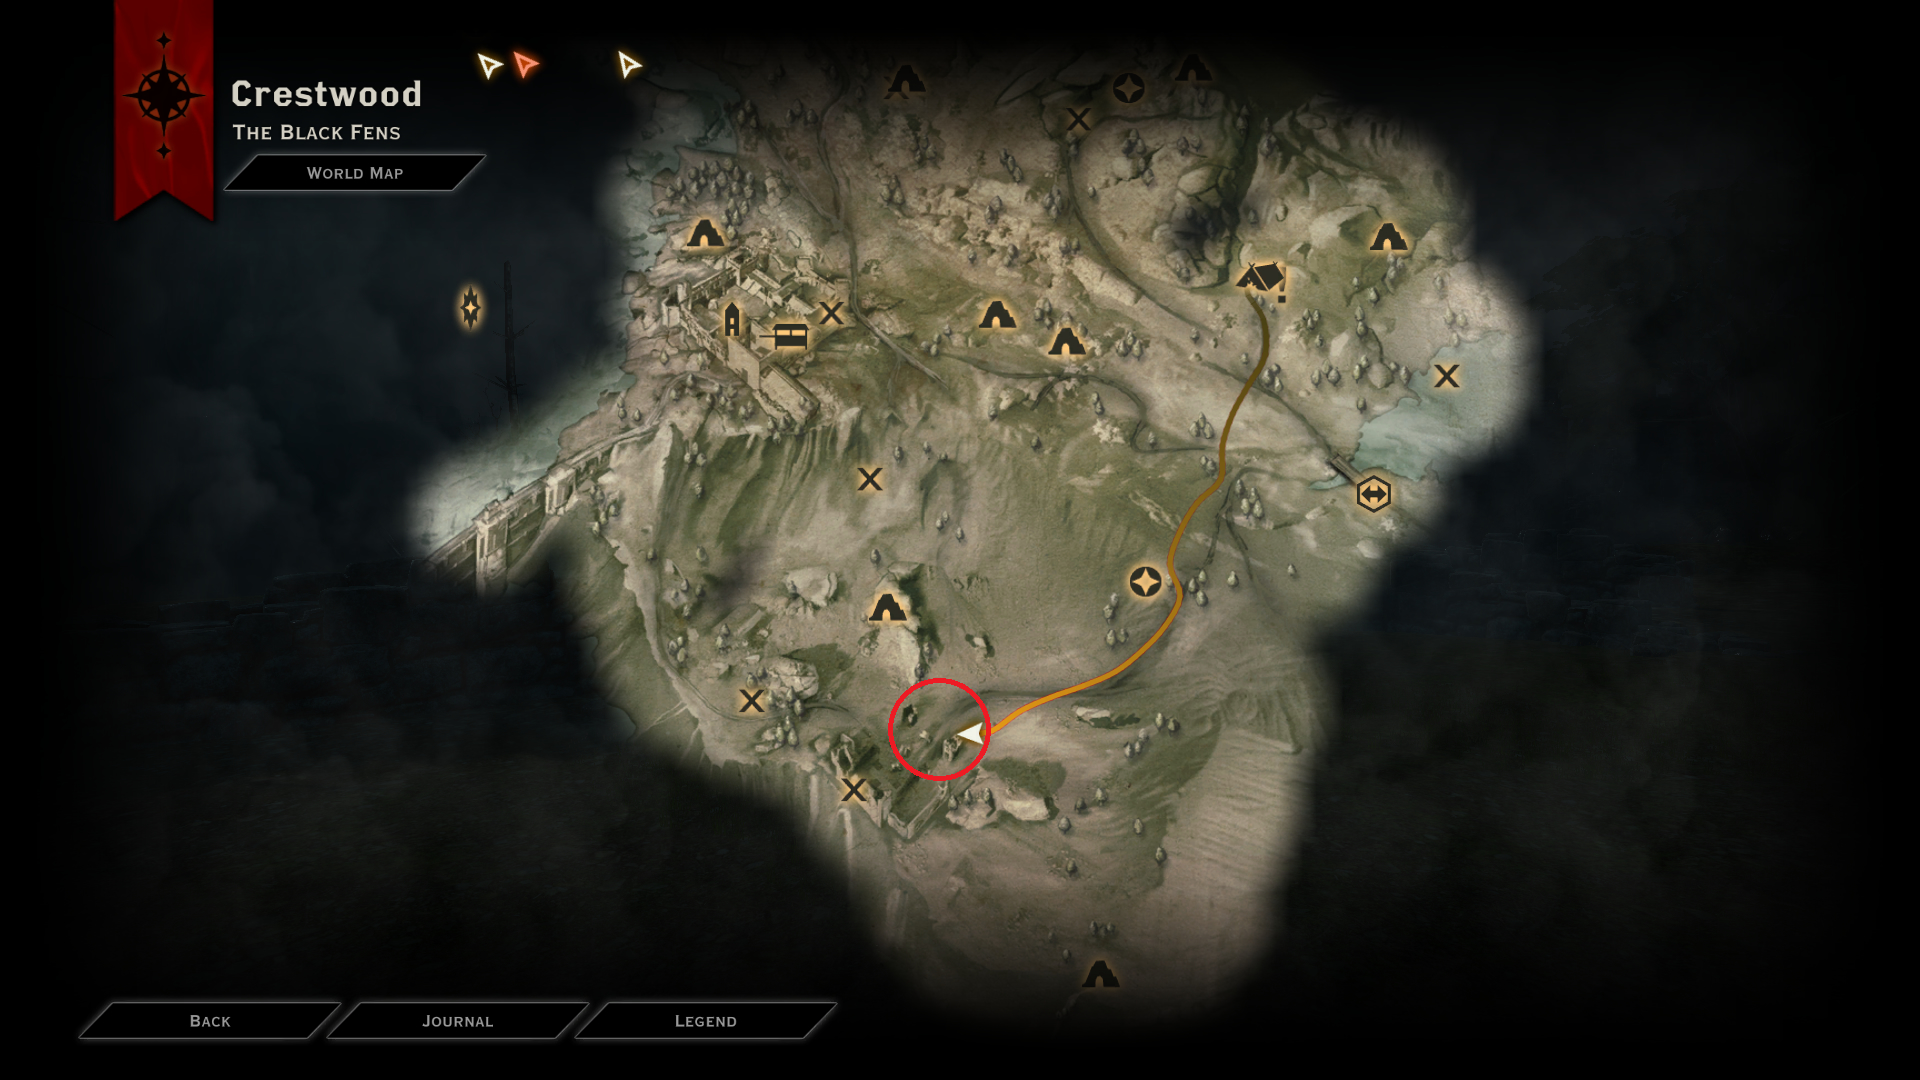
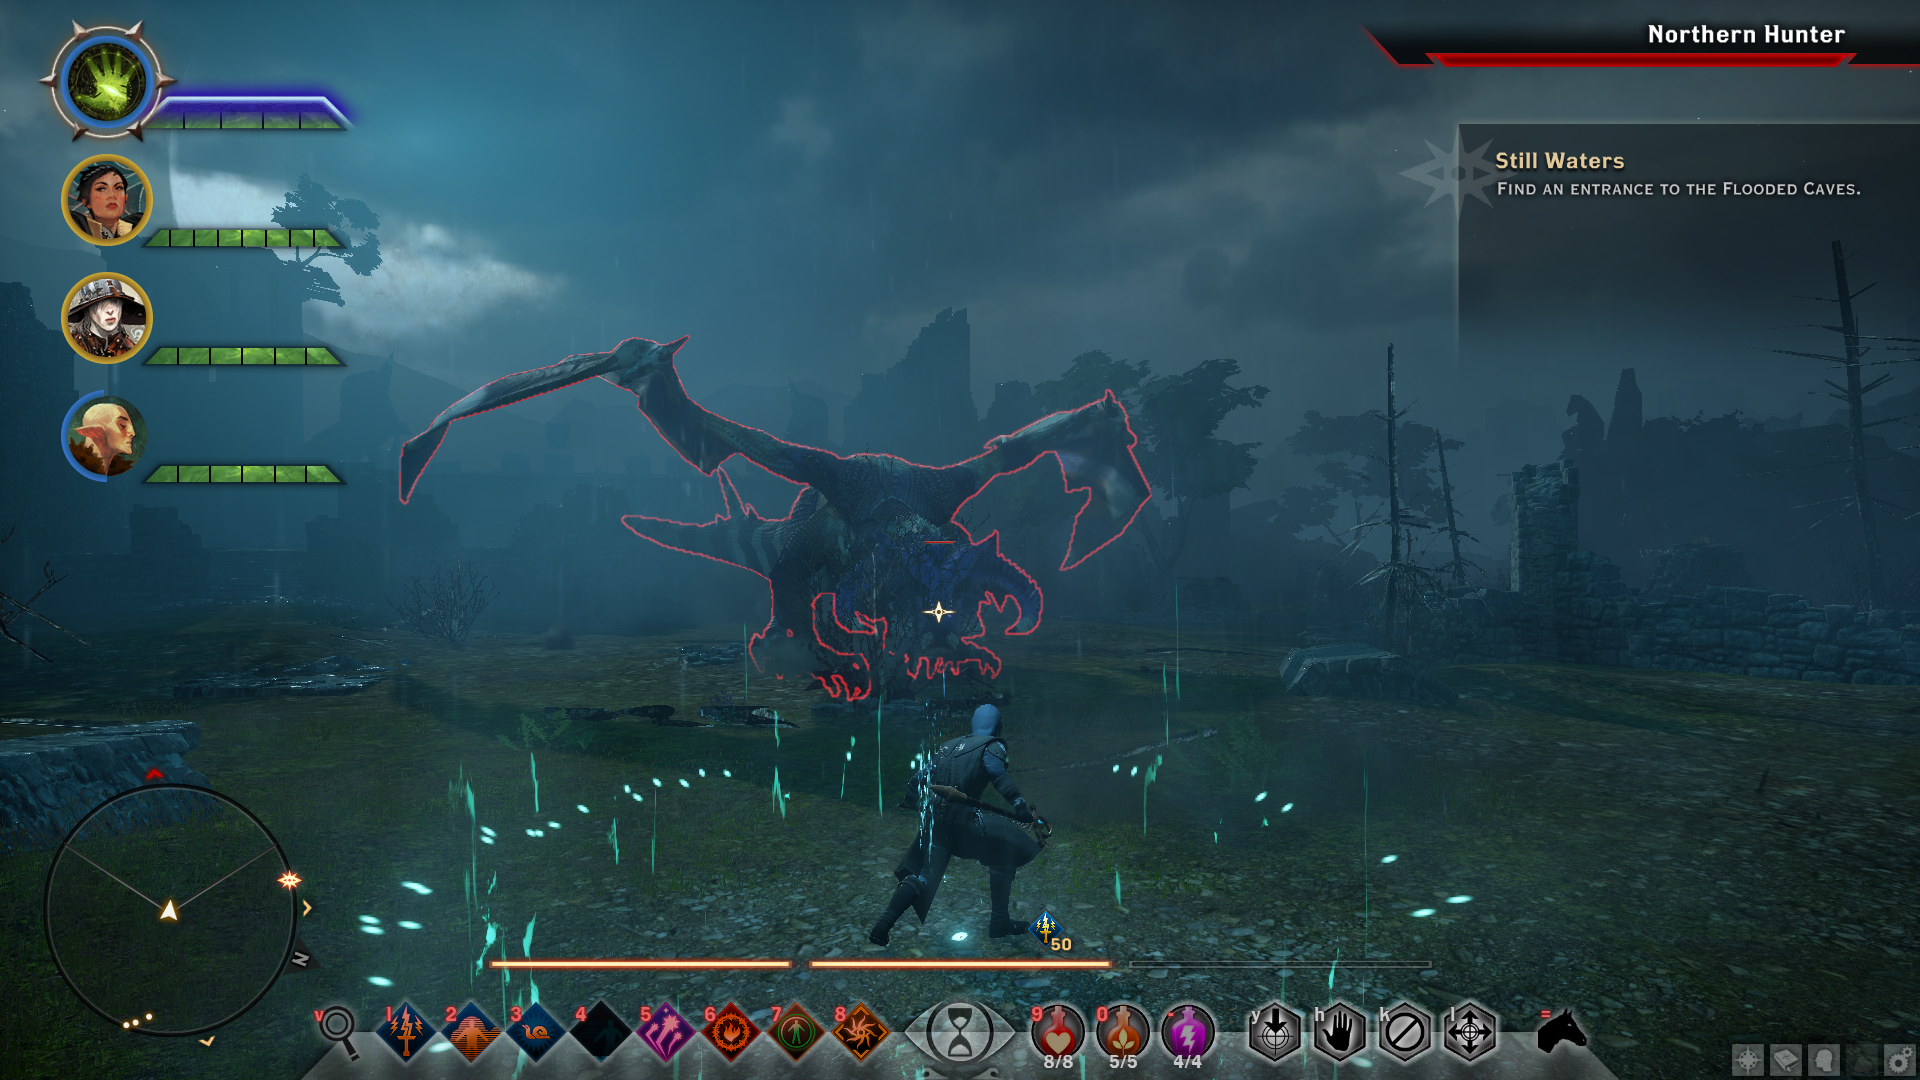
Damage type dealt: Electricity
Resistance: Electricity damage
Weakness: Spirit damage
Abyssal High Dragon (level 14) – Western Approach
You can find a character names Frederic at the location shown below. Talk to him and he will give you multiple side quests. Keep completing all of these quests until you get his final quest called “The Abyssal High Dragon” where you will have to to lure out and defeat this high dragon.
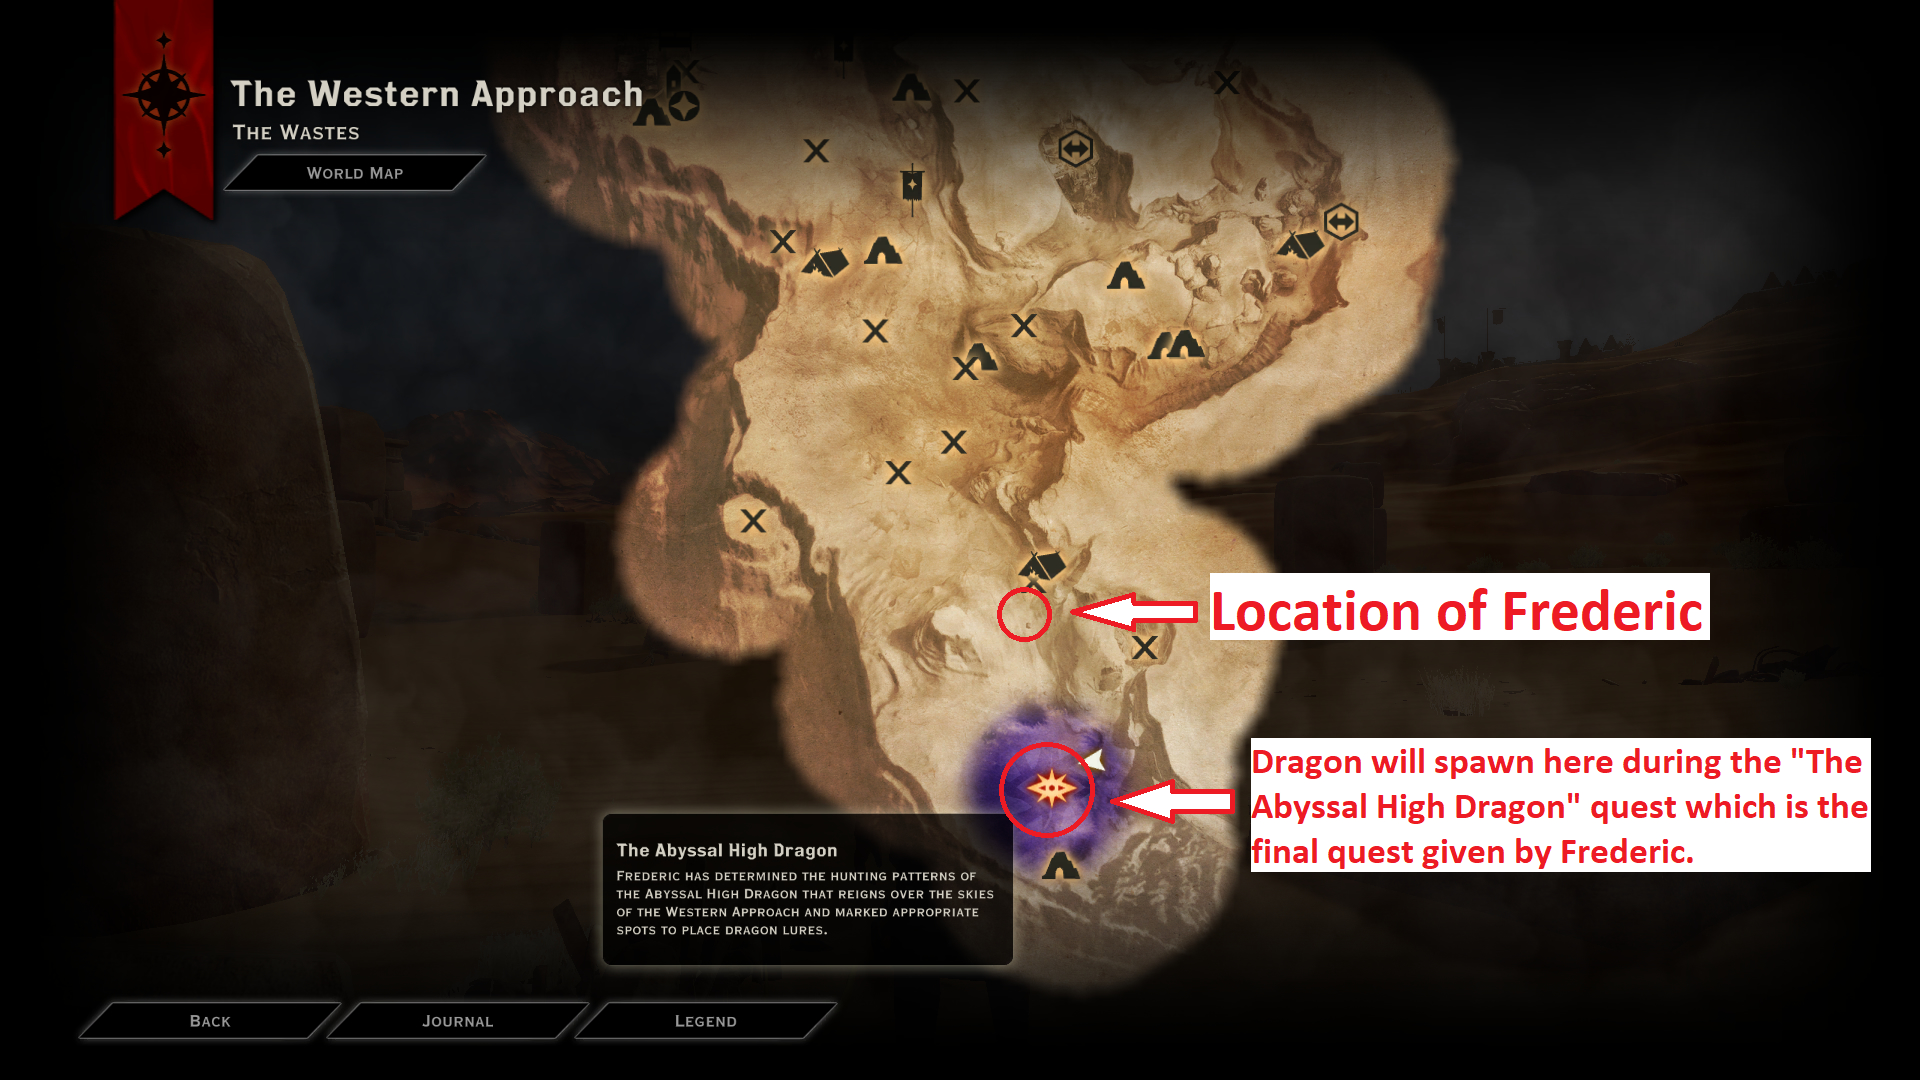
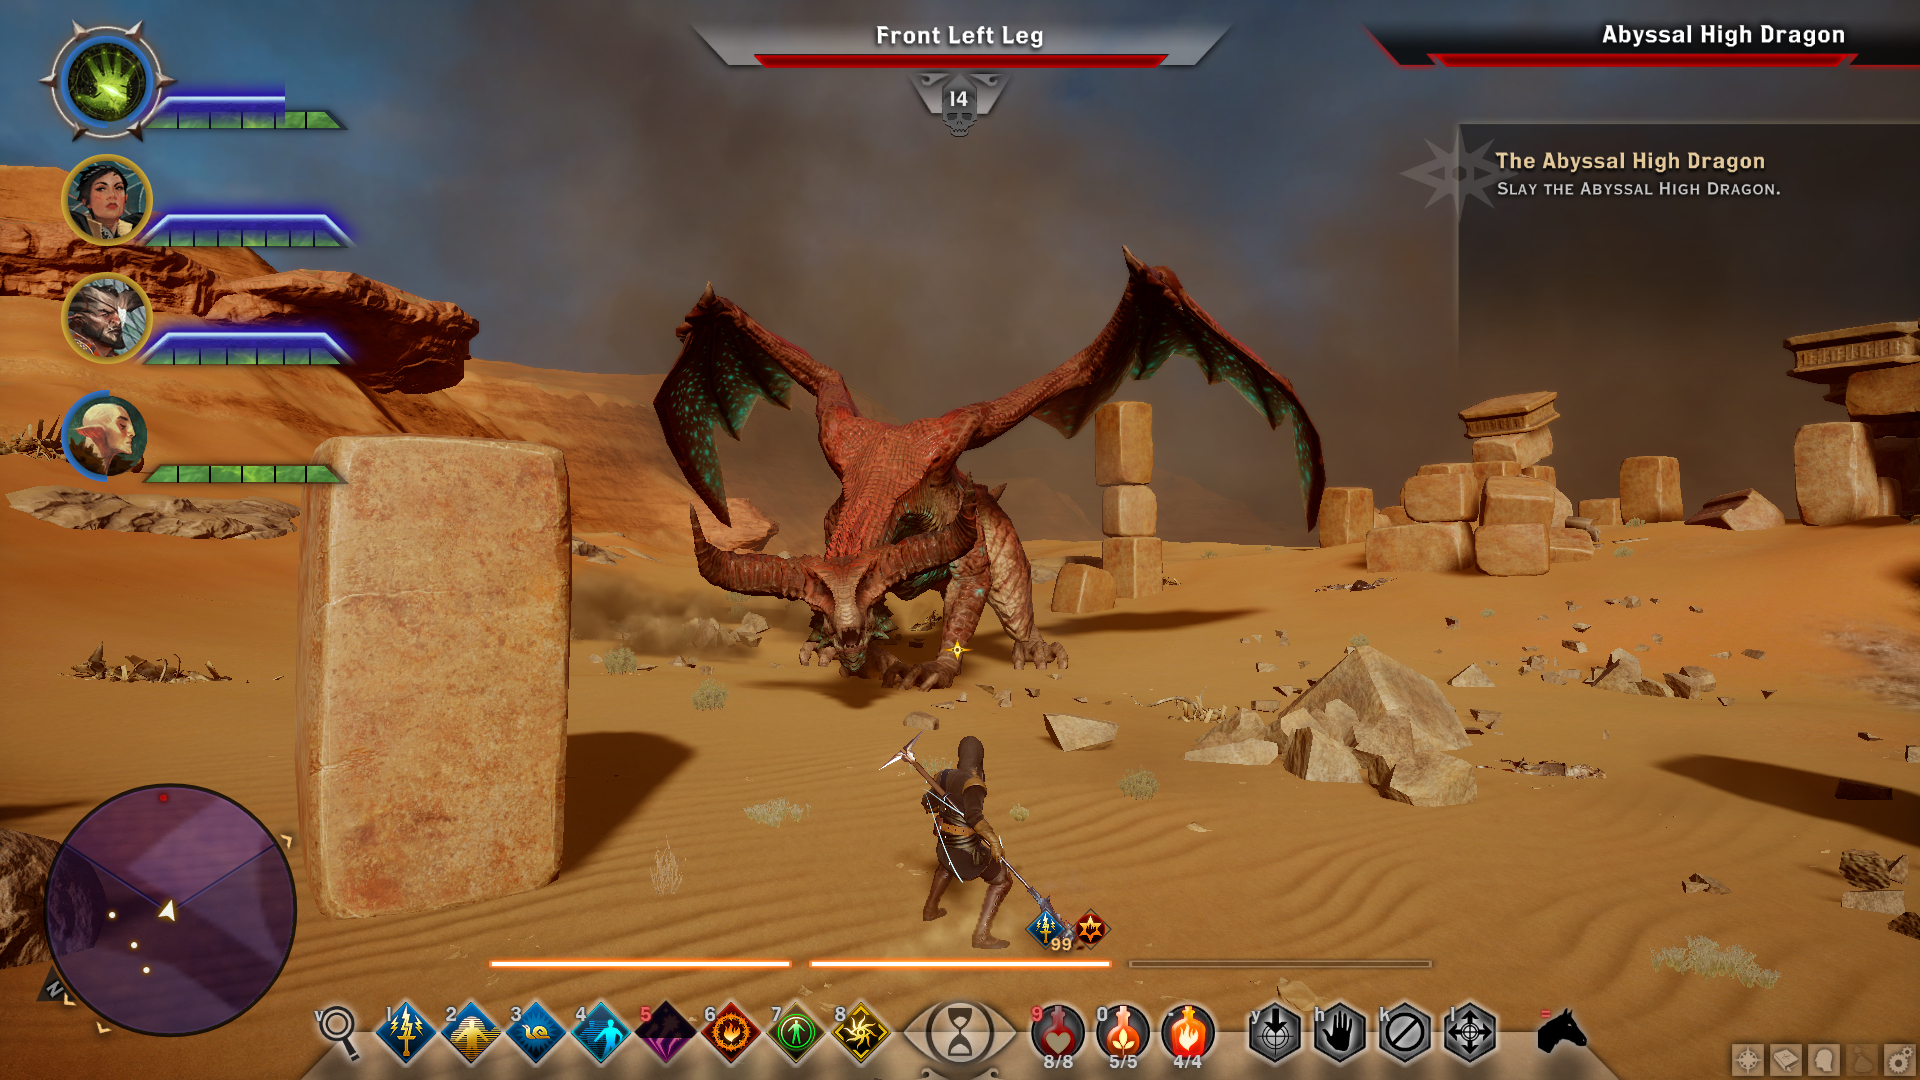
Damage type dealt: Fire
Resistance: Fire damage
Weakness: Cold damage
Gamordan Stormrider (level 15) – Exalted Plains
Go to the location shown below and plant the Inquisition flag there to unlock the “Gain Access to Ghilan’nain’s Grove” war table operation. The path to the dragon will be blocked until you complete it.
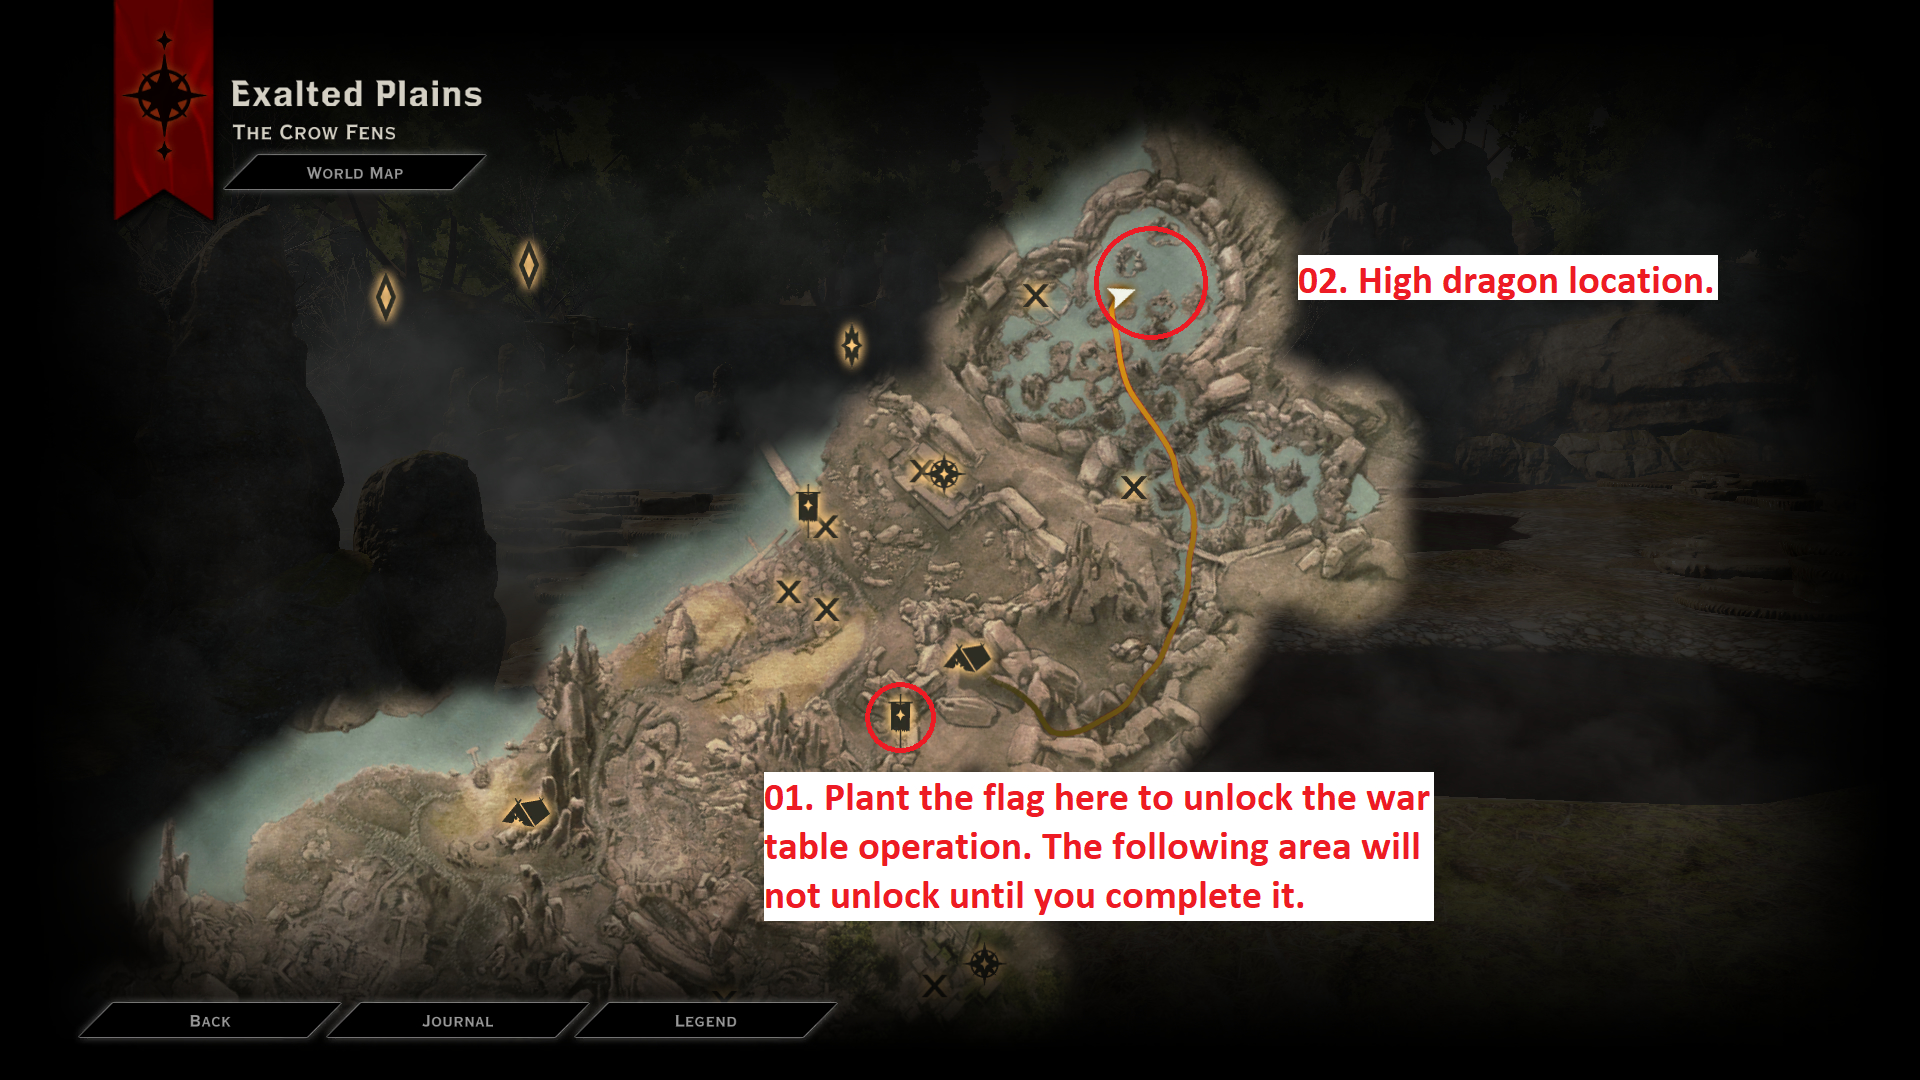
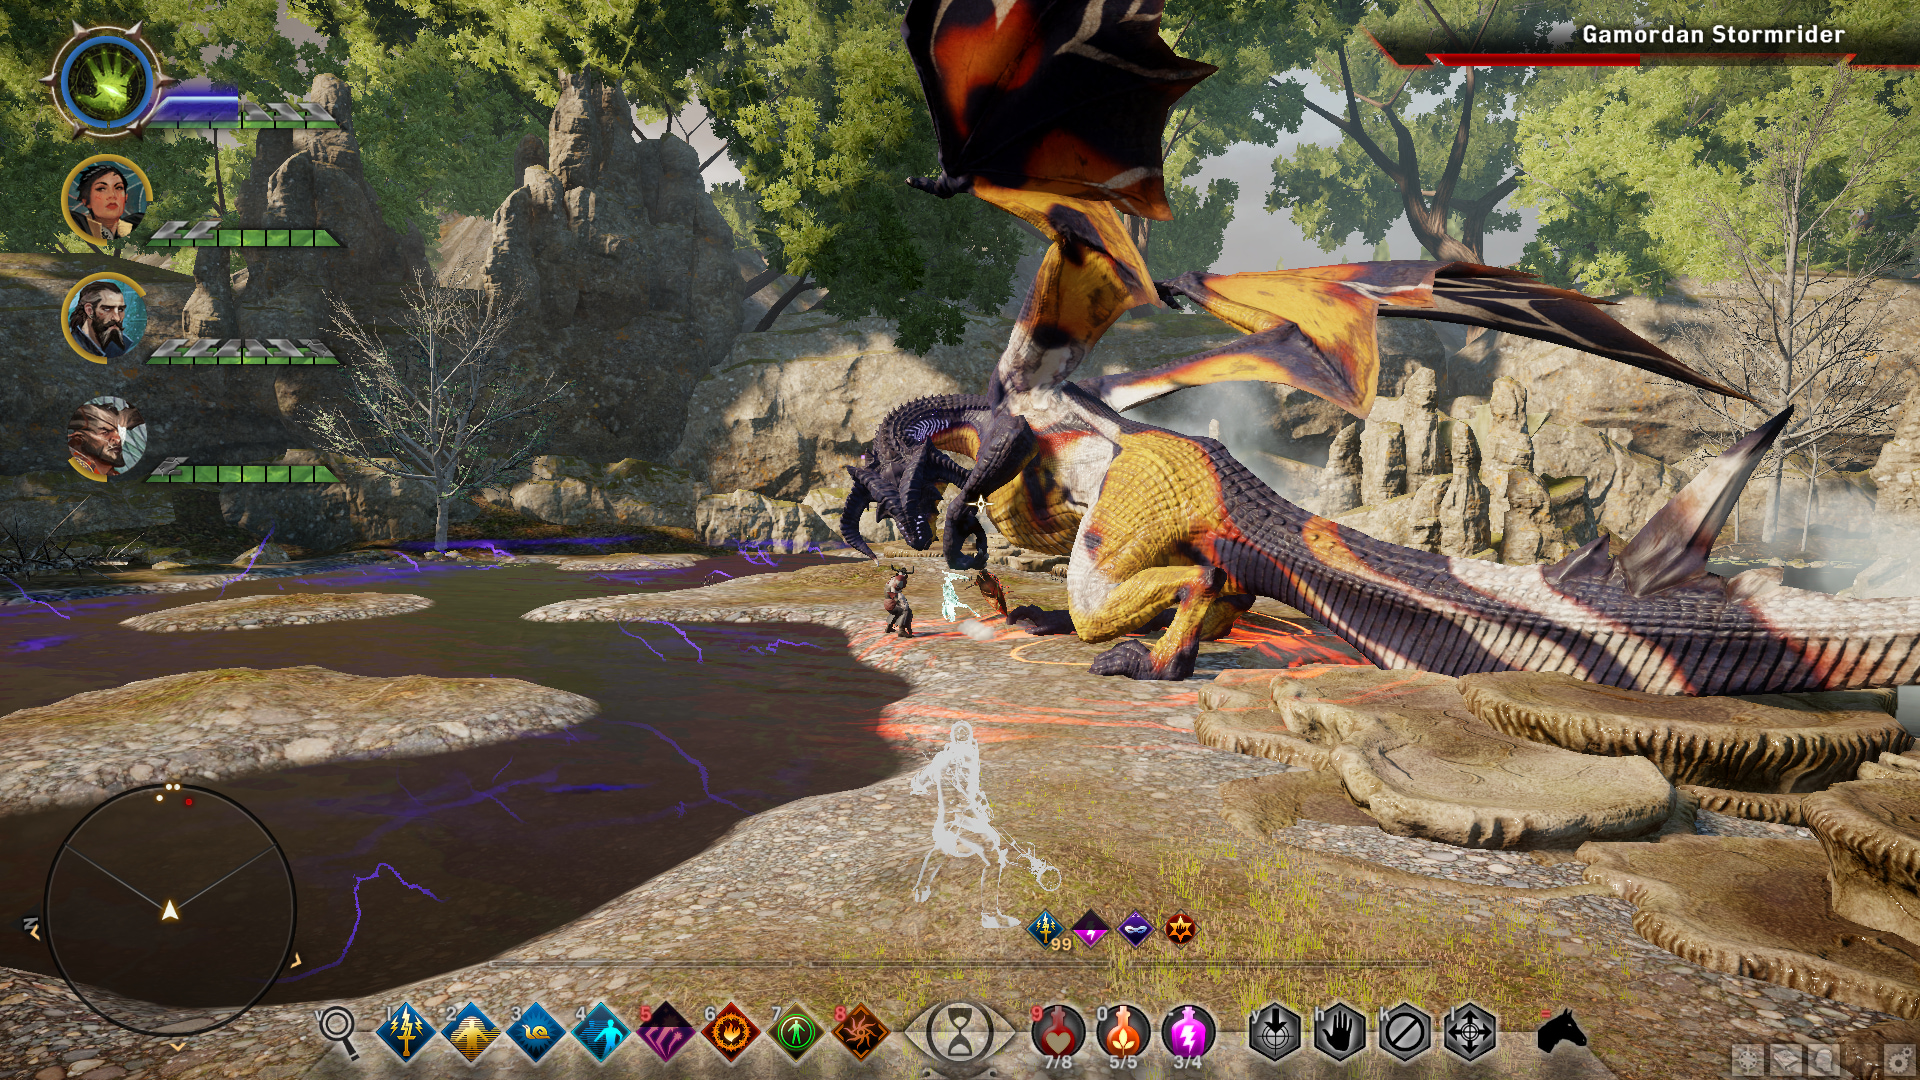
Damage type dealt: Electricity
Resistance: Electricity damage
Weakness: Spirit damage
Notes: The dragon will electrocute areas covered in water, as shown in the picture above. This can damage you so avoid getting in water during the fight.
Greater Mistral (level 17) – Emerald Graves
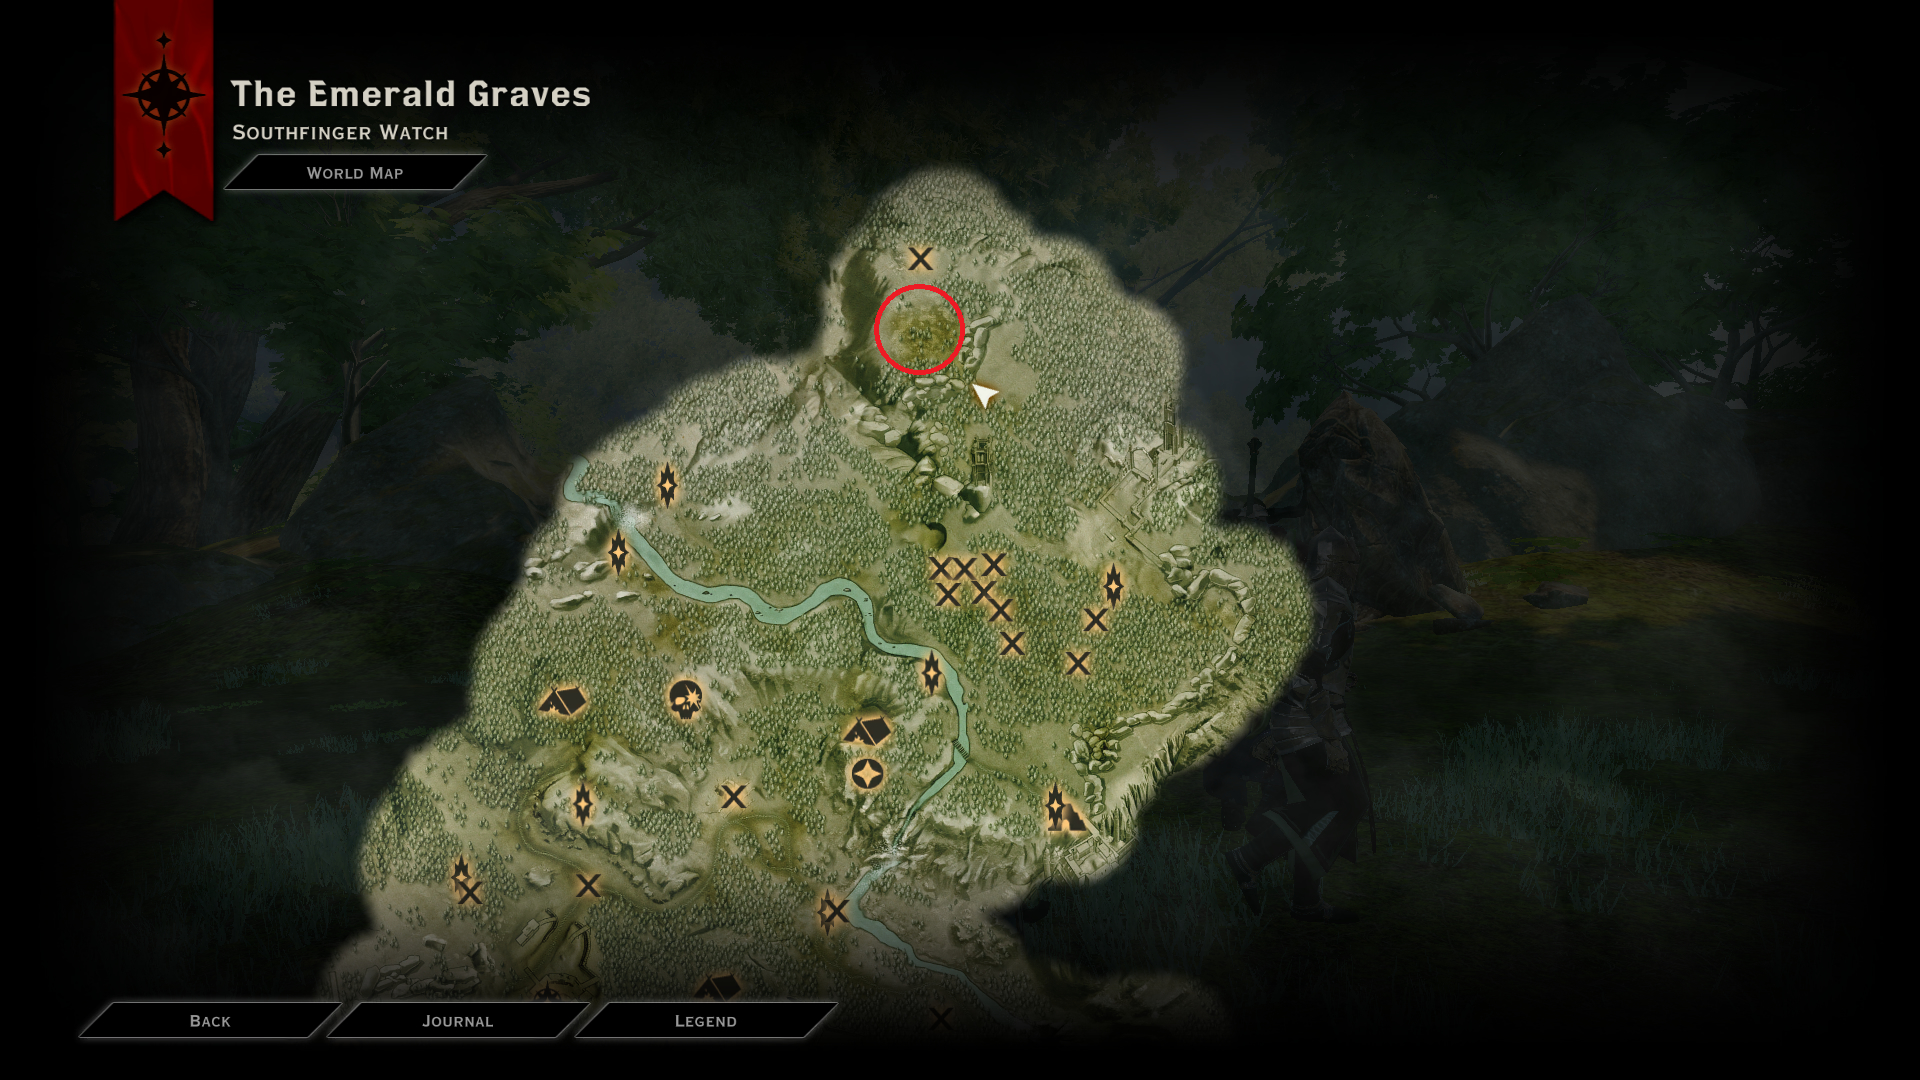
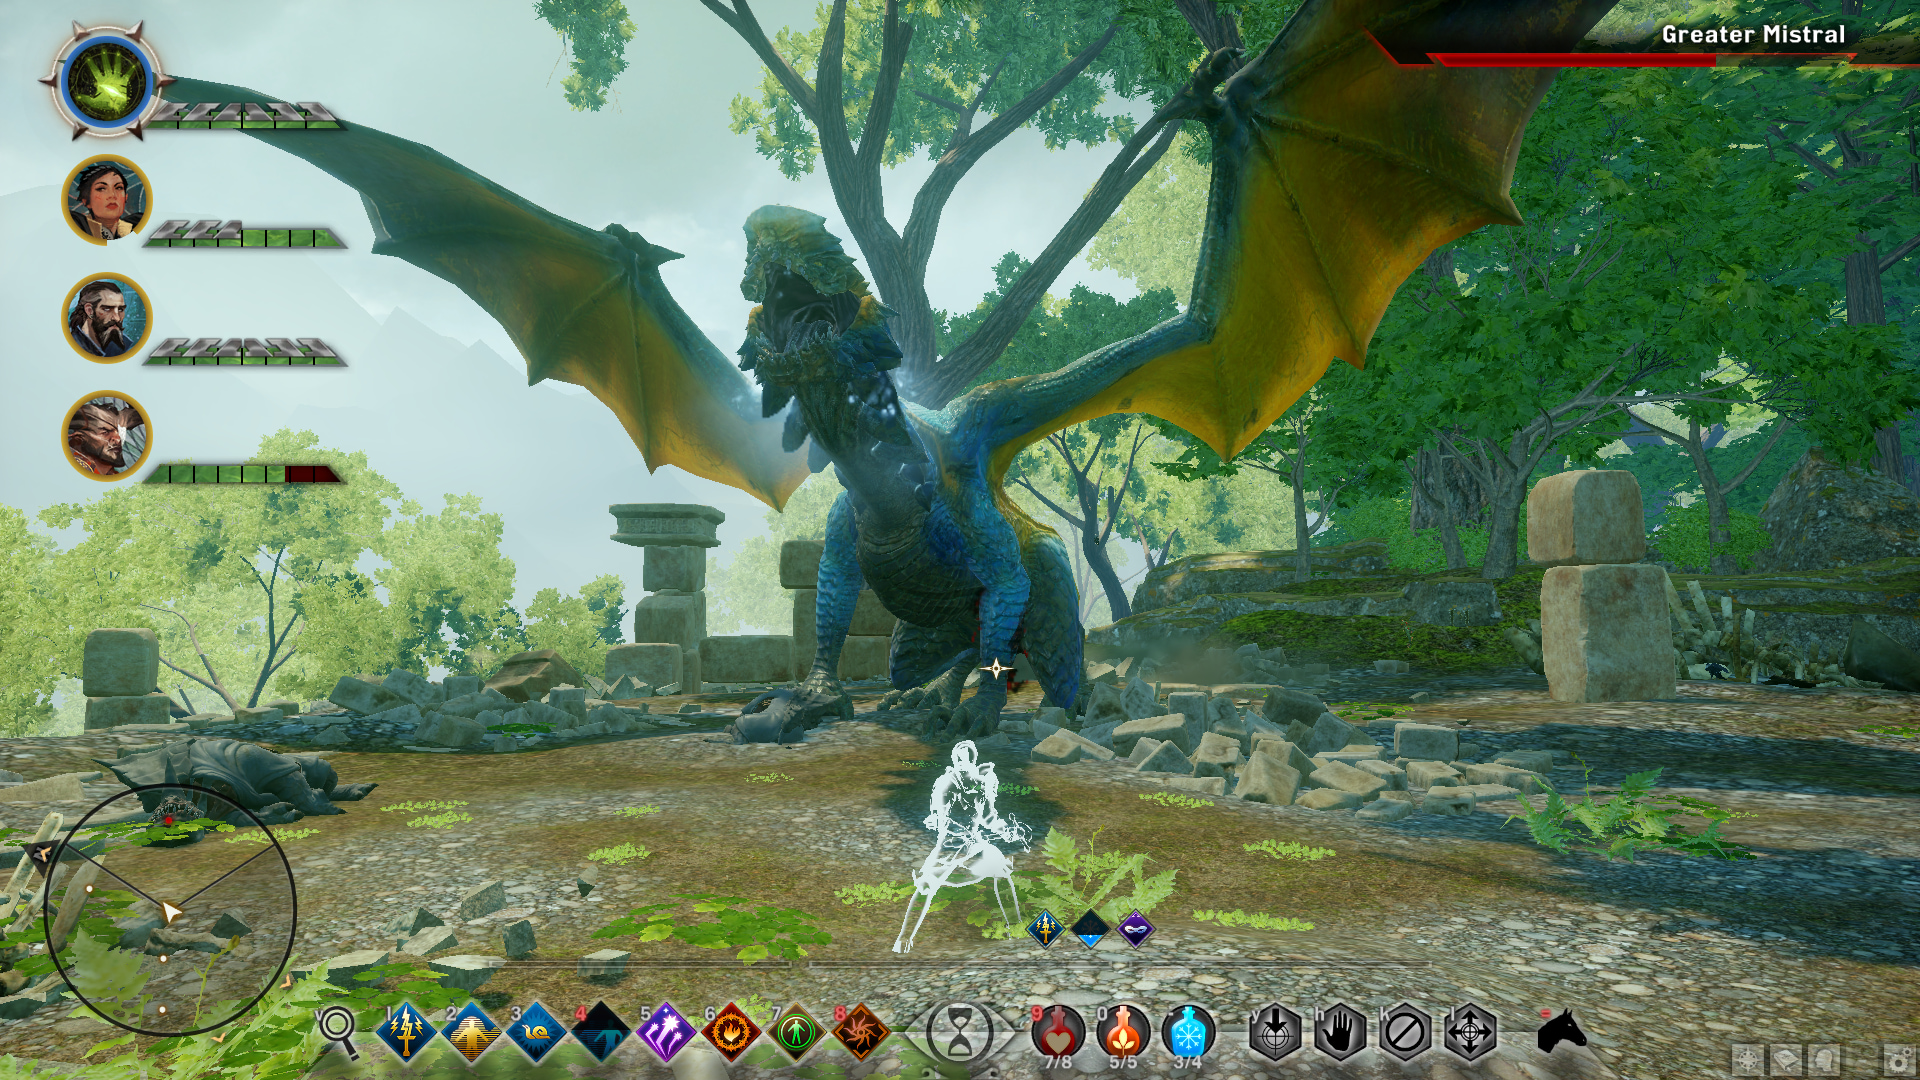
Damage type dealt – Cold
Resistance – Cold damage
Weakness – Fire damage
Hivernal (level 19) – Emprise Du Lion
Note: This dragon must be defeated while a trial modifier is enabled to earn another achievement. Otherwise you will need to do another playthrough to earn that achievement. Check the “Trial of the Tower” achievement to learn more.
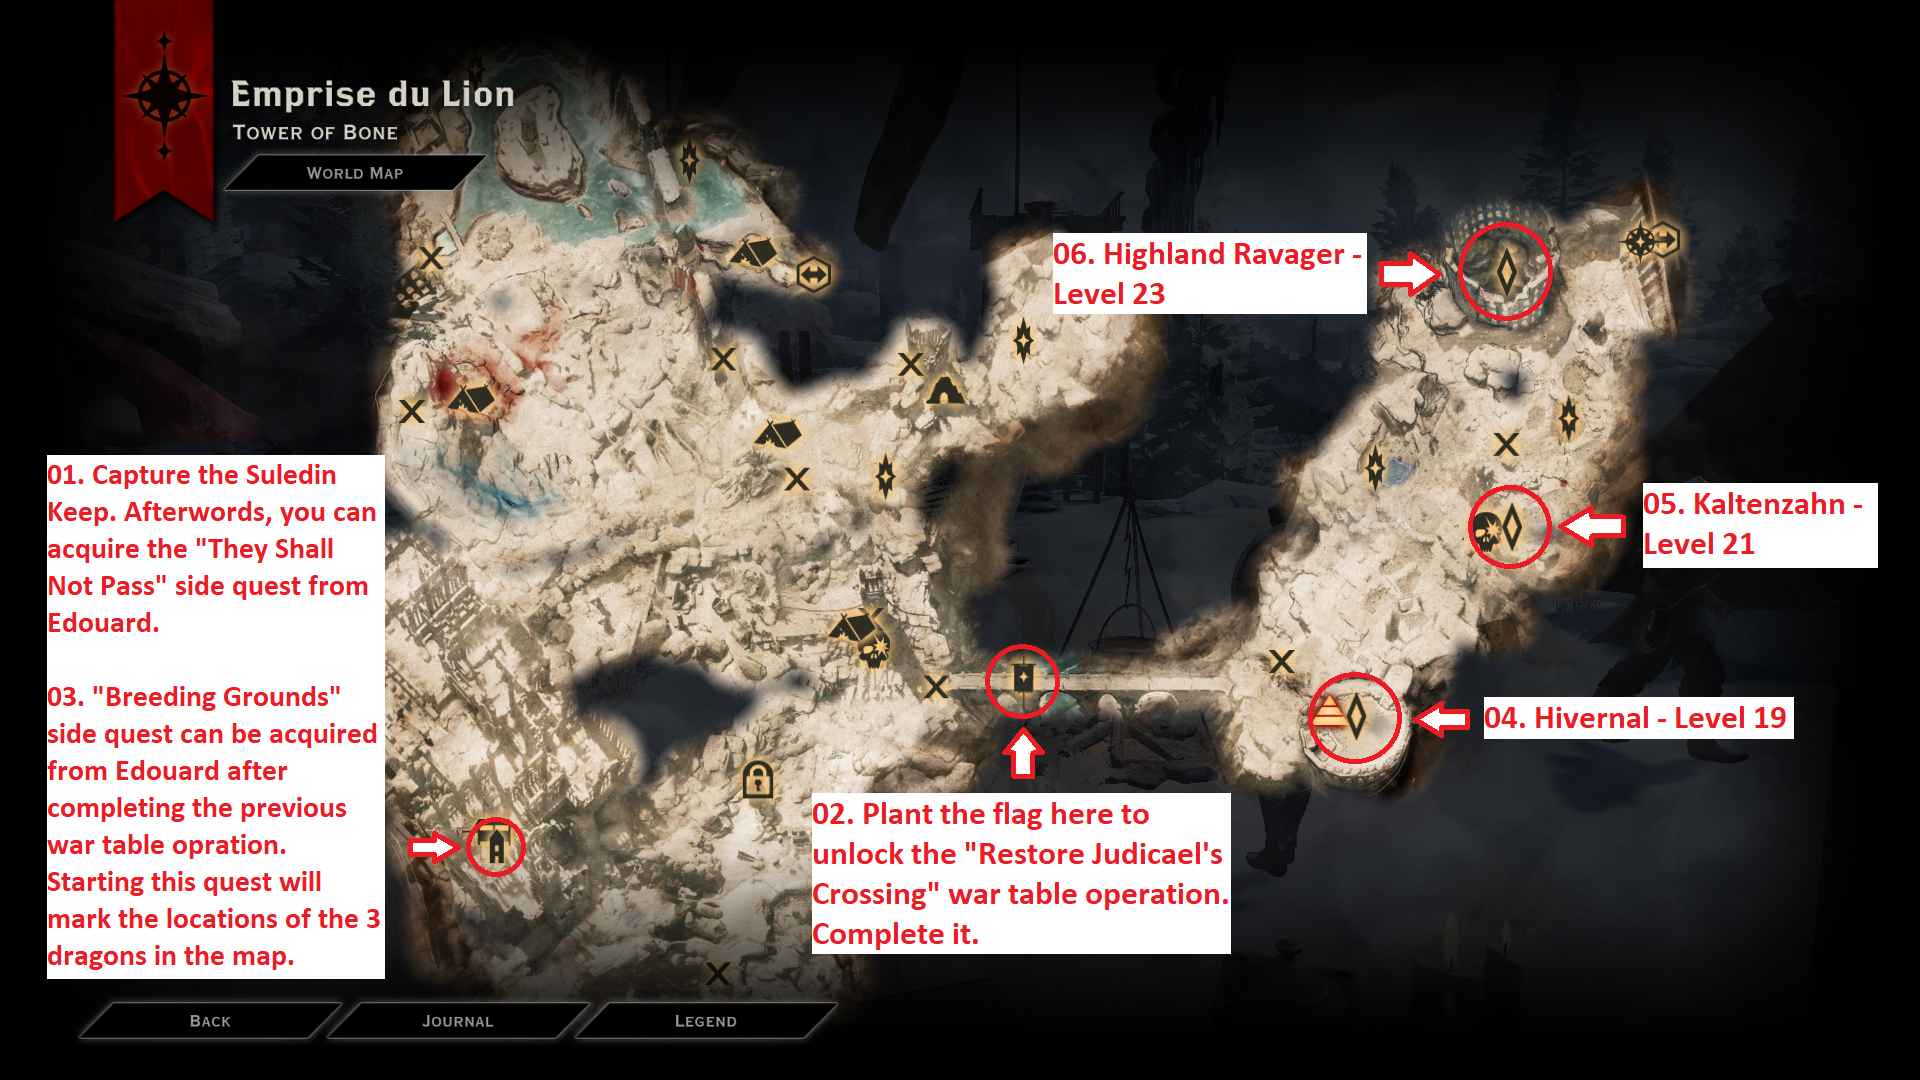
First you need to capture the Suledin Keep (check “Trial of Temperance” achievement). After that, speak with Baron Edouard Desjardins (the overseer of the captured keep) and he will tell you about the destroyed bridge and give you the “They Shall Not Pass” side quest. Go to the bridge (shown by the second point in the image) and plant the Inquisition flag to unlock the “Restore Judicael’s Crossing” war table operation, complete it. After that, speak with the Baron again to acquire the “Breeding Grounds” side quest. After that, all the 3 dragons in Emprise du Lion will be marked on your map.
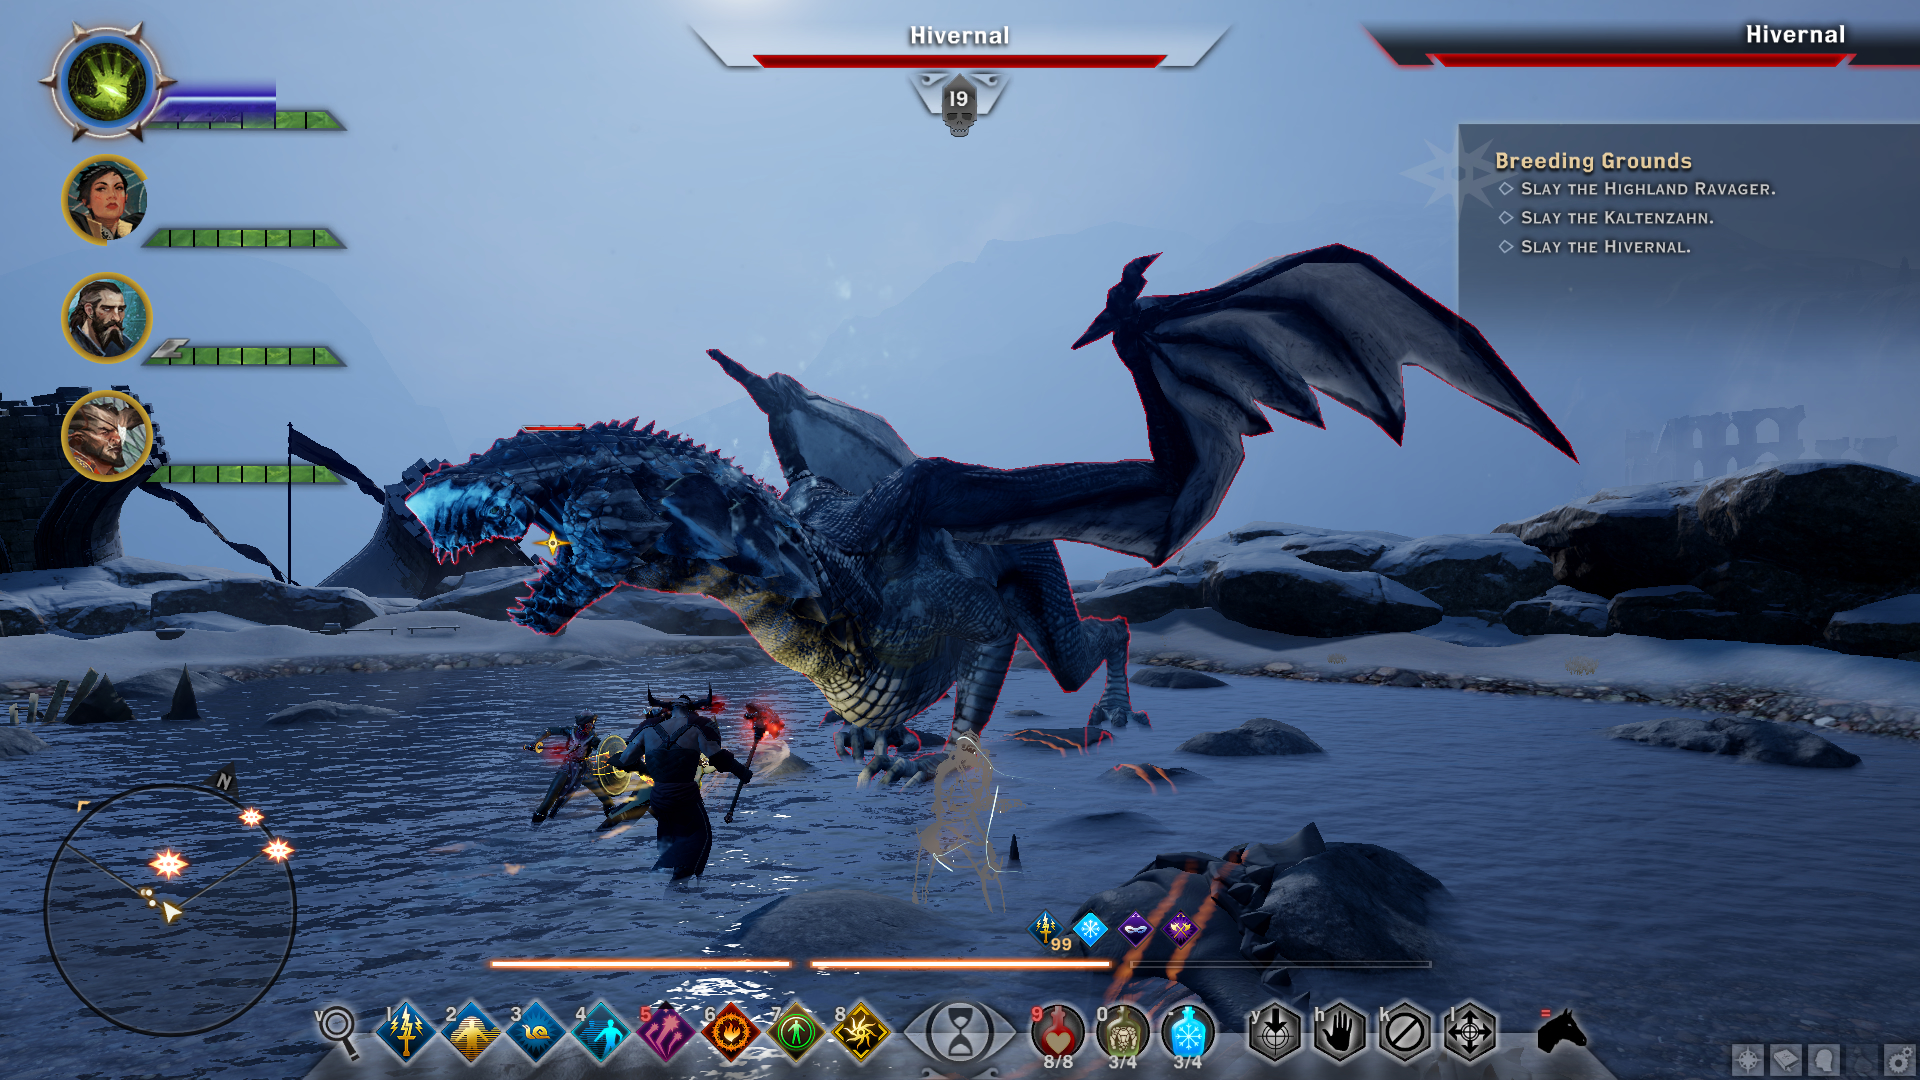
Damage type dealt – Cold
Resistance – Cold damage
Weakness – Fire damage
Vinsomer (level 19) – Storm Coast
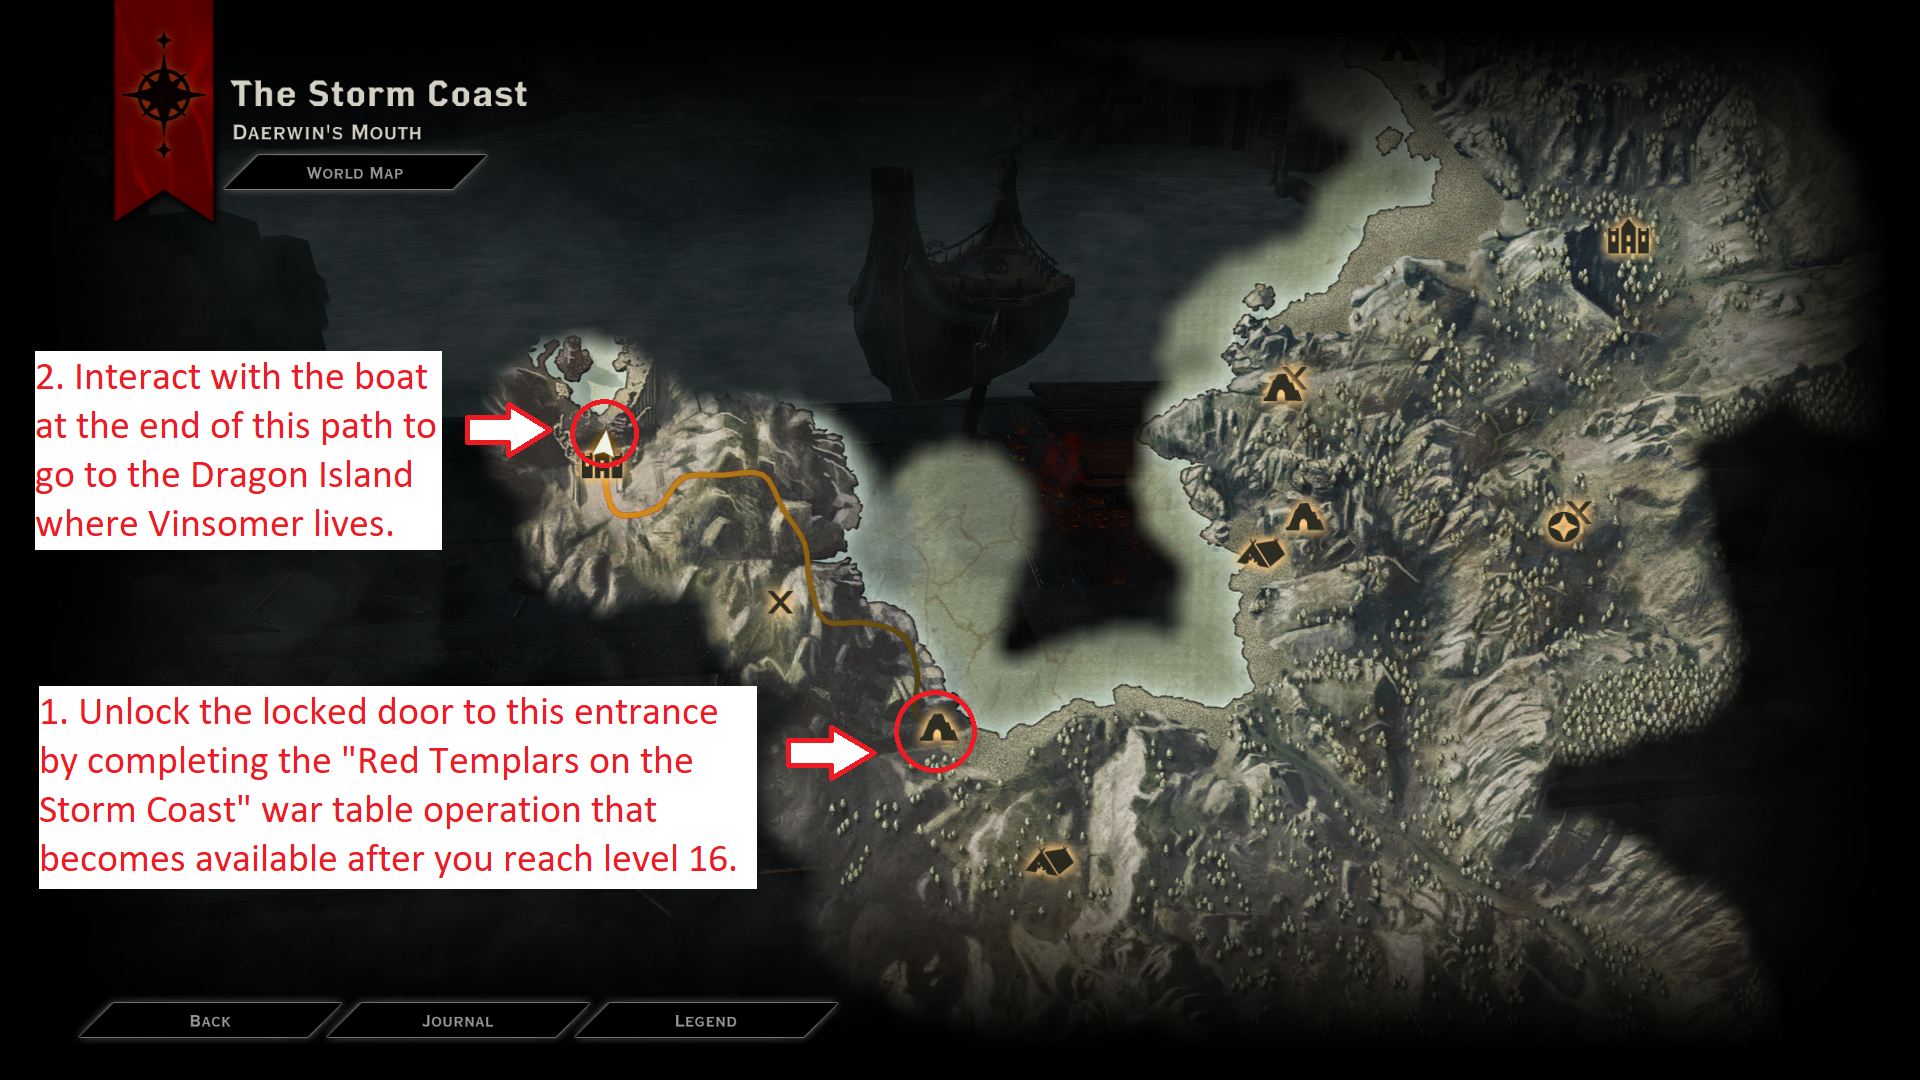
Vinsomer is located in a separate island in the Storm Coast called Dragon Island. The island is accessible only after you complete the war table operation called “Red Templars on the Storm Coast” which is unlocked after you reach level 16. After completing that operation, go to the location marked on the map below and enter the ruins. Continue on until you reach the area shown below. Interact with the boat there and you will be transported to the Dragon Island. Continue along the linear path on the island to face Vinsomer.
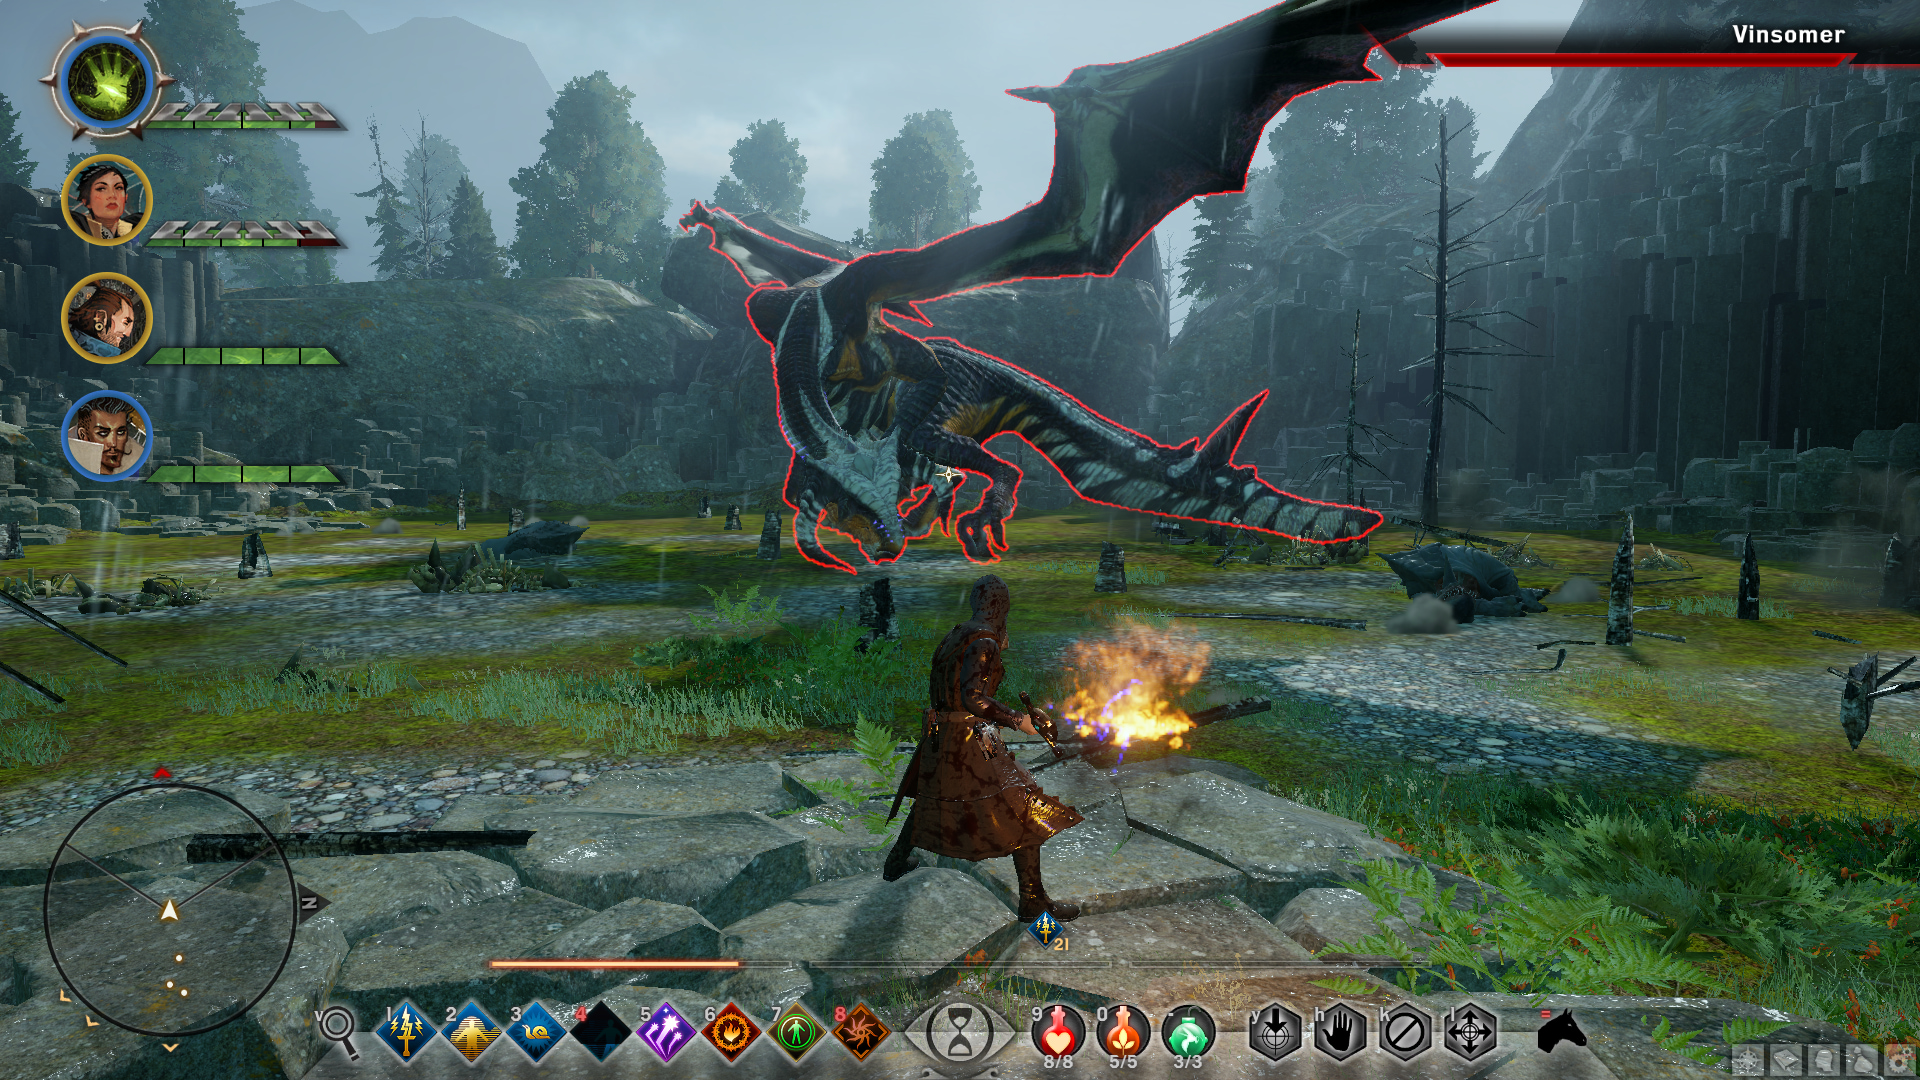
Damage type dealt – Electricity
Resistance – Electricity damage
Weakness – Spirit damage
Sandy Howler (level 20) – Hissing Wastes
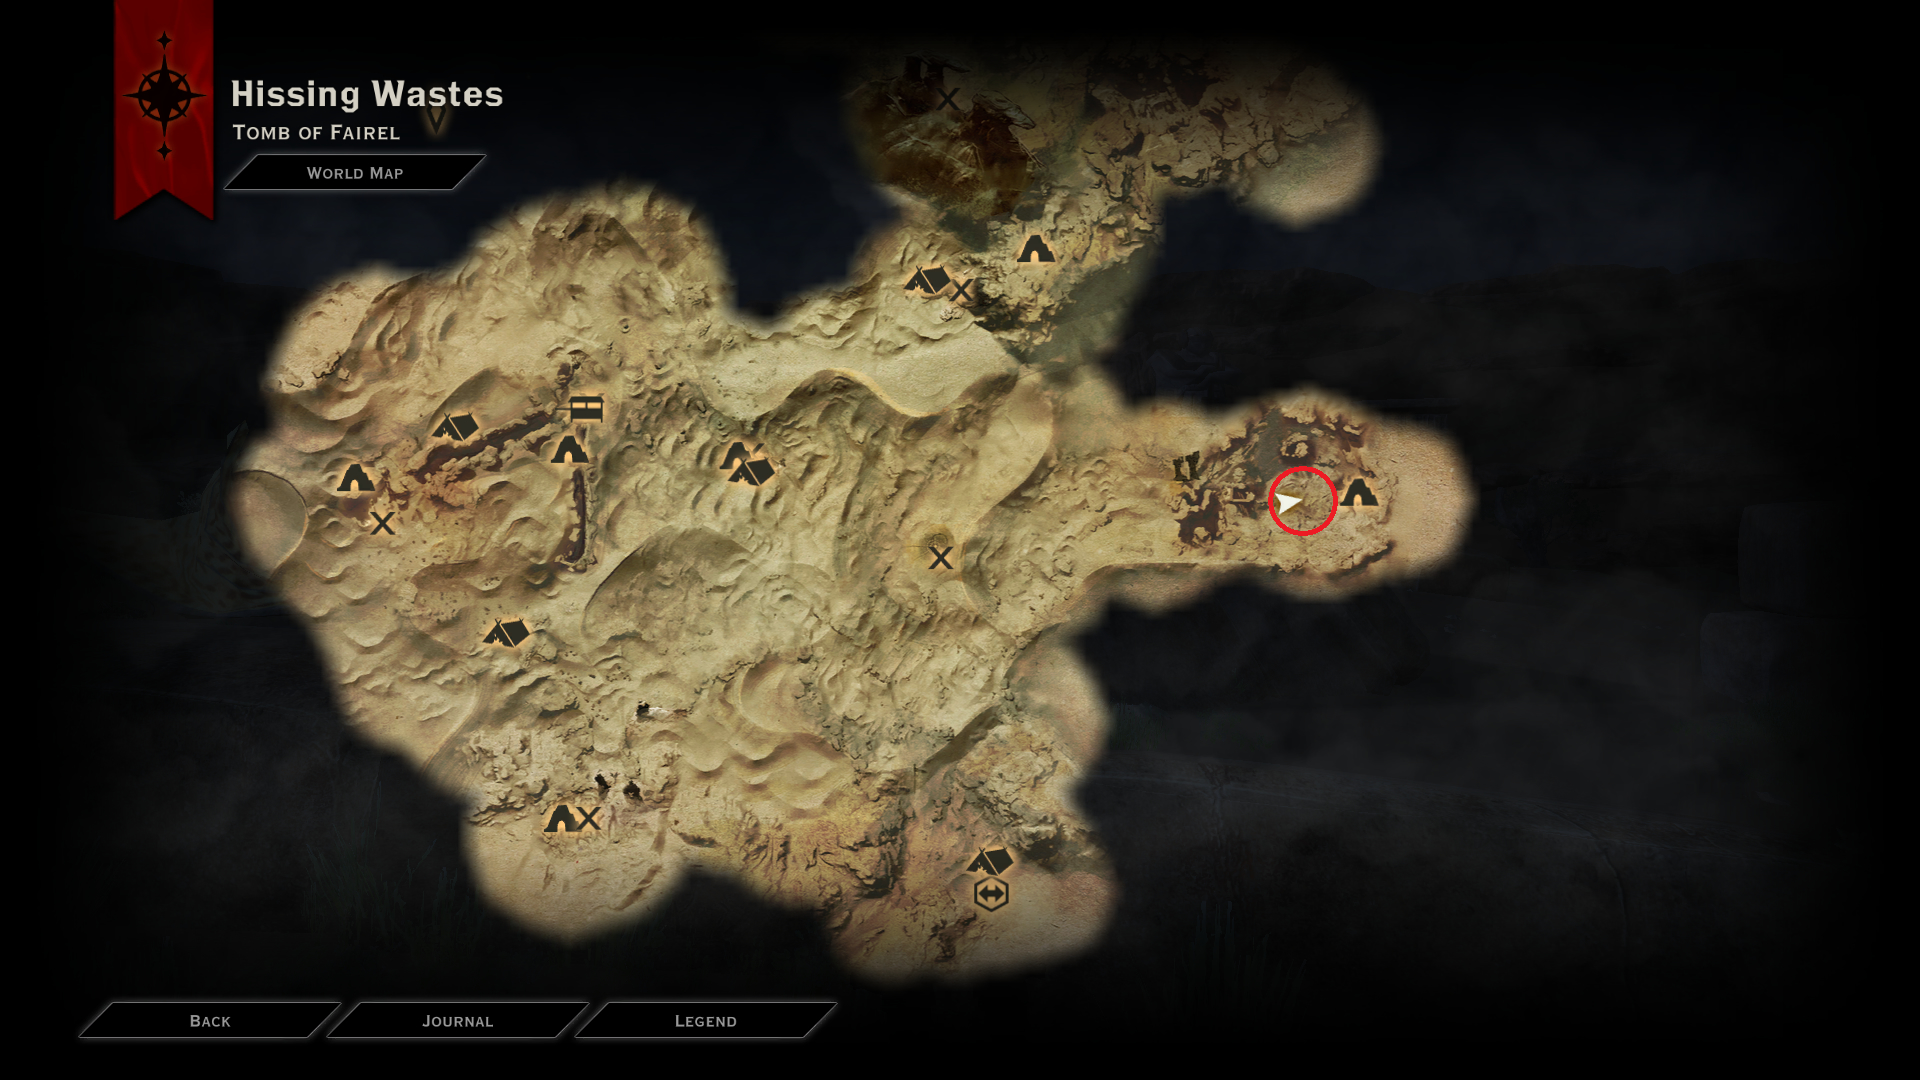
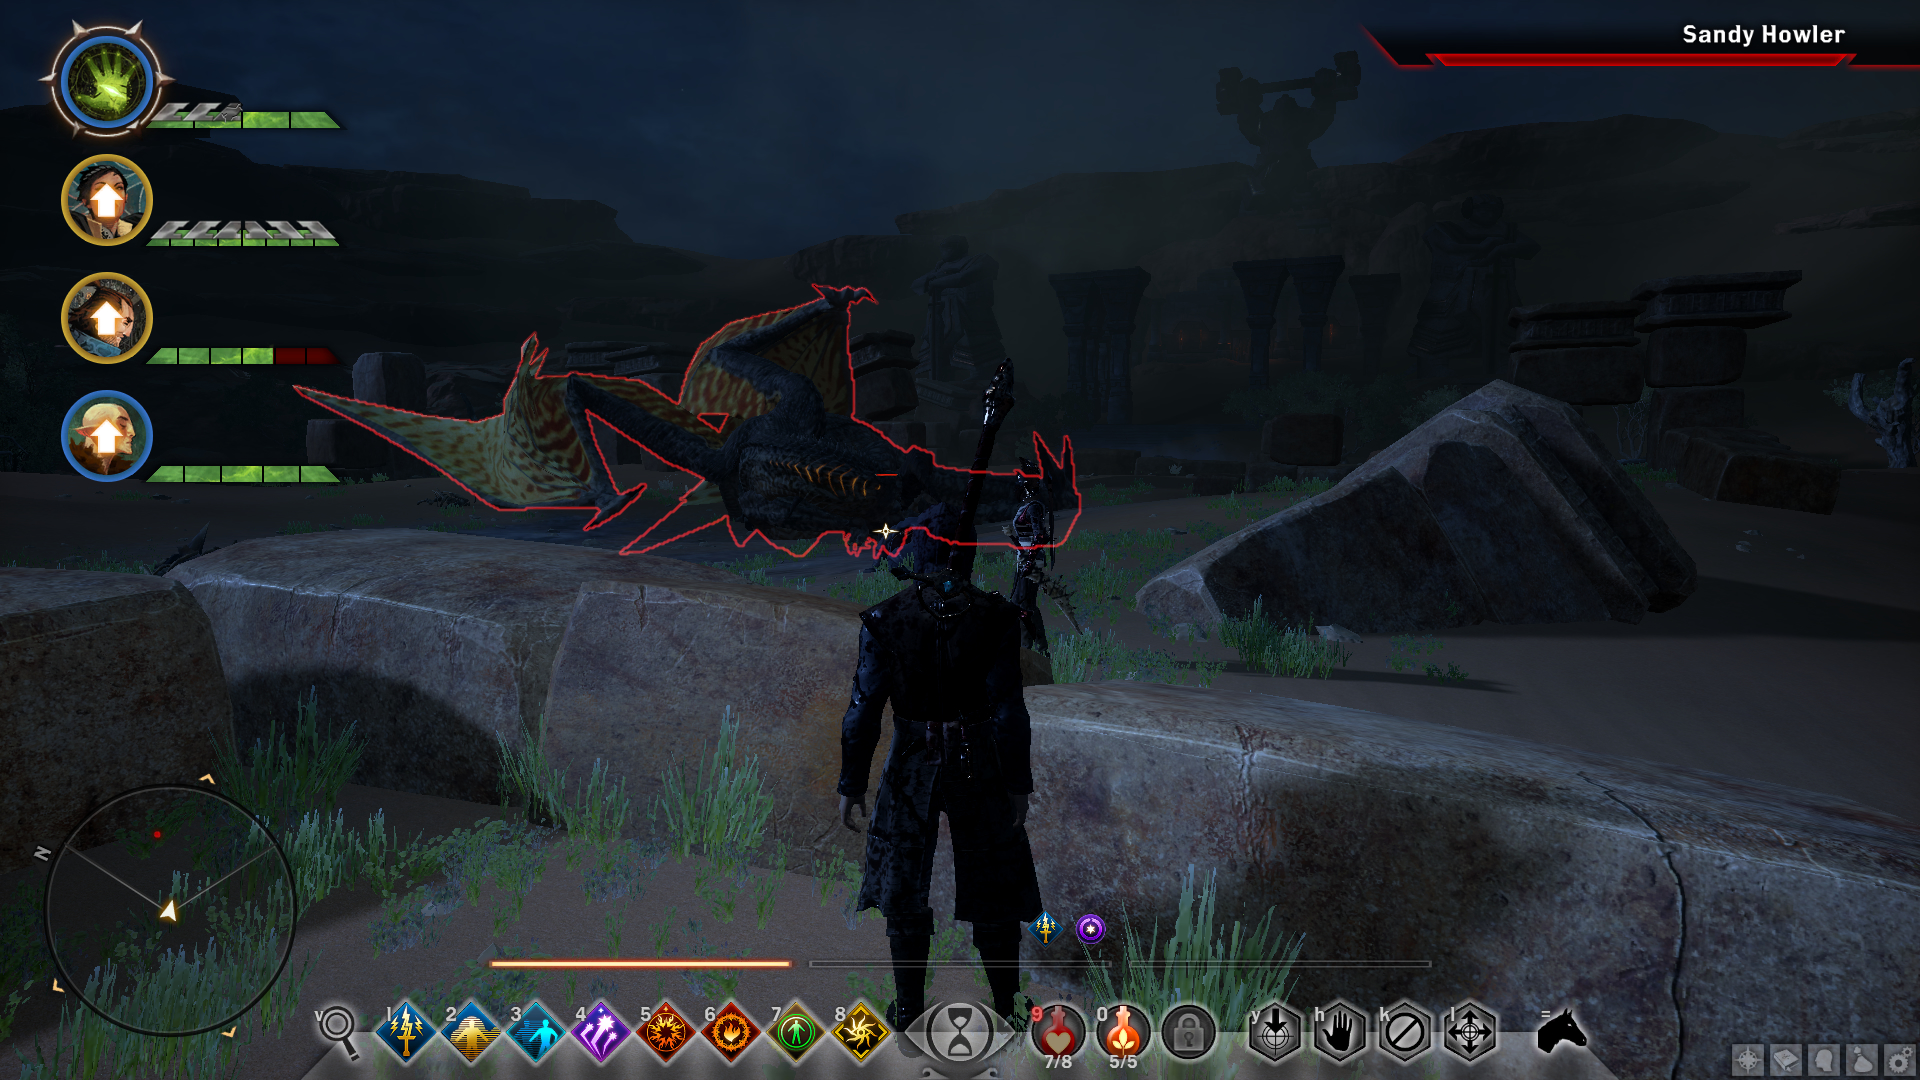
Damage type dealt – Fire
Resistance – Fire damage
Weakness – Cold damage
Kaltenzahn (level 21) – Emprise Du Lion
How to find this high dragon is explained under Hivernal high dragon’s section.

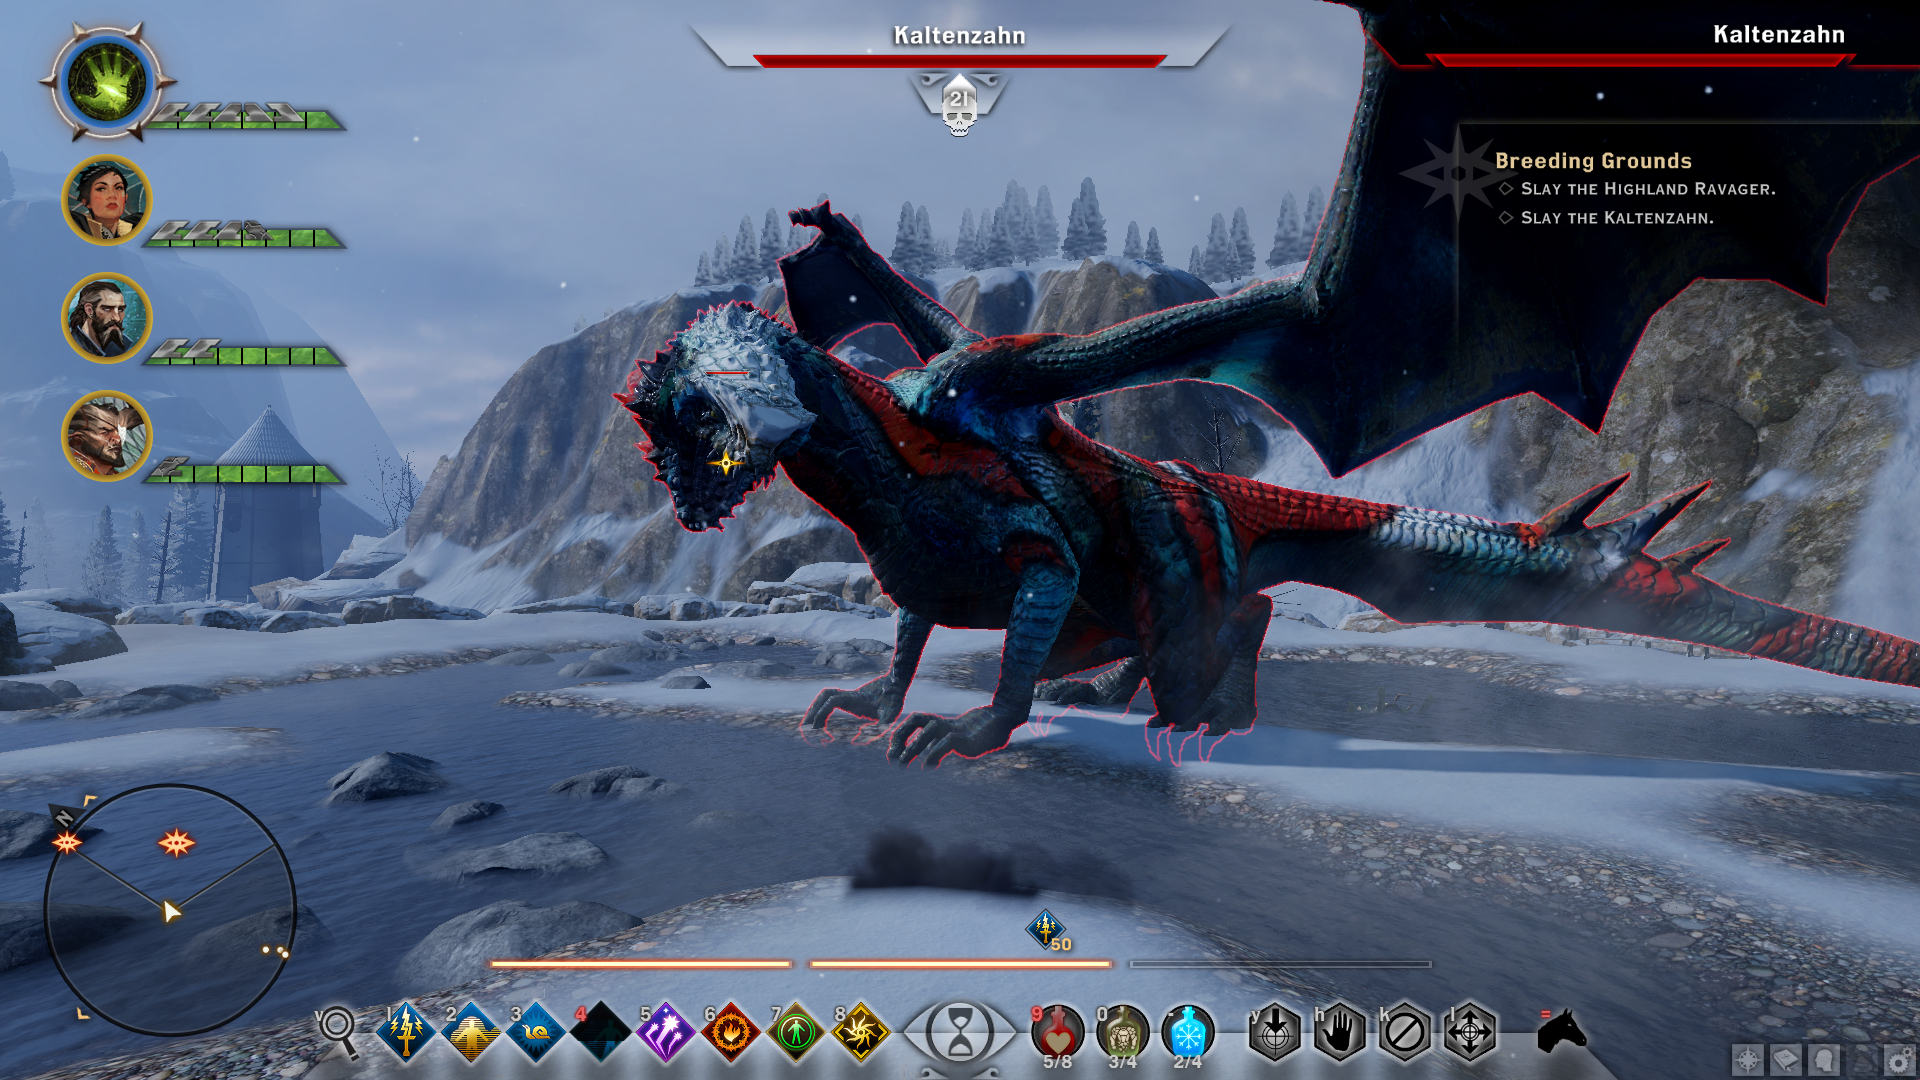
Damage type dealt – Cold
Resistance – Cold damage
Weakness – Fire damage
Highland Ravager (level 23) – Emprise Du Lion
How to find this high dragon is explained under Hivernal high dragon’s section.

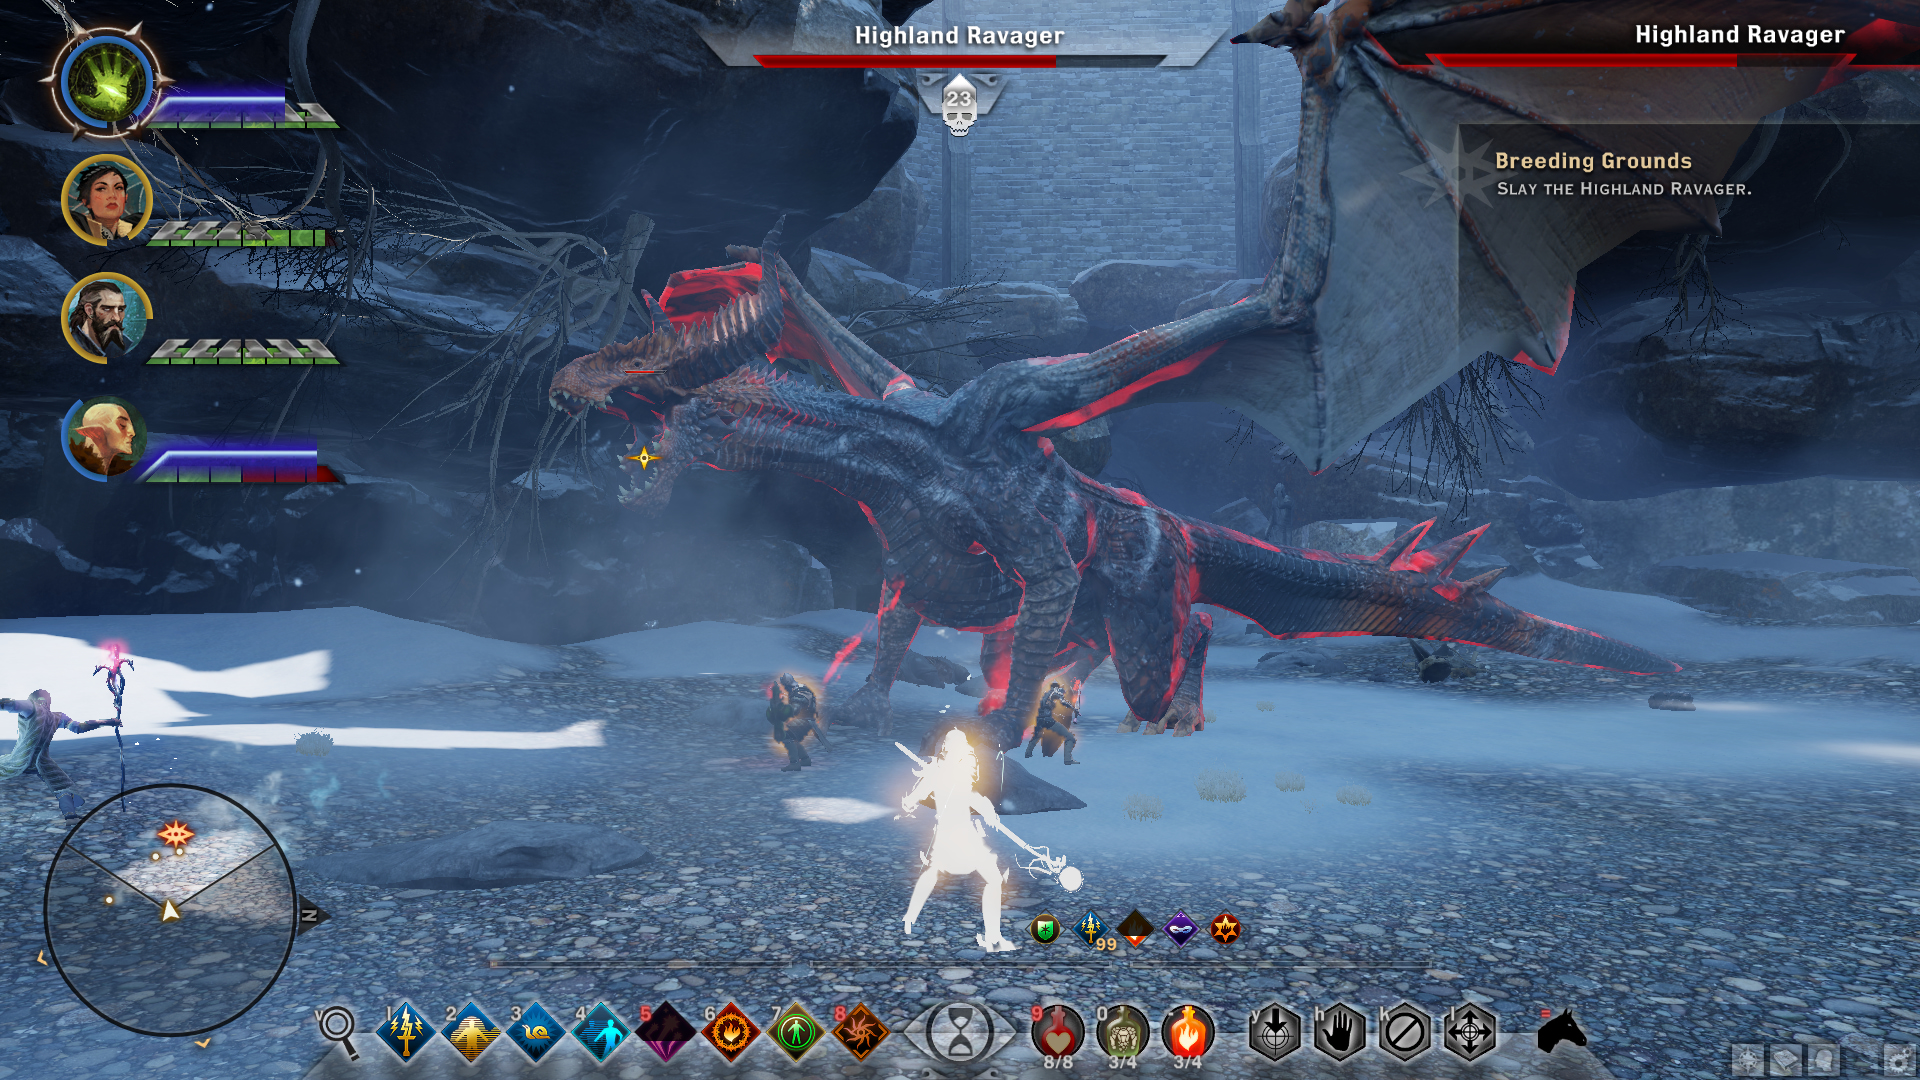
Damage type dealt – Fire
Resistance – Fire damage
Weakness – Cold damage
Hakkon Wintersbreath (level 25) – Frostback Basin
You will encounter this high dragon during the “Hakkon Wintersbreath” main quest in “The Jaws of Hakkon” DLC. You must defeat this dragon in order to complete this DLC.
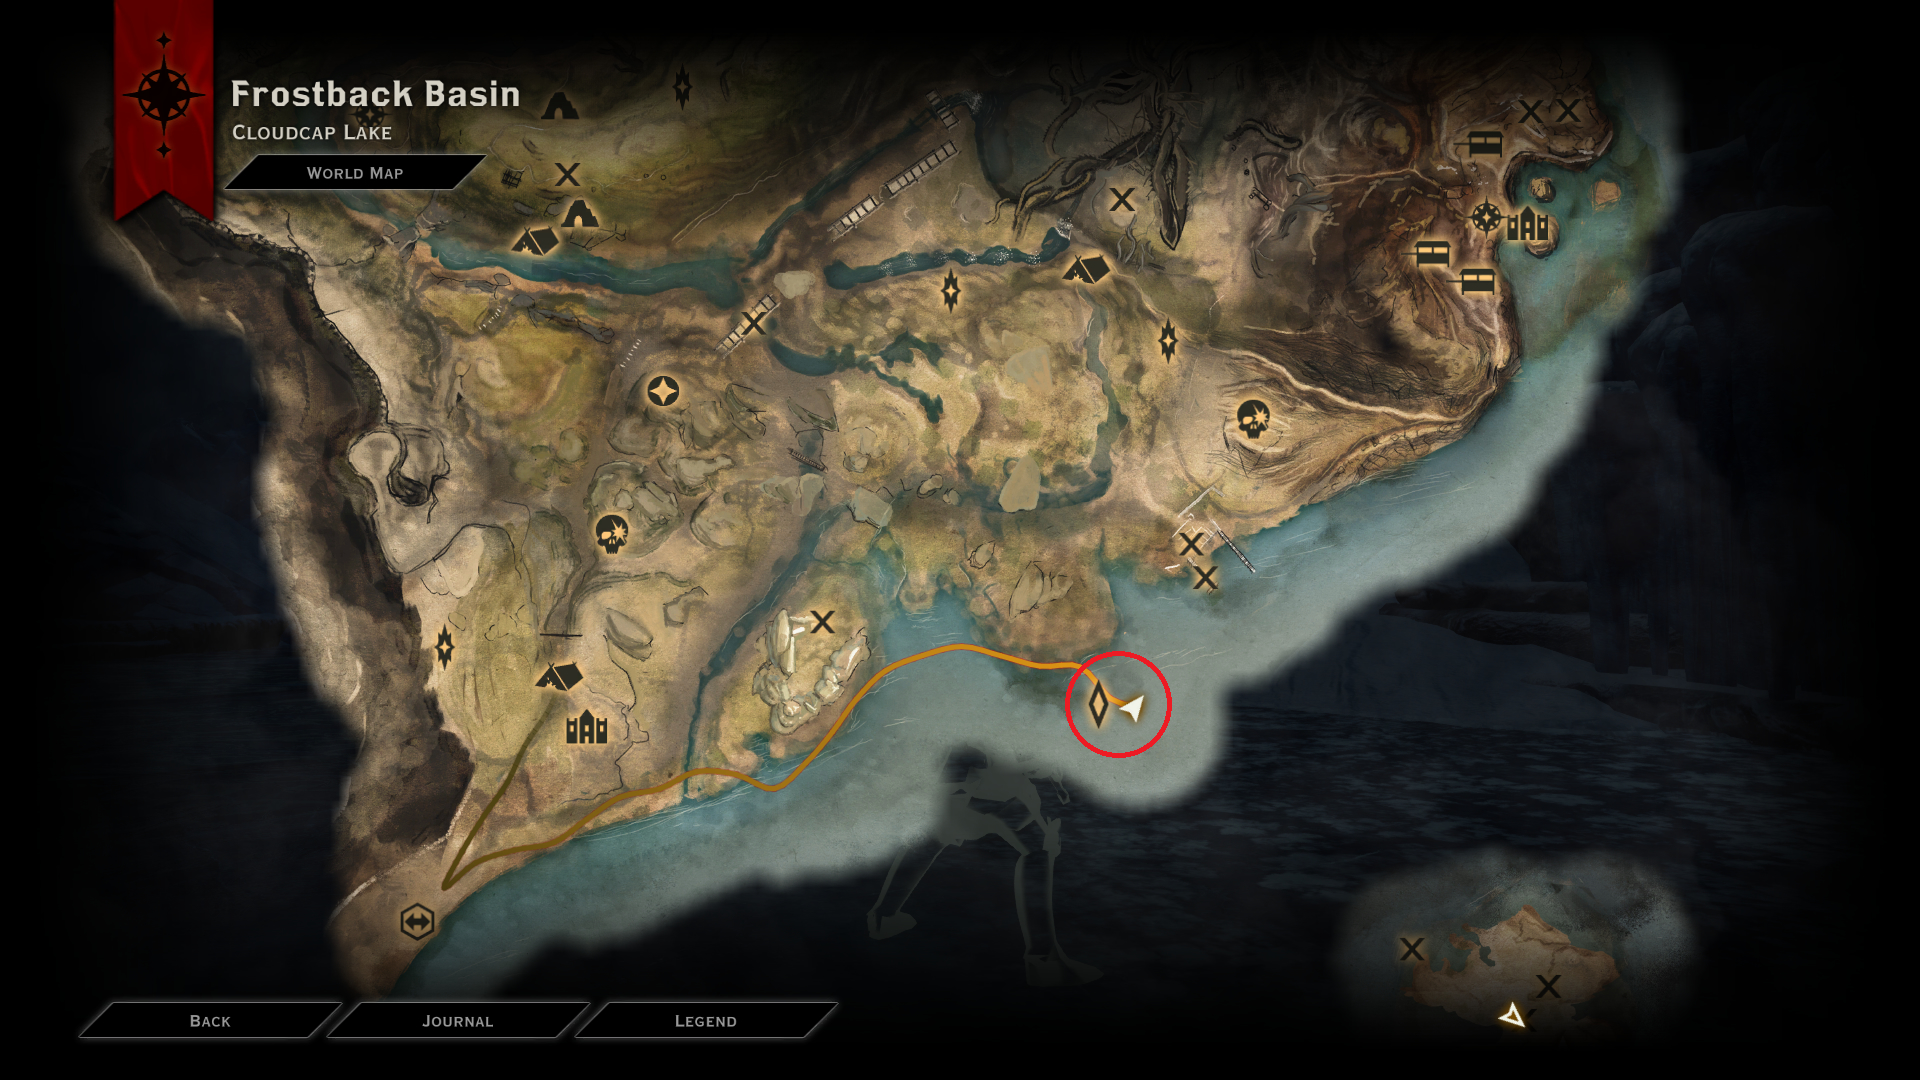
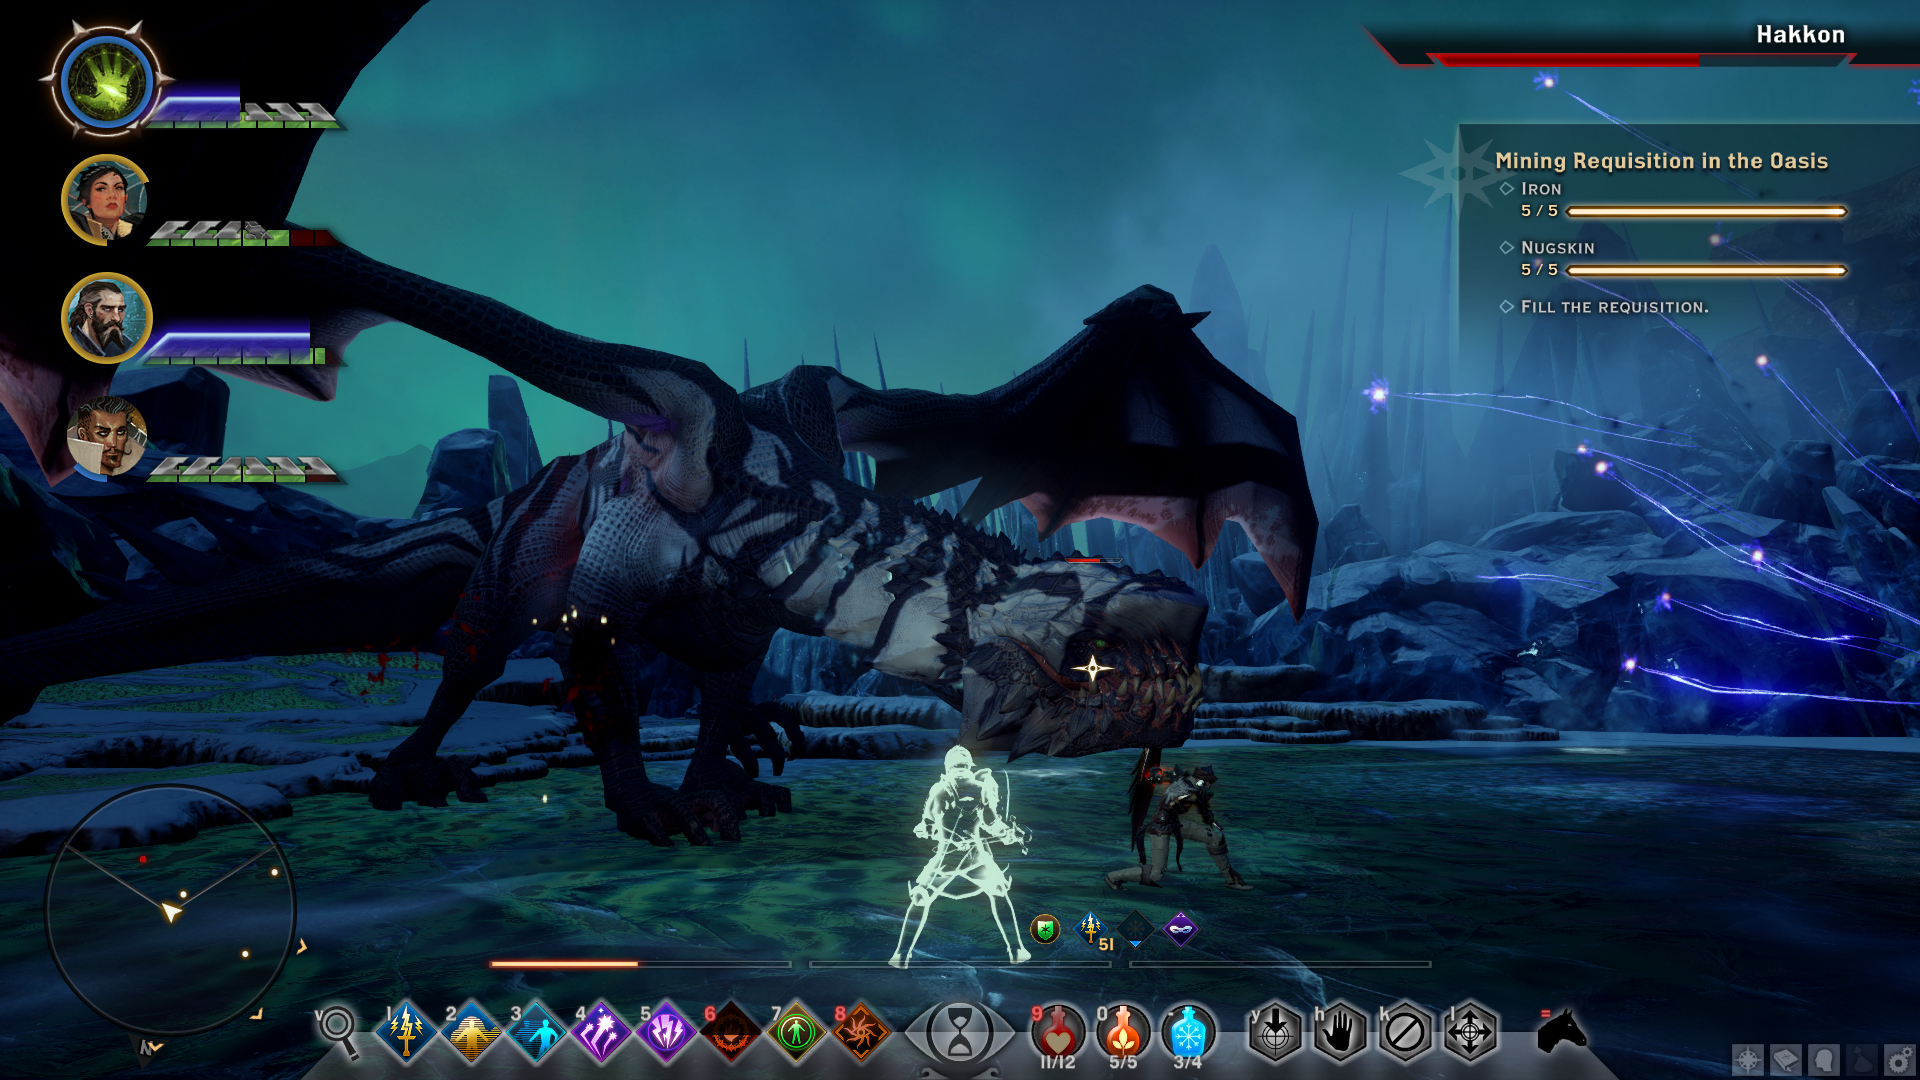
Damage type dealt – Cold
Resistance – Cold damage
Weakness – Fire damage
Note: If you killed a high dragon and reload a previous save, that kill is still counted for this achievement. So if you’re in a hurry to get this achievement, you could make a save before fighting a high dragon that you find easy to defeat (e.g. Northern Hunter), kill it, keep reloading the save and kill it 10 times until you get this achievement. However, I do recommend defeating all the 11 dragons since they give tier 4 crafting items.
Player/Skill/Crafting Related Achievements
Skilled
Upgrade any ability once in single-player mode.
Simply purchase an upgrade for an already unlocked ability when you level up.
Well-Prepared
Craft a weapon or piece of armor in single-player mode.
After the prologue, you will be able to explore the village of Haven. There you can find the blacksmith called Harritt. When you first talk to him, he will give you an armour schematic for your class. You can find the resources needed to create the armour in crates inside the blacksmith’s workshop. Simply craft an armour using any material.
Customized
Enchant or upgrade a piece of equipment in single-player mode.
Simply craft a armour/weapon upgrade part through the blacksmith or buy one from a merchant and install it on a compatible armour/weapon. Installing any armour/weapon upgrade part, rune, or sigil on an item will unlock this achievement.
Earliest way you could unlock this is by buying the cheapest upgrade equipment for Varric’s crossbow Bianca from merchants in Haven or Skyhold and installing it.
Focused
Spend 10 points in a single ability tree with any one single-player character.
You will earn this naturally while playing the game if you focus on only unlocking 2 or less ability trees. Make sure to select two ability trees that synergise well with your playstyle and party members and keep upgrading it until you’ve spent 10 ability points in one skill tree. The max reachable level is 27, so you have more than enough points to spend.
If you want to get this as soon as you can, after reaching level 10, make a save file. Go to the blacksmith or Skyhold’s undercroft and buy a respec potion there. Respec your skills and apply all your 10 ability points under a single ability tree. After unlocking the achievement, reload the previous save. Keep in mind that spending 10 ability points from any party member counts as well. It doesn’t have to be the Inquisitor.
Specialized
Choose a specialization class.
You have to reach level 10 and unlock Skyhold in order to access specialisations for your Inquisitor. If both conditions are met, wait until the 1st set of repairs are made to the Skyhold. To initiate the repairs, you simply need to go to another area and come back to the Skyhold again. It’s instantaneous. After the repairs have been made, you will unlock the “Specializations for the Inquisitor” war table operation. Complete it and 3 trainers will appear at Skyhold. Talk to them all and choose the trainer with the specialisation that best suits your playstyle and do the side quest given by that trainer.
Note: You can only chose 1 specialisation for the Inquisitor. So make sure to research a good character build and select the one needed for it (e.g.: Knight-Enchanter – DPS, Assassin – DPS, Champion – Tank).
Peerless
Level up the Inquisition to rank 10.
To level up the Inquisition rank, you need Influence. You gain Influence through exploration, completing quests, war table operations, and through buying Influence from Farris the merchant located in Skyhold. You need to earn a total of 45,000 points of influence to get the inquisition to the rank of 10.
Here are the ways to earn Influence and their (roughly calculated) average Influence rewards (sorted from low to high). Some quests and operations will not reward you Influence.
- Landmarks
- War table operations (30-120)
- Returning research items (100+)
- Campsites (50-200)
- Closing rifts (50-200)
- Farris the merchant in Skyhold (150-3000)
- Side quests (100+)
- Main quests (400-3000)
- High dragons (1600-4000)
If you keep completing every single thing (areas, quests) that you come across while playing, you can earn this about halfway through the game. If not, don’t worry. You can keep earning Influence even after finishing the base game.
An easier way to get this achievement if you have a large amount of gold is through Farris, the elven merchant in Skyhold. Make a save file and go to the merchant. Buy tier 1 contracts (cost 167 gold) since they provide the most influence per gold. If you haven’t gotten this achievement after that, buy tier 3 contracts (1690 gold, 2nd best value). If you still haven’t reached Inquisition rank 10, buy tier 2 contracts (490 gold), followed by tier 4 contracts if you still haven’t reached the necessary rank. You should definitely reach Inquisition level 10 and get this achievement after this. After earning this, if you don’t care for Inquisition perks/rank, load back to the previous save.
Master Builder
Craft an item from Tier 4 materials in all non-masterwork slots in single-player mode.
You can earn this after you acquire some tier 4 crafting materials. Tier 4 crafting materials can be found after defeating and looting high dragons in the base game. You could buy a limited amount of tier 4 crafting materials from the Black Emporium as well. After acquiring some, craft anything with tier 4 materials in the non-masterwork slots. The tier of the schematic that you use does not affect the achievement. So you could get this achievement by crafting a tier 1 weapon/armour (which require less crafting materials compared to high tier ones) with tier 4 crafting materials.
Moreover, you do not need to craft a weapon or armour to get this achievement. You could also get this by crafting a weapon or armour upgrade item such as a grip, haft, pommel, staff blade, etc. I recommend that you make a save, and craft any tier 1 upgrade item with only 2 slots using tier 4 crafting materials. You can purchase the schematics for these tier 1 upgrade items from the Dwarven Bookseller in Redcliffe Village if you don’t have any. Reload the previous save after crafting and getting the achievement since these tier 4 items are very limited.
Well-Funded
Earn 50,000 or more gold across all single-player playthroughs.
This amount may seem high at the beginning, but you can earn this and much more very easily if you’ve been careful with your money. Always keep looting and hoarding everything you can and sell the ones you don’t need to merchants. “Sterling Reputation” and “Elite Clientele” Inquisition perks can help with this process.
However, there is an easy exploit that you can do to get this achievement easily if you wanted to. You get this achievement if the total amount you’ve earned is higher than 50K gold, meaning you don’t have to have 50K gold in your inventory, and it doesn’t take into account the amount of gold you spend. So go to a merchant with your inventory full of high value items (purple level rarity sells for the most amount). Sell everything to that merchant. And then use the buy-back tab and buy everything you just sold. Your total earned amount gets increased every time you sell your items. Repeat the process and keep selling and buying back until you get the achievement.
Veteran
Reach level 20 in single-player mode.
Do every side quest, collect codex entries, explore every wilderness area, capture keeps, close rifts, and defeat every enemy you find (especially high dragons) and you can easily reach level 20. If you’re planning on completing most of the quests in the game along with the DLCs, you will reach level 20 naturally.
I highly recommend that you acquire all the 4 knowledge Inquisition perks as soon as you can (“Arcane Knowledge”, “History Knowledge”, “Nobility Knowledge”, and “Underworld Knowledge”) since this will significantly increase your XP gain while collecting codex entries.
Player/Skill/Crafting Related Achievements (Continued)
Master Alchemist
Upgrade your alchemic potions, grenades, or tonics 30 times in a single playthrough.
You will be able to get this achievement mid to late stages in the game, provided you have enough recipes and herbs. I recommend that you spam search ability and collect every herb that you come across while exploring. You will need a lot of herbs. Acquiring the “Optimal Cutting” Inquisition perk can help as well.
You will have a chance to get seeds for the plants that you harvest after relocating to Skyhold. These seeds have unlimited uses and can be used to plant herbs on the garden pots in Skyhold’s garden. You only need to get seeds for each plant once. When you come across a rare herb that you do not have a seed for yet, quicksave near it and farm the herb. If you did not get the seeds for it, quickload. Repeat the process until you acquire the seeds for it if you want to get the seeds for it quickly. I recommend that you use the garden pots to plant rare herbs since you can find common ones easily.
I also recommend that you upgrade the Skyhold garden to an Herb Garden to increase the number of pots and farm rare herbs through that. More information regarding that is explained under the “Botanist” achievement.
Below are the locations and the process to acquire of all the potion, tonic, and grenade recipes in the game. Keep in mind that you do not need to collect all. You only need just enough for 30 upgrades.
Potions
Healing Potion
Automatically acquired at the beginning of the game.
Regeneration Potion
Recipe is given by speaking with Adan (who is near the potion equip/upgrade benches in Haven) for the first time. Or by purchasing from the merchant Bonny Sims in Skyhold if Adan wasn’t spoken to in Haven.
Lyrium Potion
When speaking to Adan for the first time in Haven, ask him if he needs any help. You will be given the side quest “Passing Notes”. Complete it to get the recipe. If the quest wasn’t completed before moving to Skyhold, purchase it from Bonny Sims in Skyhold.
Tonics
Rock Armor Tonic
Loot the body shown in the location below to start the “Sketch of Calenhad’s Foothold” side quest.
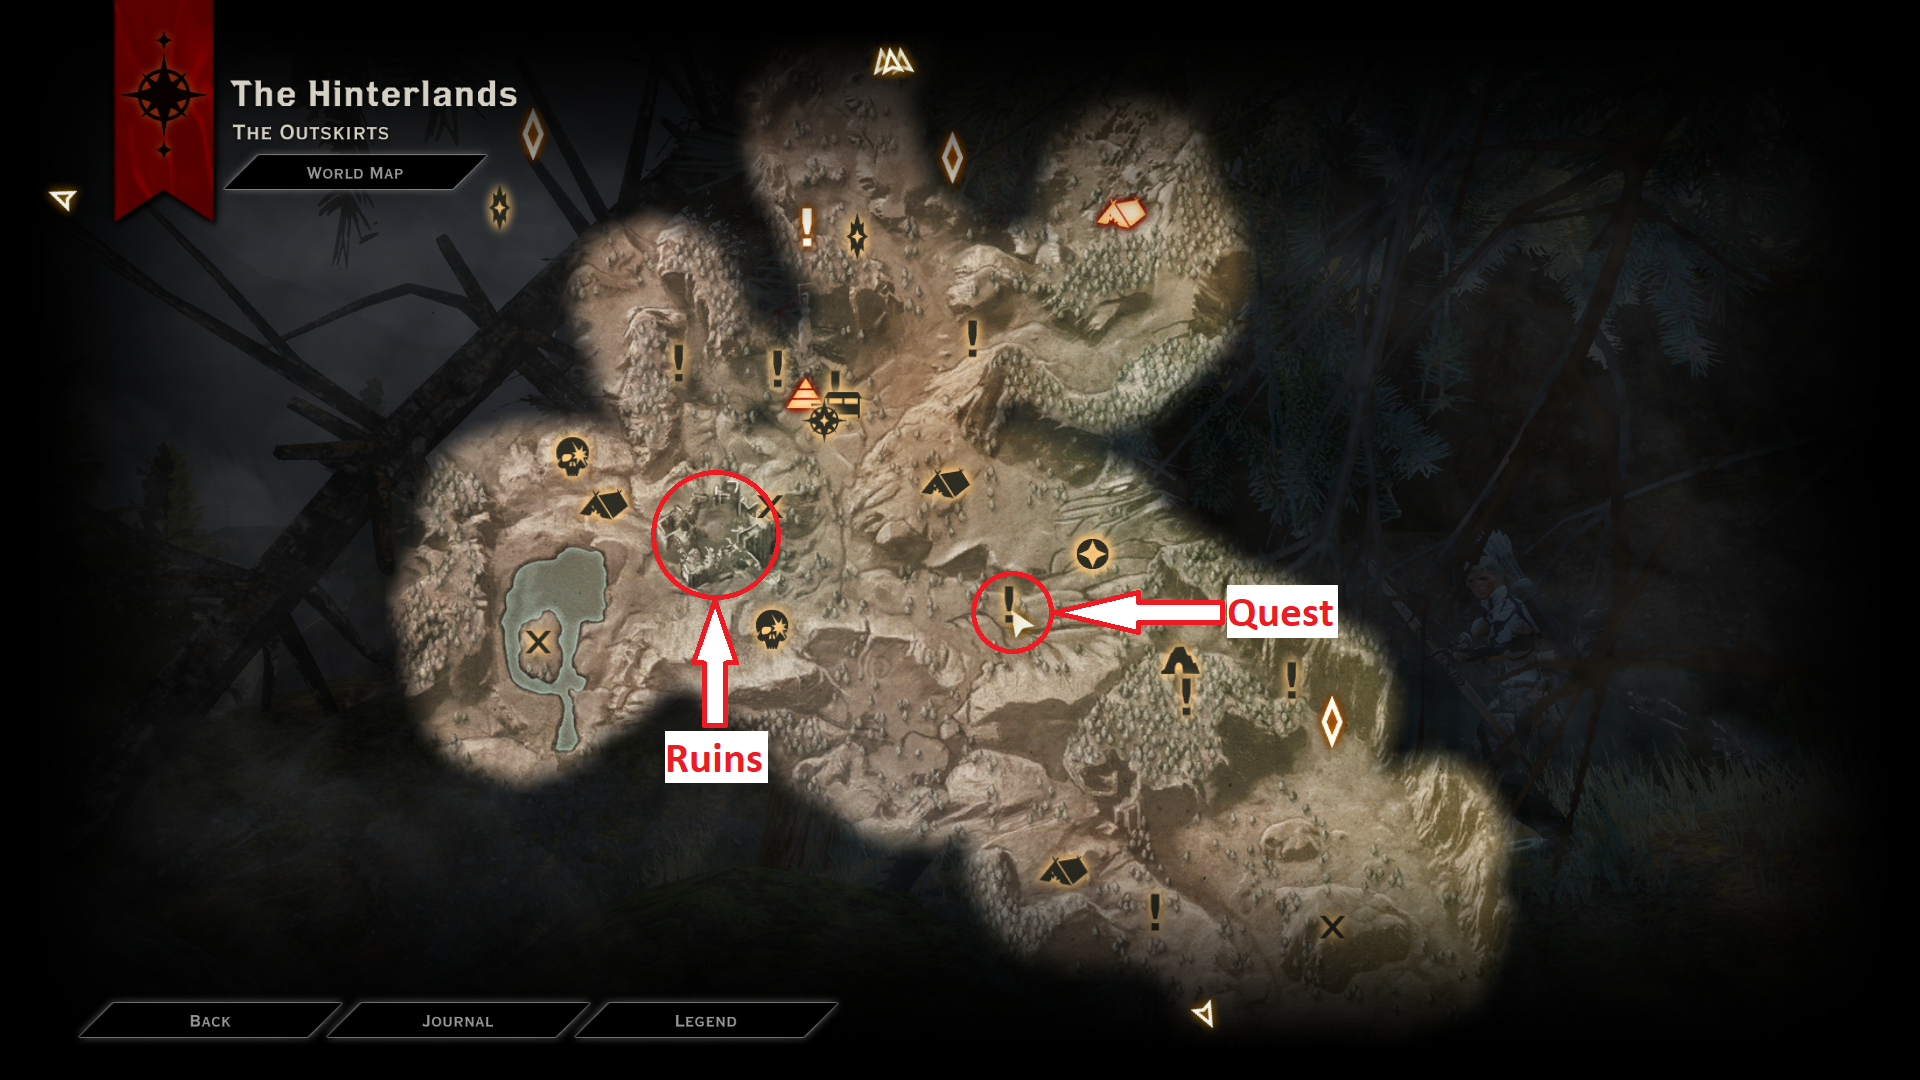
Afterwords go to the ruins shown above and use the search function to find the recipe and complete this quest.
Fire/Cold/Electrical/Spirit Resistance Tonic
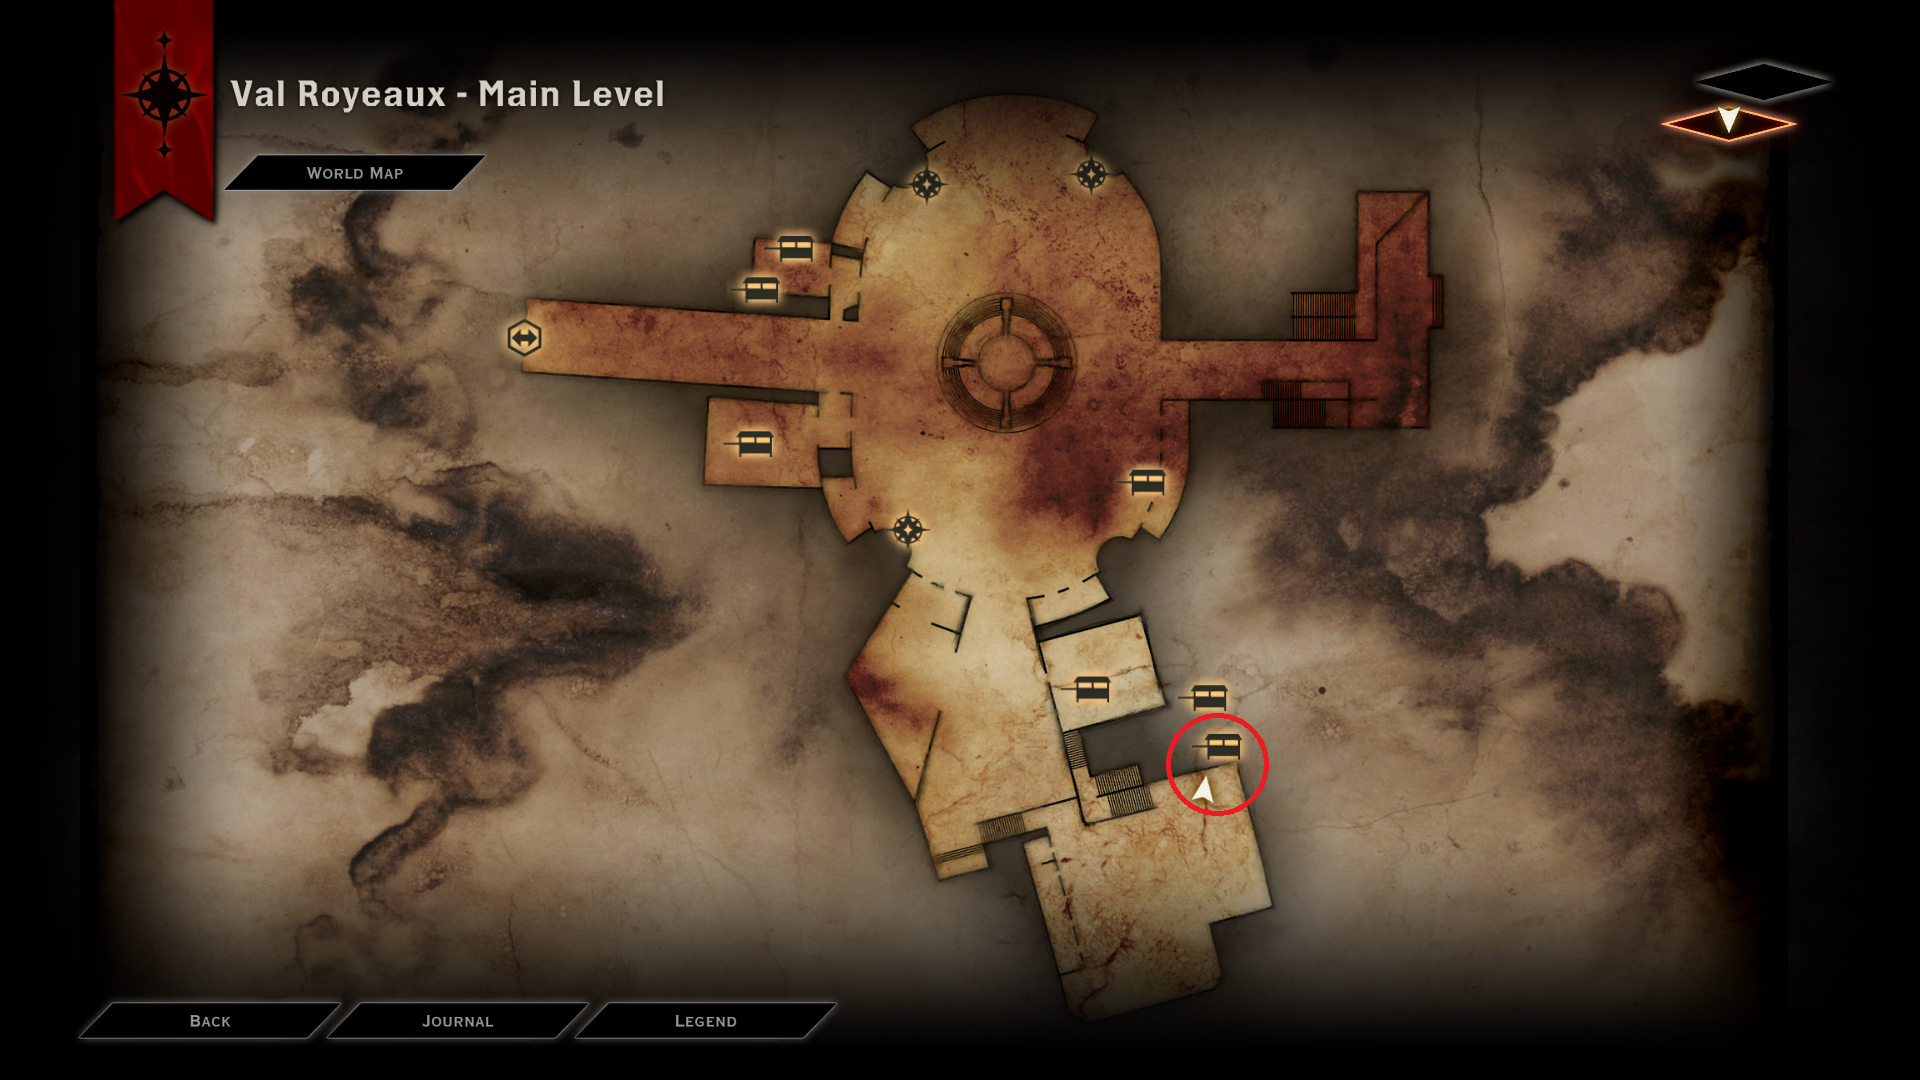
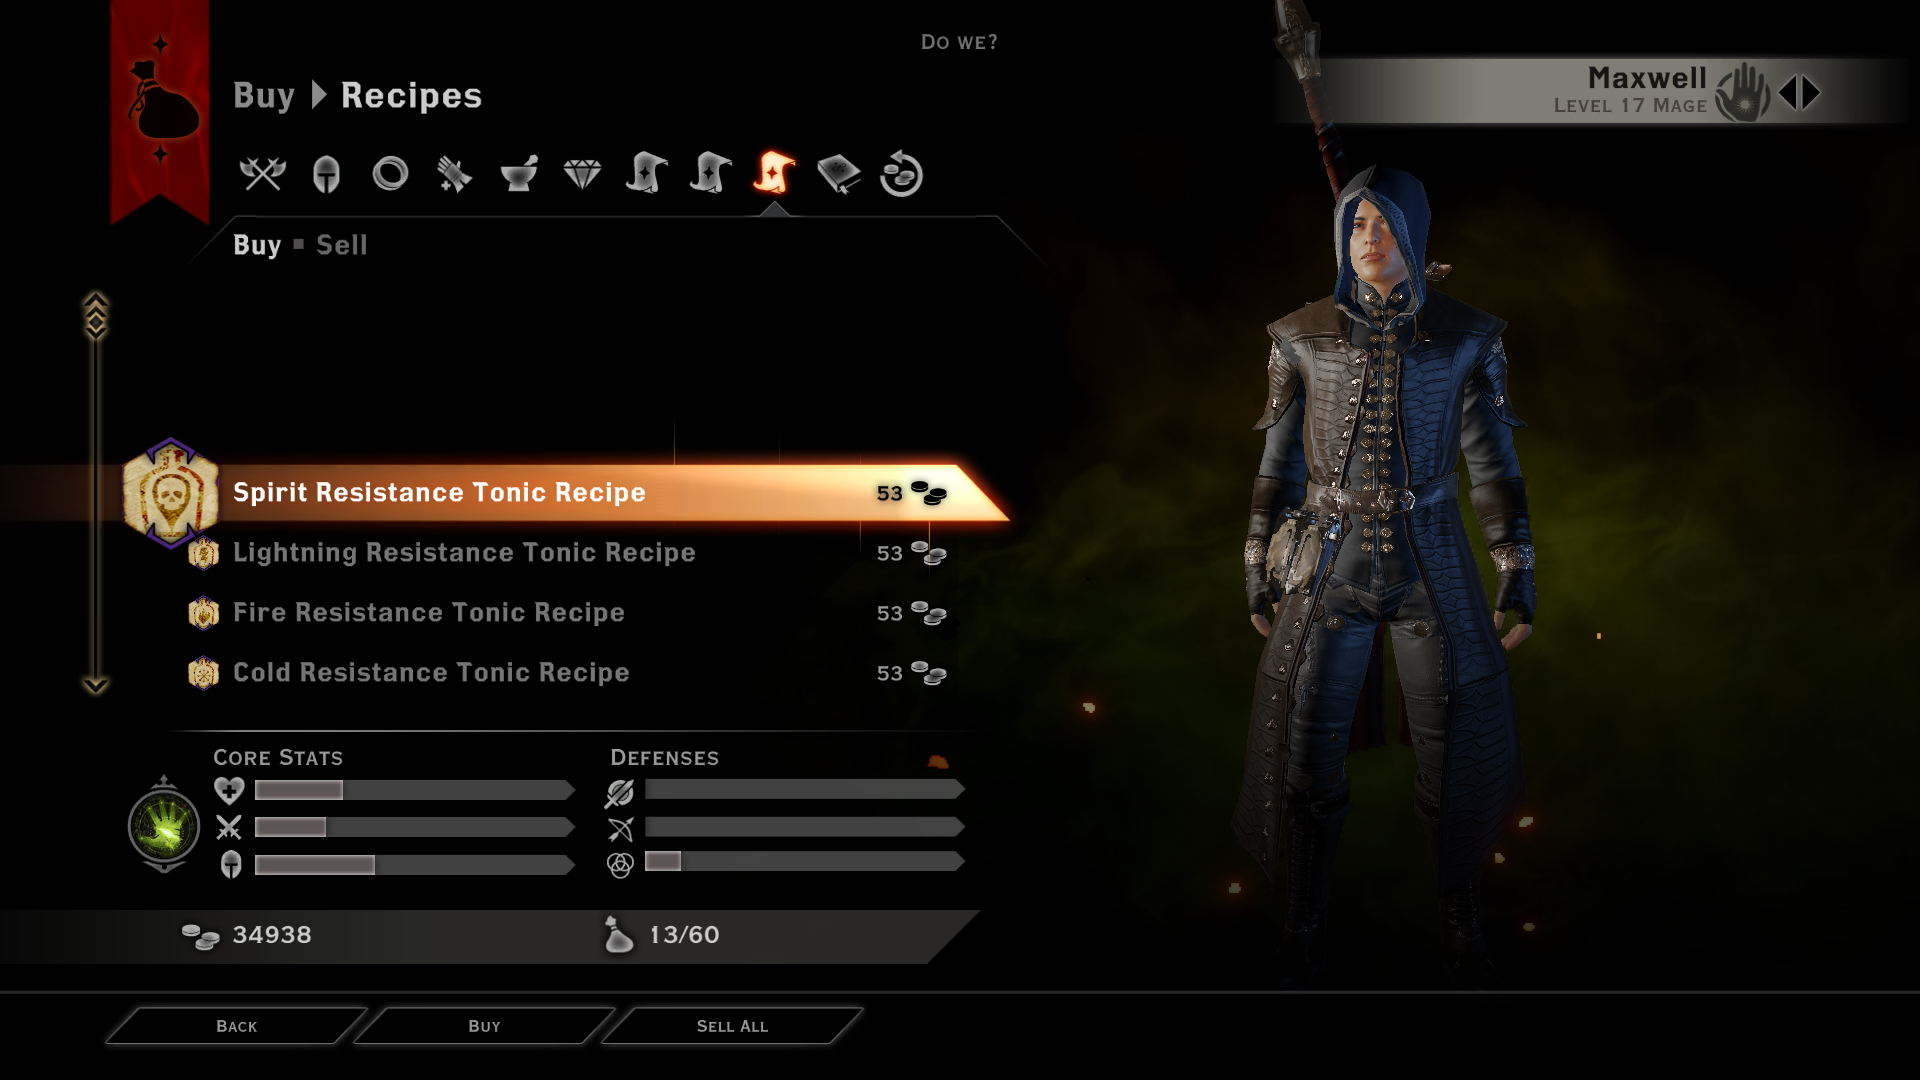
Recipes for these tonics are acquired by purchasing them from the merchant Willvan in Val Royeaux (shown below).
Mighty Offense Tonic
Go to Storm Coast and go to the location shown on the map below, you can find a cabin with a locked door inside. You must interact with the door.
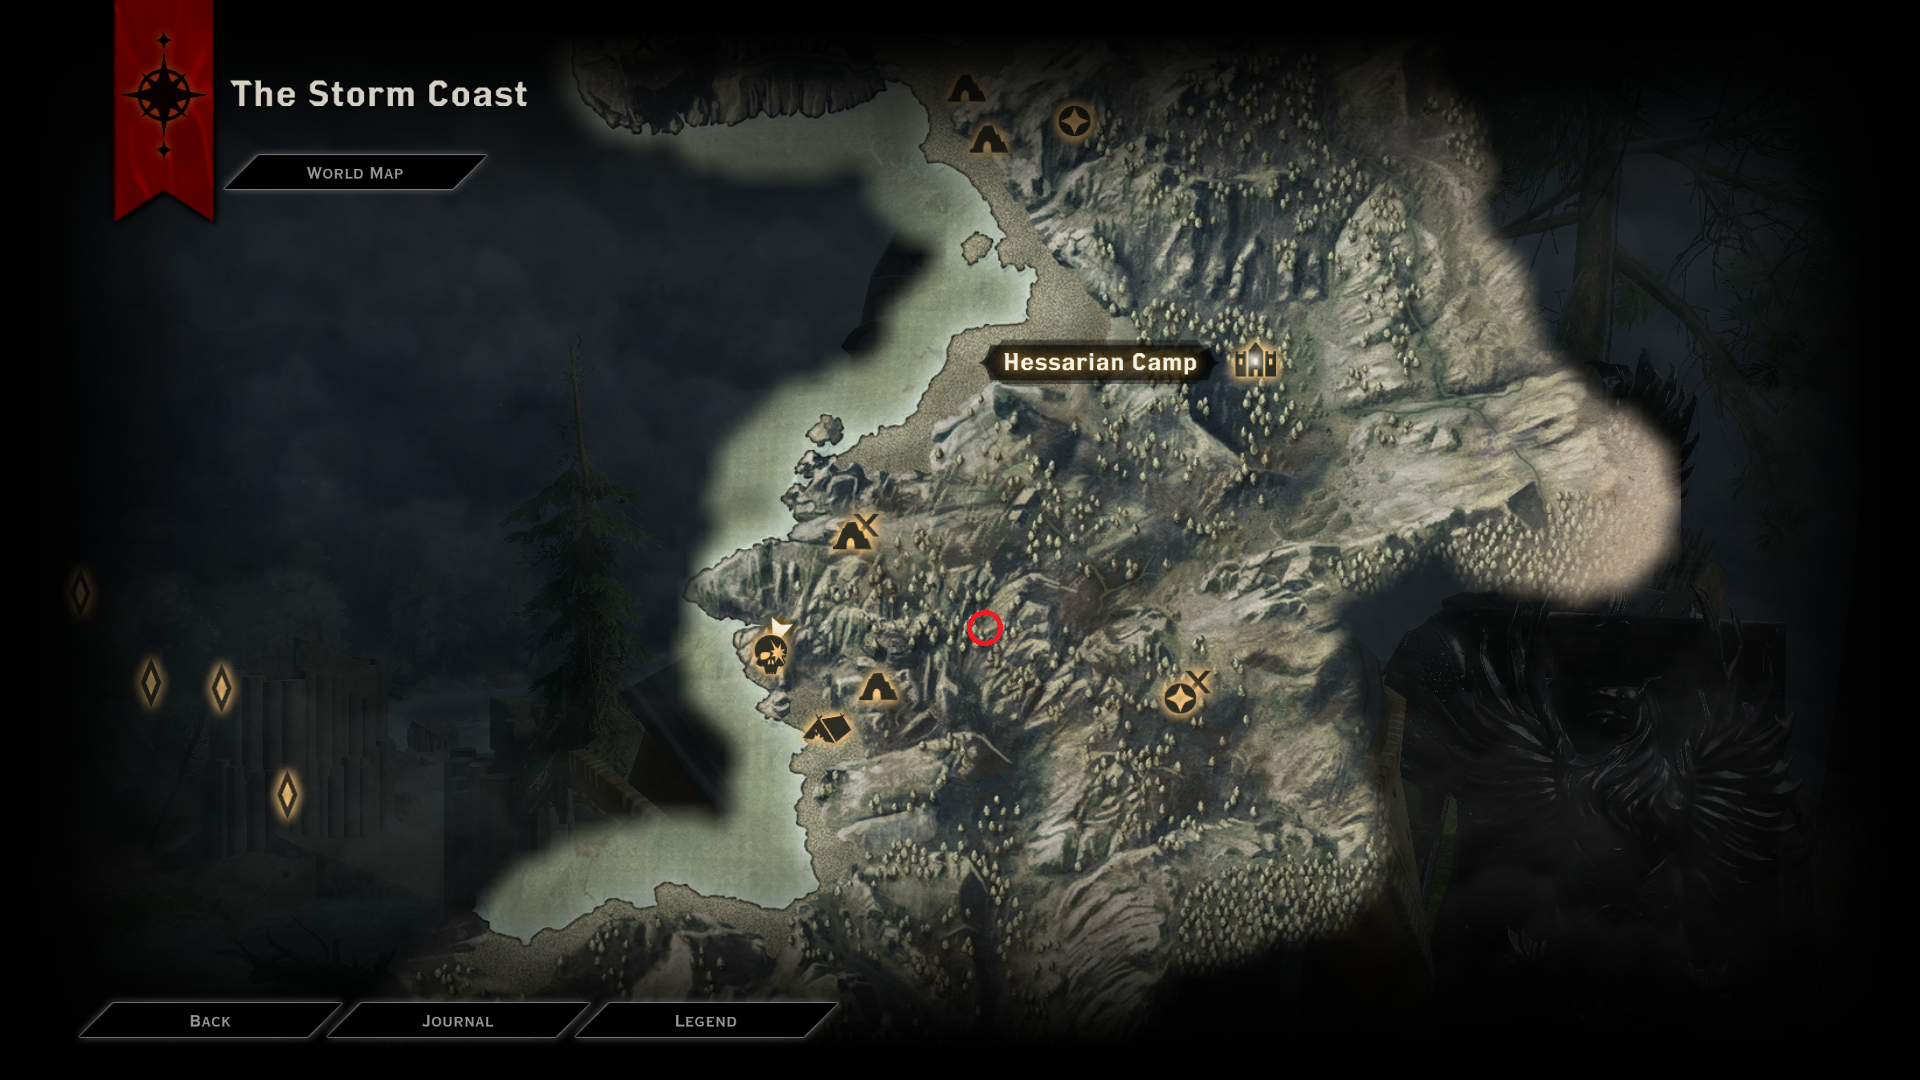
Afterwords the mage named “Rebel Mage” carrying the key has a chance to spawn in random locations throughout the Storm Coast. after finding him and defeating him, loot his key and unlock the door and inside you can find the recipe.
Tears of the Dead
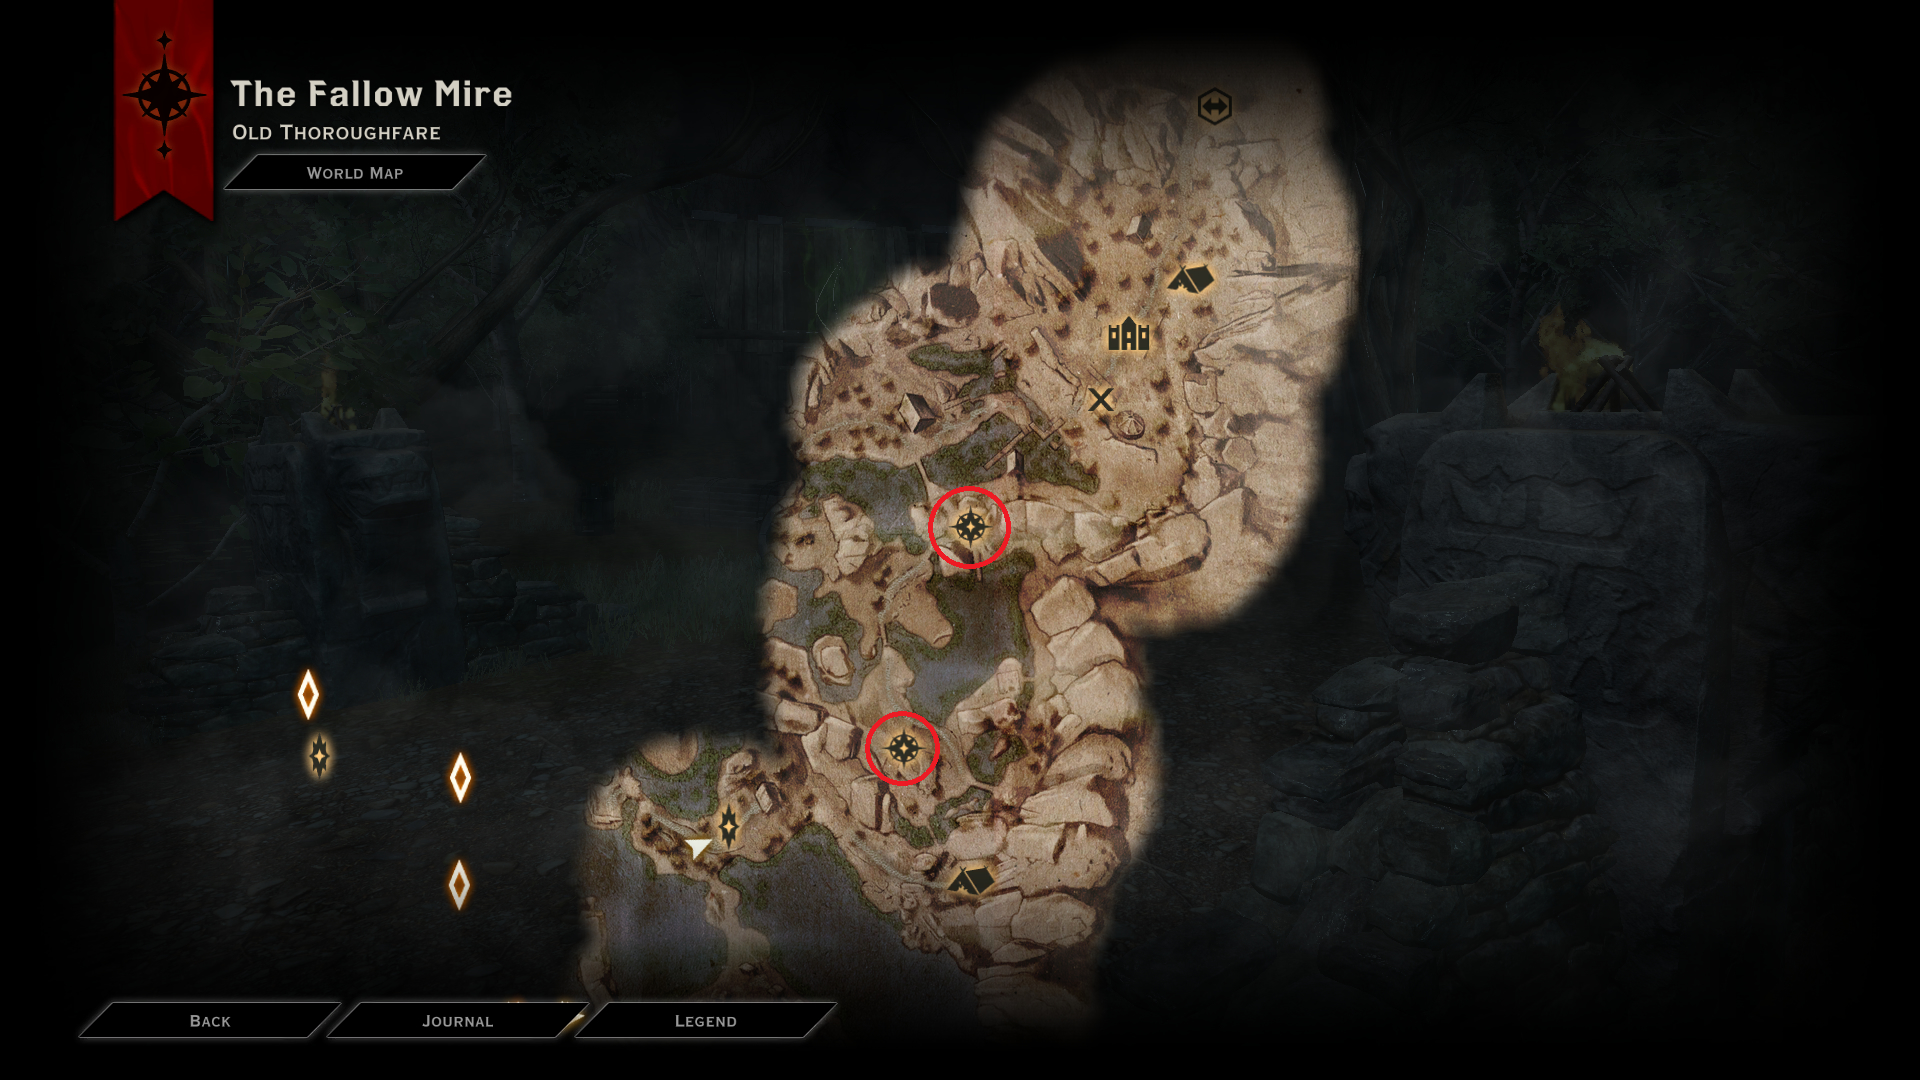
Light a veilfire brazier on any of the beacons shown on the map and read the velifire rune right behind the brazier on the beacon. You will acquire “Beneath the Mire” side quest. Complete it to get the recipe.
Grenades
Antivan Fire
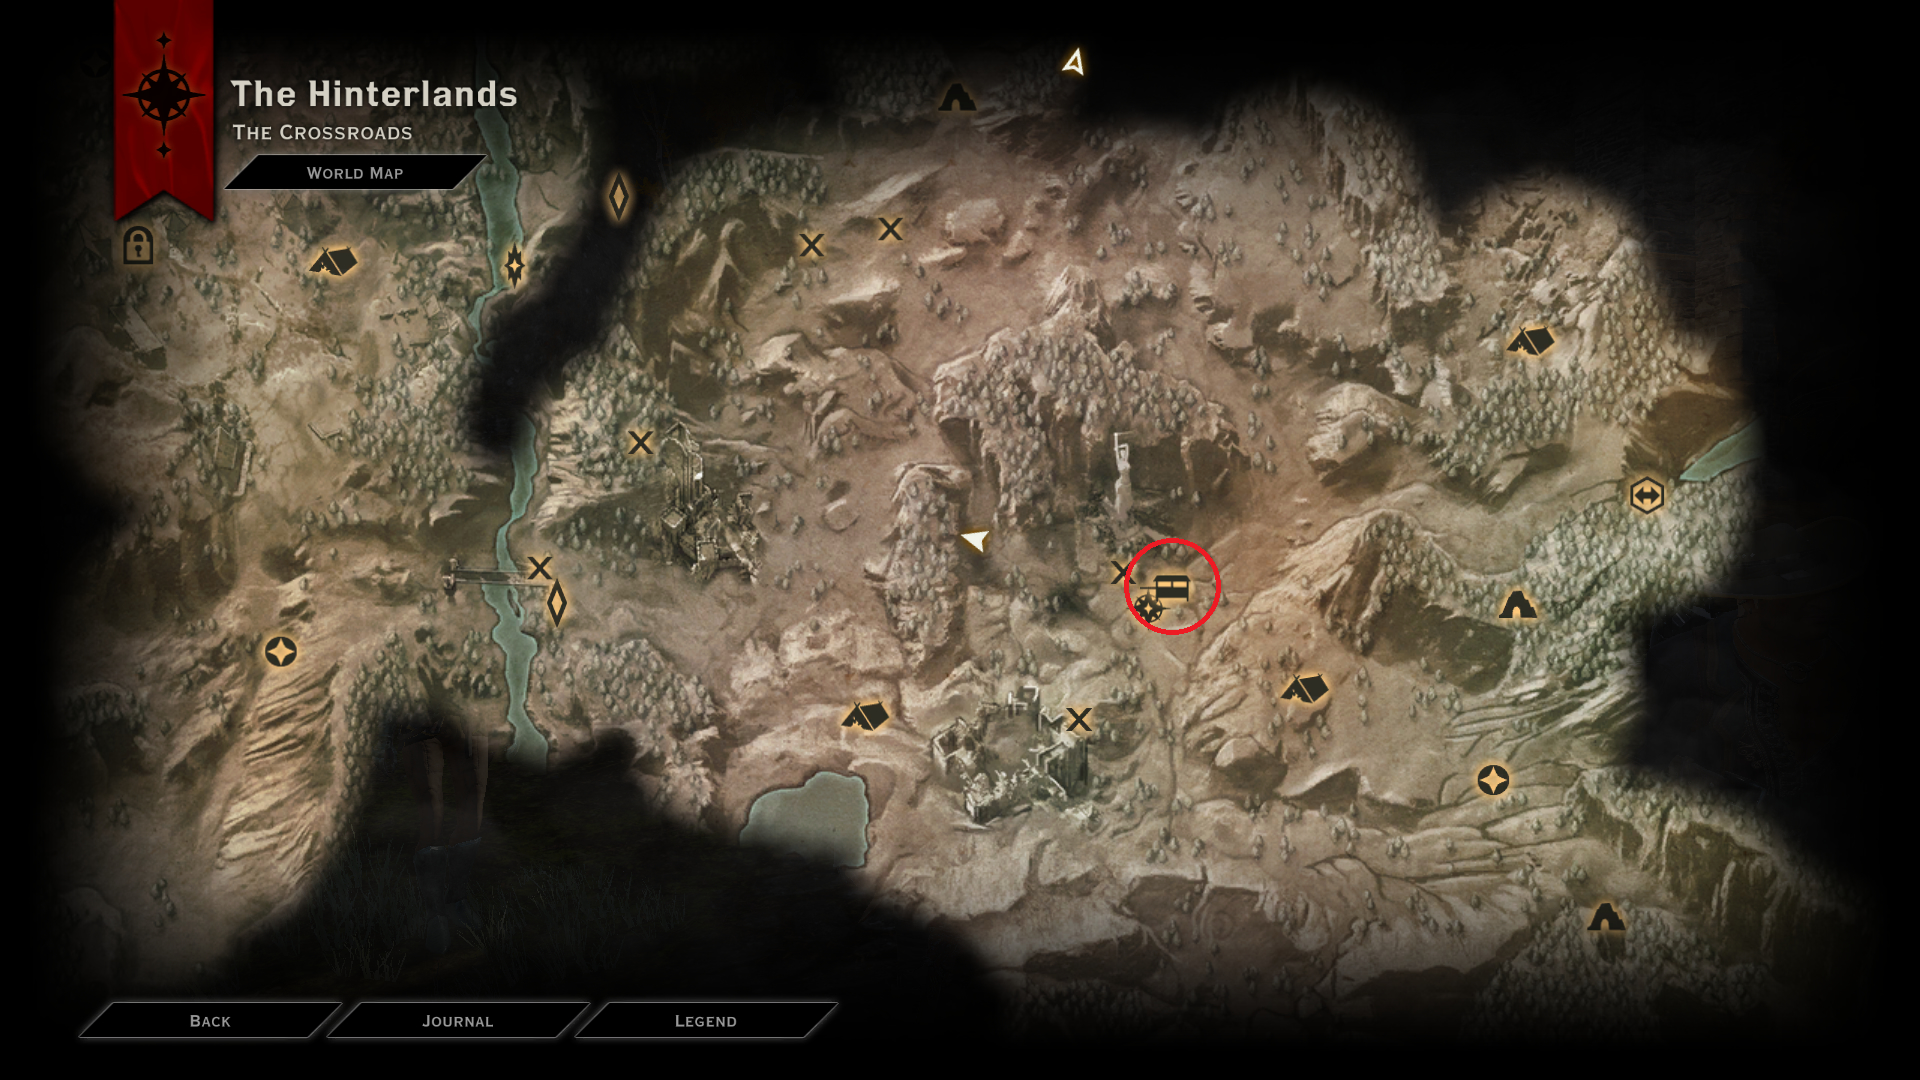
Purchased from the merchant in the Crossroads area in Hinterlands.
Pitch Grenade
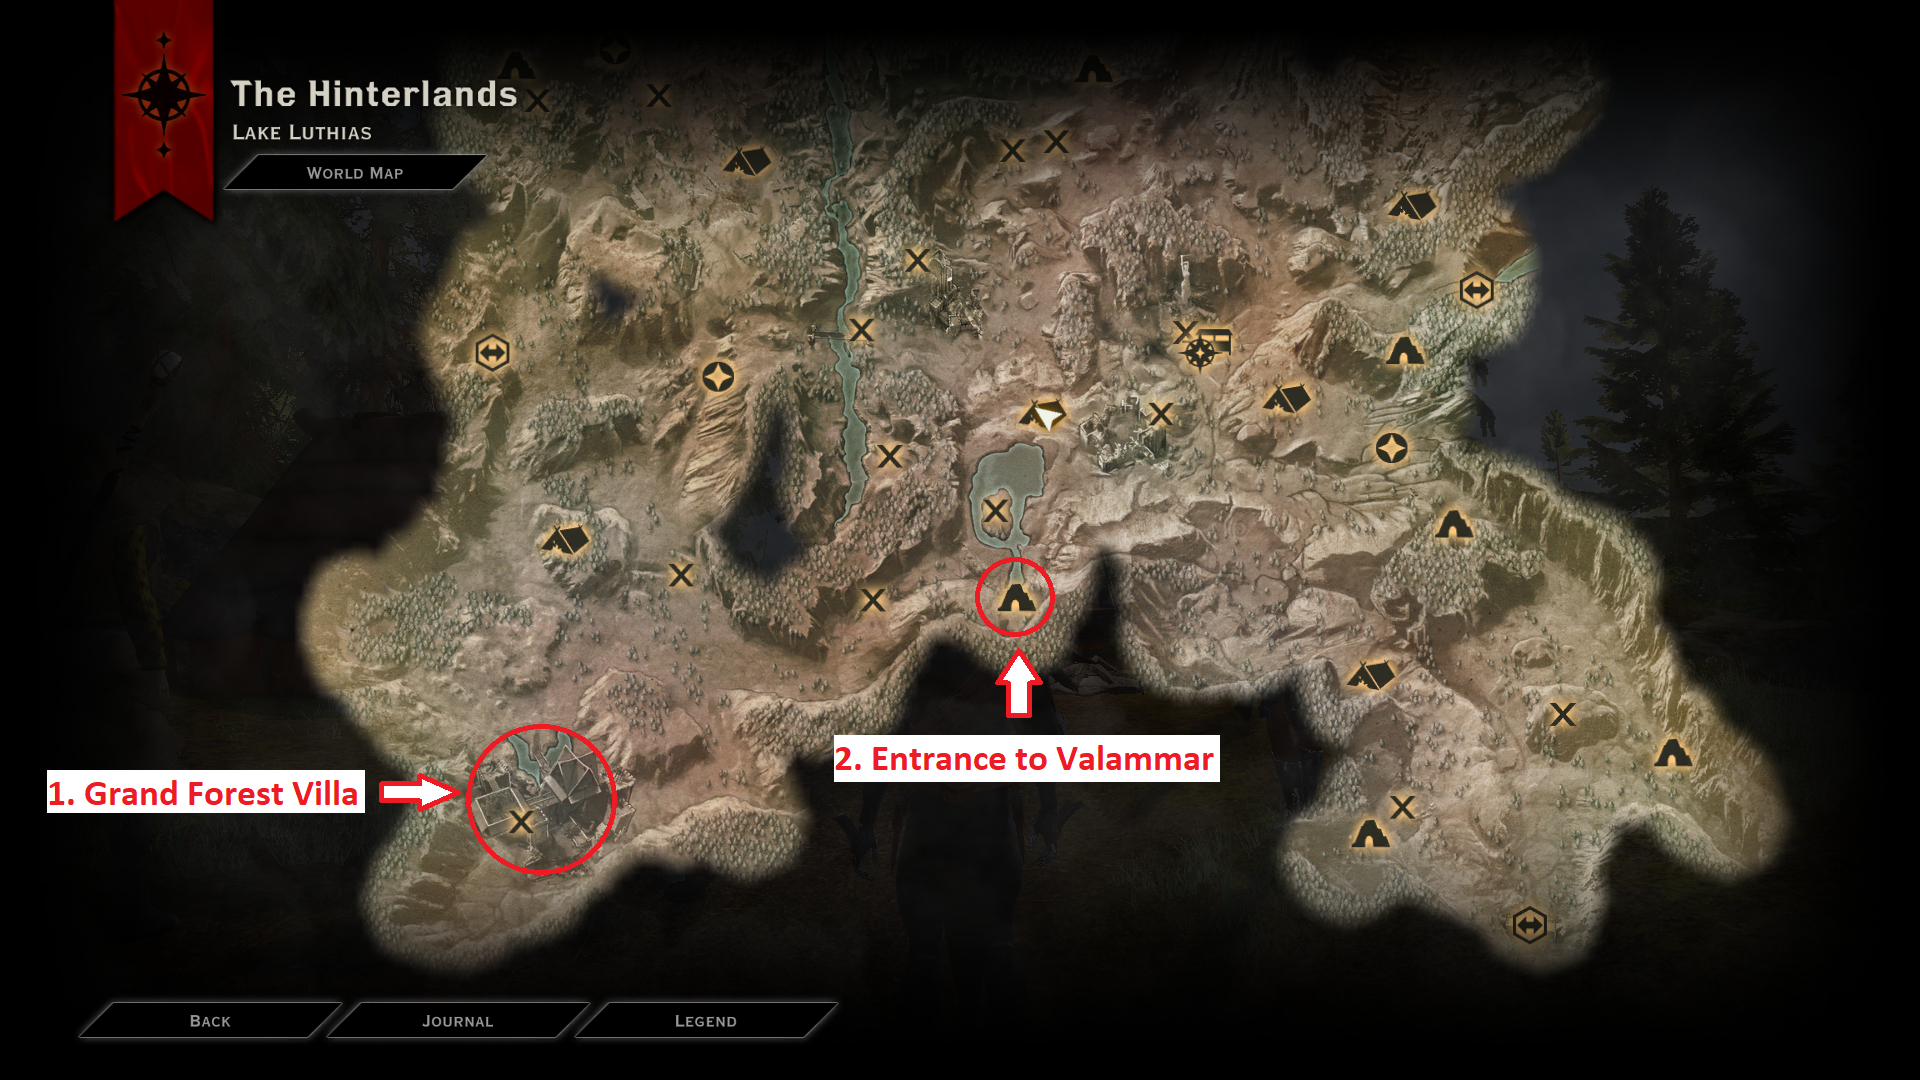
Go to the Grand Forest Villa shown in the map below. Search the villa and defeat the Mercenary Leader upstairs. Search the area near him to find the “Valammar Key”. Enter Valammar by unlocking the door in the location shown below.
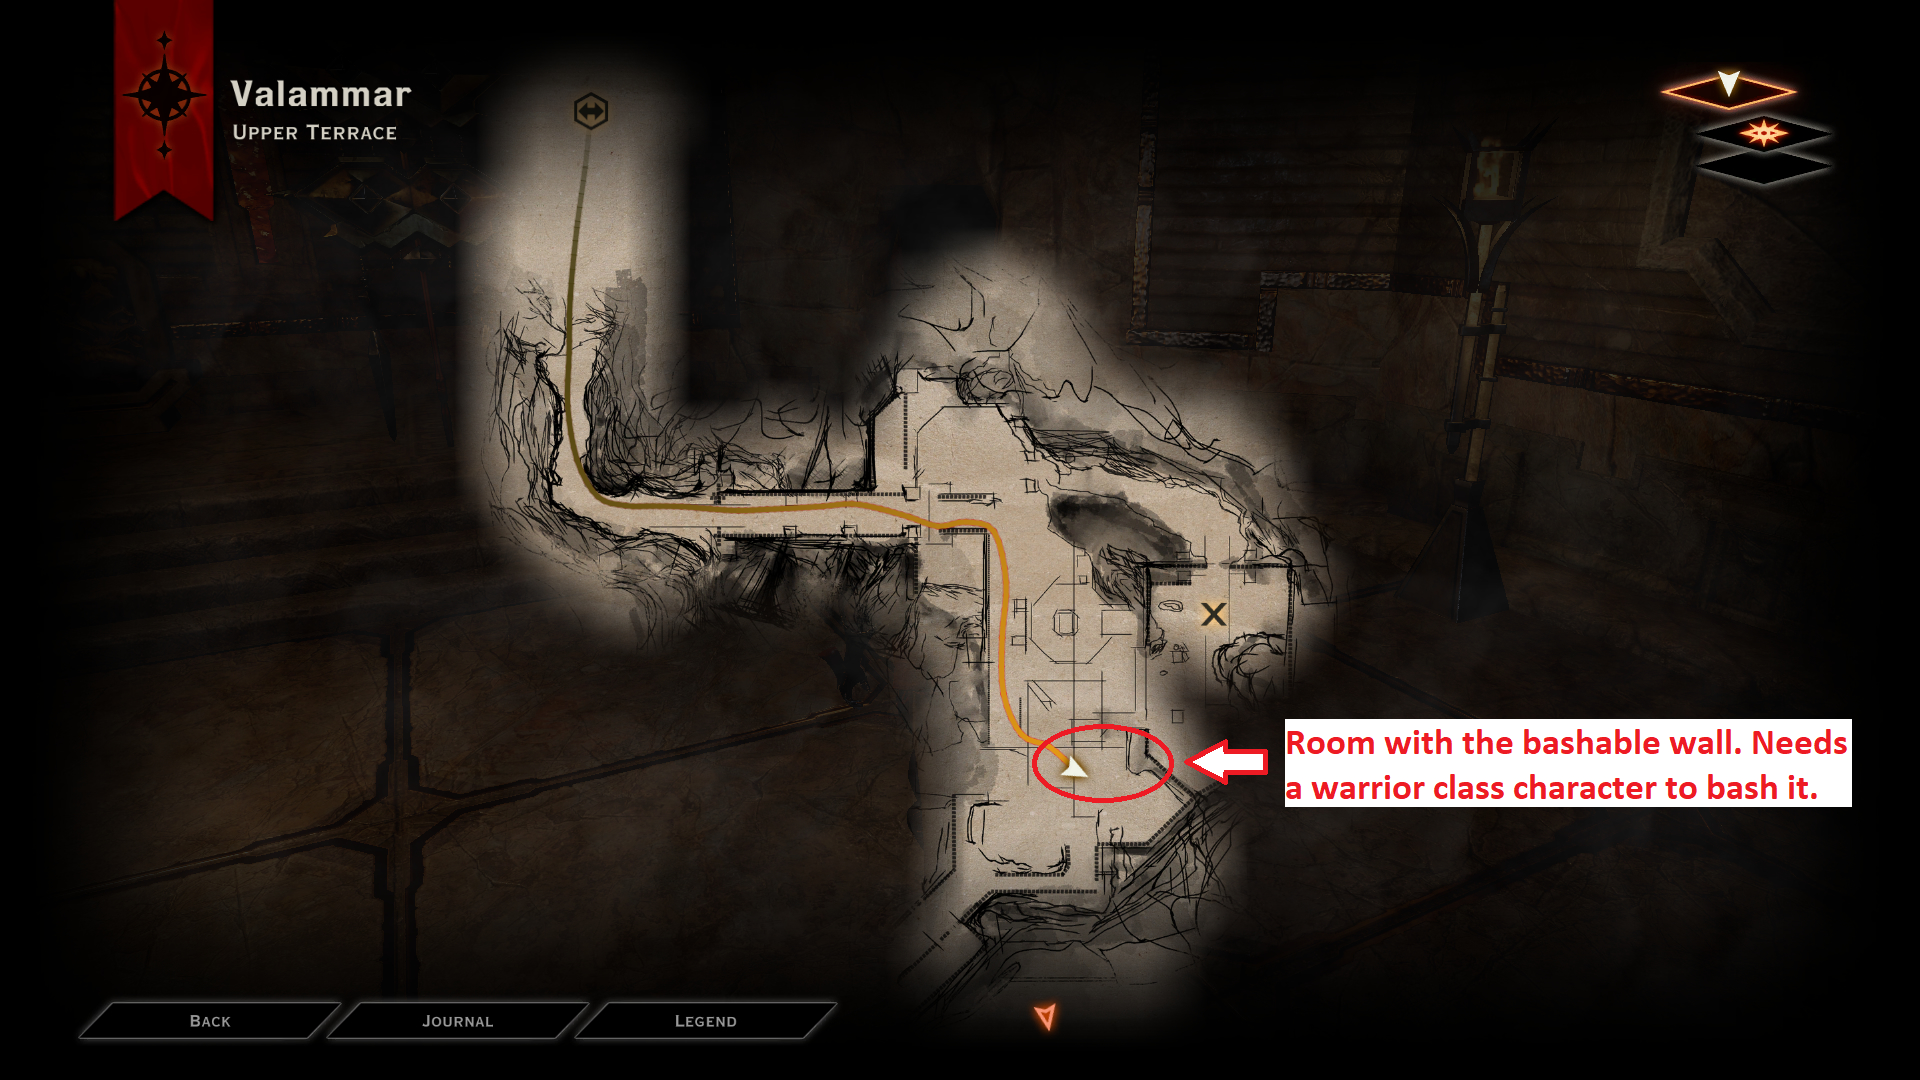
Inside Valammar, climb the stairs and go to the upper terrace. Enter the first door to the left on the terrace and use a warrior class character on the bashable wall there (marked below). The recipe will be inside a chest in the hole in the wall.
Jar of Bees
After recruiting Sera, you will unlock the war table operation “Red Jenny: Inquisition Needs Beeees!”. Complete it to get the recipe.
Confusion Grenade
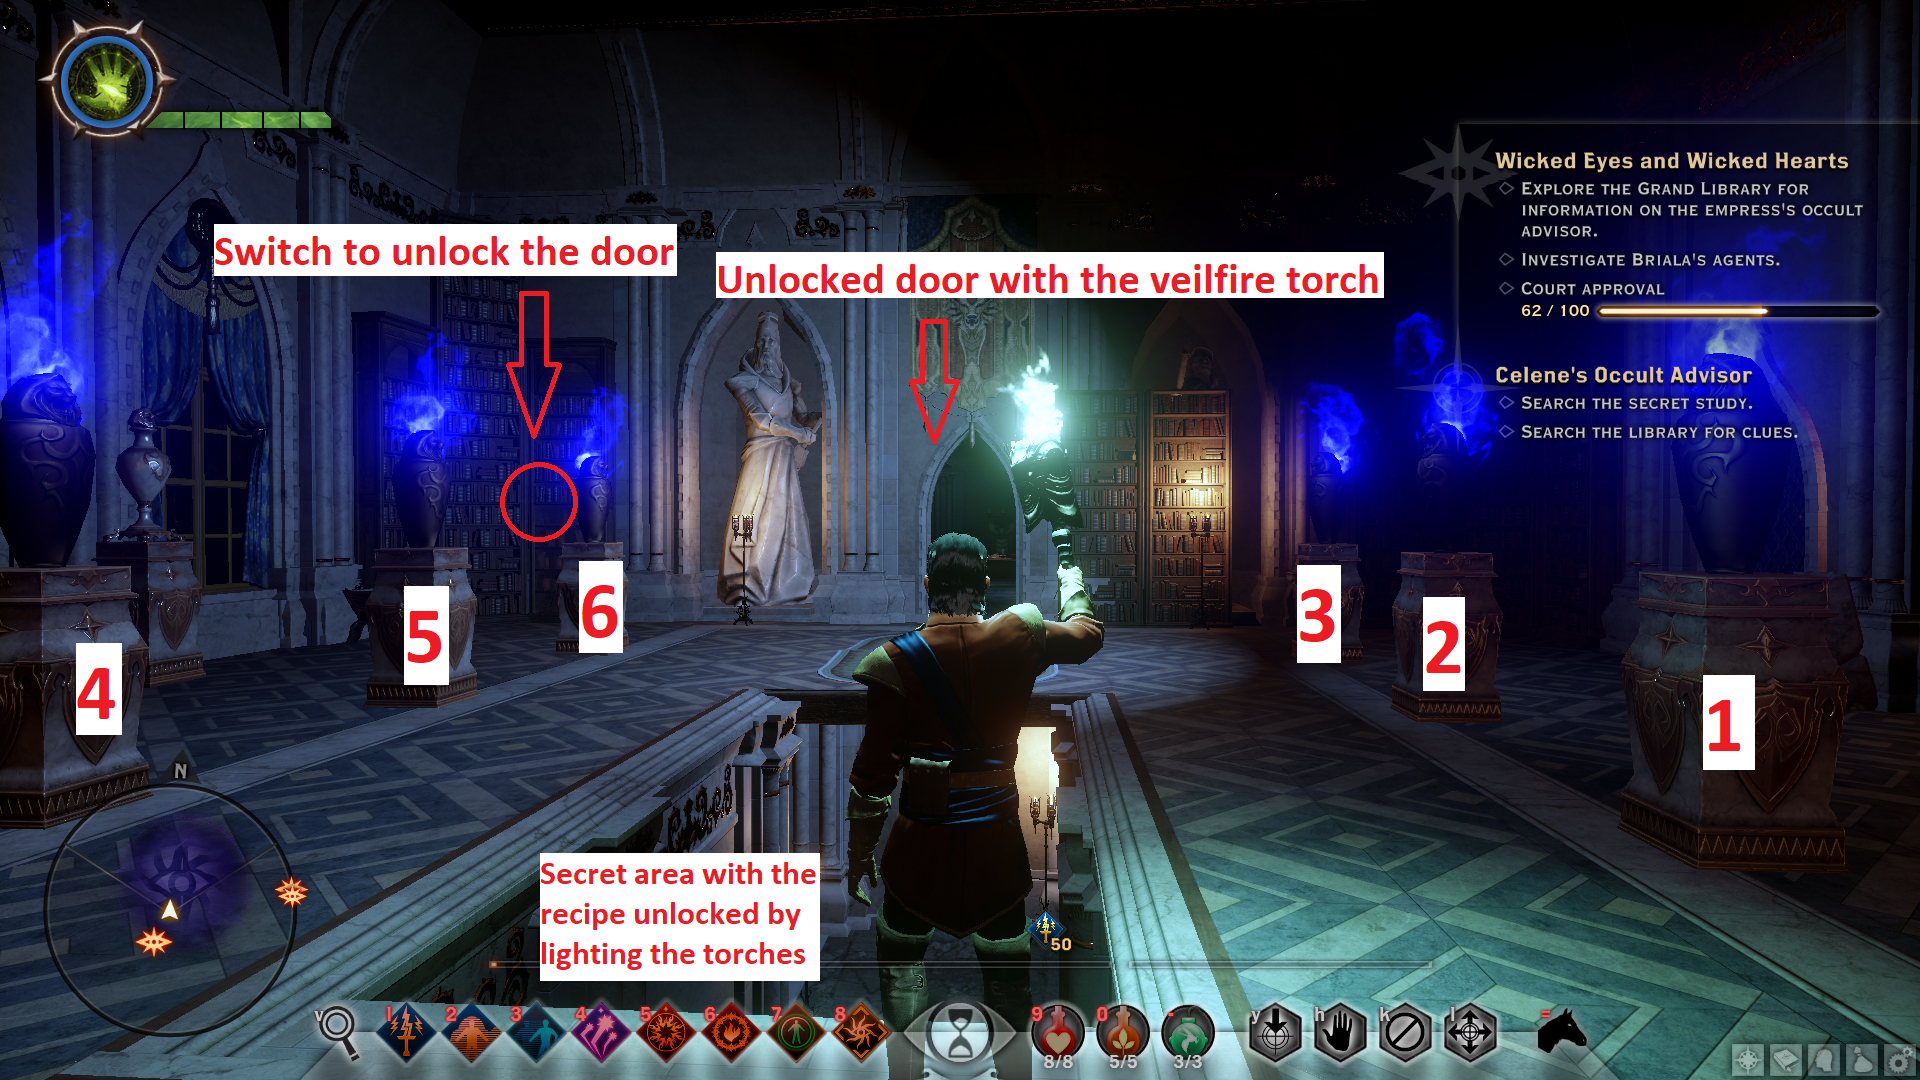
During the “Wicked Eyes and Wicked Hearts” main quest, you will have to explore the Grand Library. Enter the library by climbing the wooden frame near the fountain. Inside the library, there will be a room shown as below. Use the search function near the bookcase and interact with the switch to unlock the nearby door. inside the door there will be a veilfire brazier. Get a veilfire torch from that brazier and light the urns shown in the order below. After that, a secret area will unlock. The recipe will be in one of the chests inside the secret area.
Healing Mist
When entering Crestwood for the first time, you will automatically be given the “Still Waters” side quest. Going through with it, you will have to capture the Caer Bronach keep. After capturing the keep, enter its underground area through the ladder shown below.
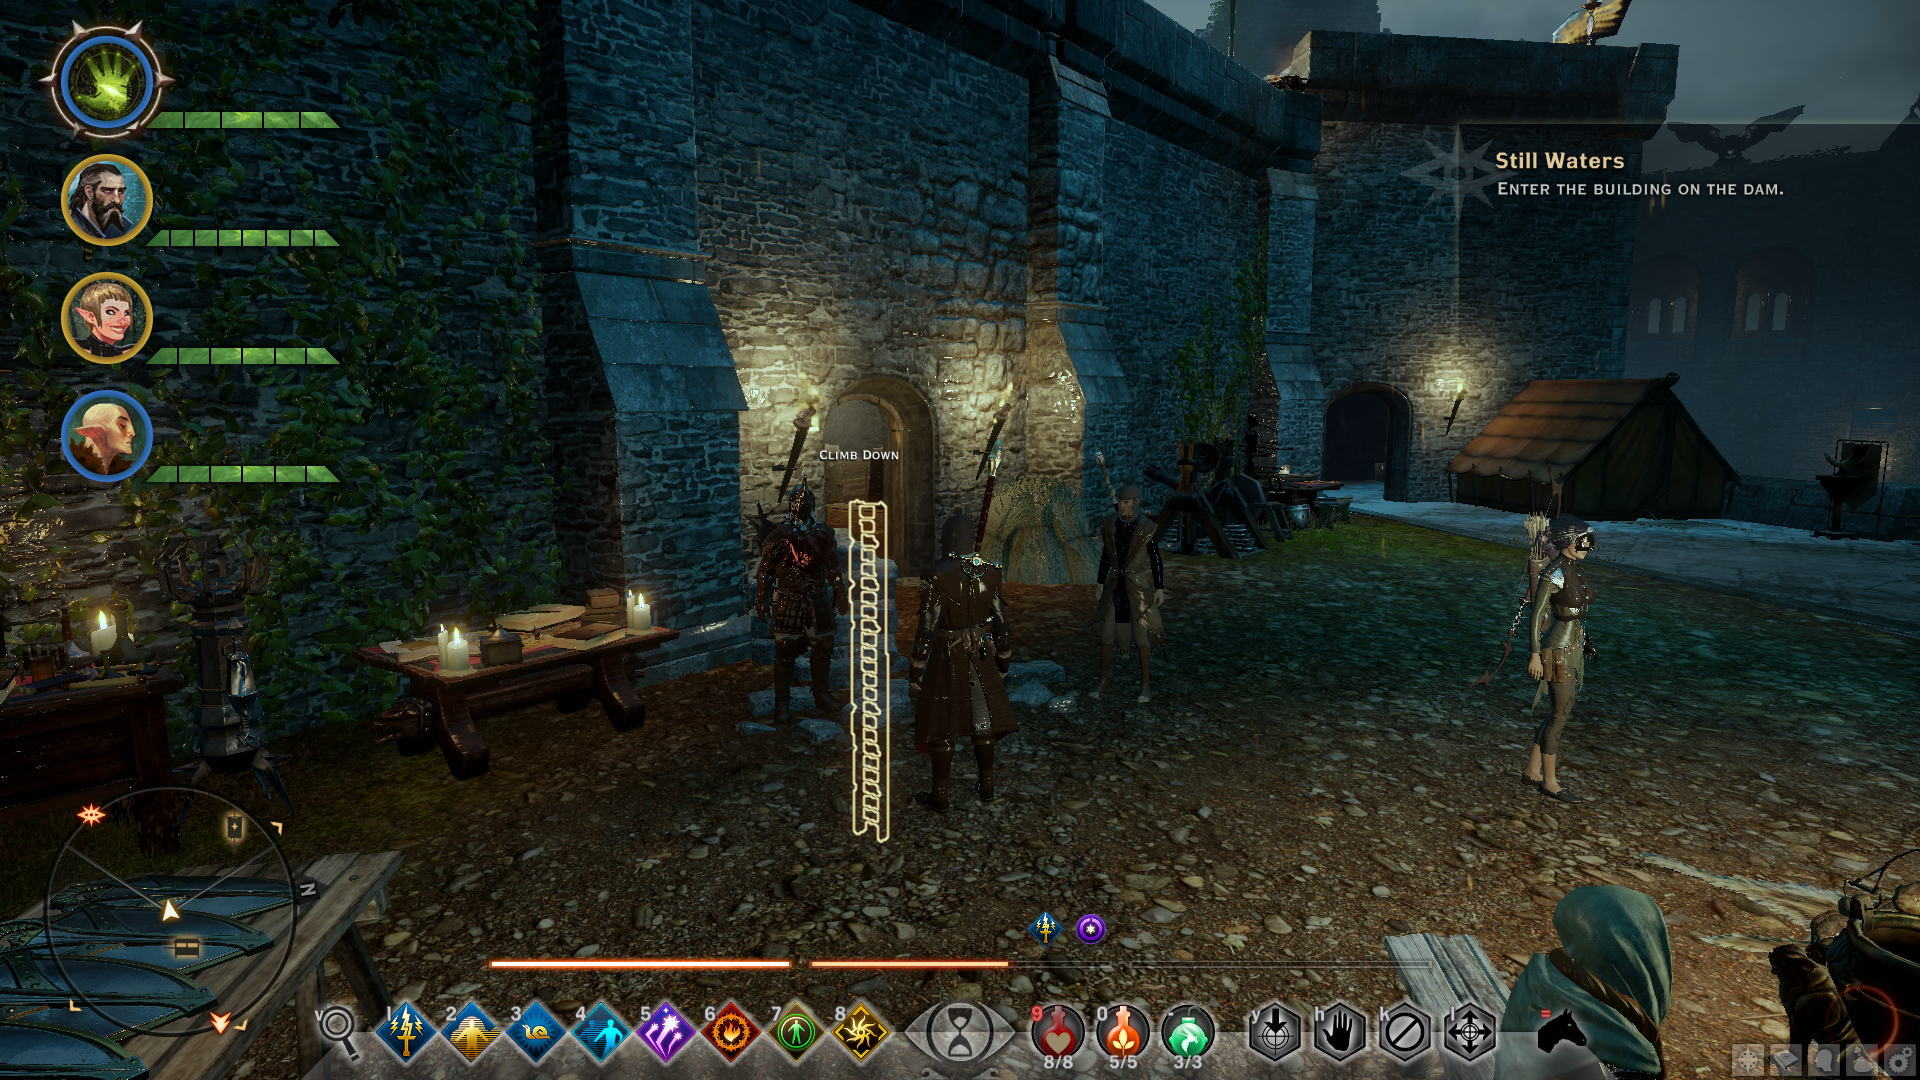
In the underground area, you will find a giant white spider named “Snowball”. Defeat it and loot it to get the recipe.
Companion Related Achievements
They Who Stand
Recruit a new companion.
The three companions you recruit at the beginning of the game do not count for this achievement. You need to recruit one more companion. See “The Brightest of Their Age” achievement below on how to recruit one.
The Brightest of Their Age
Recruit all possible companions in a single playthrough.
Cassandra
Recruited at the beginning of the game. Unmissable companion.
Varric
Recruited at the beginning of the game. Unmissable companion.
Solas
Recruited at the beginning of the game. Unmissable companion.
Sera
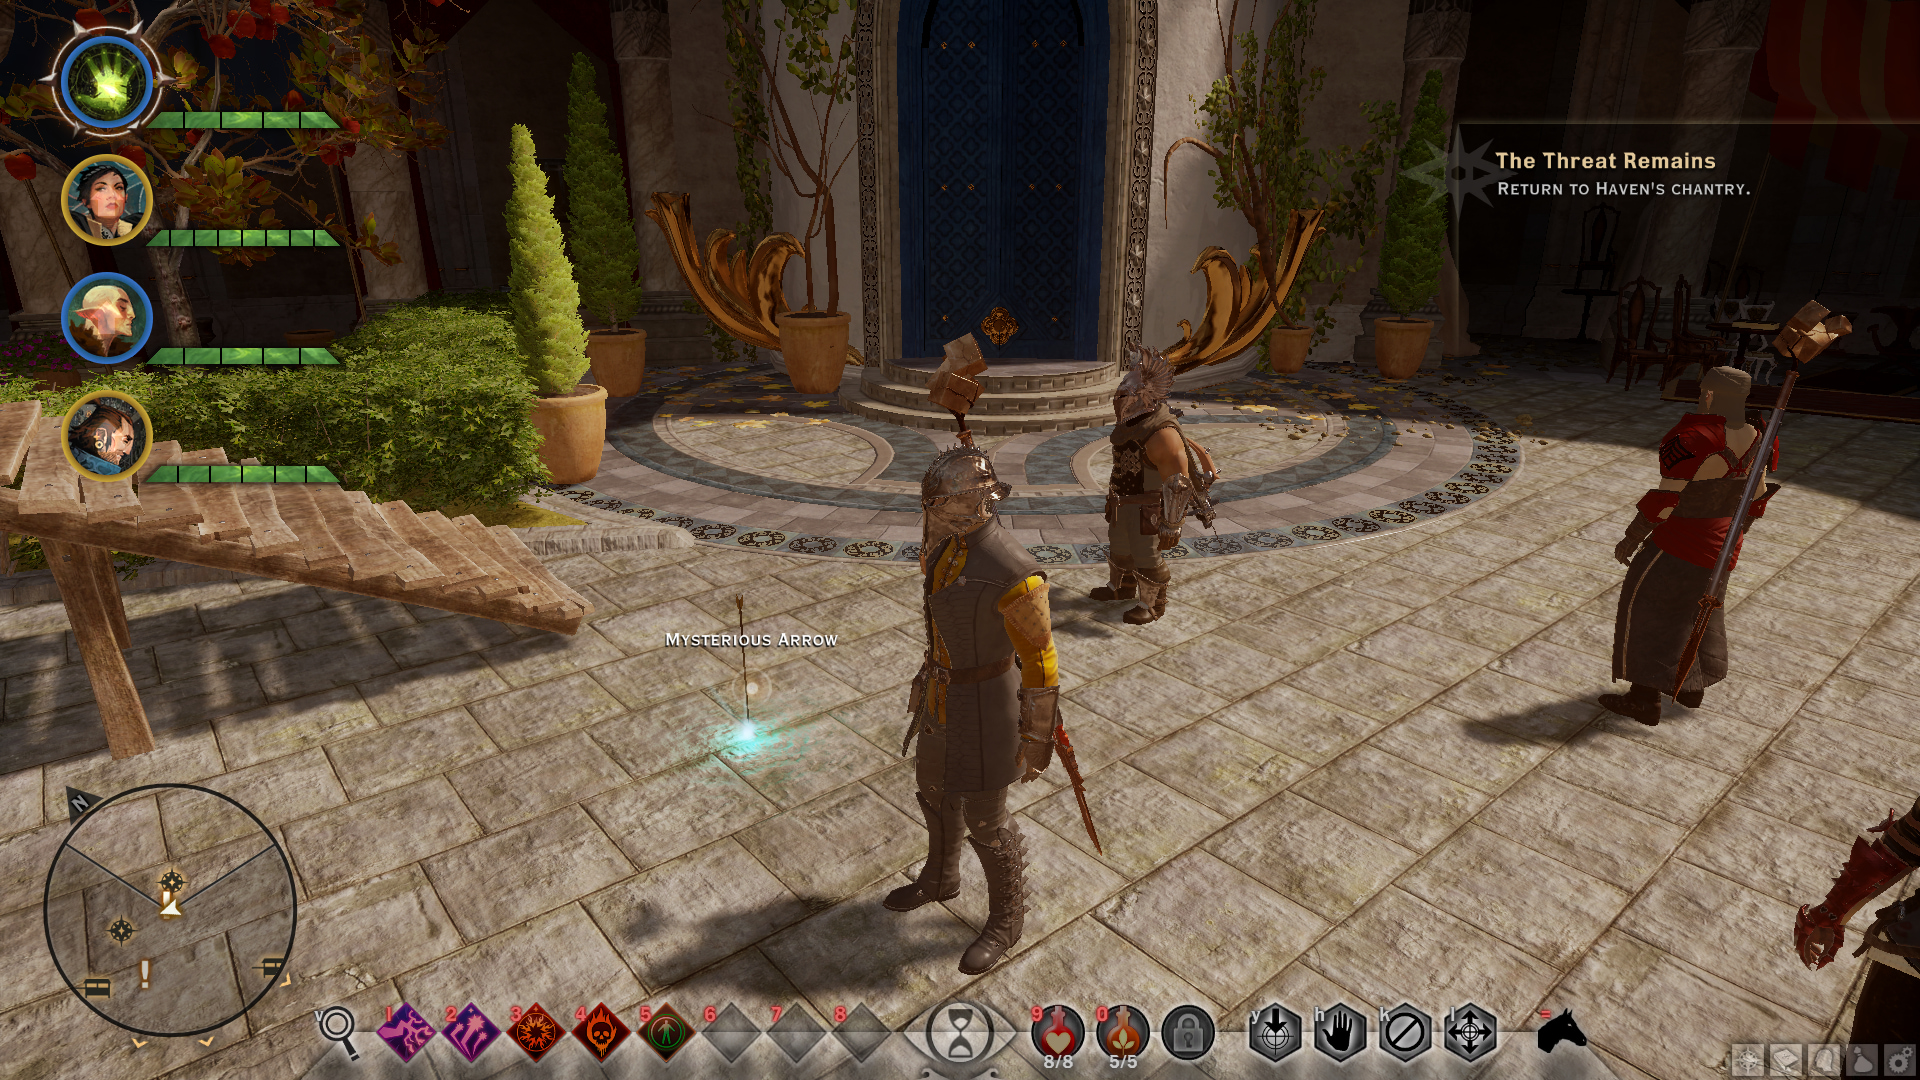
Just after you arrive to Val Royeaux for the first time, a cutscene with the Inquisitor, Chantry, and Lord Seeker Lucius will occur. After it ends and as soon as you move your character, an arrow will be shot on the ground near you. Cassandra will comment on it. Pick it up and the companion quest “A Friend of Red Jenny” will start. Complete the objectives in the quest which are very straightforward. Near the end of the quest, you will meet Sera. When she expresses interest in joining the inquisition, accept her offer. Missable companion.
Vivienne
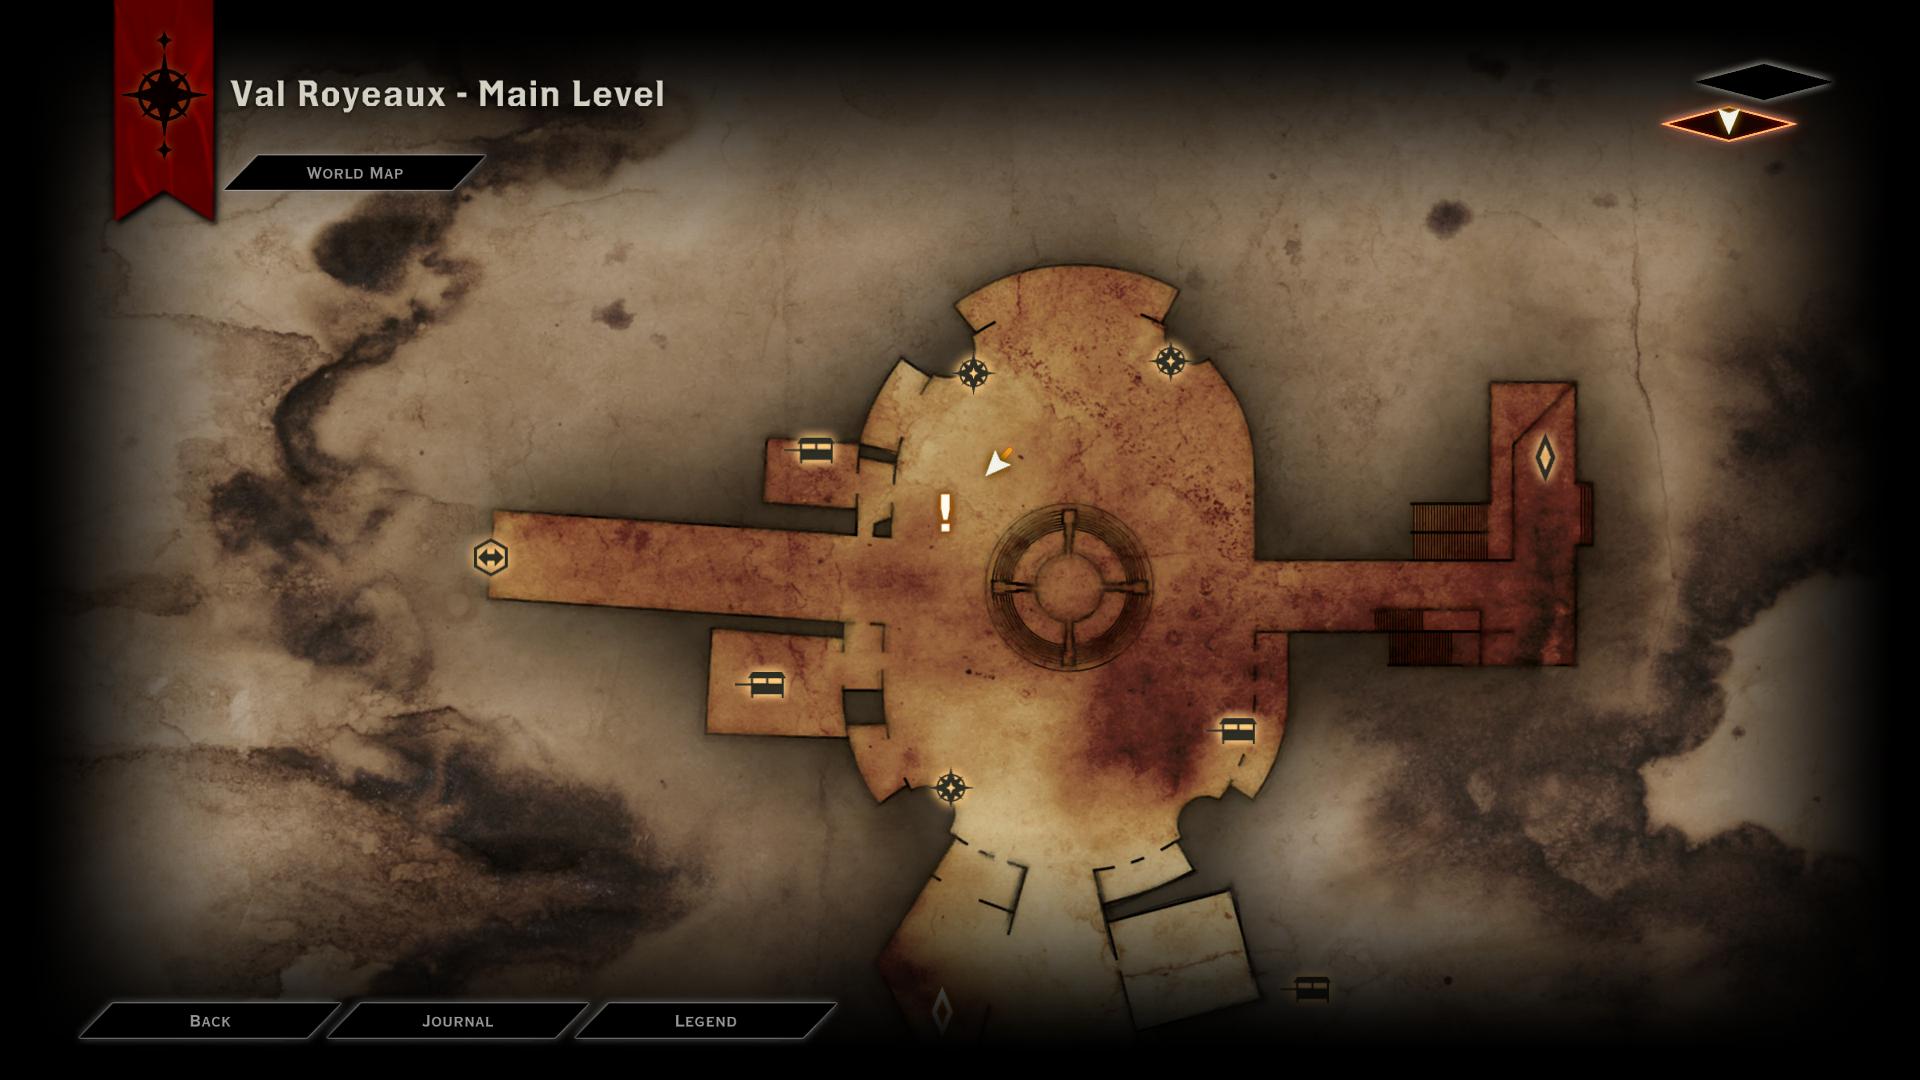
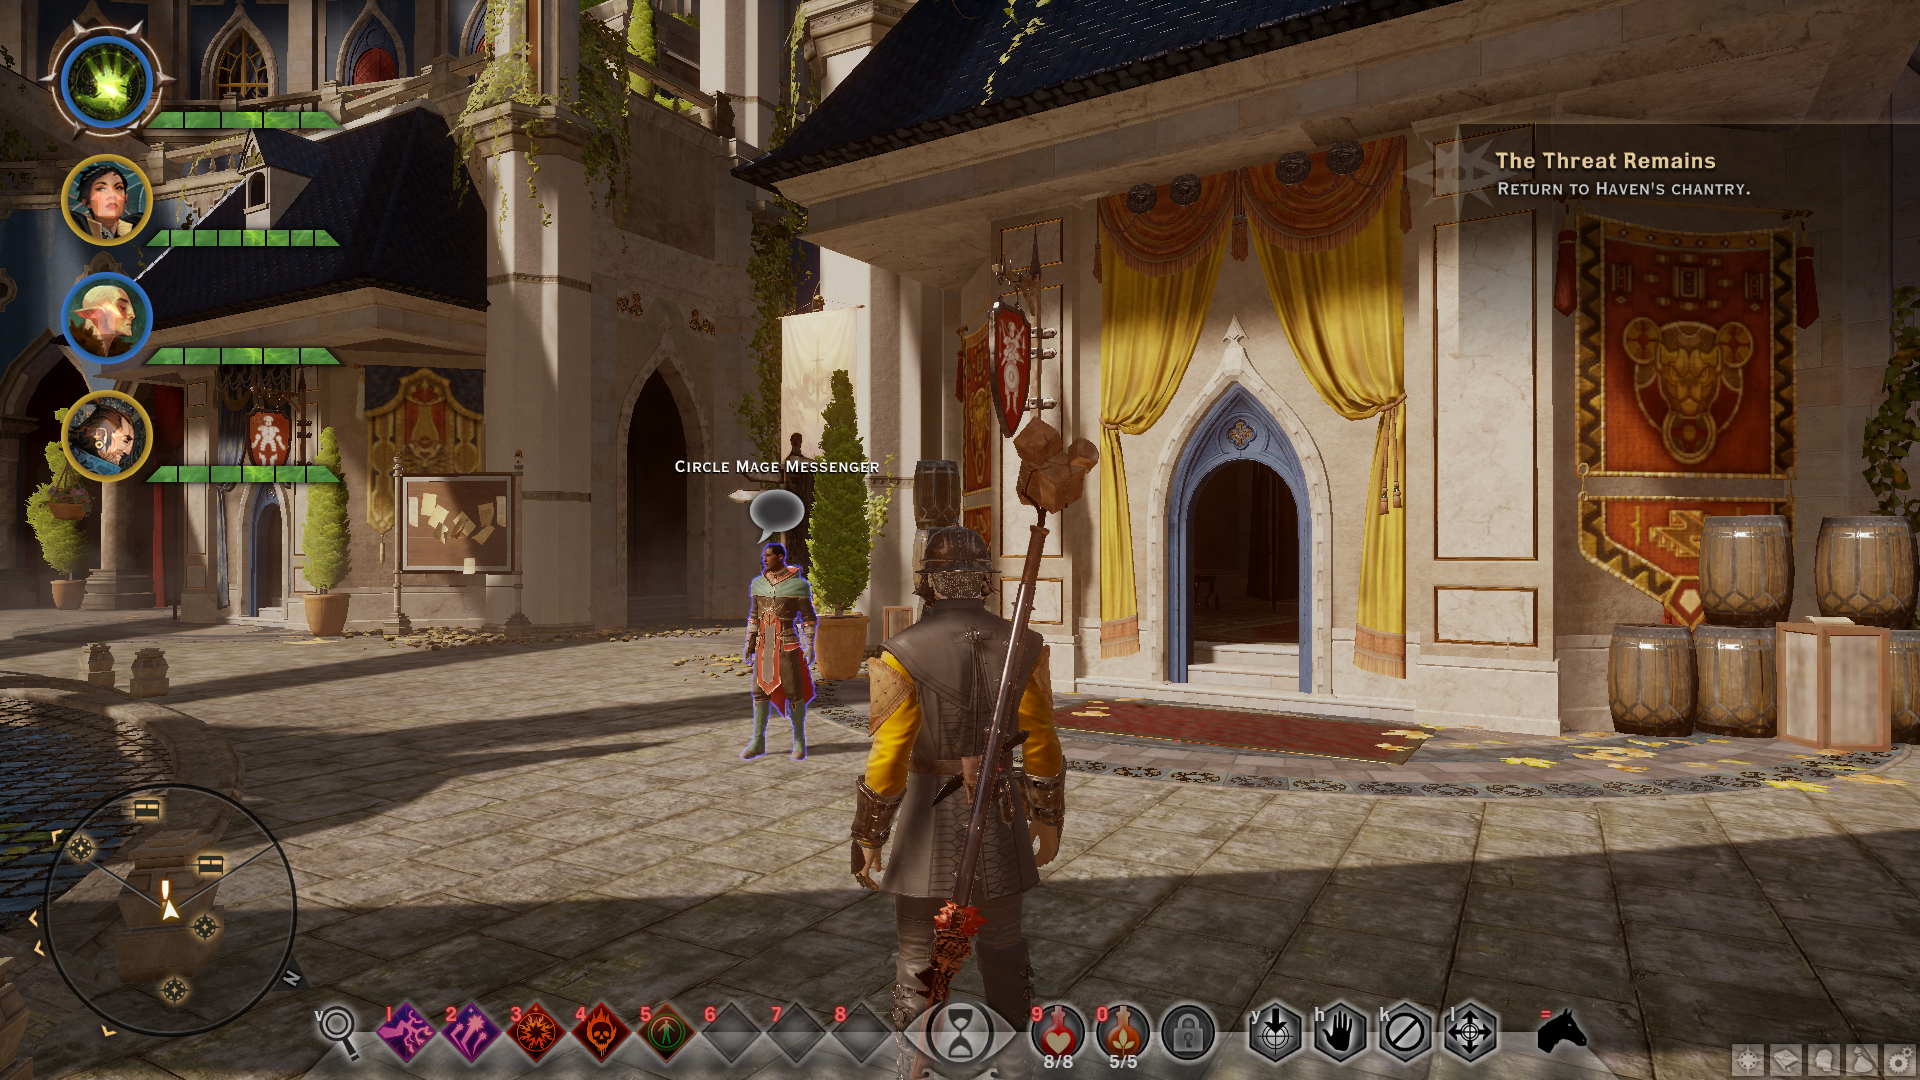
Similar to the Sera’s recruitment above, the quest to recruit Vivienne can be started just after the cutscene with the Inquisitor, Chantry, and Lord Seeker ends. After the cutscene, you can find a Circle mage messenger near the starting area of the map. Talk to him and you will start the “The Imperial Enchanter” companion quest. Complete its objectives and near the end of the quest, Vivienne asks to join the Inquisition. Accept her offer and she will join as a companion. Missable companion.
Blackwall
Just after returning to Haven after visiting Val Royeaux for the first time, a cutscene occurs between Cassandra, Cullen, Josephine, and Leliana. In it, Leliana will come and talk to you about her agents finding a Grey Warden called Blackwall and trigger “The Lone Warden” companion quest. Complete it. Near the end of the quest, Blackwall will ask to join the Inquisition. Accept his offer and he will join as a companion. Missable companion.
Iron Bull
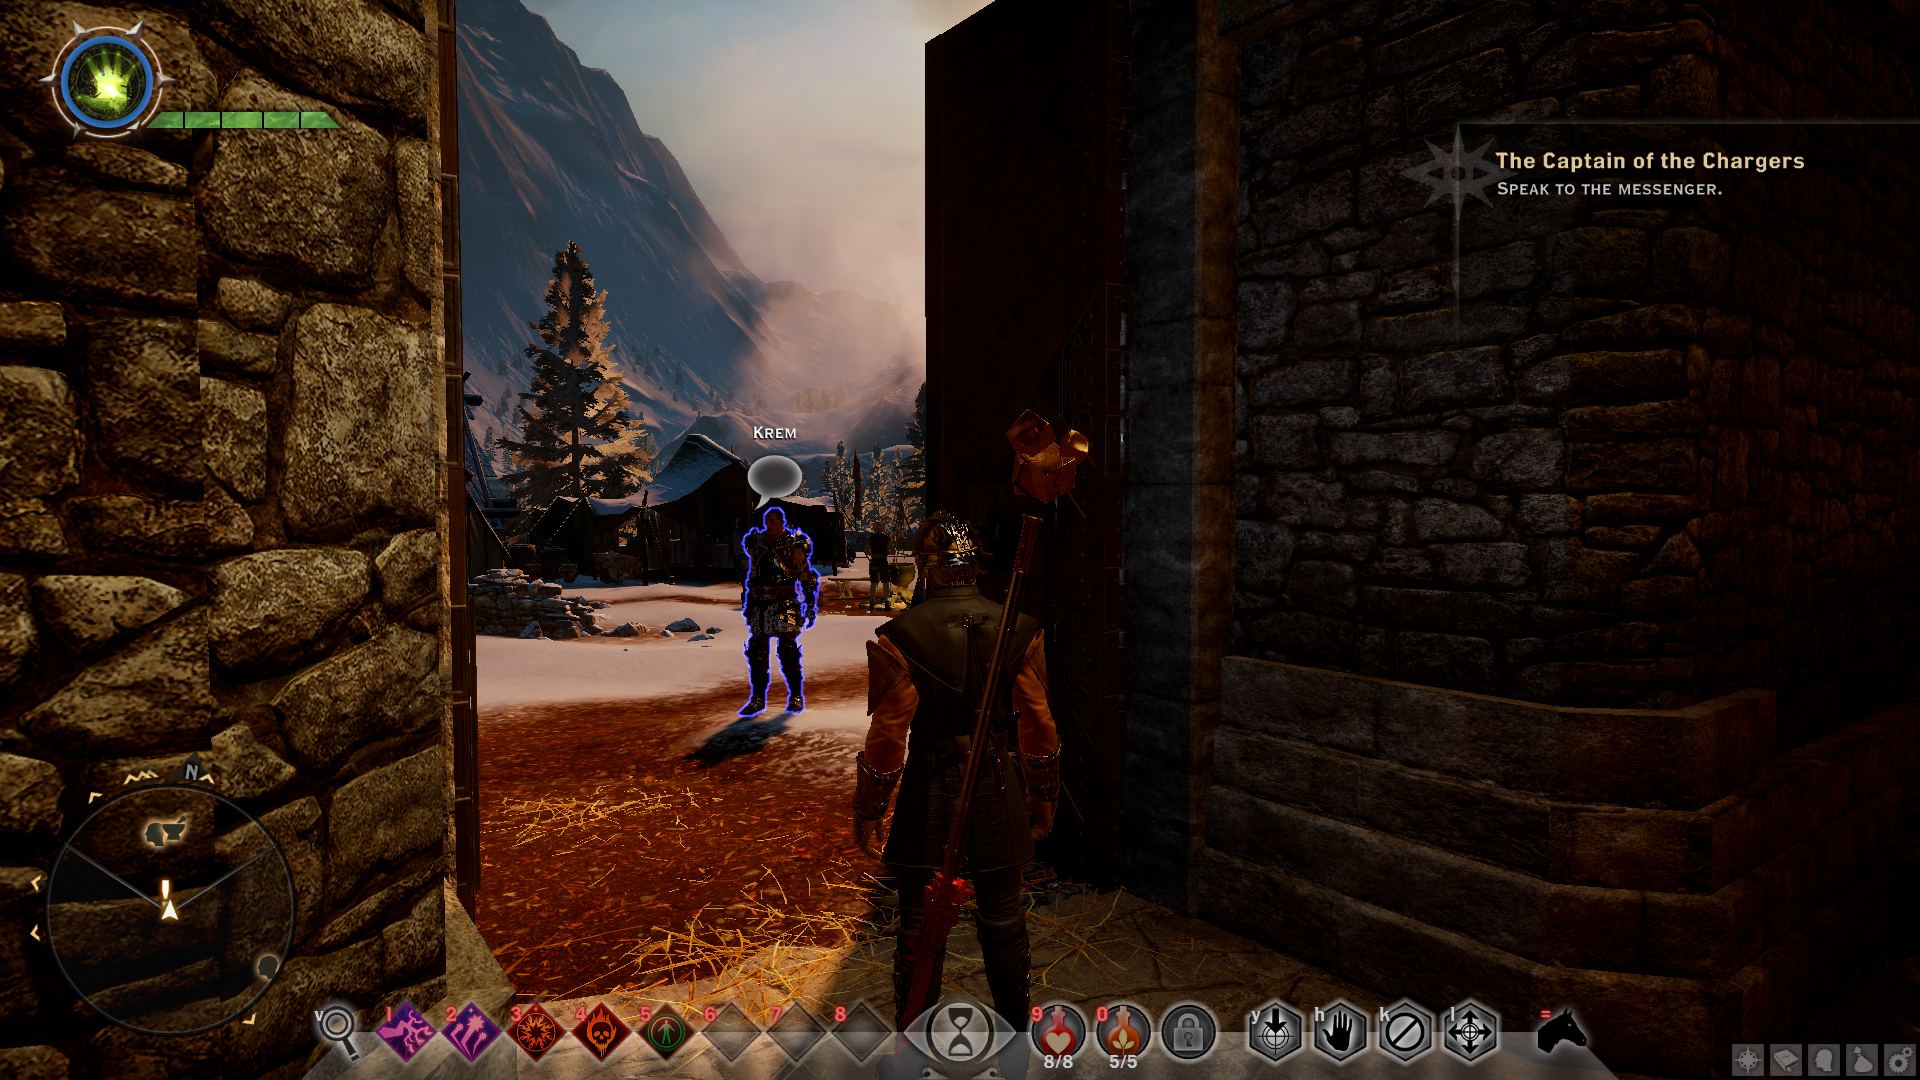
After returning back to Haven from your first visit to Val Royeaux, a cutscene will occur, after this, you can find Krem just outside the Haven Chantry’s doors. Speak with him and accept his offer and you will start “The Captain of the Chargers” companion quest. Complete its objectives and you will have a chance to recruit Iron Bull. Missable companion.
Cole
You always meet Cole while going through the main story. The chance to recruit him becomes available only after specific sections in either “In Hushed Whispers” or “Champions of the Just” quests. Missable companion.
If you completed “Champions of the Just”
Cole appears at Therinfal Redoubt to help the Inquisitor. After coming back to Haven, Cole appears on the War Table and tells the Inquisitor that he would like to join the Inquisition. Simply accept his offer and he will join as a companion.
If you completed “In Hushed Whispers”
Cole arrives at Haven near the beginning of the “In Your Heart Shall Burn” main quest to warn the Inquisition of the incoming threat. After completing the quest and moving to Skyhold, go near Cullen and use the “Look for Cole” option nearby. In the following cutscene, accept his help and he will join as a companion.
Dorian
Like Cole, you always meet Dorian while going through the main story. The chance to recruit him becomes available only after specific sections in either “In Hushed Whispers” or “Champions of the Just” quests. Missable companion.
If you completed “Champions of the Just”
Dorian arrives at Haven near the beginning of the “In Your Heart Shall Burn” main quest to warn the Inquisition of the incoming threat. After completing the quest and moving to Skyhold, he can be found near the library which is a floor above where Solas is located. Talk to him and he will offer his help to the Inquisition, accept it and he will join as a companion.
If you completed “In Hushed Whispers”
You will encounter Dorian during the “In Hushed Whispers” main quest. And he will be a temporary companion during the quest as well. At the end of this quest, he will ask to join the Inquisition. Simply accept his offer and he will join as a companion.
Companion Related Achievements (Continued)
Beloved and Precious
Commit to a romantic relationship.
TL;DR: Stick to one character when romancing, gain their approval, complete their companion quests, always talk to them, exhaust their dialogue options and always choose the flirt dialogue option when given the chance.
There are 8 fully romanceable characters in the game. They consist of party members and a few advisers. Each of them have a preferred race(s) and gender(s) and would only romance an Inquisitor if he/she is of their preferred gender(s) and race(s). You can only fully romance 1 character per playthrough.
I recommend that you select 1 character that you want to romance at the beginning of the game and keep choosing the flirt dialogue option (shown with a heart icon in the dialogue wheel) whenever it is available only on that character. Make sure to talk to them after main quests, events, and their companion quests to get new dialogue, exhaust all the dialogue options, and always select the flirt dialogue option if it is given.
If your romantic partner is a companion (not an adviser), it is recommended that you keep a high approval rating with that person (see the “People Person” achievement on how to gain approval) since most of the time, you need a high approval rating to unlock their companion quests. For most advisers and companions, you must complete their adviser/companion quests to commit to the relationship.
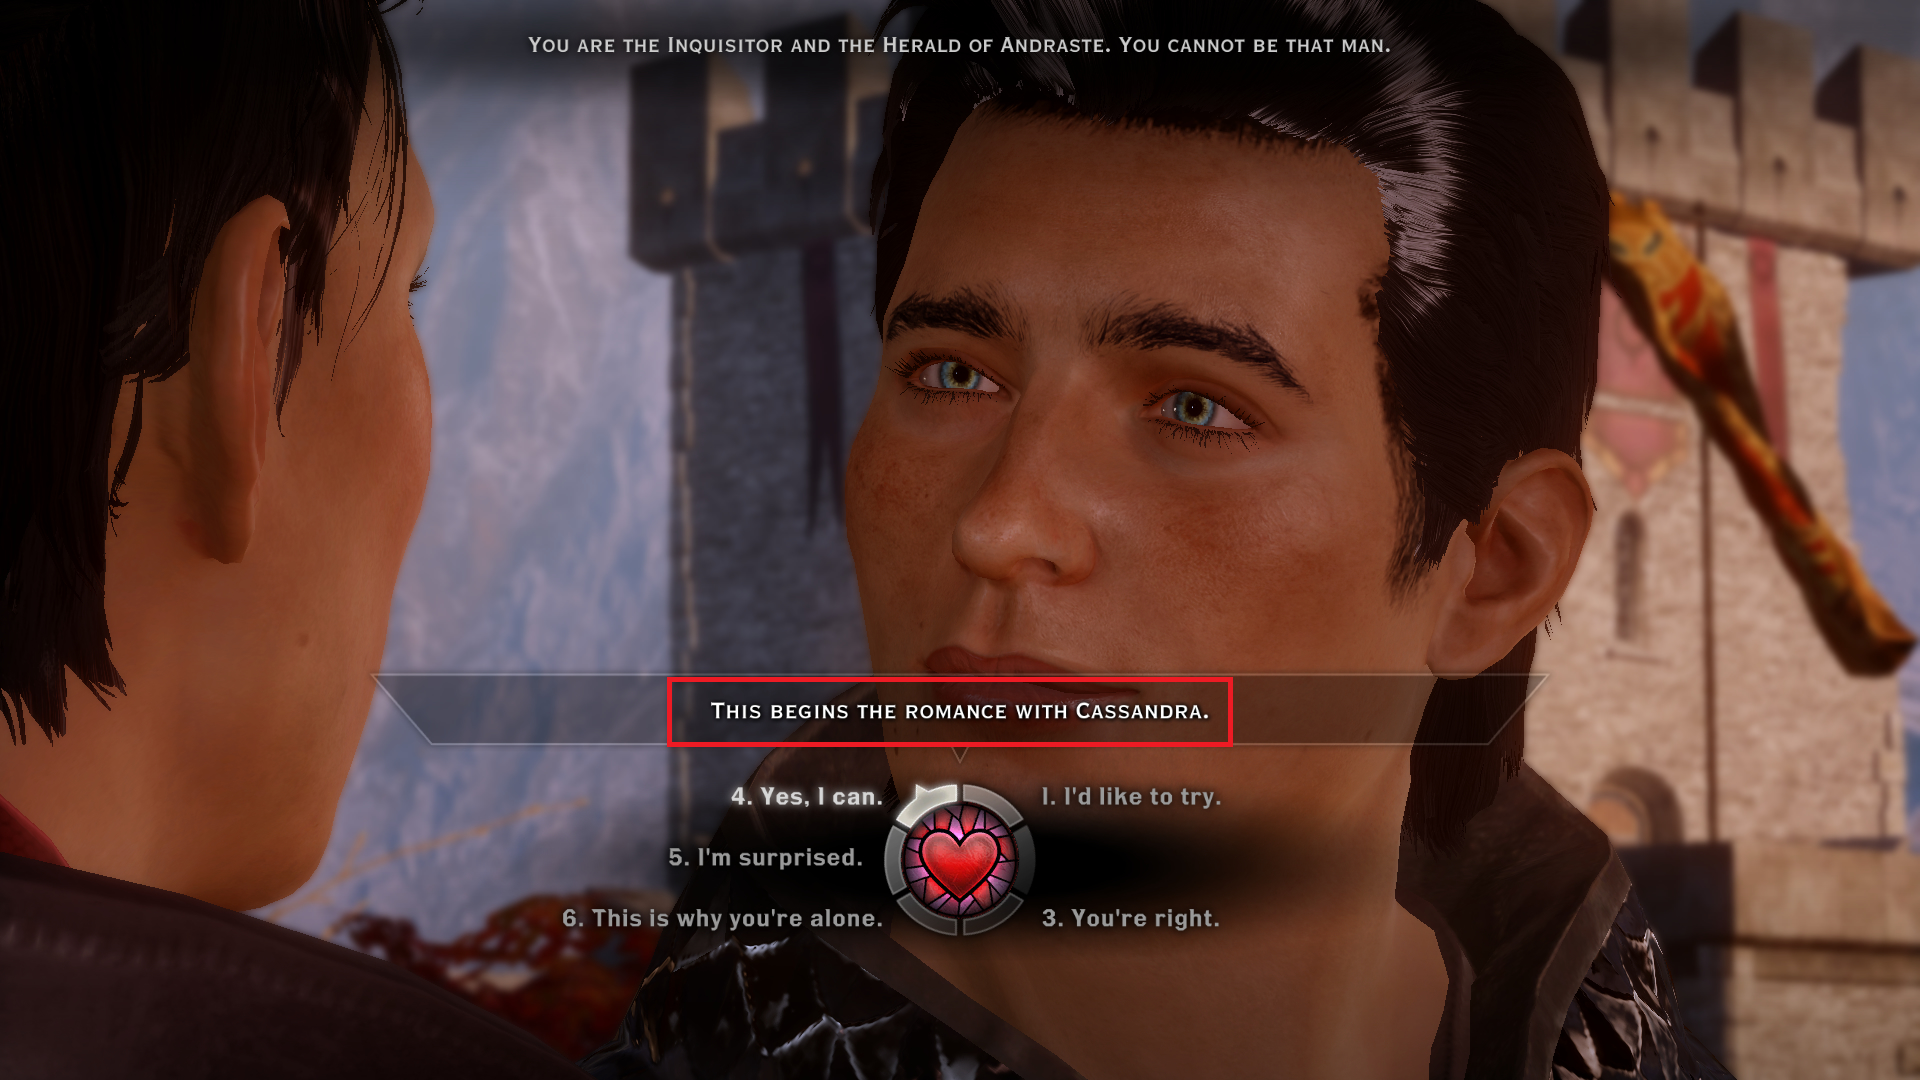
Keep flirting and you will eventually be given the option to officially initiate the romance arc with that character. The game will warn you that you will “…begin the romance with *character*” (shown below).
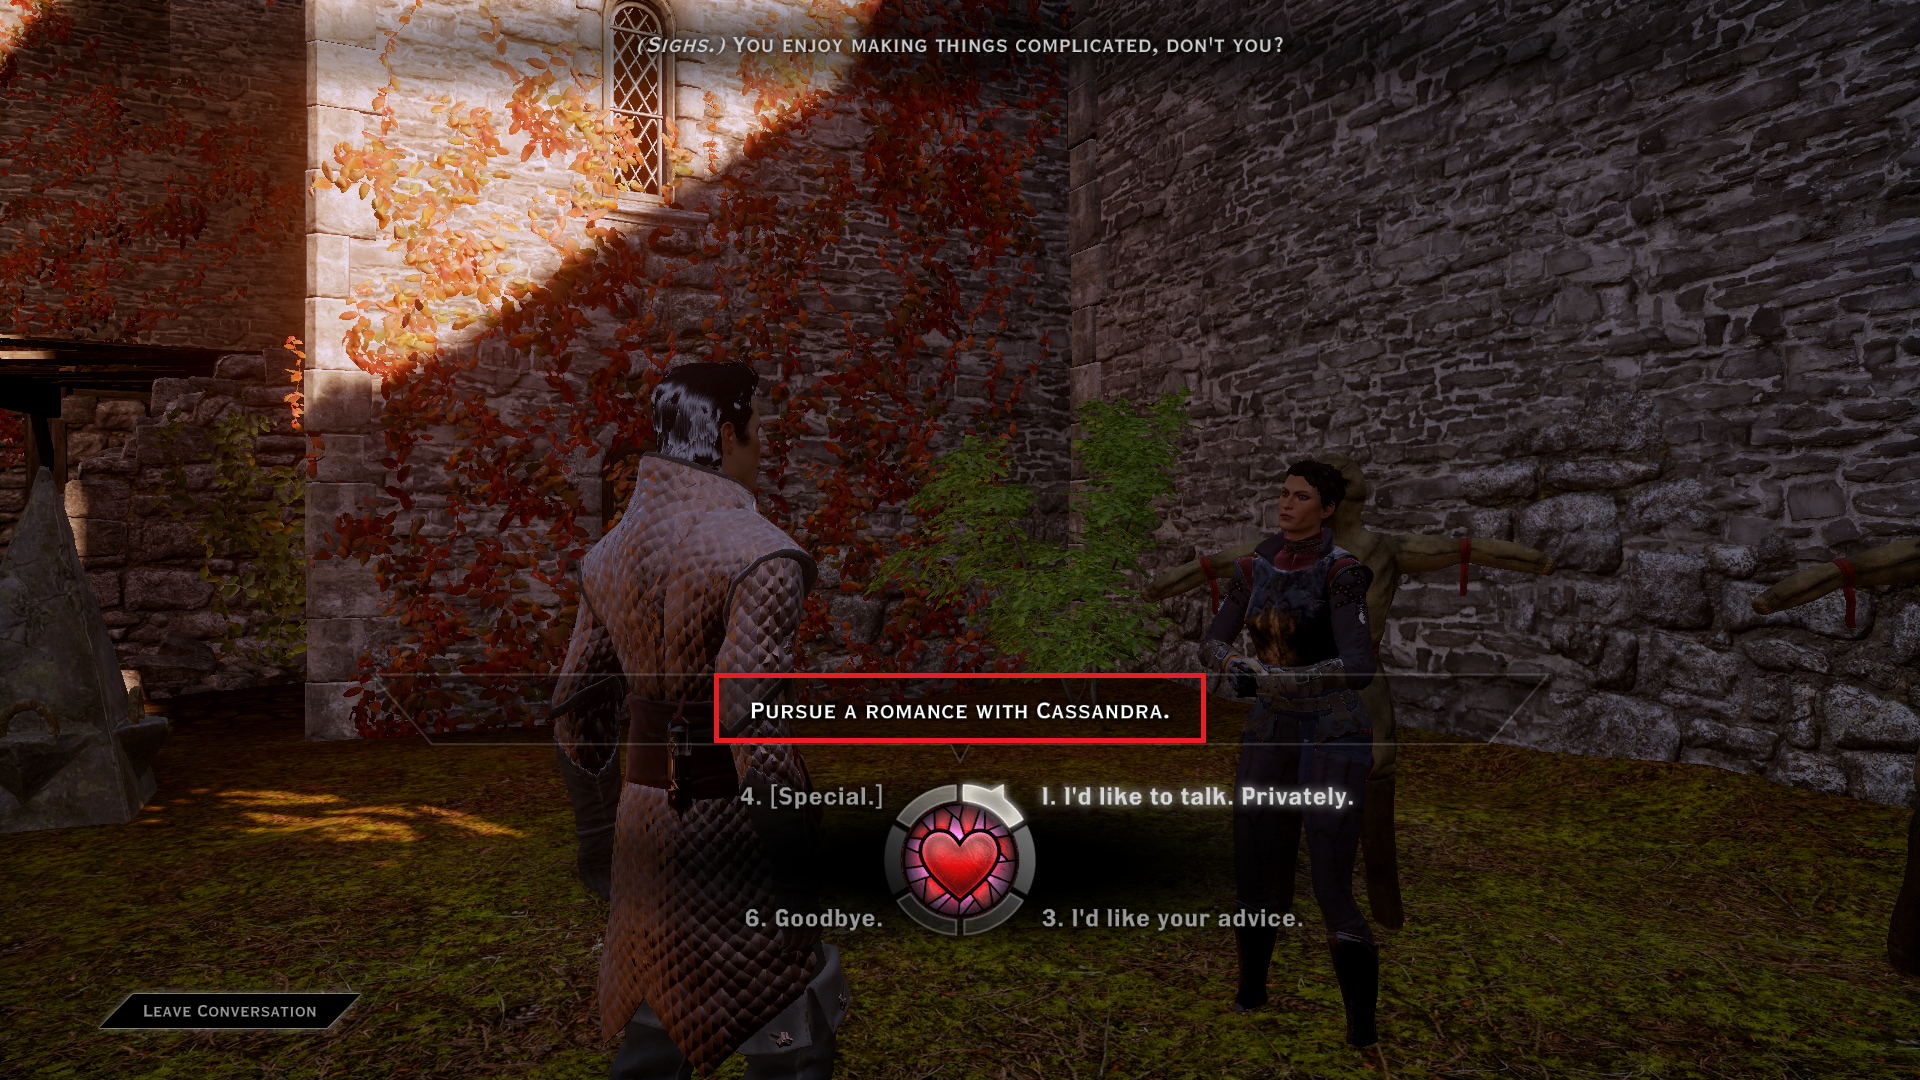
However, simply starting the relationship alone will not earn this achievement. You have to keep going through the romantic route and finish the romance scene to earn this. The game will warn you with “Pursue a romance with *character*” before the romance scene (shown below).
Below are the companions’ and advisers’ preferred race(s) and gender(s), and the beginning and pursuing points of the relationship with them. Keep in mind that you need a high approval rating with them to access some of the quests and dialogue.
Note: The “how to initiate the romance” part written below only describes how to officially start the relationship. You still need to keep continuing to flirt with the character and progress through the story and commit to the relationship to get the achievement.
Blackwall
Preferred race: Any (Dwarf, Elf, Human, or Qunari)
Preferred gender: Female
Initiating the romance: After the “Explanations” companion quest (which is acquired after flirting with him several times).
Cassandra
Preferred race: Any
Preferred gender: Male
Initiating the romance: After her “Promise of Destruction” companion quest, you will have the chance to begin the romance provided you’ve been flirting with her before.
Cullen
Preferred race: Human or Elf
Preferred gender: Female
Initiating the romance: Flirt with him whenever you can in Haven and talk to him after moving to Skyhold and choose the romance option.
Dorian
Preferred race: Any
Preferred gender: Male
Initiating the romance: Complete his companion quest “Last Resort of Good Men” (acquired by speaking to Mother Giselle when you have high Dorian approval) and choose the flirt dialogue option near the end of this quest. Or choose the flirt dialogue option when talking to him after that quest.
Iron Bull
Preferred race: Any
Preferred gender: Any
Initiating the romance: Keep flirting with Iron Bull and after getting to Skyhold, start his “Demands of the Qun” companion quest (which is acquired after asking him about Qunari and having high approval). After the quest speak with him and agree to the romance encounter, talk with him again and you can properly start the romance.
Josephine
Preferred race: Any
Preferred gender: Any
Initiating the romance: Keep flirting with her whenever you can. After coming to Skyhold, ask her about her family and talk to her again after a while to get “Of Somewhat Fallen Fortune” quest. Complete it and choose the flirt dialogue option at the end (you might need to exhaust the “Investigate” dialogue branch to get the flirt option). Back at Skyhold, she will tell you to talk to Leliana. Talk to Leliana and tell her that you are serious about Josephine. Talk to Josephine again after this and choose the flirt dialogue option and start the romance.
Sera
Preferred race: Any
Preferred gender: Female
Initiating the romance: Keep flirting with her from the beginning and gain a large amount of approval with her. Upon reaching Skyhold, talk with her and get her “The Verchiel March” quest (in which you have to approve her on actions in the quest) After that, with high approval, you can help her with her pranks. Keep flirting and with enough approval, you can initiate the romance with her.
Solas
Preferred race: Elf
Preferred gender: Female
Initiating the romance: Flirt with him whenever you can in Haven. After reaching Skyhold, exhaust his dialogue options and you will enter a scene with him Haven in the Fade. Choose the flirt dialogue option and kiss him there. After coming back to Skyhold, speak with him again and start to the romance saying you will risk it.
Companion Related: “People Person” Achievement
People Person
Become friends with at least three of your inner circle in one playthrough.
TL;DR
How to unlock the quests inside the quotations are explained in the detailed character sections under this achievement.
- Blackwall: Complete “Memories of the Grey” with him in the active party. Support Grey Wardens whenever you can to earn approval his as well.
- Cassandra: Complete “Unfinished Business” with her in the active party. Complete “Guilty Pleasures” and “Promise of Destruction”. Accepting your role as the Heral/Inquisitor and being religious and faithful to Maker and Andraste will earn approval with her as well.
- Vivienne: Complete “Favors the First Enchanter” with her in the active party. Complete “Bring Me the Heart of Snow White” with giving her the correct item. Being religious and supporting the Chantry and Circle of Magi will earn approval with her as well.
- Iron Bull: Complete “Demands of the Qun”. After completing “Lost Souls”, judge Chief Movran and exile him to Tevinter. Kill high dragons and Venetori enemies with him in the active party.
Longer Version
Companions in DA:I have 5 relationship levels;
- Hostile: -75 to -30
- Cold: -29 to -5
- Neutral: -4 to 34
- Warm: 35 to 74
- Friendly: 75 to 125
You need to have the “Friendly” level with at least 3 companions at the same time to unlock this achievement. All the companions except Cole and Dorian start with 0 points (“Neutral” level) when recruited. Cole and Dorian’s levels depend on who you choose to support after “The Threat Remains” main quest. This is not a difficult achievement to earn, but you need to be careful of not loosing too much approval from many companions since each companion has different views which can gain or lose you approval depending on the choices you make throughout the game.
For a much more detailed walkthrough regarding how to manage choices regarding companion approval, I recommend going through the dragonage.fandom.com – https://dragonage.fandom.com/wiki/Approval_(Inquisition) of Dragon Age Wiki.
The approval gains throughout the game are as as follows;
- Slightly Approves (noted in + throughout this guide): +1 point
- Slightly Disapproves (noted in – throughout this guide): -1 point
- Approves (noted in ++): +5 points
- Disapproves (noted in –): -5 points
- Greatly Approves (noted in +++): +25 points
- Greatly Disapproves (noted in —): -25 points
Note: Many side quests and operations allow you to gain/lose minor (+) to medium (++) amount of approval from some companions depending on the choices made. And choices made in main story quests allows you to gain/lose large amount of approval (+++) as well. I have not included these in this guide since they contain massive spoilers and would make this guide much more longer. But each companion’s personality can give you an idea on how they would react to these choices you make. However, if you do not mind the spoilers and would like to know the exact dialogue choice which nets you approval, refer the wiki article I’ve linked above.
Below are all the companions and their personality traits which you can use to understand them. On some companions, I have also listed some of their companions quests which can easily net you a large amount of approval. Use the information given below to befriend 3 companions and earn this achievement.
Cassandra
Personality & Behaviour
- Deeply religious.
- Likes when the Inquisitor accepts their position as the Herald of Andraste.
- Likes when the Inquisitor praises the Maker, Andraste, and the Chantry.
- Likes religious institutions such as the Circle of Magi and Templar Order and dislikes opposing/changing them.
- Likes when the Inquisitor reaffirms her beliefs.
Companion Quests
- “Unfinished Business”: Available after talking to Cassandra in Skyhold. Kill the given targets while she’s in the active party. +++Cassandra for each target killed (only ++Cassandra if she’s not in the active party).
- “Guilty Pleasures”: Triggers while talking to her with +35 approval at Skyhold. Simply don’t be a jerk during the dialogue. +++Cassandra at the end.
- “Promise of Destruction”: Triggers after speaking to her in Skyhold after finishing the Crestwood part of “Here Lies the Abyss” main quest. +++Cassandra at the end. Unlocks her romance path after this quest provided the Inquisitor has flirted with her before.
Varric
Personality & Behaviour
- Likes when Inquisitor takes his side and is friendly with him.
- Likes when inquisitor makes jokes and act in a witty manner.
- Gains +Varric when killing Red Templars with him in the active party.
- Likes when Inquisitor acts selflessly.
Companion Quests
- “Seeing Red”: Can be triggered after talking to Varric at Haven or Skyhold and asking him about red lyrium. Destroy the red lyrium nodes given in this quest with him in the active party to get ++Varric each time a node is destroyed. There are a total of 18 red lyrium nodes.
Solas
Personality & Behaviour
- Like when the Inquisitor is curious about knowledge, ask questions, be thoughtful, and generally being Inquisitive (pun intended).
- Likes when the Inquisitor supports mages, the Fade, and spirits.
- Dislikes when the Inquisitor chooses actions that go against the above values.
- Dislikes when the Inquisitor is disrespectful of the elven culture (especially if the Inquisitor is an elf).
Sera
Personality & Behaviour
- Dislikes elven things and being asked about elven things.
- A quinari Inquisitor will gain the most approval with her, while an elven Inquisitor will gain the least amount.
- Dislikes magic and supporting mage freedom.
- Dislikes nobility and doing things to appease nobility.
- Likes when Inquisitor agrees with her.
- Likes pranks.
- Dislikes being questioned about her actions or disagreeing with her and her actions.
Vivienne
Personality & Behaviour
- Dislikes the chaos the came from the mage rebellion, rebel mages, and helping them.
- Likes old status quo and dislikes change.
- Religious.
- Likes the Chantry and would like for things to go back to how they were before.
- Likes the Circle of Magi and would like to bring mages back to the Circle of Magi.
- Ambivalent towards Templars.
- Likes when the Inquisitor engages in politics.
- Dislikes when the Inquisitor disagrees with her.
Companion Quests
- “Favors the First Enchanter”: To trigger this, talk to her about helping her rebuild the Circles of Magi after recruiting her. Do the quest and at the end you will gain +++Vivienne.
- “Bring Me the Heart of Snow White”: Triggered after “Wicked Eyes and Wicked Hearts” main quest. Give her the actual snowy wyvern heart to get +++Vivienne.
Blackwall
Personality & Behaviour
- Likes when the Inquisitor helps and protects the helpless and inspires others to do the same.
- Likes praising and helping Grey Wardens.
- Gains +Blackwall when killing darkspawn with him in the active party.
- Dislikes helping selfish power hungry individuals.
- Dislikes needless punishment.
Companion Quests
- “Memories of the Grey”: Triggered after speaking to Blackwall after recruiting him. If not triggered at the first attempt, keep talking to him until it does. Finding each artefacts (which are shown on the map) using the search function with him in the active party nets you +++Blackwall (without him in the active party it’s only ++Blackwall). There are 10 artefacts in total spread throughout 5 wilderness areas.
Companion Related: “People Person” Achievement (Continued)
People Person(Continued)
Iron Bull
Personality & Behaviour
- Gains +Iron Bull when killing Venatori enemies with him in the active party.
- Likes killing high dragons (+++Iron Bull the first time if you kill a high dragon with him in the active party. ++Iron Bull each time after that)
Companion Quests
- Completing “Lost Souls” side quest in Fallow Mire. After that you can judge Chief Movran back in Skyhold. Choose to arm and exile him to Tevinter (+++Iron Bull, +1 Agent)
- Talk with Iron Bull and ask him about Ben-Hassrath. Earn +35 approval and trigger his drinking with Chargers cutscene. Speak to him after all of this he will give you the “Demands of the Qun” companion quest. Go through the quest and choose any choice after the signal goes up. You will earn +++Iron Bull back at Skyhold regardless of whatever choice you make. However, the choice massively affect his fate in the Trespasser DLC (regardless if you did this quest or not).
Cole
Personality & Behaviour
- Likes when the Inquisitor selflessly helps people.
- Likes when Inquisitor kills/punishes people who hurt others.
- Dislikes when the Inquisitor blames him for his past mistakes.
- Dislikes when the Inquisitor imprisons people in judgements.
- Cole’s approval will be gained or lost regardless if he’s in the active party or not.
Companion Quests
- “Subjected to His Will”: To get this quest, speak to Cole after completing the “Here Lies the Abyss” main quest and you will get the “Obtain Amulet for Cole” war table operation. Complete it, talk to Cole and give the amulet to Cole. Either of the choices you make regarding Cole in this quest will net you +++Cole.
Dorian
Personality & Behaviour
- Likes when the Inquisitor flirts with him (regardless of Inquisitor’s gender).
- Likes when the Inquisitor makes witty remarks.
- Likes when the Inquisitor supports mages.
- Dislikes when the Inquisitor blames Tevinter or mages.
Companion Quests
- “One Less Venatori”: After moving to Skyhold and talking with Dorian, you will unlock the war table operation, “Dorian’s Request”. Complete it and you will unlock “One Less Venatori” companion quest. Doing this quest will give you 2 +++Dorian and 1 ++Dorian approval.
Exploration/Map Related Achievements
Trailblazer
Discover a campsite and establish an Inquisition camp in any wilderness area.
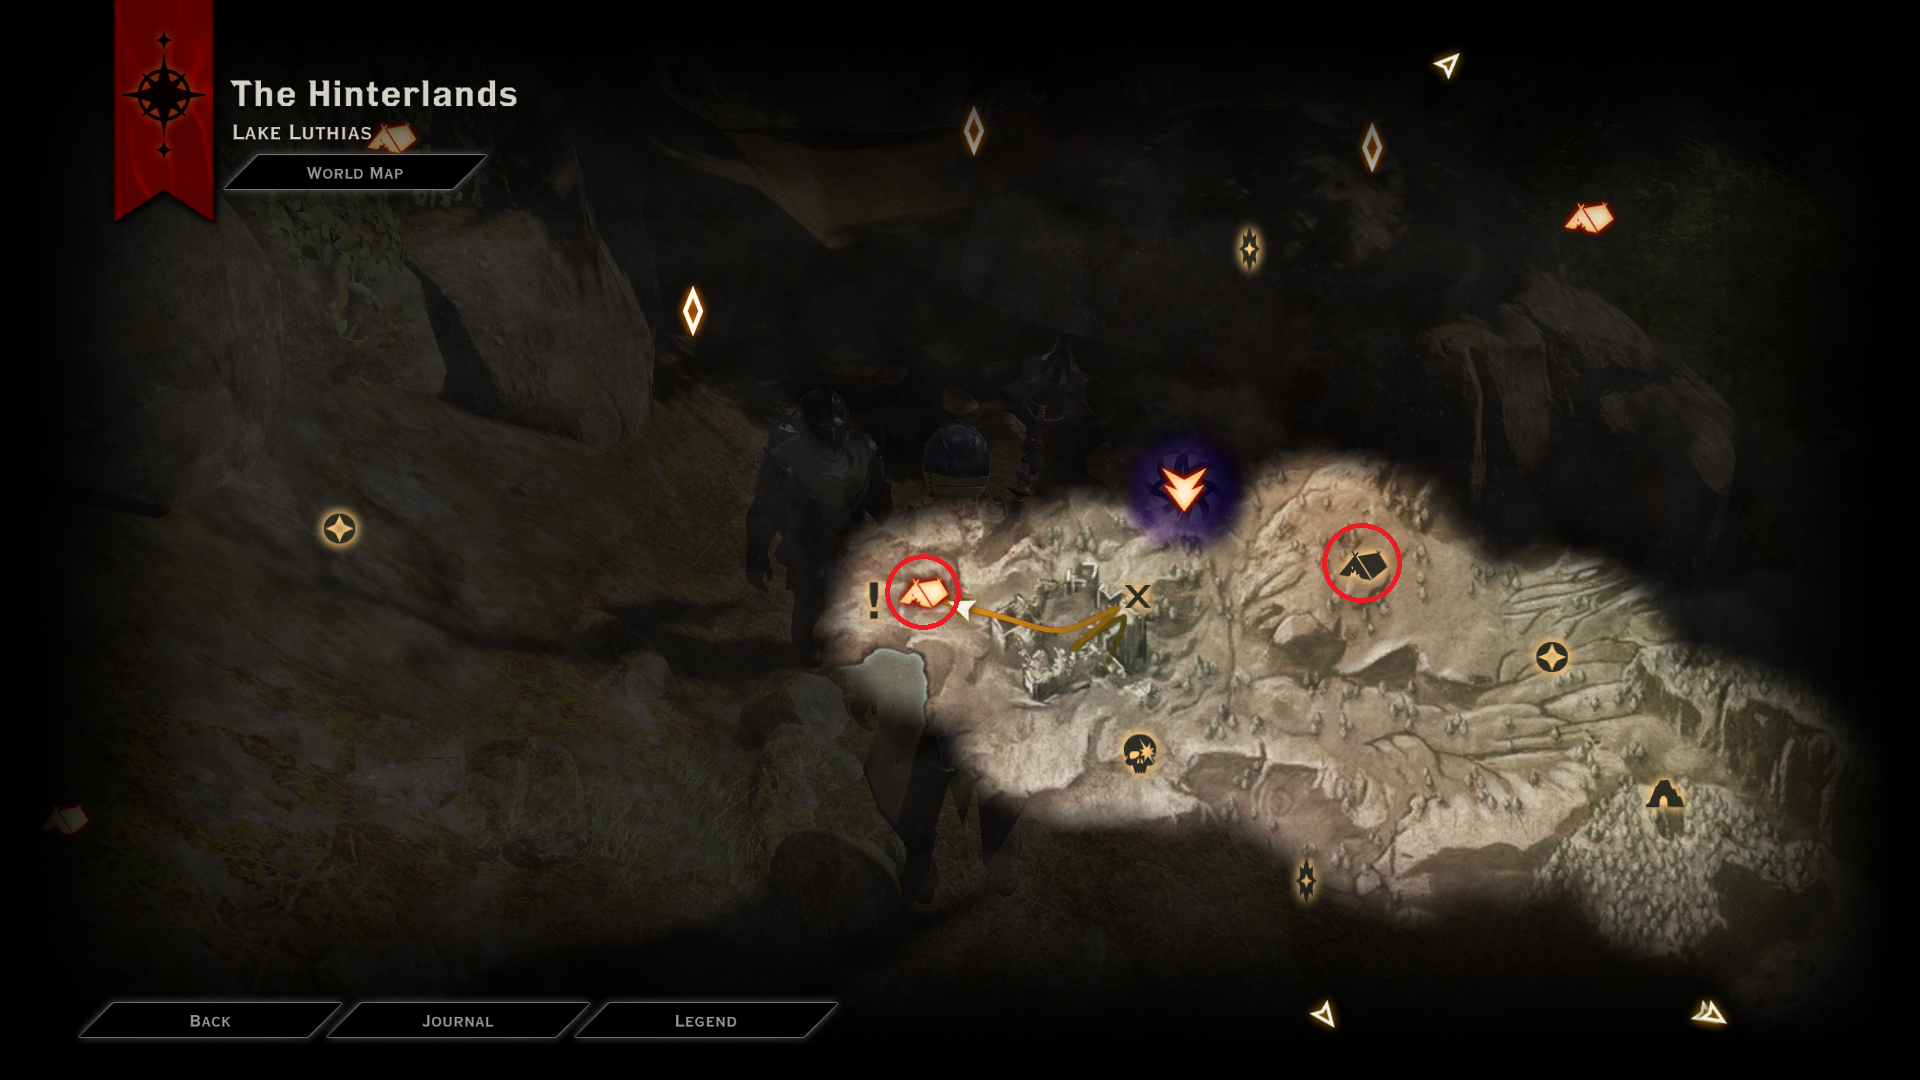
You can earn this as soon as you first arrive in Hinterlands. Simply go to any campsite location that is marked on the map (shown by a tent icon) and establish a camp there.
Here are the nearest two campsite locations from where you first spawn in Hinterlands;
Pathfinder
Discover a campsite and establish at least one Inquisition camp in 10 wilderness areas.
Related to the previous achievement. You will come across many campsite locations in many wilderness areas throughout the game. Manually establish at least 1 campsite from 10 different wilderness areas to get the achievement. Keep in mind that establishing multiple campsites in a single wilderness area doesn’t count. For example, the whole map of Hinterlands counts as a single wilderness area.
It’s also worth noting that you always automatically establish 1 camp whenever you unlock and visit a new wilderness area. However, these automatically established camps do not count towards this achievement. So you have to manually establish a different camp in every wilderness areas for it to count towards this achievement.
The base game has only 10 wilderness areas. Therefore, it will take a while to unlock all these 10 areas, but this achievement is very easy to earn.
Sharp-Eyed
Find and recover a shard identified by an ocularum.
You can earn this as soon as you first arrive in Hinterlands. oculara are skull-like devices mounted on poles that you encounter in wilderness areas throughout the game. When interacted with one, the screen will change to show that you’re looking through a telescope-like lens. Here, you need to explore the screen until you see a beam of light appear near your reticle. Simple move the reticle until it the light centres on it. Then it will tell you that a shard has been discovered. The number of the shards that can be discovered by that specific ocularum is shown at the top. After finding all the shards, exit the telescope-like screen. New markers will be shown on your map with the newly discovered shards’ locations. Go near one and you’ll see a new lootable object. Interact with one of them to recover a shard and the achievement will pop up.
Nearest ocularum location from the Hinterlands spawn point
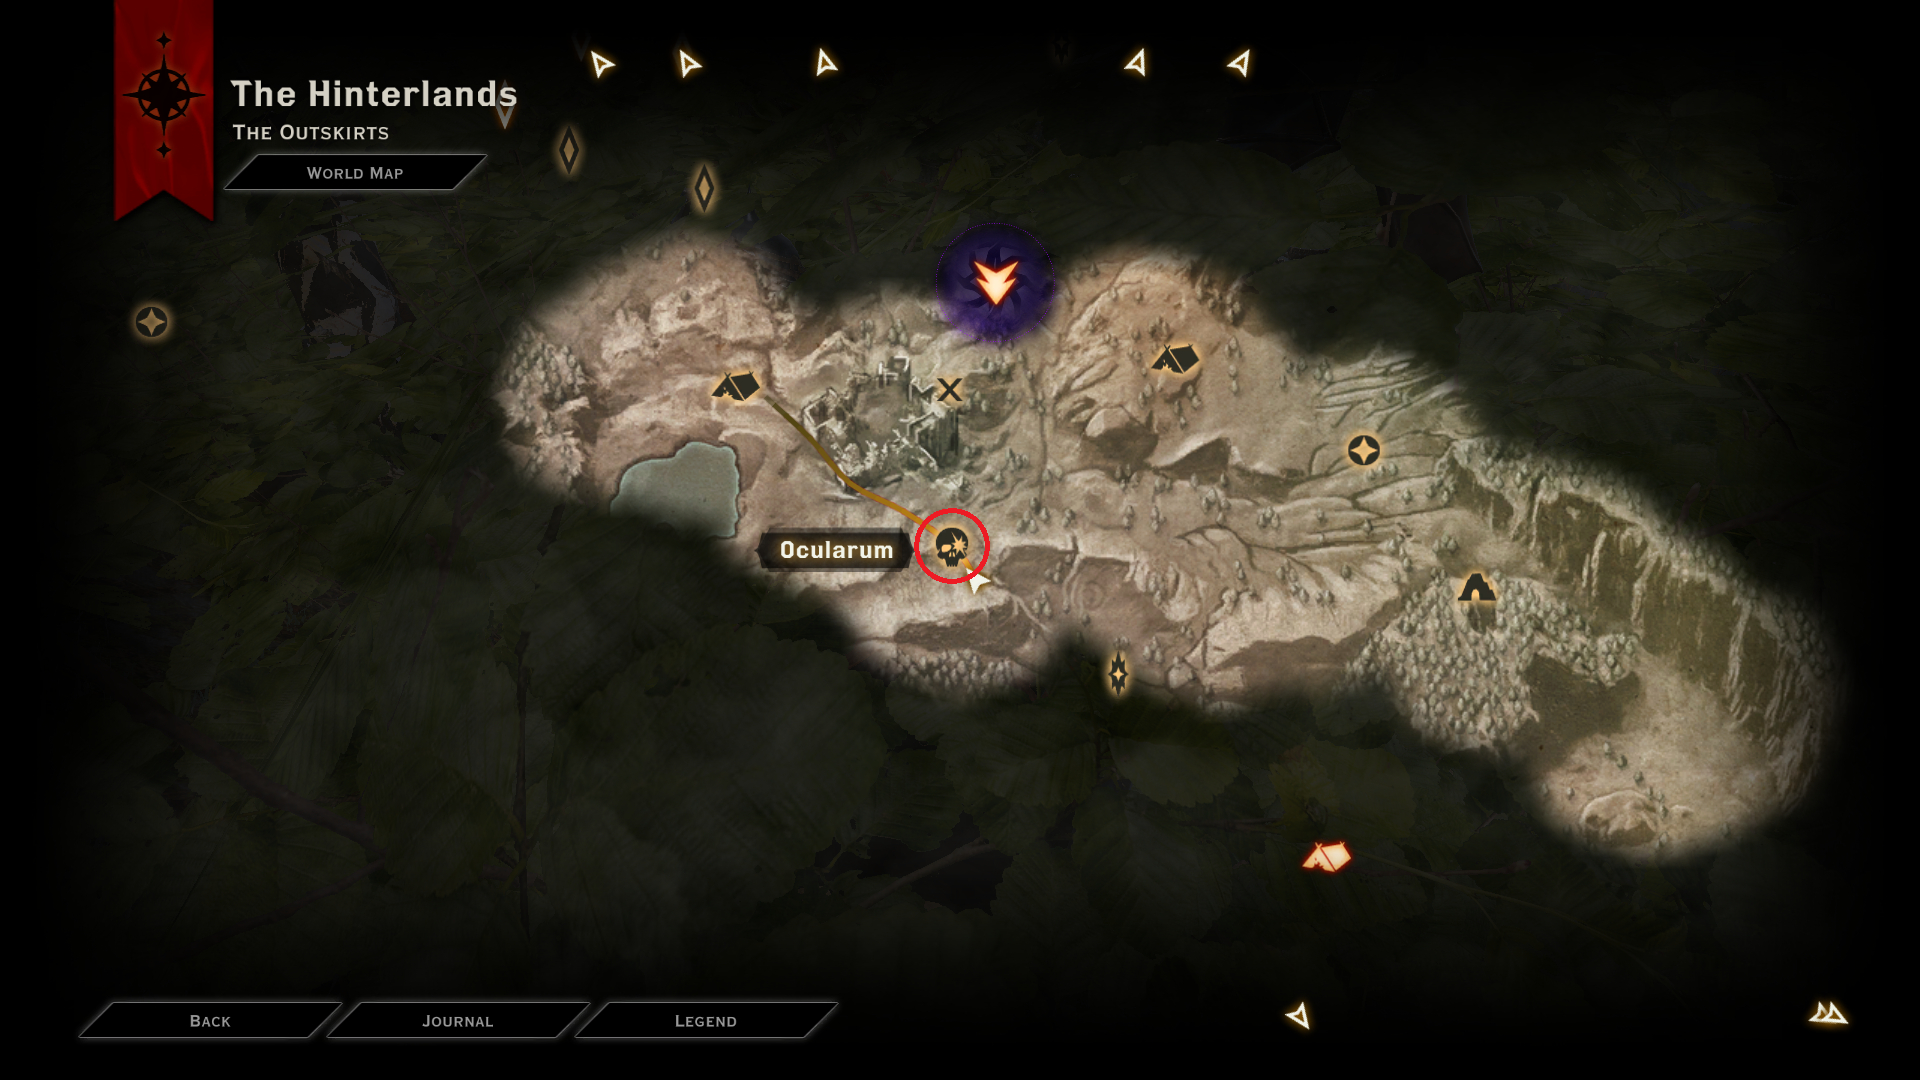
Note: You must interact with all the oculara in every wilderness areas and find all their shards since you need every shard in the base game to unlock the “Keymaster” achievement.
Well-Read
Discover a veilfire rune.
You can earn this as soon as you first arrive in Hinterlands. There are two caves where you can find veilfire runes in Hinterlands. You need a mage in your party to access these caves.
Location 1
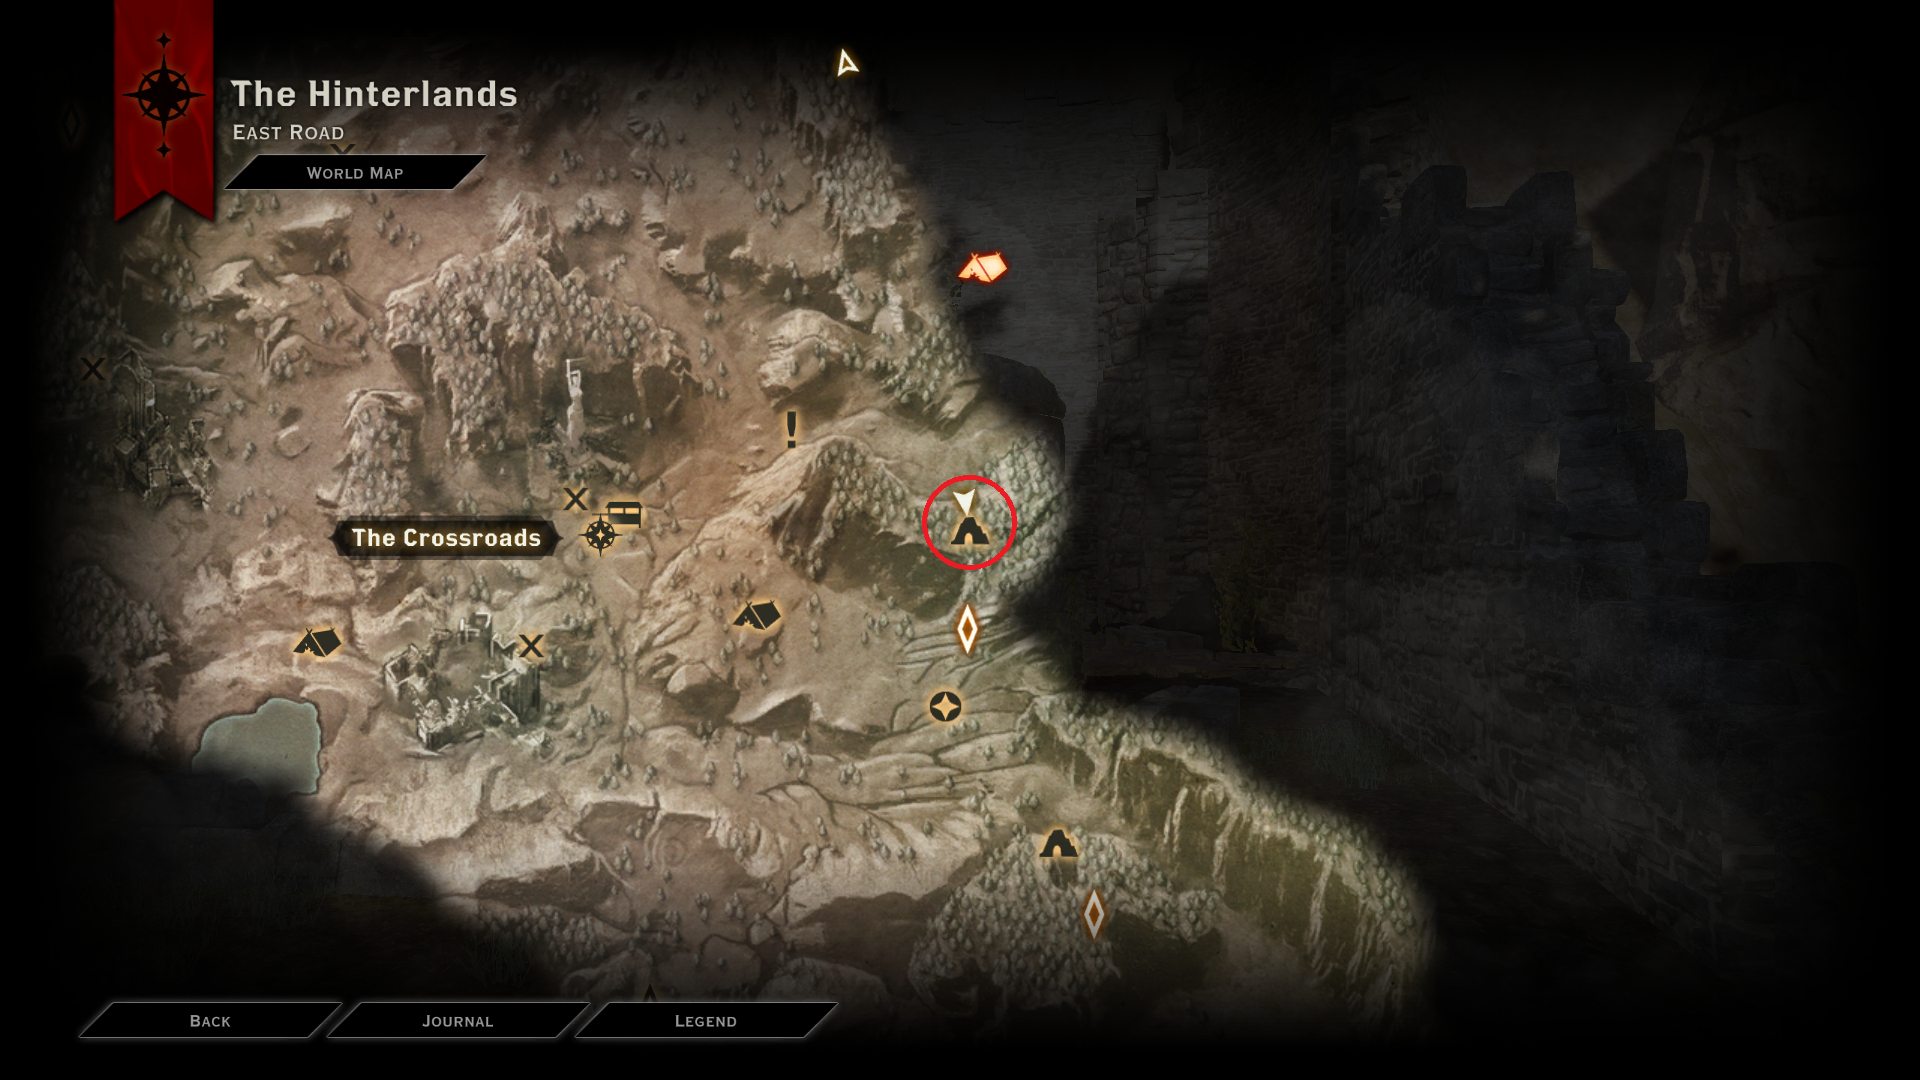
When you go to the location, you will find a Dalish mage fighting a demon, you can speak with her to trigger the Solas’s companion quest “Measuring the Veil”. You can either speak with her to get the quest or ignore her. This has no impact on getting the veilfire rune. Although, I recommend doing the quest with Solas in your party. Nearby, you will see a path to the cave blocked by boulders. Use a mage in your party to interact with it and remove it.
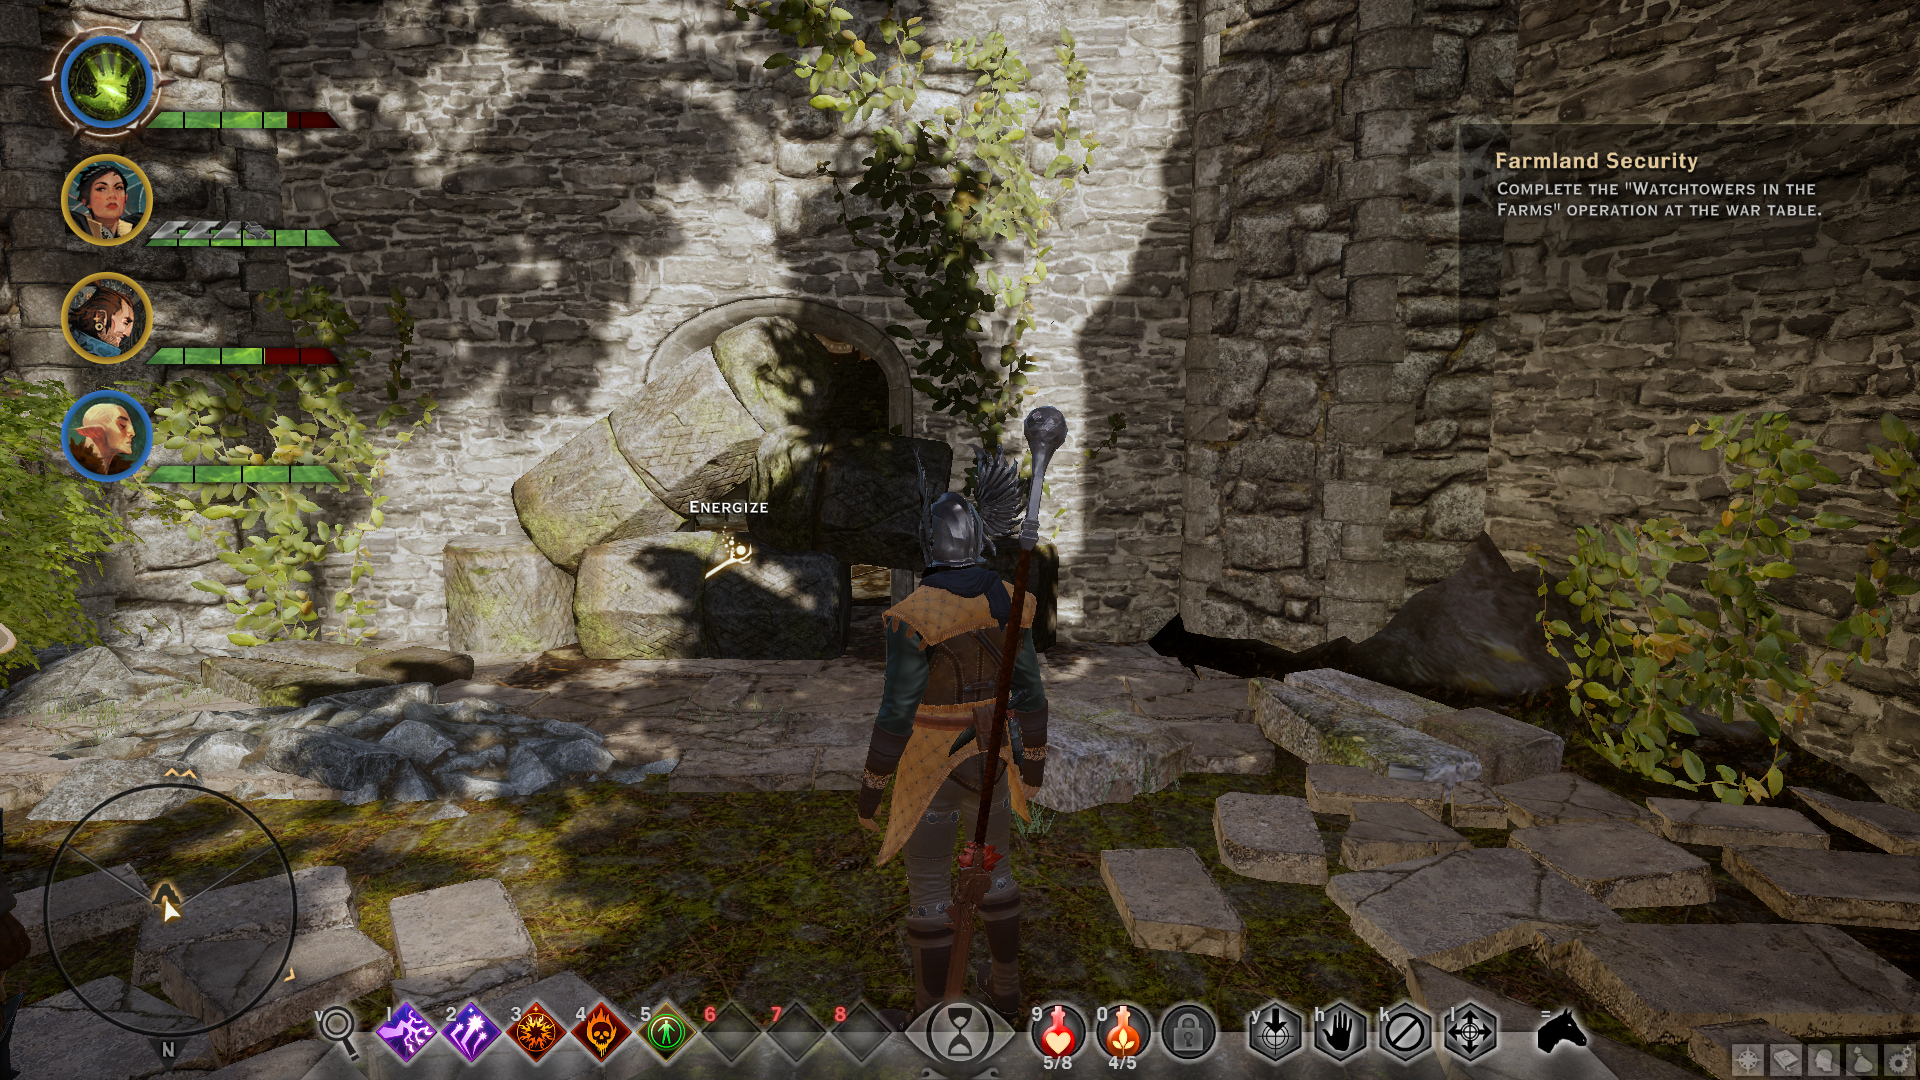
Defeat the enemies that spawn. Nearby, you will find unlit veilfire braziers that mages can interact with. Use a mage on it and light the brazier and pick up a veilfire torch. With the torch in your hand keep going inside while lighting up unlit braziers. More enemies will spawn inside that you need to defeat. After reaching the end of the cave, go the left side. You will notice a glowing set of runes on a fallen boulder near a broken statue. A member in your party will comment on the runes. Go near the rune with the torch and examine it to get a veilfire rune and the achievement should pop up.
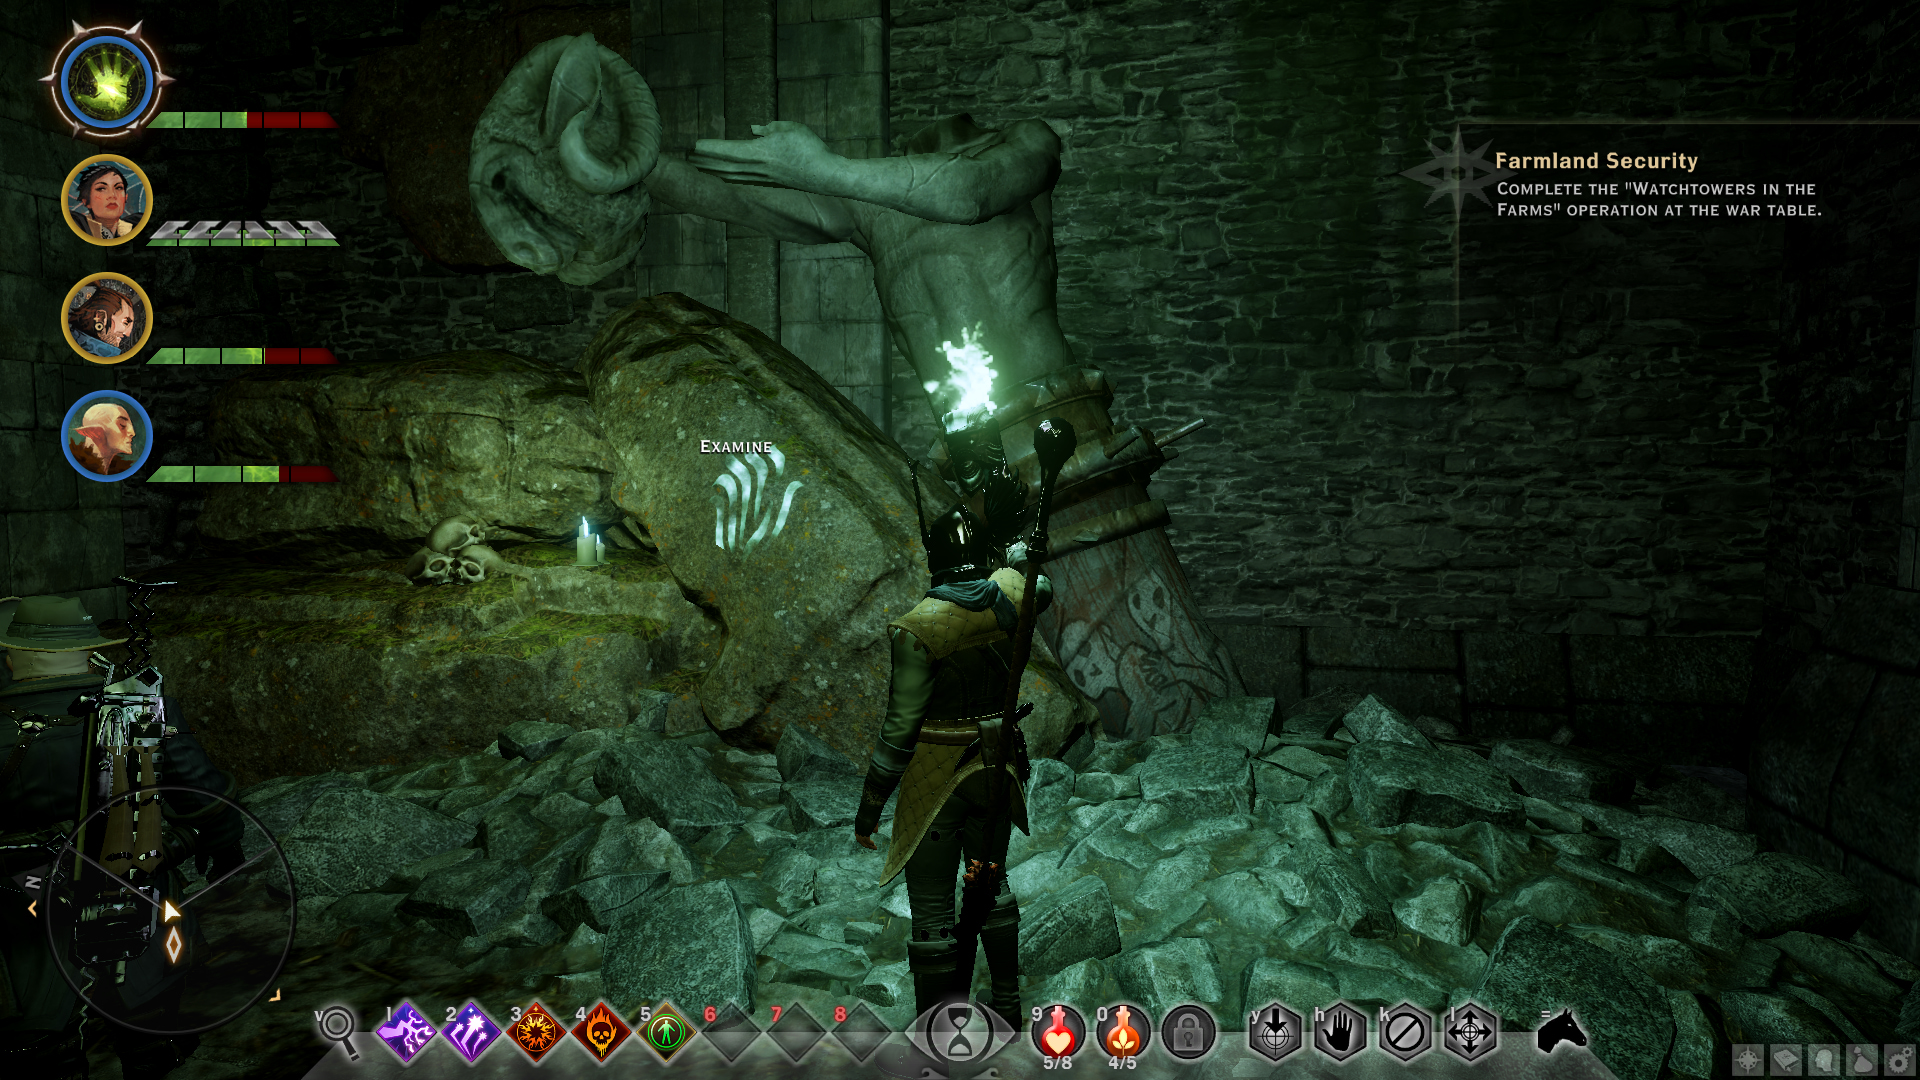
As for the side quest, there is a nearby object you have to interact with. After interacting with it, the Dalish mage will thank you and try to keep the artifact. You can convince her to give it to you using the “Solas?” option in dialogue wheel (++Solas), “Arcane Knowledge” Inquisition perk (++Solas), or by being an Elven Inquisitor (++Solas, -Sera). Fighting her is not recommended as she’s level 12 and can easily defeat you if you’re underleveled.
Location 2
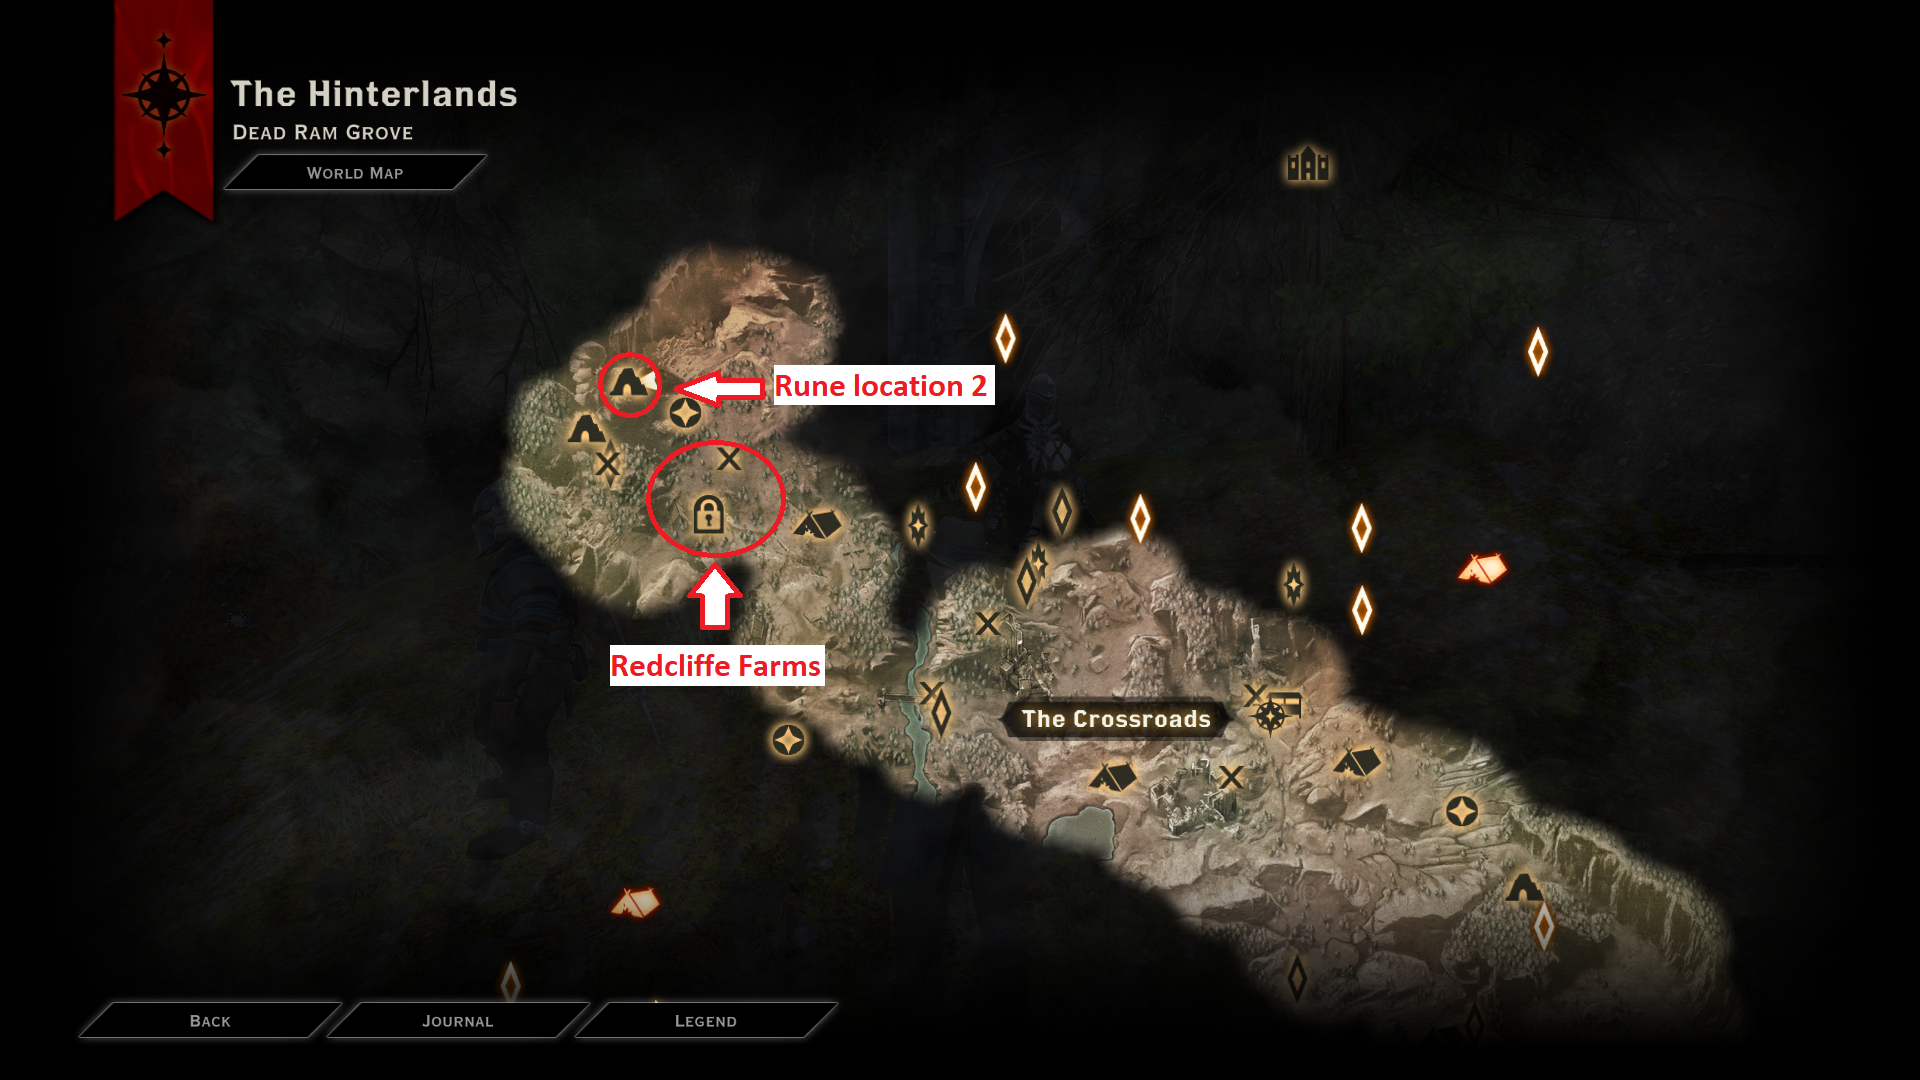
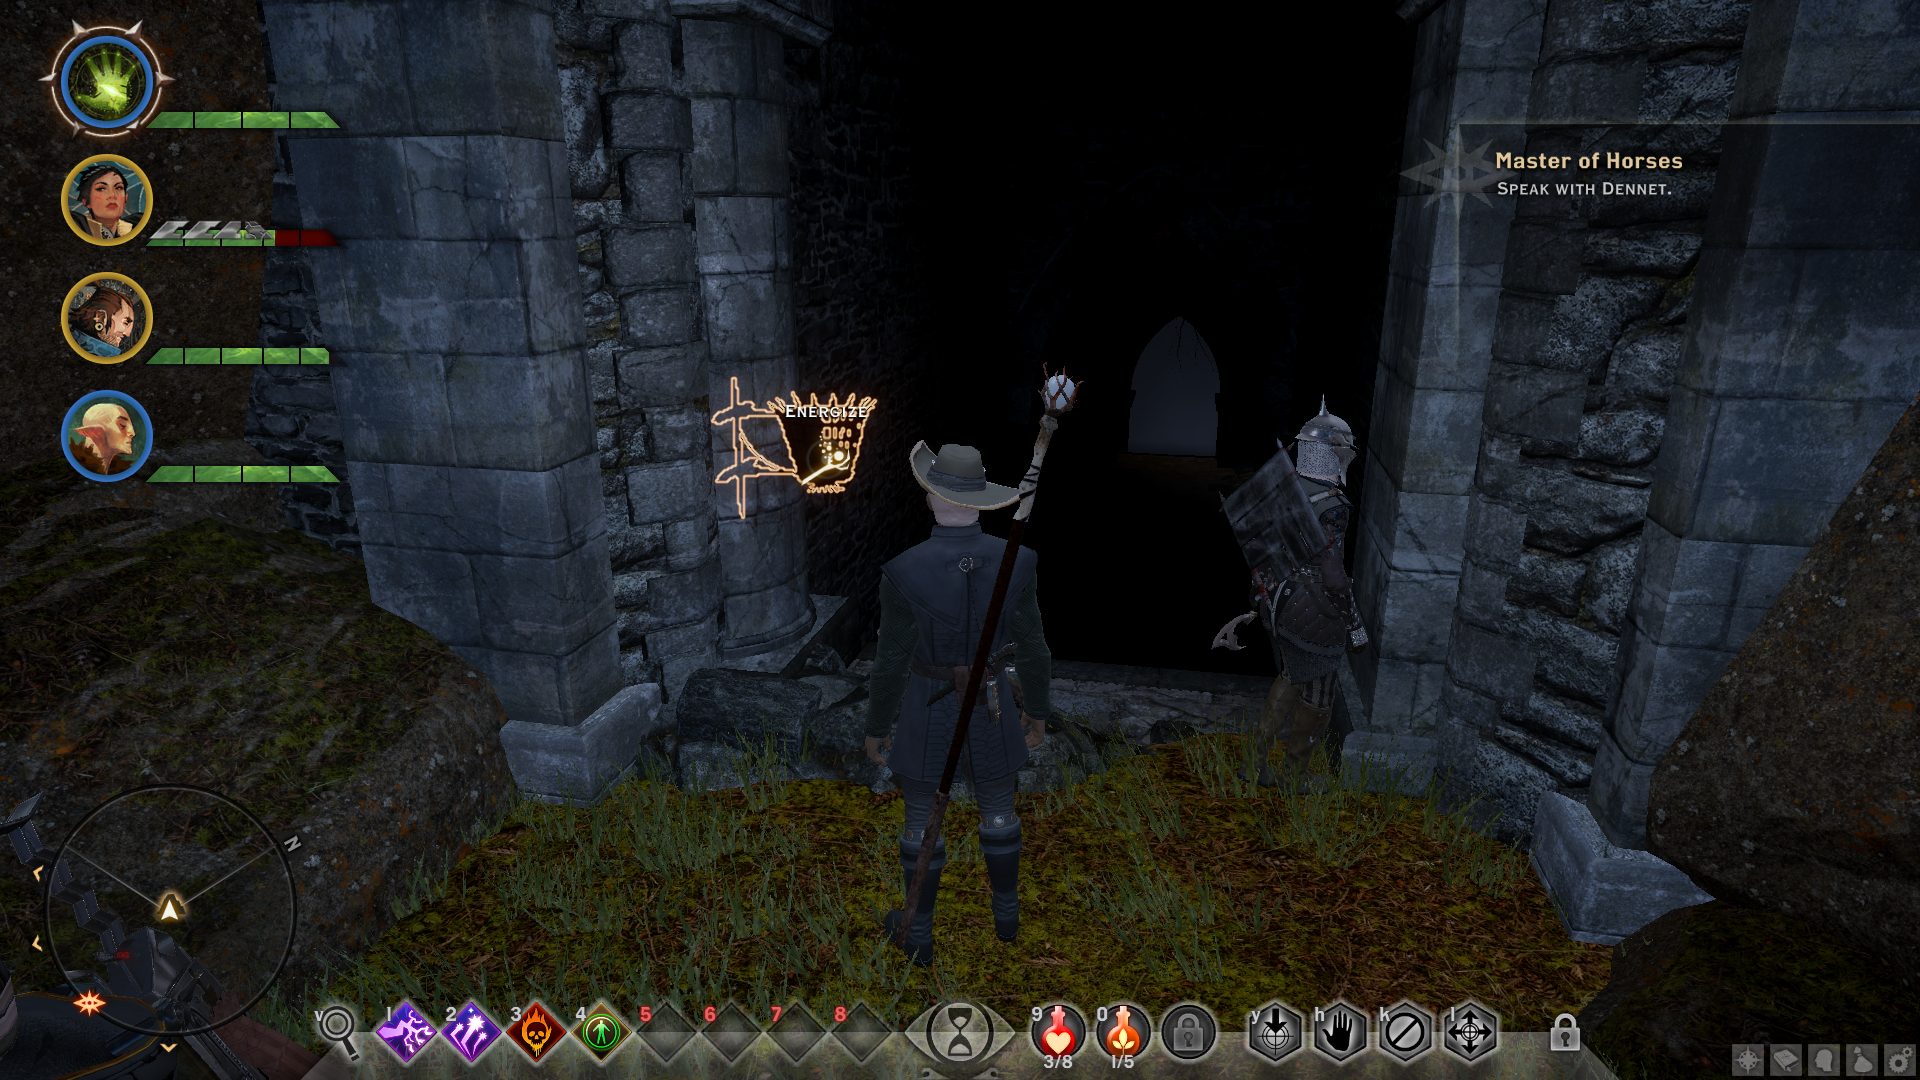
The rune will be at the end of the cave.
Cavalier
Secure a mount.
You can earn this as soon as you first arrive in Hinterlands. When you first arrive in Hinterlands, you will be given a side quest by Scout Harding called “Master of Horses” in which you have to find and speak with Horsemaster Dennet. This is a straightforward quest and his location will be marked on your map. Complete the side quest and you will be awarded with a “Fereldan Forder” as your first mount.
Saddled Up
Purchase or secure five different mounts of any kind.
Related to the achievement above. For this achievement, you need to recruit Horsemaster Dennet as an agent for the Inquisition. The process of his recruitment is explained under the “Persuasive” achievement section above.
After recruiting him, he can be found near Haven’s or Skyhold’s stables. Talk to him and purchase four more mounts to get this achievement.
Note: I got this achievement after purchasing only one horse. I believe this is due to the fact that I already had more than 5 mounts for having the Game of the Year edition (only available version on Steam). So purchasing one more mount most likely prompted the game to check the amount of mounts I had and trigger the achievement. So you should get this after purchasing one mount as well.
Loremaster
Collect 250 codex entries in a single playthrough.
Exploring the map while searching houses, caves, rooms and every nook and cranny is the best way to get this. The discover button (Default key ‘V’) is extremely helpful. Keep spamming it all the time while you’re exploring and look at the inspectable items such as notes, books, etc. highlighted by it to easily find codex entries. Make sure to exhaust all the dialog options from people you meet using the “Investigate” dialogue branch since sometimes this can give you codex entries as well. Finding new locations, establishing landmarks can earn you codex entries as well. Val Royeaux also has a massive number of codex entries scattered throughout it, so make sure to discover them all. If you have been collecting a lot of these from the start, you can earn this achievement quite early on. I managed to get this even before reaching Skyhold.
Do not be worried if you haven’t gotten it early on in the game. There are a massive amount of codex entries throughout the game so you don’t have to go out of your way to find them. You will come across many books, notes, locations, dialogues, etc. that unlock codex entries. Simply keep an eye out for them.
Note: I highly suggest unlocking the “Underworld Knowledge” (Forces), “Arcane Knowledge” (Secrets), “Nobility Knowledge” (Connections), “History Knowledge” (Inquisition) Inquisition perks as soon as you can, since each of these perks increase your experience gain by +50% for each codex entry found, meaning having all these perks unlocked gives you 150XP per codex entry compared to the 50XP you get without having any of these perks.
Exploration/Map Related Achievements (Continued)
Quartermaster
Complete 20 requisition requests in a single playthrough.
You can get requisition requests mainly from requisition officers that spawn in established campsites in wilderness areas and sometimes from your quartermaster in Haven/Skyhold. These requests ask you to collect a few different resources that can be found in that particular wilderness area. These resources usually include items like ores, herbs, particular valuables that are only looted from enemies, etc. Finding these resources and completing each request through a requisition table (located in campsites in wilderness areas and near quartermaster in Haven/Skyhold) grants you +1 power.
The requests that you get from requisition officers are infinitely repeatable. And you can have 1 active requisition request from each different wilderness area. Completing a request in a specific wilderness area and talking with a requisition officer in that area again will give you a new request. So keep collecting every resource you come across while exploring (keep spamming ‘V’ while exploring), defeat and loot every enemy you come across, and complete requisition requests as soon as you can. Keep repeating this process and you will unlock this achievement in no time.
Liberator
Liberate three keeps in a single playthrough.
Keeps are large fortifications that you can capture. Before capturing, they’re always occupied by enemies. You have to fight your way inside and plant the Inquisition flag on the shown location to capture it. The quests to capture the keeps can be triggered in many ways, but simply walking near the keeps will always trigger its capture quests if they hadn’t already been triggered.
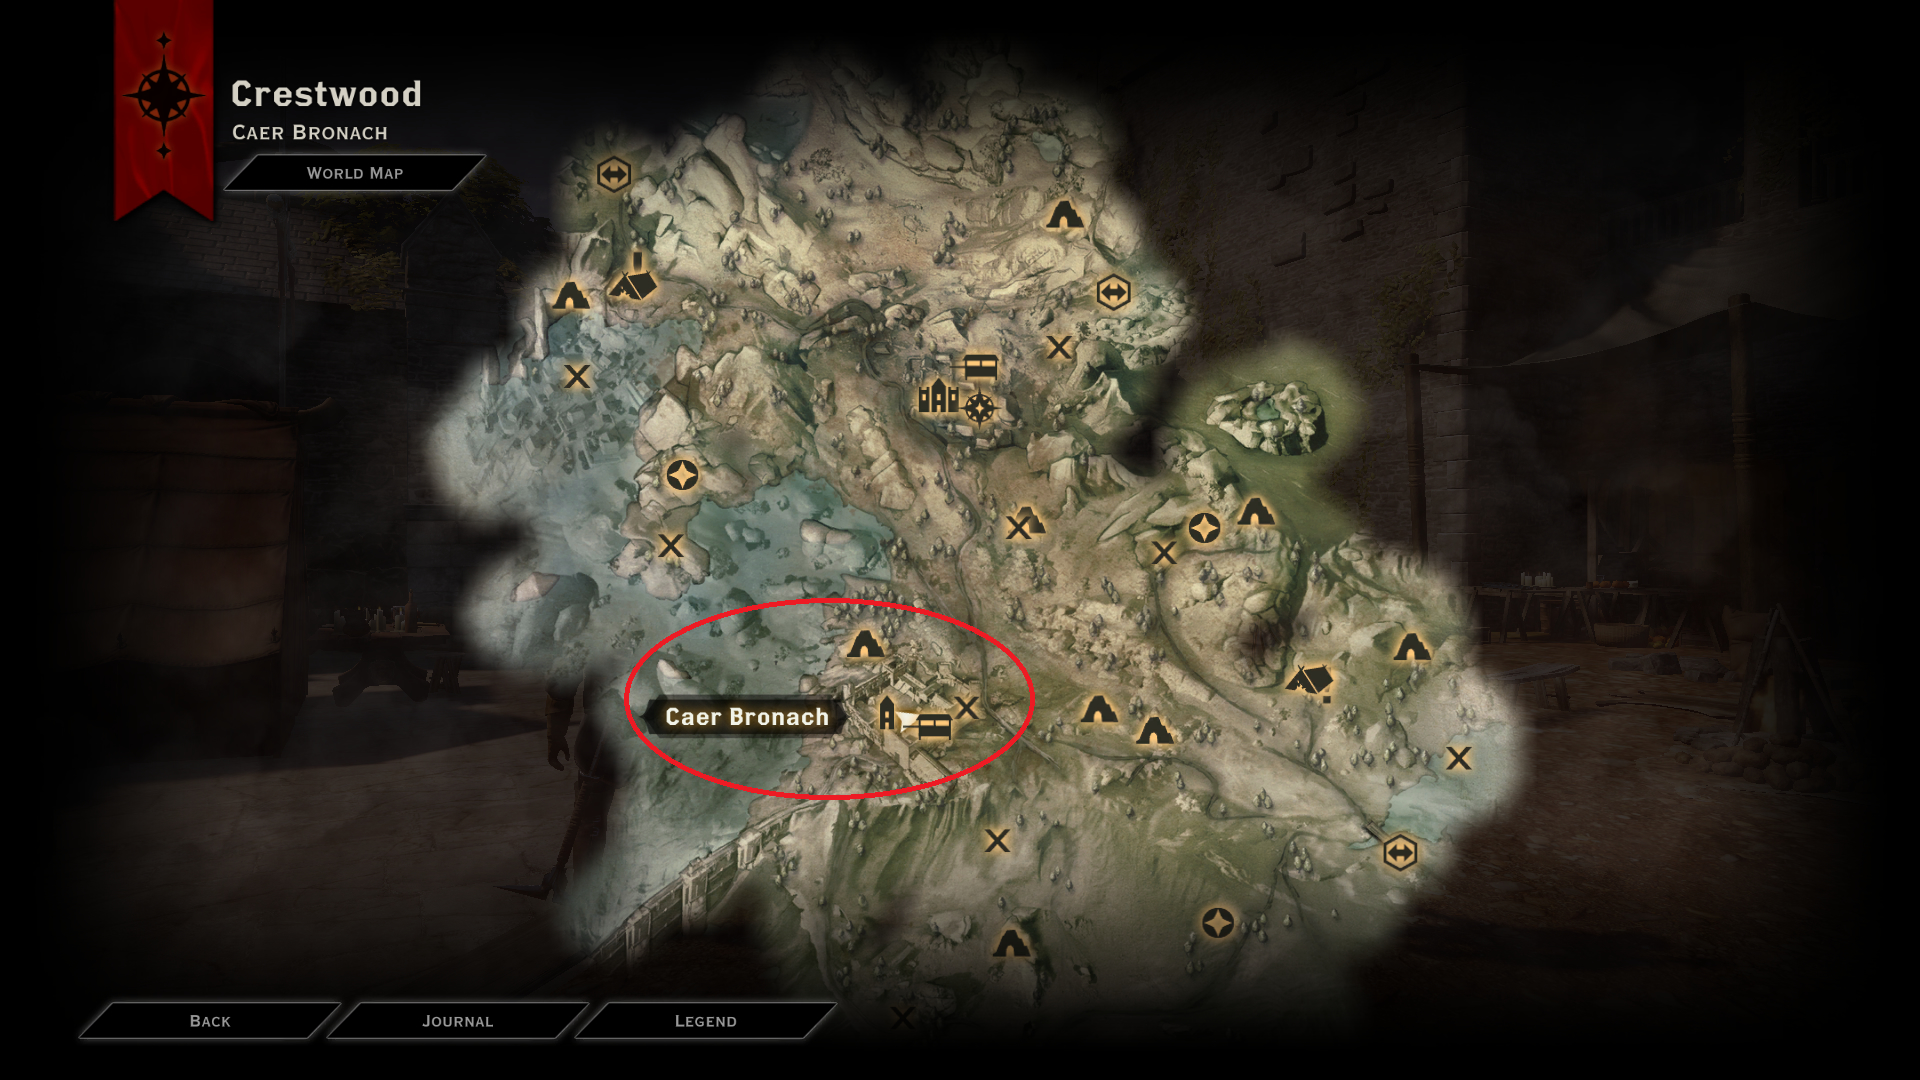
Crestwood – Caer Bronach
You will automatically be given the “Still Waters” side quest while entering Crestwood for the first time. By continuing on with the quest, you will have to capture this keep as an objective. Another way to trigger the quest to capture this keep is by simply going near the keep.
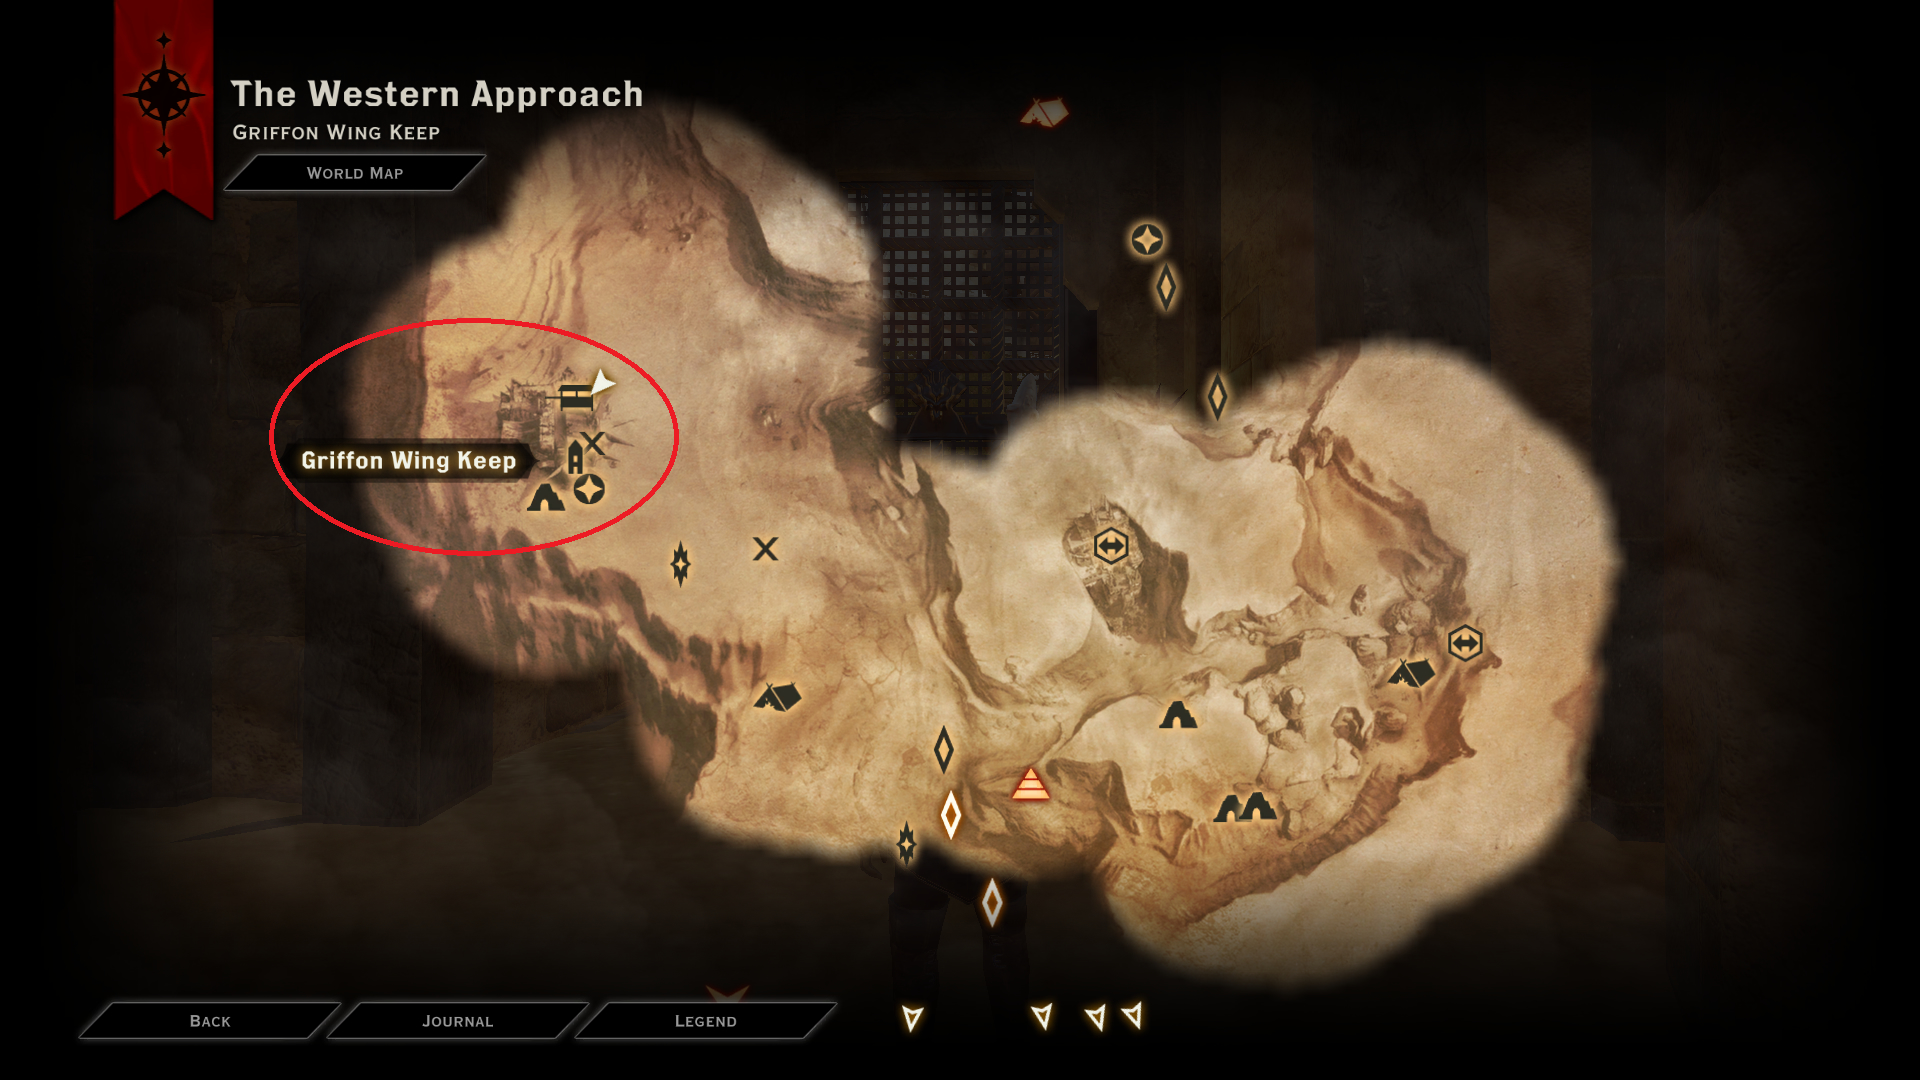
Western Approach – Griffon Wing Keep
There are many ways to trigger the “Assault on Griffon Wing Keep” quest to capture this keep, but the most reliable way is to simply go near the keep and the quest will automatically start.
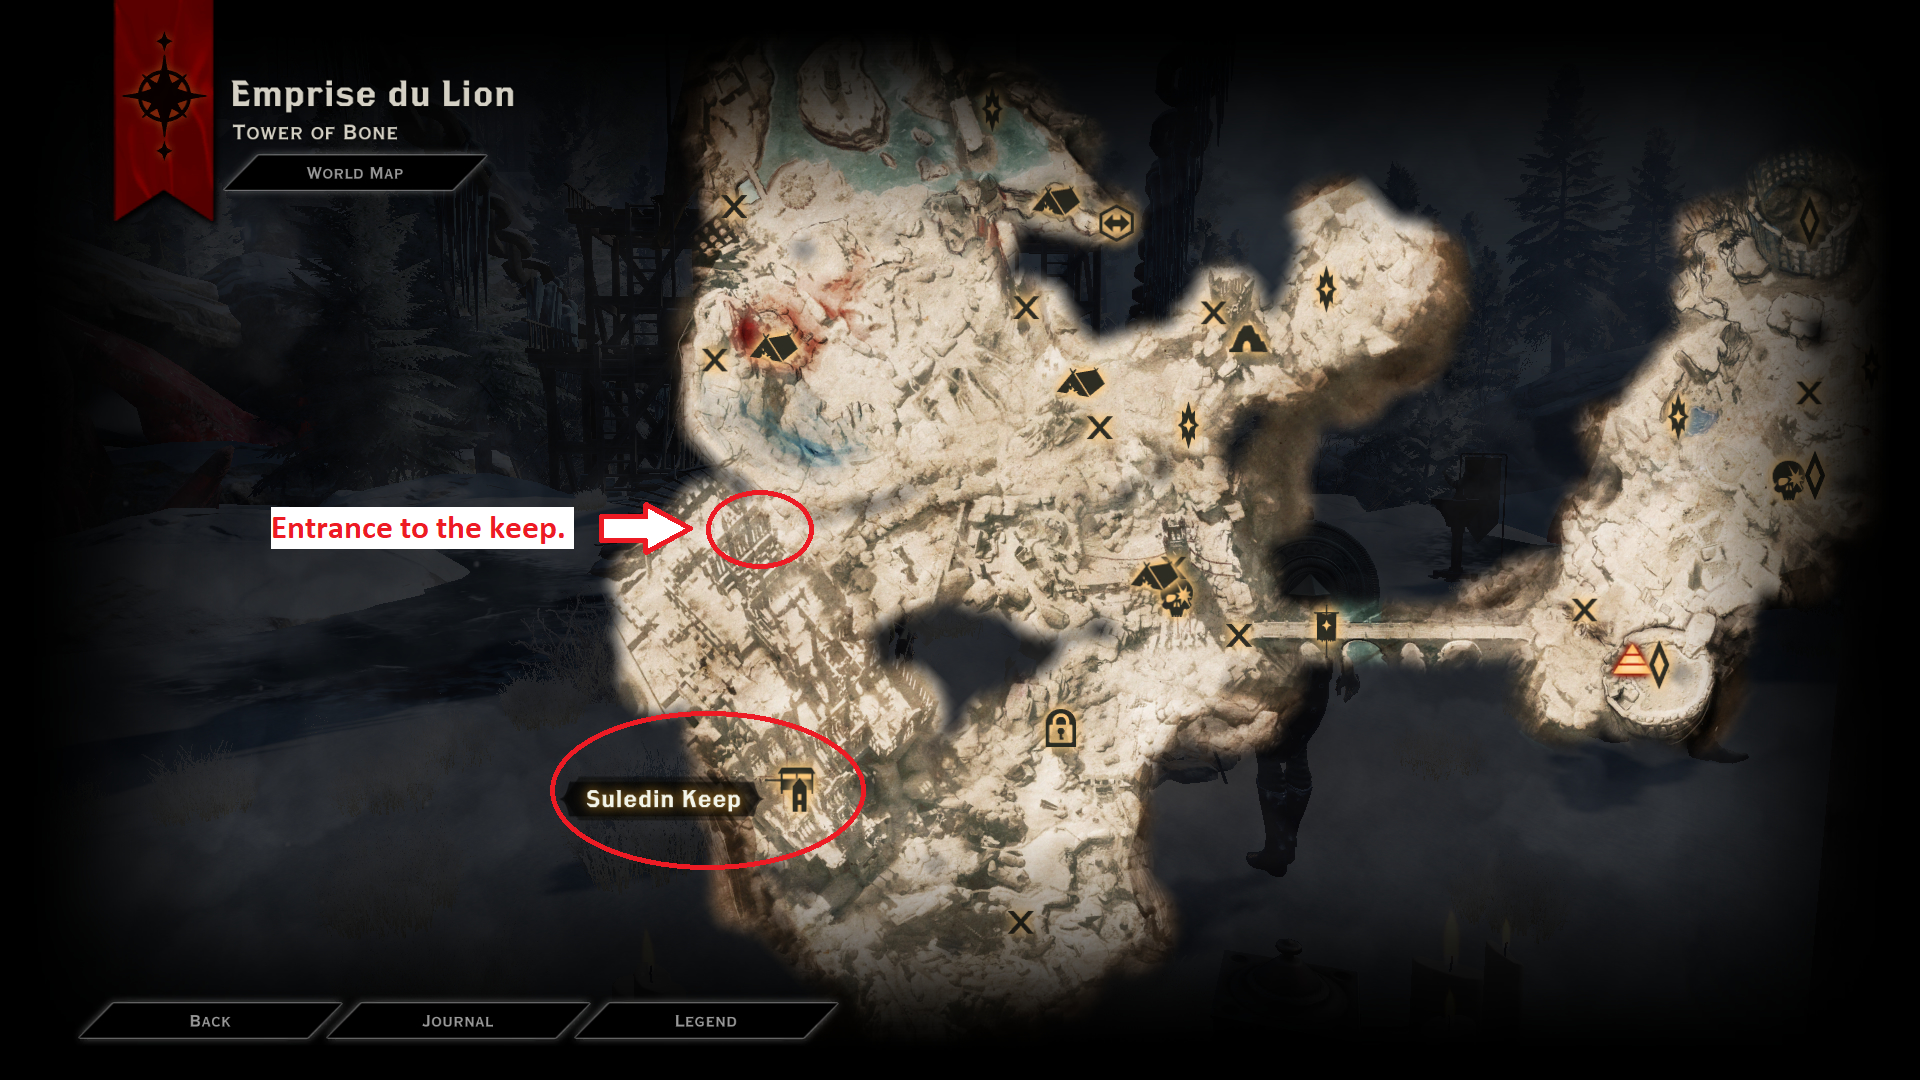
Emprise du Lion – Suledin Keep
Note: Capturing this keep is related to a trials related achievement. If you do not enter Emprise du Lion and capture this keep without enabling a specific trial, that achievement will be unobtainable for that playthrough. Check the “Trial of Temperance” achievement for more information.
When you arrive at Emprise du Lion for the first time, you will automatically acquire the “Take Back the Lion” side quest. In this quest, you simply need to capture 3 camps. After capturing the 3 camps, this quest will finish and you will automatically acquire the “Capturing Suledin Keep” side quest. Follow along this quest and you will capture the keep. Keep in mind that just before the capture point of the keep, you will encounter a demons named Imshael who is related to the
“Call Me Imshael” side quest. You will have to deal with him before capturing this keep.
Stargazer
Unlock 15 astrariums in a single playthrough.
Astrariums are globe-like objects that you can find throughout wilderness areas. Interacting with one will open up a puzzle screen that you have to solve to unlock that astrarium. There are 15 astrariums in the base game that are spread throughout 5 wilderness areas, with each area having 3 astrariums. The Jaws of Hakkon DLC adds 3 more astrariums as well. Unlocking any 15 of the 18 astrariums will unlock this achievement. Unlocking all the 3 astrariums in an area will unlock a location with treasure. Below are the wilderness areas with astrariums.
- Hinterlands (3)
- Storm Coast (3)
- Crestwood (3)
- Western Approach (3)
- Emerald Graves (3)
- DLC – Frostback Basin (3)
Astrariums are marked on the map with a 4 pointed star icon. You will naturally come across astrariums while travelling through wilderness areas. Keep in mind that unlocking a single astrarium will mark the location of the other 2 in that area on your map. So you need only to find 1 and unlock it to find the locations of other astrariums in that area. The puzzles themselves aren’t very complex. You need to connect the dots in an area correctly to form a given shape. If you would like to know the exact locations of astrariums or how to solve the puzzles, the wiki page for the dragonage.fandom.com – https://dragonage.fandom.com/wiki/Astrarium has more information.
Marked for Greatness
Seal 75 rifts in a single playthrough.
You need to seal 75 fade rifts in 1 playthrough to earn this achievement. Fade rifts are encountered throughout wilderness areas and during main and side quests. There are 81 fade rifts in wilderness areas in the complete game (including the 8 in the Frostback Basin wilderness area added in The Jaws of Hakkon DLC). Combined with the unmissable rifts you have to close during main quests and a few that spawns only during side quests, you have more than enough fade rifts to close to earn this achievement.
Keep closing the fade rifts you encounter in wilderness areas. If you have trouble finding their locations, keep in mind that establishing camps will mark the locations of fade rifts in that camp’s region on your map. Establishing all the camps in a wilderness area will mark the locations of all the rifts in that area on you map.
Keymaster
Enter the heart of the Solasan temple.
To earn this achievement, you need to unlock all the vaults in the Forbidden Oasis using 114 shards. These shards can be found by searching them using oculara (see the “Sharp-Eyed” achievement). There are 114 shards in the base game. The Jaws of Hakkon DLC adds another 12 shards to the Frostback Basin wilderness area to unlock another vault in that area. This brings the total shard amount to a 126. Keep in mind you can use any 114 out of 126 shards to unlock the vaults in the Forbidden Oasis.
After collecting the first shard, you will unlock the “Investigate the Shards” war table operation. Completing this operation will unlock the Forbidden Oasis wilderness area. You will acquire the “The Temple of Pride” side quest when you travel to this area for the first time. I suggest collecting all the 114 shards before attempting this quest since this achievement only unlocks after you unlock all the doors. When you unlock a door using shards, the amount of shards used to unlock it will be removed from inventory.
You need to spend 6 shards to unlock the vault door for the “The Temple of Pride” side quest. Unlocking this door will open up a dungeon area which will contain 3 more locked vault doors which are associated with “The Cold Endured”, “The Fire Captured”, and “The Spirit Calmed” side quests. You need 36 shards to complete each of these quests (108 in total for these 3 quests). After completing all these 3 quests, you will automatically get the “A Prideful Place” side quest. Completing this quest will earn you this achievement.
I suggest you explore all wilderness areas that you come across and use the oculara in these areas to find all the shards. Finding shards can be a very grindy process, so I recommend you do this while exploring the map, instead of saving oculara and shards up to do it later.
Exploration/Map Related: “Persuasive” Achievement
Persuasive
Acquire 10 Inquisition agents in a single playthrough.
The inquisitor can encounter people that can be recruited as agent for the inquisition throughout their journey. They can be recruited to work for either Cullen, Josephine, Leliana, or the Inquisition itself. Recruited agents count as perks within the category they were recruited on. They also reduce the time it takes to complete war table missions by 5% each for their recruited adviser. Some of the potential agents are missable and can disappear completely if not recruited immediately. Therefore, you should do the necessary tasks to recruit them immediately.
Below, I have listed more than 10 agents, their locations, and their recruiting processes for you to earn this achievement. Keep in mind that there are more recruitable agents than the ones listed here so keep an eye out if you want to recruit them. If you want to know more about other agents and their recruiting processes, refer to the Dragon Age Wiki article regarding dragonage.fandom.com – https://dragonage.fandom.com/wiki/Agents.
Hinterlands
Ritts (Leliana – Secrets)
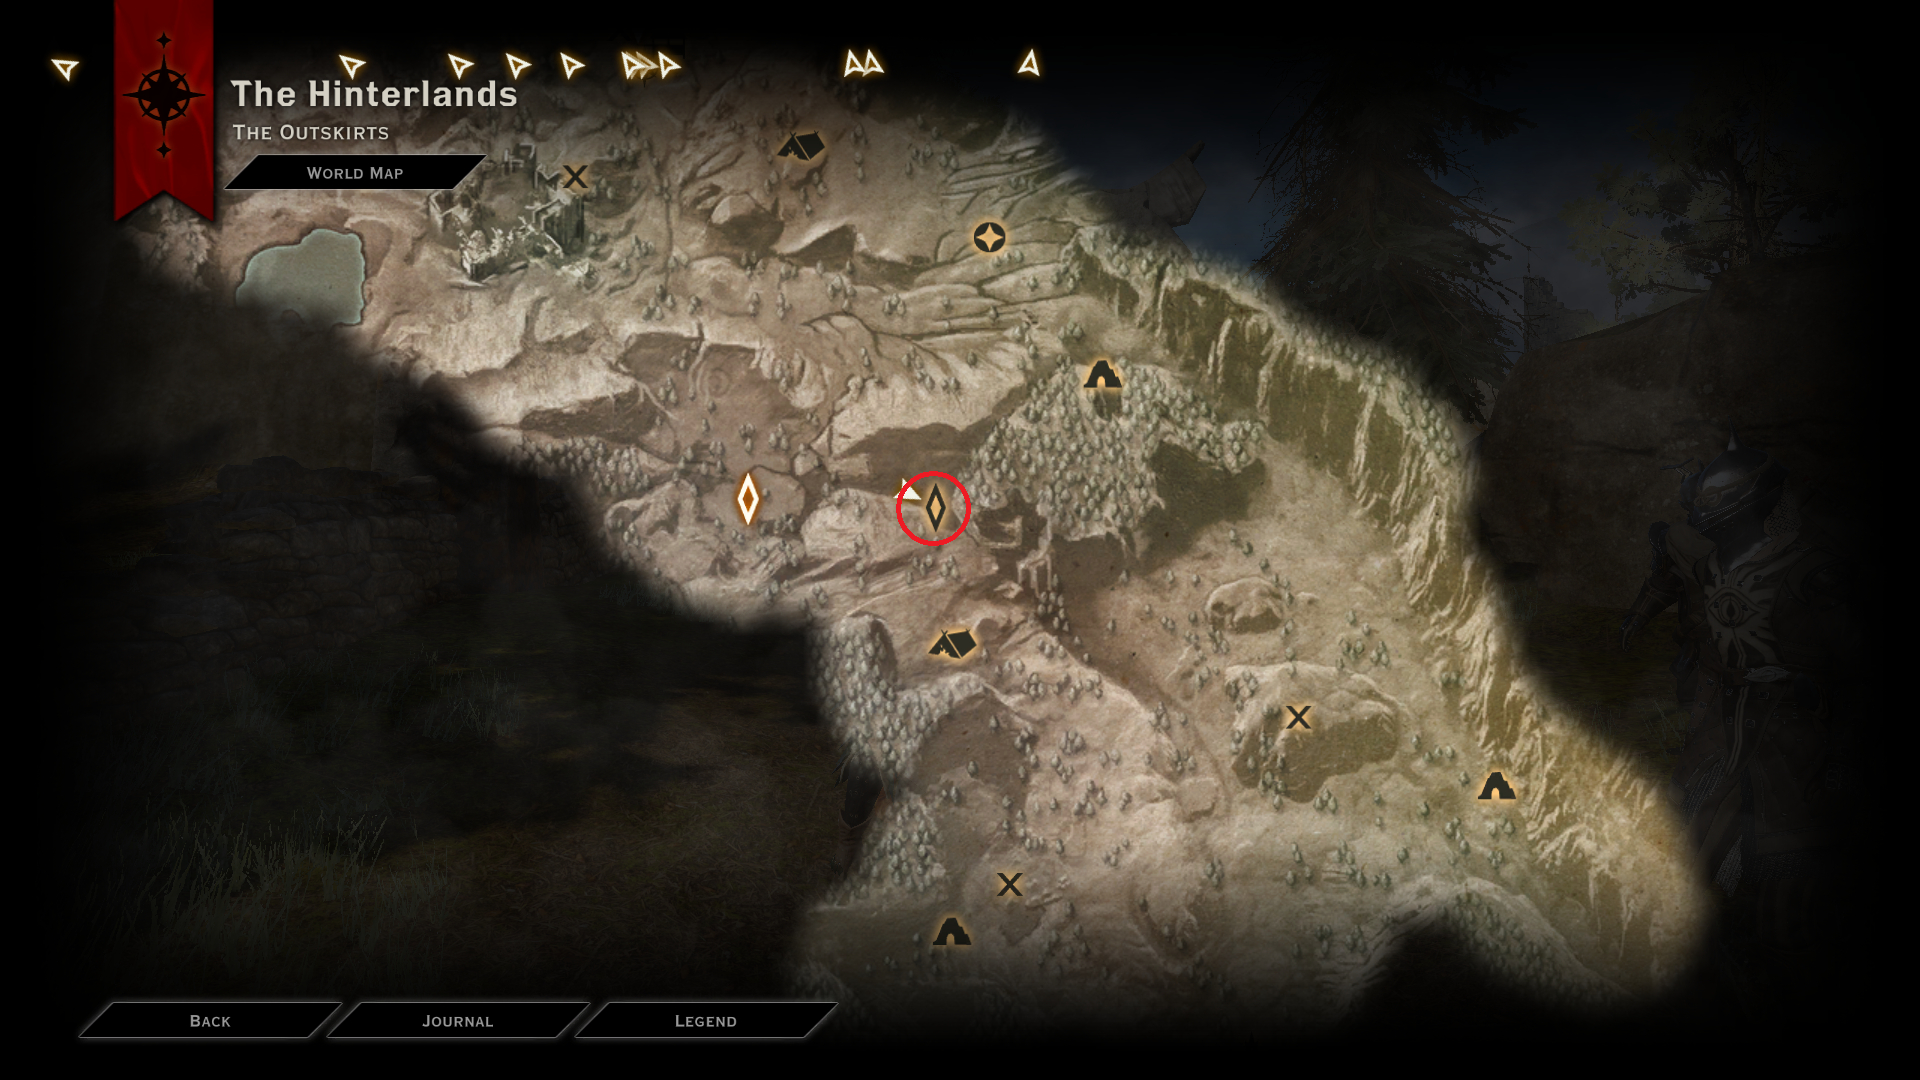
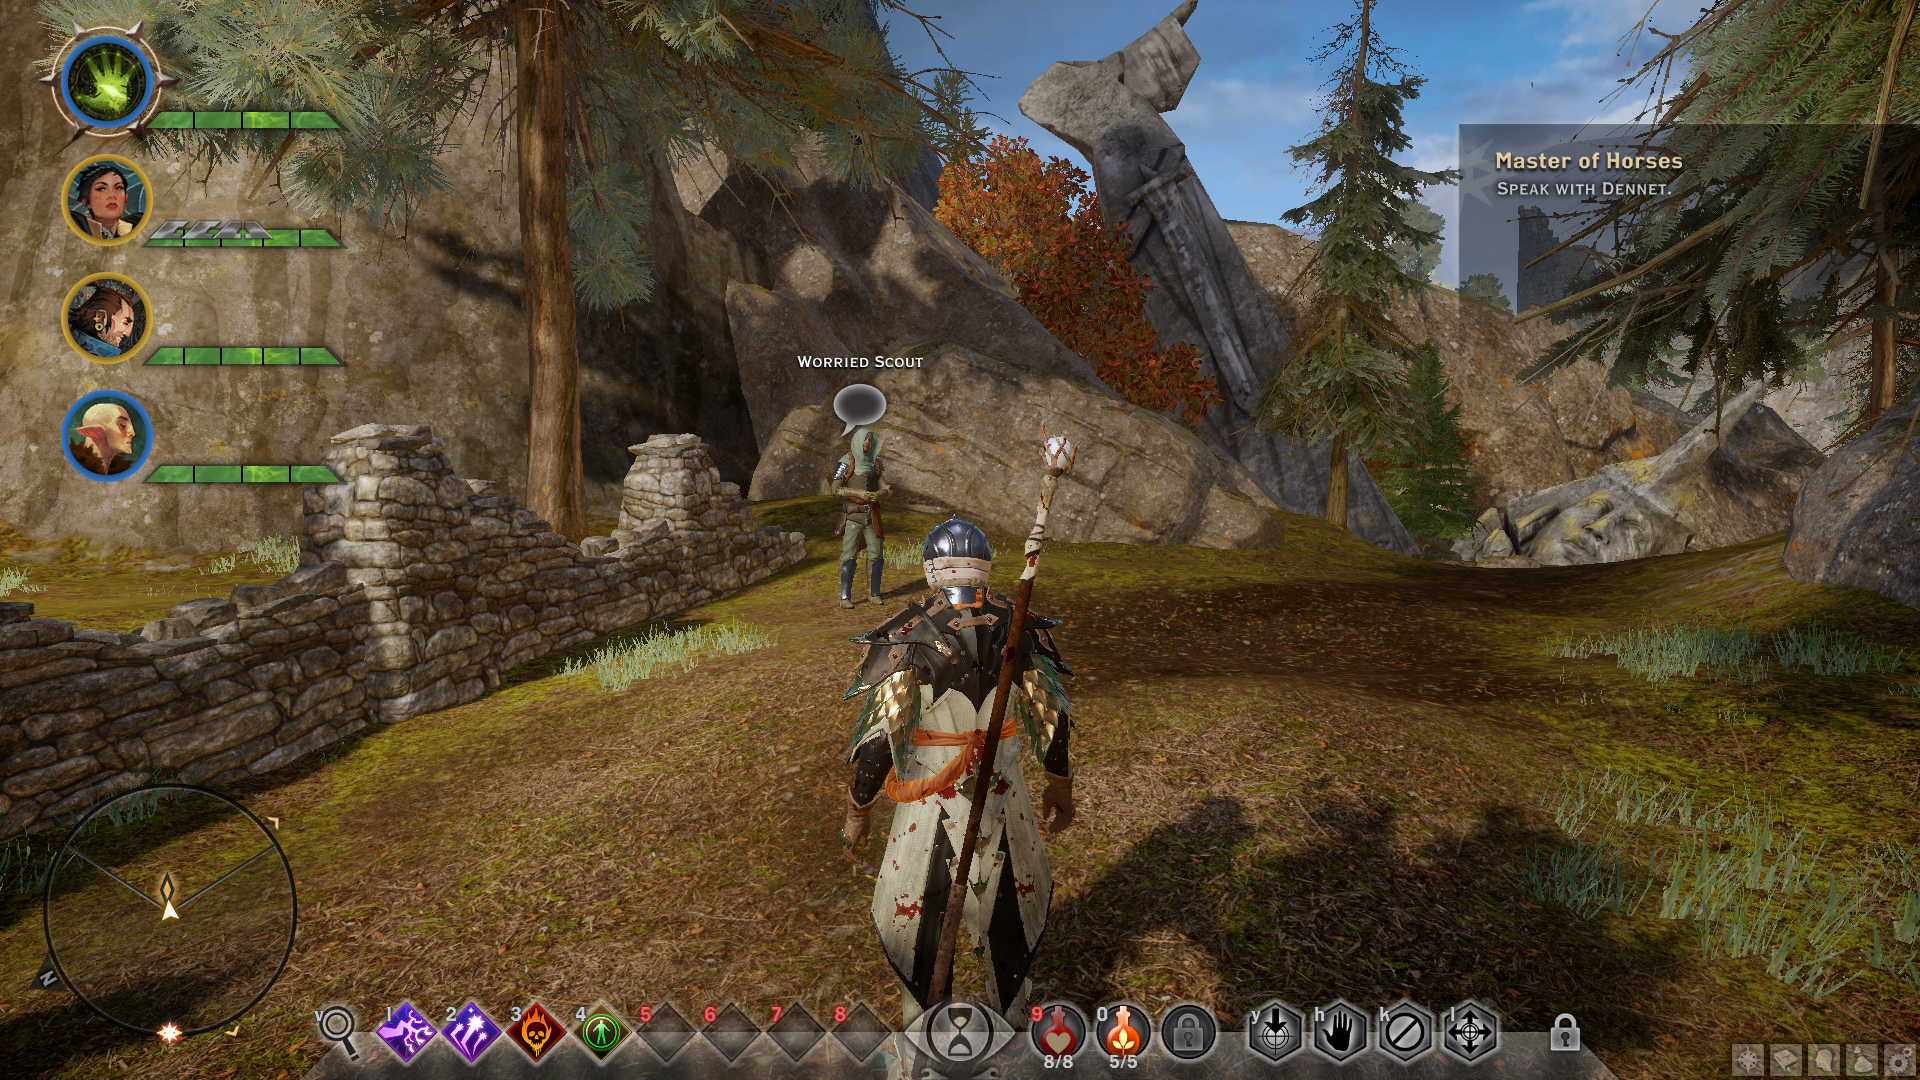
Can be recruited as soon as you arrive in Hinterlands for the first time. Keep in mind you need to have Varric in your party, or Inquisitor be a Dwarf, or have the “Underworld Knowledge” Inquisition perk. Near the campsite of Dwarfson’s Pass, you will find an Inquisition Scout. Talk to him and get the side quest “Strange Bedfellows”. Go to the location shown on the map and talk with Ritts. Then use the inspect action (default ‘V’ on keyboard) on the nearby body and wine bottle. After she explains what happened, you can select the following special dialogue (shown by a five-pointed star) to recruit her;
- Deferring to Varric in your active party. (+Varric)
- If your inquisitor is a Dwarf or have the “Underworld Knowledge” perk;
–“No. You have potential.” (+Cassandra, ++Iron Bull)
Choosing either of the dialogue above will recruit her as an agent for Leliana. After that you can go back to the worried scout and inform him of Ritts’s fate and complete the quest.
Note: Make sure you recruit Ritts before reporting back to the worried scout. Otherwise she will disappear and you won’t be able to recruit her as an agent again.
Speaker Anais
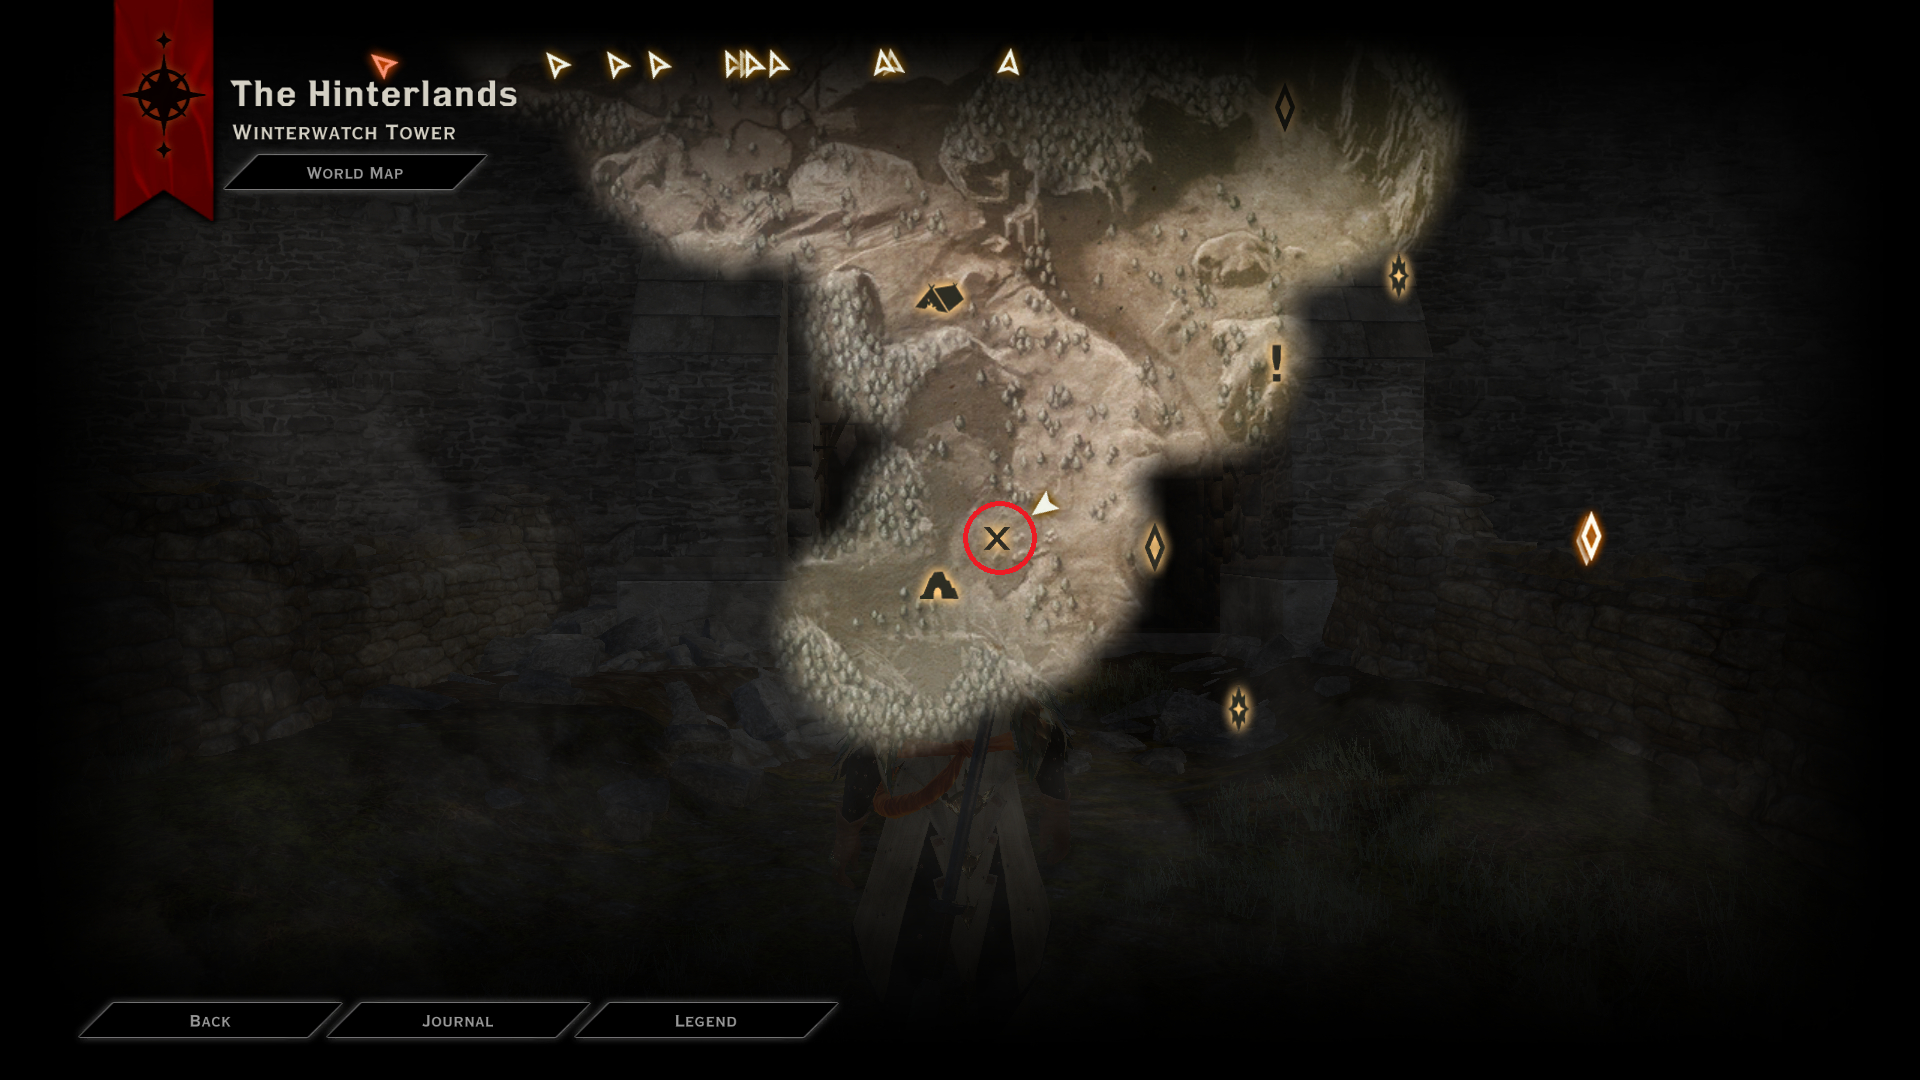
Can be recruited as soon as you arrive in Hinterlands for the first time. She can be found in front of the gate of the Winterwatch Tower. Talk to her and she will give you the “Praise the Herald of Andraste” side quest. To complete it, go inside the Winterwatch Tower and close the Fade rift in it. Speak to her again you can recruit her using the dialogue listed below;
- –“Listen and gather information.” (Leliana – Secrets) (+Dorian, ++Iron Bull, +Sera)
- –“Spread word of an Inquisition.” (Josephine – Connections) (+Cassandra, ++Solas)
Lord Berand
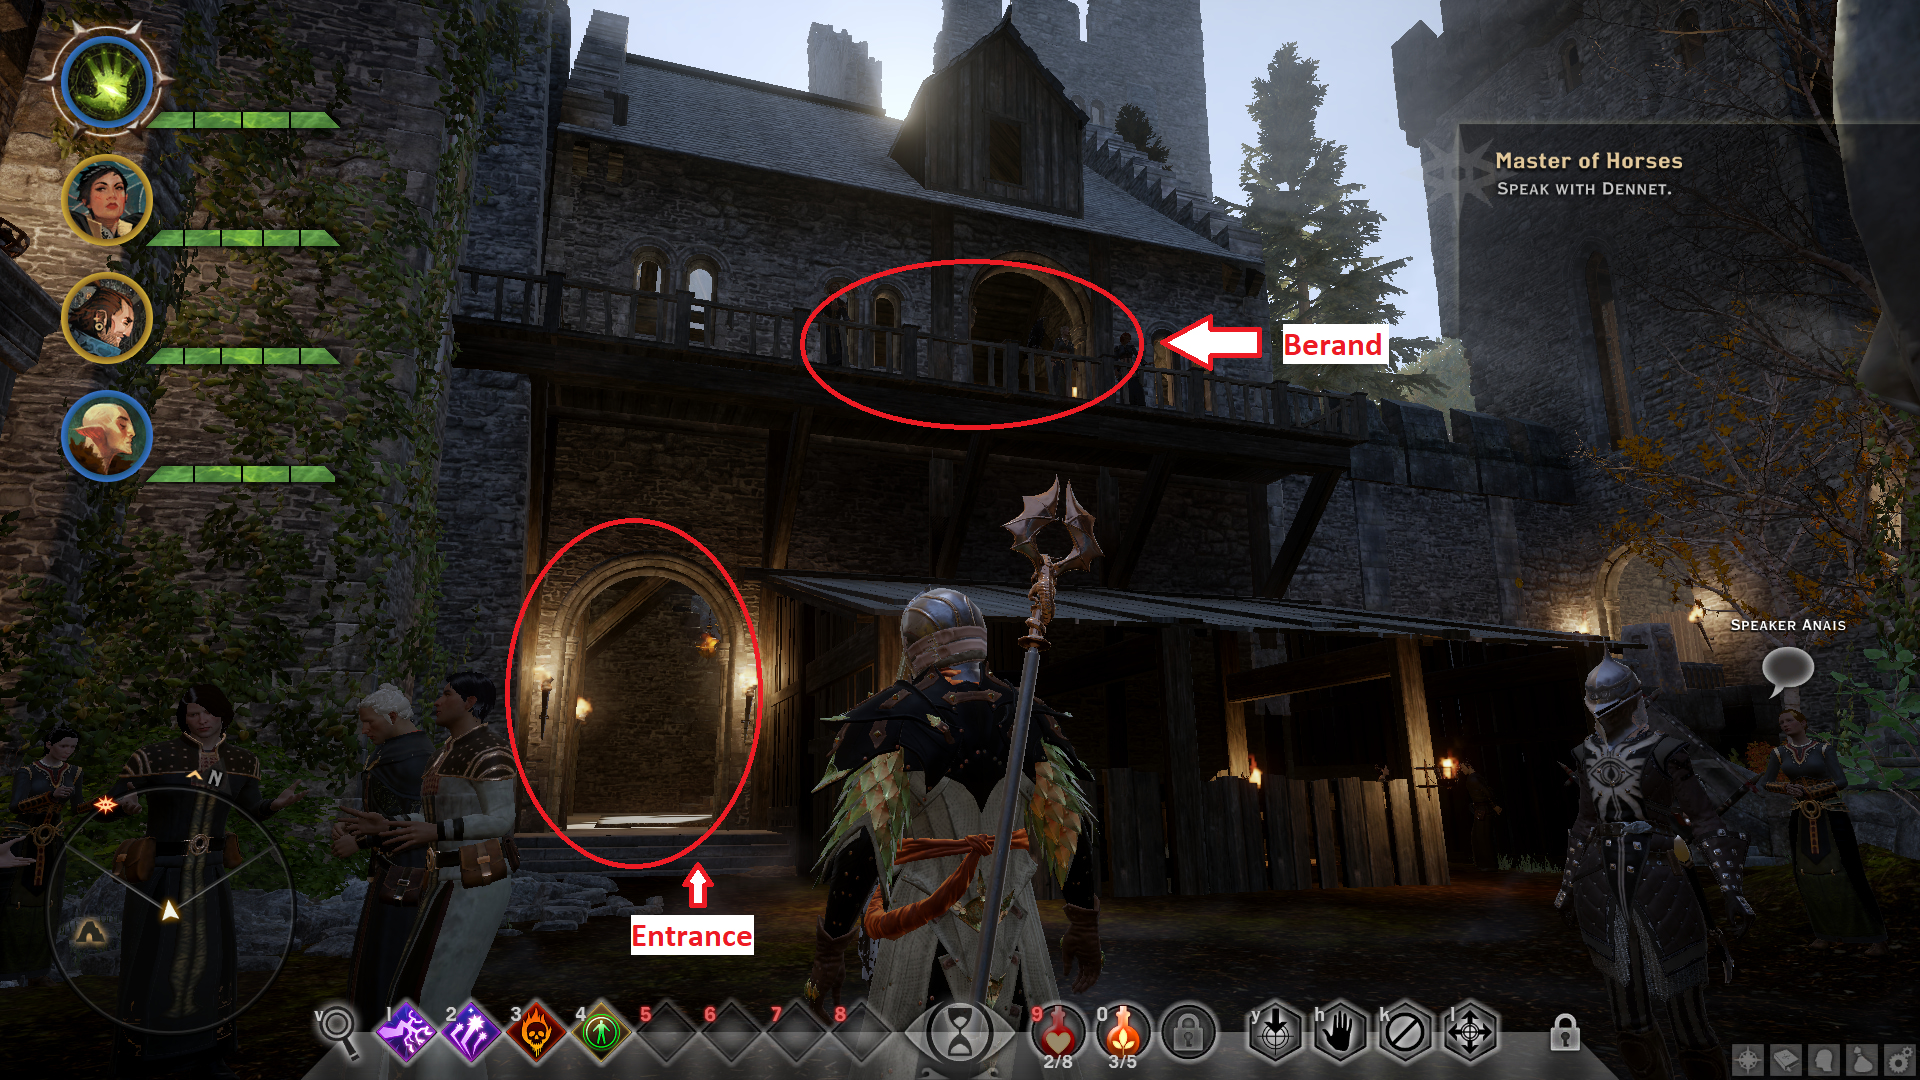
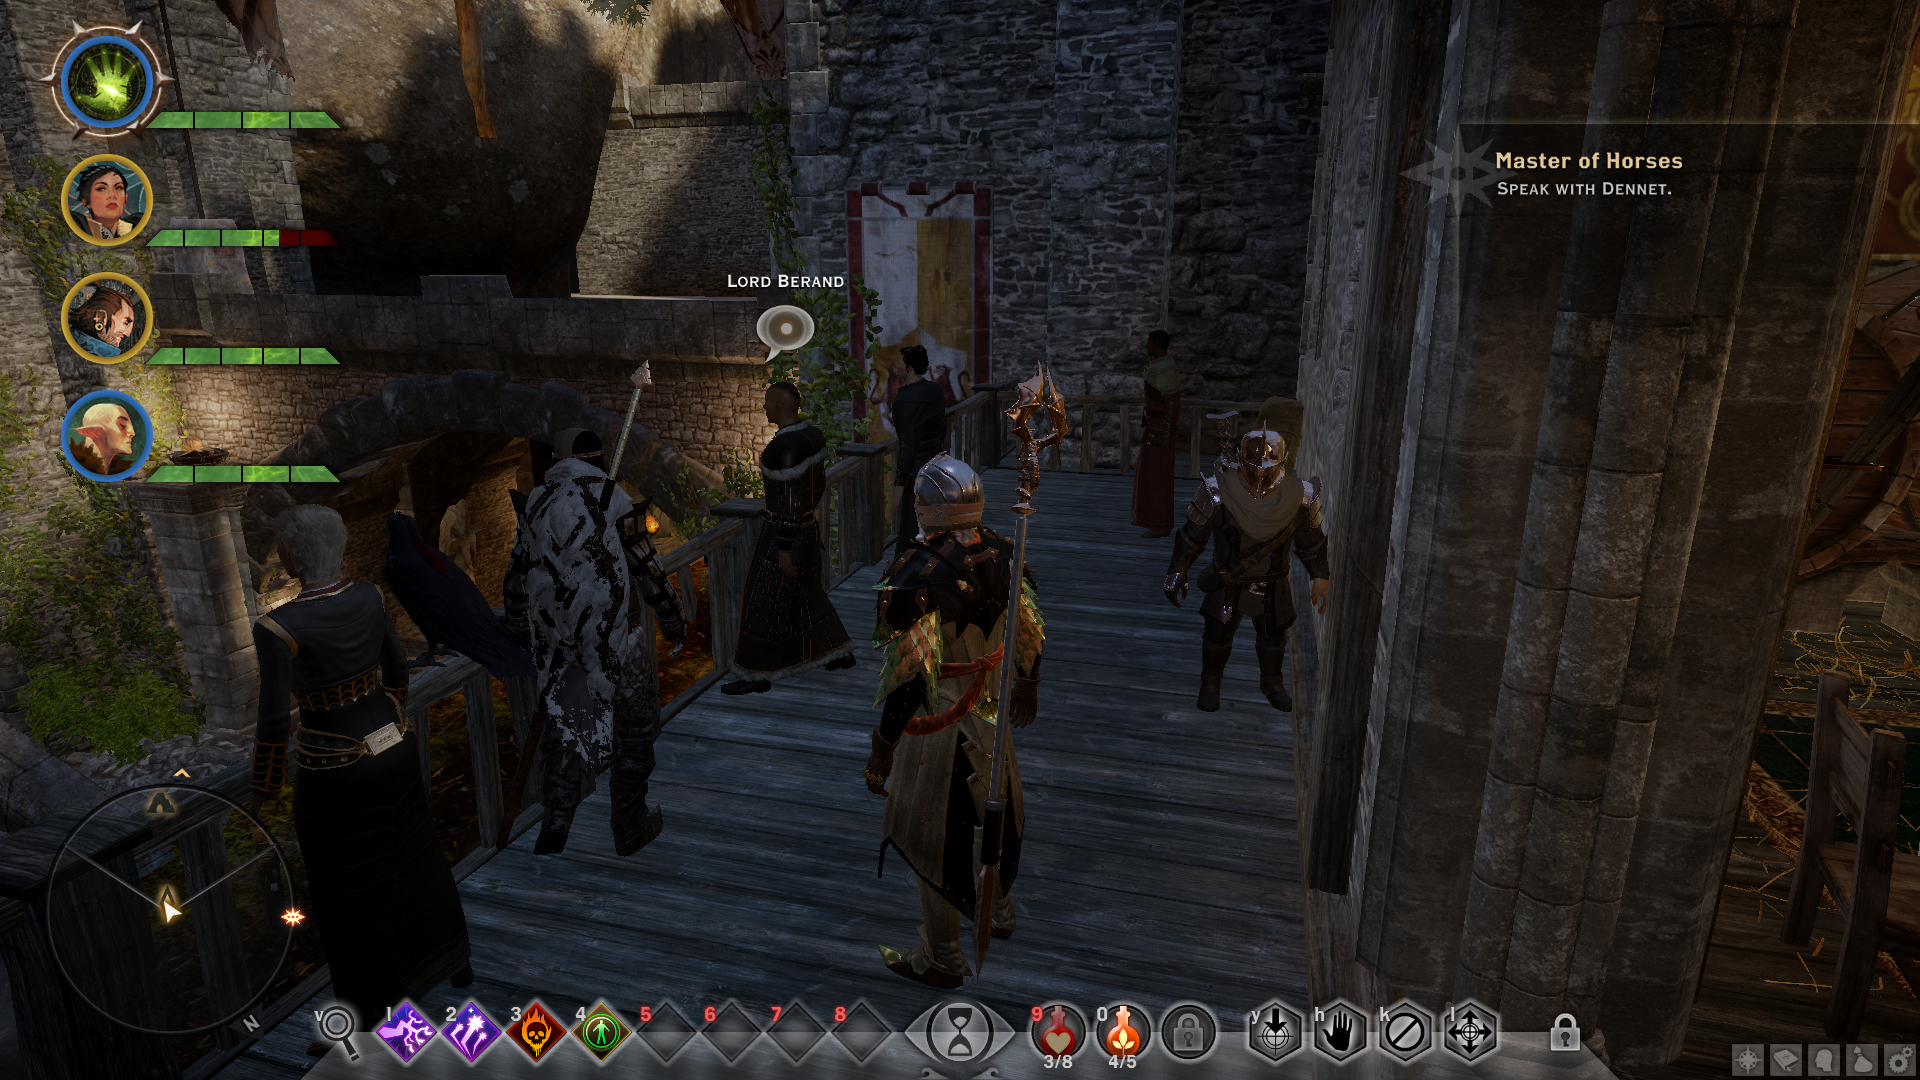
Can be recruited as soon as you arrive in Hinterlands for the first time. He can be found inside the Winterwatch Tower. Speak with him and he will give you the side quest “Love Waits”. Go to the location marked on the map, complete the objective and return to Berand. Choose one of the dialogue listed below to recruit him.
- –“Join the Inquisition.” (Cullen – Forces) (+Cassandra, +Iron Bull)
- –“You failed her. Go home.” (Josephine – Connections) (+Sera, +Solas)
Enchanter Ellendra (Josephine – Connections)
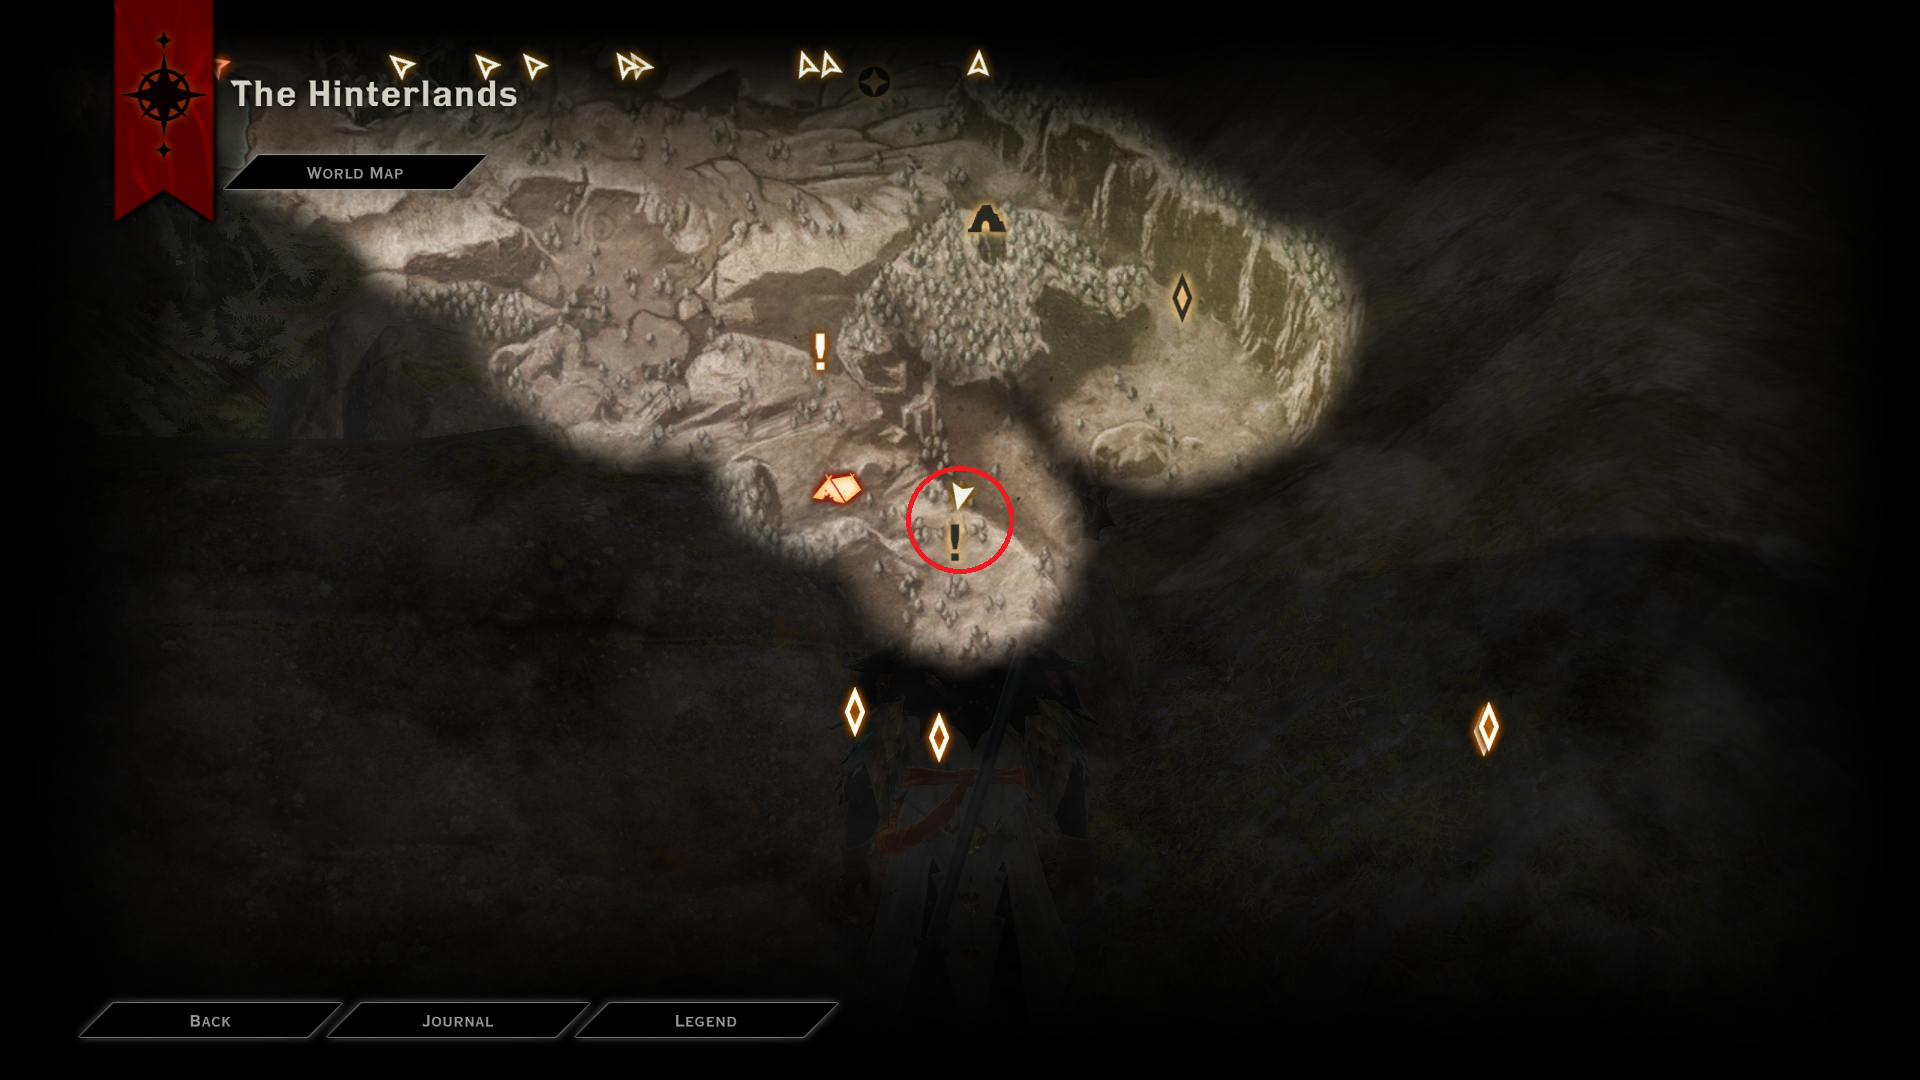
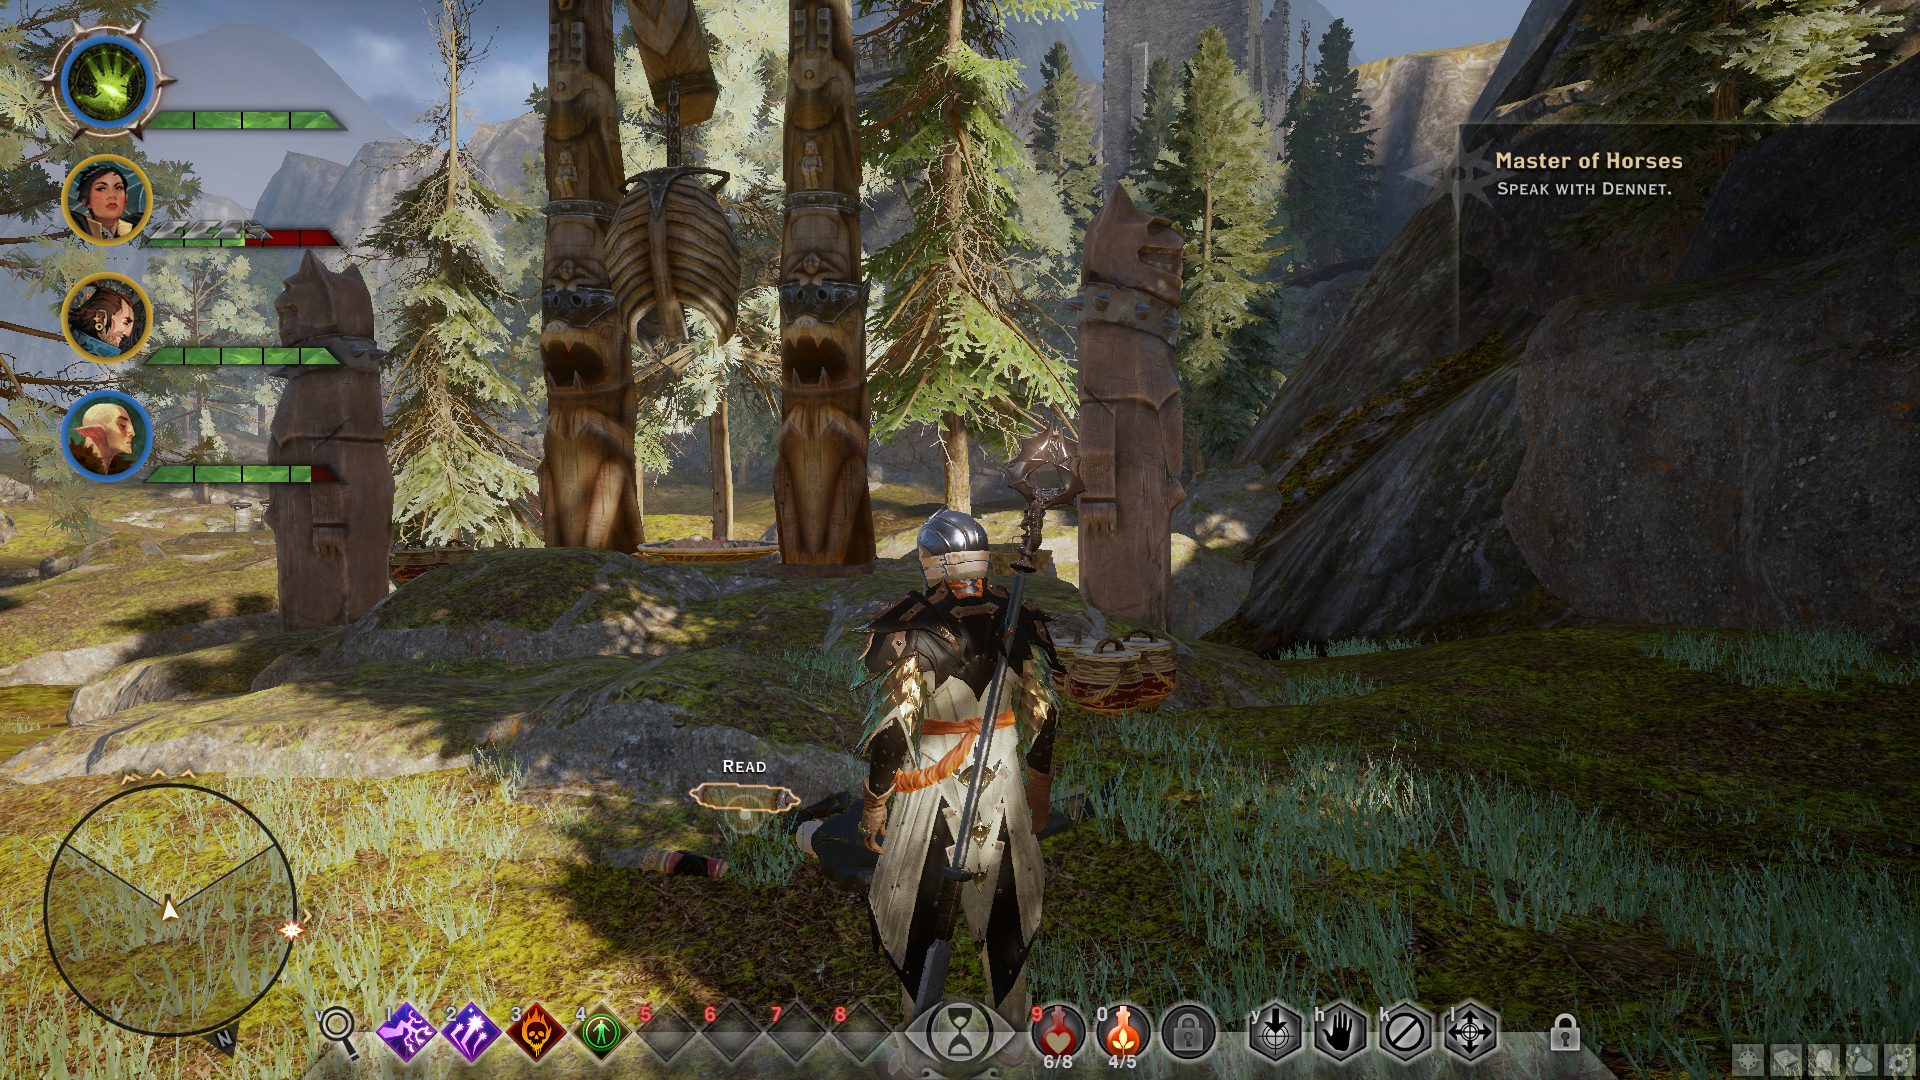
Can be recruited as soon as you arrive in Hinterlands for the first time. You must first start the “My Lover’s Phylactery” side quest by visiting the location shown above. After searching the body, the quest will start. You will be shown where she is as an objective marker on the map. You can recruit her after completing this side quest provided your inquisitor is a Human mage, or you have the “Arcane Knowledge” Inquisition perk, or you have Vivienne in your party, or have completed the “Champions of the Just” quest by choosing the templars after “The Threat Remains” main quest, or by taking the mages as prisoners at the end of “In Hushed Whispers” quest by choosing mages after “The Threat Remains” main quest. If you don’t have any of those after finishing the side quest, simply wait until you acquire one before talking to her again. When you’re ready, choose one of the dialogue listed below to recruit her.
- If your inquisitor is a Human mage;
–“As a mage, I can relate.” - Arcane Knowledge perk;
–“Magic can be a positive force.” - Deferring to Vivienne in your active party. (-Sera, -Solas, +Vivienne)
- After finishing “Champions of the Just”;
–“I have redeemed the templars.” - After finishing “In Hushed Whispers” by conscripting mages;
–“I have tamed the rebels.”
Master Dennet (Inquisition)
Can be recruited as soon as you arrive in Hinterlands for the first time. When you arrive in Hinterlands for the first time, Scout Harding will tell you about finding horses for the Inquisition and start the “Master of Horses” quest. Go to the location marked on the map and meet Dennet and talk to him to finish the quest and get your first mount. During the conversation, ask him about getting horses for the Inquisition. This will trigger “Horses for the Inquisition” side quest and he will ask you to help him secure the farms and tell you to talk to his wife Elaina and farmhand Bron who are located nearby. Talk to them to get the “Trouble with Wolves” and “Farmland Security” side quests. They’re pretty straightforward with objective markers shown on the map. Finish those quests and talk to Dennet again. You have an option to recruit him to the Inquisition. Ask him to join the Inquisition by;
- Deferring to Cassandra, Dorian, or Vivienne in your active party.
- Using the “Underworld Knowledge” or “History Knowledge” perks.
Tanner (Leliana – Secrets)
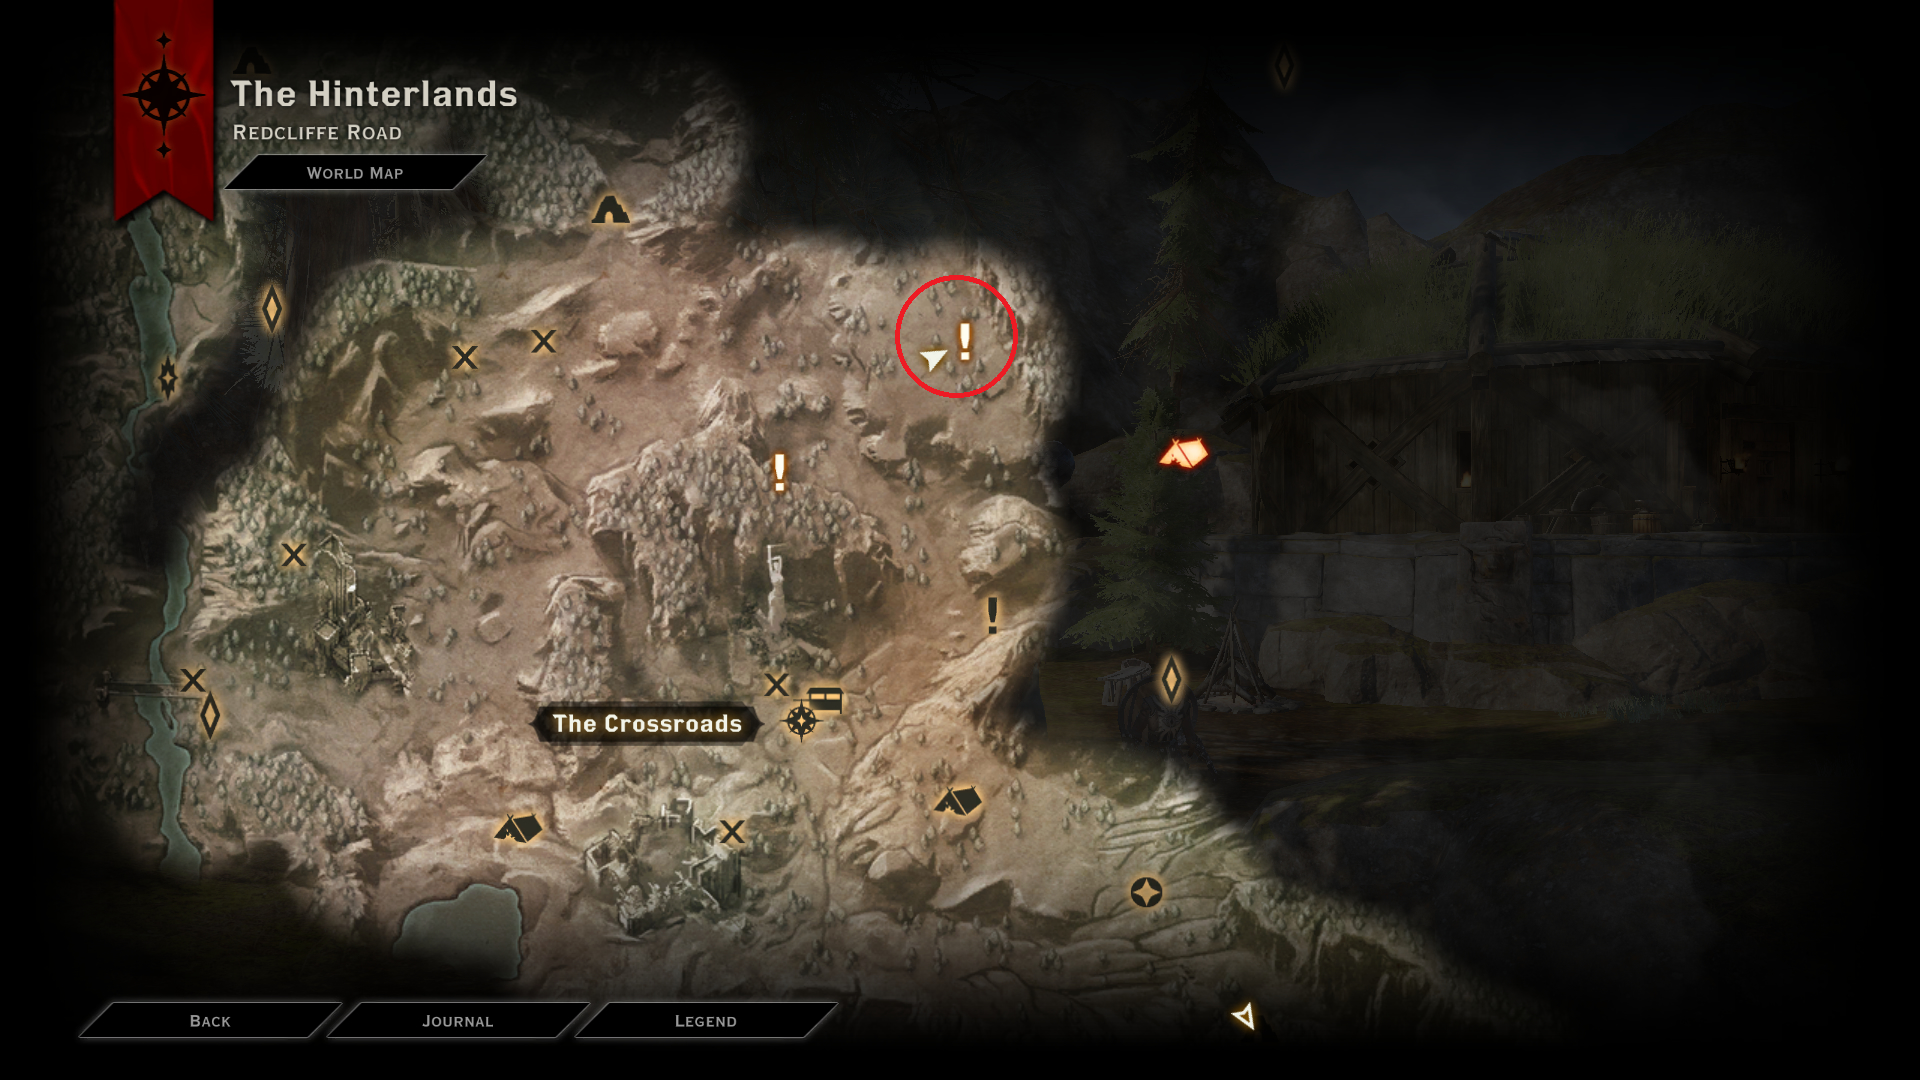
Go to the area circled above. There will be a corpse near the hut in that area. Search the corpse and loot the letter to start the “Business Arrangements” side quest. Complete the quest by going to the Redcliffe Village and talking to Tanner. Recruit her using any of the following methods.
- Deferring to Cassandra (++Cassandra, -Sera, -Solas)
- Deferring to Varric (-Cassandra, +Varric)
- “Underworld Knowledge” perk
–“You can do better with us.” (+Sera)
Exploration/Map Related: “Persuasive” Achievement (Continued)
Persuasive(Continued)
Hinterlands
Vale’s Irregulars (Cullen – Forces)
You need to help the refugees at the Crossroads by completing 6 side quests.
“East Road Bandits”
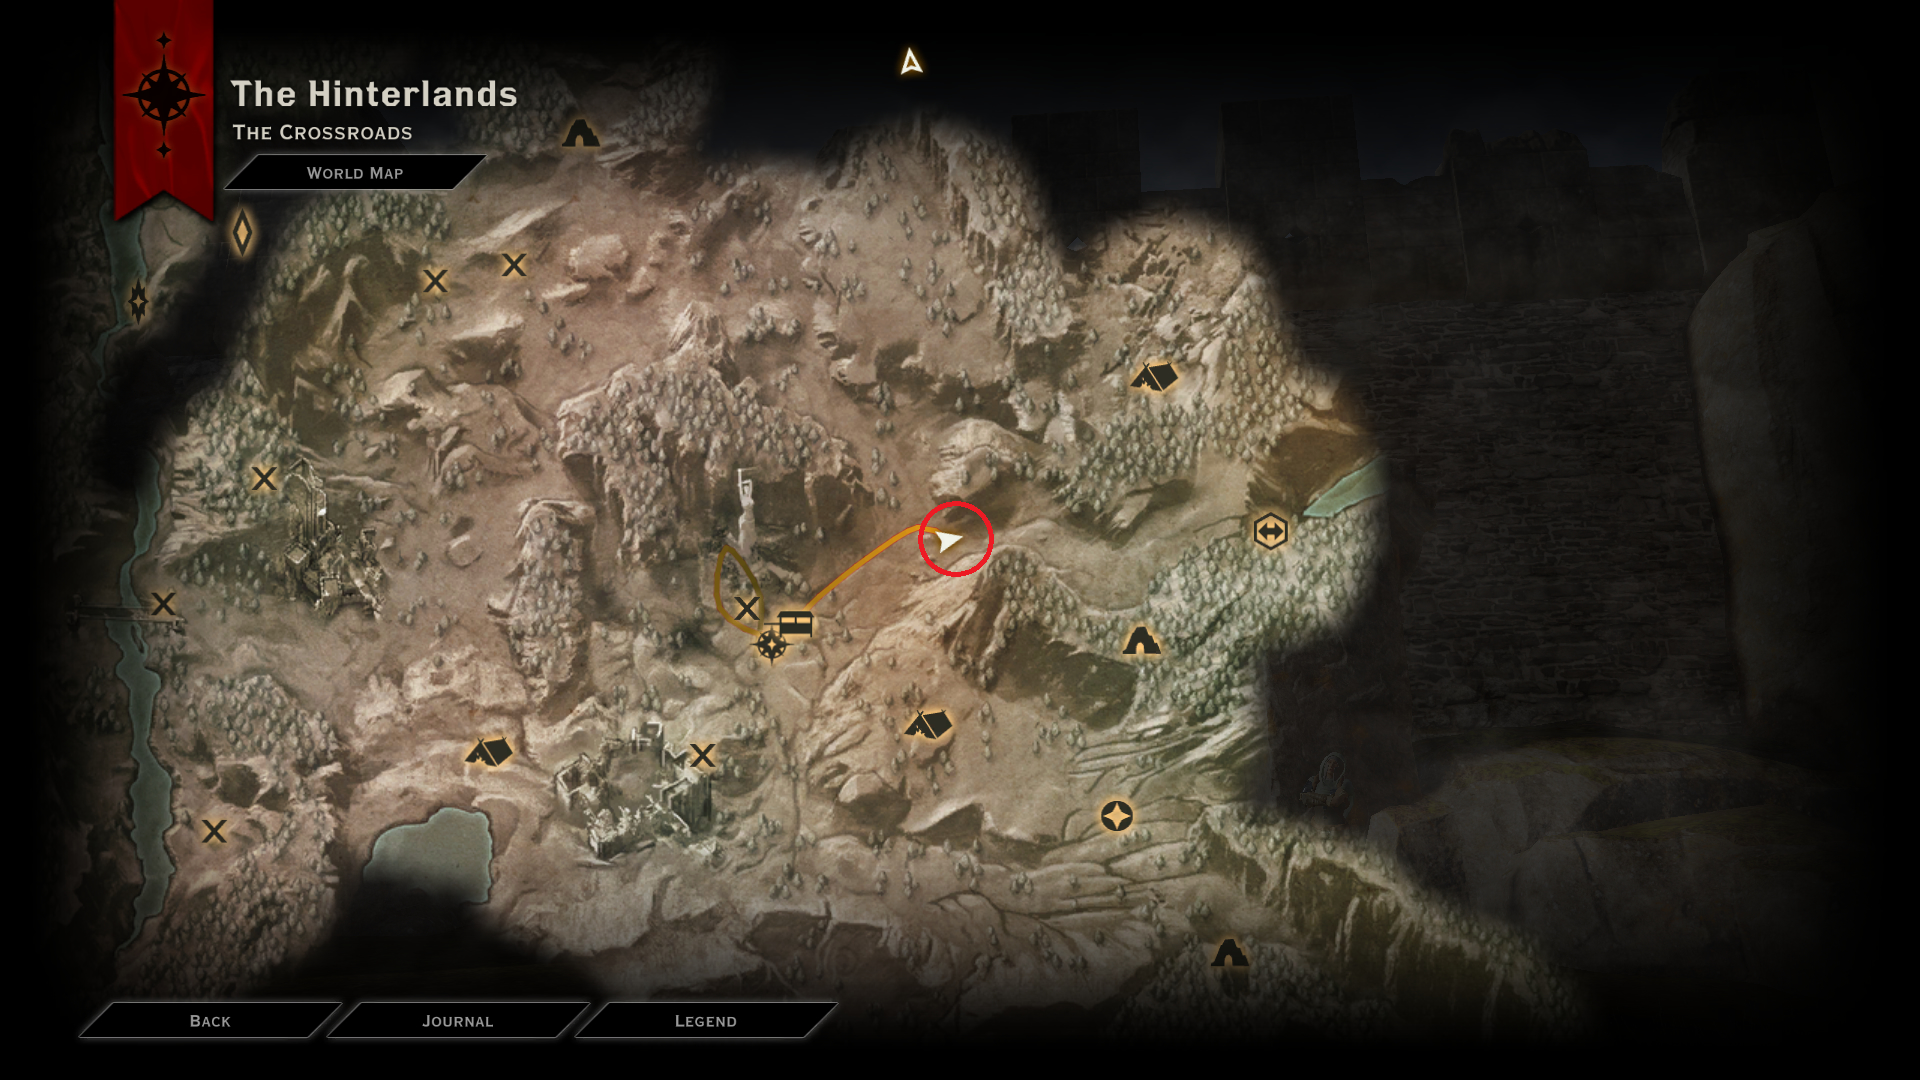
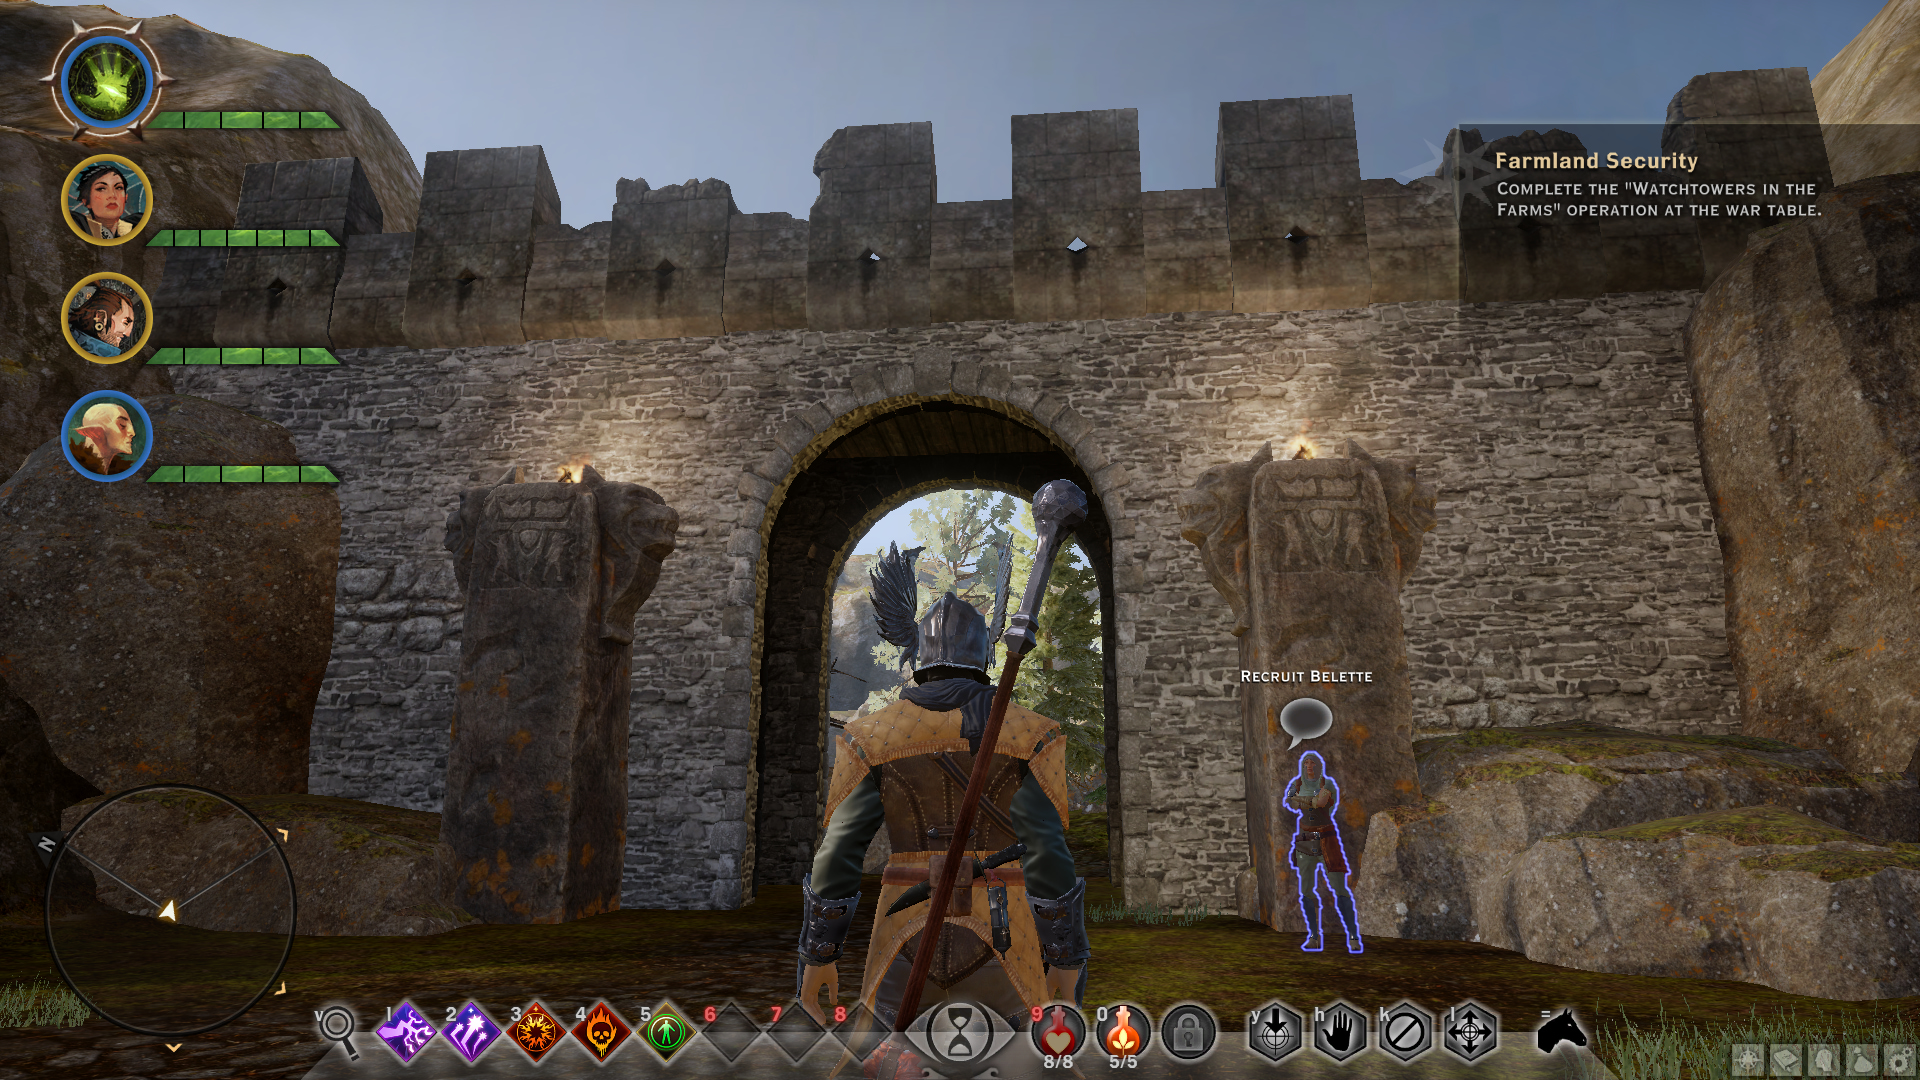
Talk to recruit Belette and she will give you this quest.
“Templars to the West”
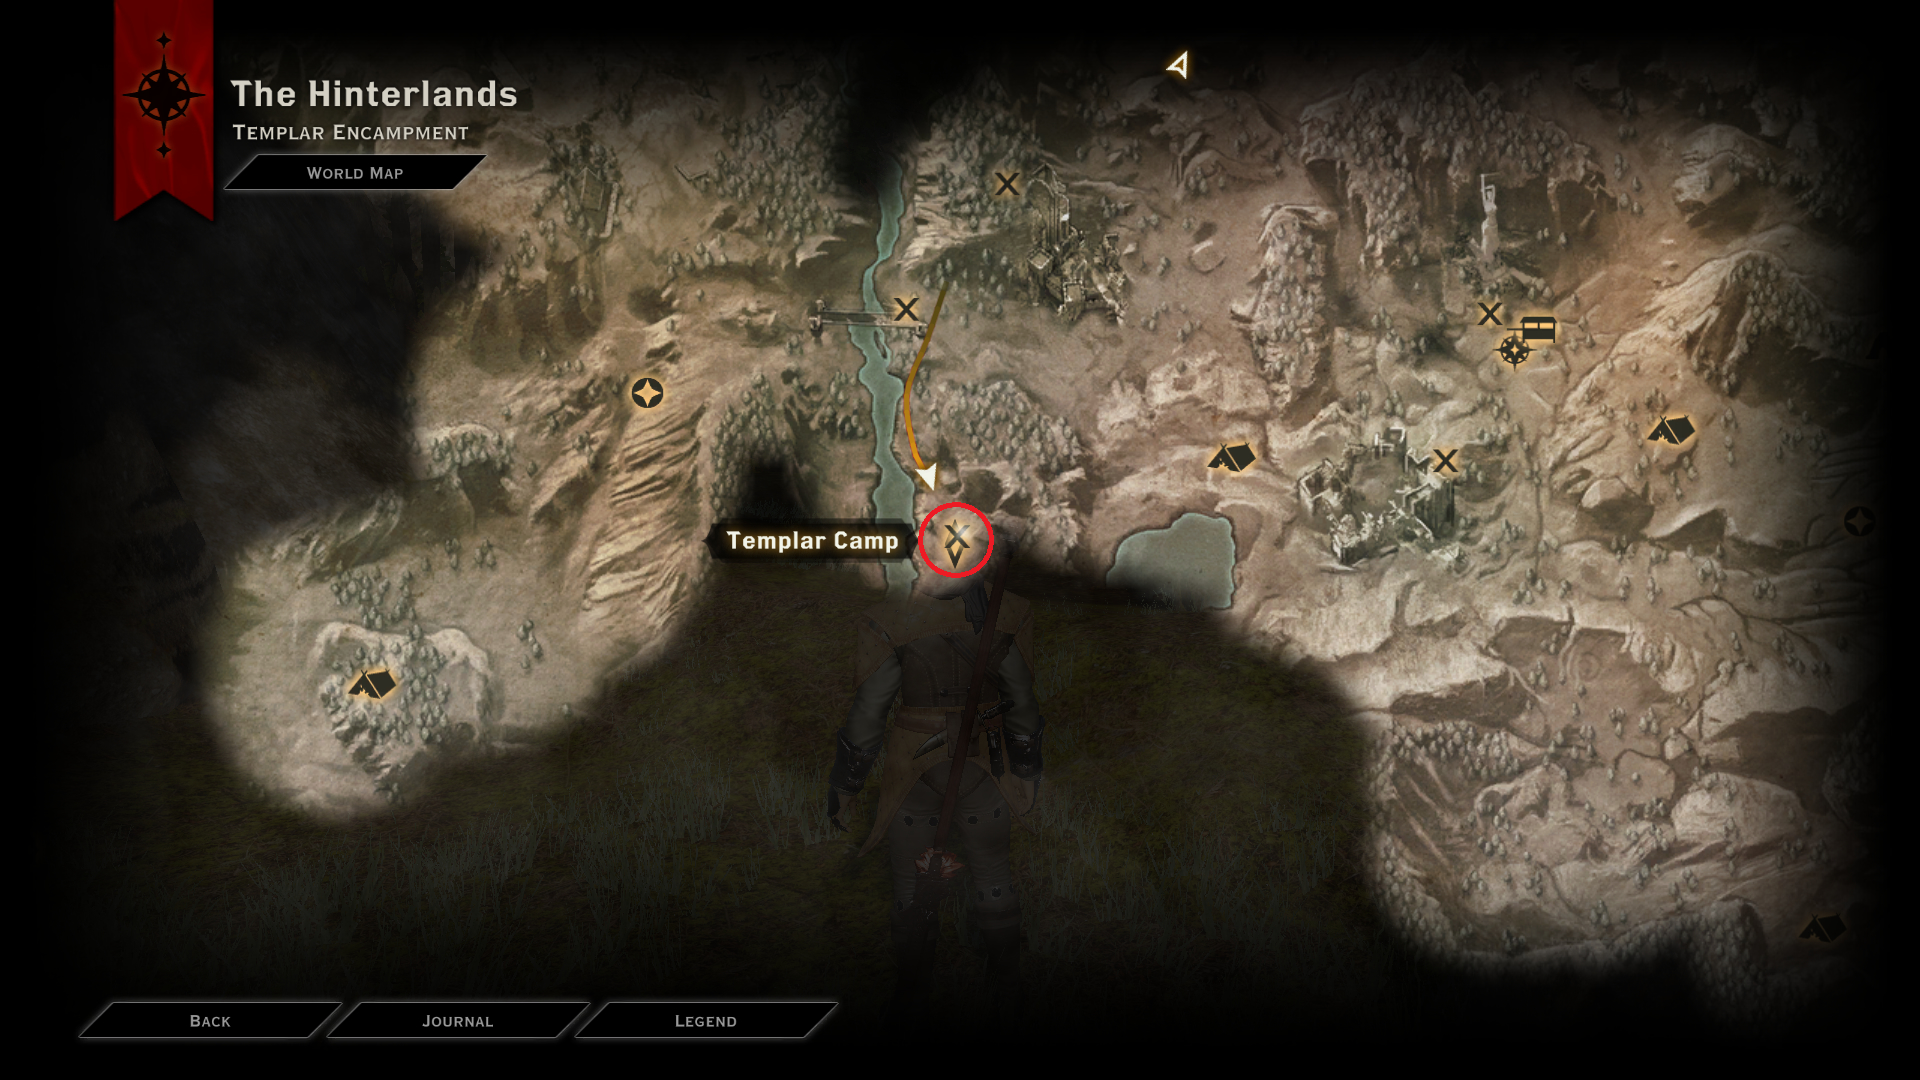
You can trigger this by finding any “Templar Encampment” codex entries scattered throughout 3 locations. However, easiest way to trigger this is to simply walk to the encampment itself. This quest doesn’t need to be completed to recruit this agent if either “Champions of the Just” or “In Hushed Whispers” main quest was completed first.
“Apostates in Witchwood”
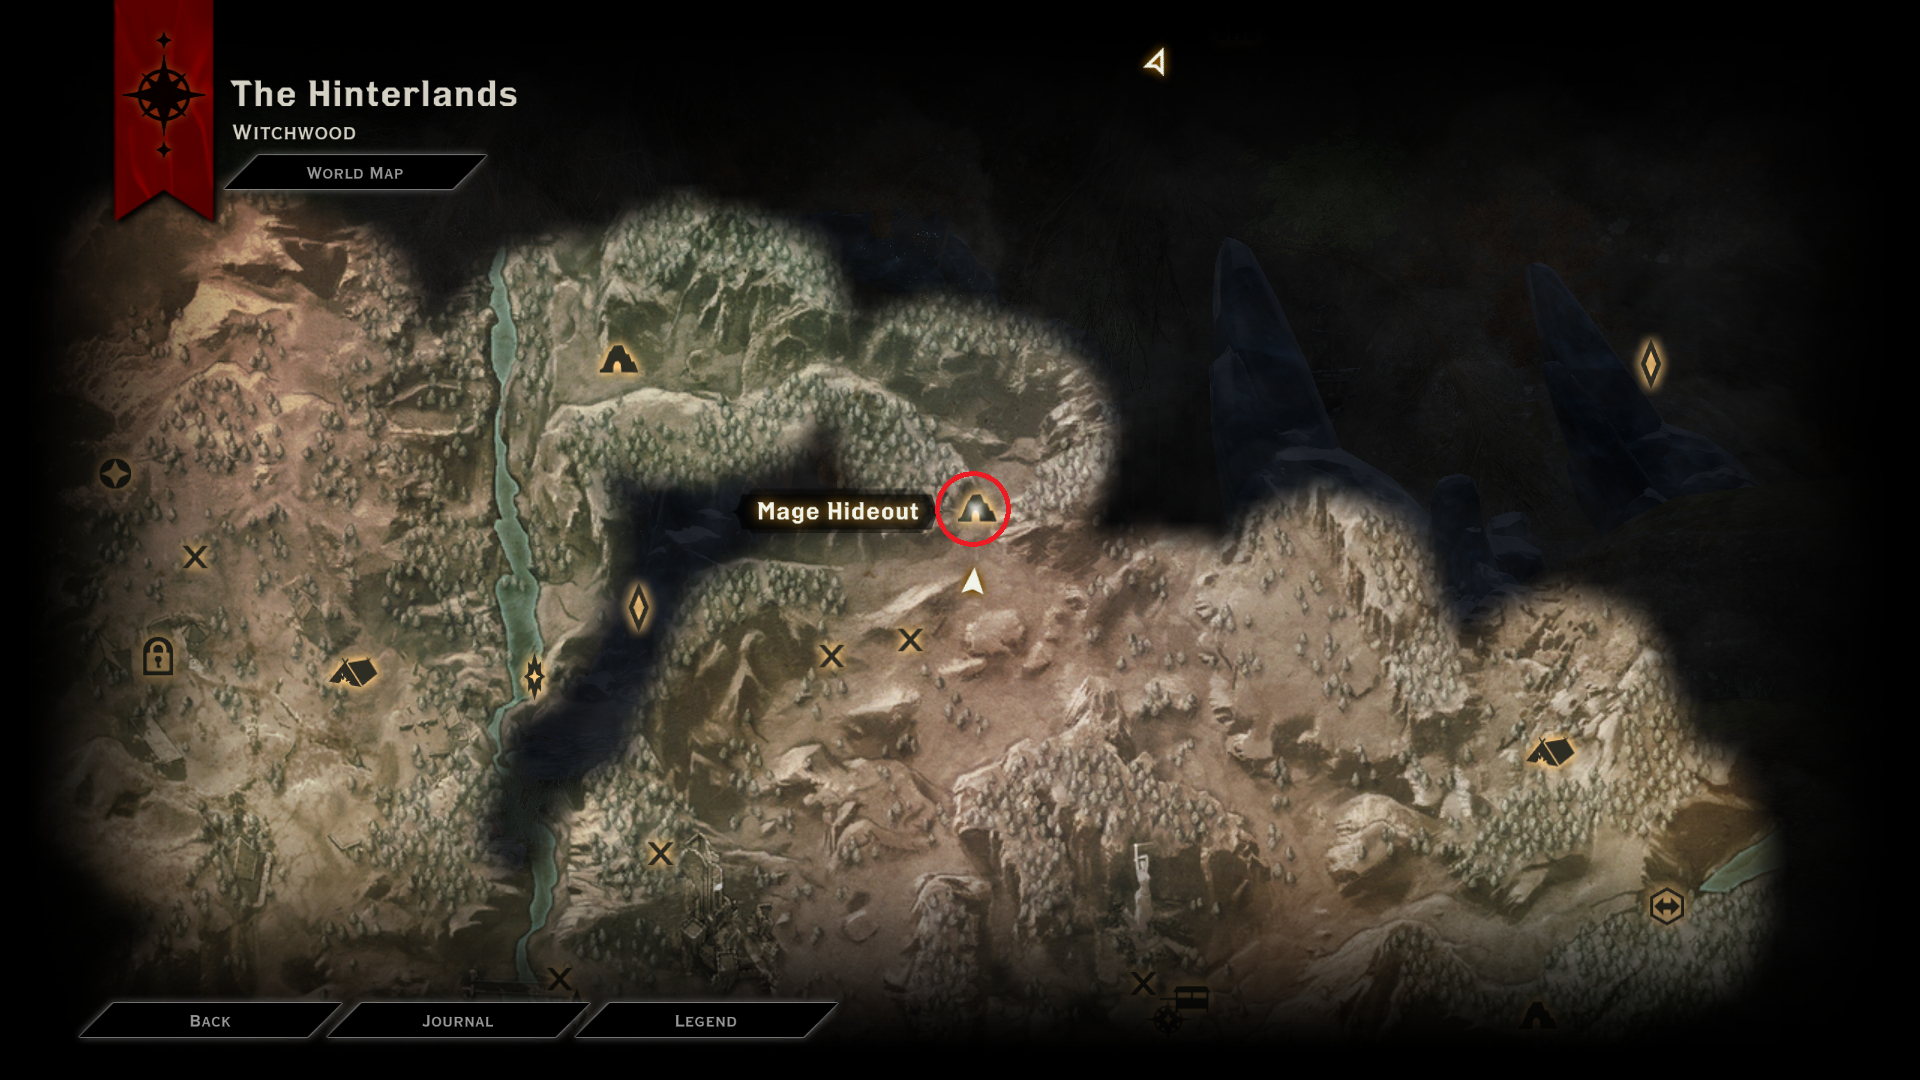
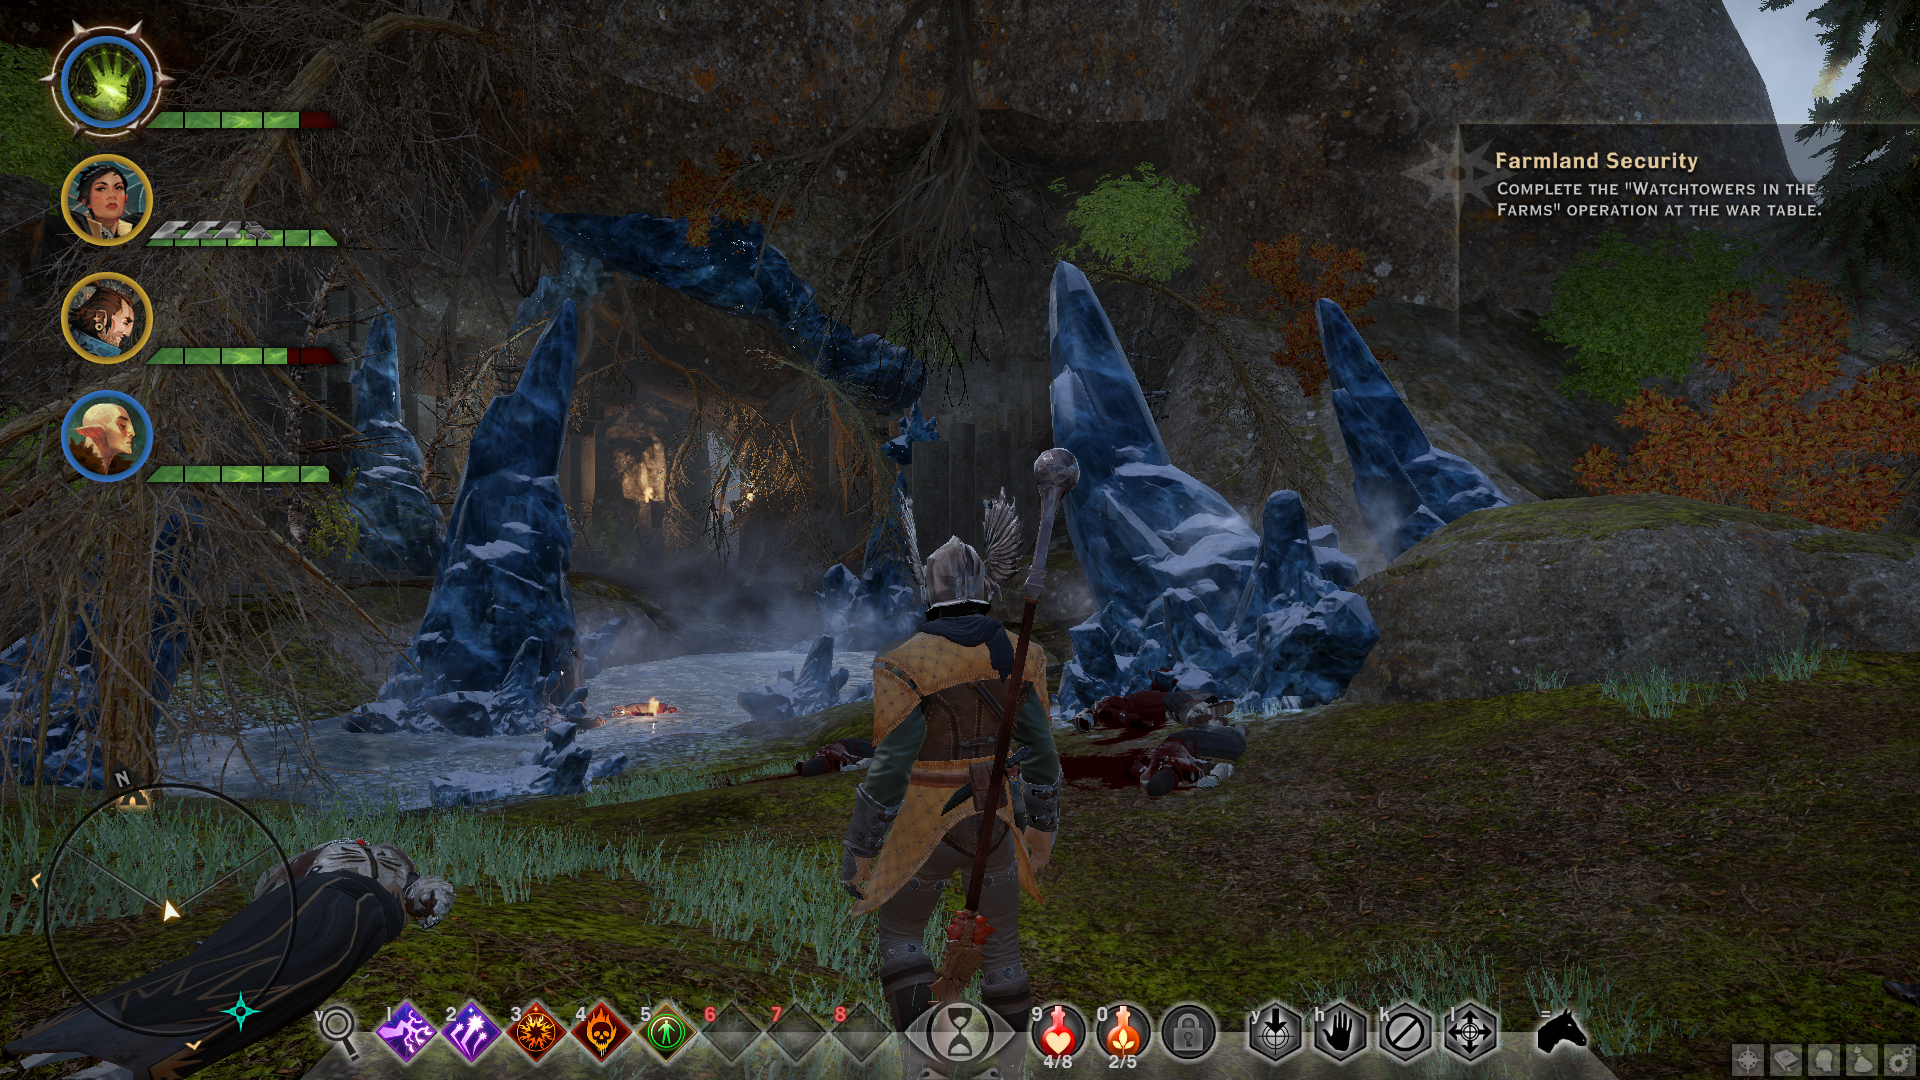
You can trigger this by finding any “Stronghold of the Apostate Mages” codex entries scattered throughout 3 locations. Like the above quest, walking straight to the mage stronghold will also trigger this quest. This quest doesn’t need to be completed to recruit this agent if either “Champions of the Just” or “In Hushed Whispers” main quest was completed first.
“Hunger Pangs”
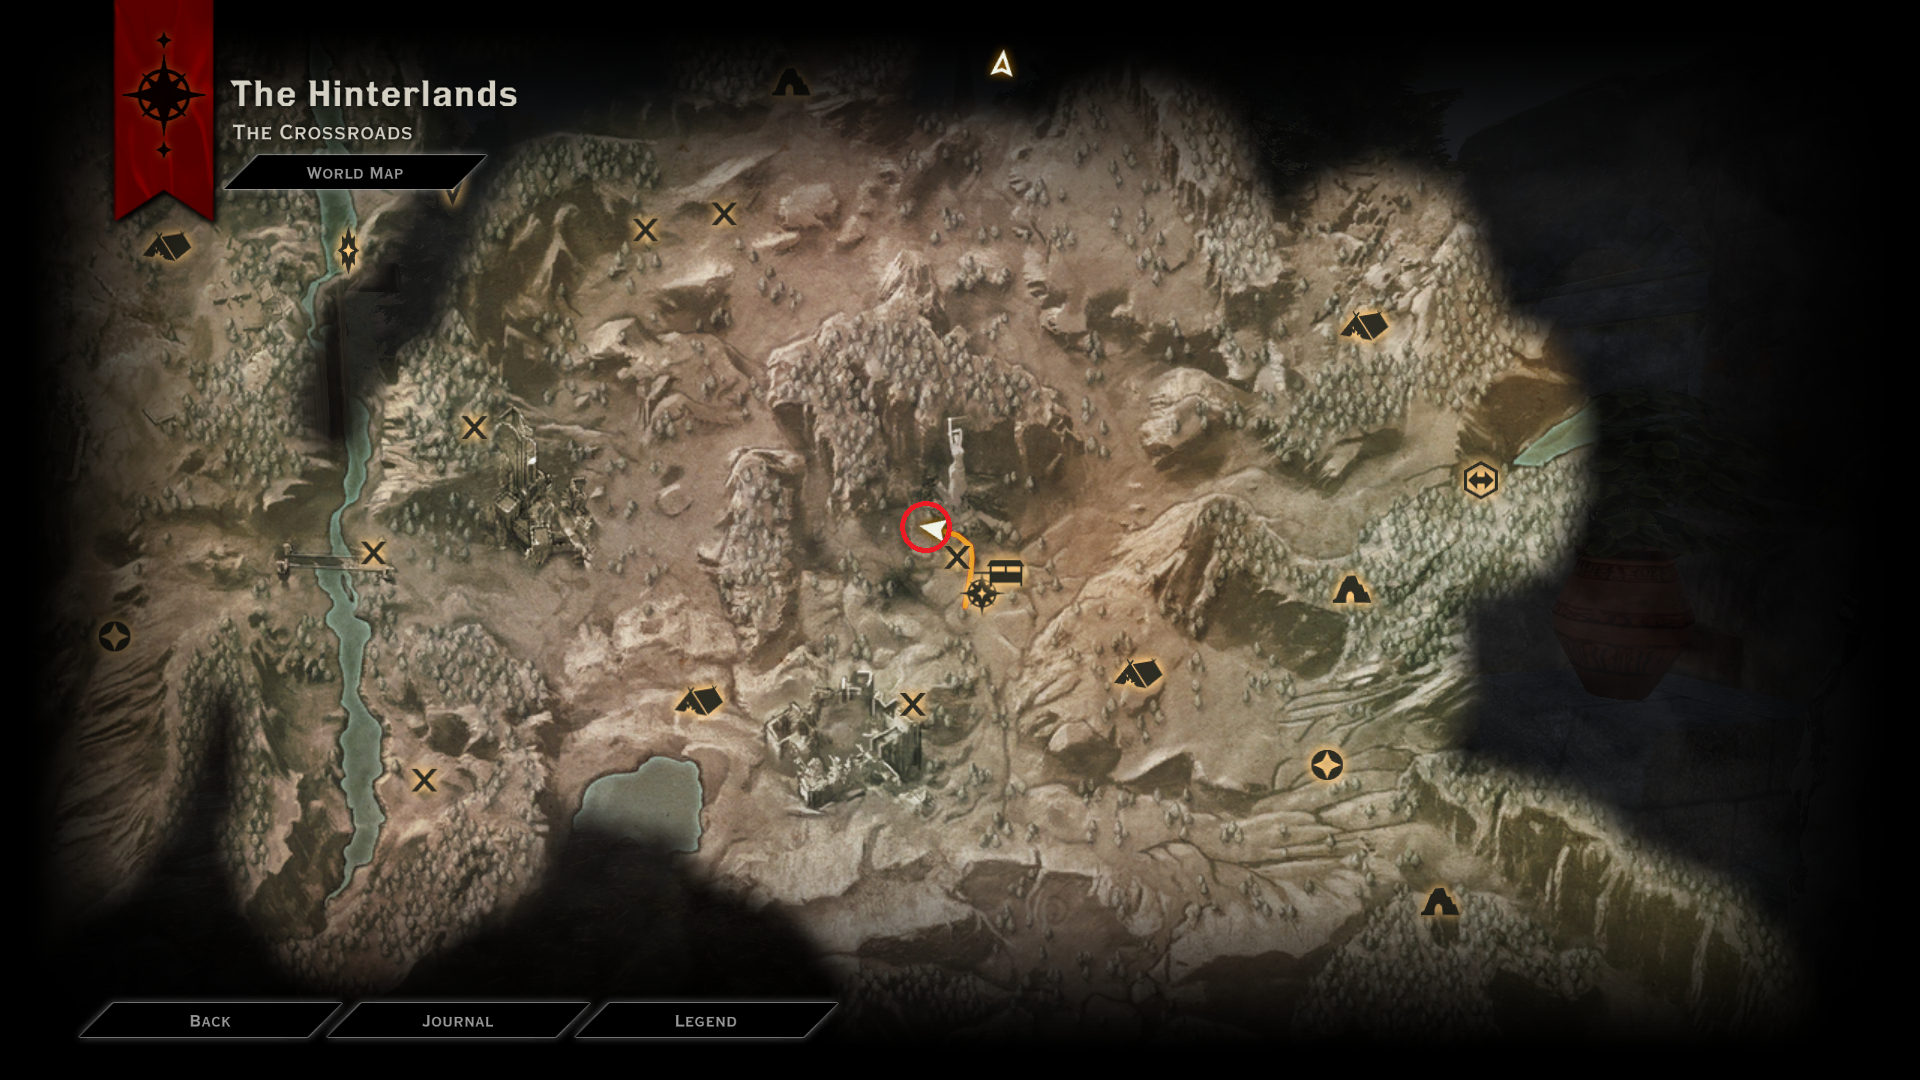
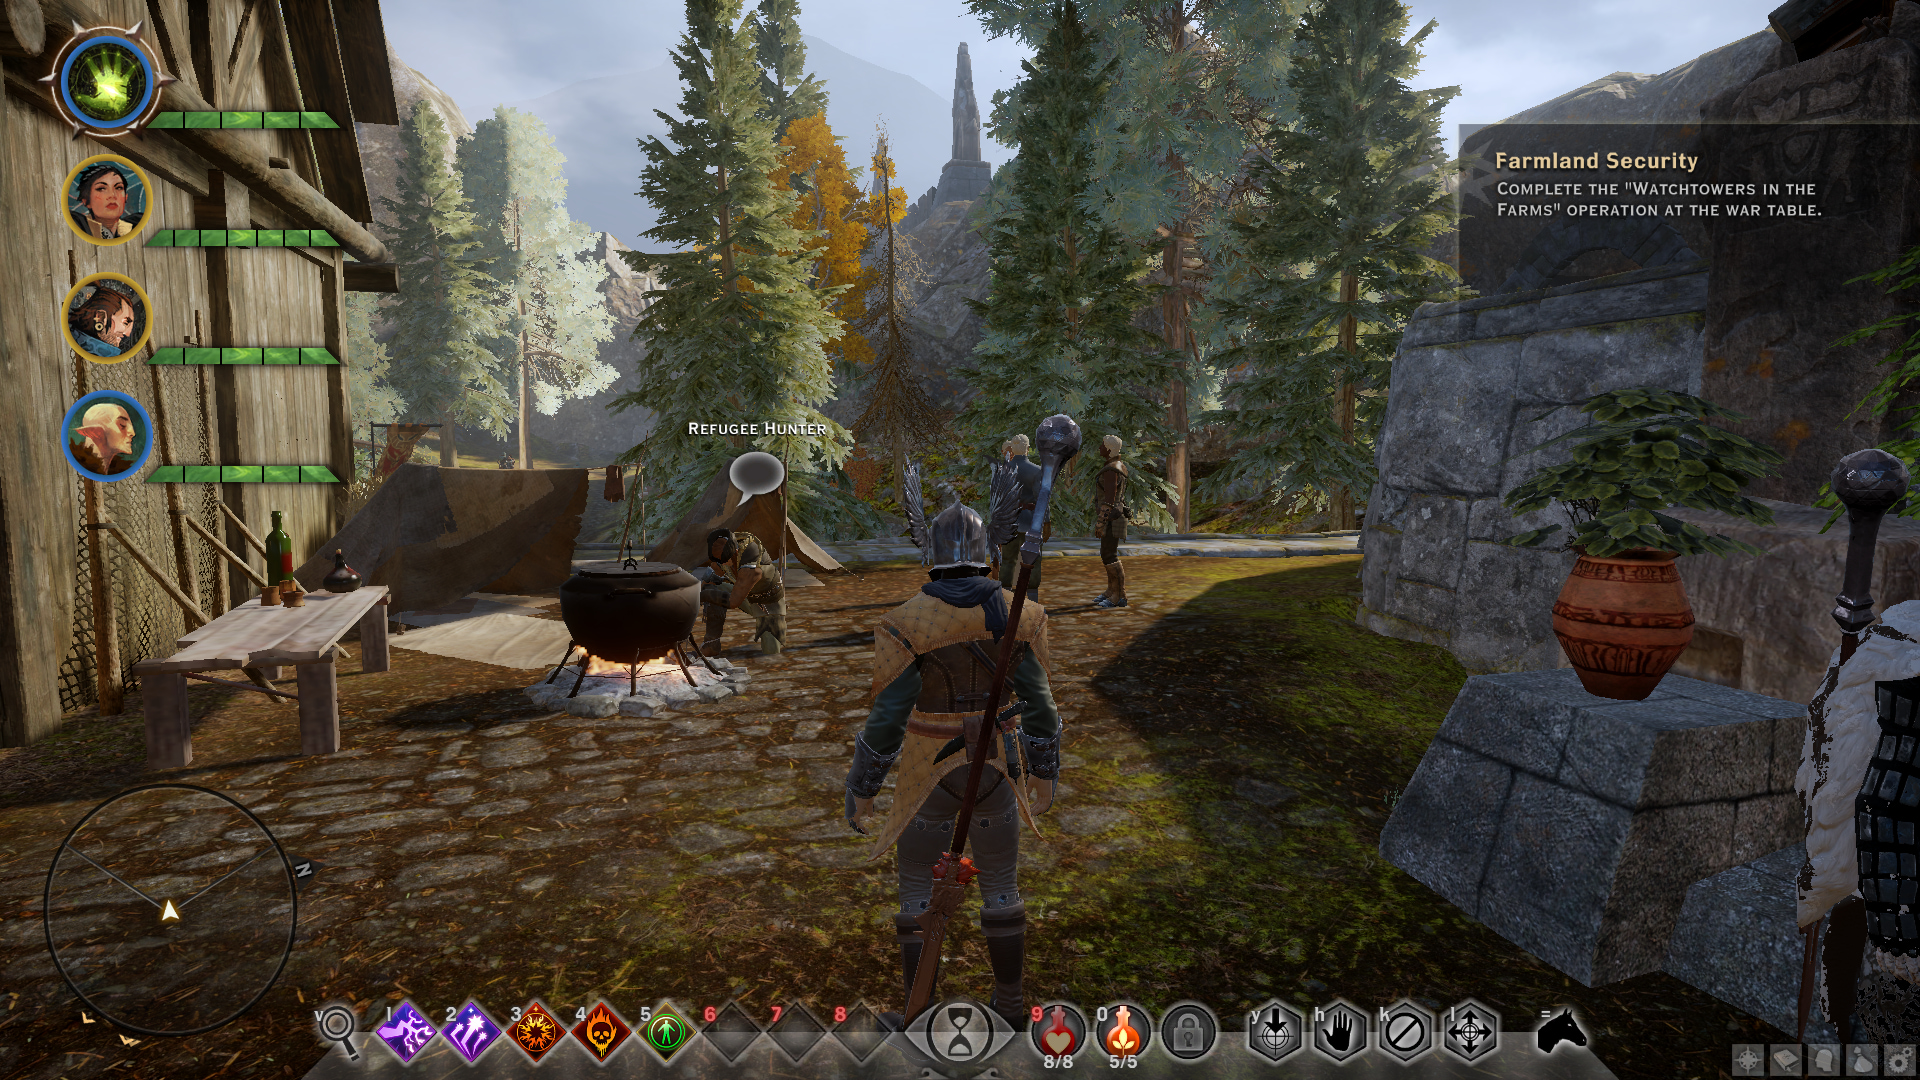
Talk to the Refugee Hunter near the Crossroads to start this quest. Can be completed by looting 10 ram meat from any killed ram (spawning locations are marked on the map).
“In the Elements”
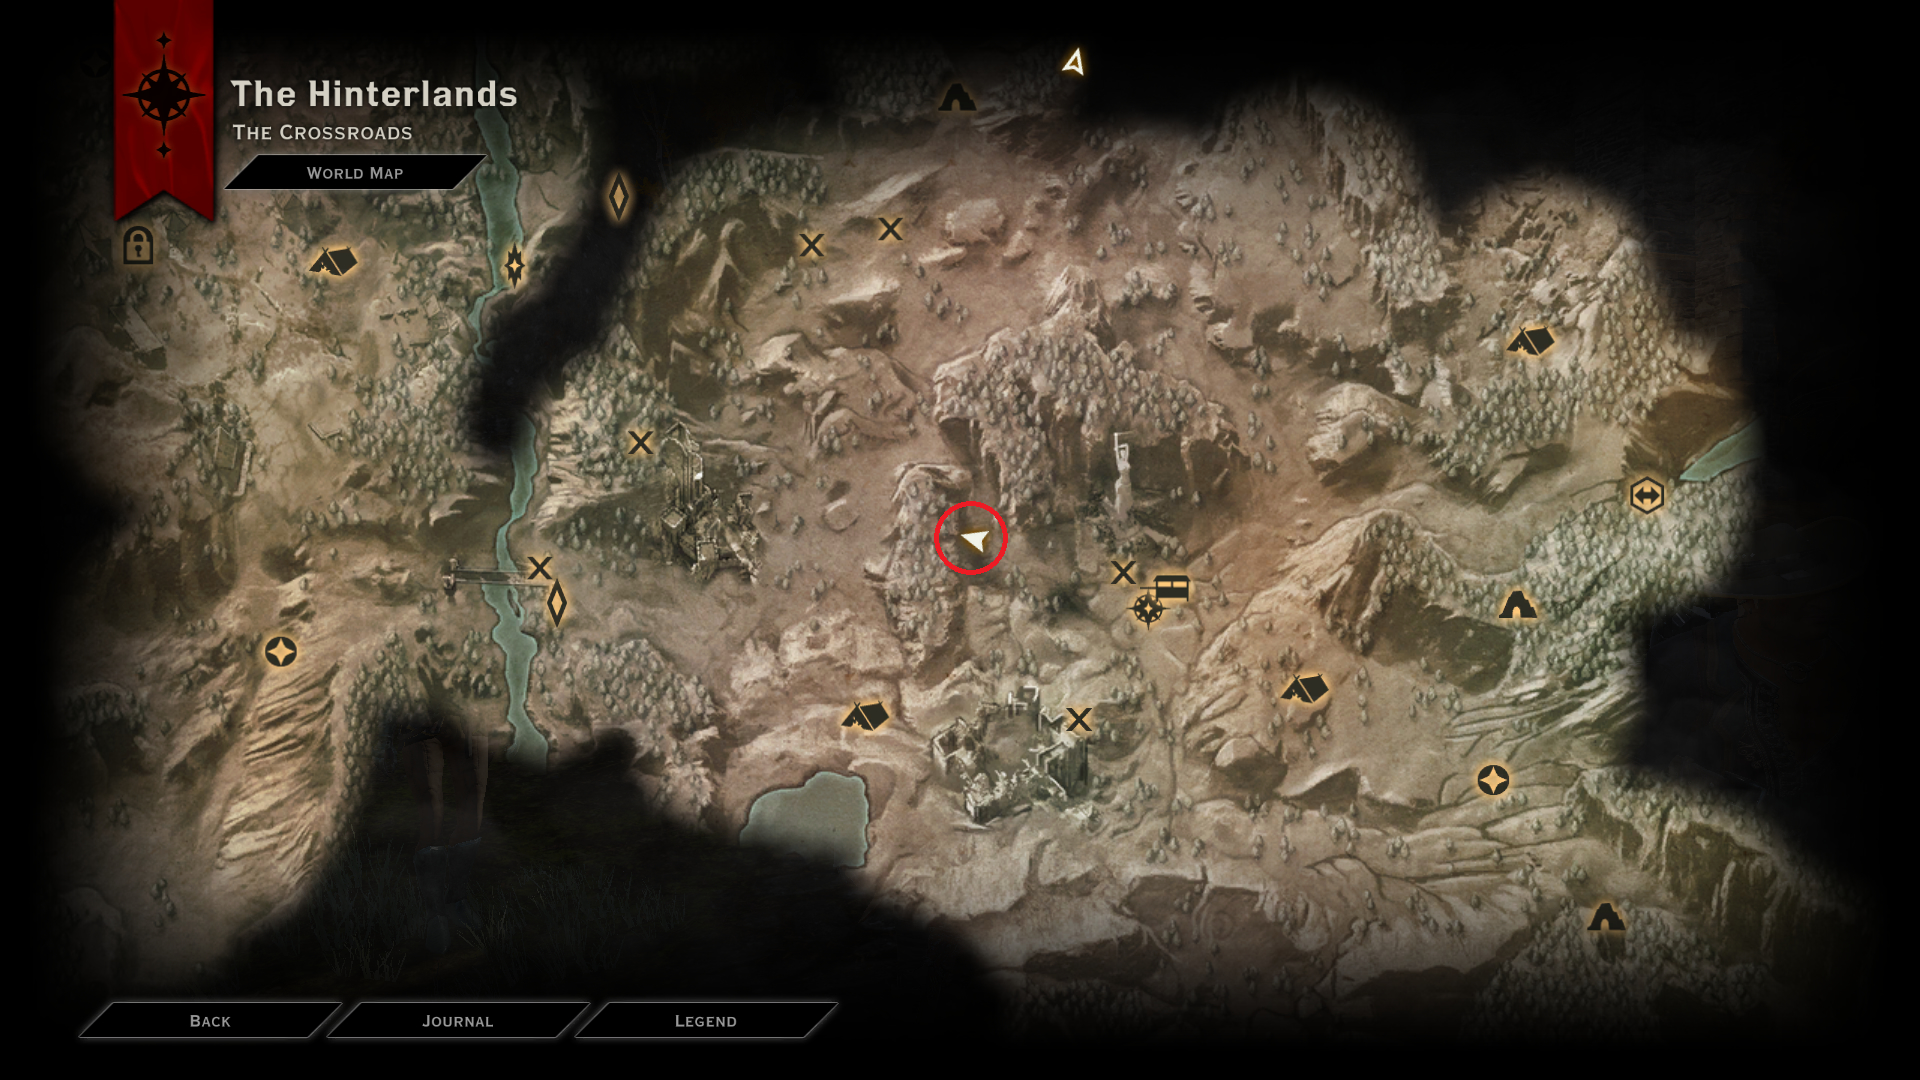
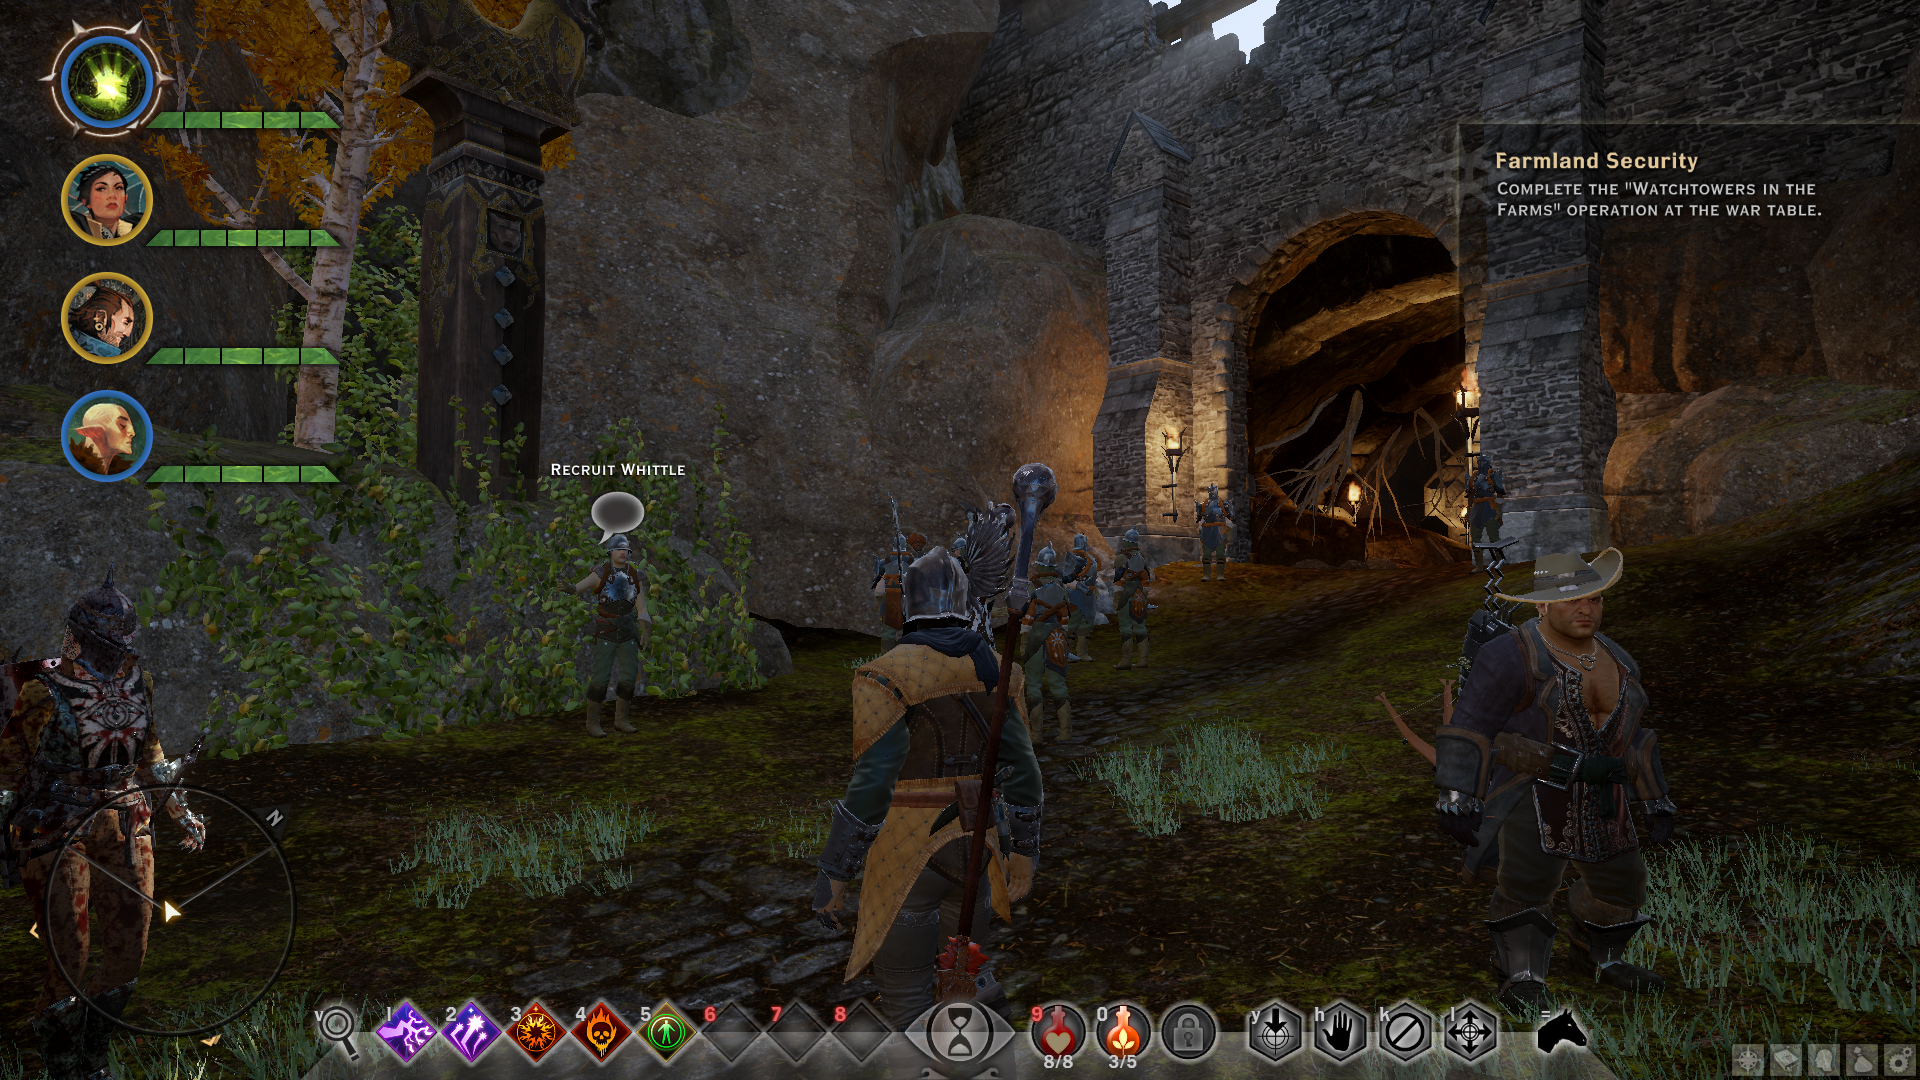
Talk to Recruit Whittle to start this quest. Mark the supply caches in areas shown on the map to complete this.
“A Healing Hand”
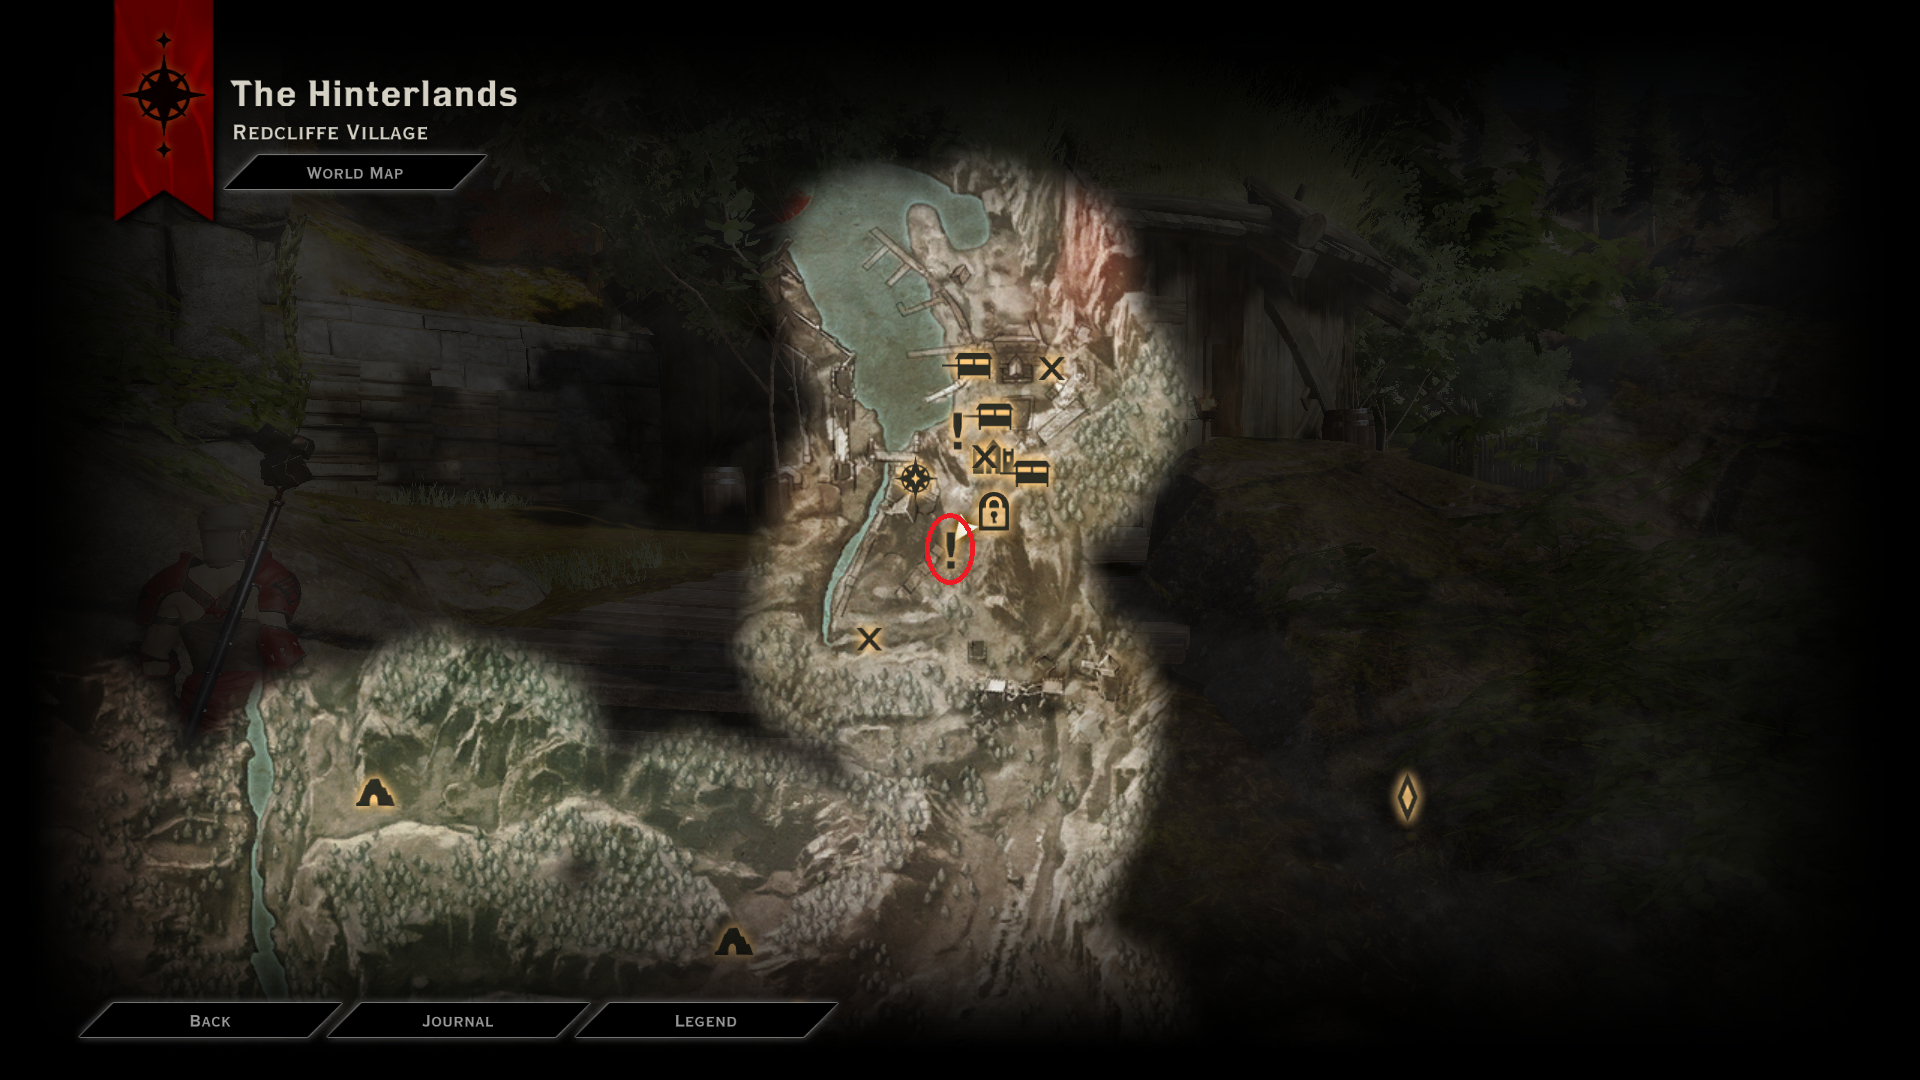
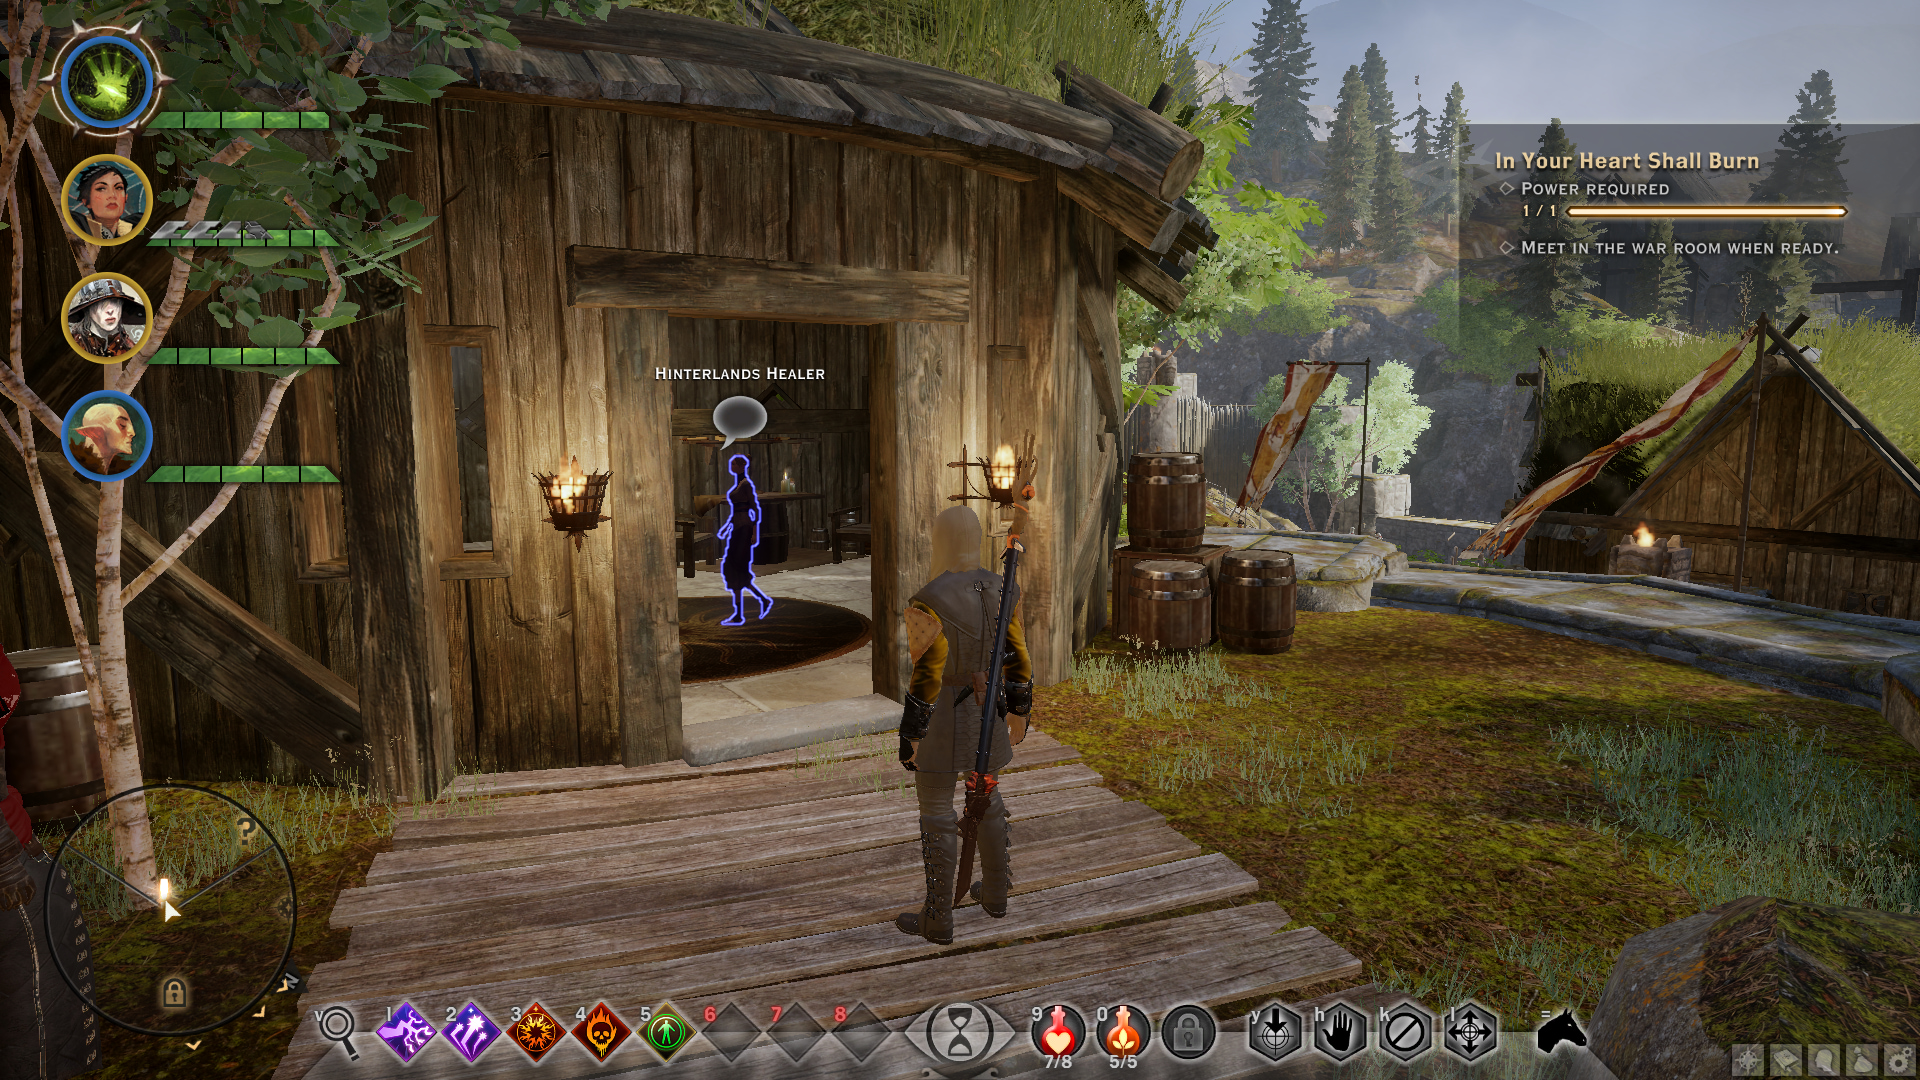
After completing the “The Threat Remains” main quest, the gates to the Redcliffe Village can be opened. Go to the location shown above and talk with the Hinterlands Healer to start this quest. Ask her to help the refugees at the Crossroads. She will ask why she should help you. Choose any of the special dialogue options below;
- Deferring to Cassandra (++Cassandra, ++Cole , +Sera)
- Deferring to Solas (++Cole, ++Solas)
- “Nobility Knowledge” perk
–“The Inquisition cares” (+Blackwall, +Cassandra, ++Cole, +Sera, +Solas) - “History Knowledge” perk
–“They will remember your help” (++Cole, +Sera, -Solas) - Having an elven Inquisitor
–“This is how you change things” (++Cole, +Dorian, +Iron Bull, +Sera, +Solas)
After all the above side quests have been completed, return back to Corporal Vale and speak with him. Only choosing the following line recruits these people as you agents.
- –“Recruit the skilled.” (++Blackwall, ++Cassandra, +Dorian, ++Iron Bull, ++Sera, ++Solas)
Storm Coast
Blades of Hessarian (Cullen – Forces)
When you first arrive in Storm Coast, Scout Harding will give you the “Cleaning House” side quest. following along the quest will take you to a shack with dead bodies. Loot the house and on a nearby note you will find the recipe to an amulet called “Mercy’s Crest”.
You can craft it via a Requisition table by going back to the starting campsite. You need one Deepstalker Hide and two Serpentstones to craft it. Serpentstones spawn on Storm Coast and Deepstalkers also spawn inside caves in Storm Coast. Craft it and equip it on your Inquisitor before approaching the Hessarians’ camp. You need to fight their leader and defeat him and his two Mabari hounds. After defeating him, the other members of this group will automatically join the Inquisition as Cullen’s agents provided you have been wearing the “Mercy’s Crest” amulet when approaching the camp and fighting the leader.
Note: If you didn’t craft and equip the amulet before approaching the camp, everyone inside the camp will attack you and you will permanently lose the chance to recruit this faction as an Agent.
Fallow Mire
Sky Watcher
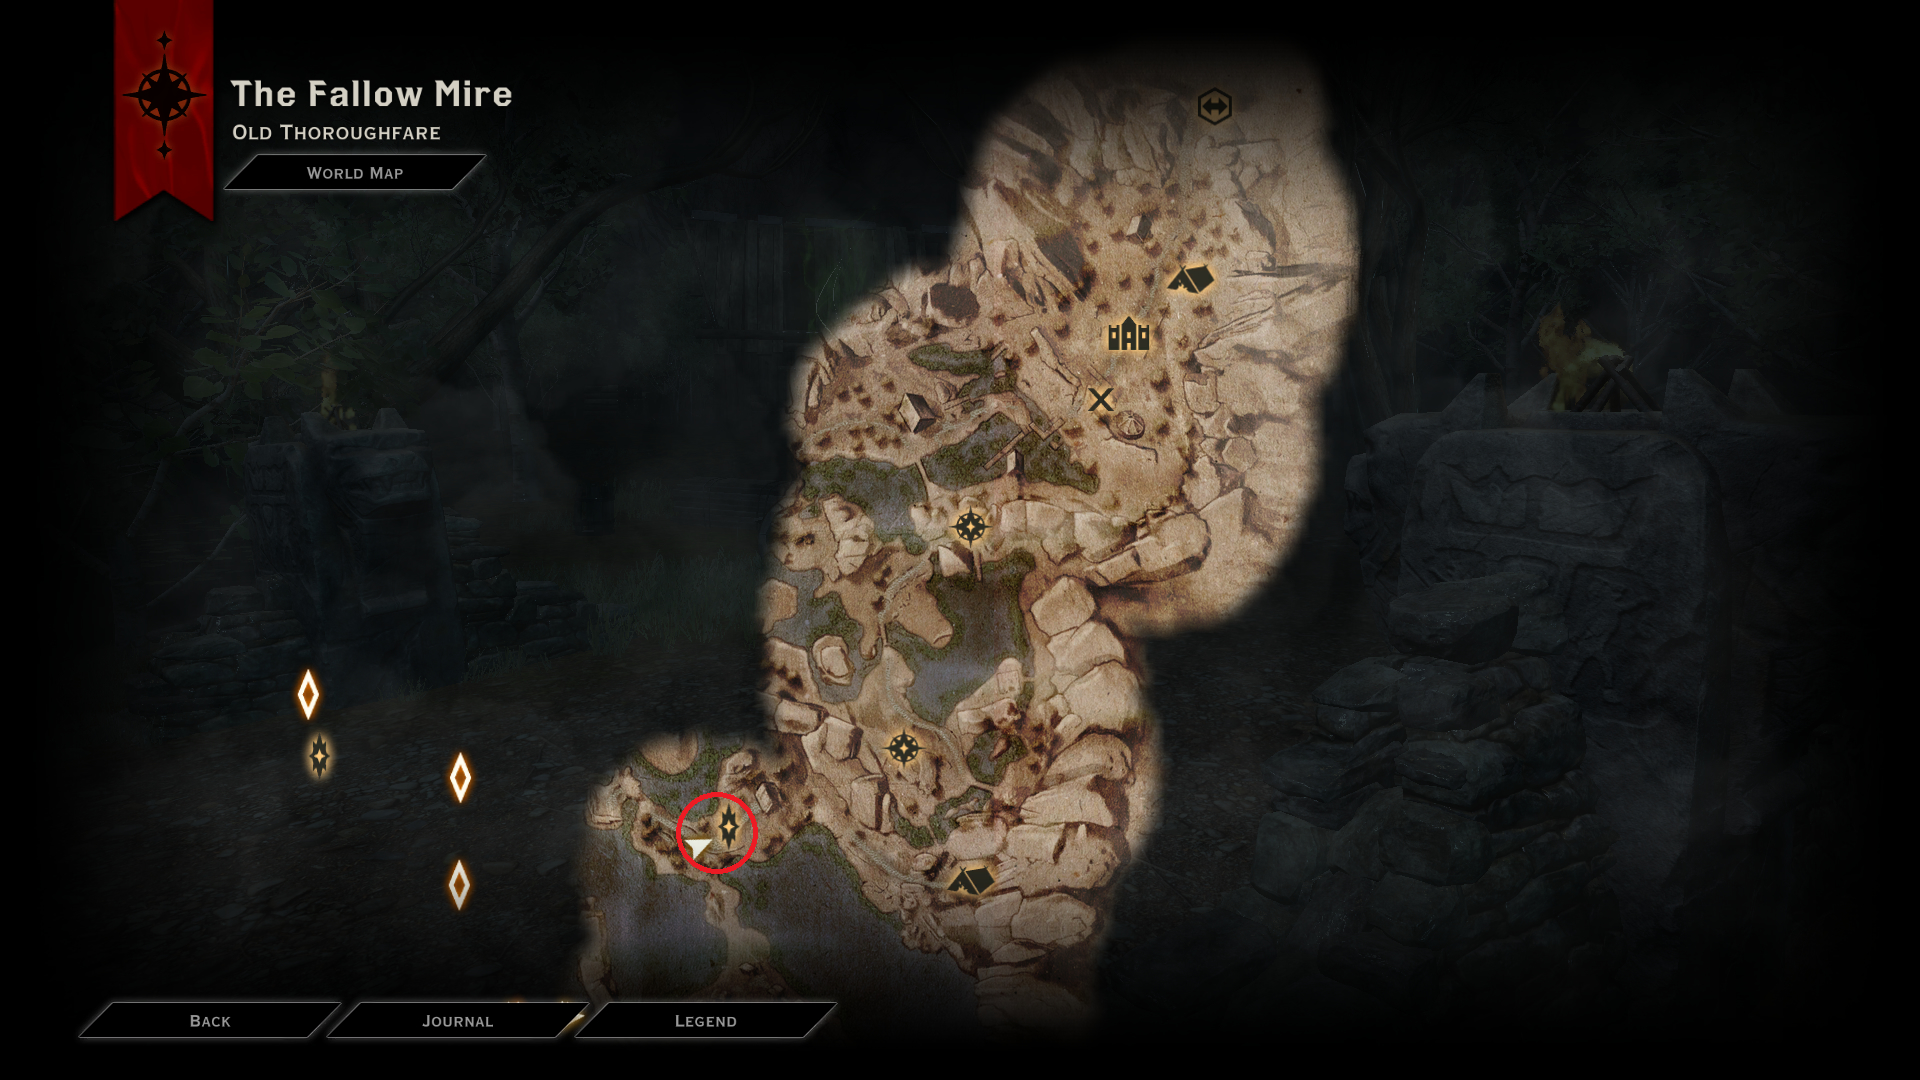
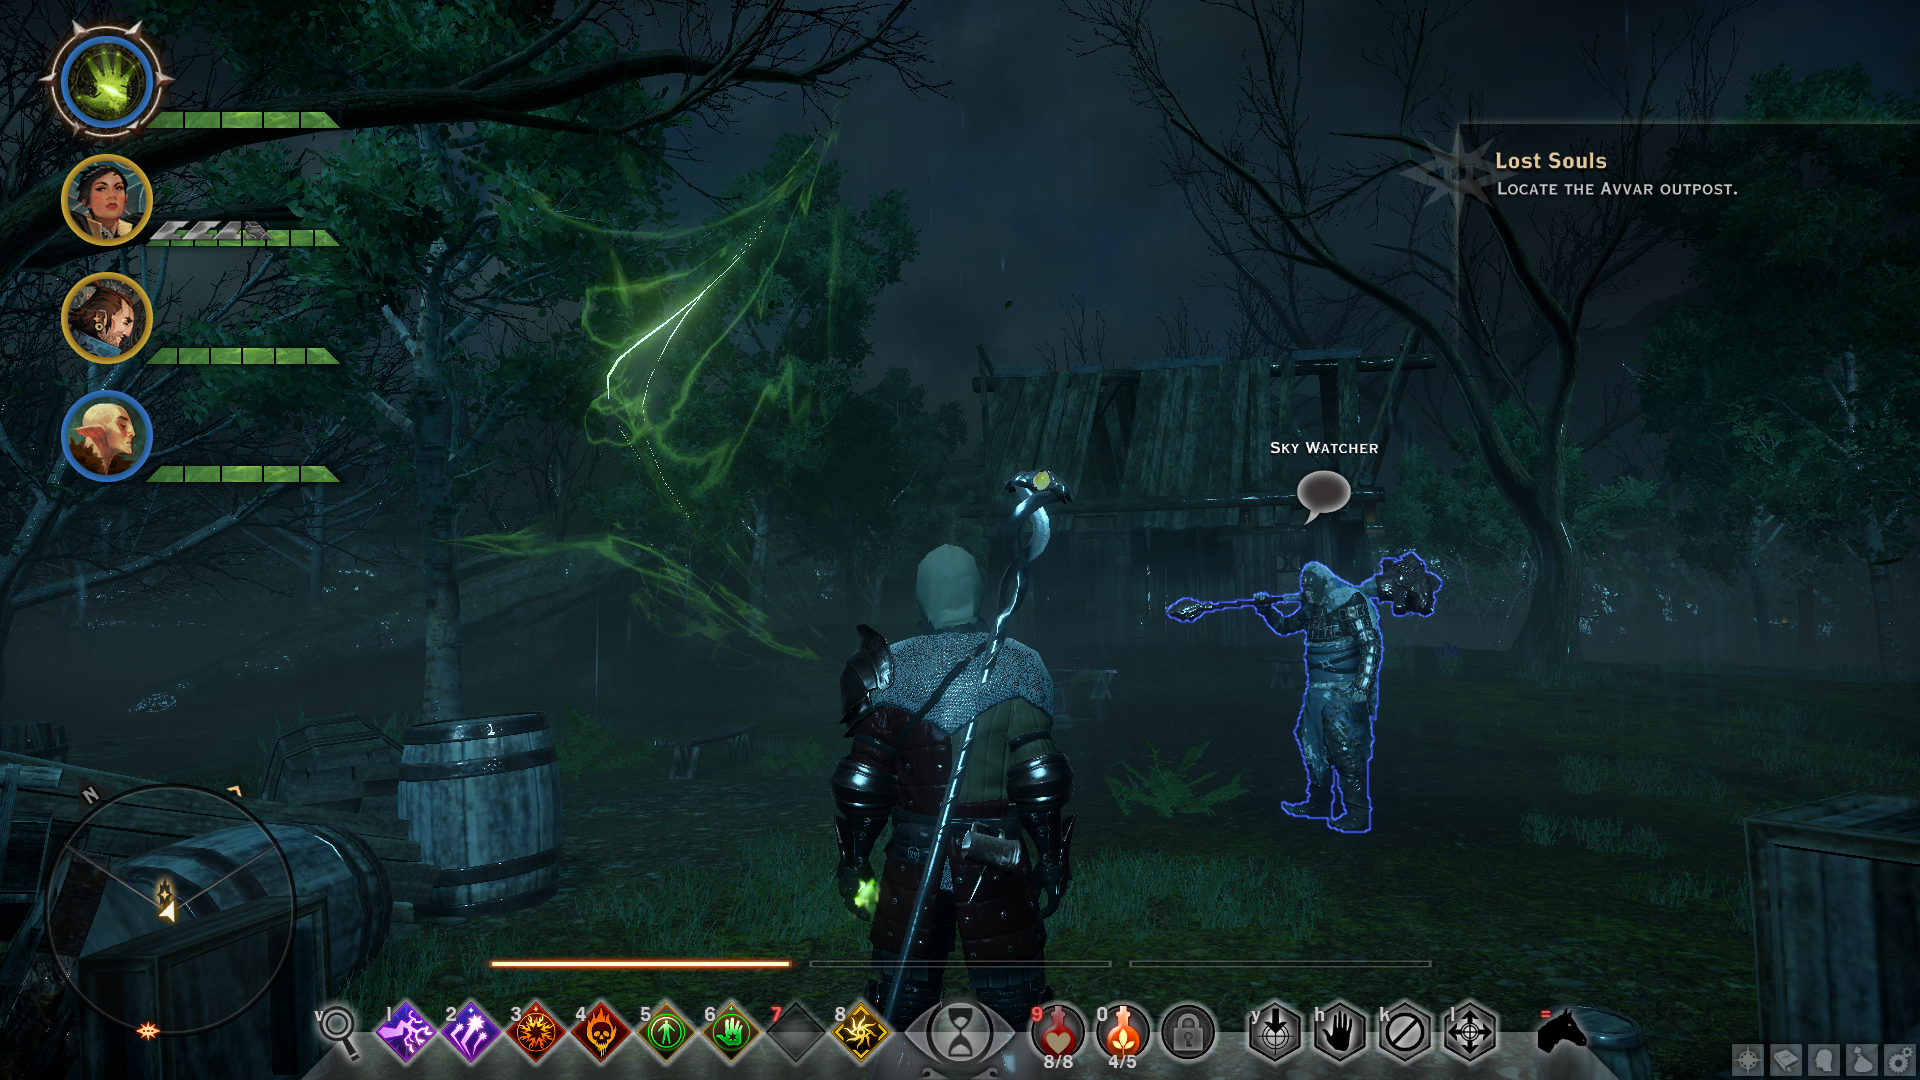
Before completing the “Lost Souls” side quest, go to the Fade Rift location shown above, and talk with the Sky Watcher. After talking to him, open the Fade Rift next to him, defeat the enemies, and close it. Then, go through the quest and defeat the Avvar leader. After defeating him, the Sky Watcher will spawn nearby. Talk to him and ask him to join the Inquisition.
Note: If you didn’t talk to the Sky Watcher before completing the “Lost Souls” quest, or leave Fallow Mire without recruiting him after finishing the quest, he will leave and you will permanently miss the chance to recruit him.
Val Royeaux
Belle (Josephine – Connections)
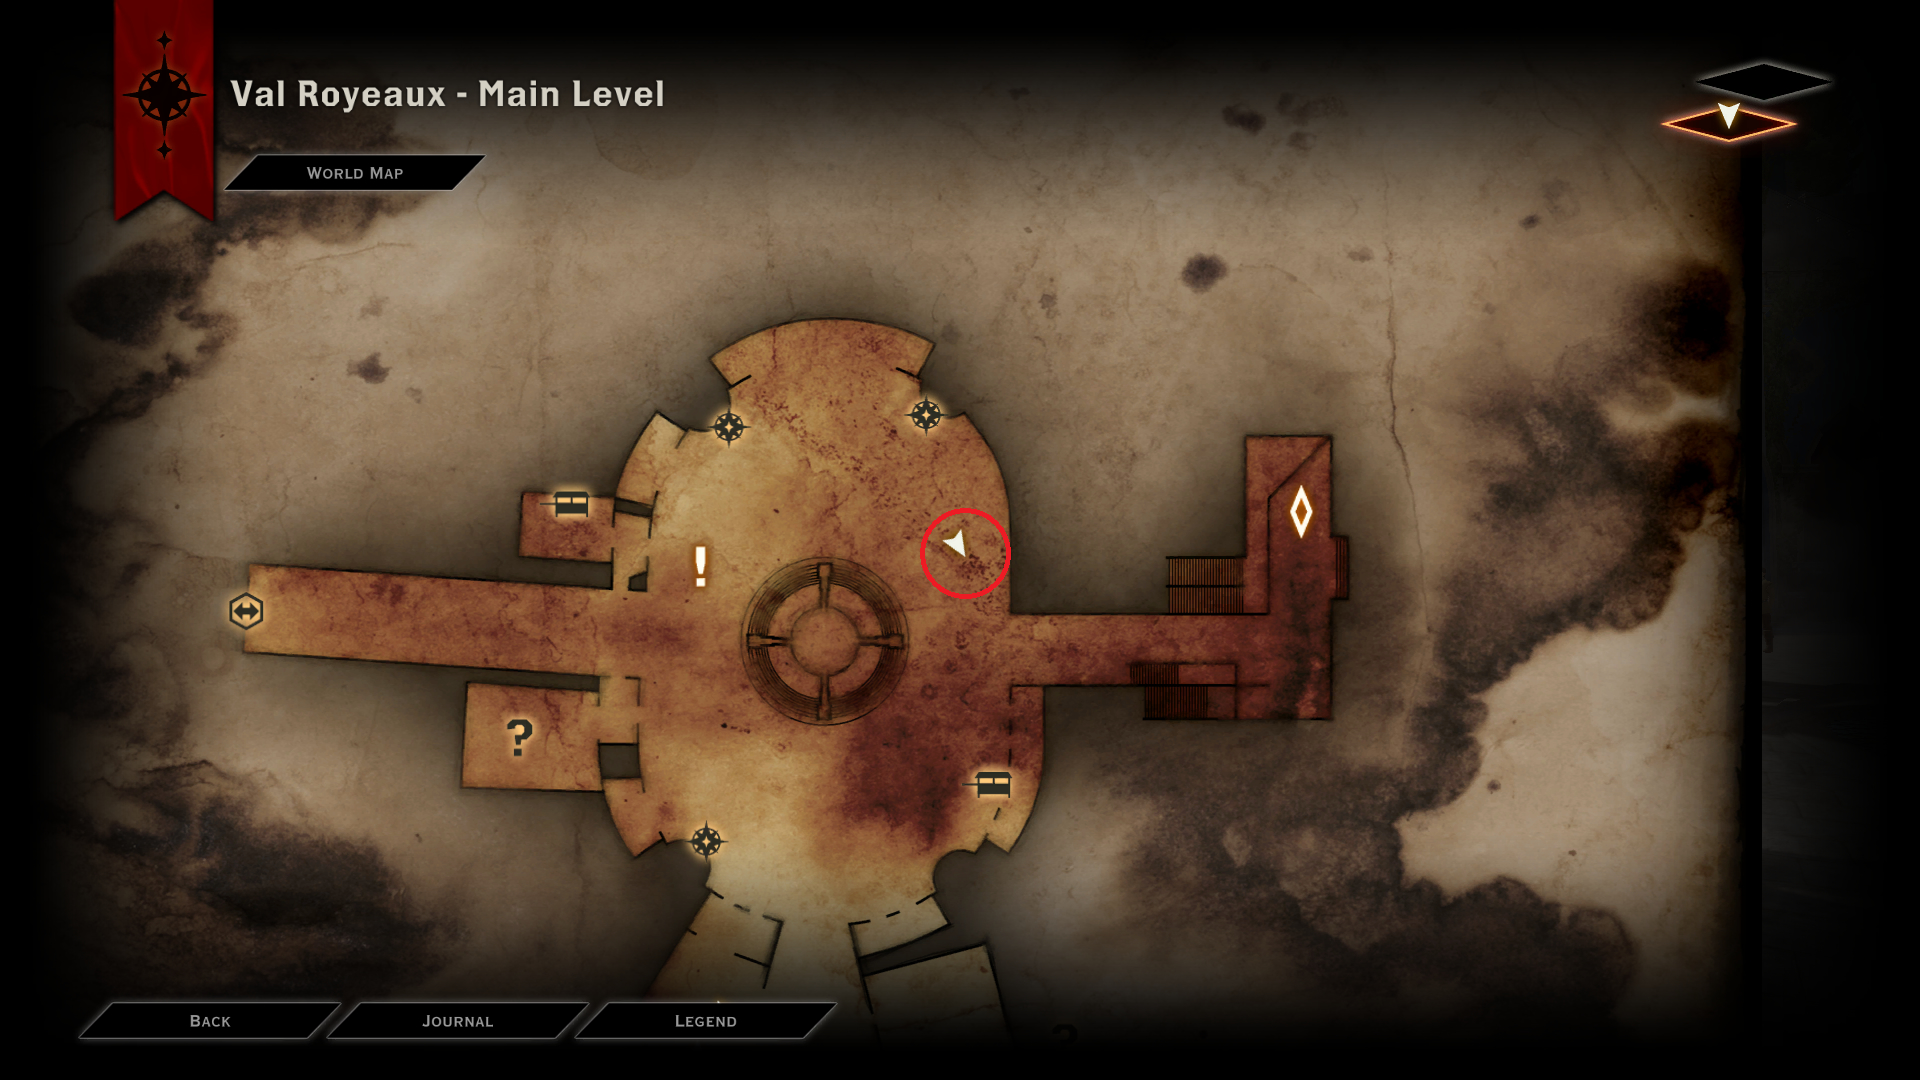
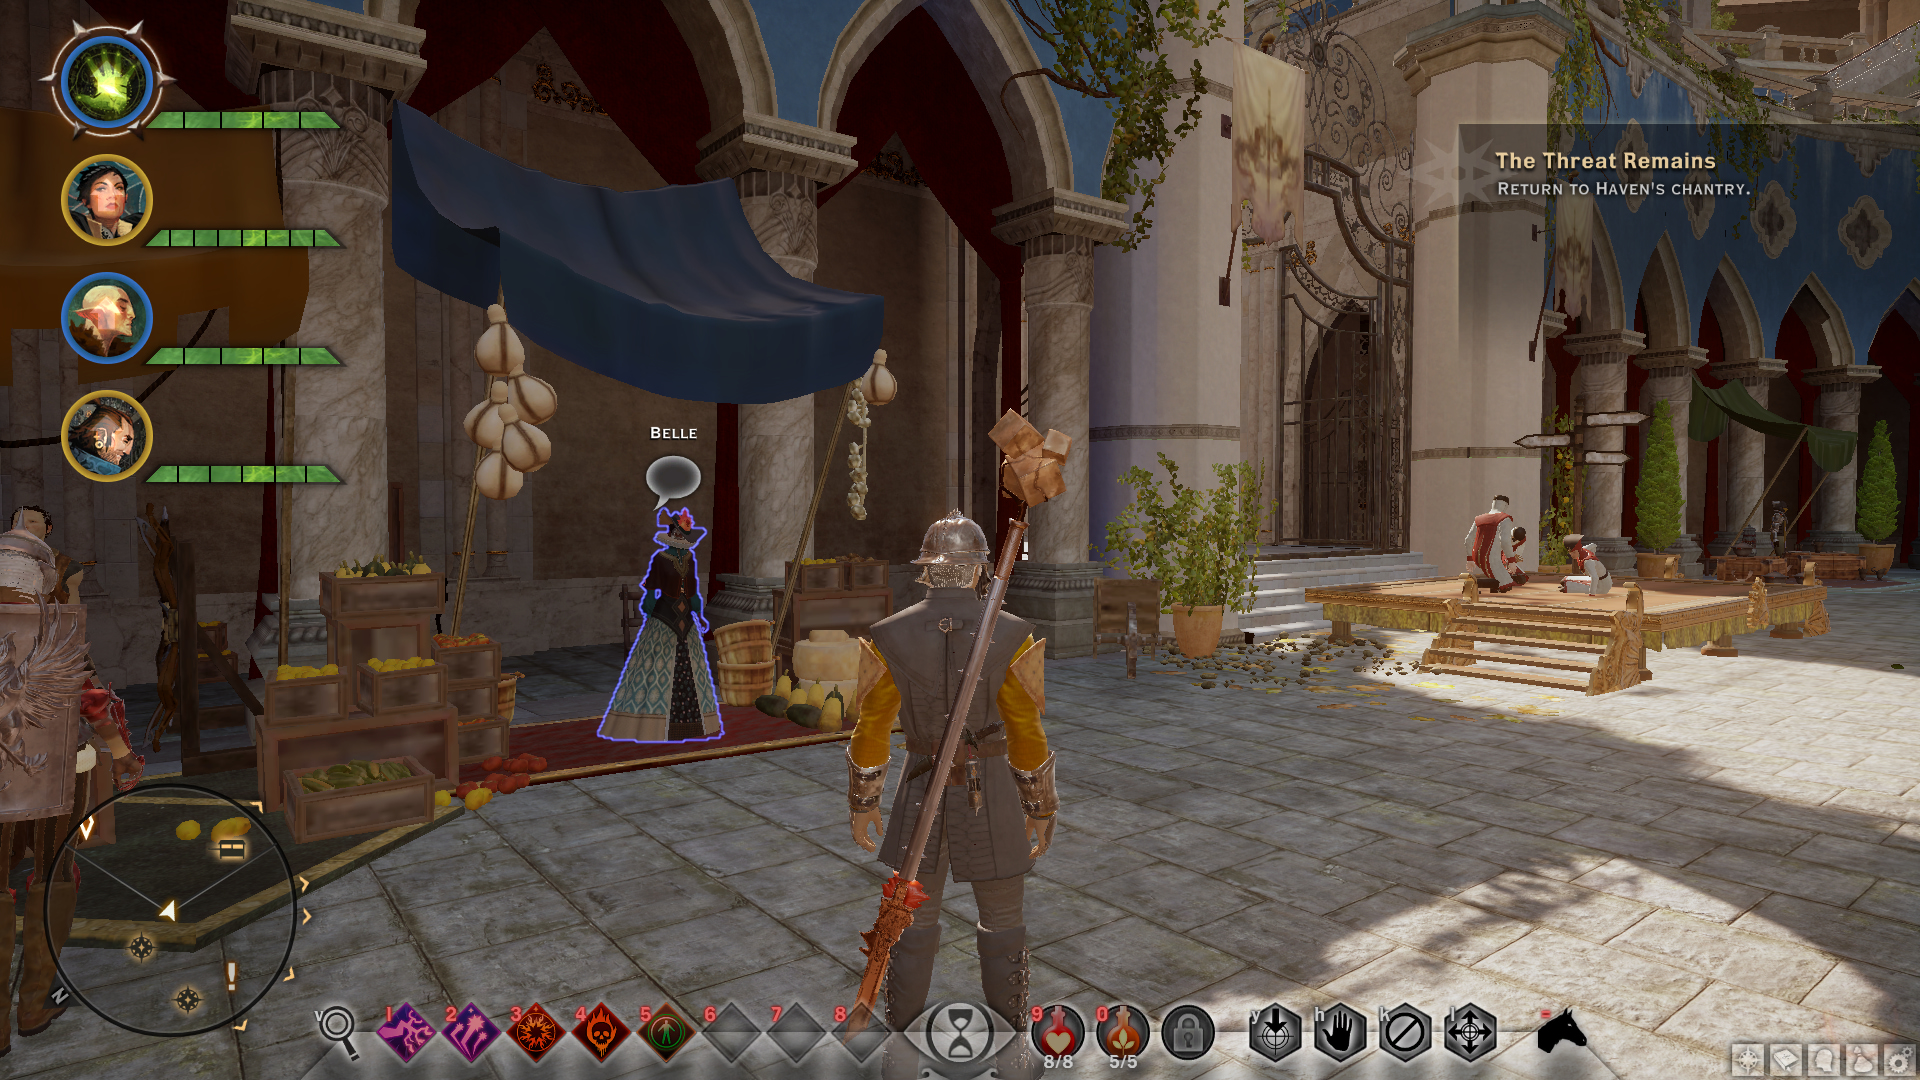
Can only be recruited when you arrive in Val Royeaux for the first time. When you first arrive in Val Royeaux during “The Threat Remains” main quest, a cutscene will occur with the inquisitor, Chantry, and Lord Seeker Lucius. After the cutscene ends, you can find her on the left side of the platform where the cutscene happens. Simply talk to her and accept her help and she will become an agent. Deferring to Cassandra will net you her approval (+Cassandra), but it is not necessary to recruit Belle.
Note: It is important that you recruit her as soon as you can, before leaving Val Royeaux and triggering the cutscene with Grand Enchanter Fiona. Otherwise she will disappear permanently, losing your chance to recruit her as an agent.
Skyhold Judgements
After relocating to Skyhold, you will get a chance to judge some characters for their crimes after quests. Some of these characters can be recruited as agents.
Movran the Under
You can judge him after completing the “Lost Souls” side quest in Fallow Mire. Choose the “Arm and exile to Tevinter Imperium” option to recruit him as an agent (+++Iron Bull, ++Sera, +Blackwall, +Cole, +Dorian, +Solas, +Vivienne).
Crestwood
Jana (Leliana – Secrets)
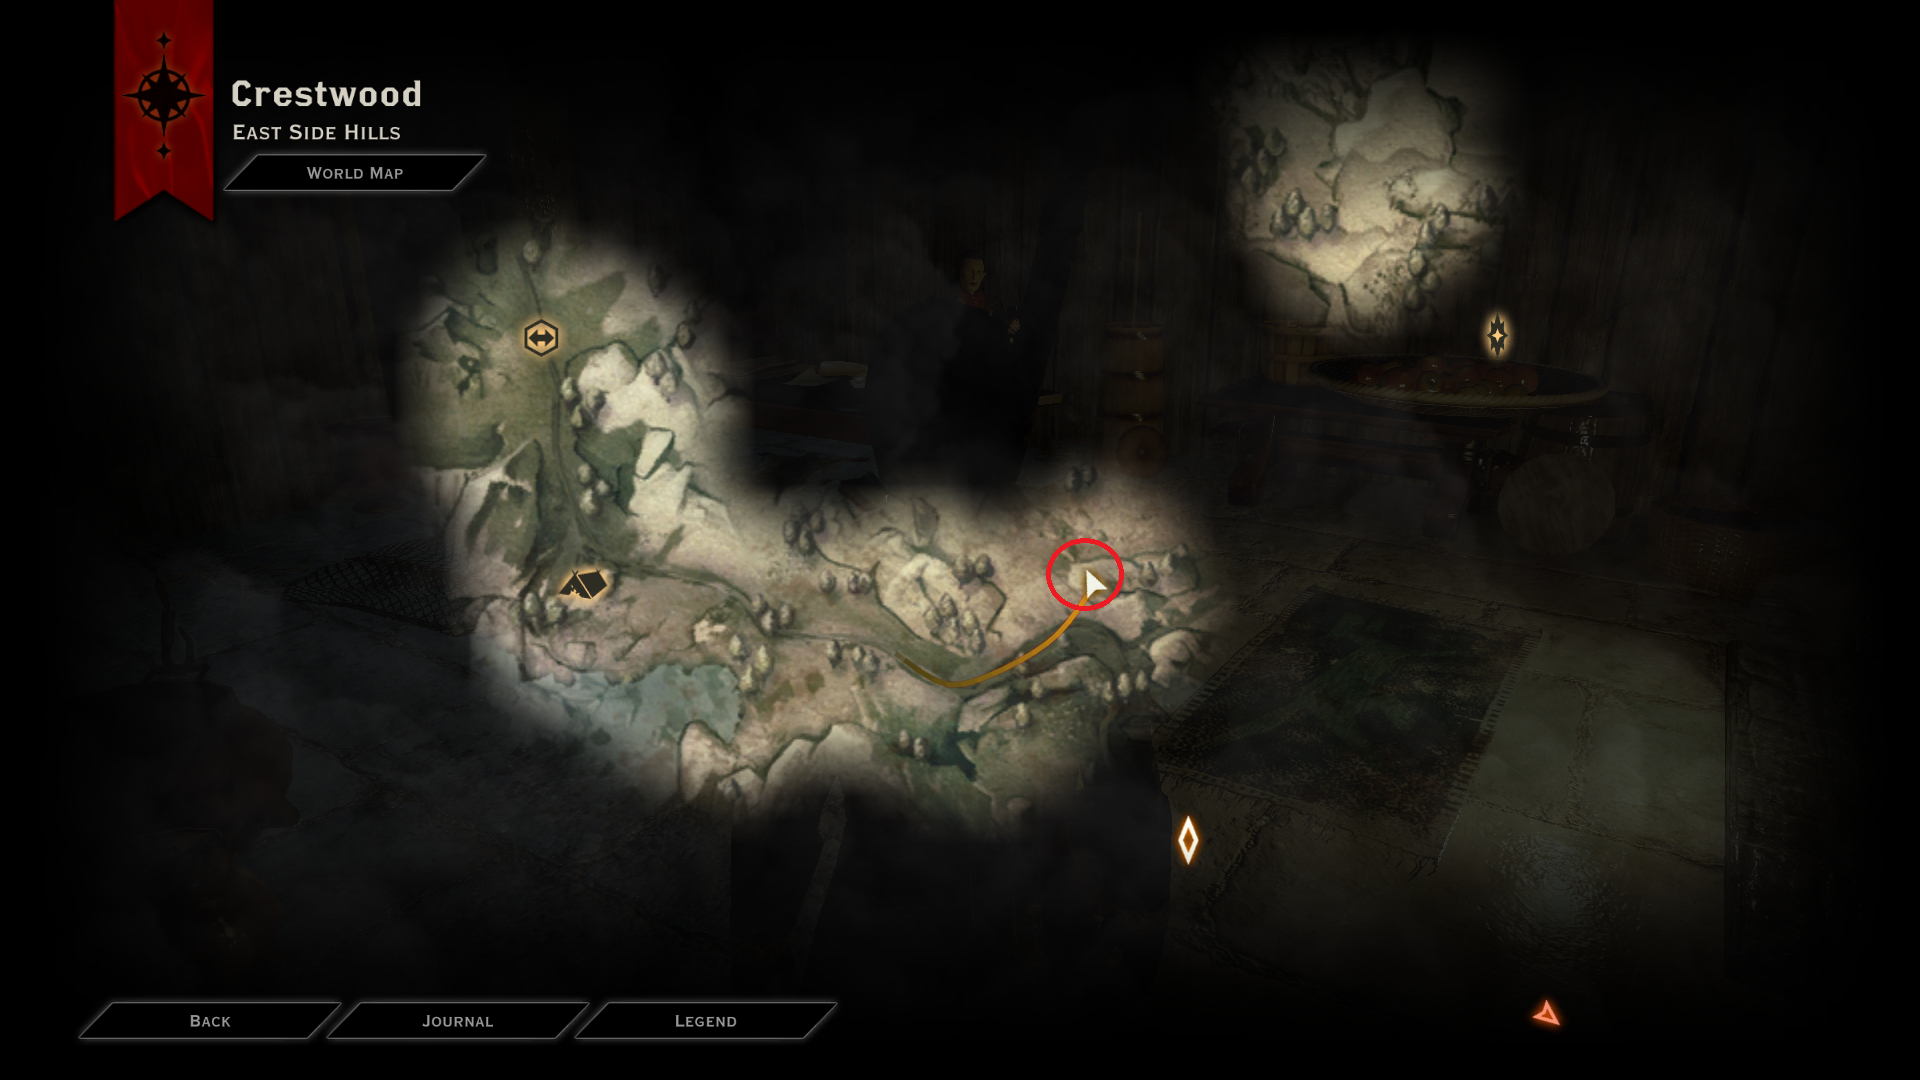
After arriving in Crestwood during the “Here Lies the Abyss” main quest, you will encounter 2 Grey Wardens attacking enemies and helping an elven woman. You will see her running away to the location marked above. Go there, talk to her and use either of the following options to recruit her.
- Deferring to Solas (++Solas, -Sera)
- “Nobility Knowledge” perk
–“Don’t do it.” (++Cole, ++Sera, ++Solas, +Dorian)
Note: If you completed “Still Waters” side quest or “Here Lies the Abyss” main quest without recruiting her, you will permanently lose the chance to recruit her as an agent. I recommend recruiting her as soon as you meet her since you only need to choose a dialogue option to recruit her.
Skyhold/Base/Operations Related Achievements
Commander
Complete a timed mission on the war table.
Simply complete a war table operation that takes a specific amount of time to finish. The money gathering operation, “Gather Coin” works for this achievement.
High Commander
Complete 50 missions or operations in a single playthrough.
You need to complete 50 war table operations to get this achievement. Do not be worried if this seems like a huge amount. There are a massive number of operations available throughout the game. Repeatable operations count for this achievement as well. Simply keep completing them as soon as you get the chance.
Keep in mind that some operations are quest sensitive and will get removed from the war table if you do not complete them before doing various quests. You lose the chance to do some operations after locating to Skyhold as well. And some of these operations have follow up operations which only unlocks after completing their previously related operation. So, it’s a good idea to complete the non-repeatable operations available to you as soon as you can.
You can unlock some operations by visiting locations, examining things, and talking with your companions or people you meet. So it’s a good idea to exhaust all the dialogue options when you talk with someone.
Operations take real world time to complete, and you can only do three operations at once using your three advisers. So you should assign them to operations as soon as you can and reassign them whenever they become available. There is an exploit you could use if you wanted. The operation time is counted from your PC’s system time. You could instantaneously complete an operation by manually forwarding the time in the system clock. Note that this might mess up how save files are sorted since they are also sorted by your system time.
Note: Some operations awards different rewards such as companion approval, influence, items, gold, crafting materials, more follow-up operations, or even side quests depending on the adviser used for that operation. So if you want to fully utilise operations to your benefit, I recommend searching the operation name on thedragonage.fandom.com – https://dragonage.fandom.com/and looking at the “Results” and “Rewards” sections. Obviously, this is optional and you can skip this if you don’t want spoilers or want to play the game naturally.
Decorator
Purchase any new decoration element for Skyhold.
After acquiring Skyhold, you will be able to decorate it using various items that are either found or purchased. You need to purchase 1 new decoration to get this achievement.
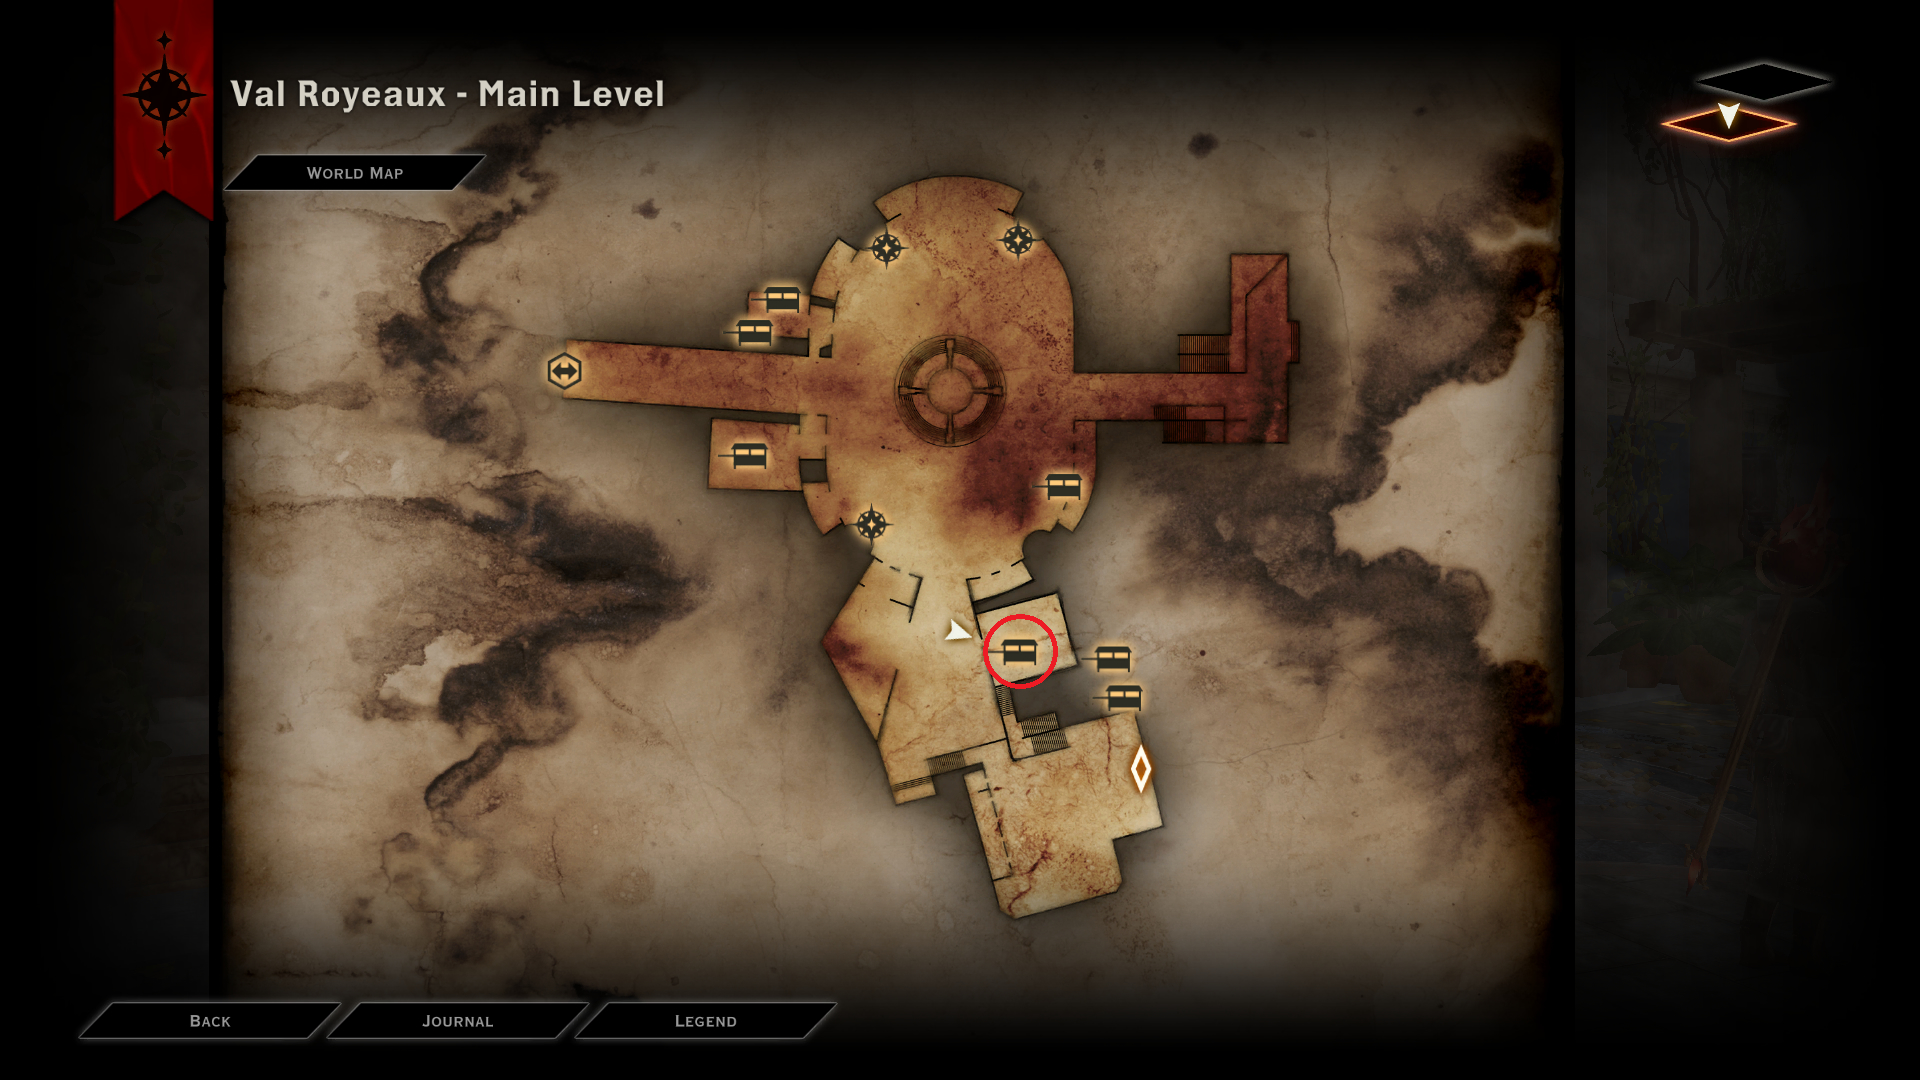
You can purchase decorations by going to Val Royeaux and meeting with the merchant shown in the location above.
Regal
Completely upgrade one throne.
After locating to Skyhold, the Inquisitor has the ability to cast judgement for the prisoners while sitting on the throne. You get the “Inquisition Throne” by default at the Skyhold. The “Gather Coin” repeatable war table operation (which is on the Ferelden side of the war table) now has a chance to give you an “Inquisitor’s Throne Accessory” as a reward when completed. You only have 2 upgrades for every throne, so keep doing the “Gather Coin” operation repeatedly until you get “Inquisitor’s Throne Accessory I” and “Inquisitor’s Throne Accessory II” as rewards to fully upgrade the throne. These accessory upgrades are automatically installed.
There are multiple types of thrones available throughout the game. However, they all only change the appearance and have no other functionality. For more information on how to unlock other thrones and their upgrades, visit dragonage.fandom.com – https://dragonage.fandom.com/wiki/Thrones. “Inquisition Throne” is still the easiest throne to upgrade since you always automatically get the throne after moving to Skyhold.
Botanist
Harvest 50 herbs from Skyhold’s garden in a single playthrough.
After reaching Skyhold and completing its 1st set of repairs (simply leave Skyhold and come back), you can enter the garden through the door in front of Varric’s default location. At the beginning, you have 2 garden pots available by default. After reaching Skyhold, you now have a random chance to receive seeds for the plants that you harvest. Keep harvesting plants and you will eventually get their seeds.
After getting the seeds, go to the Skyhold garden and plant any of these the seeds in the garden pots. Their growth have 3 stages. Planted, growing, and ready to harvest stages. They will be at the planted stage first. Moving to another location and coming back to Skyhold moves them to the next stage. Keep moving and coming back until the planted herbs are ready to be harvested. After harvesting, they go back to the growing stage. So you can repeat this process to easily farm 50 herbs and get this achievement. However, if you plant a different seed, this process will start over from the planted stage.
There is an option to upgrade your Skyhold garden to an herb garden which has a higher amount of garden pots. To unlock this, first go to the Inquisitor’s Quarters (through the door next to the Inquisitor’s throne). In this room, on the table, you will find a note.
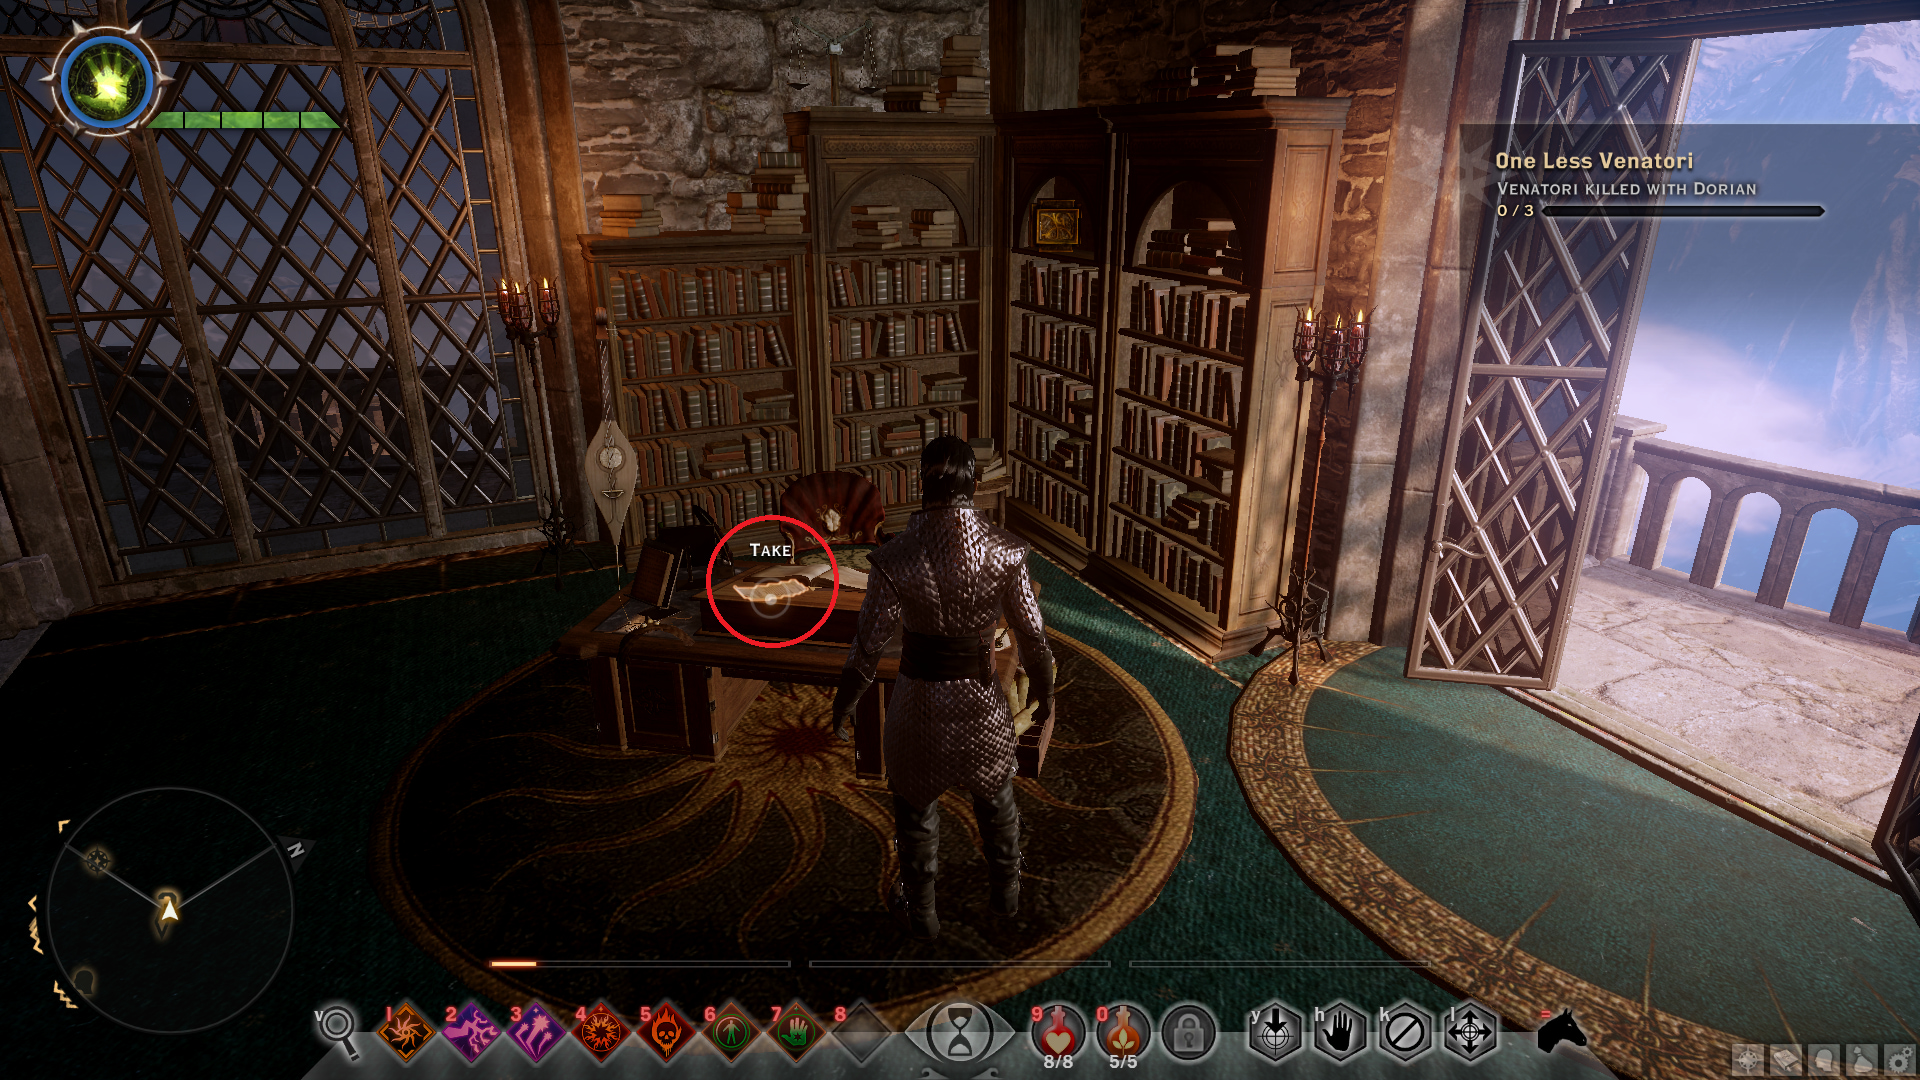
Reading it will unlock 3 side quests, one of which is “A Greener Garden”. After finding the items listed (30 Spindleweed, 30 Elfroot, 30 Blood Lotus, 1 Logging stand) in the quest, go to the Requisitions table and craft the “Skyhold Garden”. Now go to the garden and you can select which type of garden you can upgrade it to. Choose the “Herb Garden” option and it will increase the amount of garden pots. This can make earning this achievement much easier.
Difficulty Related Achievements
Herald
Finish the single-player campaign on at least Hard without lowering the difficulty.
Complete the base game from beginning to the end on Hard difficulty without lowering it. The Hard difficulty should be selected when starting the new game.
This achievement is earned along with the “Inquisitor” achievement if you start and finish the base game on Nightmare difficulty.
Inquisitor
Finish the single-player campaign on Nightmare without lowering the difficulty.
To earn this achievement, you need to start a new game on Nightmare difficulty selected and finish the main quests of the base game of that playthrough without lowering the difficulty. You should earn this achievement when you defeat the Elder One and finish the “Doom Upon All the World” main quest if you’ve been playing on Nightmare difficulty from the beginning.
You will earn the “Herald” achievement along with this achievement if you start and finish the game on Nightmare difficulty.
Below is a mini guide listing useful tips and trick that you can use to help in your Nightmare difficulty playthrough. I haven’t included any in-depth guide for ability builds to keep this guide from getting even more larger. The builds written below are mere suggestions. Please research externally if you want a more in-depth guide on ability builds.
General tips
- Enemies will have more health, armour, and deal more damage on this difficulty.
- You will have to do as much as exploring, questing, and reading as you can to increase your level to be effective at at fighting enemies.
- Do not fight enemies that are multiple levels higher than you and do not start quests that have a recommended level higher than yours.
Party and Abilities
- I recommend that your party always consist of 1 weapon & shield tank, 2 DPS, and 1 support mage. You can swap out 1 DPS for another tank if you want to be extra safe.
- Tanks usually specialise in Champion, Vanguard, and Weapon and Shield ability trees. Guard generating and taunting abilities should be set as preferred abilities.
- DPS rogues specialise in Subterfuge, Assassin, and Double Daggers ability trees. “Stealth” along with a few high damage abilities in Assassin tree should be set as preferred abilities.
- DPS archers specialise in Archery, Sabotage, and Tempest ability trees. “Poisoned Weapons”, “Flask of Fire”, and “Flask of Lightning” abilities should be set as preferred abilities.
- DPS warriors specialise in Reaver, Two-Handed Weapon, and Battlemaster ability trees. Reaver abilities along with other high damage abilities should be set as preferred abilities.
- DPS mages specialise in Knight-Enchanter, Storm, Inferno, and Spirit ability trees. “Spirit Blade”, “Fade Cloak”, “Fire Mine”, “Barrier”, “Energy Barrage”, and “Static Cage” should be set as preferred abilities.
- Support mages specialise in Spirit, Winter, and Storm ability trees. “Barrier”, “Revival”, “Ice Mine”, “Static Cage” should be set as preferred abilities.
- The DPS characters’ behaviour should be set to follow the tank, and the support mage’s should be set to defend the tank by spamming “Barrier” on them. Finally, the tank’s should be set to follow the controlled character while taunting enemies and generating Guard.
- Set their stamina/mana % reserve to a very low amount so that they use abilities frequently.
- Be wary when selecting DPS melee characters like Iron Bull and Cole to your active party. While they can deal very high damage, letting the game AI run those companions in battle will end up with them dying most of the time. So only select them if you’re planning on always micromanaging them or taking manual control of them during combat.
Equipment
Crafted equipment are usually the best equipment due to how customisable they are. You can use rare, tier 3 crafting materials that remove class restrictions to equip armours of any type (heavy, medium, and light) on any class of character. However, these do not remove race restrictions.
These materials are;
Metal
- Silverite: Found throughout Arbor Wilds, Emprise du Lion, Frostback Basin
Leather
- Snoufleur Skin: Looted from snoufleurs found near the Riverwatch Camp in Exalted Plains or Frozen Lake in Emprise du Lion.
- Hardened Tusket Skin: Found abundantly throughout Frostback Basin.
Cloth
- Dales Loden Wool: Looted from defeated Red Templars.
Guard on Hit Equipment
- Equipping items that generate Guard on enemy hit is one of the best way to improve your survivability on Nightmare difficulty. Guard bar essentially acts as a 2nd health bar.
- You can craft such equipment by adding a Fade-Touched Lambswool (Guard), Fade-Touched Onyx (Guard), Fade-Touched Obsidian (Guard), or Fade-Touched Silverite (Guard) on your masterwork slot while crafting equipment. Usually, these Fade-Touched crafting equipment are rarely found.
- The equipment can be a weapon, armour, or shield and the character needs to equip it. The user will generate an amount of Guard whenver they score a hit. Ability hits will generate Guard as well. The amount of Guard generated depends on the masterwork material used.
- There is an exploit that you can use to endlessly farm Fade-Touched Obsidian (Guard) which gives 3 Guard on hit.
- Unlock the “Deft Hands, Fine Tools” Inquisition perk and go to the Redcliffe Village. Unlock the locked door shown on the map below using a rogue.
When looting the container inside, take the Fade-Touched Obsidian (Guard) and few other items, but leave at least 1 item in the container. If you left 1 item inside the container, travelling to another area and coming back to Hinterlands will refill that container to have another Fade-Touched Obsidian (Guard). You can repeat this process to acquire as many of these as you want, giving you a good supply of Guard generating equipment.
DLC: Jaws of Hakkon Achievements
Historian
Uncover the secrets of a legendary figure.
DLC main story related. You will earn this achievement at the end of the “Ameridan’s End” main quest.
Winter’s End
Dispel a myth of ancient days.
DLC main story related. You will earn this achievement at the end of the “Hakkon Wintersbreath” main quest.
Legend-Marked
Impress the Avvar of Stone-Bear Hold and gain their friendship.
After reaching Skyhold, complete the “Investigate Frostback Basin” war table operation and visit the Frostback Basin. Speak with Professor Kenric in Frostback Basin and you will unlock the “Avvar Allies” main quest. Follow along the quest and speak with the Avvar leader in Strong-Bear Hold. The previous quest will complete and you will unlock the “Guests of the Hold” side quest. In this quest, you need to gain +5 Approval Points (+AP) from the Avvar. The current approval is shown in the journal quest entry and on a bar on the upper right corner (similar to how the court approval is shown during “Wicked Eyes and Wicked Hearts” main quest). Luckily, the approval amount cannot go down through any action.
You can earn approval using the following methods. Keep in mind that the some side quests and the war table operations written below won’t be available until you go to the Stone-Bear Hold and speak with the Avvar leader first.
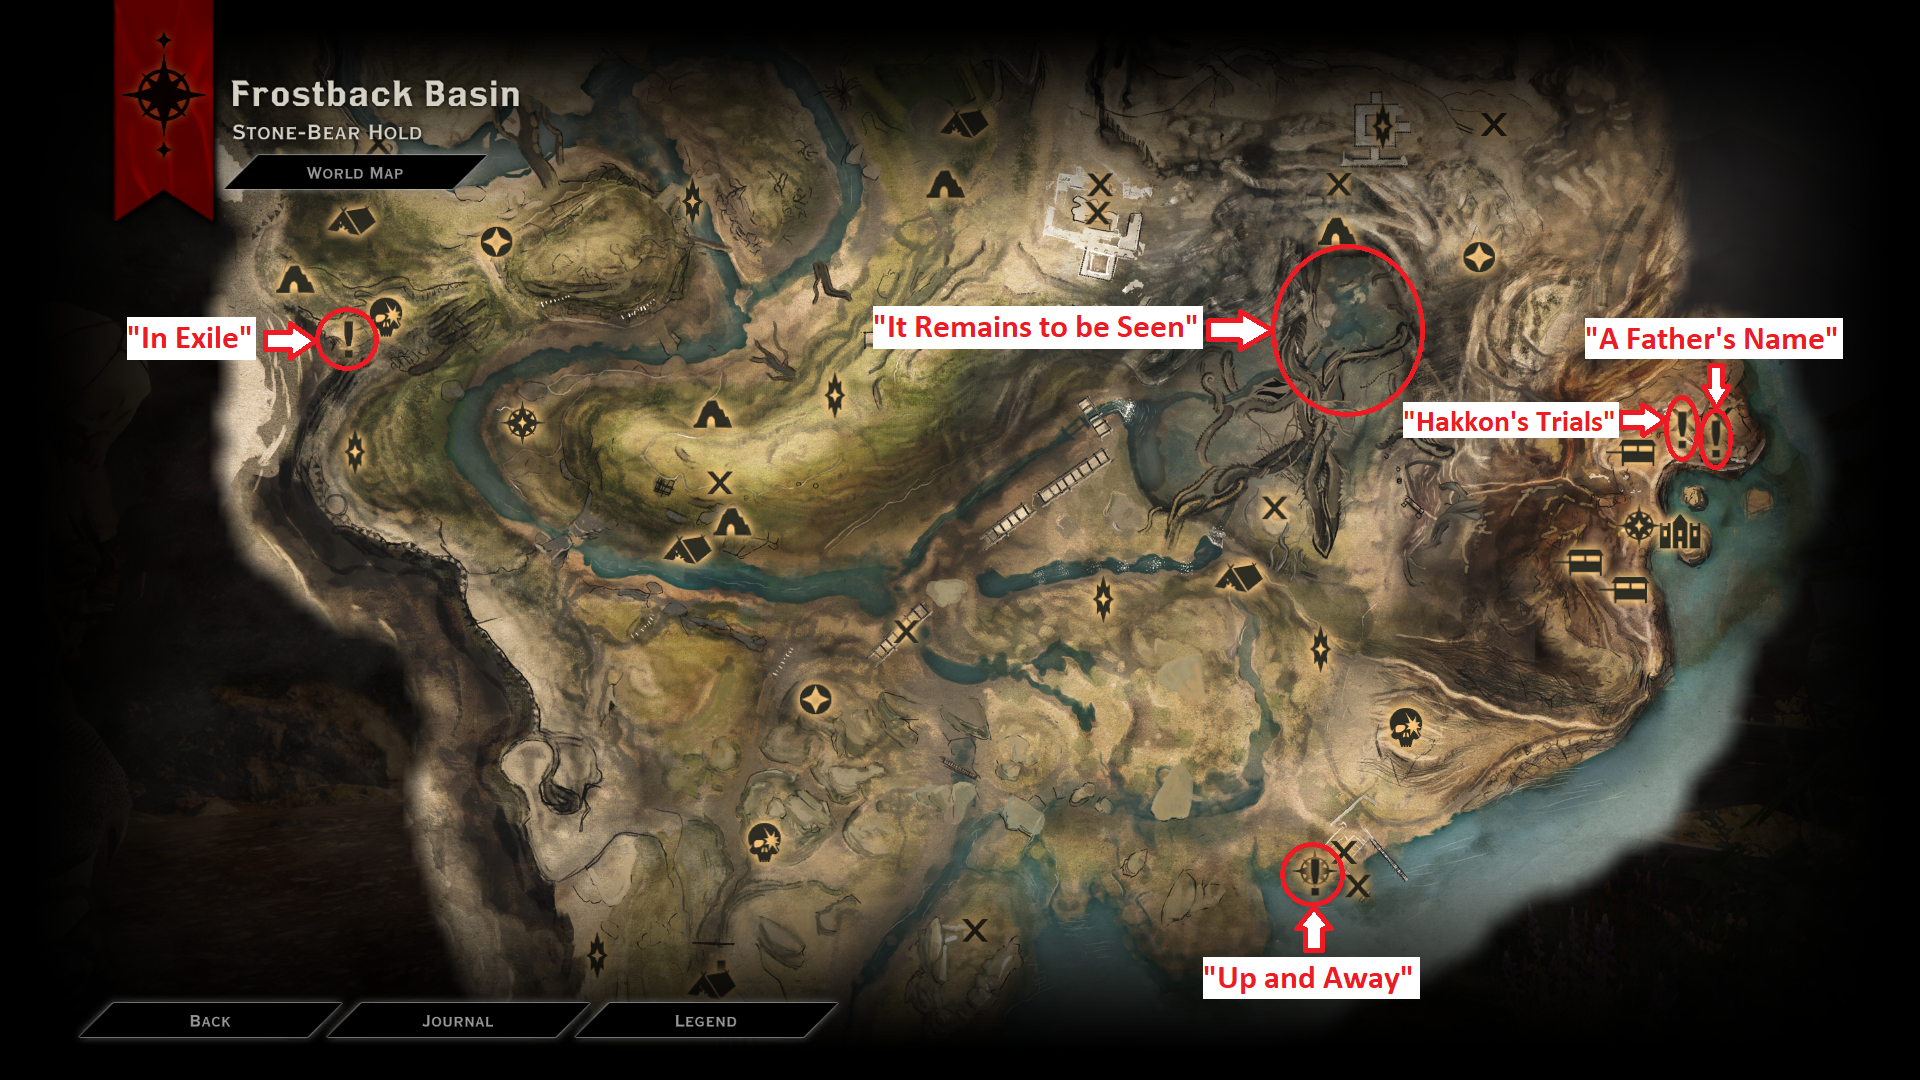
- Complete “It Remains to be Seen” side quest (+1AP or +2AP): Go to the swamp area shown in the image above. Find any of the 5 pyramid shaped artefacts (shown in an image below) that are in this area to trigger this quest. You need to find all the 5 artefacts for this quest, which are marked on the map below. After finding them go to the Augur in Stone-Bear Hold (located in the hut next to trader Helsdim). Continue on with the quest and read all 3 veilfire gyphs. Speak with the Augur afterwords and choose “Renewal?” as the dialogue option. This will grant you +2AP, other 2 dialogue options only grant you +1AP.
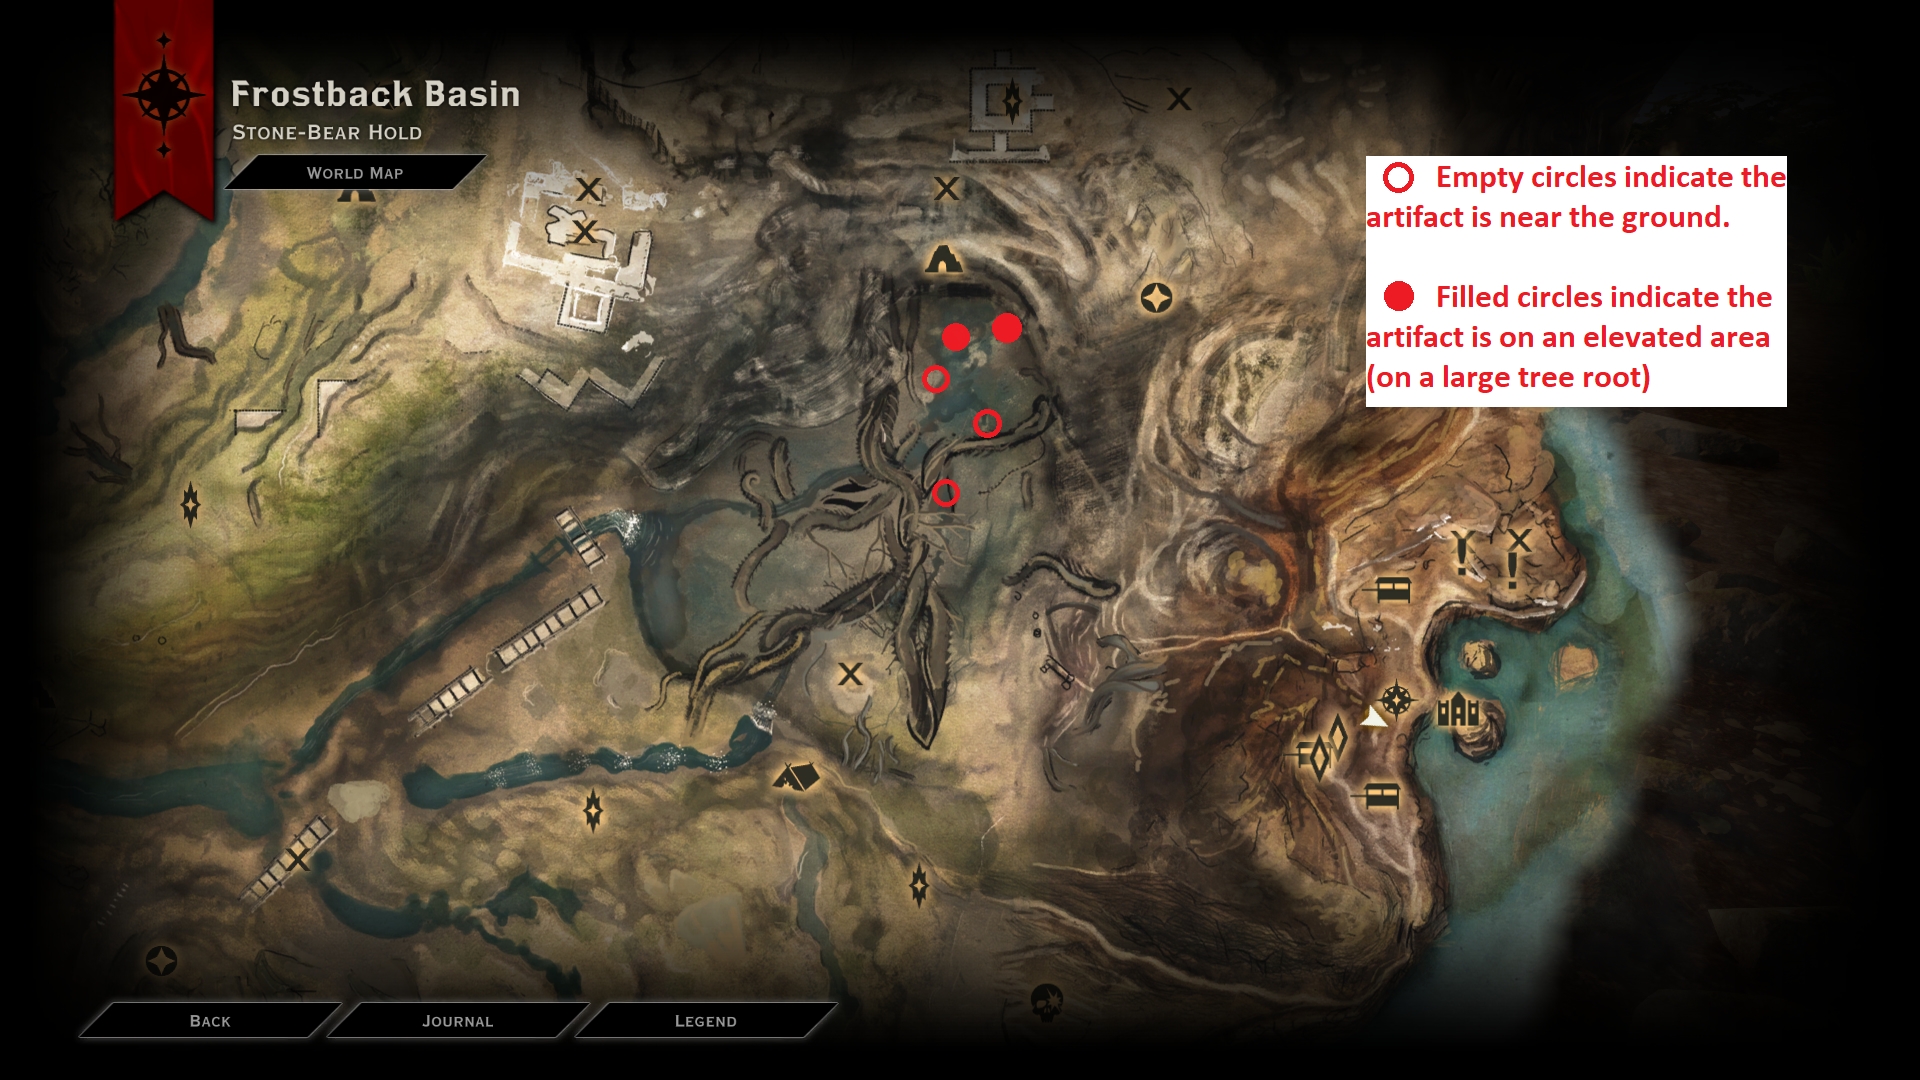
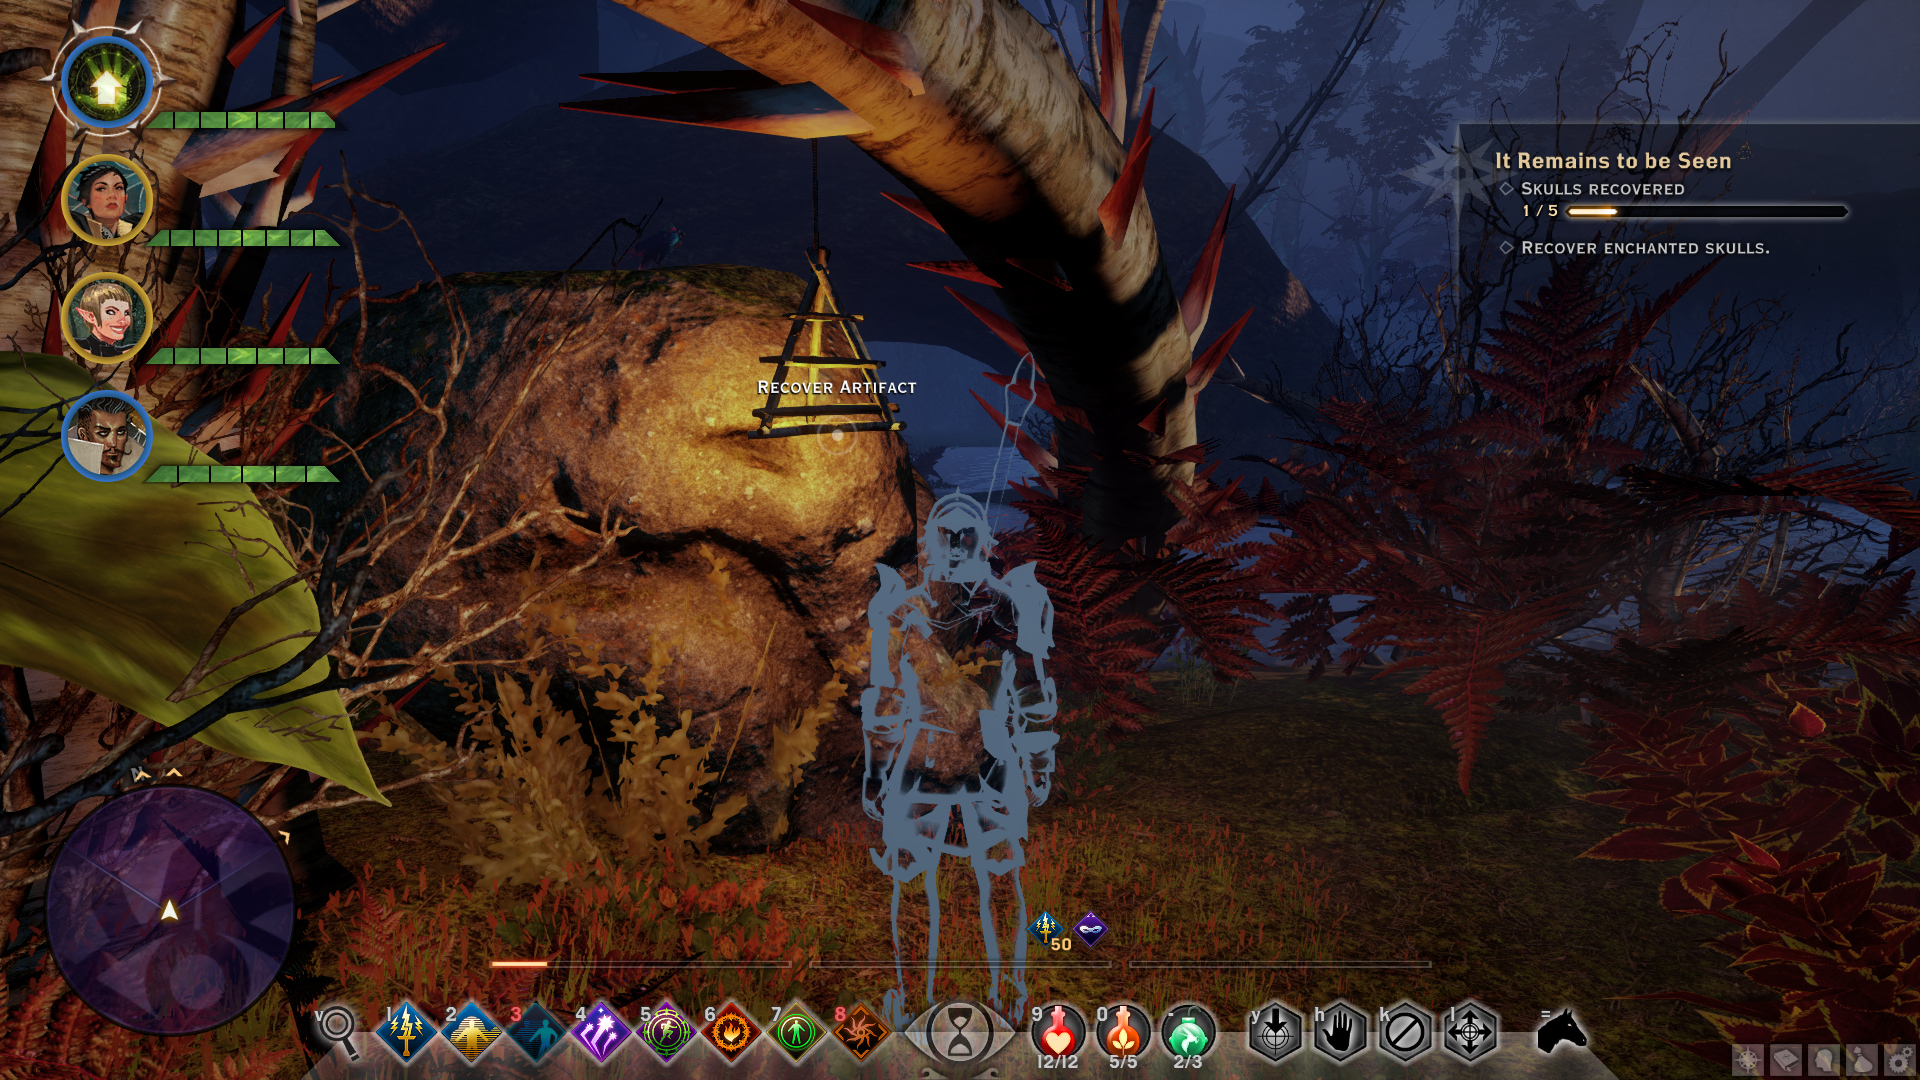
- Complete “In Exile” side quest (+1AP)
- Complete “Up and Away” side quest (+1AP)
- Complete “Hakkon’s Trials” side quest (+1AP)
- “A Father’s Name” (0 or +1AP): Go along with the quest and kill the beasts. You can chose to give the crafting materials to the Master of the Hunt or to Finn. Giving the materials to Master of the Hunt yields +1AP. Giving them to Finn does not give any AP.
- Complete “Send Relics of Tyrdda Bright-Axe” war table operation (+1AP): First, you need to find all the landmarks related to Tyrdda Bright-Axe in Hinterlands (simply unlock all the landmarks in Hinterlands). After that you will unlock the “Locate Weapon of Tyrdda Bright-Axe” war table operation which you need to complete. Both of these can be completed in the base game before starting the DLC. If you have completed both of those, you will unlock this operation.
- Complete “Send Skywatcher to Stone-Bear Hold” war table operation (+1AP): You will unlock this operation if you recruited Sky Watcher as an Inquisition agent in Fallow Mire during the “Lost Souls” side quest (check the Fallow Mire section under “Persuasive” achievement).
You will not be able to complete “Guests of the Hold” side quest even if you get all the 5 Approval Points early on in the DLC. You still need to complete the “Hakkon Wintersbreath” main quest and then talk with the Avvar leader with +5AP to earn this achievement.
Firestarter
Destroy all the Winter Shards and light all the fires in the Old Temple.
There are 8 Winter Shards and 7 fires that you encounter during the “Ameridan’s End” main quest.
During “Ameridan’s End” main quest, you will launch an attack on the old Tevinter ruin. There, you will need to enter a place called the Old Temple. You will encounter multiple small white coloured orbs called Winter Shards near the entrance of the Old Temple. However, these Winter Shards outside of the Old Temple don’t count for these achievement. Only the ones inside the Old Temple do.
Below is an image of a Winter Shard.
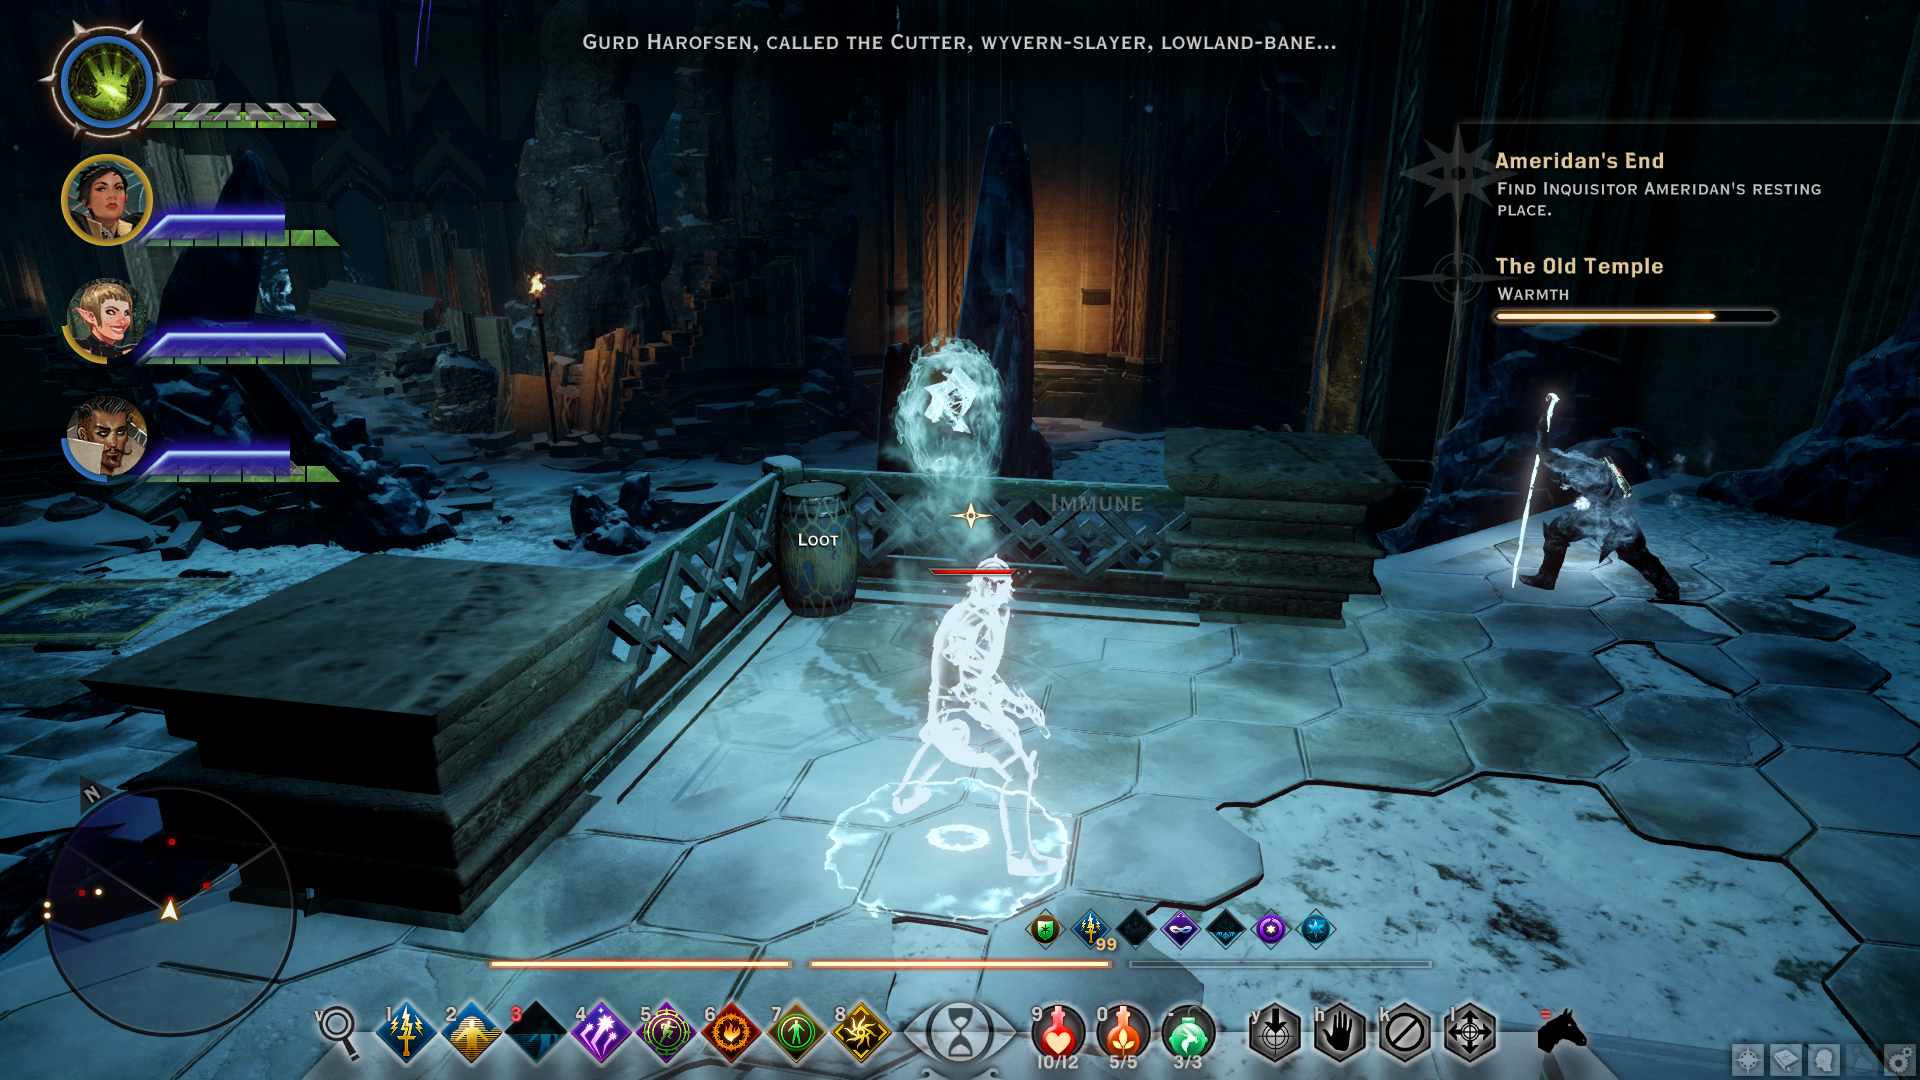
Make sure you have a rogue in your party before you start this quest since you need to unlock a locked door to light a fire. Inside the Old Temple, you will be shown a bar on the top right corner showing your warmth level. If it drops down to 0, you and your party will start to take damage. Starting fires and staying near them will fill up the bar. Be mindful of this while exploring the map.
Below are the locations of all the fires and Winter Shards in the Old Temple.
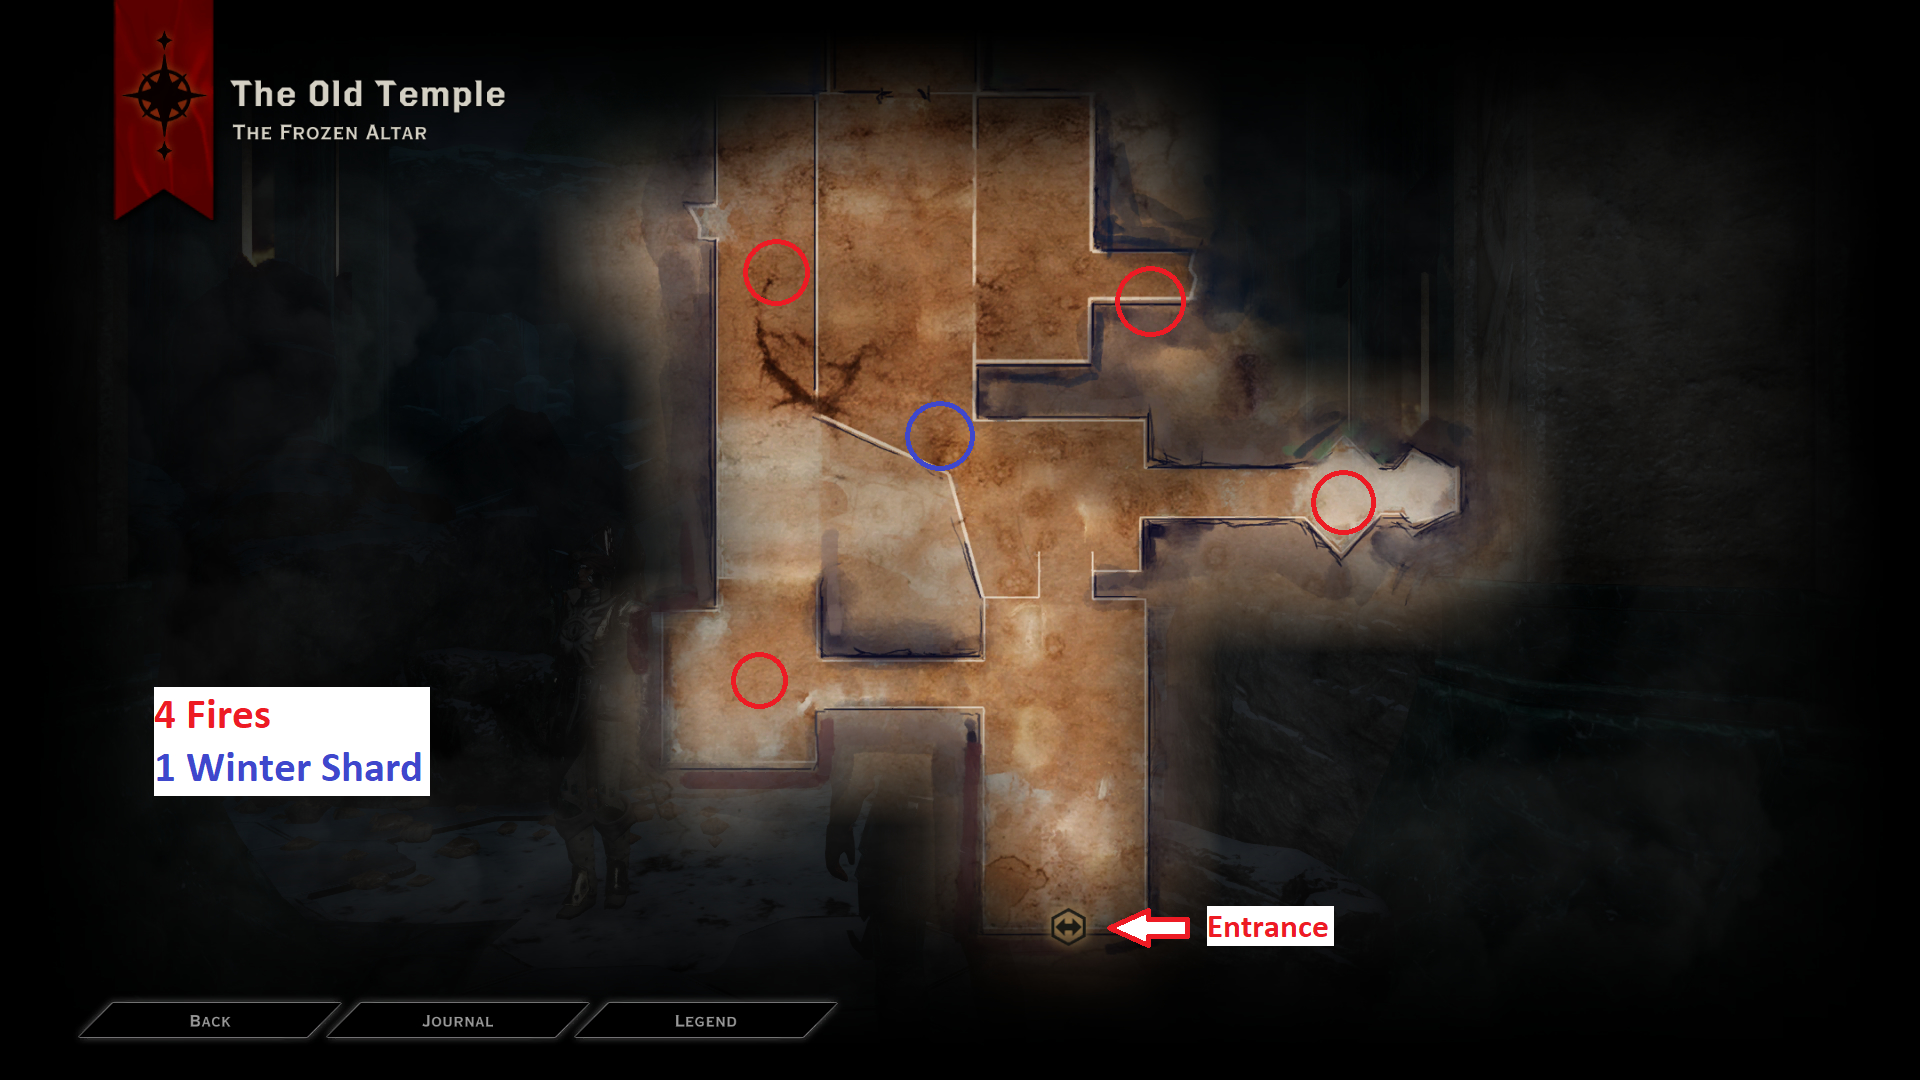
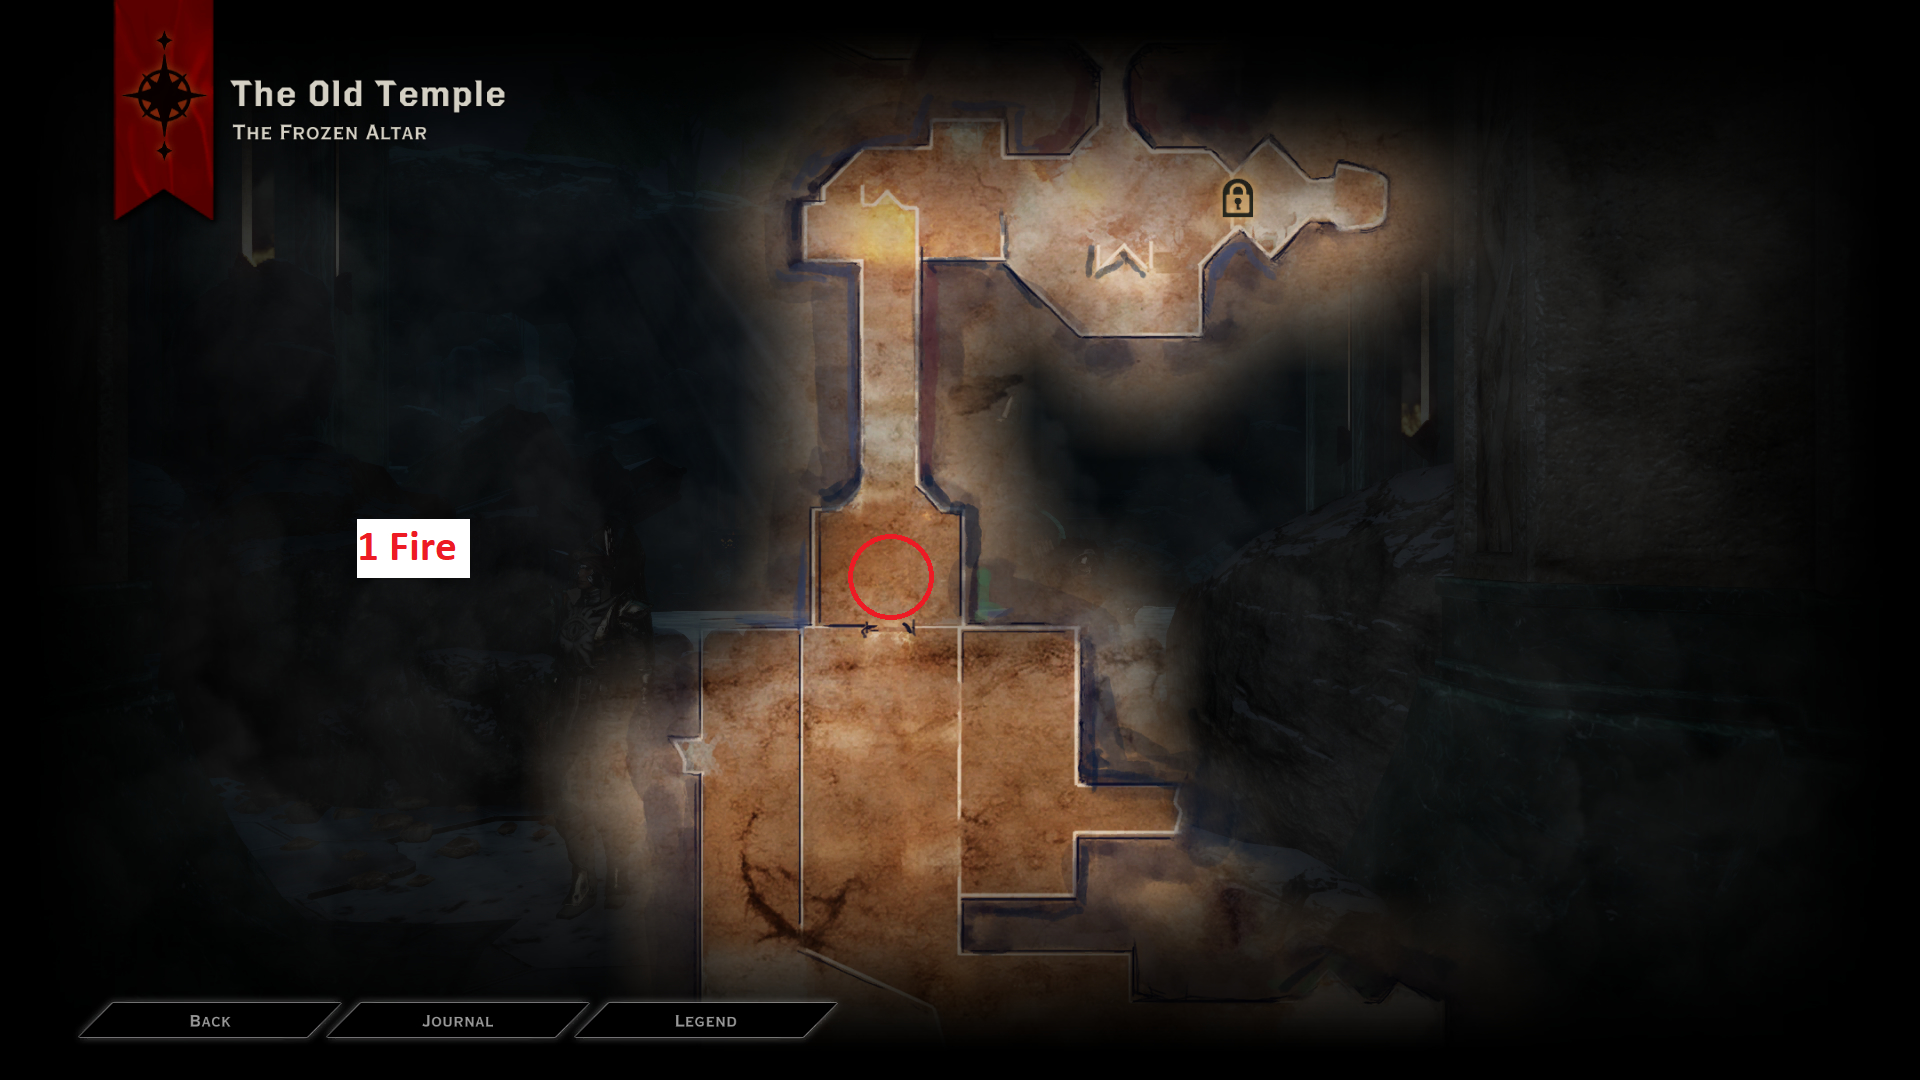
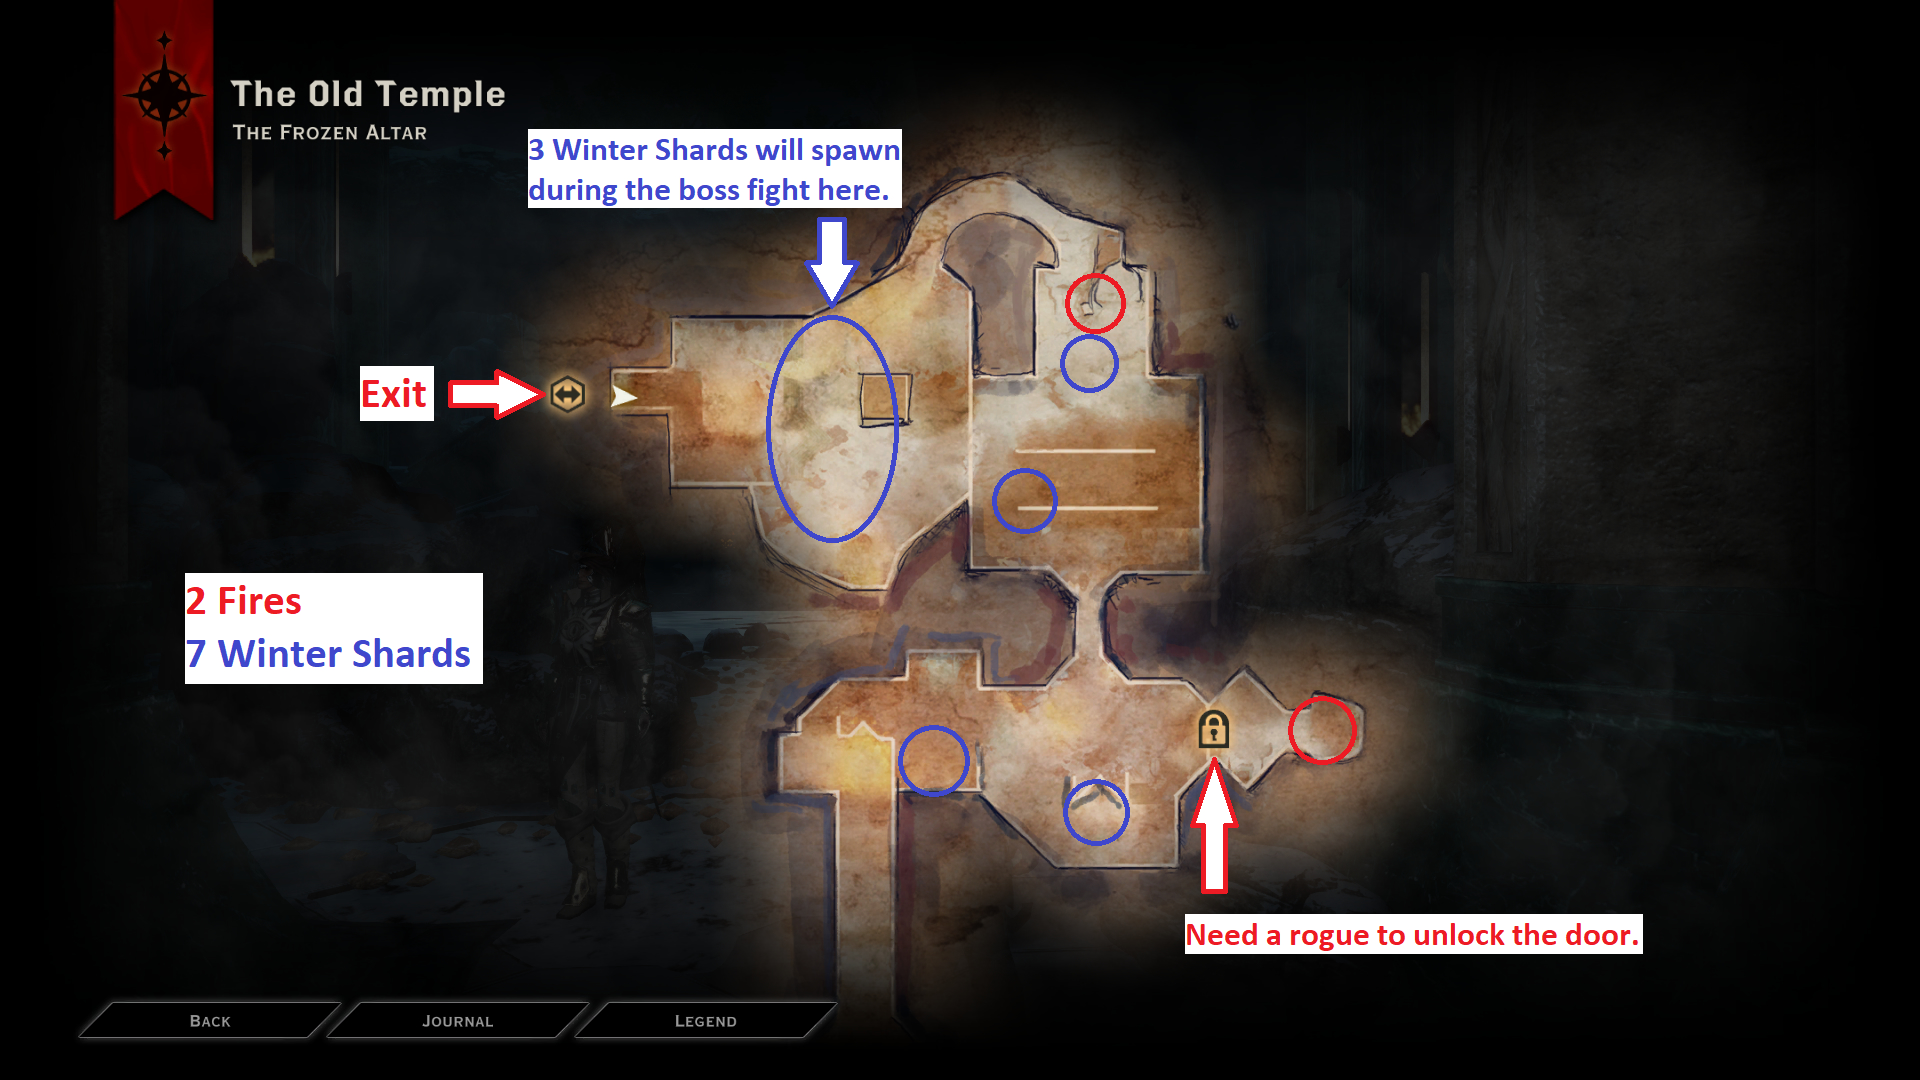
DLC: The Descent Achievements
Giant Slayer
Defeat an ogre alpha.
DLC main story related. You will encounter an ogre alpha at the very beginning of “The Descent” main quest which starts at the beginning of this DLC.
Fact Finder
Help Shaper Valta discover secret dwarven history.
DLC main story related. You will earn this achievement near the end of the “The Descent” main quest.
Shaper of Stone
End the earthquakes threatening the surface.
DLC main story related. You will earn this achievement at the end of the “The Descent” main quest.
Deep Roads Commander
Complete a mission at the expedition table in the Legion of the Dead camp.
At the beginning of this DLC, you will be given “The Descent” main quest. Follow along the quest and after you blow up the seal using lyrium charges, you will be given an objective to establish a camp nearby. Establishing the camp will unlock the Deep Roads Expedition Table which acts similarly to the war table in Haven/Skyhold. Completing any expedition table operation will unlock this achievement.
You can easily earn this by completing the “Deep Roads Expeditions: Legion Camp Improvements” expedition table operation which is located on “The Deep Roads” side of operations (left side). This operation is completed instantaneously and is available from the very beginning.
DLC: Trespasser Achievements
Forever Marked
Progress the story to unlock.
DLC main story related. Finish the “Trespasser” quest and complete the DLC and you will earn this at the end of the epilogue.
Coroner
Find all of the wearable items that make up the Taken Shape.
For this achievement, you need to collect all the items of “The Taken Shape” set. The set consists of “The Hand That Cuts” (ring), “The Eye That Weeps” (amulet), “The Bind That Guides” (belt), and “The Skin That Stalks” (armour). These items are spread throughout the DLC in different locations.
The Hand That Cuts
After your first meeting with the Exalted Council, you will arrive at the Crossroads using an eluvian. Here, take the path to the right from the entrance and use the eluvian there (instead of using the one shown in the quest marker).
You will enter a large rectangular area called Abandoned Chateau. You will notice a small chest at the end of the area directly from the entrance to the chateau. Try to loot it, and enemies will spawn. Defeat them and loot the chest which contains this ring.
The Eye That Weeps
After going to the Elven Mountain Ruins and coming back to the Winter Palace, you will need to go to the Crossroads again. When coming here, a new path will be unlocked. Before going through the eluvian that leads to the Deep Roads, turn left and go through that path to another eluvian to the Hidden Hollow area.
Much like claiming the item above, try to loot the chest there, defeat the enemies, and loot the chest again to get this item.
The Bind That Guides
The path to this item is unlocked alongside “The Eye That Weeps” above after completing Elven Mountain Ruins area and coming back to Winter Palace. After you go back to the Crossroads, before entering the eluvian that leads to Deep Roads, turn right and go through that path. You will find a reg, egg-shaped object.
Interacting with it will extend the land near you to another area. Go the the location shown below on the map and enter the Forgotten Tower. The process of looting the chest in this area will be the same as it was for the items above.
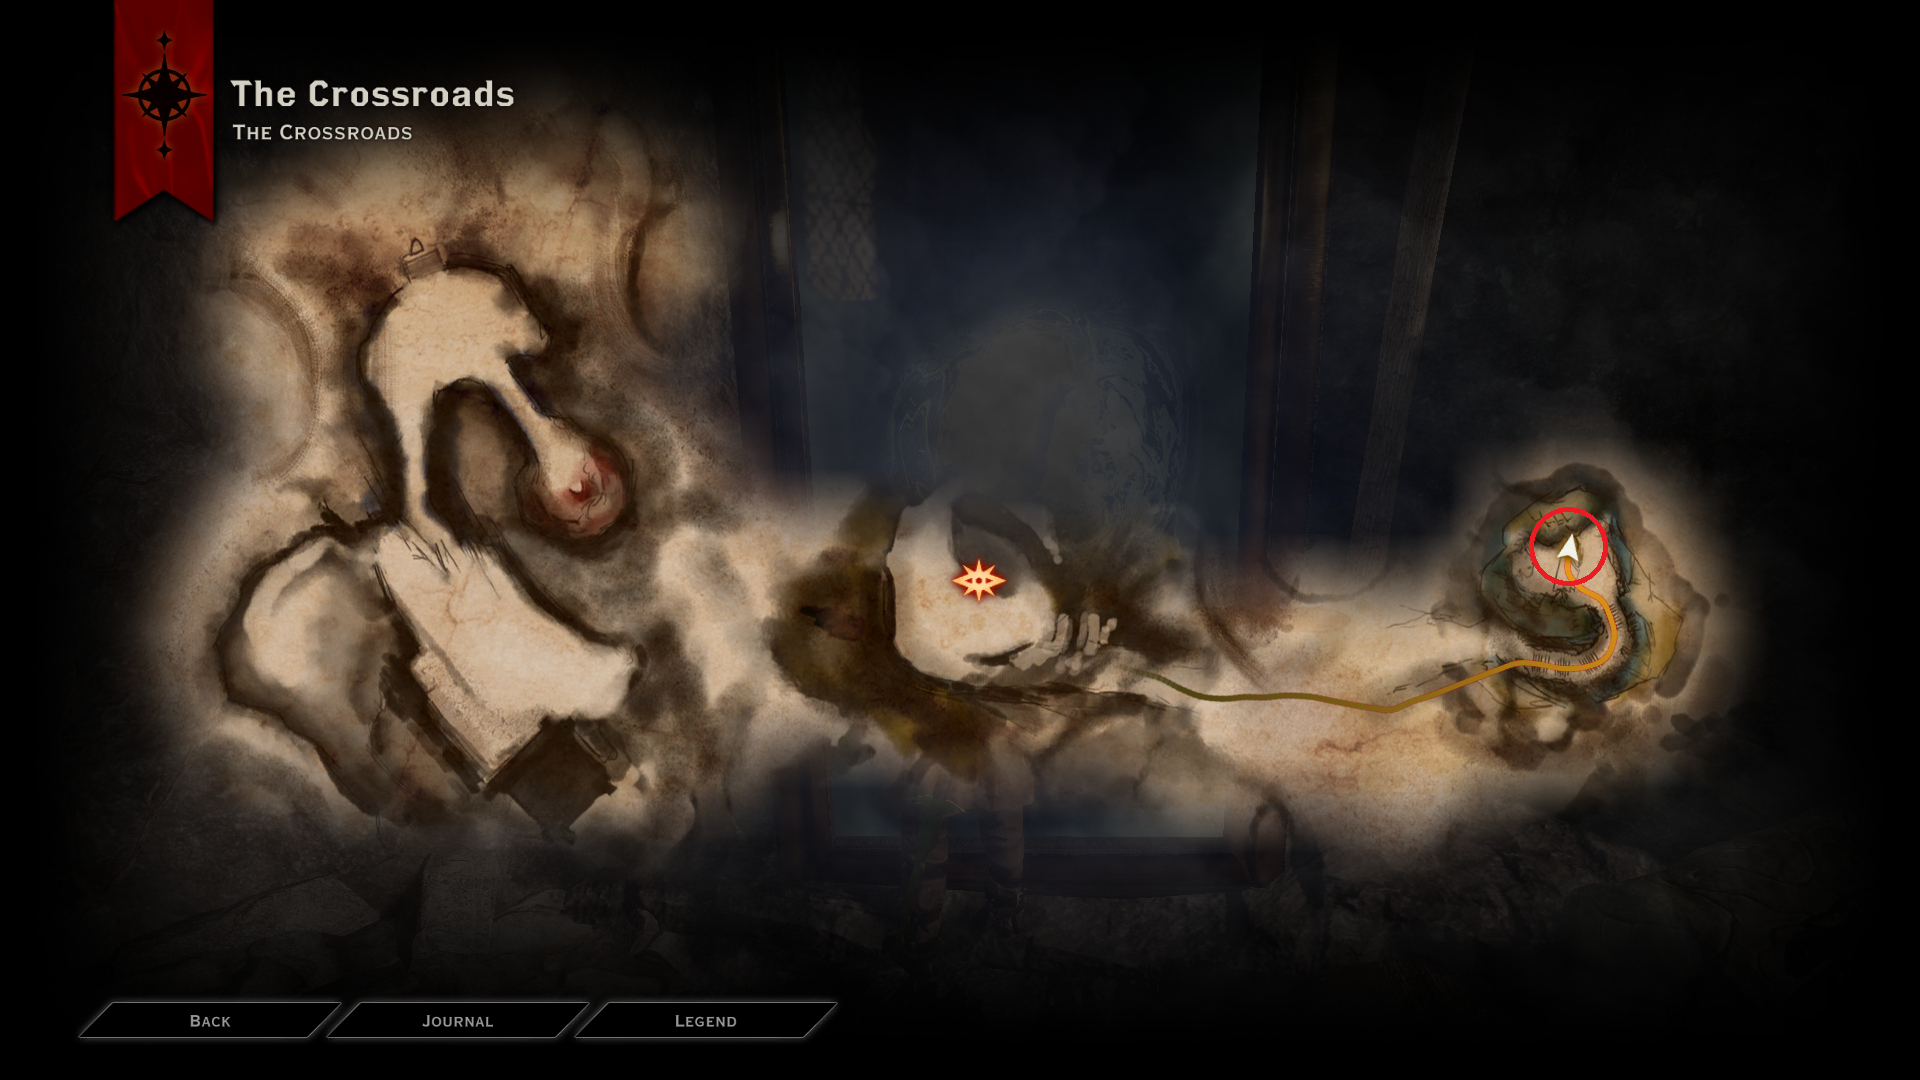
The Skin That Stalks
The path to the eluvian that leads to this item is unlocked after finishing the Deep Roads section, coming back to the Winter Palace, and entering the Crossroads again (before entering The Shattered Library). You will unlock a new path that leads to the Shattered Library. On that newly appeared path, you will find another red, egg-shaped object like before. Interact with it, and a new path will appear next to you. Go through that path and use the eluvian there to enter the Ancient Jail.
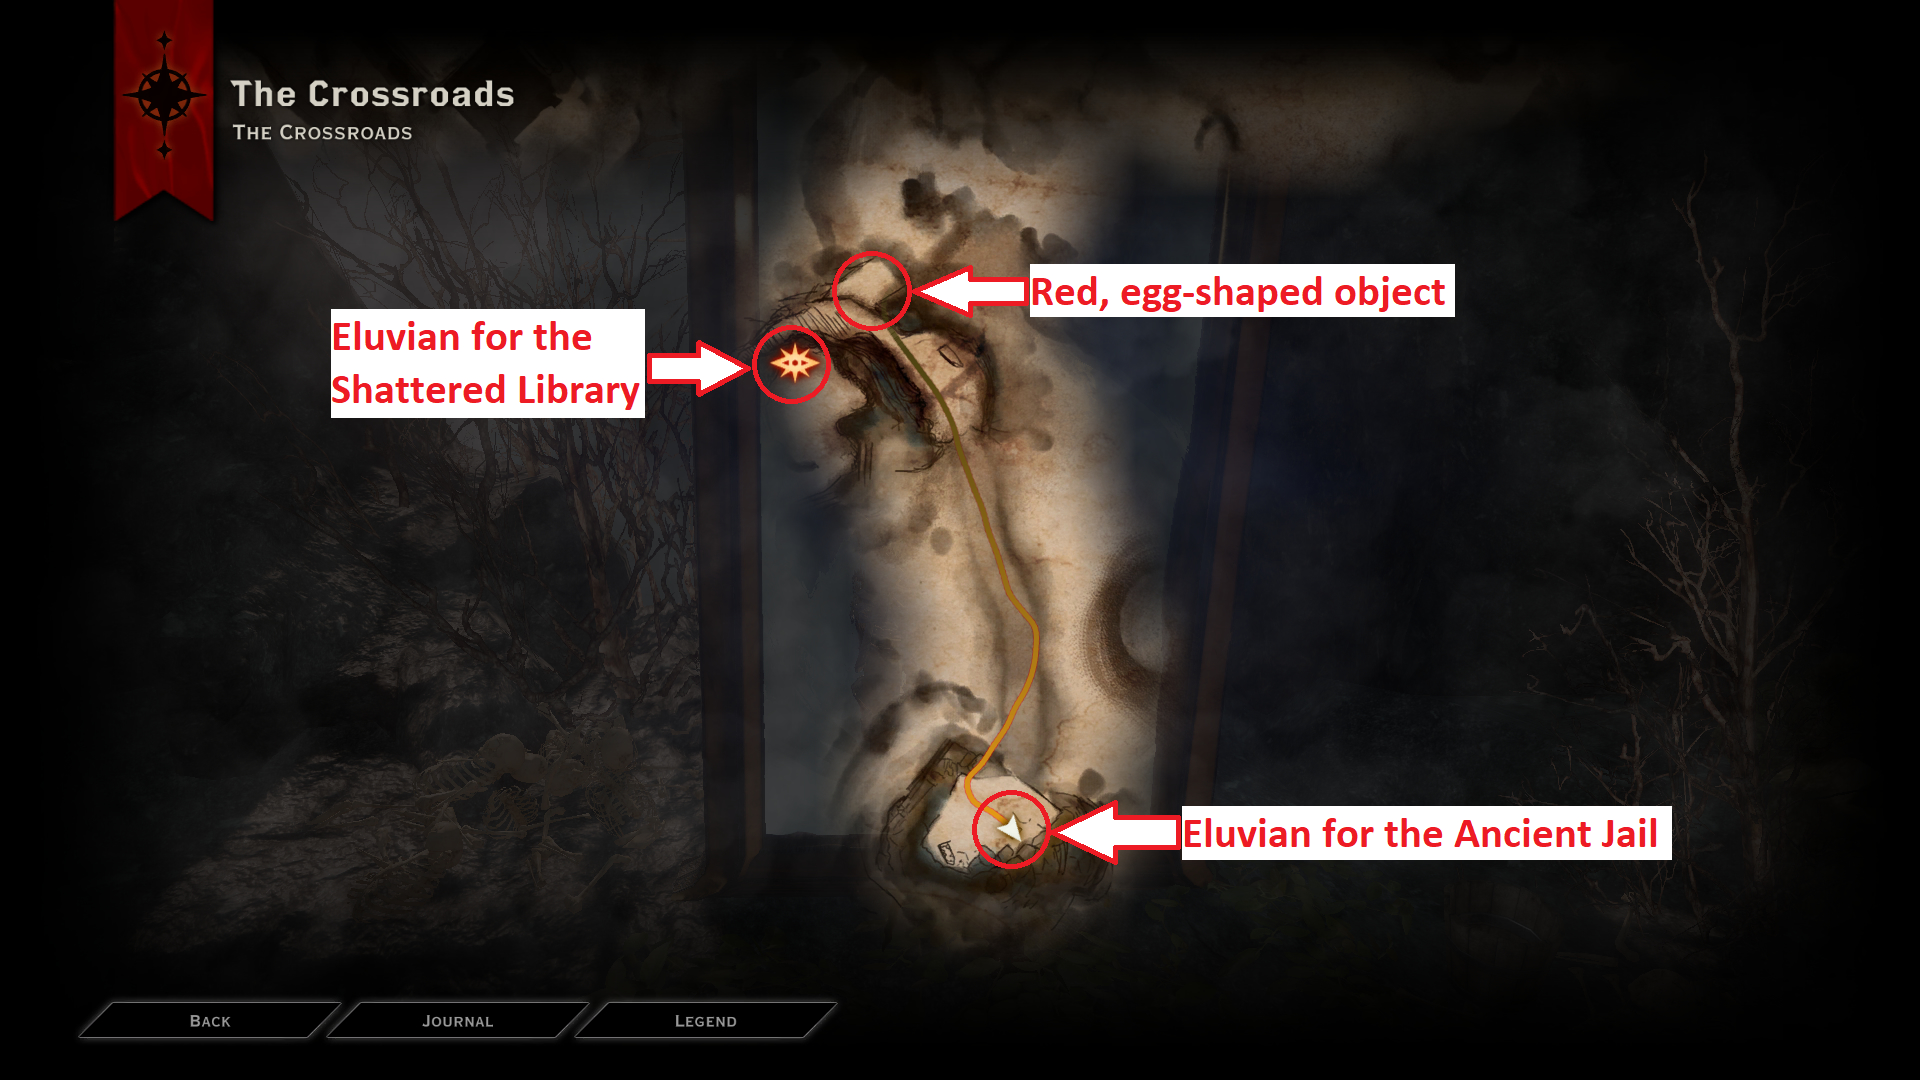
Loot the chest in this area using the same process as before.
You will get this achievement after acquiring all the 4 items that make up The Taken Shape set.
DLC: Trespasser Achievements (Continued)
Lateral Thinker
Unlock all caches watched over by ancient statues.
For this achievement, you need to solve all the puzzles related to the 4 Fen’Harel statues found throughout this DLC and claim their rewards. The location of the statues, and how to solve them are written below.
1st Puzzle – Elven Mountain Ruins
The 1st puzzle is unmissable and is part of this DLC’s main quest. So you must solve it in order to proceed.
This puzzle is found at the very end of the Elven Mountain Ruins section, inside a large structure called Forgotten Sanctuary. Near the very end of this structure, you will find the statue along with the puzzle. To solve this puzzle, you simply need to light the veilfire brazier that the Dread Wolf statue is directly looking at. This is the 2nd brazier from the left.
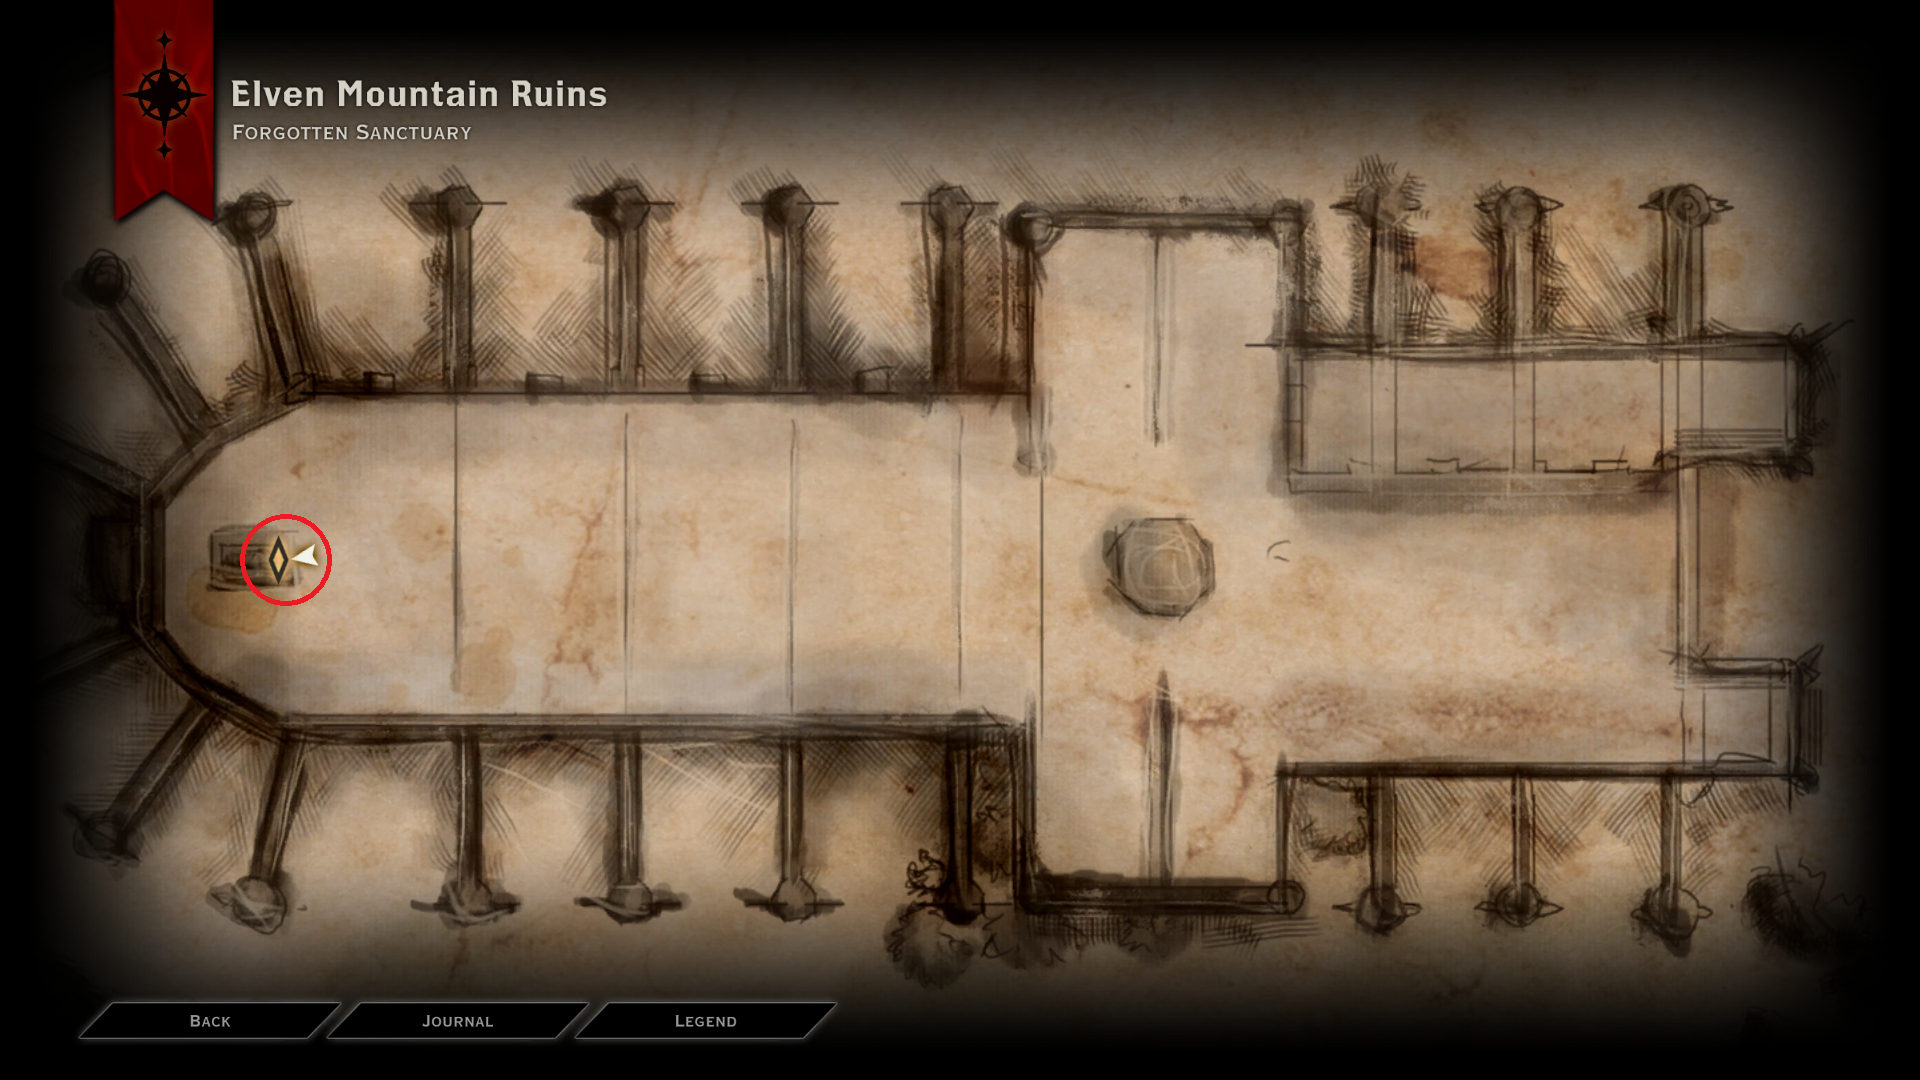
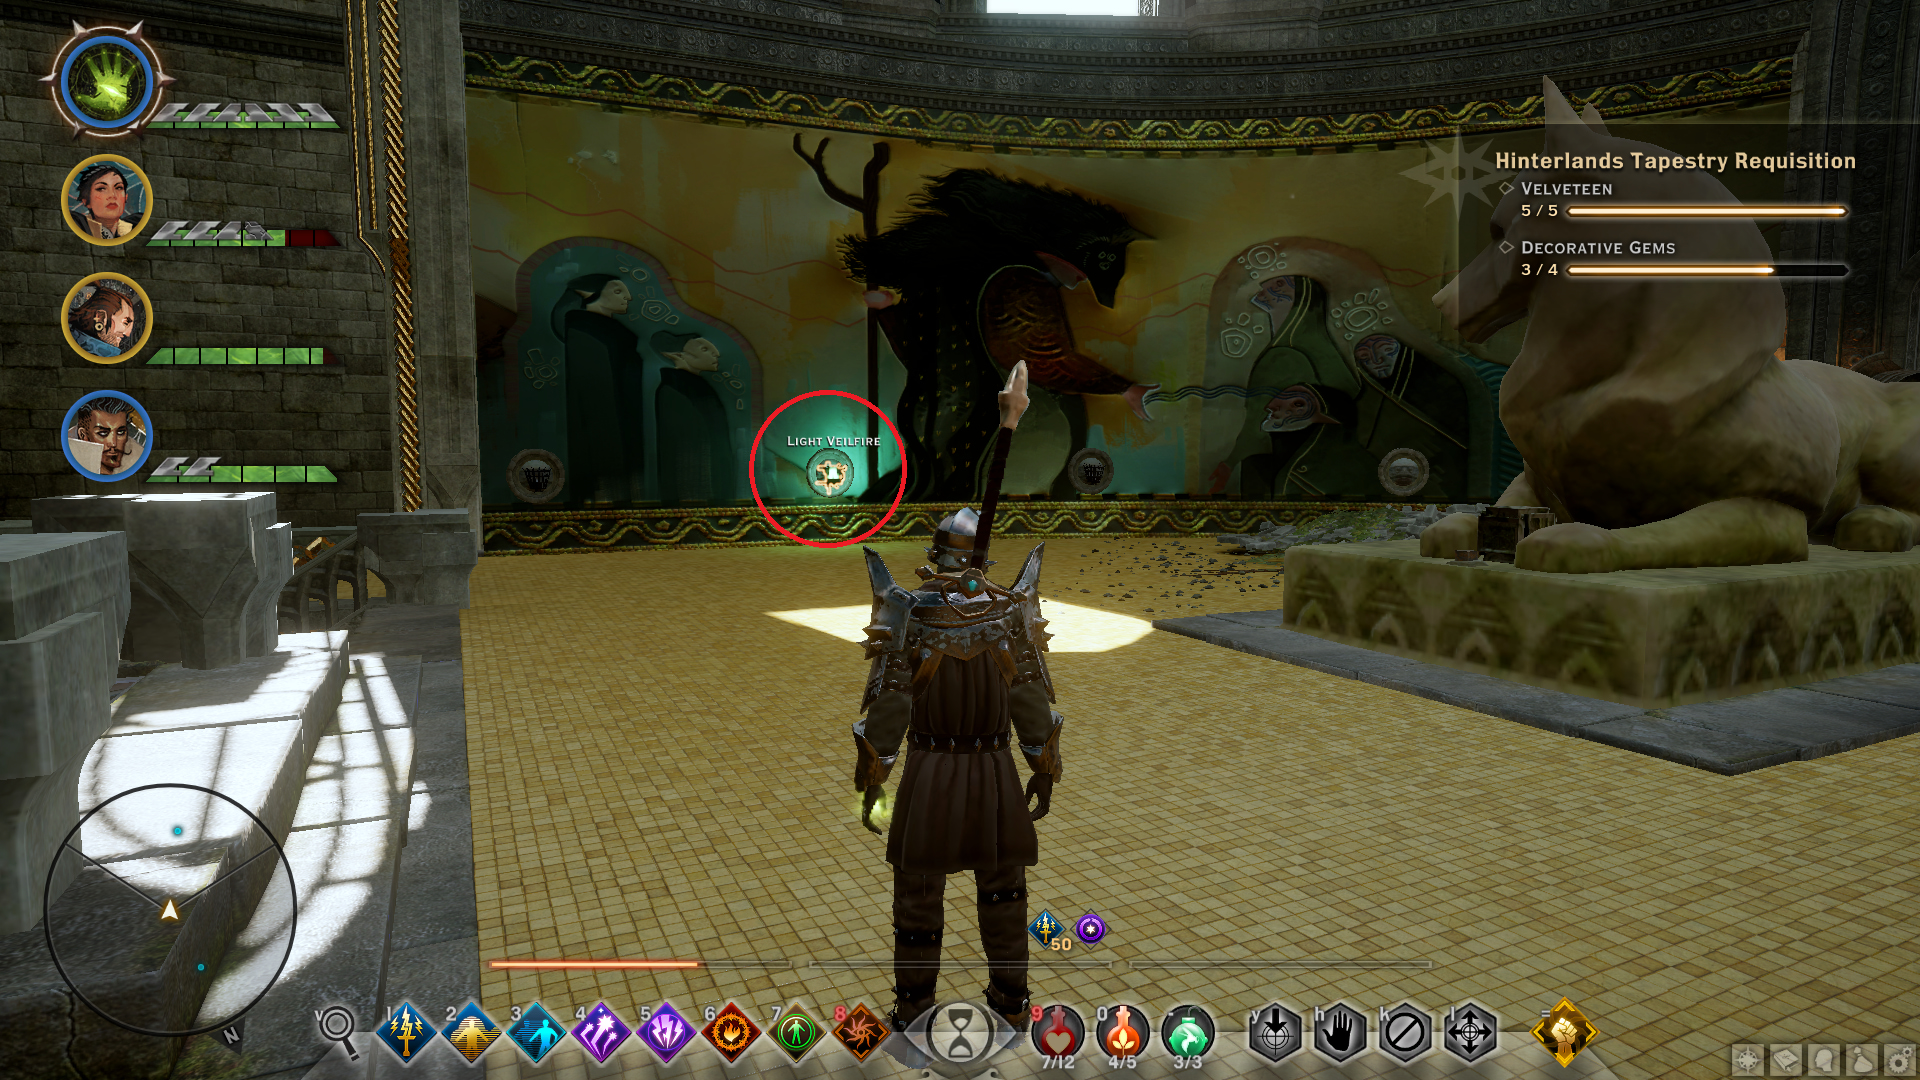
If you don’t have a mage in your party, you can find a lit veilfire brazier behind the statue. Lit the correct veilfire brazier, press the button in front of the statue to solve this puzzle, and claim the loot (which is located between the Dread Wolf statue’s paws).
2nd Puzzle – Shattered Library
Progress through the Shattered Library and come to the area in the map shown below. Go through the 1st, 2nd, and 3rd eluvians marked on the map. After arriving through the 3rd one, give the “Hold Position” command to your party. Only move the Inquisitor to the top and use the “Anchor Discharge” ability to move through the purple flame and reach the Dread Wolf statue at the top floor. At this point, your other party members should be near the 4th eluvian. Use the Inquisitor to press the button on the statue. This will start a hidden timer and you have to reach the now lit veilfire braziers in the previous area. After the timer goes off, the braziers will be extinguished. After pressing the button, immediately switch to another party member. Since they’re holding position near the 4th eluvian, you can quickly come to the previous location using that party member. Reach downstairs to the 6th area and the braziers will now be lit.
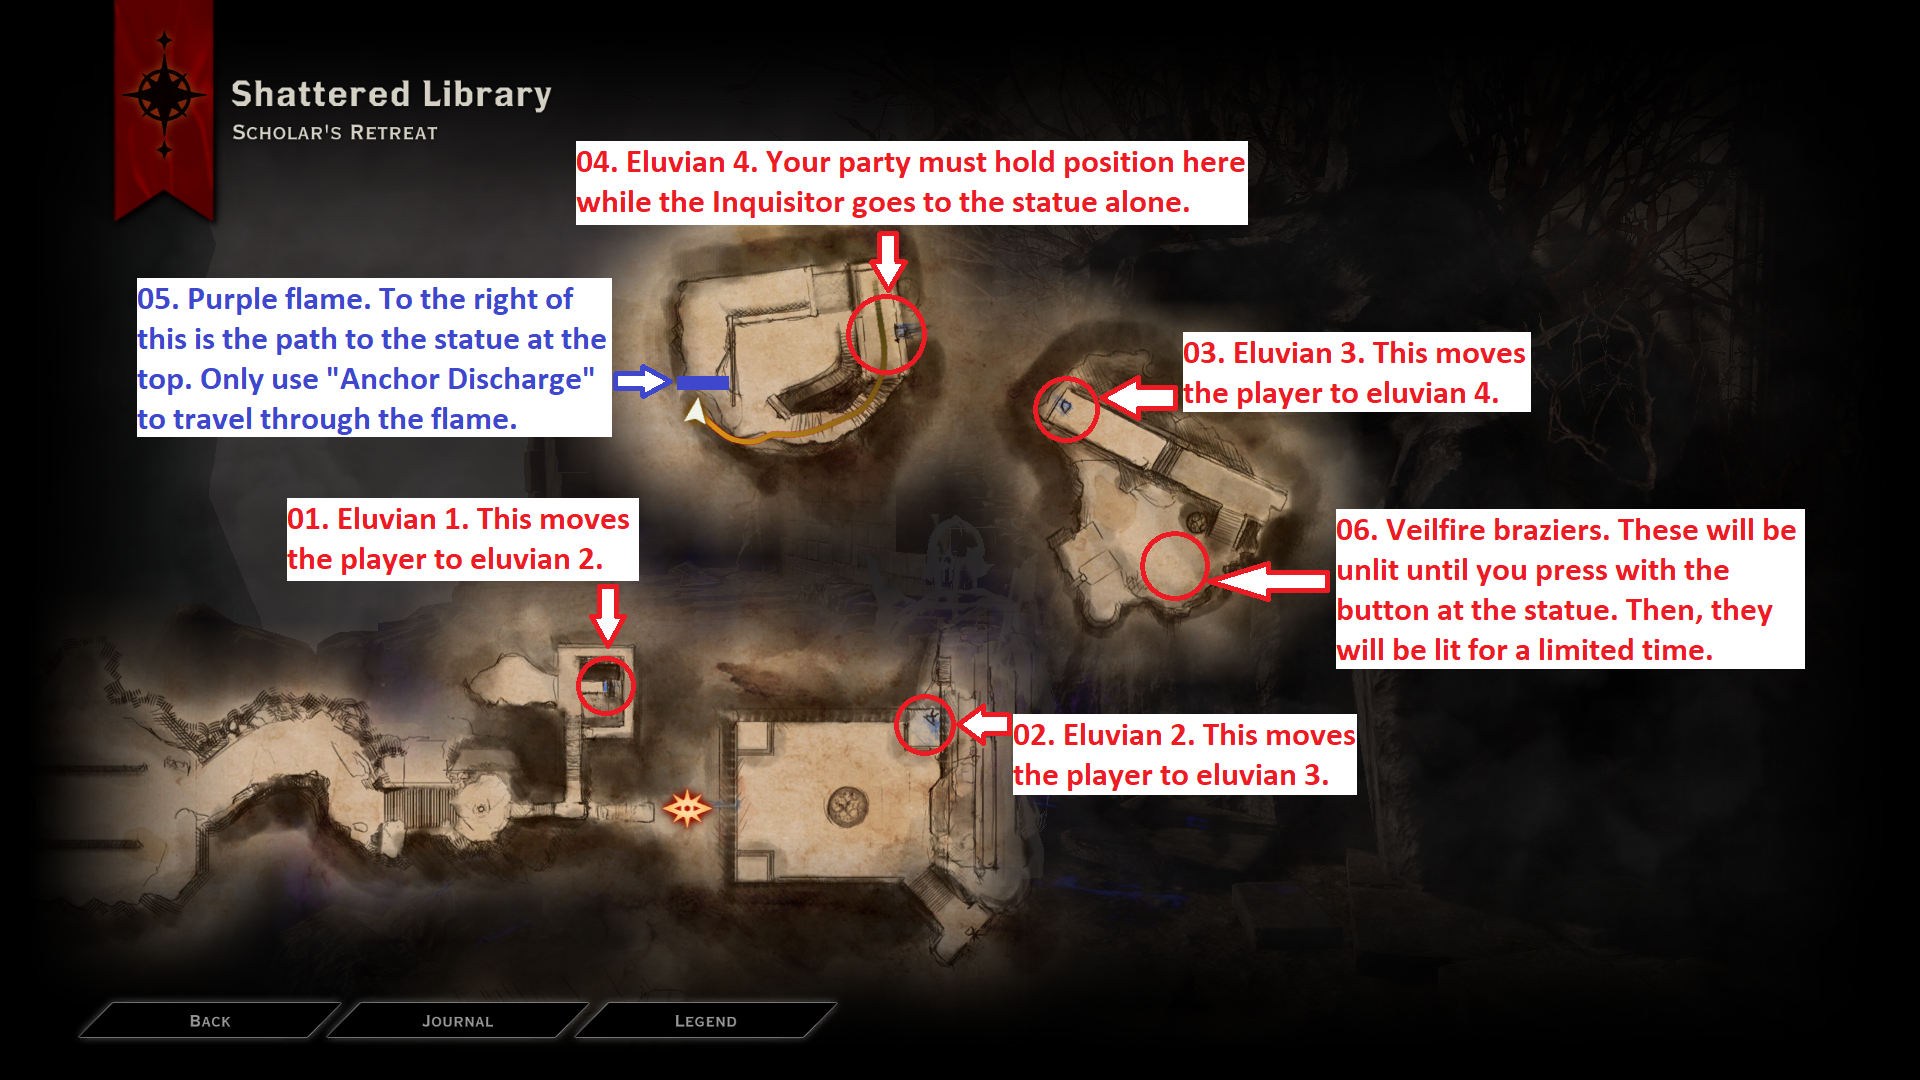
Quickly take a veilfire torch before the braziers go out and come back to the Dread Wolf statue. Use the veilfire torch on the small statue near the Dread Wolf statue and and the chest will be unlocked.
My explanation to this puzzle may get confusing, so I have recorded a video from my gameplay showing how to unlock this puzzle. Refer it if you get stuck.

3rd Puzzle – Deep Roads
Even though you come across the eluvian that leads to this puzzle during you first arrival at the Deep Roads, the path to it will be blocked by rubble and gaatlok canisters. So you have to complete the Shattered Library section first and acquire the “Anchor Blast” upgrade to your “Anchor Discharge”, which makes the this ability deal AOE damage and explode gaatlok canisters. After finishing the Shattered Library section and before going to The Darvaarad, go to to the Deep Roads through the eluvian you used to enter it before. Go to the location shown in the map below and use Anchor Discharge to clear the rubble. The path to the eluvian will be cleared after that.
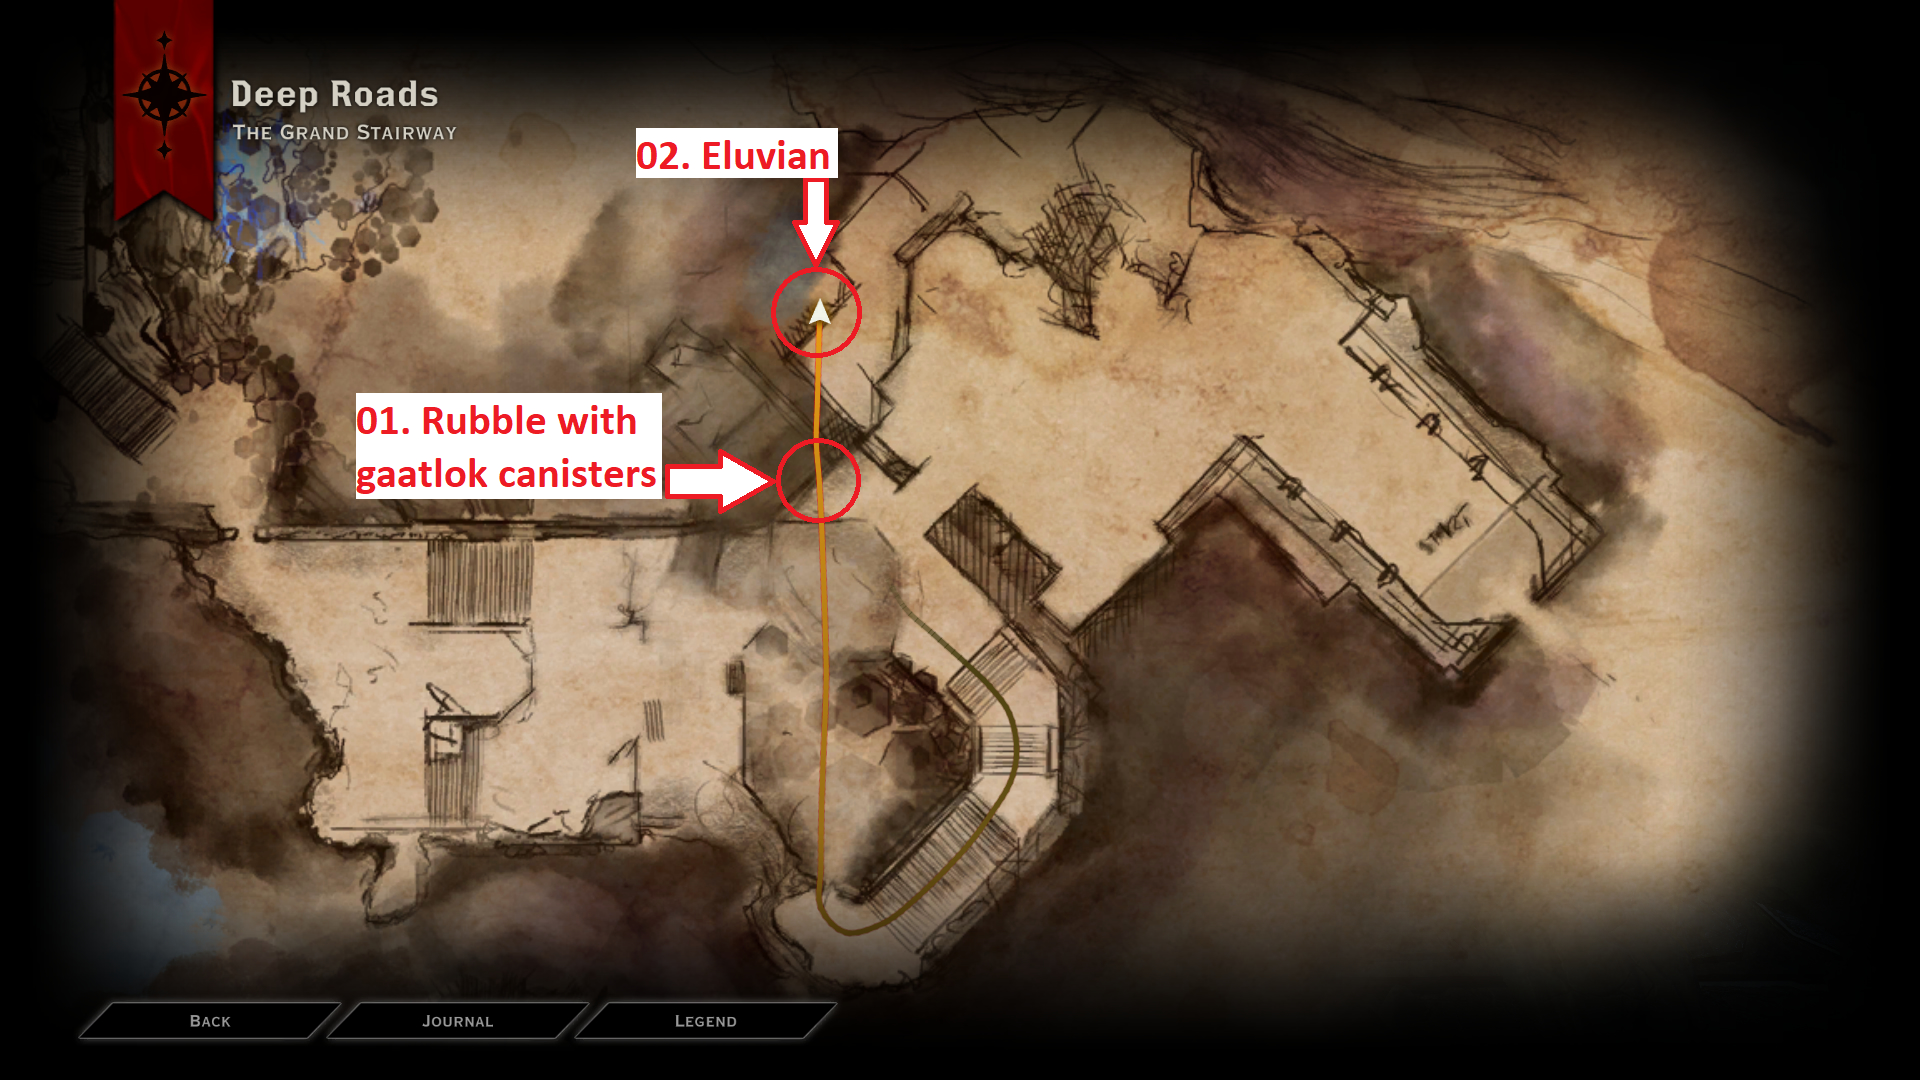
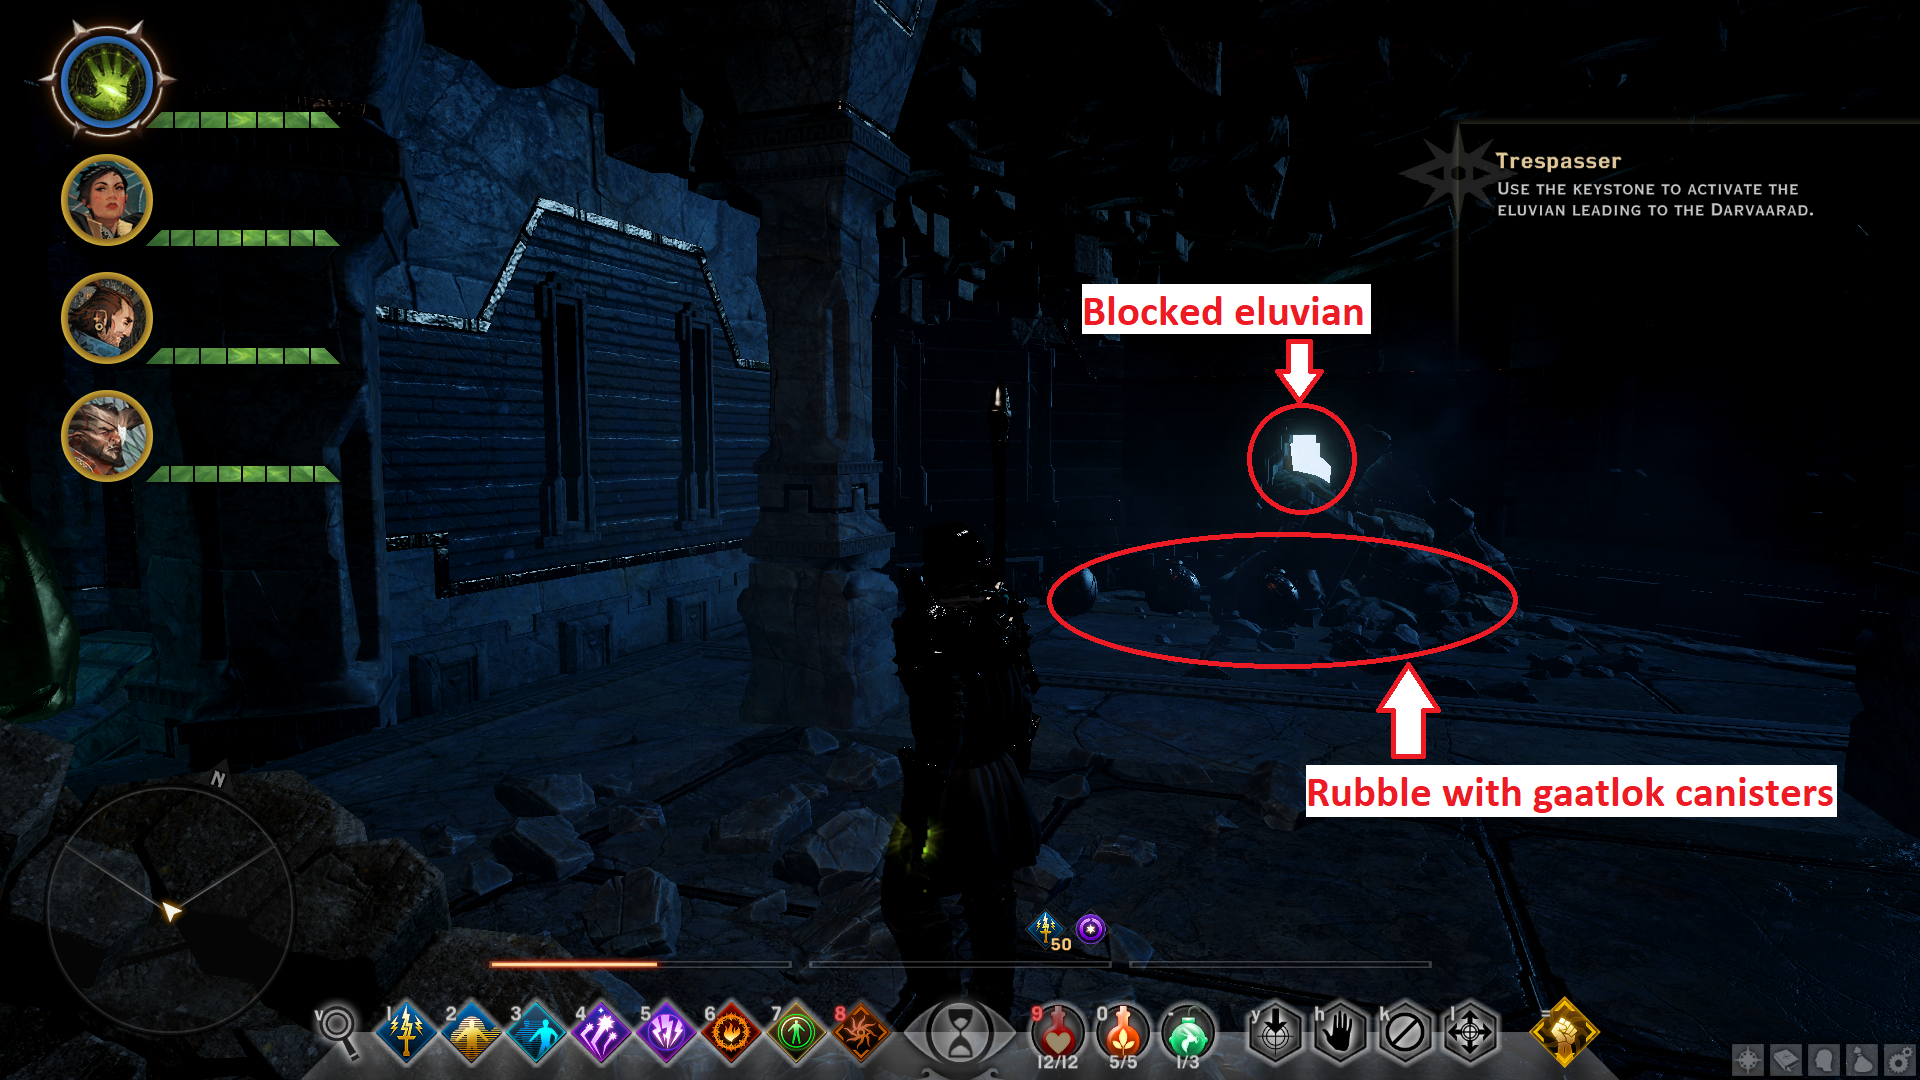
You will enter an area called the Unknown Ruin. A lit veilfire brazier will in in front of you. Take a torch from it and proceed to the next area. Go past the Dread Wolf statue to the mural on the wall. An unlit brazier will be there, higher on the wall. Focus your camera away from the statue, to the mural. Look back at the statue and its eyes will be glowing now. While keeping the camera focused on the statue, go near it and press its button. A path will be made to reach the unlit brazier. Light it and the chest will be unlocked.
4th Puzzle – The Darvaarad
Immediately after you reach the Darvaarad, you will find a lit veilfire brazier near the entrance. You can use this to light other unlit braziers if you don’t have a mage in your party. Keep going through the map and you will come to the courtyard. Defeat all the enemies in this area first. After that, go to the Research Tower marked on the map. The tower’s front entrance is initially locked, so you will have to enter from the side.
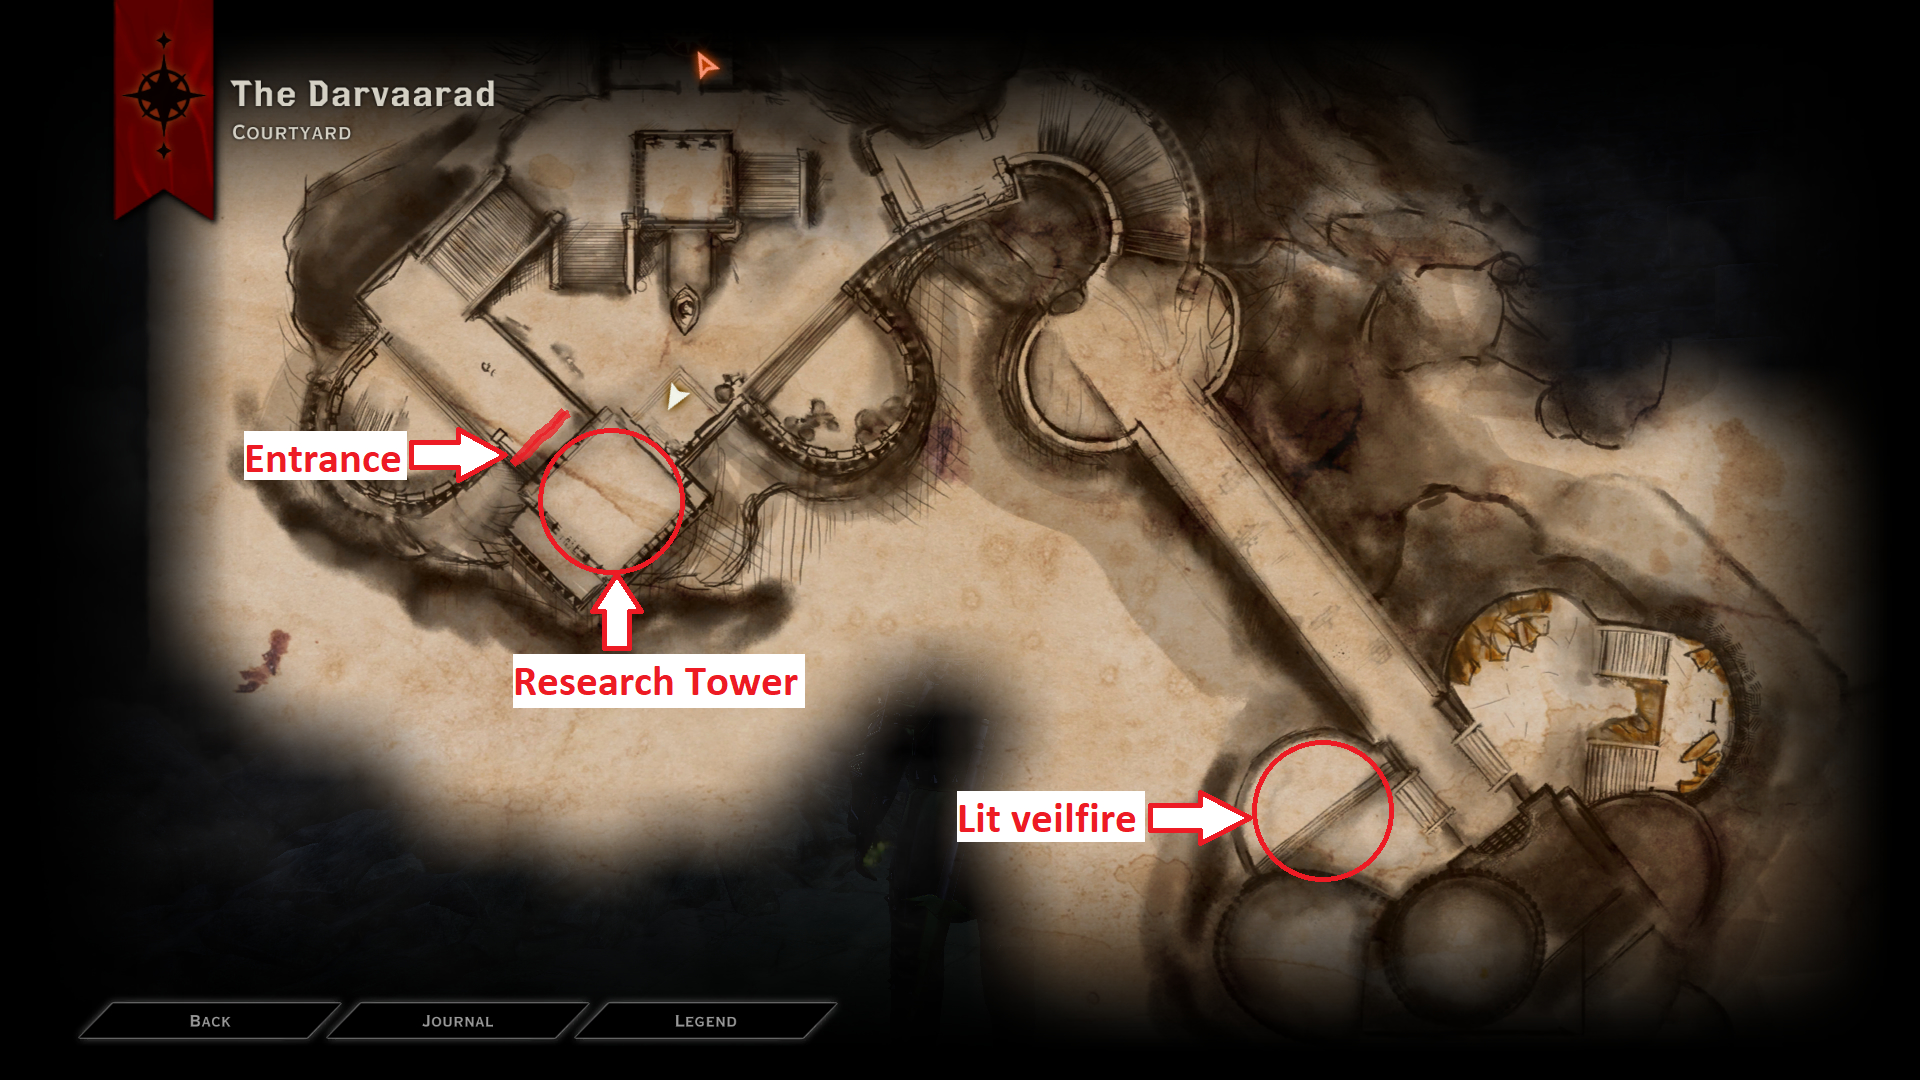
There are multiple statues with unlit braziers spread throughout different levels in this tower that you need to light in the correct order to solve this puzzle. The correct statue order and floor levels are as follows;
1. Owl – Ground floor
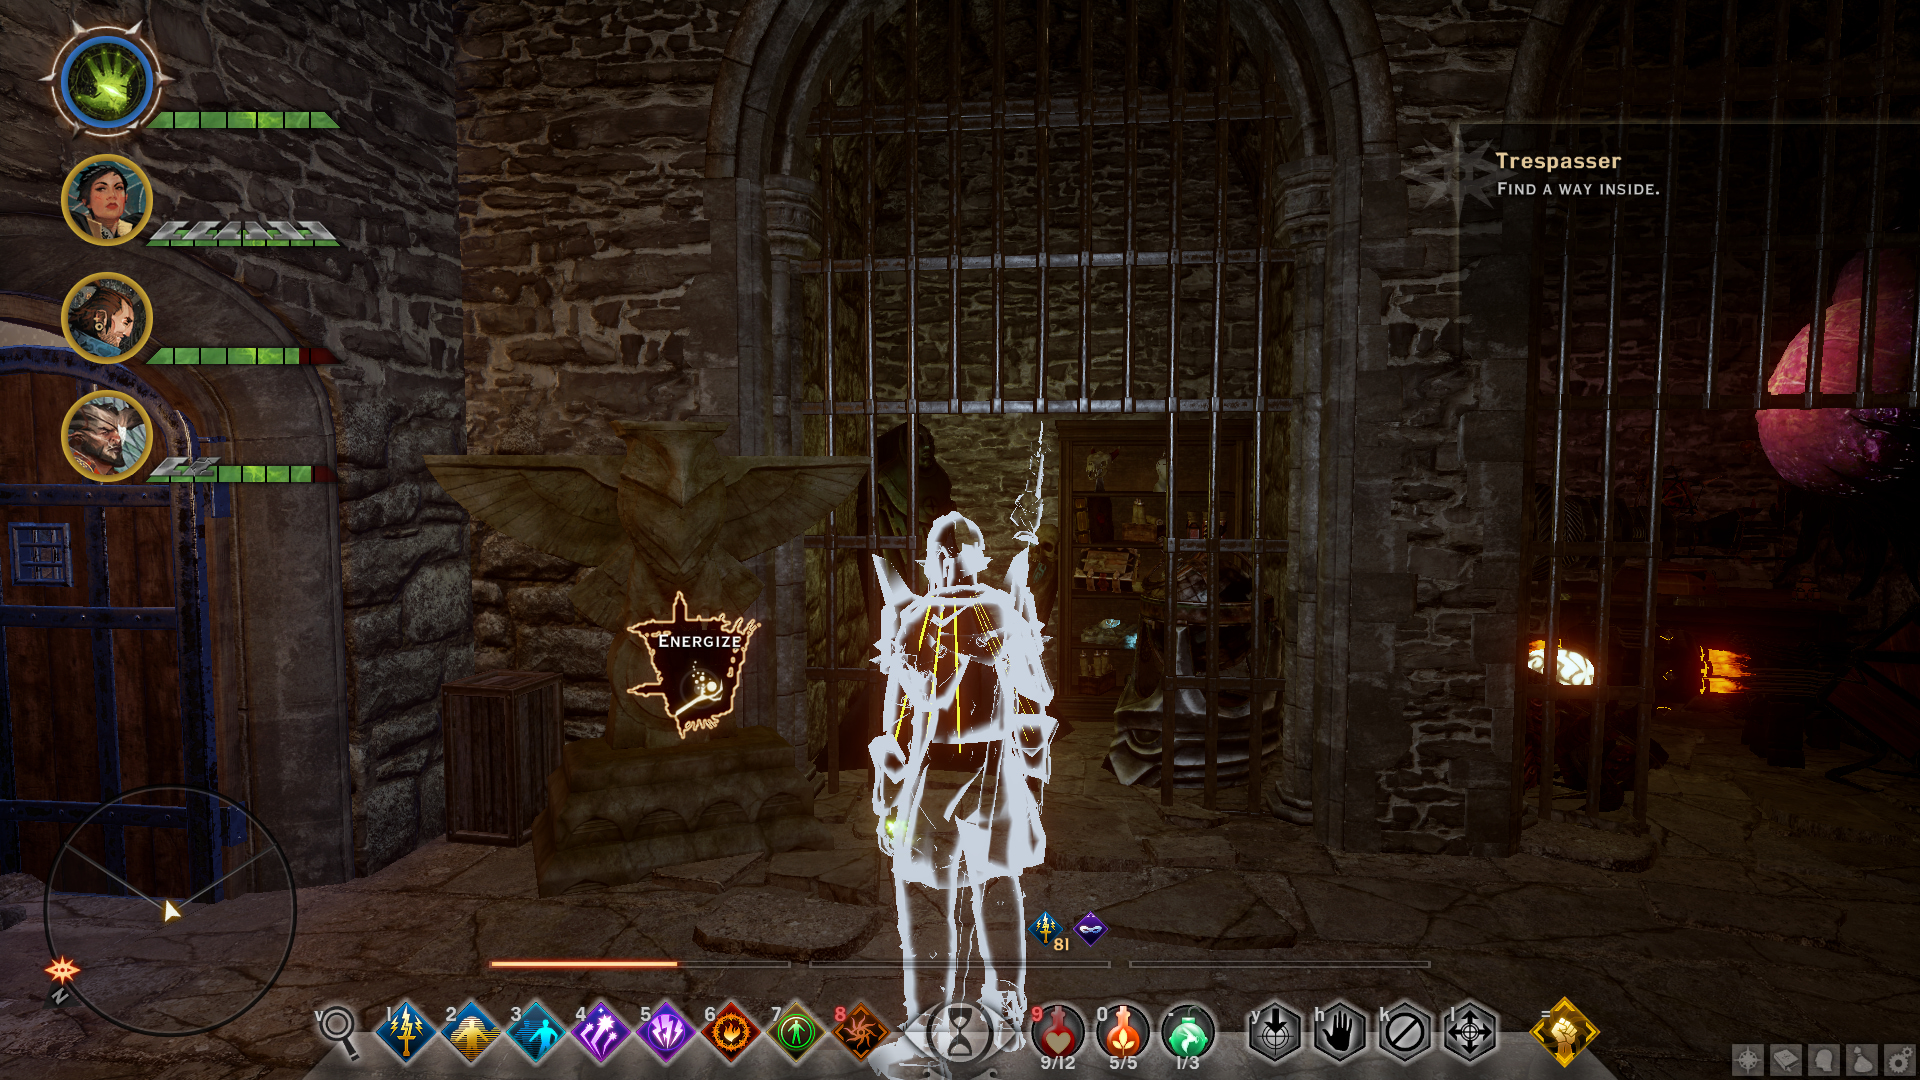
2. Halla – Top floor
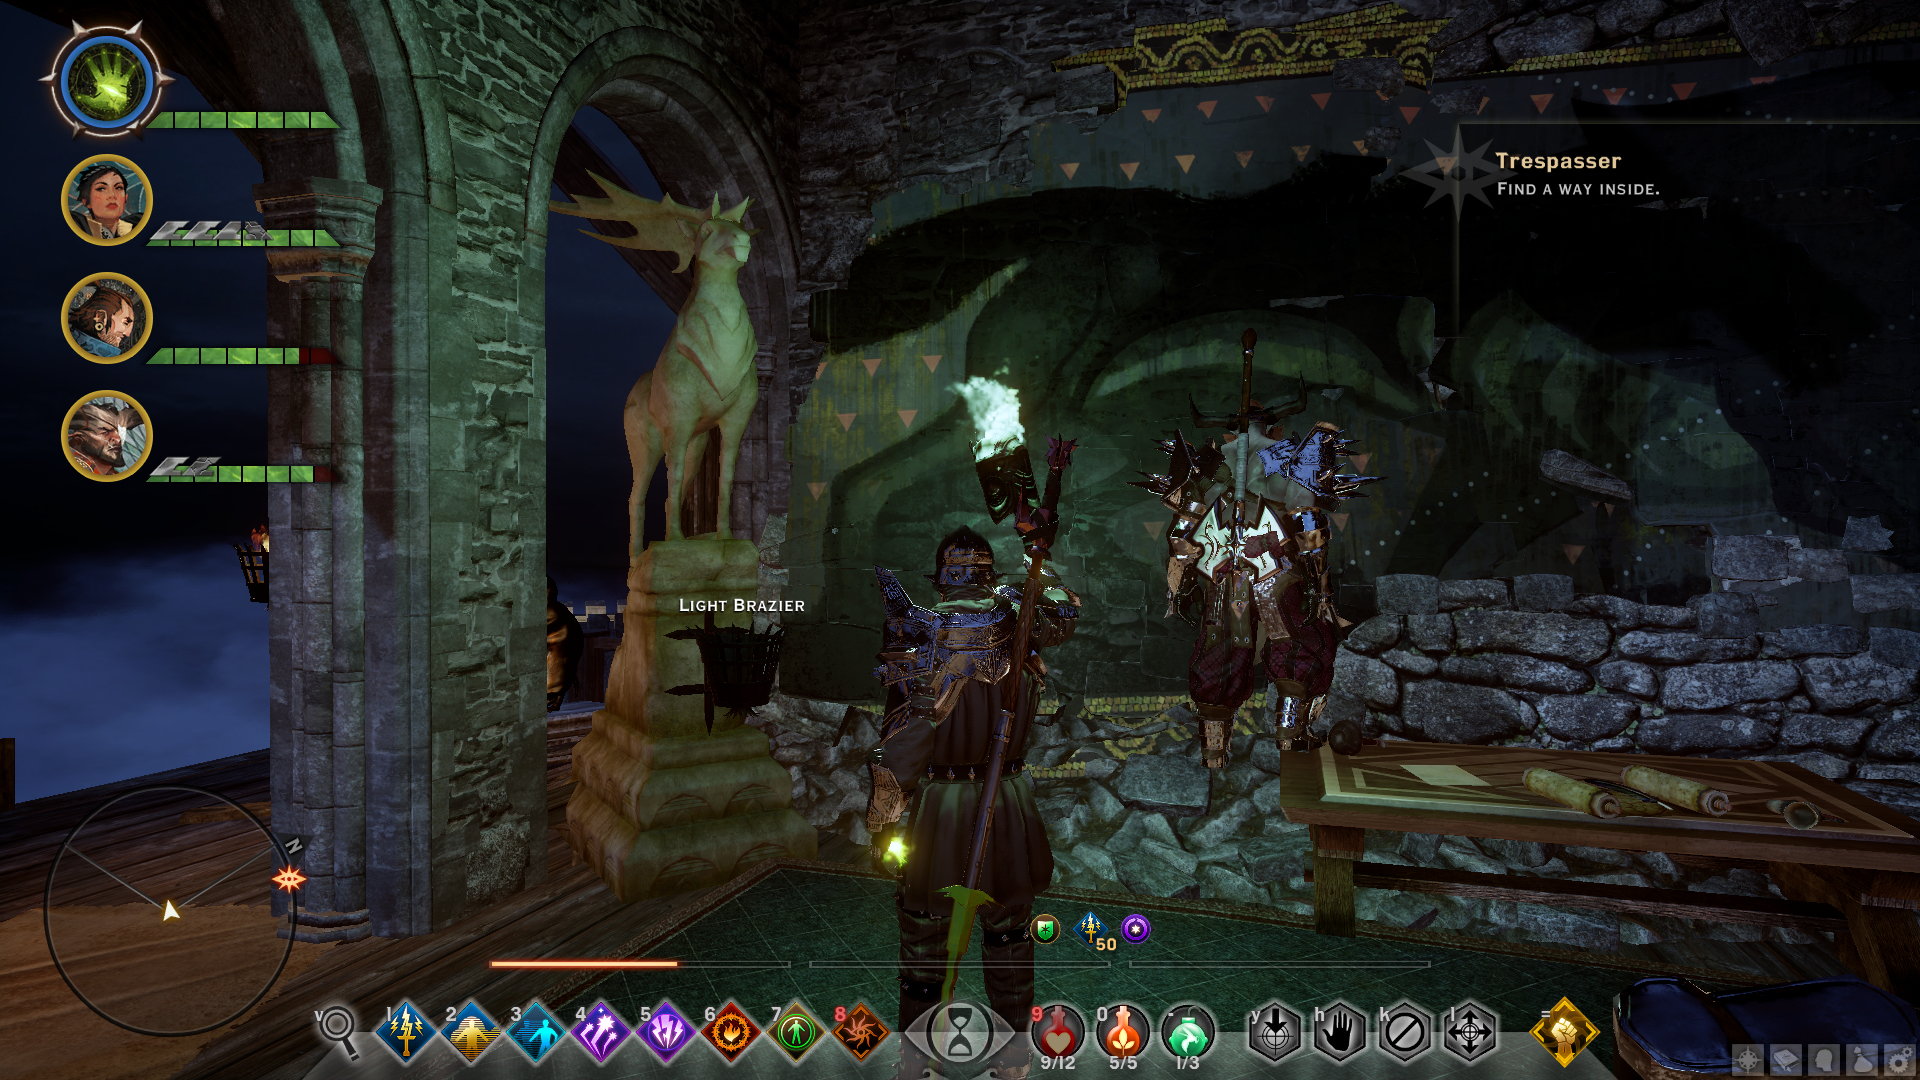
3. Dragon – Top floor
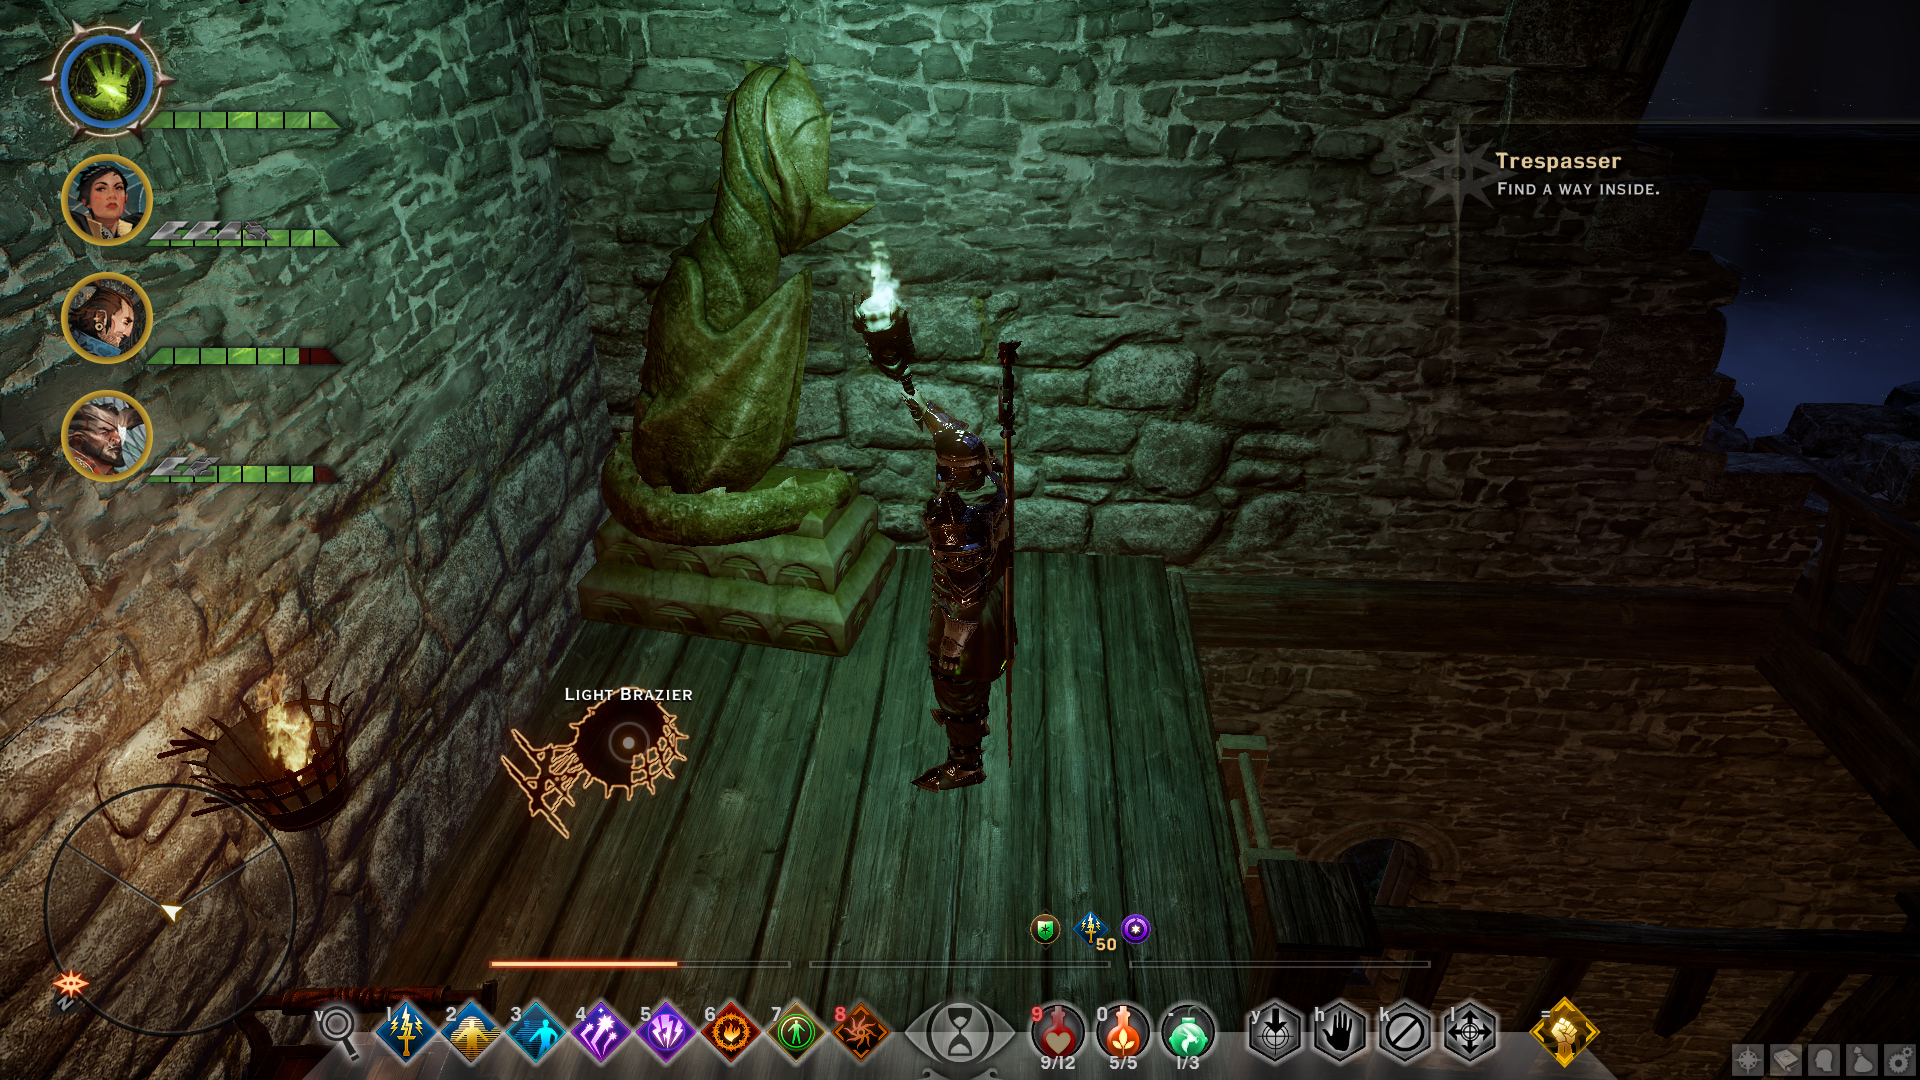
After lighting the last brazier, the chest, which is located on the ground floor on the Dread Wolf statue, will be unlocked.
After solving all the 4 puzzles and collecting all their rewards, this achievement will unlock.
DLC: Trespasser – Trials Related Achievements
Trial of the Emperor
Defeat 20 foes promoted by Walk Softly.
Related trial: “Walk Softly”
Trial modifier description: The enemies of the Inquisitor may have new traits and abilities in combat.
Note: This achievement can easily be earned while doing the Nightmare difficulty playthrough. I recommend enabling the “Walk Softly” trial after turning level 10, earning the achievement, and disabling the trial afterwords. Disabling the trial before earning the achievement will reset the defeated enemies count. Do not make any changes to the difficulty level.
Keep in mind that not all enemies that spawn will be buffed by this modifier. Some enemies will spawn with basic stats, and some enemies will spawn with buffed stats which are indicated by a “Promoted” label when looking through the tactical camera.
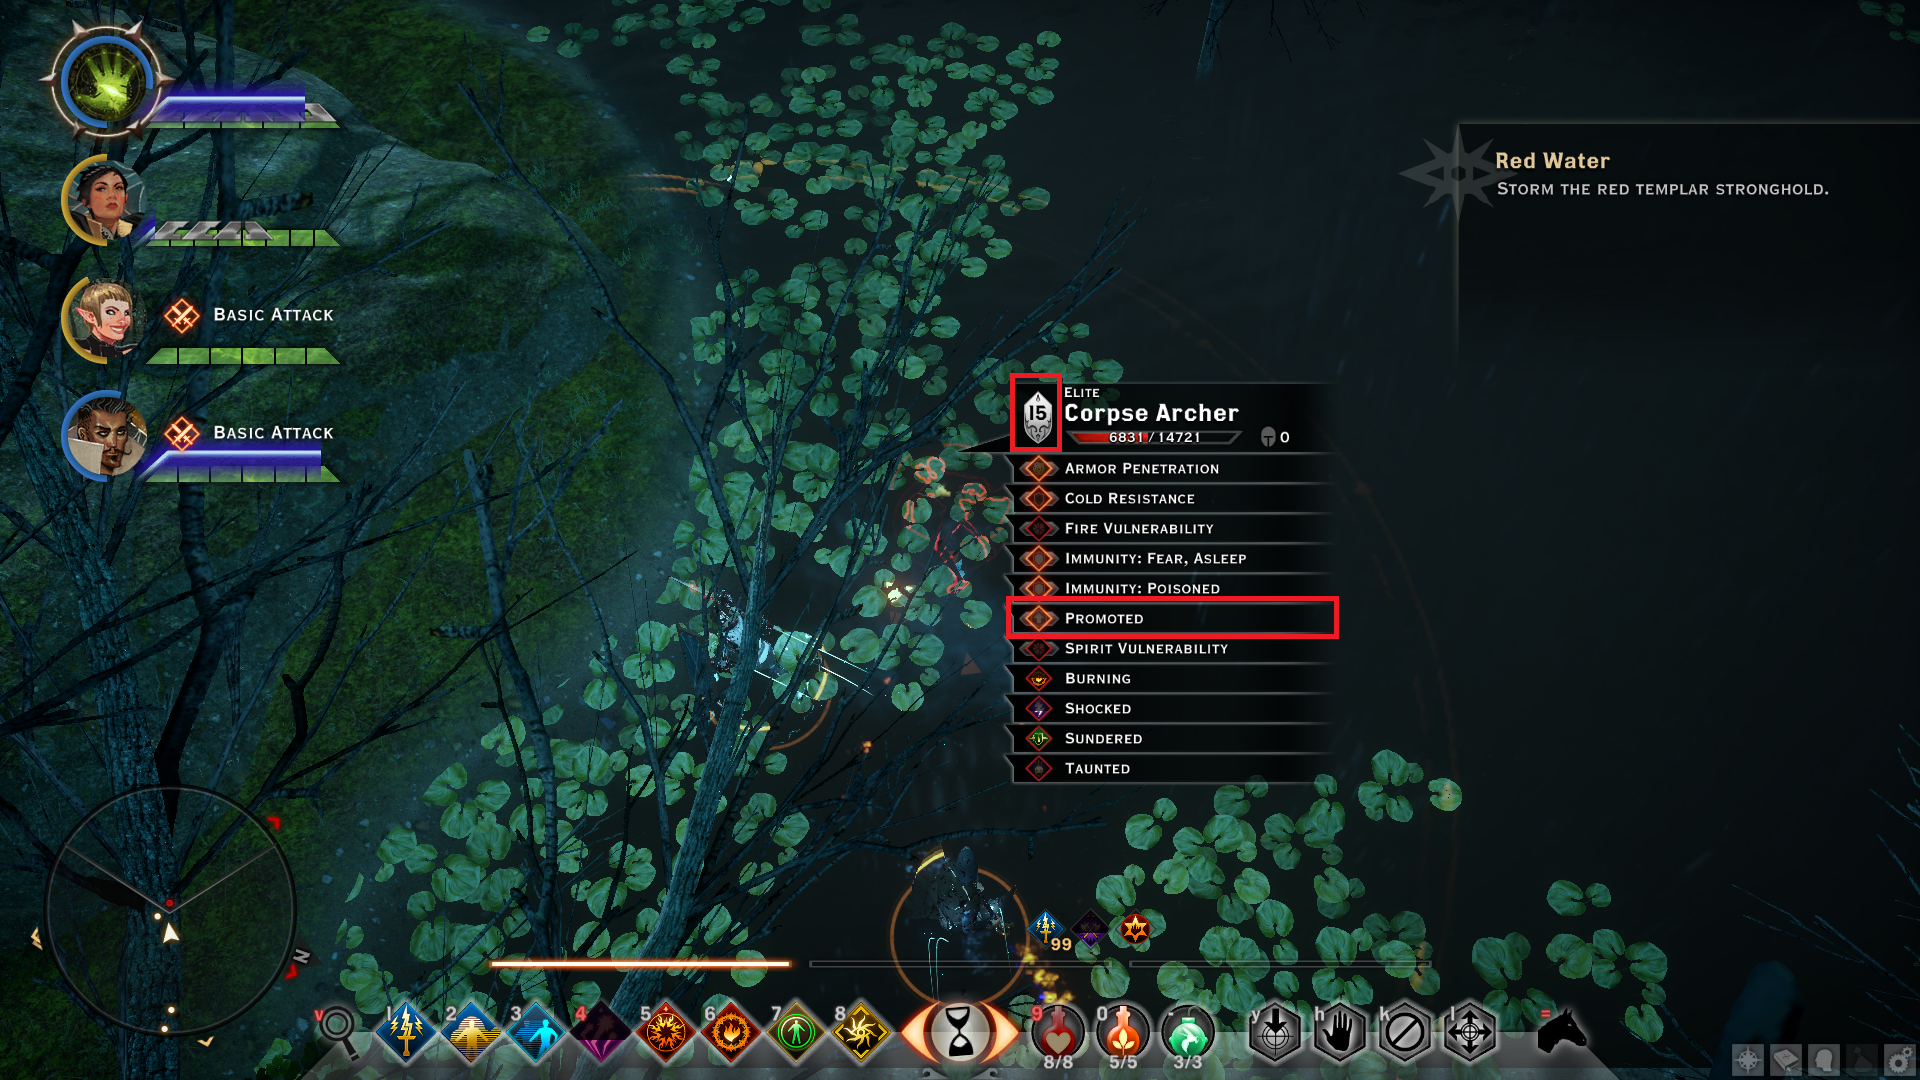
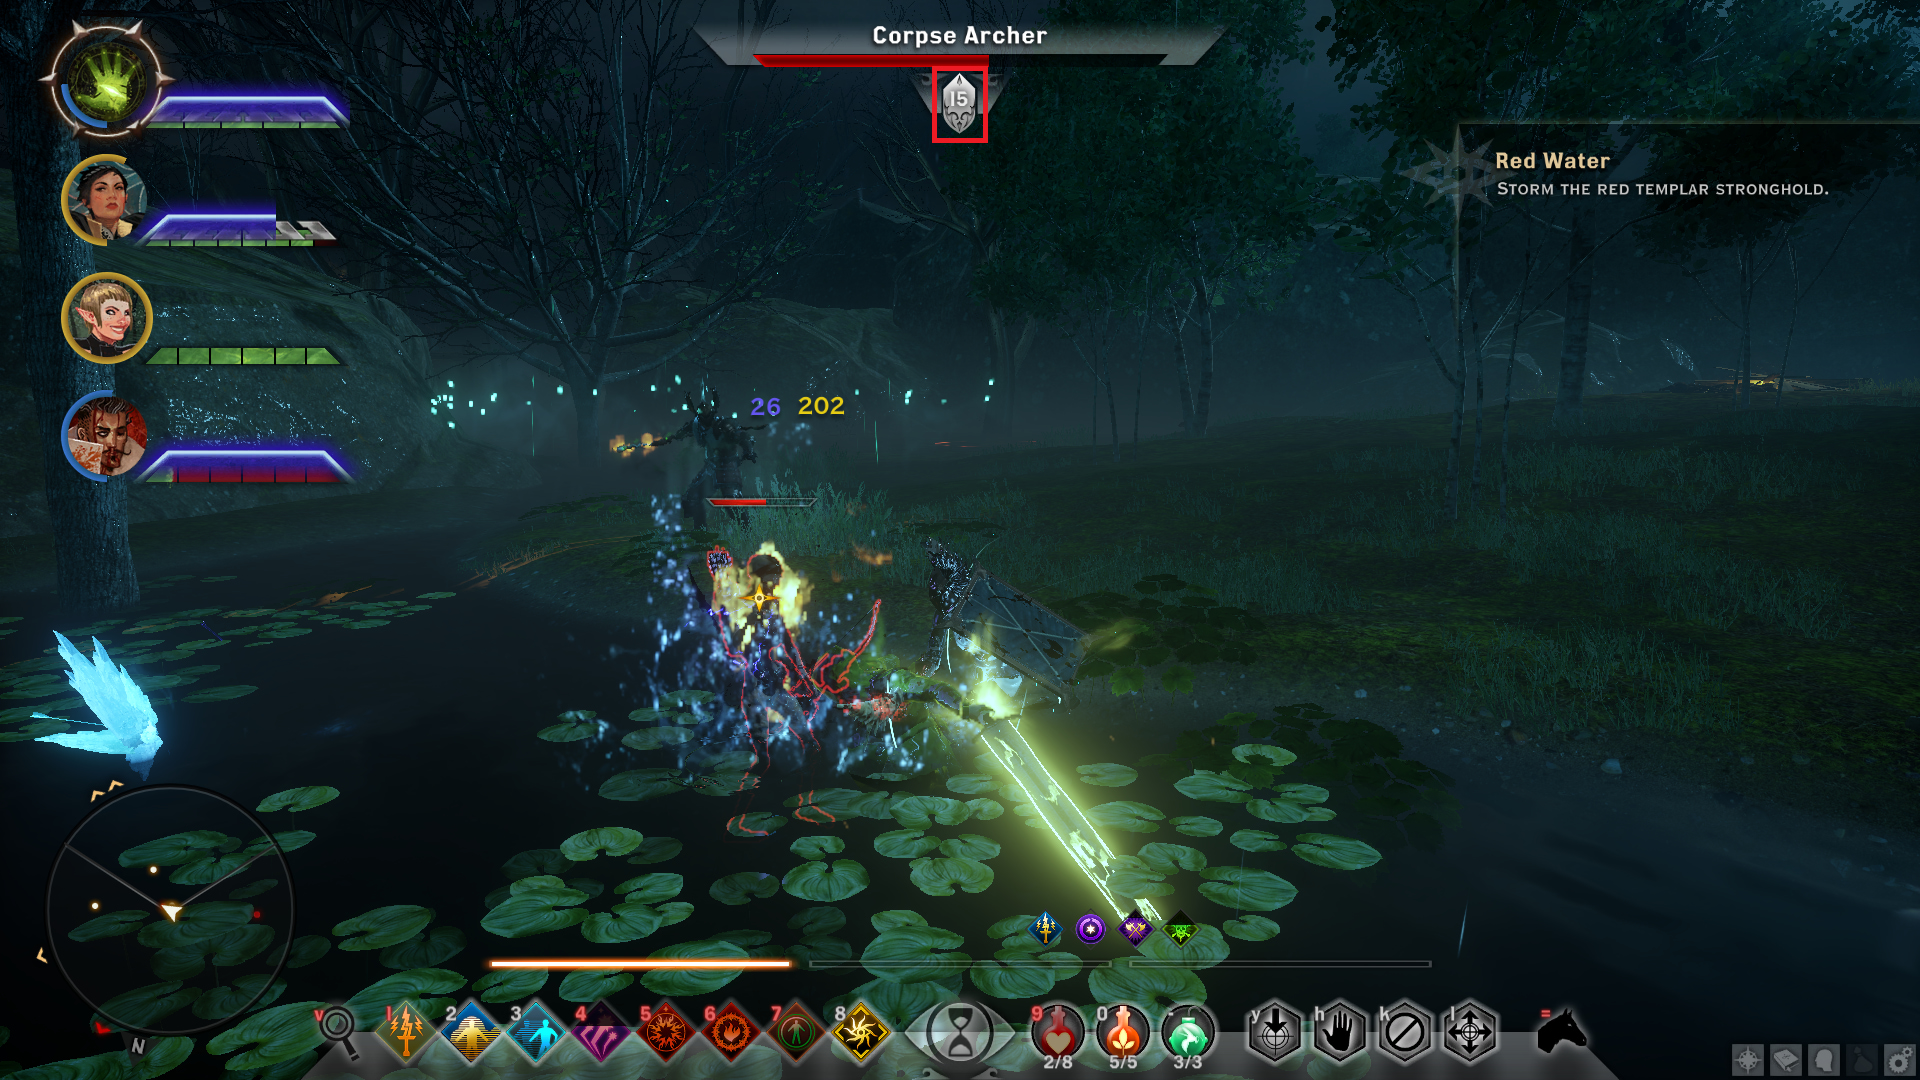
Even harmless animals have a chance to be buffed by this modifier which counts towards the achievement.
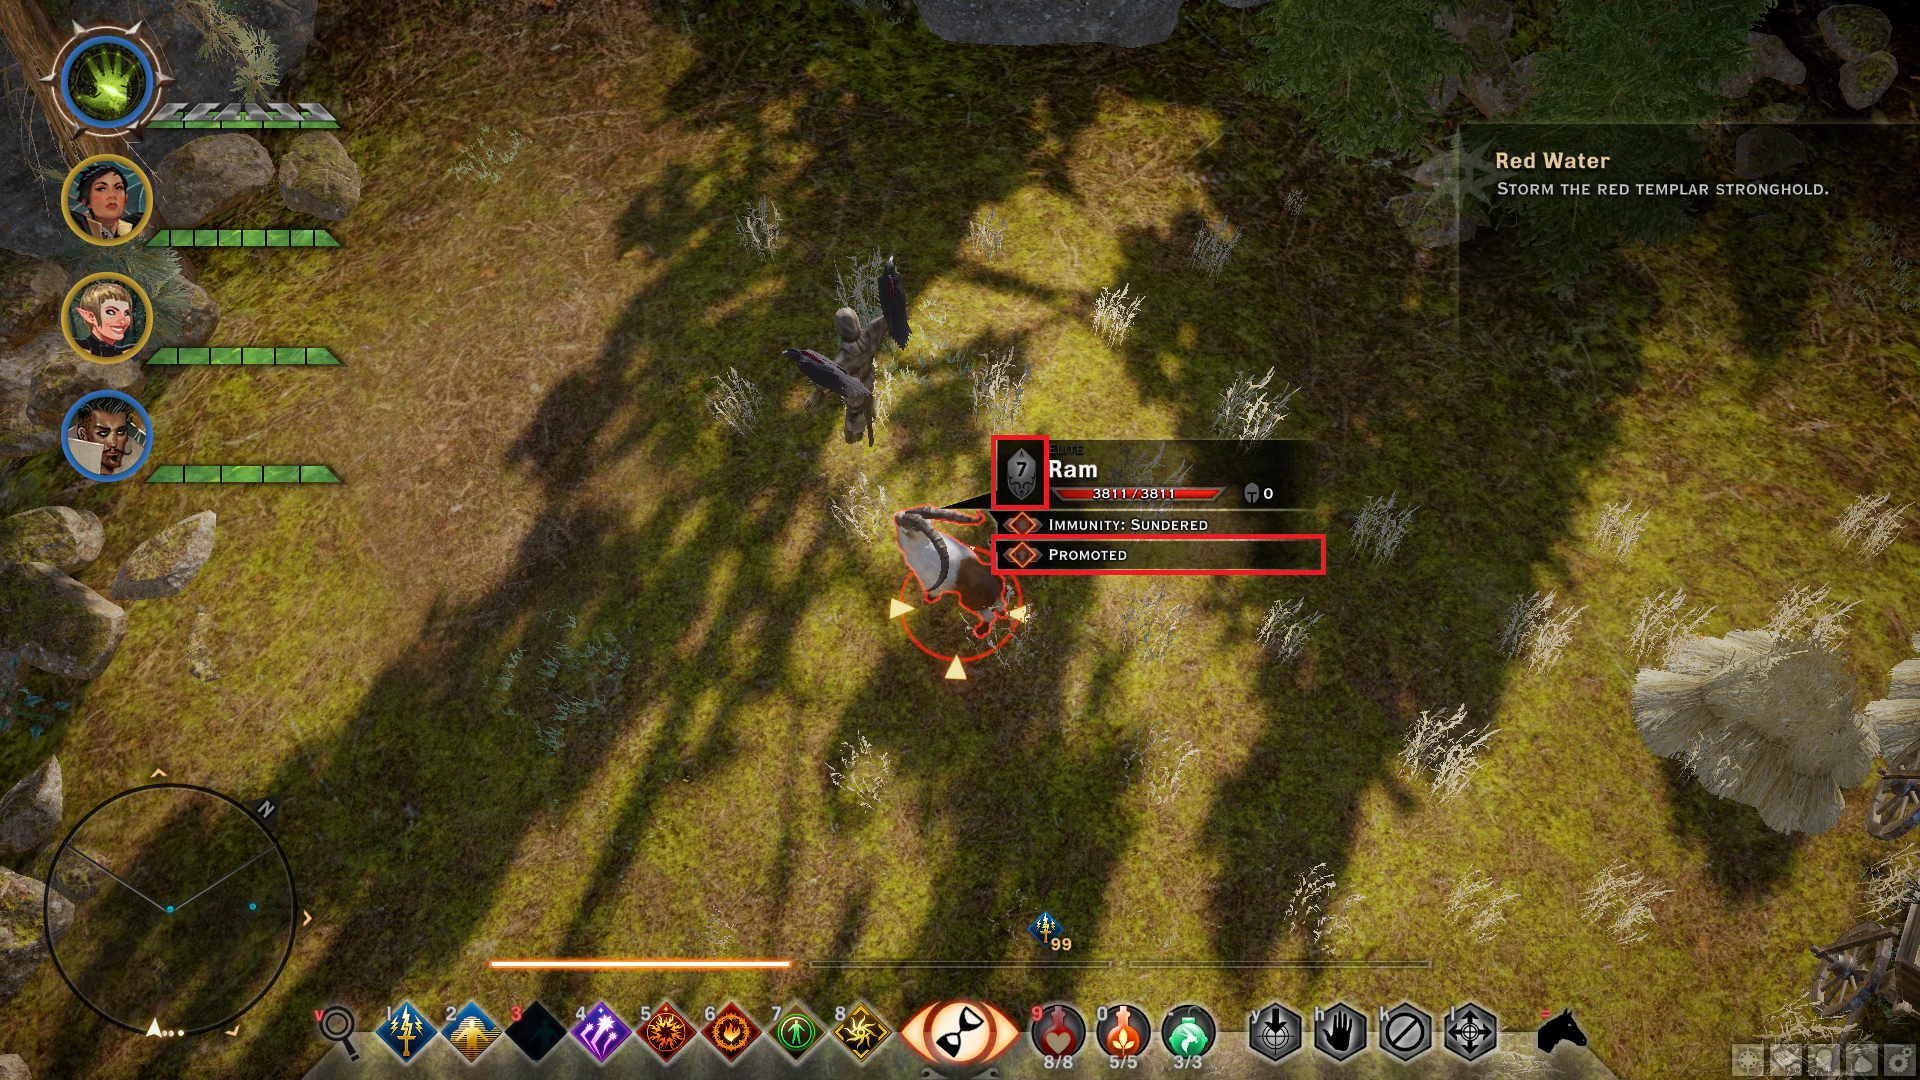
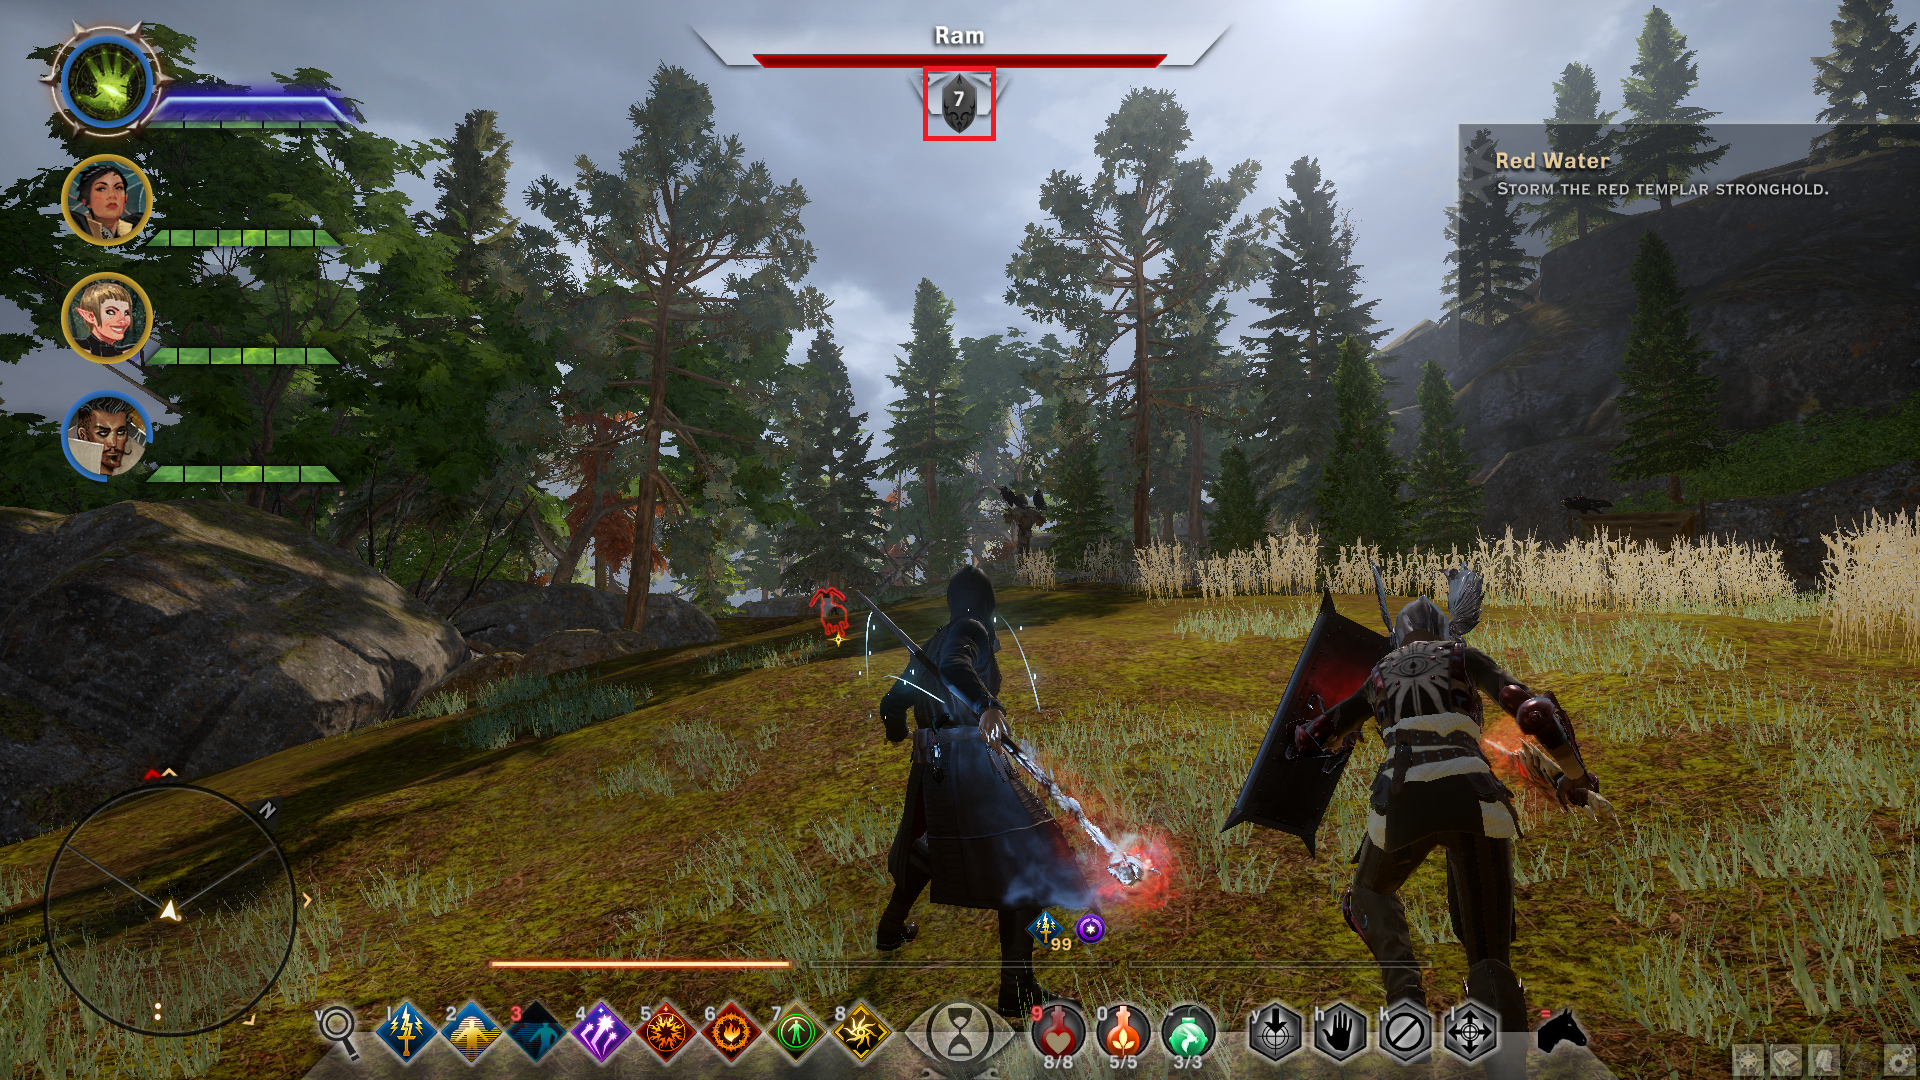
This achievement can be done around level 10-15 if needed. There are 2 methods I’ve tested and I will list them below.
Method 1 (level 10+)
Enable the trial and go to the starting campsite area of the Hinterlands. The harmless animals that spawn around the area such as Rams and Fennecs have a chance to be buffed by this trial. Keep killing them using a ranged character until the achievement pops up. If animals stop spawning, return to Skyhold and come back.
Method 2 (level 15+)
Enable the trial and go to Fallow Mire. Undead enemies will spawn whenever you enter nearby surrounding water. This provides an unlimited amount of enemies for you to fight with so you don’t have to worry about enemies running out. After killing all the surrounding enemies, simply exit the water and reenter and they will spawn. Keep doing this until you earn the achievement.
Trial of the Empress
Even Ground on: slay a level 16 or higher Fereldan Frostback.
Related trial: “Even Ground”
Trial modifier description: Enemies always scale to be at least the same level as the Inquisitor.
Note: This achievement can be earned while doing the nightmare difficulty run. I recommend creating a save, enabling the “Even Ground” trial, earning the achievement, and disabling the trial afterwords. Do not make any changes to the difficulty level. If you managed to kill the dragon before reaching level 16 or killed it without turning the trial modifier on, you will be unable to obtain this achievement on that playthrough.
You have to be at least level 16 before trying this achievement. Fereldan Frostback high dragon is located in Hinterlands. She can be very hard to beat, especially on nightmare difficulty. You will need upgraded fire resistant tonics (Location is listed under the “Master Alchemist” achievement) cold damage weapons with corrupting/dragon-slaying runes. With this trial on, even overleveling you Inquisitor doesn’t help since she will always be the same level as you.
While you can defeat Fereldan Frostback normally, there is an exploit that you can try to easily defeat this specific high dragon.
How to Easily Defeat the Fereldan Frostback
You need a mage with a high damage staff with cold damage. It helps to have “Energy Barrage” ability with “Energy Bombardment” upgrade as well. Turn the trial on and travel to the Dusklight campsite. Give the “Hold Position” command to you party members. Enter the cave-like tunnel with the mage and as soon as you exit, stop. Make sure that party members are far away and holding position. You will see the dragon far away. Simply keep attacking it from there and it will not move.
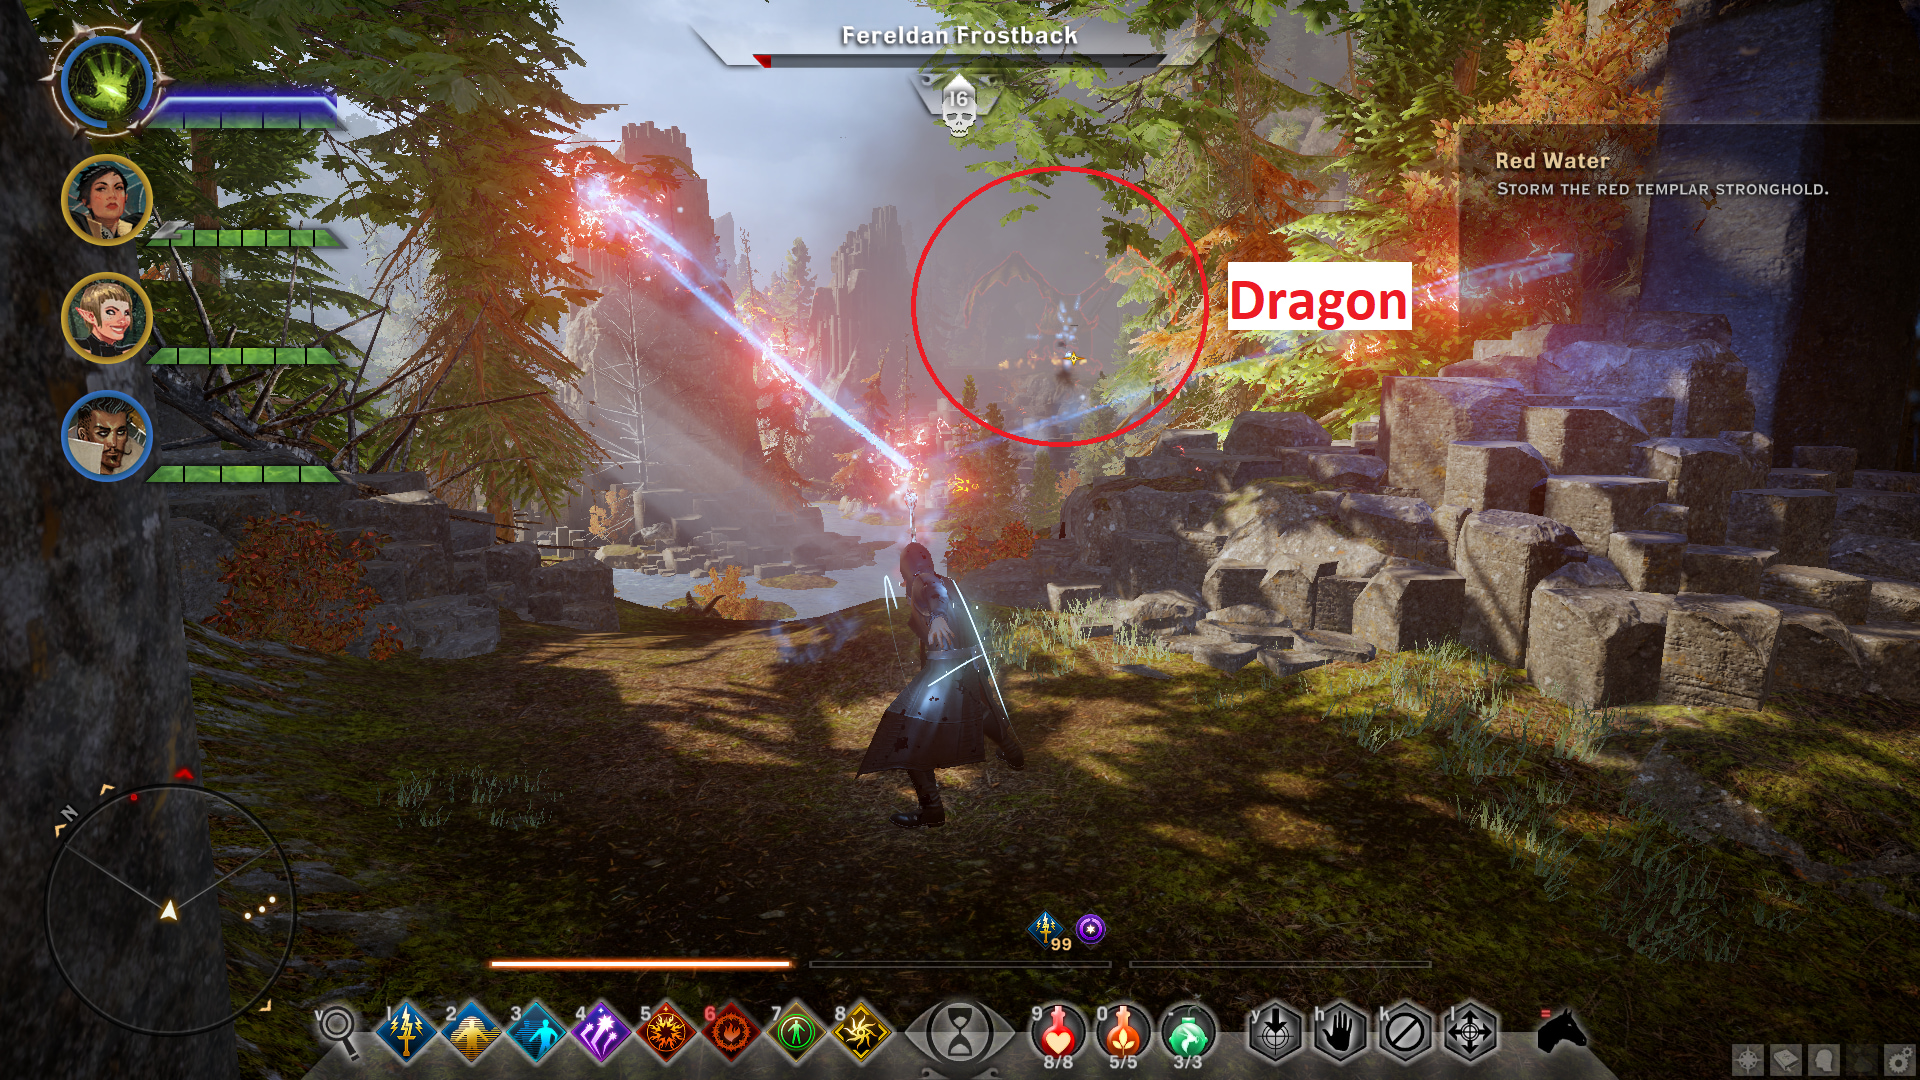
Do not go any further since it will trigger an event and the dragon will take flight. Reload the save if this happens. Since staves and “Energy Barrage” ability have unlimited range, you can easily defeat the dragon without even taking a single hit from very far away. Keep attacking her and use “Energy Barrage” whenever it’s available. The achievement will unlock after you kill her.
Trial of the Hermit
Slay 10 great bears promoted by Grizzly End.
Related trial: “Grizzly End”
Trial modifier description: Bears will be given a promoted status increasing their health and stats.
Note: This achievement can be earned while doing the nightmare difficulty run. Great bears have a random chance to spawn so I recommend that you turn this trial on before you enter Emerald Graves since you can encounter a few great bears while exploring Emerald Graves. Simply turn the trial on and kill 10 great bears in Emerald Graves and turn the trial off afterwords.
This trial affects both normal bears and great bears. However, the achievement only counts killing great bears that are found on Emerald Graves or Emprise du Lion. Their level ranges from level 11-19 (level 15 on Emerald Graves) and can be difficult to kill if you’re underleveled. They are resistant to cold damage and vulnerable to fire damage.
As I’ve said above, I recommend that you turn this trial on just before travelling to Emerald Graves. Simply explore the map and finish the necessary quests before trying this achievement. You might encounter a few great bears while exploring. Kill them whenever you spot them.
After exploring, you can farm the remaining amount of bears by using the following method.
Travel to the Gracevine Camp shown below. Go along the path that I’ve travelled in the map (shown by a brown-orange coloured trail). There is a chance that a great bear might spawn in near the river banks, but it’s a very low one. However, cross the river and follow along the shown path and you will almost always encounter a great bear fighting 2 broncos after crossing the river (keep an eye on the minimap for red coloured enemy sign when near the area). Kill the bear and fast travel back to the Gracevine Camp. Keep following the path again until you come to the same spot and you will most likely find the great bear fighting 2 broncos again. Kill it again and keep repeating the process until you earn the achievement.
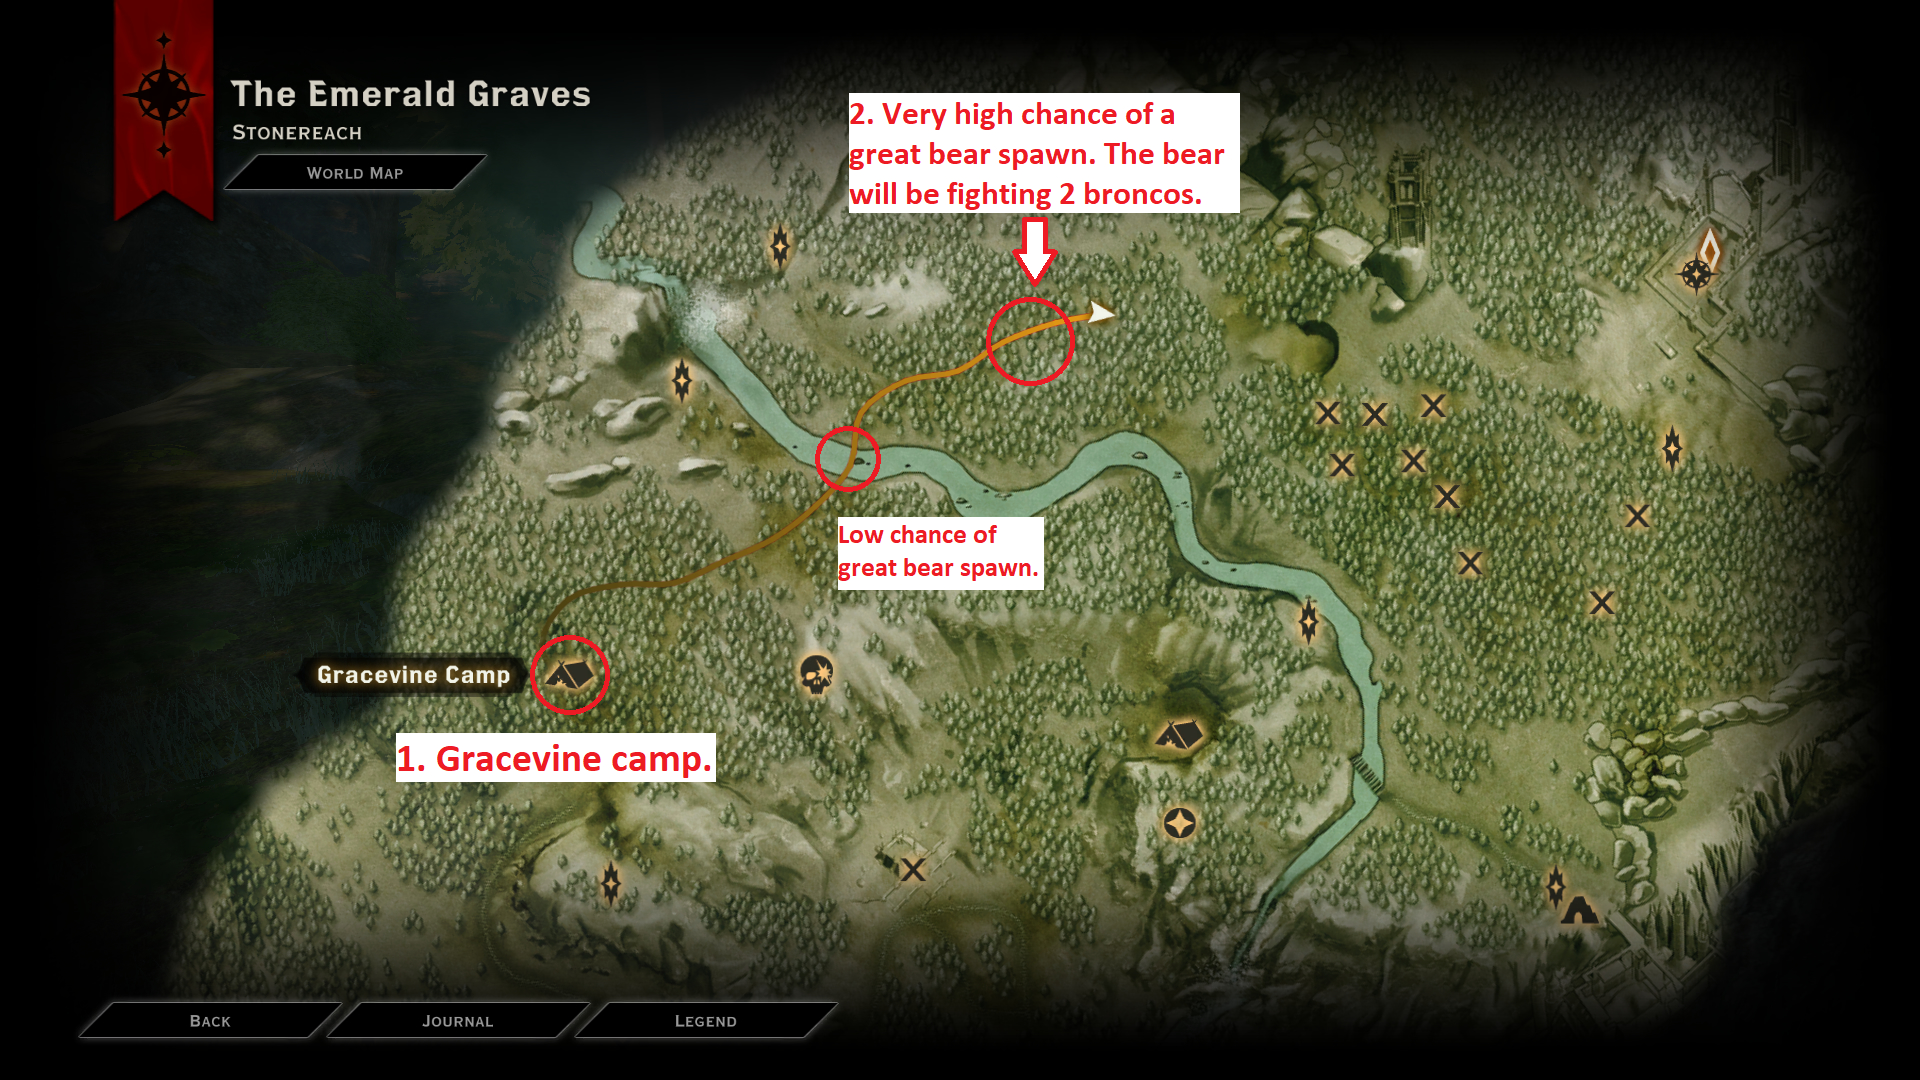
I cannot guarantee that the great bear will always spawn at that point, however, it did spawn to me all the 6 times (in a row) when I went to that location. If a great bear didn’t spawn, fast travel back and try again.
DLC: Trespasser – Trials Related Achievements (Continued)
Trial of Temperance
Rest Easy trial always on in Emprise du Lion: claim Suledin Keep.
Related trial: “Rest Easy”
Trial modifier description: Lose all focus if you rest or travel to a camp.
Note: This achievement can be earned in your Nightmare difficulty playthrough.However, the “Rest Easy” trial must be turned on before you enter Emprise du Lion for the first time.If you have already entered Emprise du Lion without turning this trial on, the achievement will be unobtainable for that playthrough. So do not enter Emprise du Lion without enabling this trial. After entering Emprise du Lion with this trial turned on, only disable it after capturing the keep.
This trial essentially makes your focus bar empty most of the time. This will not be a issue since focus abilities aren’t necessary to capture Suledin Keep. To capture the keep, I do not recommend simply walking to the keep and capturing it.
When you arrive at Emprise du Lion for the first time, you will automatically acquire the “Take Back the Lion” side quest. In this quest, you simply need to capture 3 camps. After capturing the 3 camps, this quest will finish and you will automatically acquire the “Capturing Suledin Keep” side quest. Follow along this quest and you will capture the keep. Keep in mind that just before the capture point of the keep, you will encounter a demons named Imshael who is related to the
“Call Me Imshael” side quest. You will have to deal with him before capturing the keep.

Trial of the Tower
Rub Some Dirt on It on: slay the Hivernal high dragon.
Related trial: “Rub Some Dirt on It”
Trial modifier description: All healing potions and grenades heal only 1 health.
Note: This achievement can be earned while doing the Nightmare difficulty run. I recommend enabling the “Rub Some Dirt on It” trial, earning the achievement, and disabling the trial afterwords. Do not make any changes to the difficulty level. If you have already defeated Hivernal without enabling this trial, you will be unable to earn this achievement for that playthrough unless you reload a save and fight her with this trial enabled.
Turning this trial on will make all the healing potions and grenades in the game heal only 1 health, rendering them useless. Since healing items are useless, I recommend you replace the 2 optional potion slots with fully upgraded Cold Resistance Tonic and Rock Armor Tonic.
I recommend that you use a party consisting of 1 DPS, 2 tanks with shields (fully upgraded Vanguard and/or Champion ability trees), and 1 support mage (fully upgraded Spirit ability tree) characters. All of these characters should have equipment with Guard generation on hit (especially the tanks).
Hivernal is level 19 and deals cold damage and is resistant to cold damage, but she is vulnerable to fire damage. Equip fire damage dealing weapons on your party. You can equip cold resistant equipment, and dragon-slaying or corrupting runes on your weapons if you want, but they are not necessary for the fight. Do not attempt to fight the dragon until your whole party is at least level 19.
Finding Hivernal
First you need to capture the Suledin Keep (check “Trial of Temperance” achievement). After that, speak with Baron Edouard Desjardins (the overseer of the captured keep) and he will tell you about the destroyed bridge and give you the “They Shall Not Pass” side quest. Go to the bridge (shown by the 2nd point in the image) and plant the Inquisition flag to unlock the “Restore Judicael’s Crossing” war table operation, complete it. After that, speak with the Baron again to acquire the “Breeding Grounds” side quest. After that, all the 3 dragons in Emprise du Lion will be marked on your map.

Fighting Hivernal
- Enable the trial before you see the dragon’s health bar. Drink the necessary potions and tonics right at the beginning of the battle. Whenever the potions and tonics effects expire, drink them again.
- Set “Barrier” as a preferred ability for your support (through tactics menu) so that they keep spamming “Barrier” on your team. If the support mage falls during the battle, revive them.
- Set fully upgraded “War Cry”, “Challenge”, “Livid”, “To the Death” and other taunting and Guard generating abilities as preferred abilities on your tanks so they continuously generate Guard and taunt Hivernal.
- For the DPS, you should manually take control of them and keep outputting high amount of damage as fast as you can.
- Hivernal will take flight 3 times during the fight (at 75%, 50%, 25% health) and shoot ice balls at you from the sky. Keep moving your whole party to avoid the blast.
- Hivernal will randomly flap its wings and deal high damage to party members outside of her melee range. To avoid this, I recommend always staying inside her melee range. The tanks should always keep her focus and any received damage should be negated by generated Barriers and Guard.
Trial of the Magician
Travel Light on for “In Hushed Whispers”: finish the quest.
Related trial: “Travel Light”
Trial modifier description: All supply caches are removed from the game.
Note: You cannot earn this on your Nightmare difficulty playthrough since enabling this will remove supply caches (potion restore crates) and make the game significantly harder on this difficulty. So make a save file after you visit Val Royeaux for the first time and come back to Haven (right after finishing the “The Threat Remains” main quest). Make sure to note that specific save file’s details since you will need to find it again after finishing the game.Alternatively, you can earn this while doing the “Trial of the Fool” achievement.
It’s important to know that you must enable this trial before going even near Redcliffe Village for the first time after you acquired “In Hushed Whispers” main quest. Turning it on after you reach Redcliffe will void you the chance to earn this achievement, which happened to me. However, you can reload a previous save and try again.
So after getting the quest in Val Royeaux, turn the trial on and go to Redcliffe Village and speak with the mages. After speaking with them, you will need to use 15 Power to unlock a war table operation with the same quest name. Starting this war table operation will properly lock you into that quest. Finish it and you will earn this achievement afterwords. You can turn the trial off after that.
Method 1 (Reloading a Previous Save)
After you finish the main story and earn the “Inquisitor” achievement, load the early save file that you noted down. Reduce the difficulty to Casual, turn the “Travel Light” trial on and play “In Hushed Whispers” main quest. Do not continue the “Champions of the Just” quest since following along that quest will will make this achievement unobtainable. Since you’re playing on Casual difficulty, 8 healing potions will be enough for you to go through this quest. You will earn this achievement at the end of this quest.
Method 2 (Earning this While Attempting “Trial of the Fool” Achievement)
Refer the Walkthrough section under the “Trial of the Fool” achievement.
DLC: Trespasser – Trials Related Achievements (Continued)
Trial of the Fool
Take It Slow on: reach Skyhold at level 5 or less.
Related trial: “Take It Slow”
Trial modifier description: You gain XP at half the normal rate.
Note:Both “Take It Slow” and “Fair-Weather Friends” trials need to be enabled at the start of a new game for you to earn this and “Trial of the Lovers” achievements. So I recommend that you finish your Nightmare difficulty playthrough first and try to earn both these achievements in a new game on Casual difficulty (lowest difficulty level).To enable these trials correctly, select the “Custom” difficulty option at difficulty selection menu at the start of a new game. In the following menu, only select the 2 trials mentioned above and set the difficulty to Casual.
Note: The methods, tips written below assume that you have enabled both the “Take It Slow” and “Fair-Weather Friends” trials in a new Casual difficulty playthrough. The section under this achievement will give a walkthrough on how to reach the Skyhold at level 5 or less with both these trials enabled. The section under “Trial of the Lovers” achievement will continue from that walkthrough.
General Tips
- The goal here is to limit your XP gain as much as you can since you need to reach Skyhold before you reach level 6.
- Starting from the prologue, you should avoid combat as much as you can. If the quest objective doesn’t explicitly list defeating any enemies, you can ignore enemies that you encounter. Keep pressing the Disengage button (Default ‘L’ key) while near enemies or combat areas so that your party members don’t accidentally kill enemies and earn XP.
- Make sure to avoid combat with enemies while exploring as well.
- Do not collect any codex entries. Reading notes, books can unlock codex entries and give you XP so make sure that you do not interact with them.
- Do not complete any side quests (unless otherwise stated in the walkthrough) until you reach Skyhold since you earn XP as a completion reward.
- Since you’re going to be underleveled for some main quests, you might have a hard time fighting enemies (that must be defeated to advance the quest) or surviving battles. I highly recommend that you craft equipment from the schematics that you found in your previous Nightmare difficulty playthrough (acquired through syncing with the Golden Nug).
- Run the “Gather Coin” war table operation to earn coin. This doesn’t yield any XP.
- Instead of gathering crafting materials by hunting animals (which yields XP), use the merchant at the Crossroads in Hinterlands or Black Emporium to buy these materials.
- Keep making hard saves frequently so that you can reload back if you gain too much XP.
Gathering Power
- Establishing camps in wilderness areas will give 1 Power for each camp without any XP gain.
- Another way to gather Power without earning XP is through requisitions. However, the requisition objectives should contain items that are farmed in the wild (metals, herbs), not items looted from defeated enemies. “Hinterlands Geological Survey” and “Hinterlands Iron Survey” are the only requisition quests that require farmed materials in Hinterlands. You can find Drakestone and Onyx in Hinterlands in the caves marked below.
Another potential way to find Onyx is from the crate near the Blacksmith in Haven (shown below).
This crate usually contains high amounts of crafting materials. And Onyx has a chance to spawn in it. However, make sure to leave at least one material type in the crate. Do not take all the materials. If you leave 1 material type in the crate, exiting Haven and reentering will fill the crate again. Giving you the chance to get potentially unlimited random crafting materials.
Of course, if you wish, you can also buy both these from the Black Emporium for 40 gold each. - To ensure you only get the 2 requisition quests above, make a quicksave before speaking with a requisition officer in Hinterlands. If you get either of those quests, complete them and quicksave again. If you get different one, quickload the save and speak with the officer again. You can keep repeating this process to earn as much Power as you want.
- Talk to Threnn in Haven to get “Requisition for Weapons” side quest to get 1 Power. The items for this quest can be found in Haven.
- Speak with Mother Giselle after she comes to Haven to get another easy requisition side quest. Elfroot can be found in Haven, while Blood Lotus can be found near lakes in Hinterlands.
- Closing a rift gives you 1 Power as well. However, these give you a low to moderate amounts of XP so only use this as a last resort.
Companions
- With the “Fair-Weather Friends” trial active, the negative amount of approval earned for companions will be doubled, while positive approval stays the same. If their approval ratings drop below -35, some companions will leave the Inquisition, voiding the chance for you to earn “Trial of the Lovers” achievement.
- The only companions that have a chance to leave the Inquisition are Blackwall, Cole, Dorian, and Sera. Other companions will stay no matter how low the approval rating drops.
- With the exception of Cole and Dorian, companions start with 0 approval at the beginning. Cole and Dorian’s initial approval depend on who you recruit and how you recruit them in either “In Hushed Whispers” or “Champions of the Just” main quests.
- For this playthrough, I recommend doing the “In Hushed Whispers” main quest while recruiting the mages as allies so that you don’t gain a large amount of disapproval from Cole and Dorian.
- However, Sera will greatly disapprove of the above choice. To prevent that, do not recruit her until you finish “In Hushed Whispers” main quest.
This achievement is continued on in the section below.
DLC: Trespasser – Trials Related Achievements (Continued)
Trial of the Fool(Continued)
Continued from the “Trial of the Fool” achievement in the section above.
Walkthrough
- “Wrath of Heaven”
- Keep ignoring enemies that you encounter while going through the prologue. However, you will have to defeat enemies near the 2 rifts you encounter in order to close them.
- After reaching the forward camp, choose to charge with the soldiers since that path has the lowest enemies.
- At the end of this quest, keep disrupting the rift and defeat the pride demon. You will reach level 1 near the end of this quest.
“The Threat Remains” - Go to the Crossroads in Hinterlands. You will have to defeat the enemies here. Speak with Mother Giselle and Corporal Vale.
- Next, you have to gather 4 Power to visit Val Royeaux. Use the methods listed above to gather them.
- Follow along the quest and before leaving Val Royeaux, collect the recruitment quests for Sera and Vivienne (See “The Brightest of Their Age” achievement).
- Before leaving Val Royeaux, recruit Belle near the marketplace to easily gain +1 Power (check Val Royeaux section under the “Persuasive” achievement)
- After coming to Haven, collect recruitment quest for Iron Bull. Blackwall’s quest will be given automatically.
- Recruit Vivienne using her mission (+1 Power). Unlock Storm Coast using 4 Power and recruit Blackwall and Iron Bull as well (+1 Power for each of them).
- Since we’re recruiting mage as allies in “In Hushed Whispers” quest, do not recruit Sera until you finish that quest. This will avoid gaining disapproval with her.
- You will reach level 3 near the end of this quest. You will also gain +2 Power after finishing this quest.
“In Hushed Whispers” - Before going to Redcliffe Village to speak with mages, make sure to turn the “Travel Light” trial on if you haven’t earned the “Trial of the Magician” achievement. You must do this before even going near Redcliffe Village for the first time during this quest, otherwise this achievement will not unlock(which happened to me). This will remove supply caches (health potions restocking stations) from the game. Something you can easily manage on Casual difficulty.
- Go to Redcliffe Village in Hinterlands and follow along with the quest. You will have to close the fade rift in front of the gate (+1 Power) and inside the Chantry (+1 Power).
- After that you need to gather 15 Power to continue on with the “In Hushed Whispers” main quest. Gather the remaining amount using the methods listed above.
- Since this is your 2nd playthrough, sync your progress using the Golden Nug located near the blacksmith in Haven. You will earn all the schematics, Skyhold customisation items that you’ve earned in your previous playthroughs (provided you synced with the Golden Nug in those playthroughs). Even though you will gain some Influence, you will not gain any XP. Use the schematics to craft tier 3 or tier 4 armours to your party. Only craft a good weapon to your Inquisitor. Otherwise your party member will defeat enemies quickly. You can use tier 1 crafting materials for this.
- Start the “In Hushed Whispers” main quest through the war table using 15 Power.
- Kill the 2 guards in the area to unlock the door and then continue the quest. After finding Fiona and all your companions, come back to the drawbridge and defeat all the enemies there to continue.
- Find Leliana without defeating any other enemies. In one of the following rooms, open the gate using the gear while ignoring the fade rift. After that, go through the quest and reach the gate to Alexius’s throne room. Ignore all the enemies and fade rifts along the way.
- You will need to defeat 5 enchanters and get their lyrium shards to unlock the gate. The door needs 5 shards and the 1st enchanter is near the fade rift near the gate (who might automatically get killed by demons). Loot his body to get the first shard and to find the other 4, go to the locations shown on the map and defeat only the enchanters and loot them. Ignore all the other enemies and the fade fade rift near the gate.
- Unlock the gate and defeat Alexius. You will have to close 2 fade rifts and its enemies during this fight. Having a tier 3 or 4 weapon on your Inquisitor will really help in this fight.
- Recruit the mages as allies. This will avert the massive disapproval amount gained from Dorian and Cole. Accept Dorian to the Inquisition at the end of this quest.
- If you enabled the “Travel Light” trial at the correct time (before reaching Redcliffe Village), you will earn “Trial of the Magician” achievement now. Disable the trial after you earn this achievement. You will reach level 4 after this quest.
“In Your Heart Shall Burn” - Recruit Sera and speak with her at least once in Haven (without gaining disapproval). If you didn’t speak to her in Haven, you will gain an approval loss while talking to her for the first time in Skyhold.
- You can immediately start the main quest through the war table. However, the recommended levels for this quest are 8-11. Since you’re level 4, I highly recommend crafting good armour using the schematics you got from Golden Nug (as I’ve explained above). Even on Casual difficulty, this can get a bit difficult since you’re underleveled.
- Start the quest. You will have to defend the first trebuchet and defeat all the enemies near it until the progress bar gets filled.
- Go near the second trebuchet. On here, ignore all the enemies and turn the gear on the trebuchet to trigger a cutscene.
- Go to the Chantry building while ignoring combat. Do not attempt the “Evacuate Haven” side quest which involves killing enemies.
- After the cutscene, run to the trebuchet while ignoring all the enemies. You will have to turn the gear to turn the trebuchet. However, enemies spawn multiple times while turning the gear. Ignore them as much as you can and turn the gear, but if you keep getting interrupted from enemies (especially archers), dispose of them and keep turning the gear. You can completely ignore Knight-Captain Denem that appears near the end. A cutscene will trigger at the end.
- At the cave, use your new ability on the demons that appear.
- After exiting the cave, you won’t encounter any enemies from here to Skyhold. Simply keep continuing the quest.
- After dialogues and cutscenes, you will arrive at the Skyhold. The achievement should be acquired right after you reach Skyhold. You can disable “Take It Slow” trial after earning this achievement.
This walkthrough will continue on in the “Trial of the Lovers” achievement in the section below.
DLC: Trespasser – Trials Related Achievements (Continued)
Trial of the Lovers
Fair-Weather Friends always on: enter Halamshiral with all followers.
Related trial: “Fair-Weather Friends”
Trial modifier description: Negative approval gained for companions is doubled.
Note: You can’t earn this on your Nightmare difficulty playthrough. You need to start a new game and turn this trial on at the difficulty selection menu and go from the beginning to the “Wicked Eyes and Wicked Hearts” main quest with the trial turned on.I highly recommend completing this achievement alongside “Trial of the Fool” achievement.
Walkthrough (Continued on From “Trial of the Fool” Achievement)
- “In Your Heart Shall Burn”
- In Skyhold, during the ceremony, choose either “I’ll do it because it’s right.” or “Corypheus must be stopped.” dialogue options when declaring the Inquisition to gain only positive approval.
“From the Ashes” - Go near Cullen and use the “Look for Cole” option near him. In the following cutscene, accept his help and recruit him. After this, you will have recruited all the companions.
- Talk to Josephine and acquire the “Wicked Eyes and Wicked Hearts” main quest.
“Wicked Eyes and Wicked Hearts” - Gather 30 Power to unlock “Wicked Eyes and Wicked Hearts” in the war table. Since you have already earned the “Trial of the Fool” achievement, you are not limited by a level cap. So you can complete as many side quests, close fade rifts as you can to earn Power. However, since some side quest dialogue choices affect active party members’ approval, I suggest having your active party consist of companions that won’t leave no matter how low their approval gets. These members are Cassandra, Iron Bull, Solas, Varric, and Vivienne.
- After gathering 30 Power, start the quest through the war table.
- You will earn this achievement right at the beginning of “Wicked Eyes and Wicked Hearts” quest, just before meeting Duke Gaspard in Winter Palace. You do not need to complete the quest.
End Notes
Major Changes
- [31st of December, 2020] – Guide created.
- [3rd of January, 2021] – Started adding base game related content.
- [10th of January, 2021] – 20% of the guide completed.
- [27th of January, 2021] – 40% of the guide completed.
- [6th of February, 2021] – 60% of the guide completed.
- [21st of February, 2021] – 80% of the guide completed. All the base game achievements and their descriptions were added.
- [26th of February, 2021] – All the achievements and their descriptions for “The Jaws of Hakkon” DLC were added.
- [27th of February, 2021] – All the achievements and their descriptions for “The Descent” DLC were added.
- [2nd of March, 2021] – All the non-trials related achievements and their descriptions were added.
- [6th of March, 2021] – All the achievements added. 100% of the guide completed. Started correctly formatting the guide and fixing errors.
- [7th of March, 2021] – Guide formatted, Fixed grammatical and spelling errors. Guide published.
Sources
This guide has been made largely using my personal experience playing the game and some information acquired through the dragonage.fandom.com – https://dragonage.fandom.com/ which I have personally tested.
This is all for Dragon Age™ Inquisition Dragon Age: Inquisition – GOTY – 100% Complete Achievement Guide hope you enjoy the post. If you believe we forget or we should update the post please let us know via comment, we will try our best to fix how fast is possible! Have a great day!
- Check All Dragon Age™ Inquisition Posts List


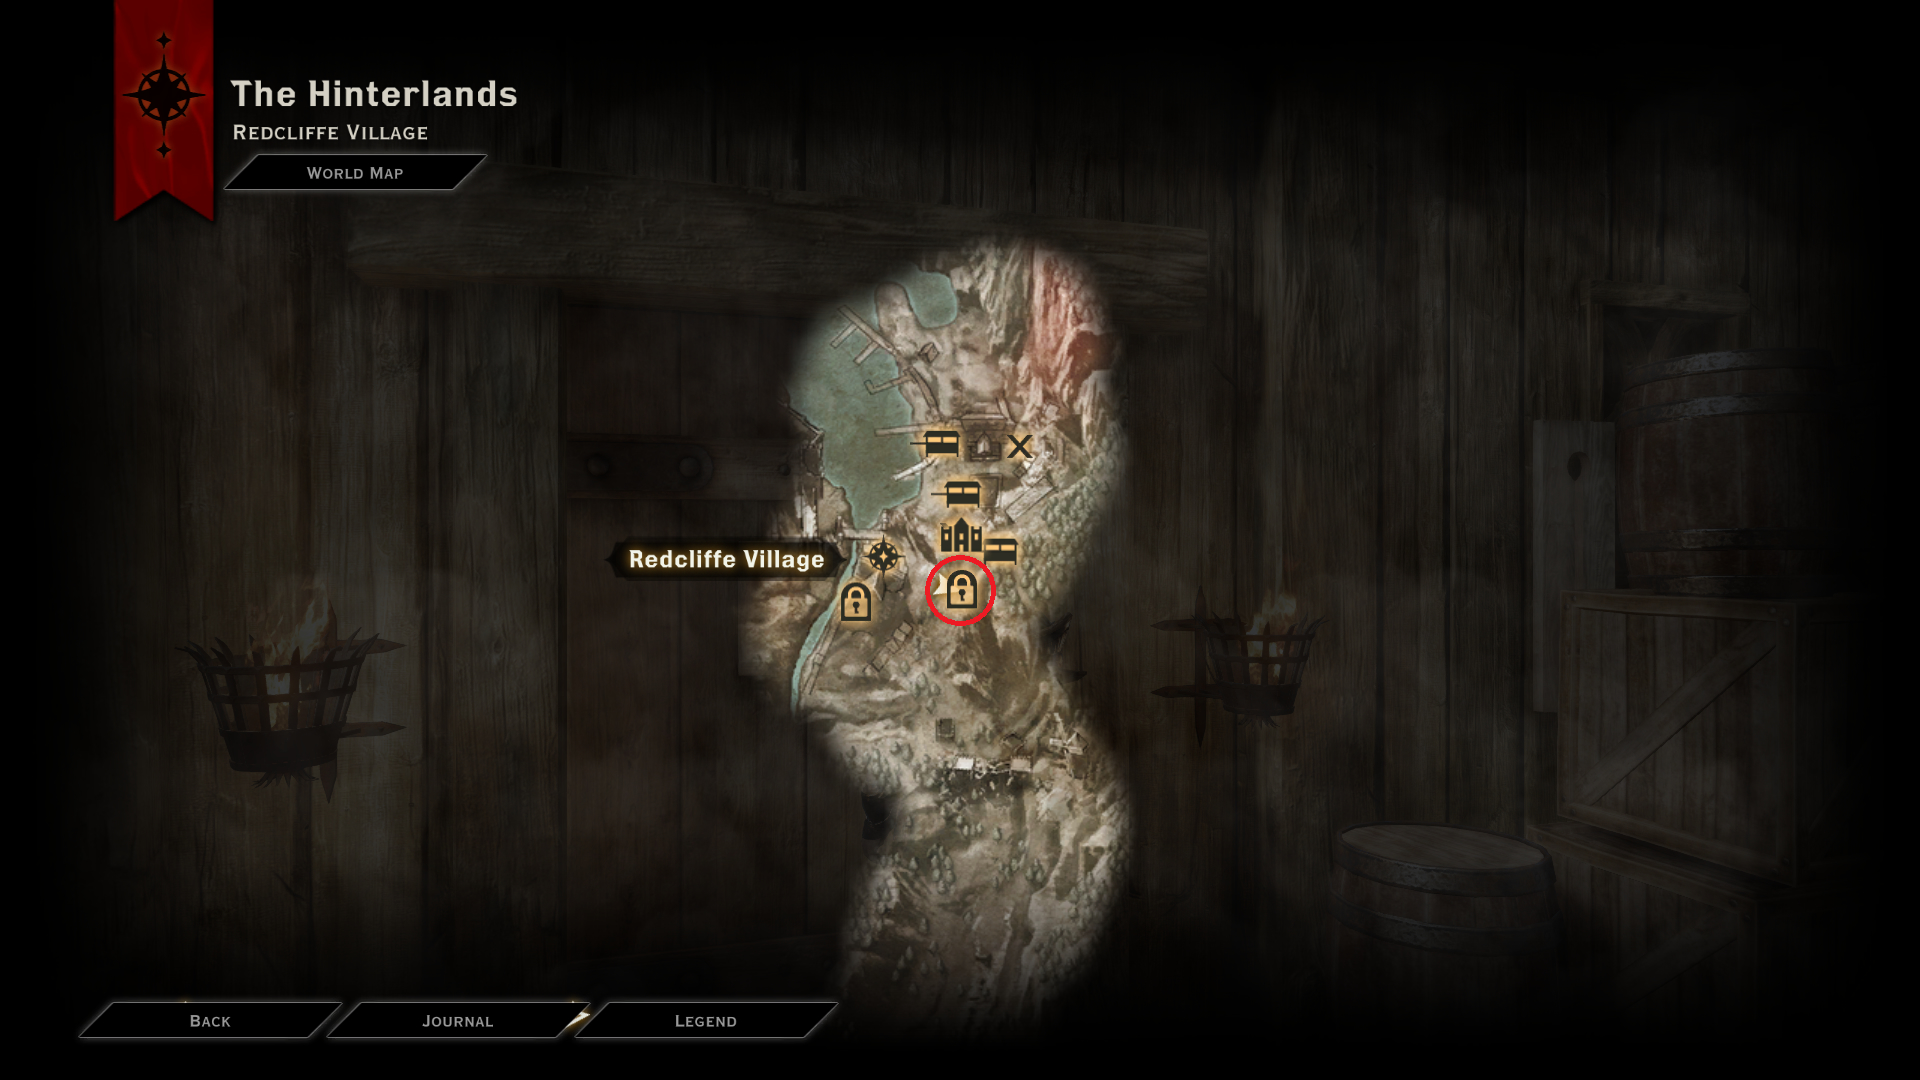
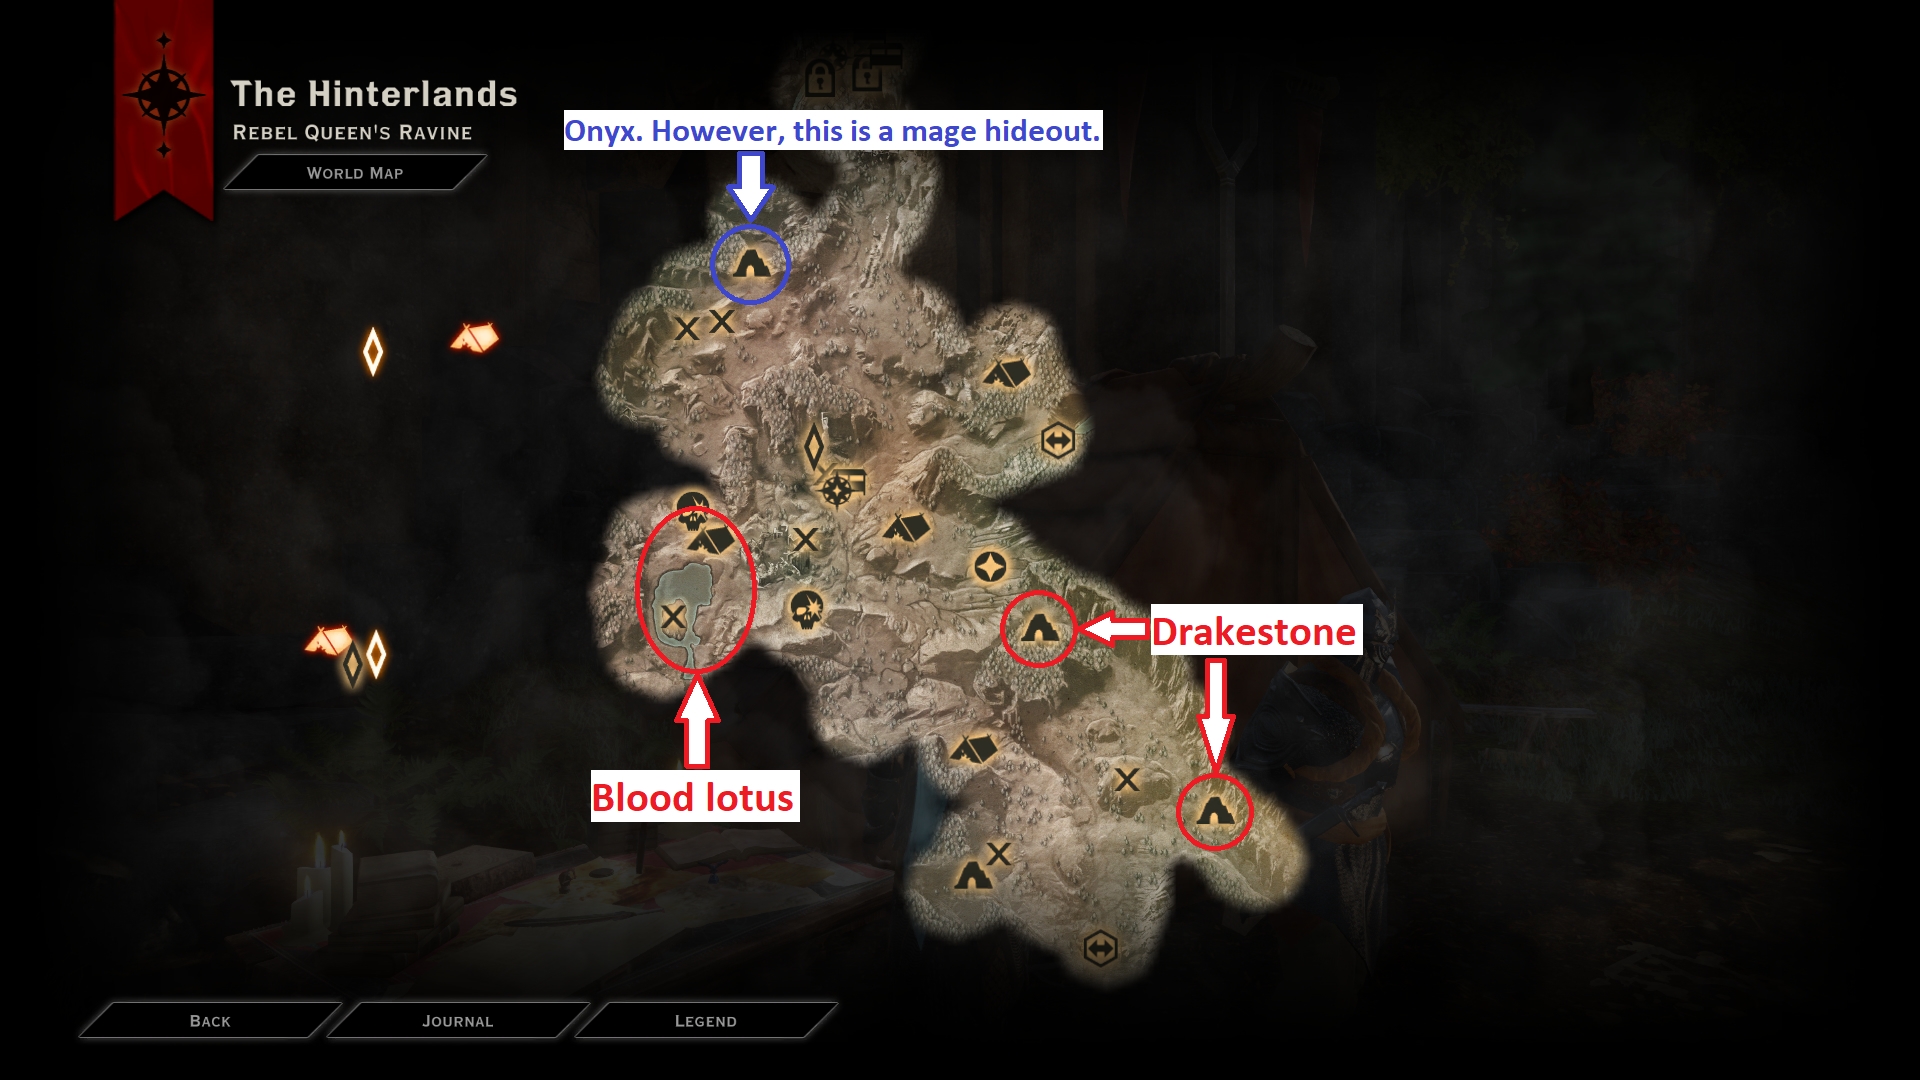
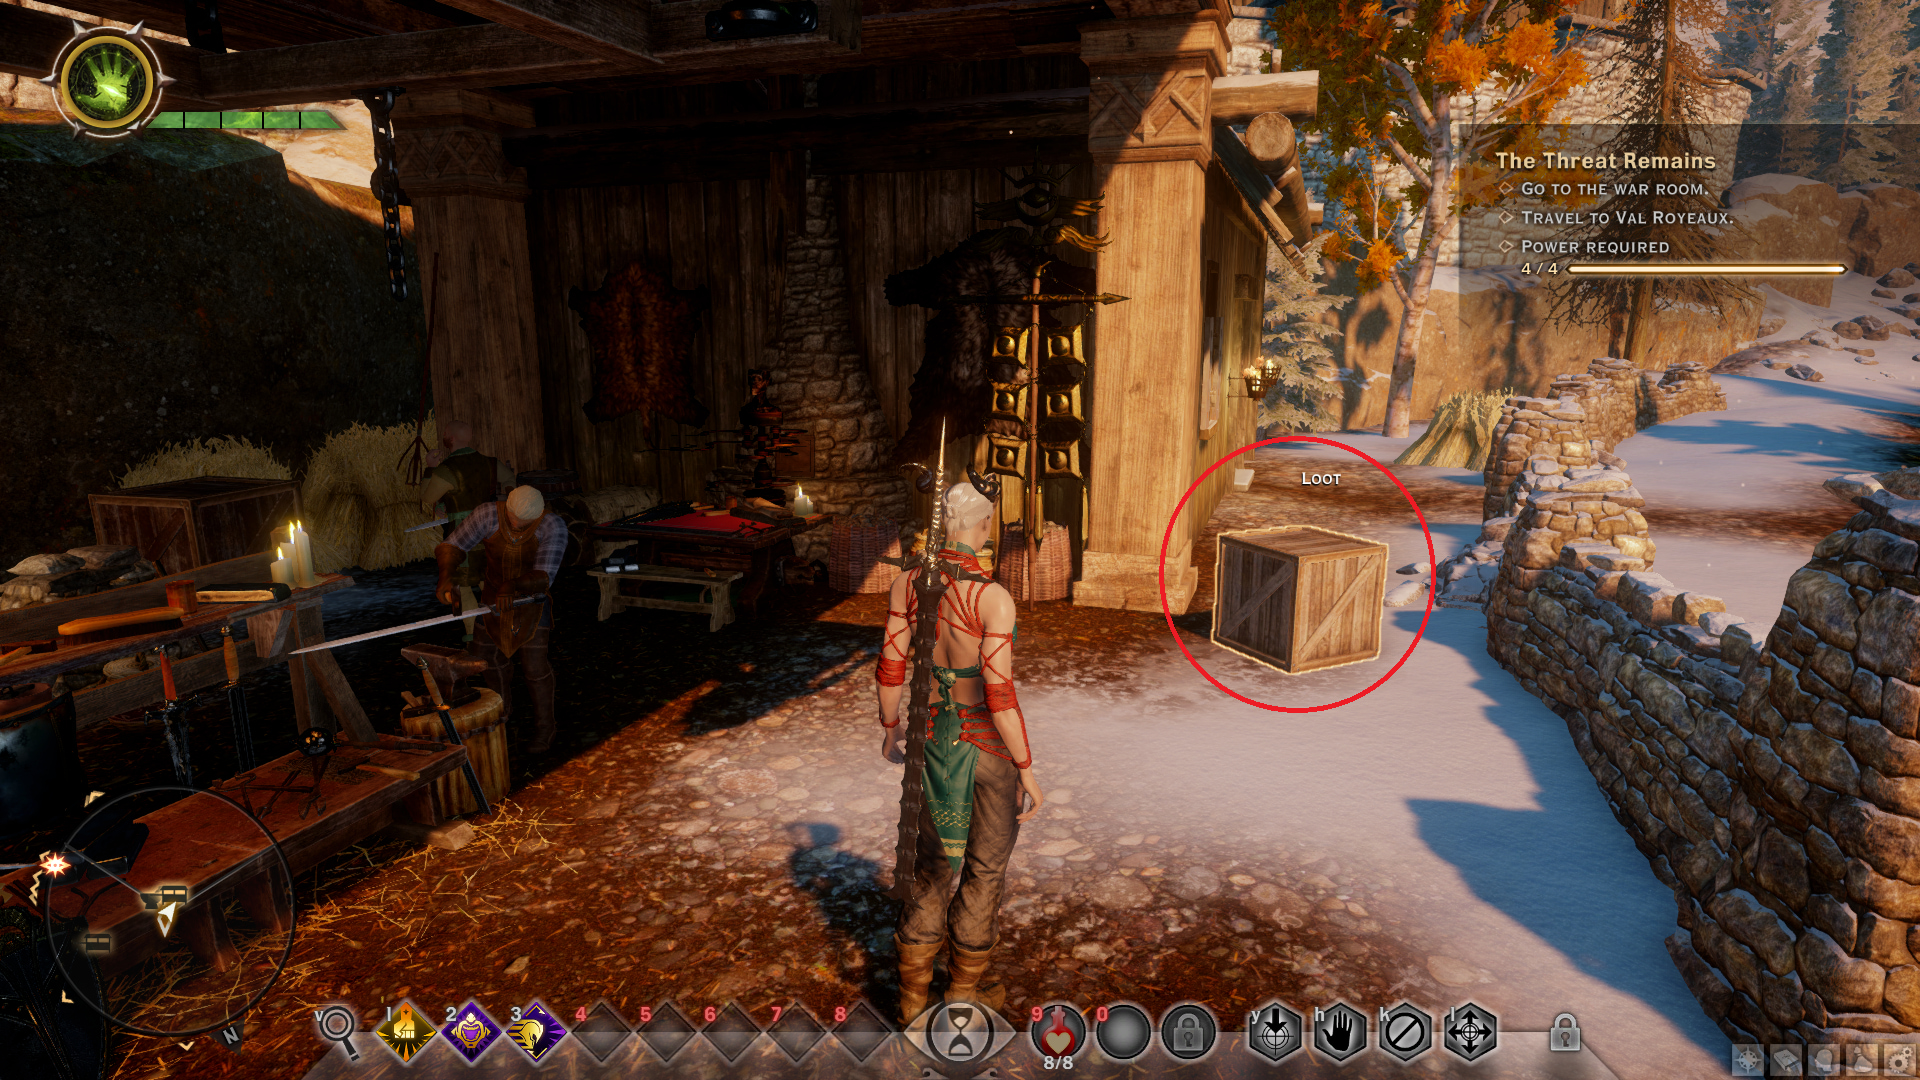
Leave a Reply