(Une version française de ce guide arrive bientôt. / A french version of this guide is in the works.)
It’s time to customize !
This guide will teach you everything you need to know about Drillship painting !
While painting your ship is not necessary to complete the game, and doesn’t offer any advantage in terms of gameplay, it is a very cool feature that I find very enjoyable, and I want everyone to be able to do something with it.
If something isn’t quite clear to you, or if you have ideas and feedback to improve the guide, make sure to leave a comment, I’ll always be around to answer !
Anyways, I hope you will find it useful.
Getting started
Painting such a massive machine is going to take a little more than a brush and a bucket of paint. This is why the Spray tool exists !
How do you acquire the spray tool ?
It’s quite simple, really ; the spray tool blueprint is unlocked with the Starter prodcution schematics, meaning you can craft it the moment you get your production module and production station. It can not be crafted inside the workbench. It’s located under the “tool” tab, and requires 1 copper tubes, 1 copper bolts, but most importantly 1 pump.
Note that the pump is a harder item to acquire than the copper parts. You’ll want to keep your spray tool safe : don’t take it on raids, it’s useless in combat and exploring, it’ll be safer inside the ship !
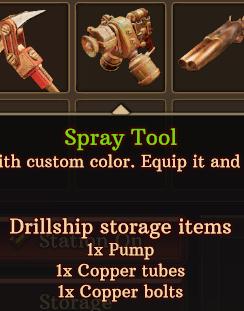
If you don’t have a pump, don’t worry ; they’re not too hard to get. You can loot them on dead COGs, with more chances to find some on production (blue) COGs, but there’s also 100% chance of finding some in a T1 drillship’s storage, whatever it’s speciality is (although there will be more in production ships).
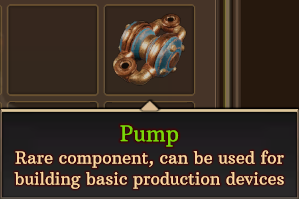
Now that you have got your hands on a spray tool, we can proceed with the interesting part of this guide.
The basics
To start painting your ship, you need the spray tool in your inventory. Now, press the “6” key on your keyboard to equip it, and simply left click on your ship (from wherever, inside or outside, it doesn’t matter) : this screen should appear.
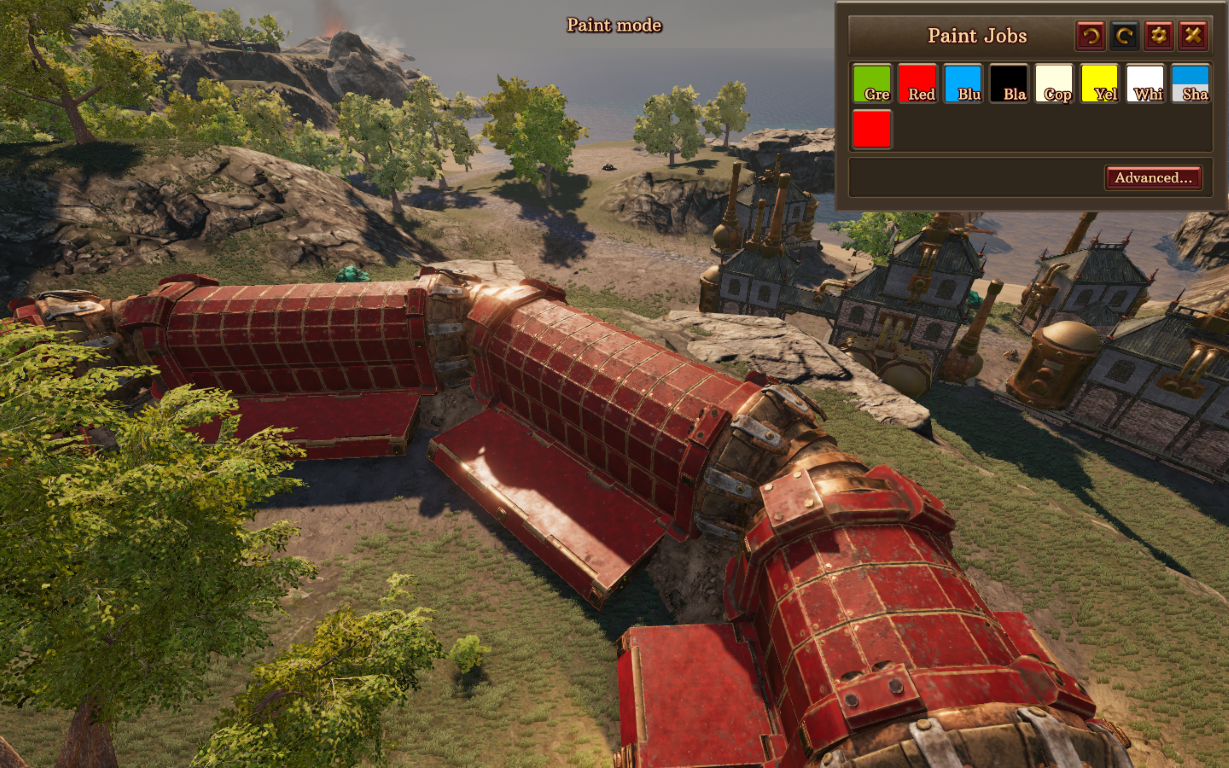
Obviously not with 4 segments, this is just my ship taken as a test subject for the example. Your game will show your ship.
Also Note that doing this does NOT stop the game time : the eruption timer will still count down, and COGs will still be able to attack you. You preferably want to use this in a safe place.
I’ll try my best to explain every feature, so let’s start from the top and proceed to the bottom. More consequent parts will get their own sections.
Paintjobs
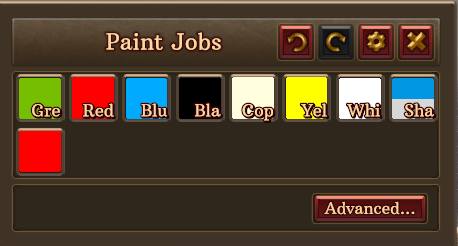
These are sets of coating and decals. A few pre-made ones are available to you from the beginning, but you can also create your own ones. They will be saved and you can reuse, modify them however you want in the future. Clicking on one will apply it to the entire Drillship.
If you’re not willing to create paintjobs of your own, you can stop here and use the pre-made ones.
Paintjobs are save dependant, meaning they don’t transfer between all your saves.
Important note : there can only be up to 16 different paintjobs per save.
Now, this won’t really get us anywhere. See the “Advanced” button ? Let’s click on it, and let the fun begin.
(The gear icon at the top is the same button. The two arrows are undo/redo, and the cross is to exit paint mode.)
After having clicked the Advanced button, your screen should now look like this :
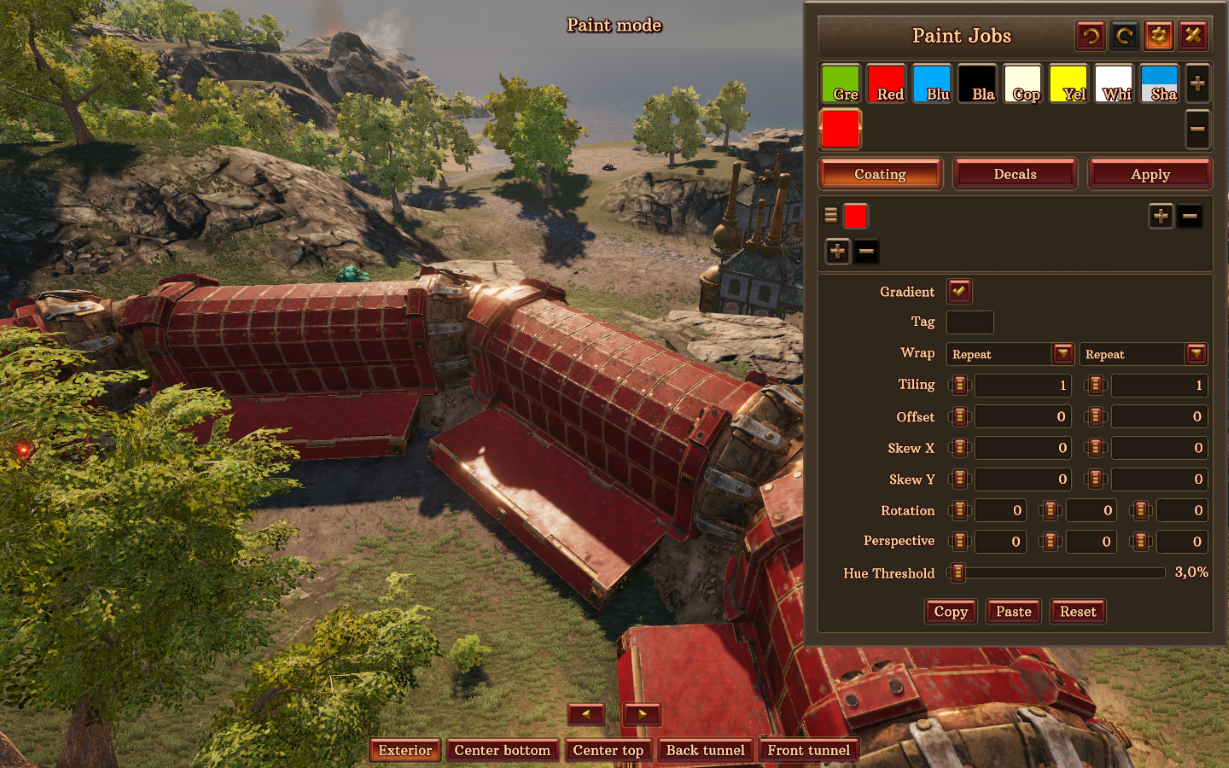
There’s a lot to unpack, but don’t panic.
First off, these buttons at the bottom of your screen are used to navigate your ship : the two arrows are to switch segments, and the others are… pretty self-explanatory, I believe.

Now, onto the actual paint screen : under the paintjobs, 3 buttons have appeared : Coating, Decals and Apply. Coating and Decals are pretty big things, so I’ll cover them later.
You can now also create new paintjobs : by clicking the + button in the paintjob section, a new one will appear. This is if you don’t want to modify the pre-made ones, or if you want to do some cool tricks, like I’ll show you later.
But for now, I want to focus on the Apply button, it’s a really important feature if you want to get creative.
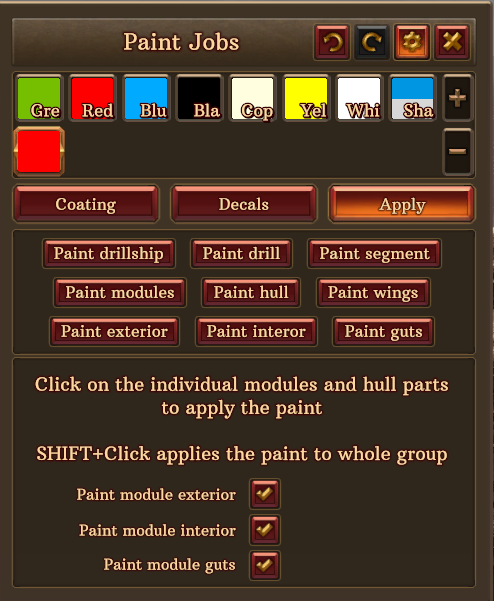
Each button does something specific. Let’s cover them one by one :
Paint drillship : this is just like clicking on paintjobs while not in advanced mode, it paints the entire ship with the currently selected paintjob.
Paint drill : this only paints the drill of the ship.
Paint segment : this paints all the elements of the segment that you are currently looking at.
Paint modules : this paints all the modules on the segment you’re looking at. (this also appplies to empty walls, door and window frames. This is basically interior and exterior in one button.)
Paint hull : this paints only the metallic parts of the segment you’re looking at, just between the spinning parts and the segment walls.
The hull is the blue part in this screenshot.
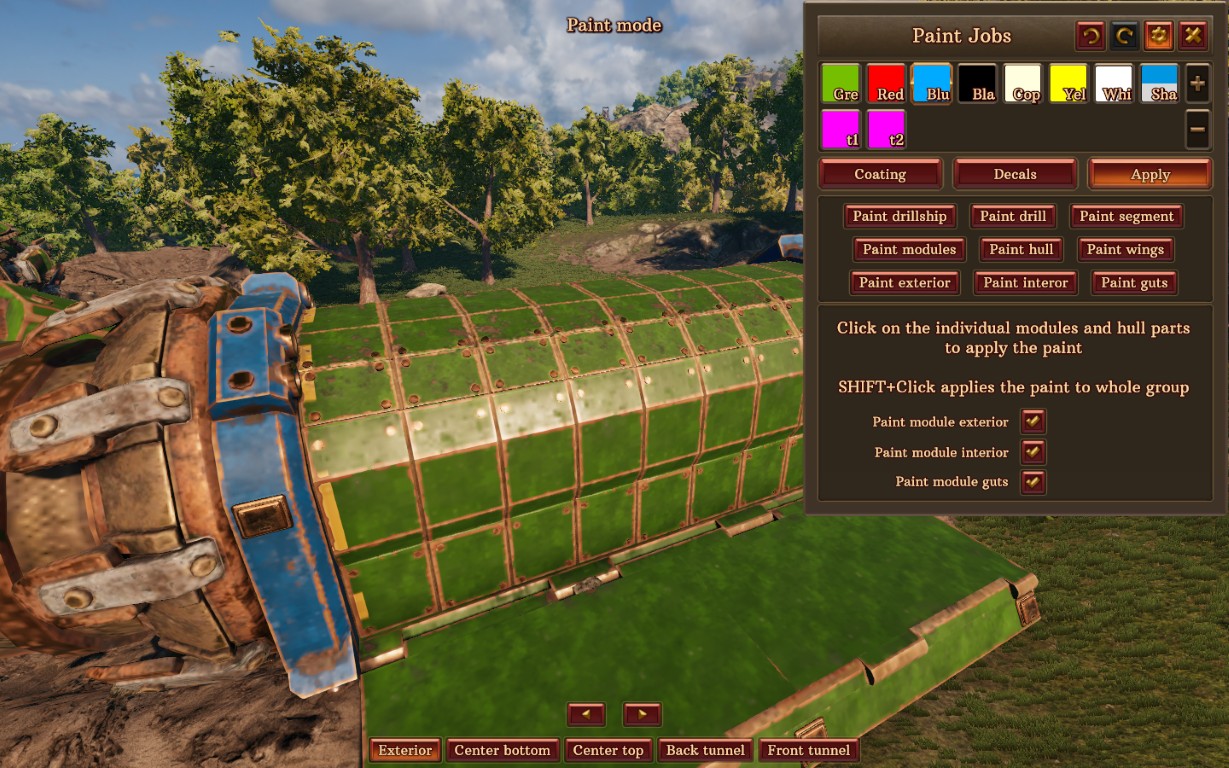
Paint wings : this paints only the wings of the segment you’re looking at, which are the platforms that fold and unfold when the ship moves.
The wings are the blue part in this screenshot.
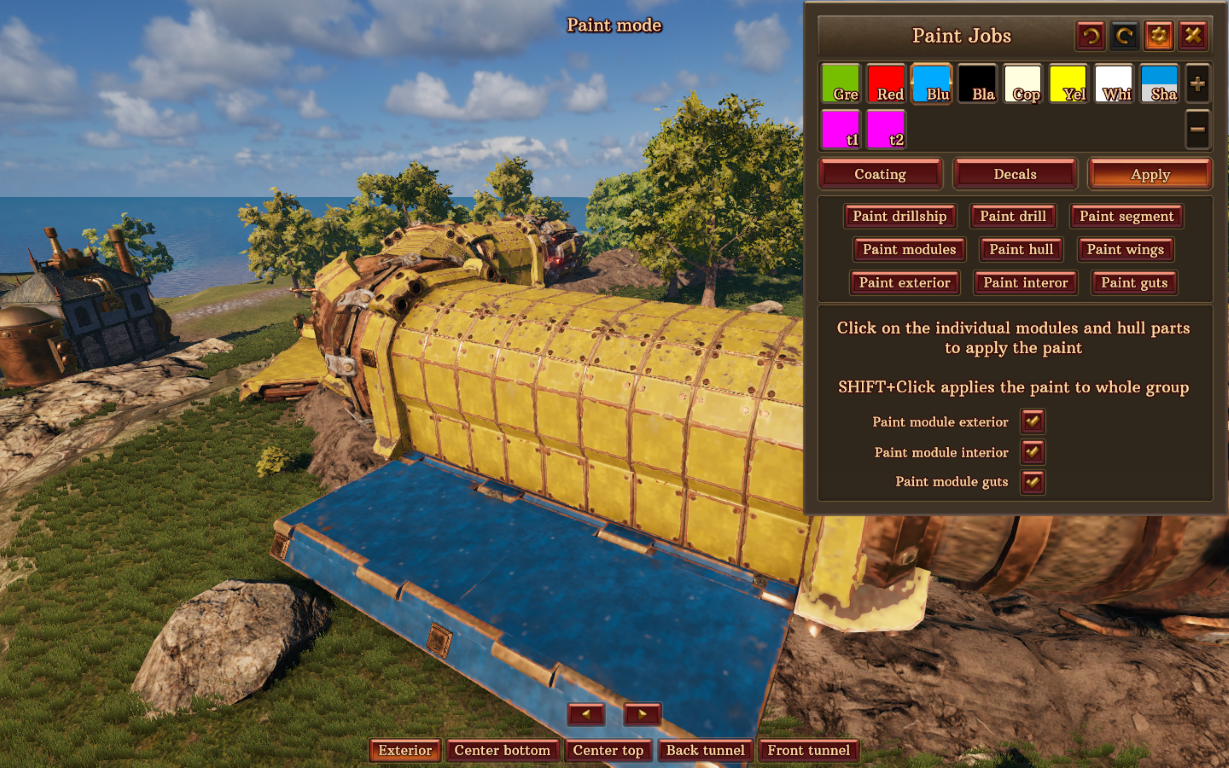
Paint exterior : this paints only the exterior of the segment you’re looking at, the interior will remain untouched.
Paint interior : this paints only the interior of the segment you’re looking at, the exterior will remain untouched.
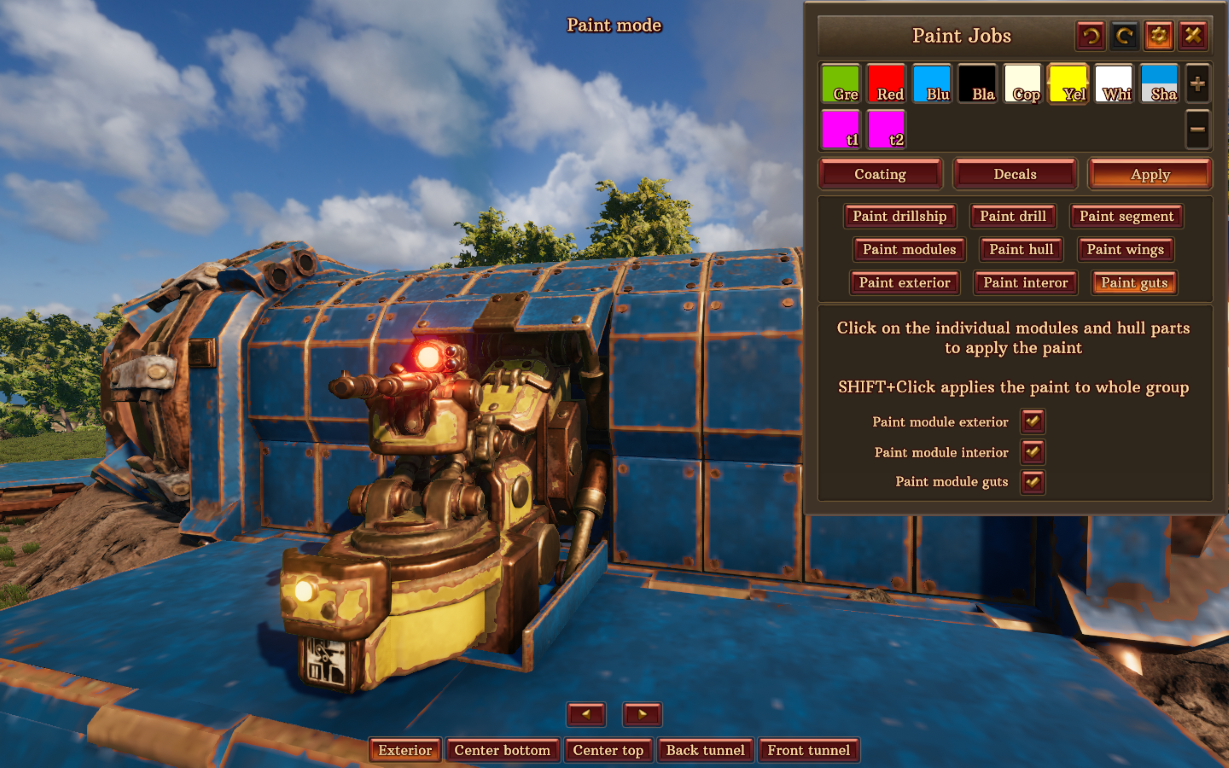
Paint guts : this paints only the inside of the modules of the segment you’re looking at, the part that is hidden when the modules are closed. This is useful for painting turrets, for example.
This is how I was able to have the interior of this sniper turret yellow, while the parts that you can see when the module is closed are still blue, like the rest of the ship. Painting the entire module would have made it so that even when closed, it would be yellow.
However, there’s more to this Apply thing. When in the apply tab, clicking on a part of the ship will paint it individually. For example, I’m able to paint this specific wall out of all the segment.
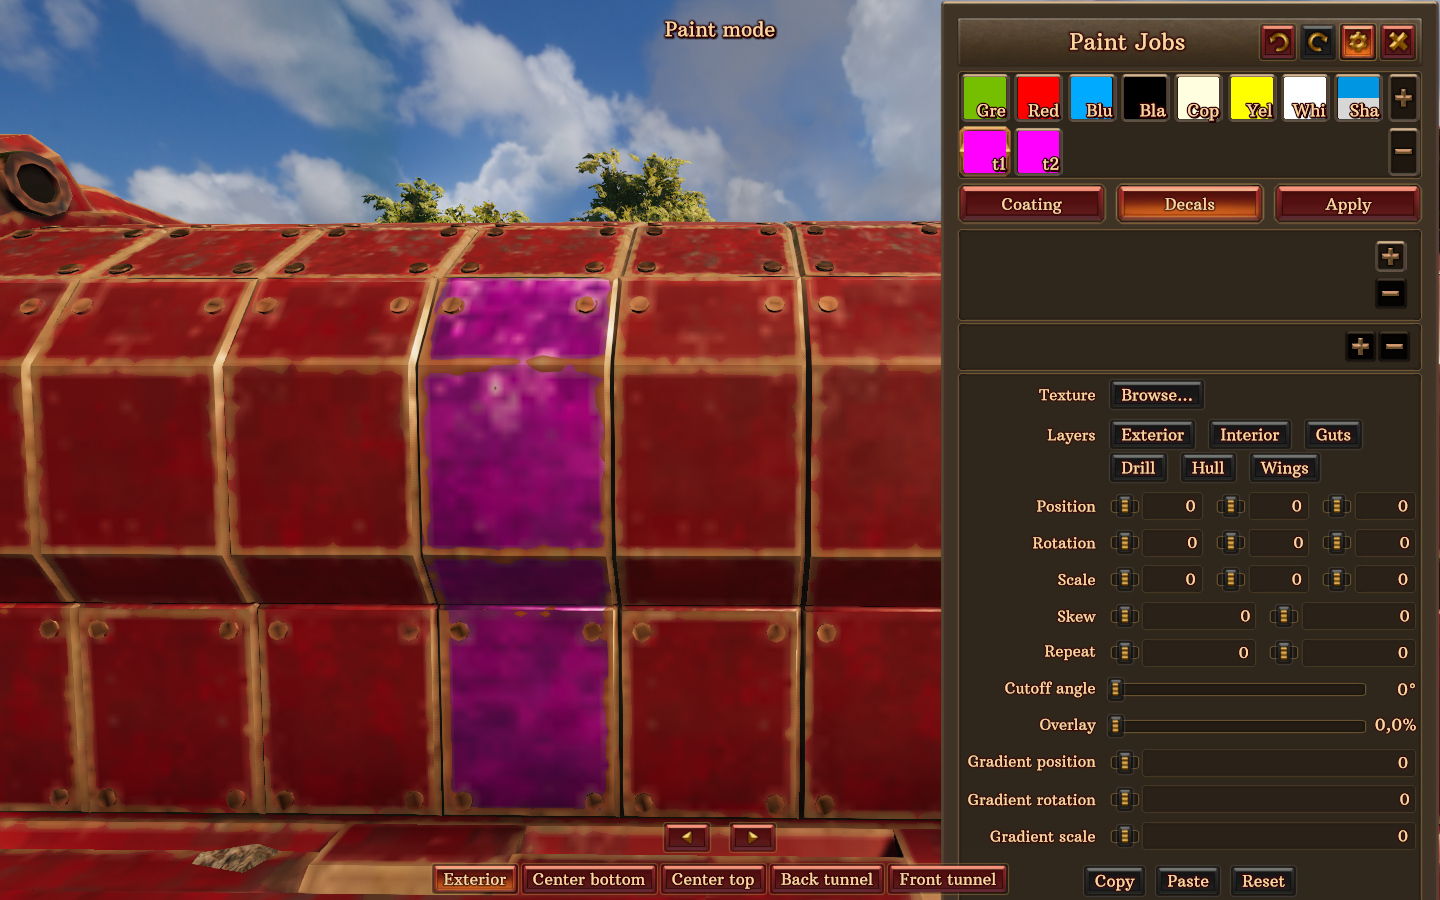
This wall is now assigned to the paintjob “t1”, and all changes done to this paintjob will affect this wall too.
But you’re also able to individually paint hull parts, wings and the top part of the wings…
And when doing this, the three checkboxes at the bottom will help you a lot :
“Paint module exterior”, when checked, will paint the exterior of the wall/module you’re individually clicking.
“Paint module interior”, when checked, will paint the interior of the wall/module you’re individually clicking.
“Paint module guts”, when checked, will paint the guts of the module you’re individually clicking. This doesn’t change anything if you’re applying it on simple walls, door frames, window frames.
This allows you to mix up colors without even having to create a new paintjob of your own ! You can use the pre-made paintjobs to paint one segment in yellow, another one in green, another one in black, and have the drill in white, for example.
With all of this, I would consider the basics of the paint mode acquired ! This has already opened the door to a lot of possibilities for customizing your ships, and you can already have quite a lot of fun with just messing around with the pre-made paintjobs and the apply feature. And we haven’t even started making our own paintjobs yet ! But I think it’s just about time we get to that, what do you say ?
Coating
Let’s get on the most important part of painting : Coating.
Note : when you see something with a * before, it means it is more of an advanced feature ; I feel like they are harder to understand, and only bring new elements if you want to spend a large amount of time on customizing your ship.
In the advanced menu, select the coating tab. You should see this UI :
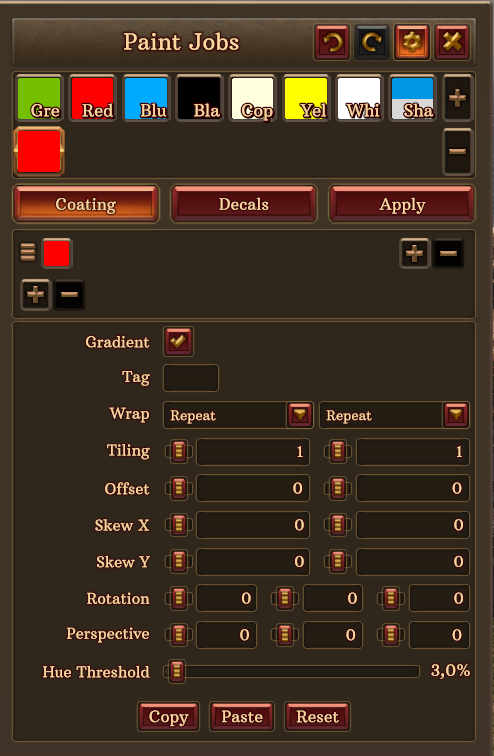
First off, you have the tag field : you can assign 3 characters to this paintjob. So far, pretty easy.
Now, for the color : to change the color of the paintjob, simply click on the square under the coating button. This will bring up this UI :
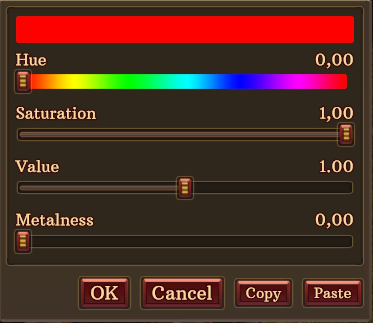
To be fair, this one should be fairly easy to understand. But still, here are some example screenshots to make it clearer for you, just in case :
Saturation : This is how intense the colour is going to be. 0 is black, 1 is the colour you picked. Inbetween is a mix.
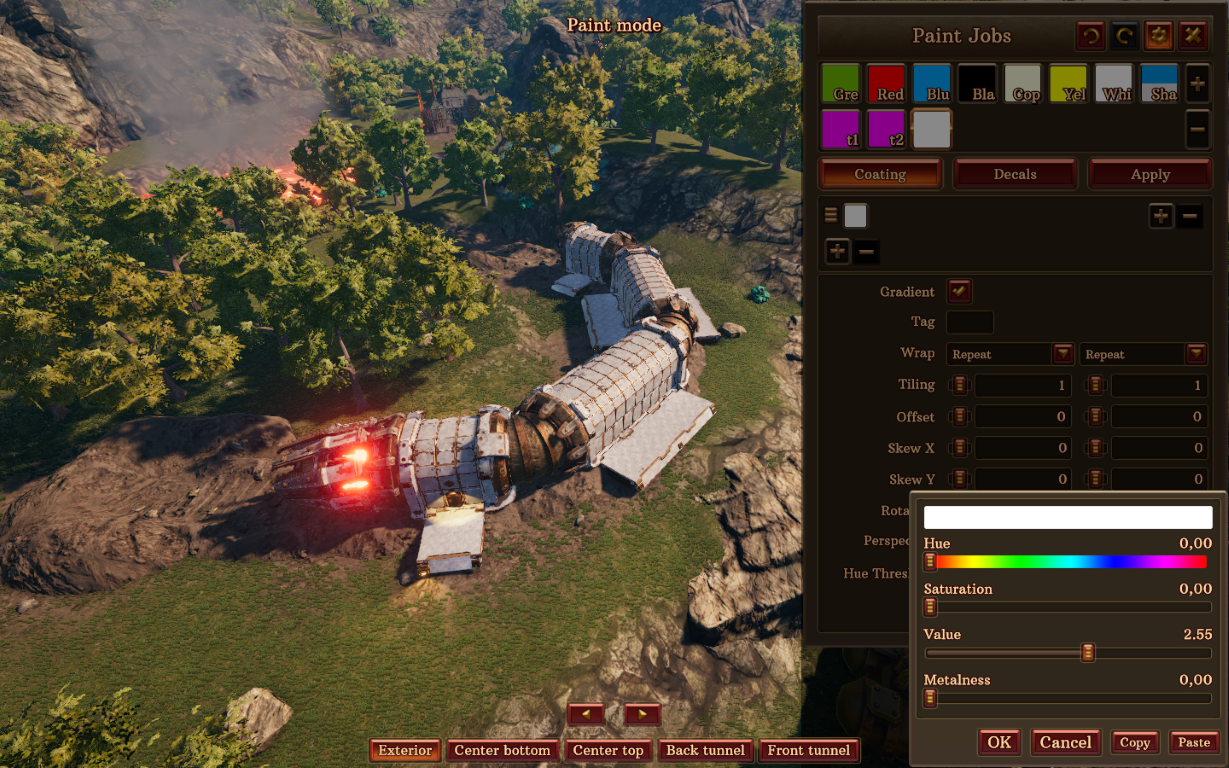
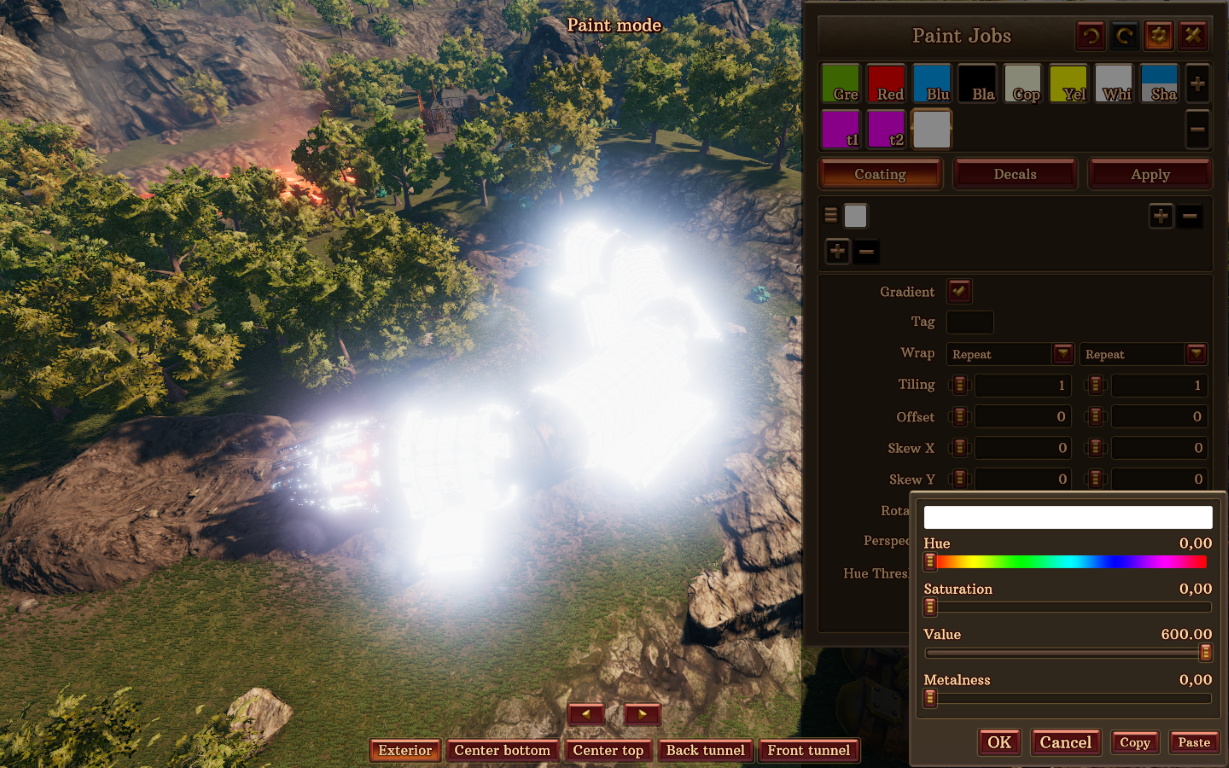
Value : This one is how much the paint glows. 0 is black, 1 is normal, and you can go up to 600. However, I do not recommend it as it basically turns your ship into a sun.
Here is the white pre-made paintjob for example.
Now, if I put the value all the way up to 600…
Metalness : This one is how reflective the paint will be, it can from 0 up to 1. For example, the Copper pre-made paintjob has 1 in metalness.
Here it is, for reference.
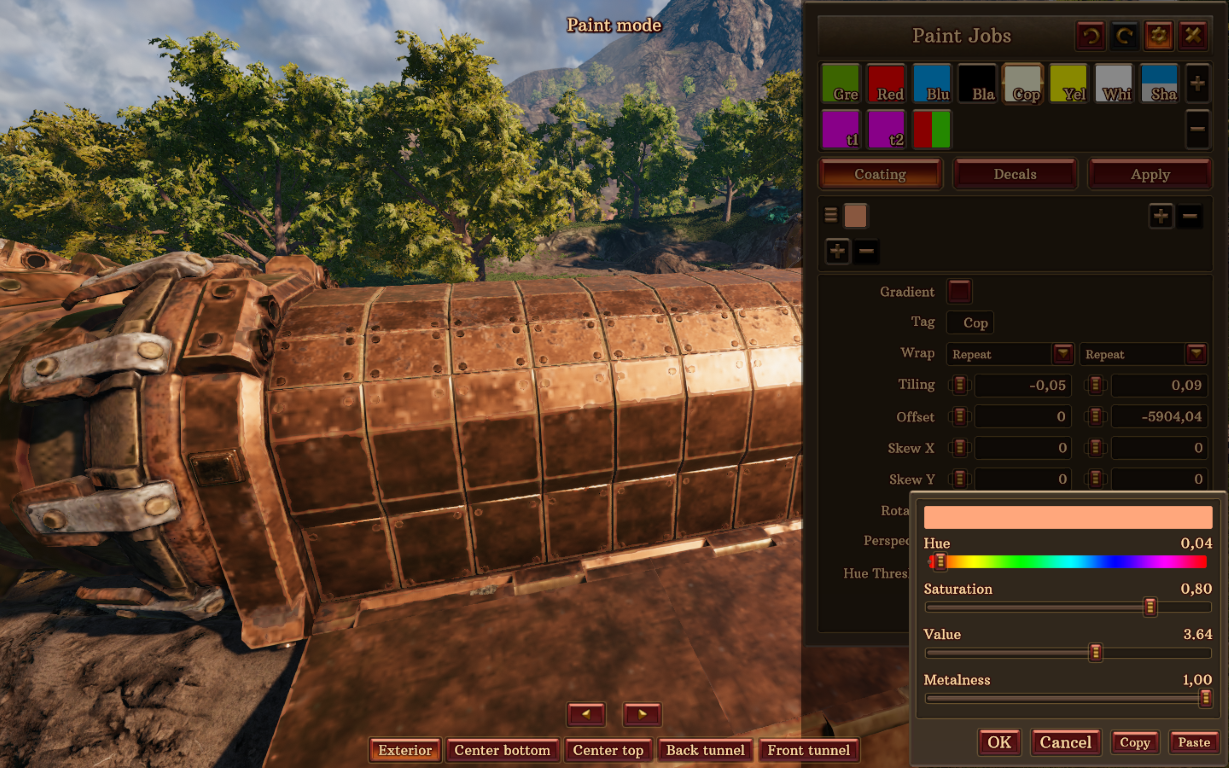
And if I turn the metalness all the way down to 0…
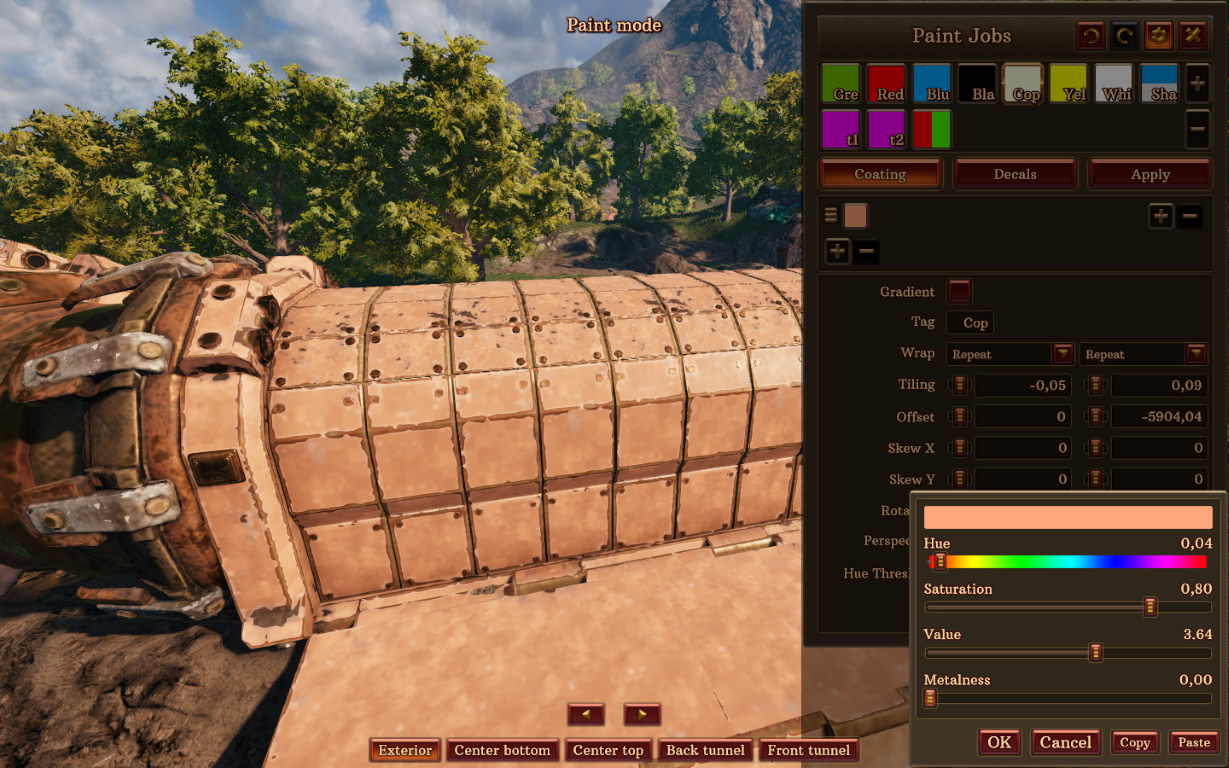
Now, back to the coating.
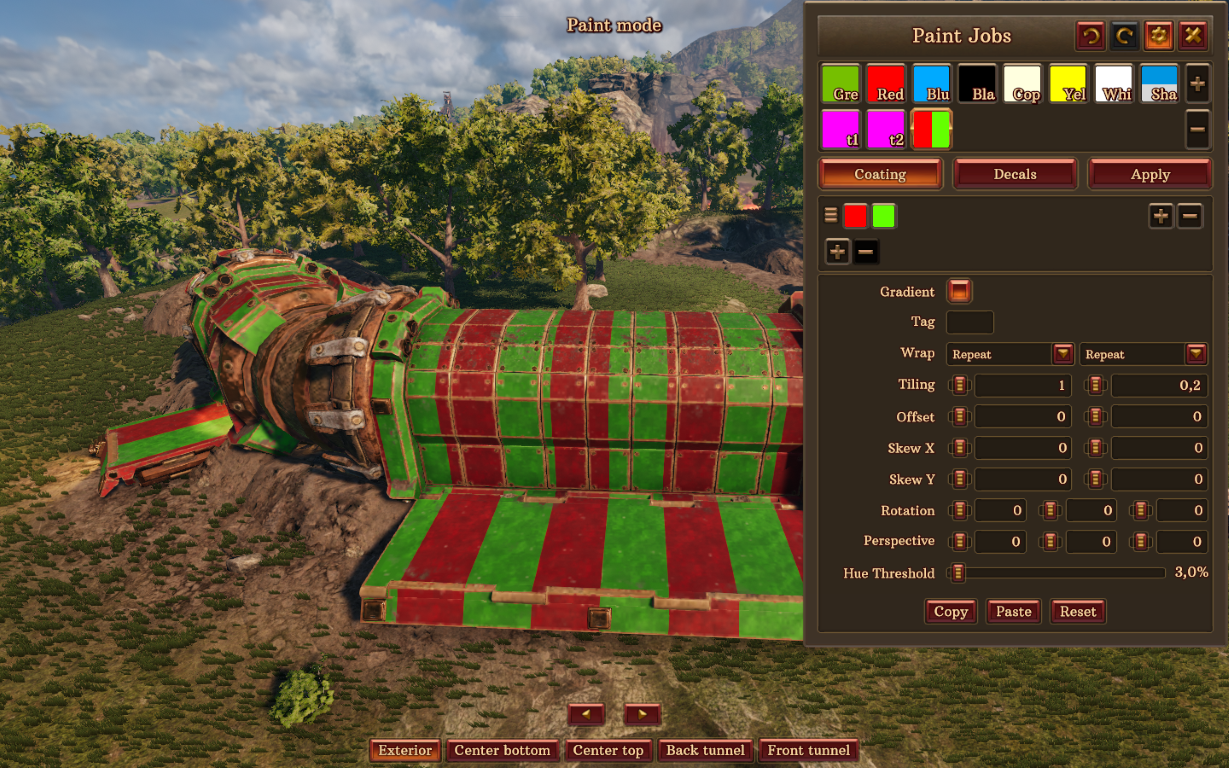
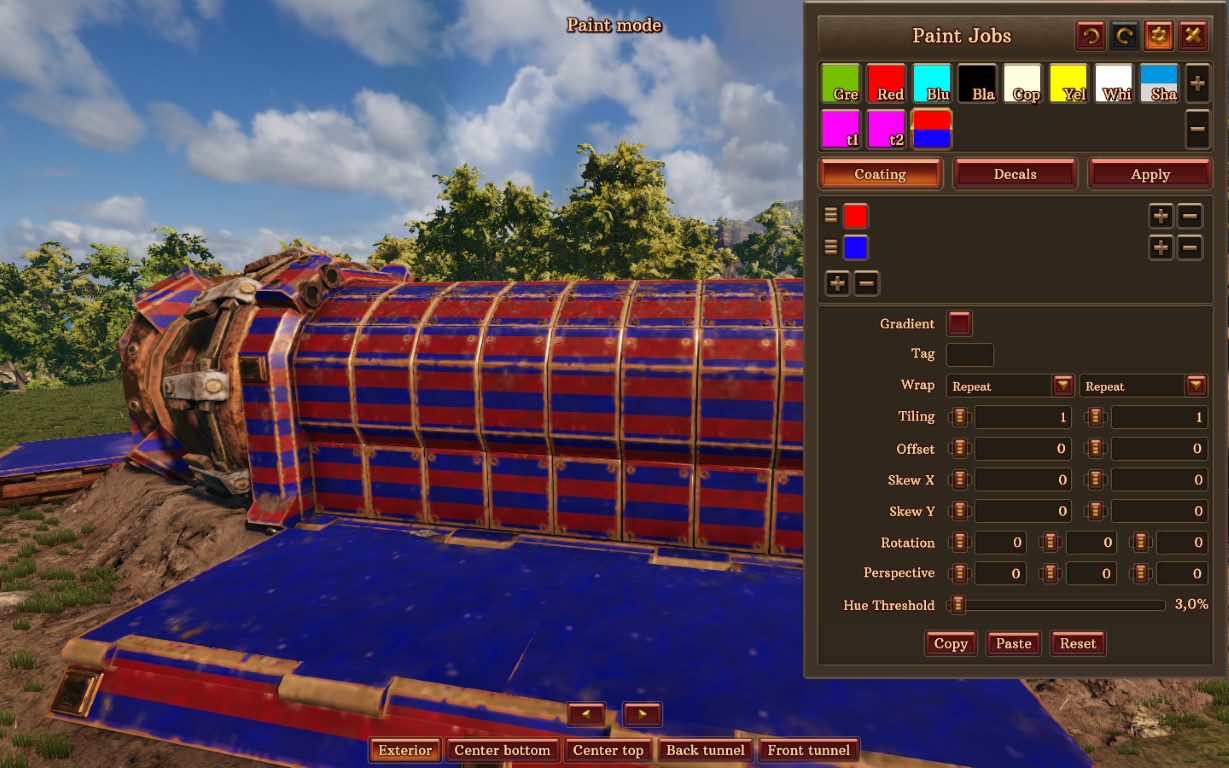
You can add other colors, by clicking the + buttons. This will add the new color as a stripe on the paintjob ! And this is why there are two buttons : you can have horizontal and/or vertical stripes.
Vertical stripes :
Horizontal stripes :
Both at the same time :
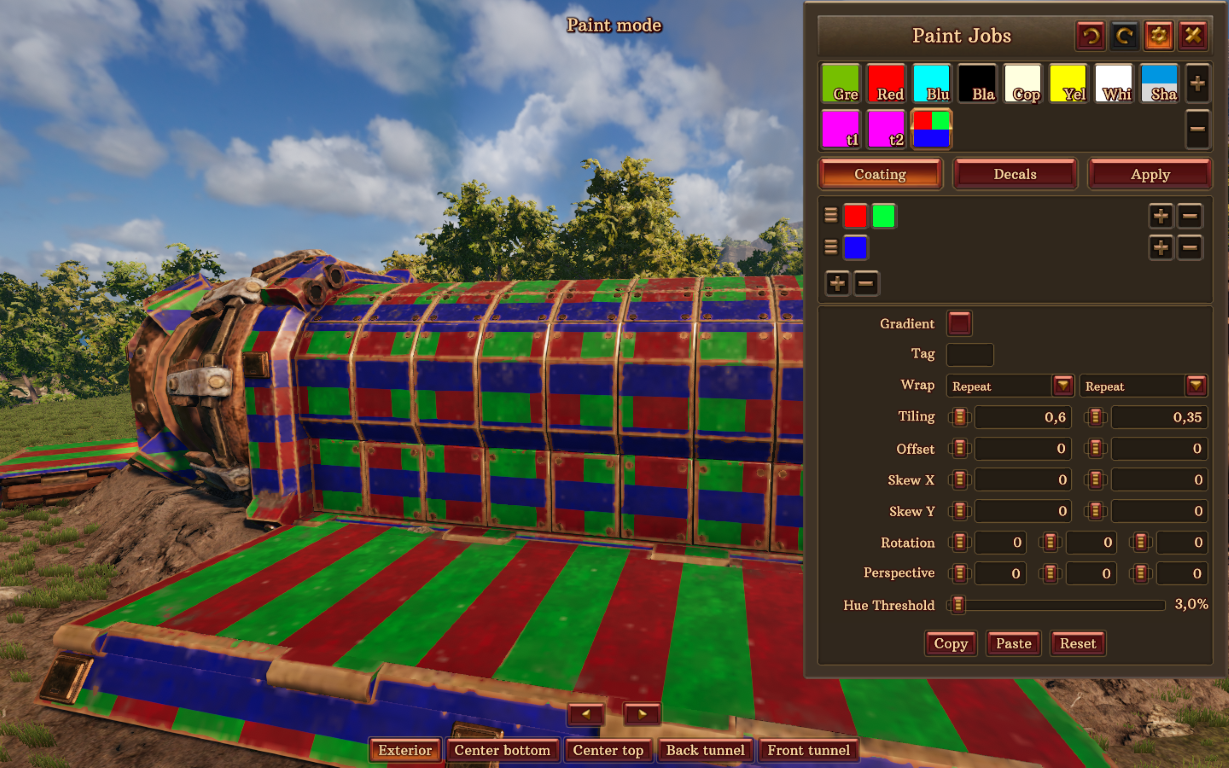
You can even drag and drop the colors, and organize them to make stripes inside of stripes ! Heh, that’s sTRIPPY… hehe…
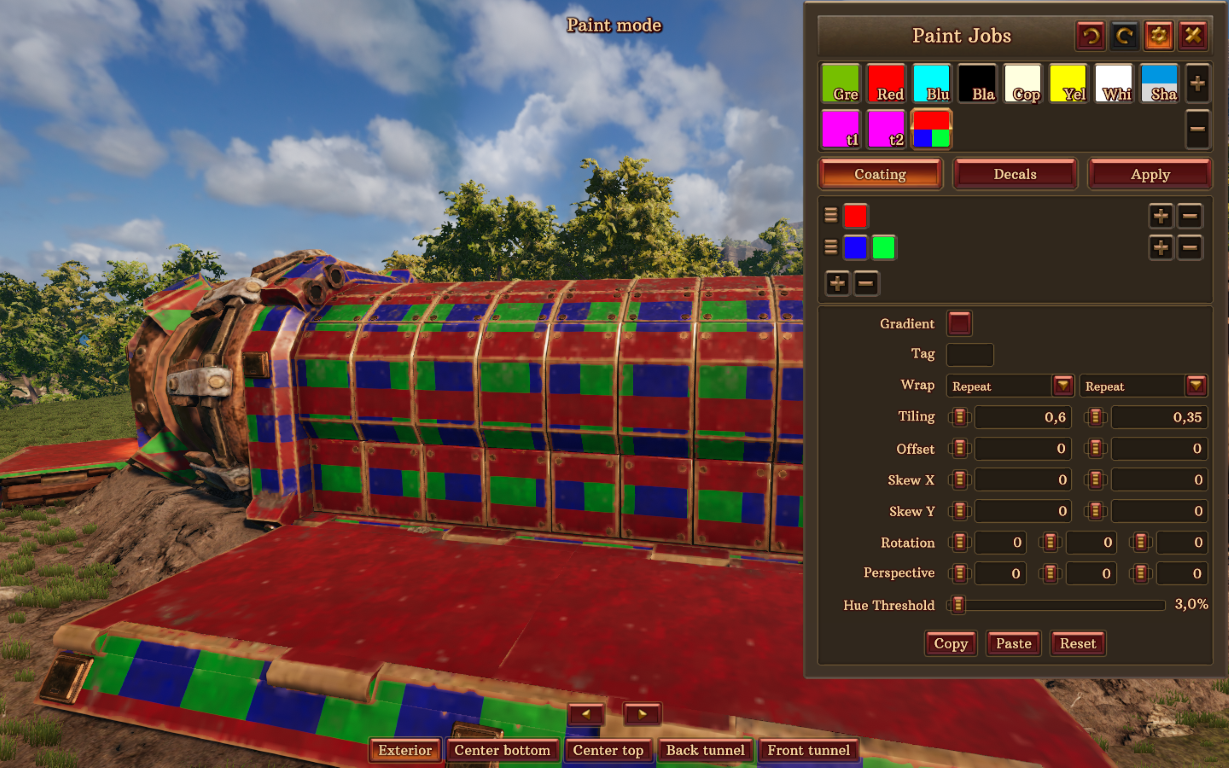
The gradient checkbox defines whether the stripes will blend together or be clearly separated.
Gradient on :
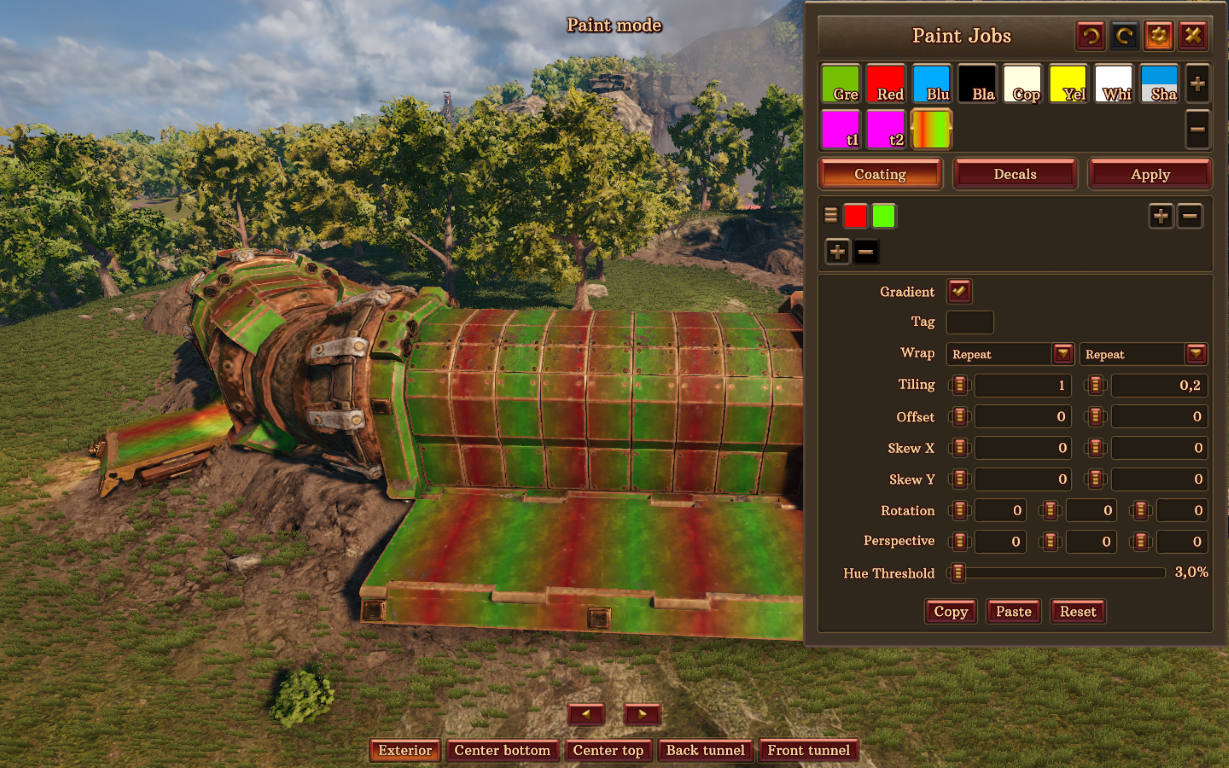
Gradient off :

Now, from there on out, you will see each parameter will have two different sliders. That is because they affect the stripes, and you can change the parameters of the vertical/horizontal stripes independently. The right ones are for the vertical stripes, and the left ones are for the horizontal ones. (Except for the wrap parameter, which is the opposite.)
Wrap changes the organization of the stripes. Let me show you :
Wrap repeat is the default setting.
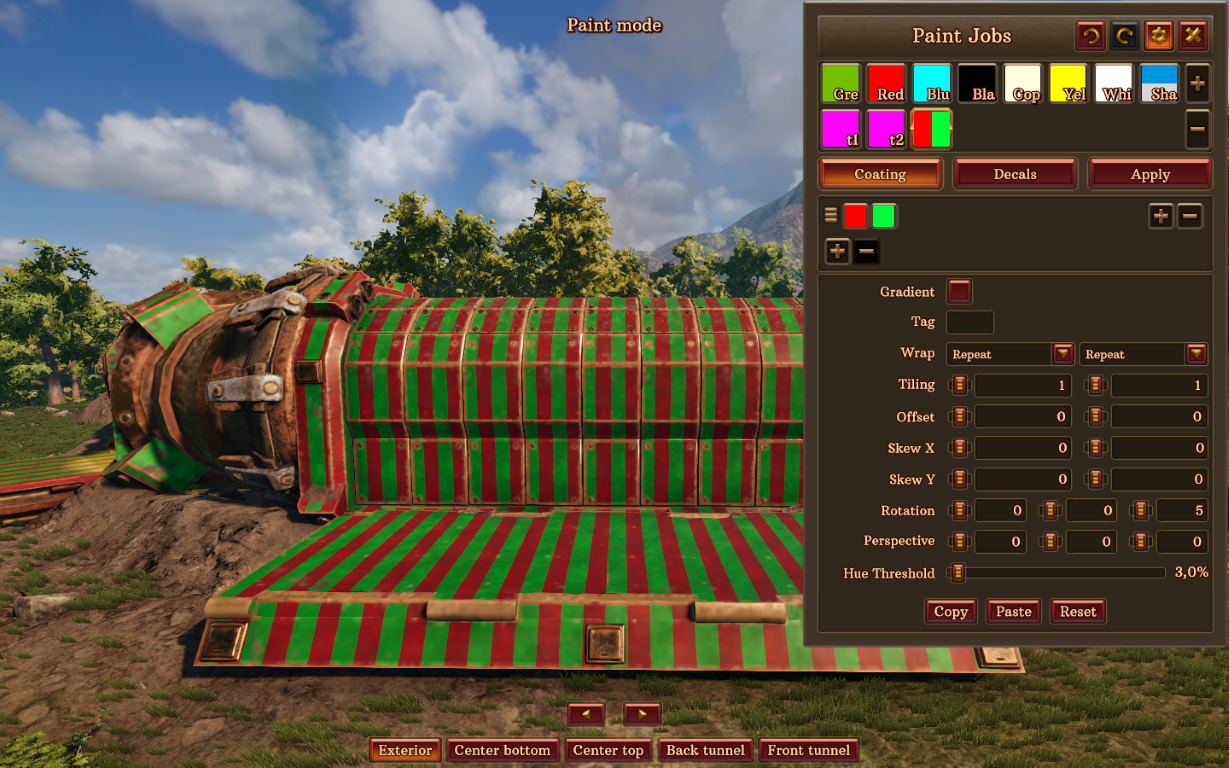
Wrap clamp separates the colors in two equal parts.
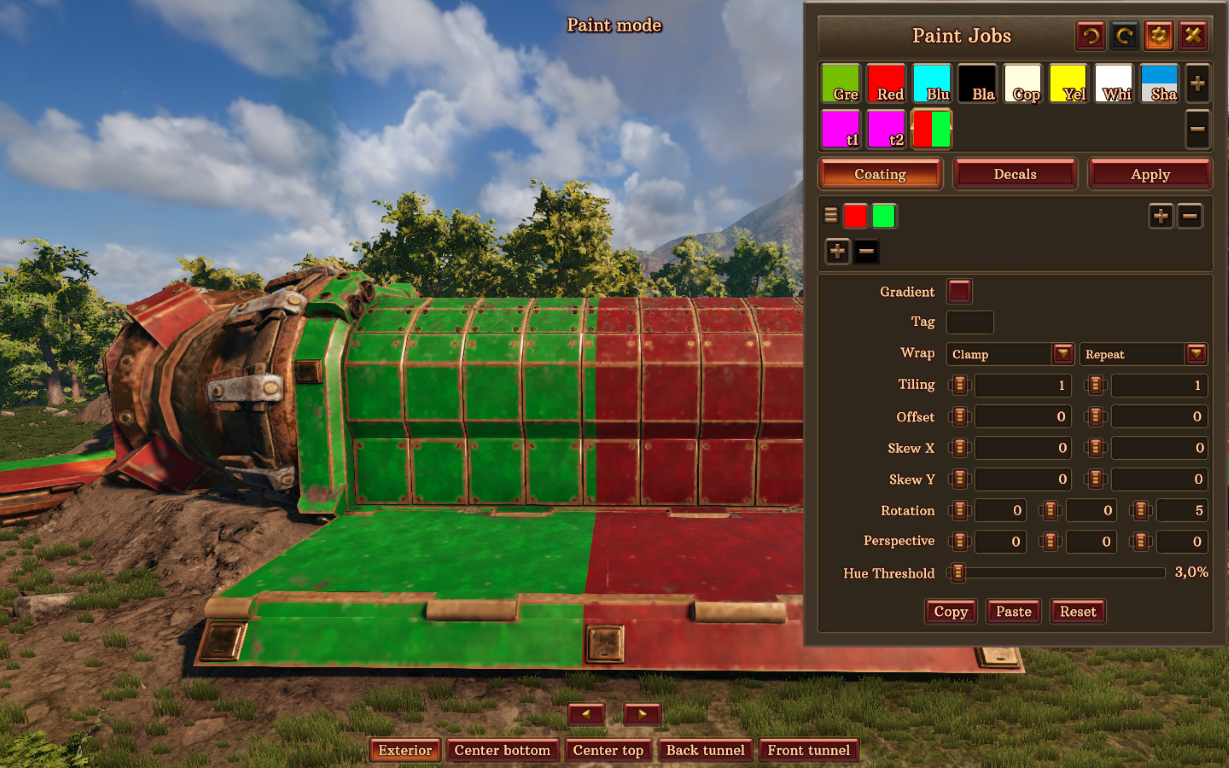
Wrap mirror puts the origin at the center of the segment, meaning that the color in the middle will always be the same, whatever parameters you change.
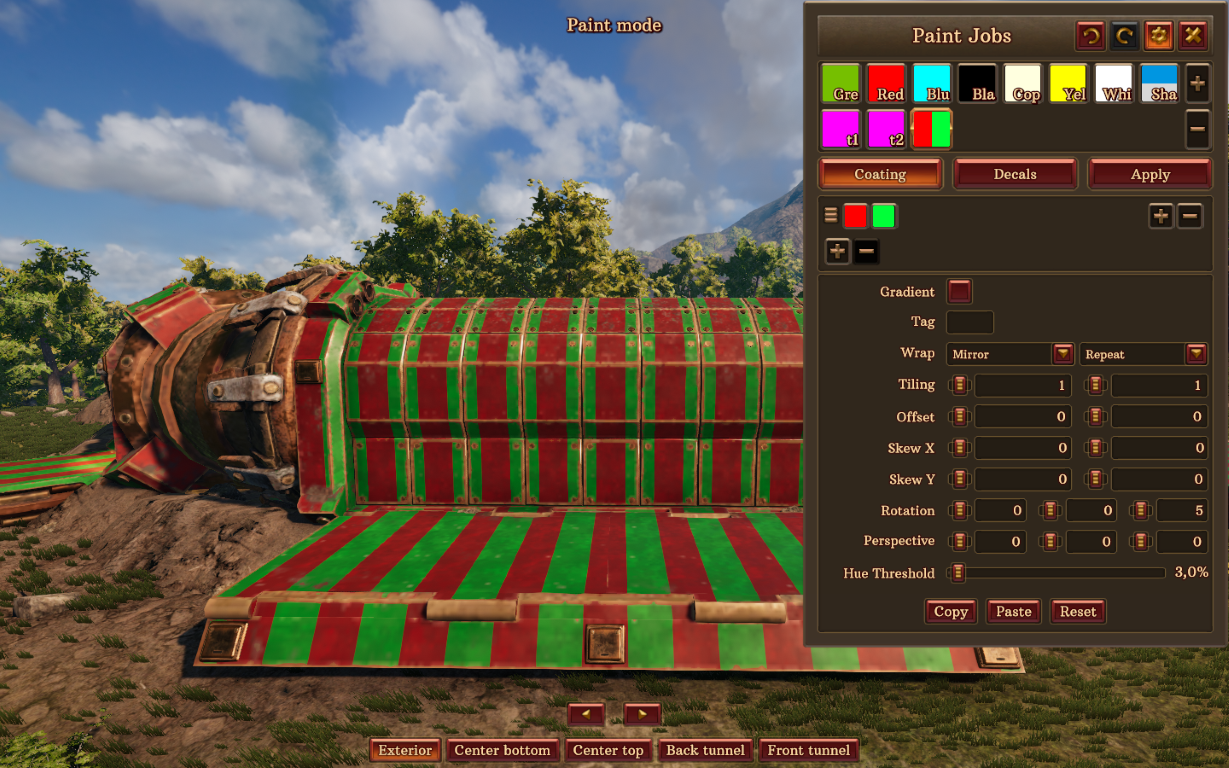
Wrap mirror once is just like the above, except the color in the middle doesn’t repeat.
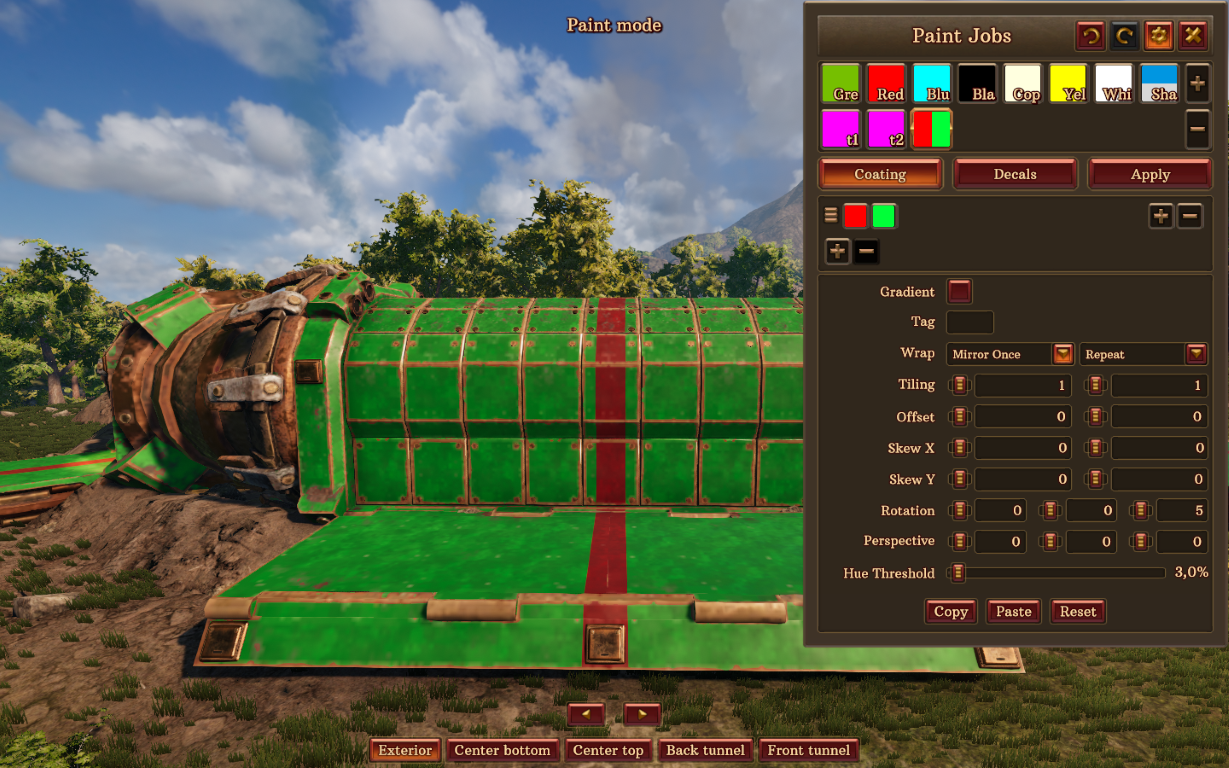
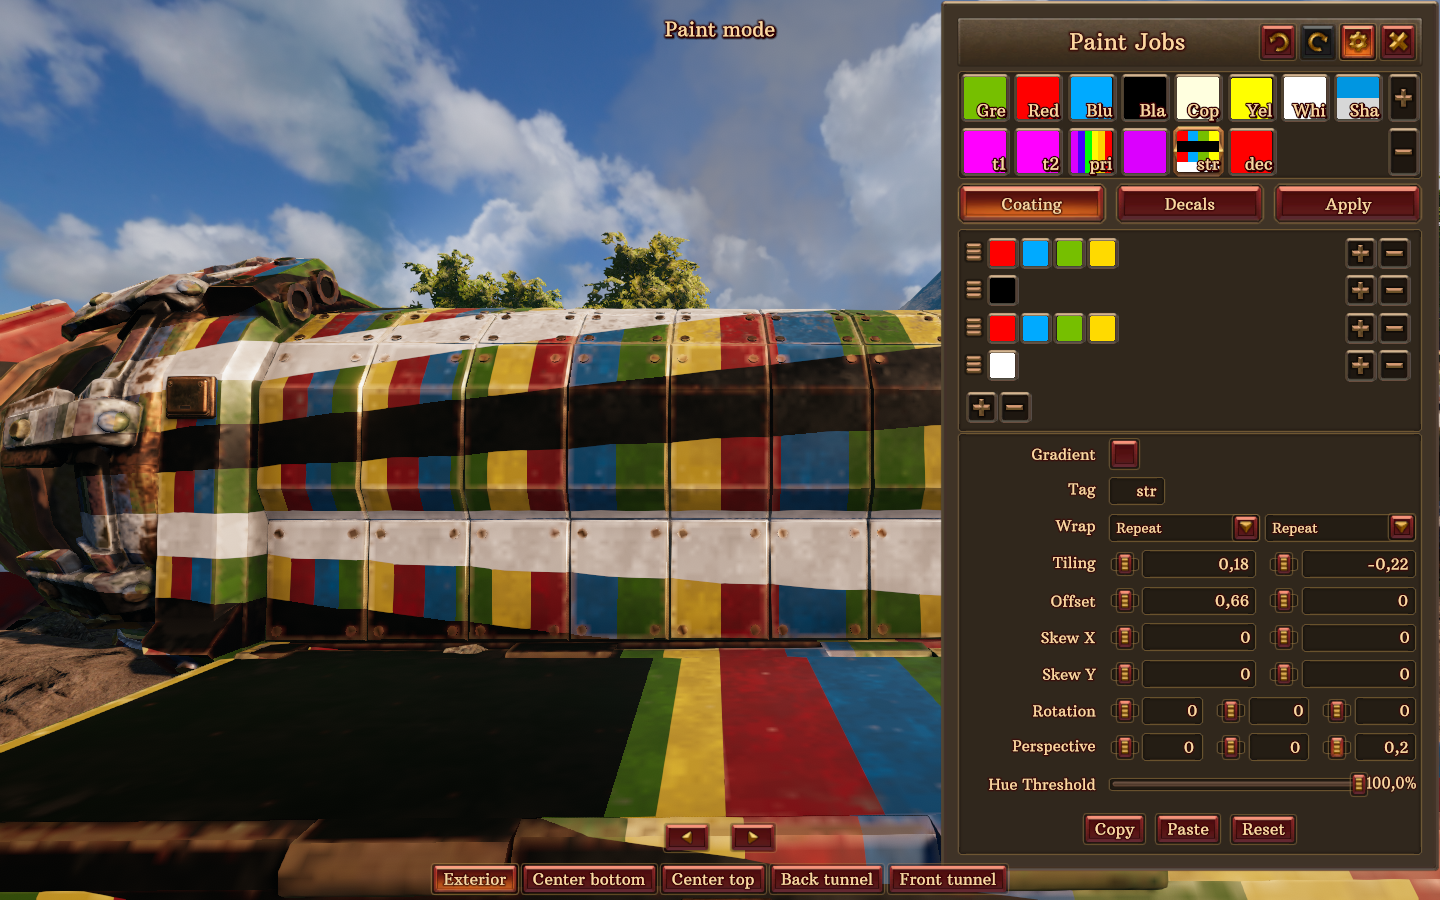
Tiling changes the width of the stripes. The lower the value, the bigger each stripe will be.
Offset changes the position of the stripes.
* Skew does weird things, and to be fair, I’m not entirely sure what exactly. I’ll do some research, but for now, I feel like it’s not essential. If you’re interested, you can mess with it and see what it does. For now, all I can tell you is that Skew X chages the horizontal stripes, and Skew Y changes the vertical ones.
Rotation makes the stripes rotate around the axis you’re changing : y, z, x (if we consider the x axis is going in the same directiion as the drill, y is going to the side and z is up.)
Hue threshold is how much the paint covers the ship, from 0% to 100% : 3% is the base value.
For example, here’s the blue pre-made paintjob.
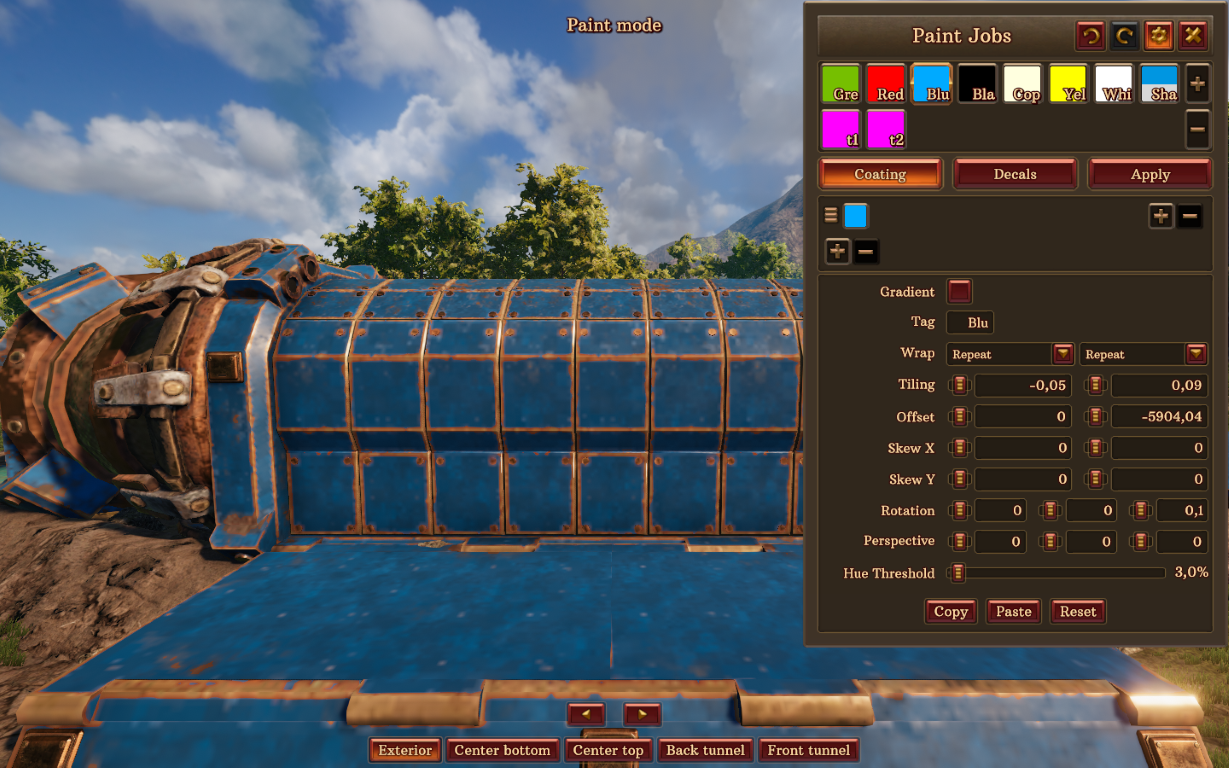
Here it is when I put the hue down to 0%, it messes up a bit.
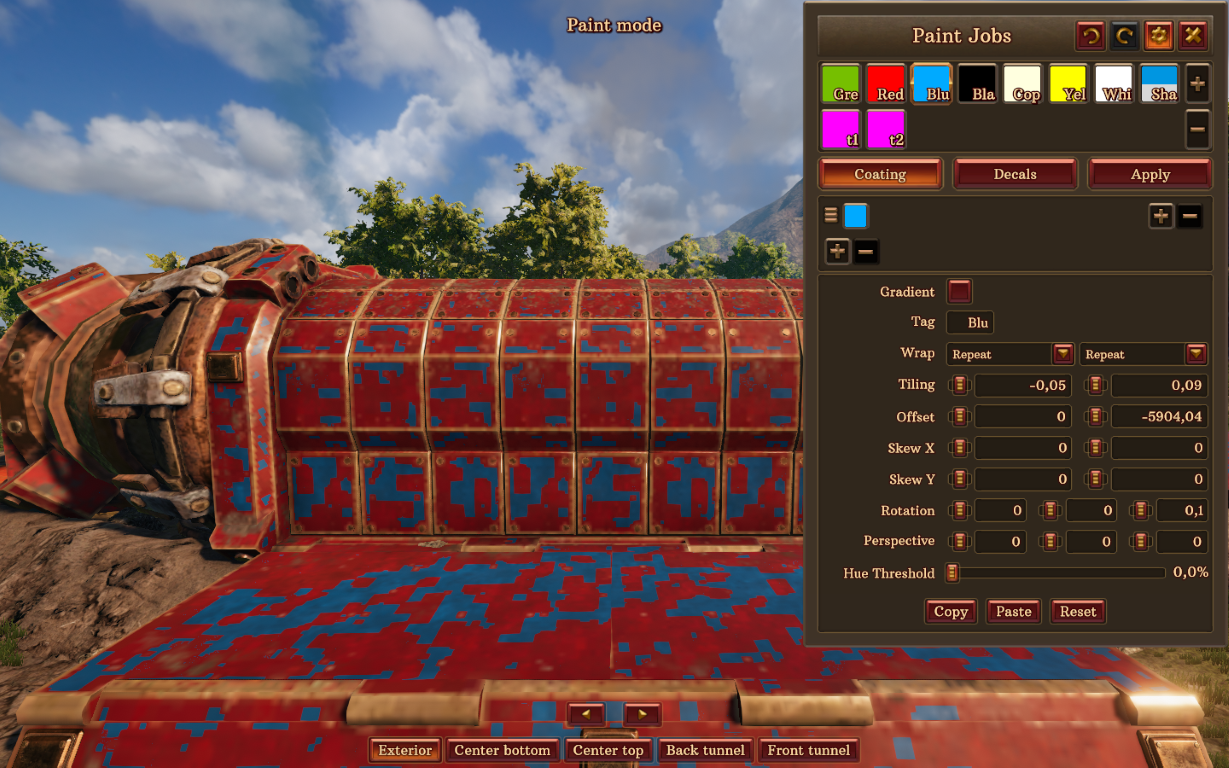
And here it is at 100%. To be fair, not much changes beyond 3~4%. It basically fills the little stiffenings between each wall. You can see there is less apparent unpainted metal.
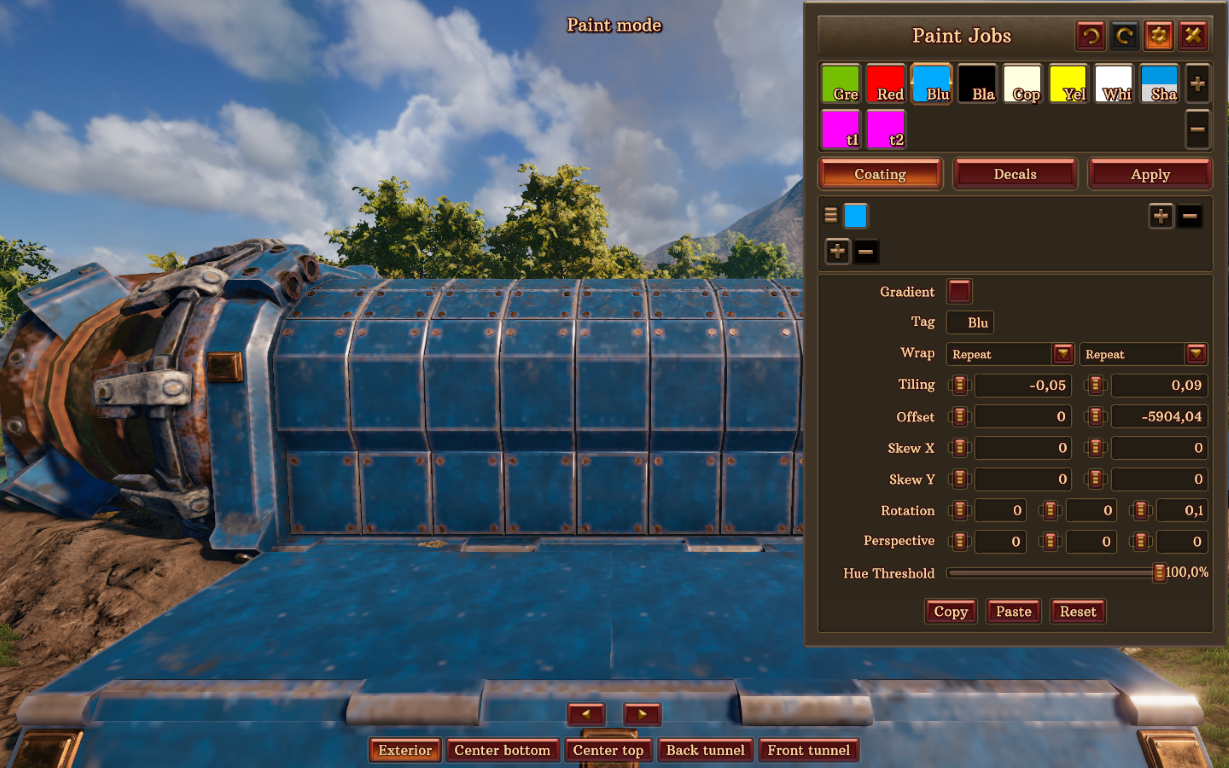
* Perspective : as the name suggests, it changes the perspective of the stripes, by some kind of optical illusion. There are 3 sliders, and to illustrate them, I’ll use this paintjob as reference :
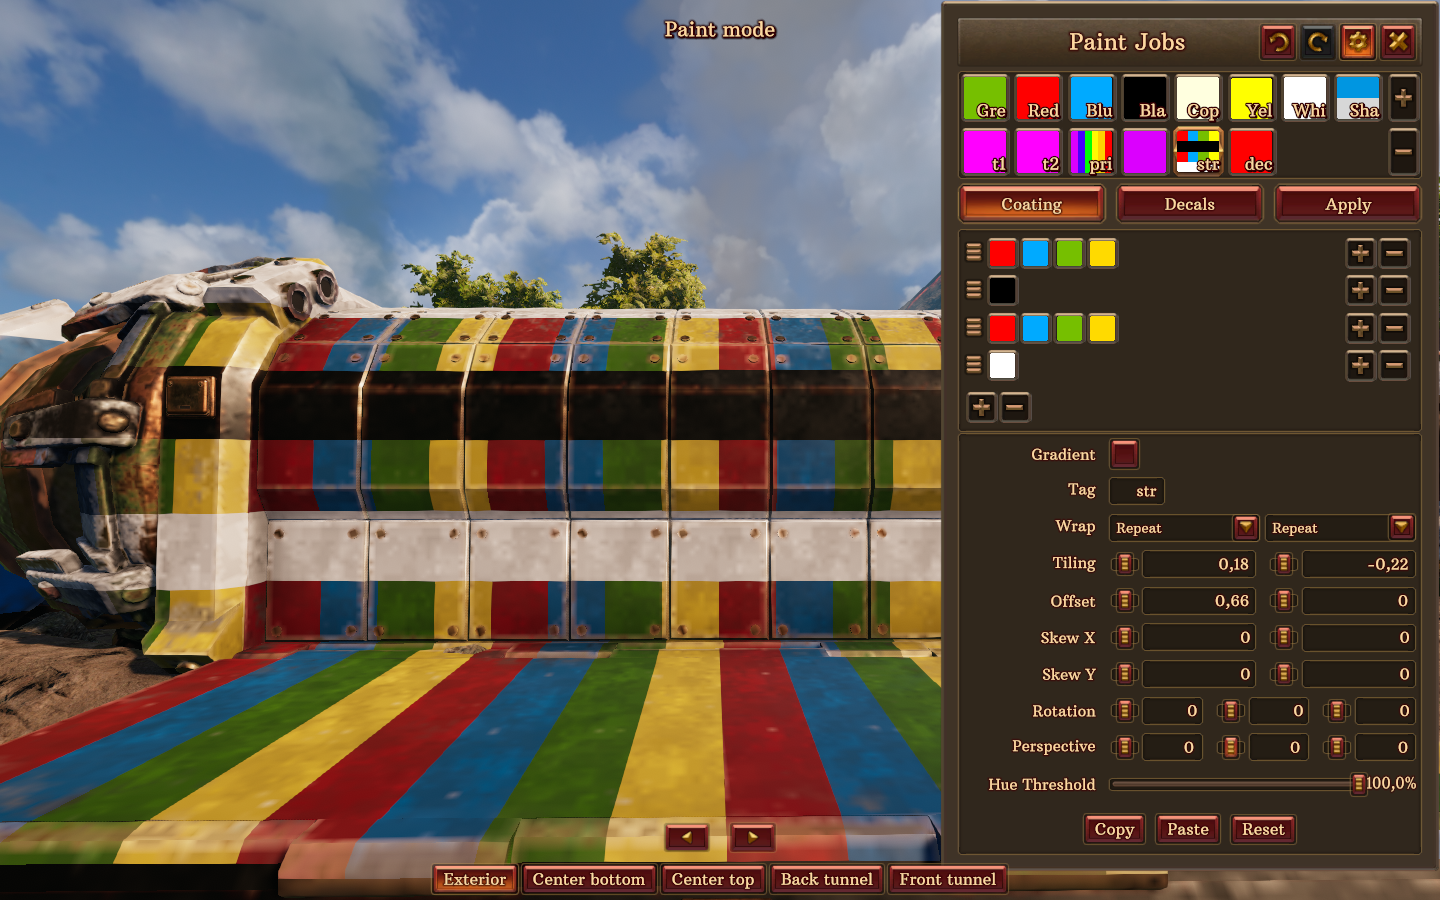
The left slider needs a screenshot from me, I forgot lol
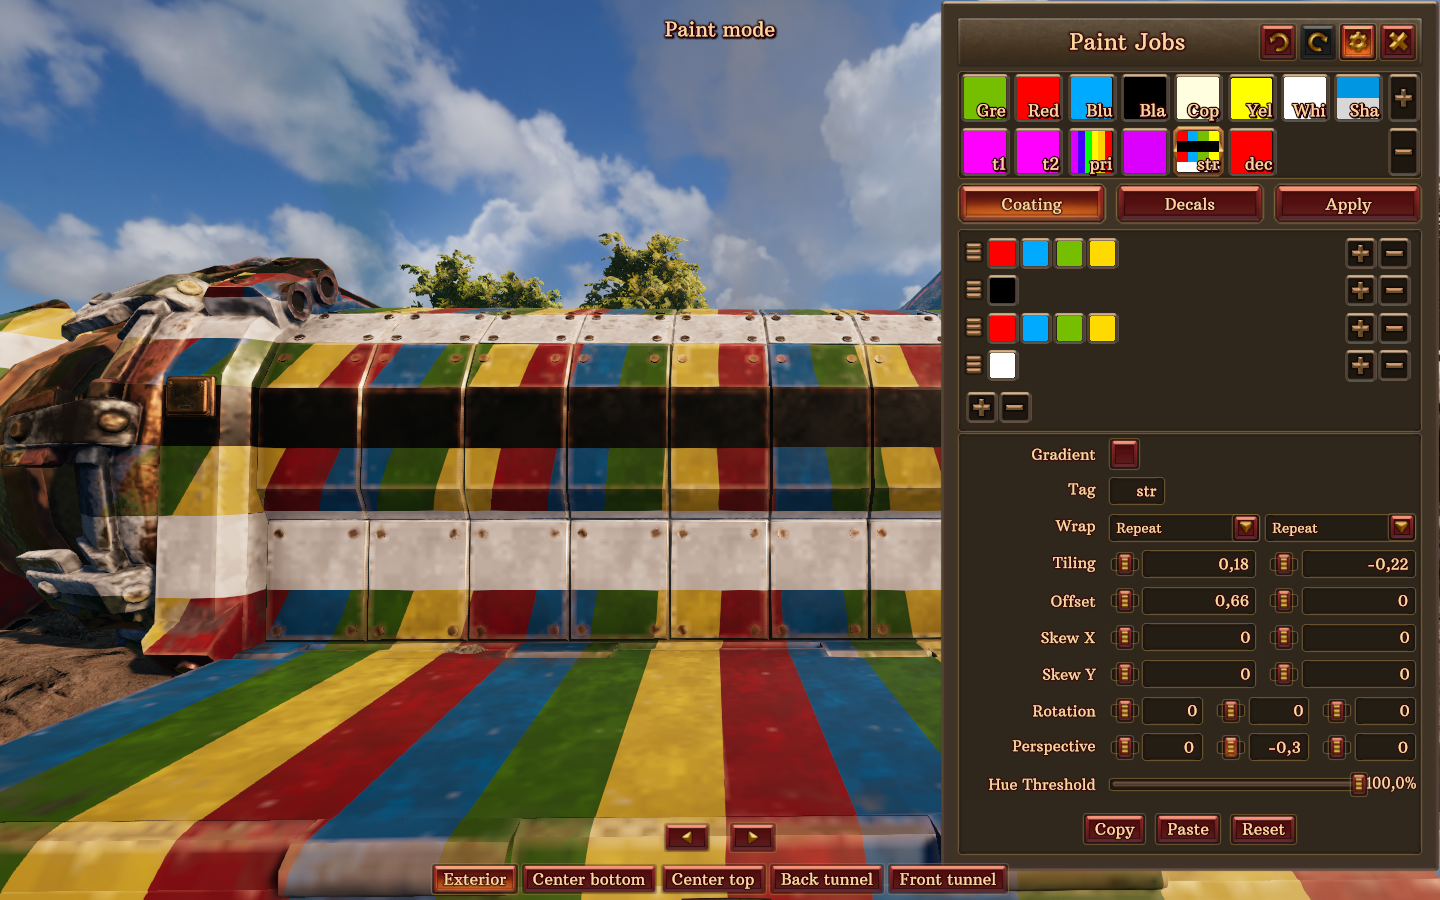
The middle slider makes it as if you were smaller, or taller.
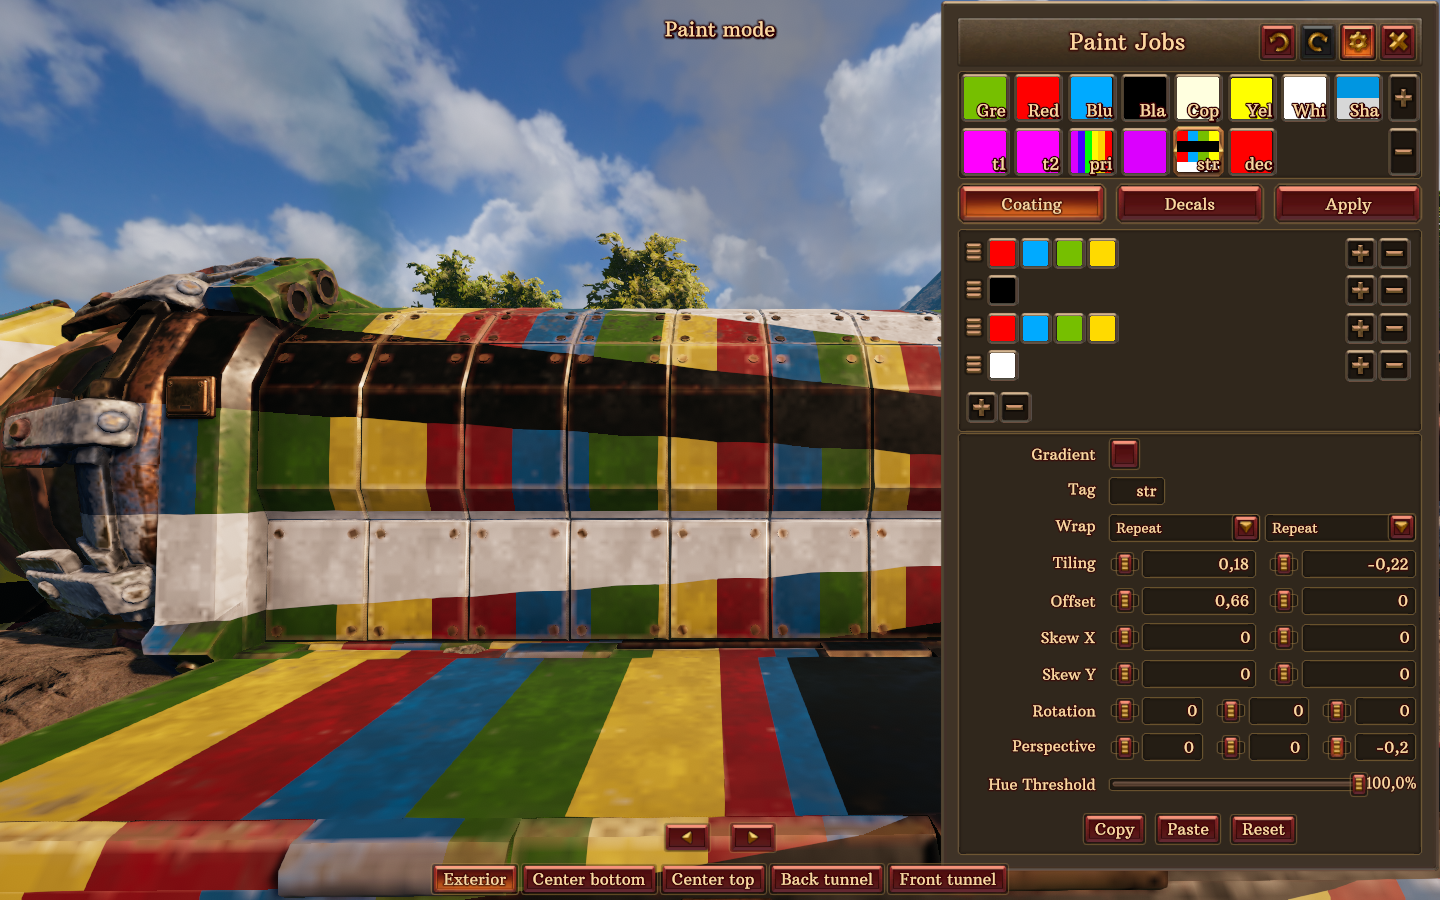
The right one changes the angle at which you’re looking at the coating.
These are the basic things that are good to know when doing some painting. You will have noticed that there are a few things I didn’t go over here, but as I said ; they’re more complex and not essential. But if you’re interested, keep on reading, there will be a part on them later.
Decals
Decals are a very interesting part of the customization. Let’s select the Decals tab from the advanced menu :
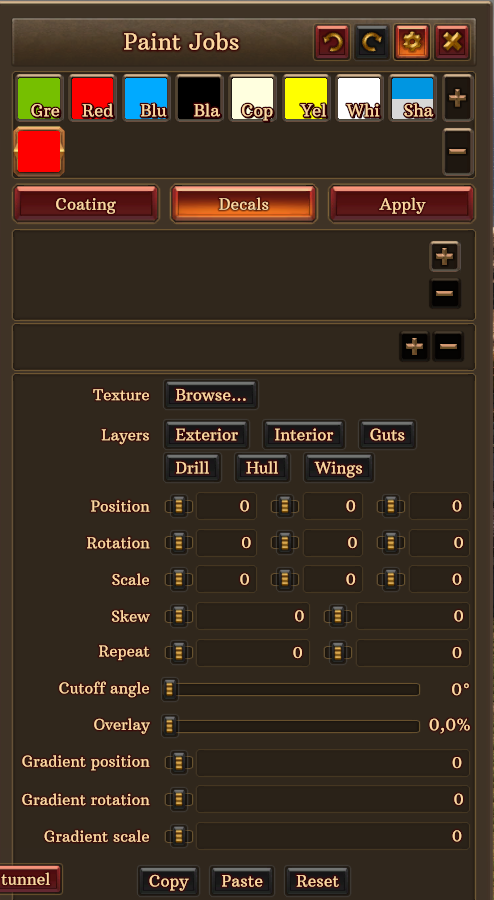
If you are on a new paintjob you just created, this is what you’ll see. You can add up to 4 decals per paintjob. To do so, click the “+” button on the right. a new decal will have appeared. The default one is a flame, but you can choose the decal you want from a large library by either double-clicking on it, or clicking the “Browse…” button next to the Texture parameter.
After having chosen your decal, you can drag it on your ship to place it. You can have the same decal multiple times, in multiple places. Here’s an example on a single wall :
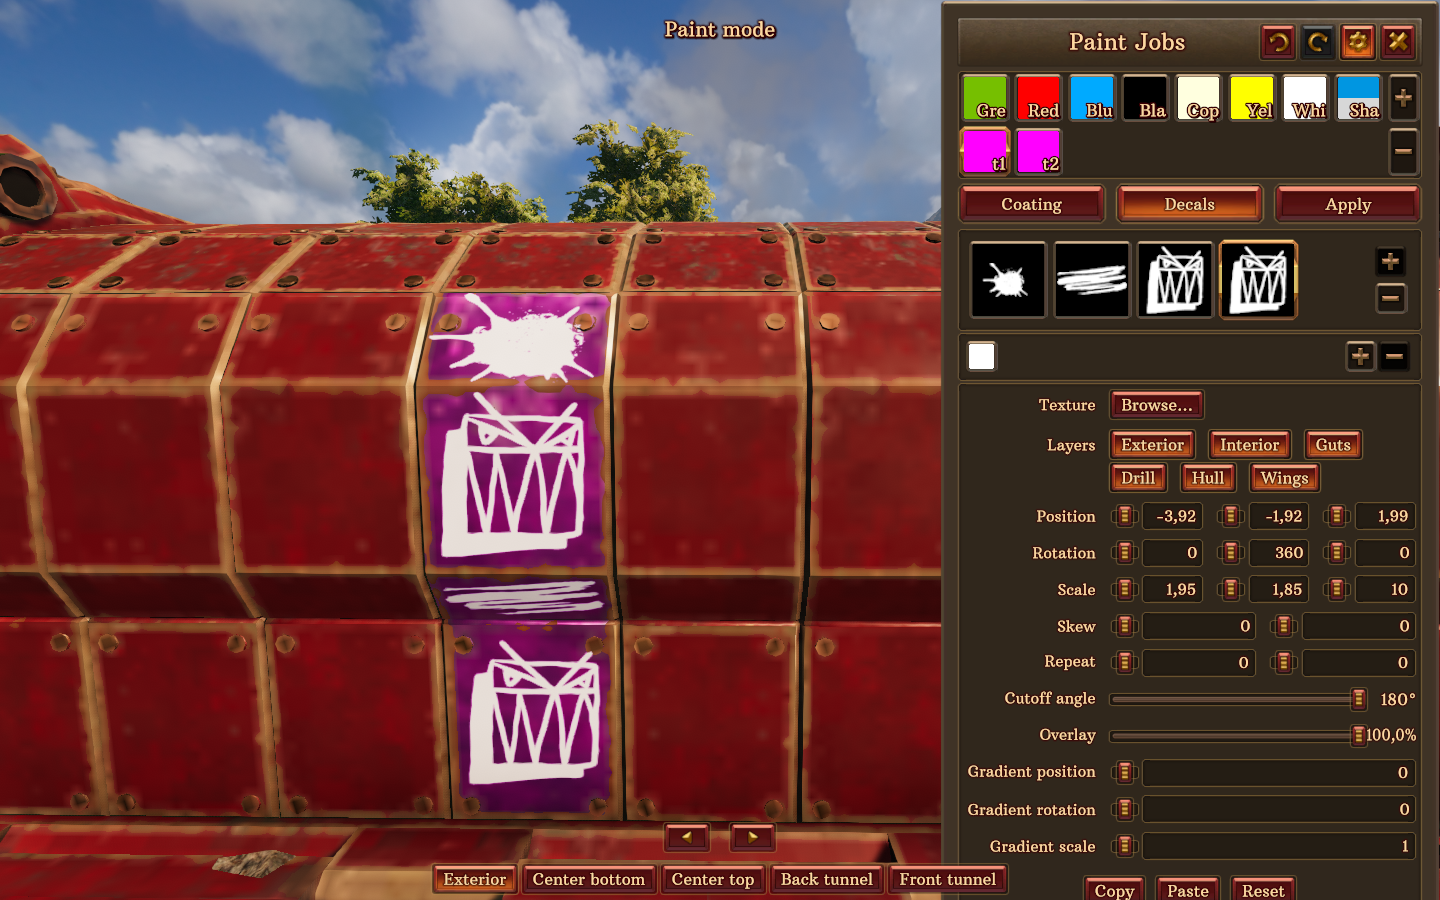
And just under the “decal list”, there’s the color bar which defines the color of the decal. It works just like for coating. And you can also have multiple colors in order to create stripes in the decal !
Now, once again, let’s go over what each parameter does, one by one !
The layers are where the decal will appear. If you keep all the boxes checked, the decal will be able to appear anywhere you place it. If you uncheck exterior, the decals will only appear on the inside of the ship, and on the other parts that are stsill checked. If you don’t want your decal to appear on the inside, uncheck inside. The other boxes work the same way, I think it’s fairly easily understandable.
The position sliders are to move the decal around, just like when you drag it with your mouse, except with these sliders, you can be much mroe precise. It’s also imperative to use them if you rotate your decal, because dragging it with the mouse will reset the rotation, not these sliders.
The rotation sliders are pretty self-explanatory, I believe.
Same goes for the scale sliders.
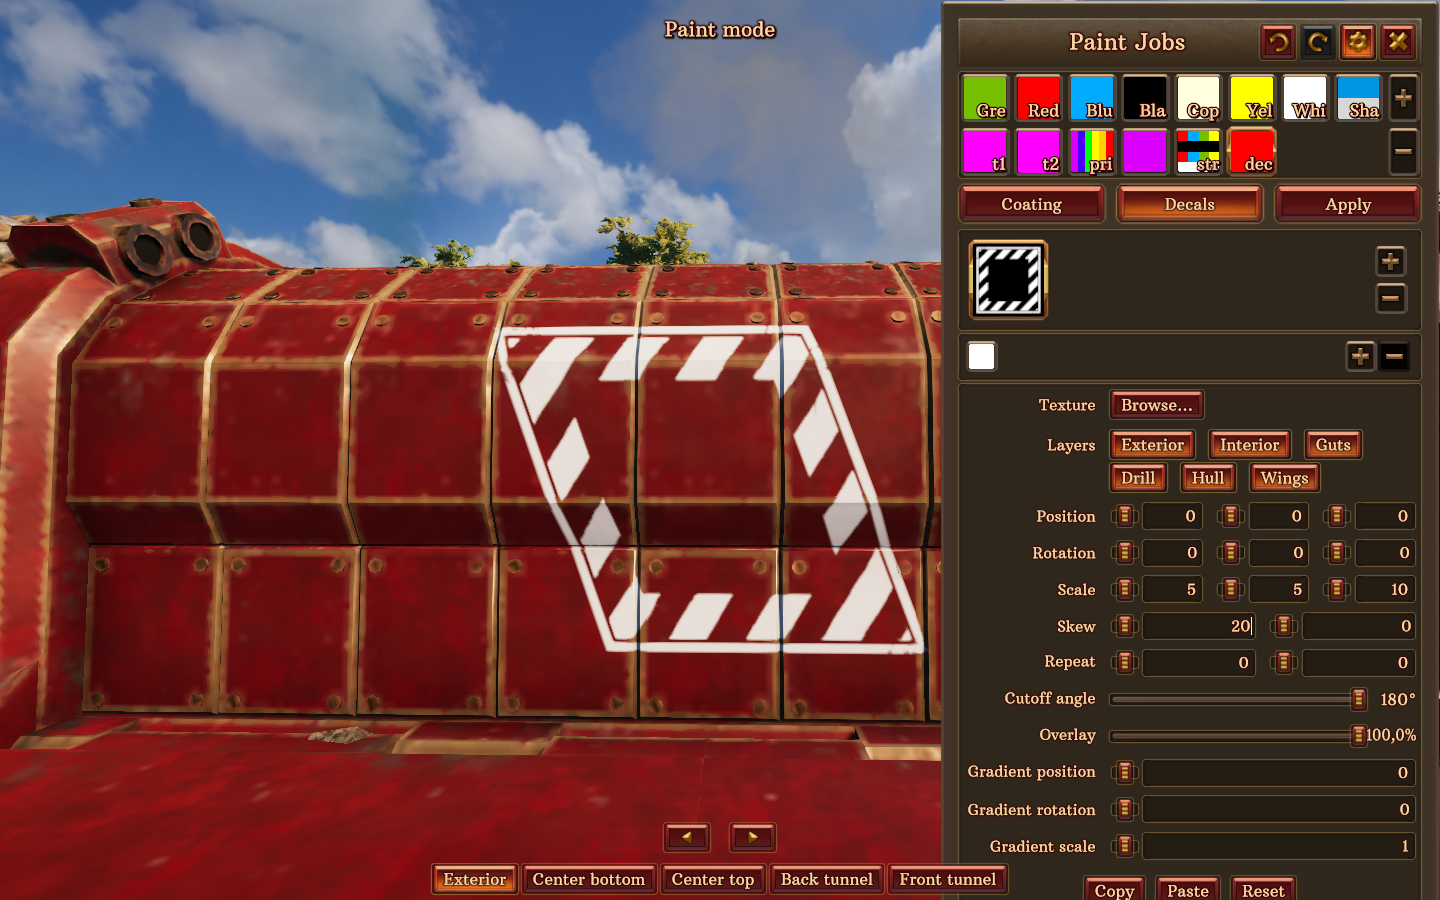
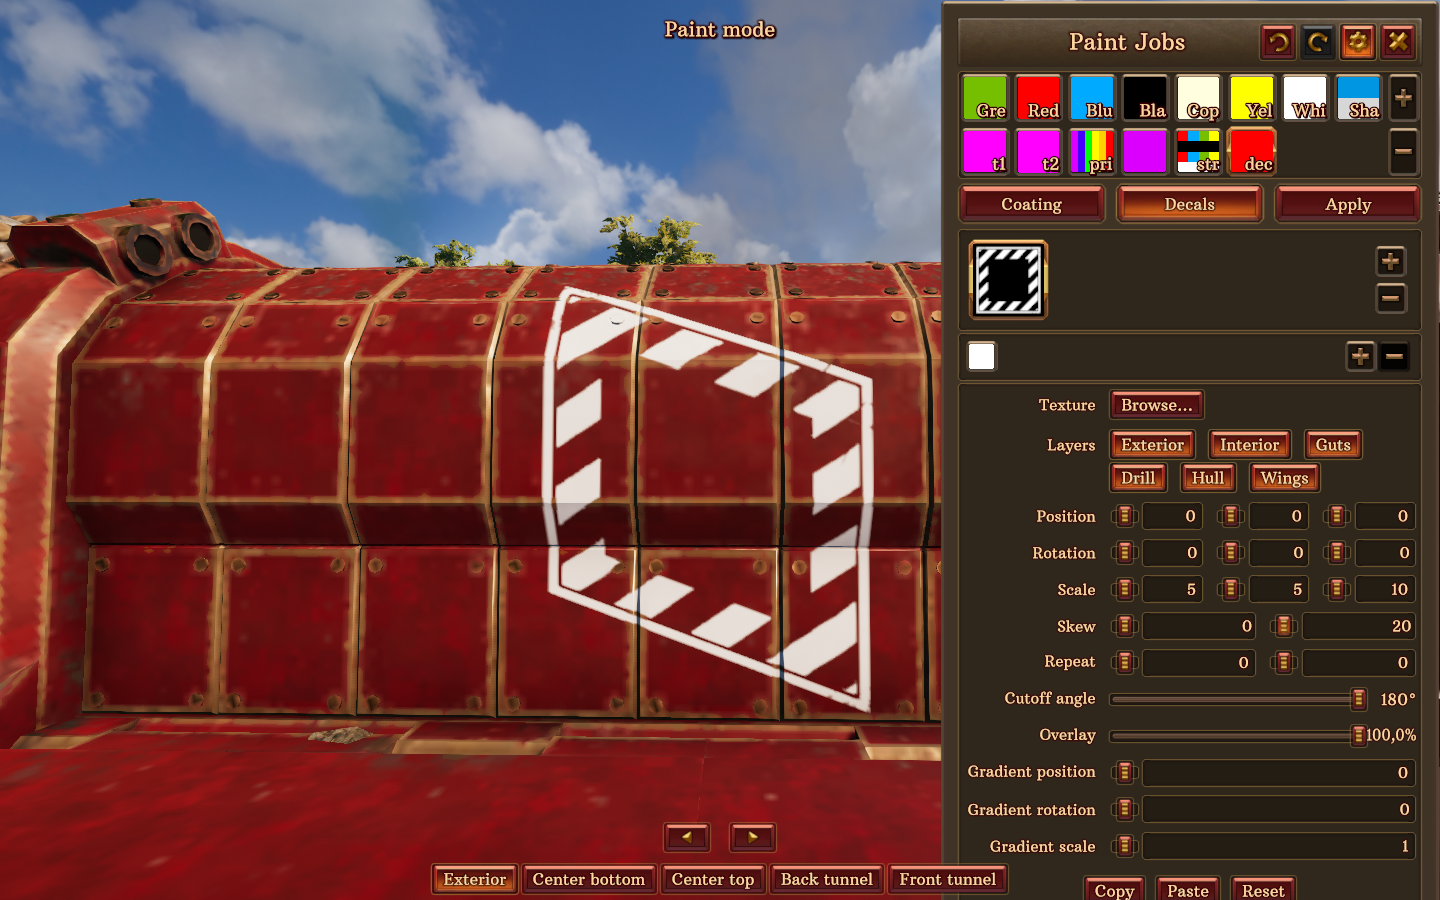
Skew does pretty weird things. It translates parts of the decal around an axis. The left slider goes around the vertical line (passing by the middle of the decal), the right one goes around the vertical line.
Here’s a basic decal, with no special parameter.
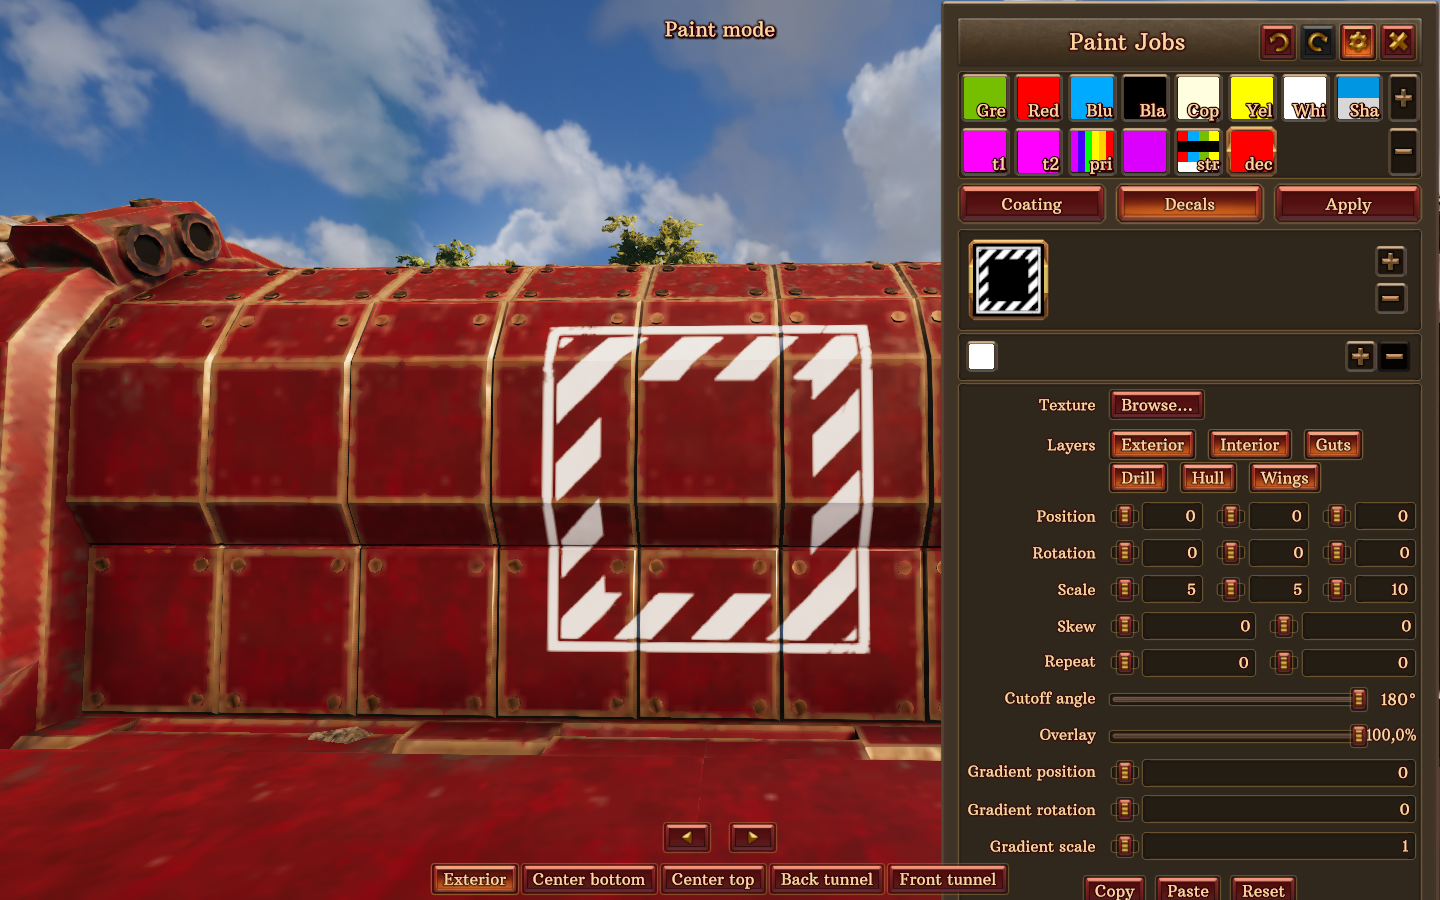
Now, I’m going to put 20 in the left slider :
Here it is with 20 in the right slider (and 0 in the left one) :
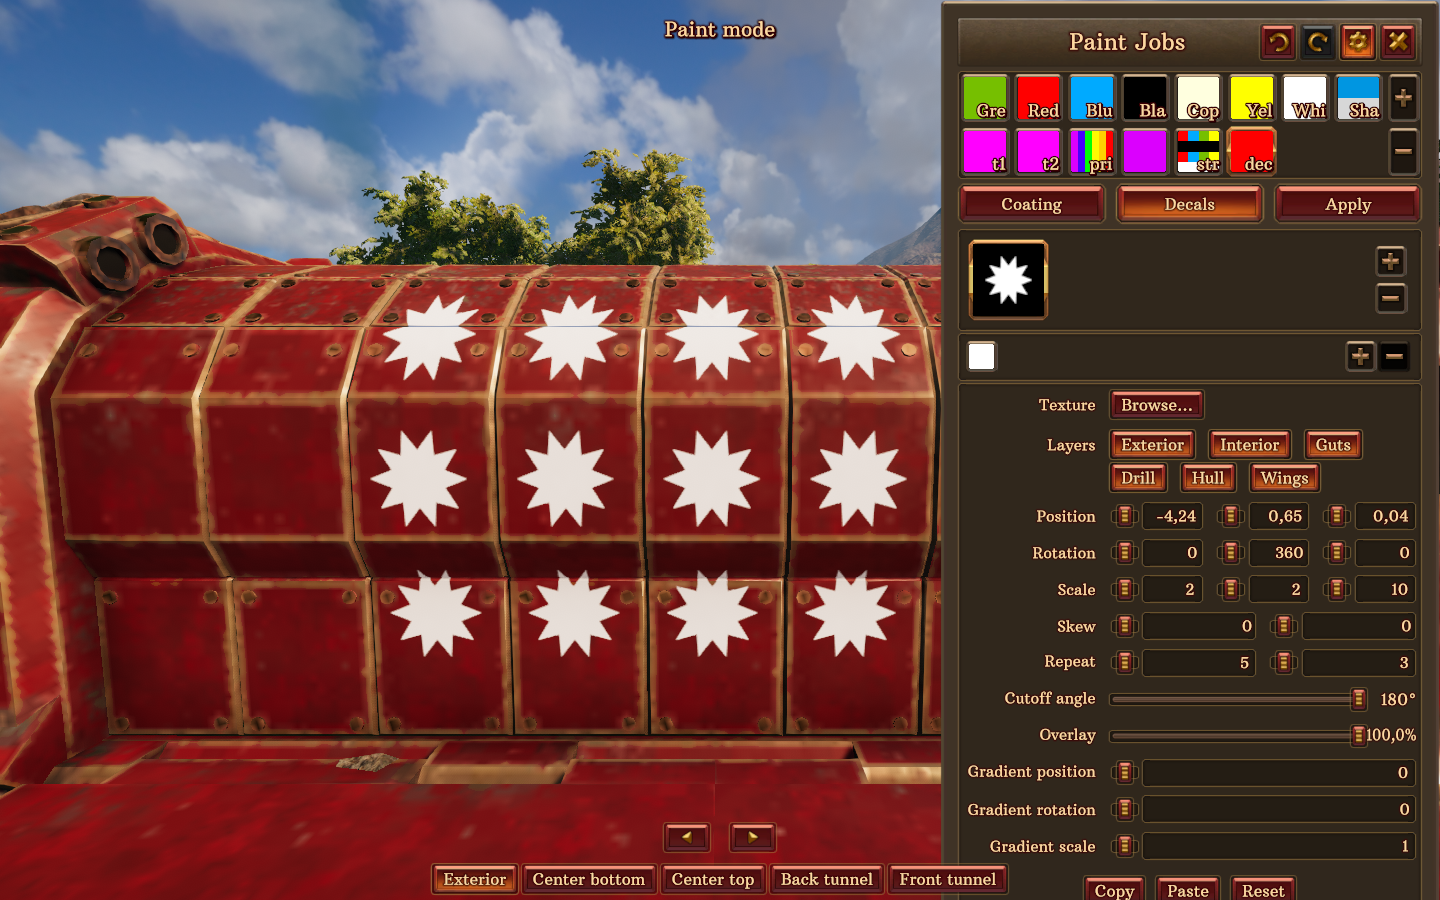
Repeat can be quite useful : it allows to repeat the decal along an axis (or multiple ones). The left slider repeats the decal on the left and right, the right one repeats it up and down.
As you can see in the decal list, I only have one decal. Repeat does not count towards the 4 decals limit.
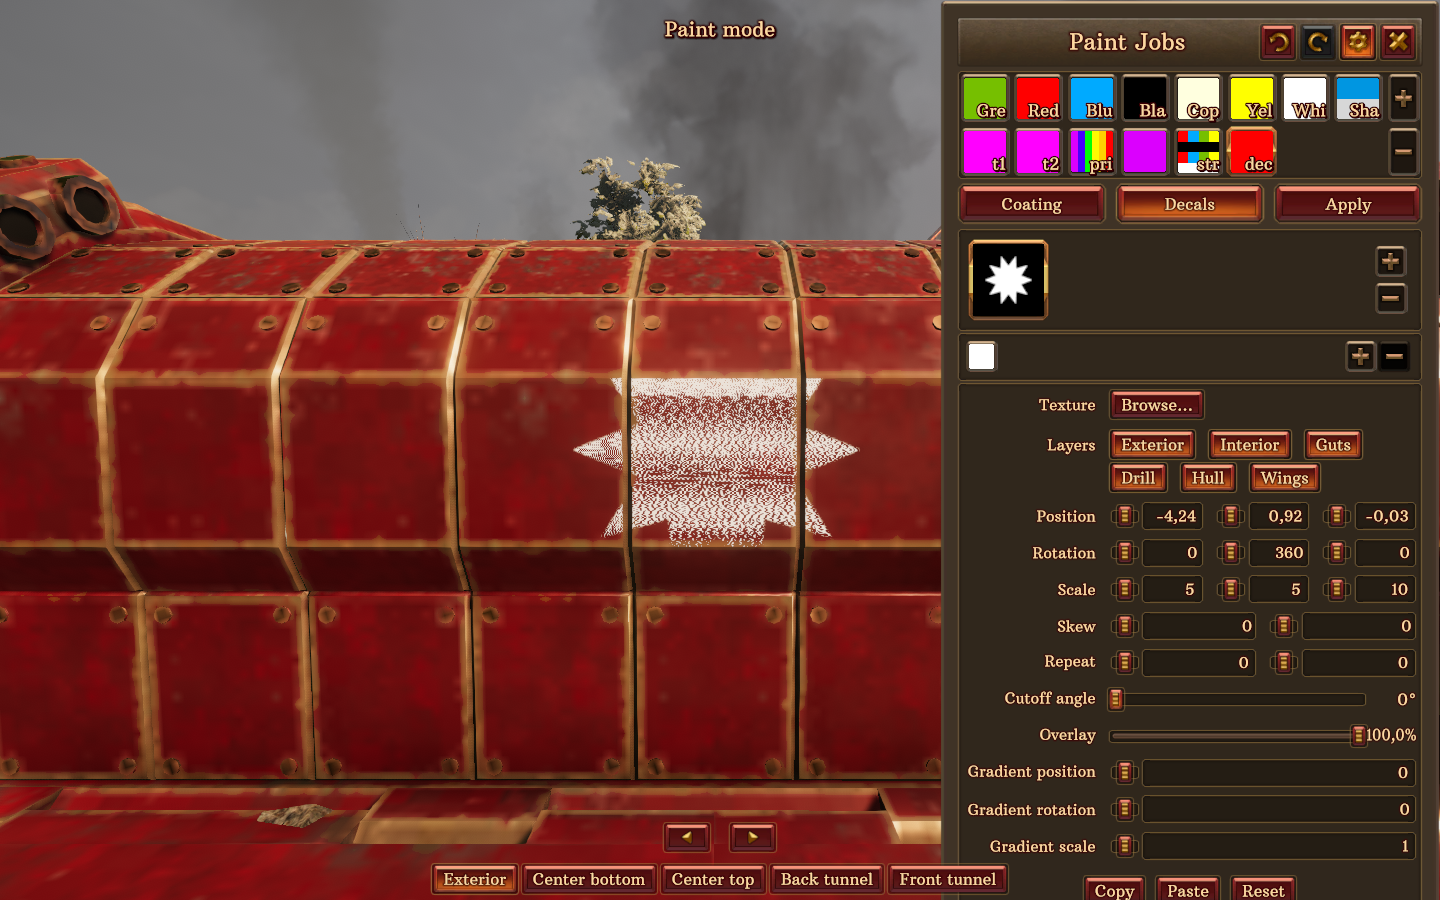
Cutoff angle is similar to the hue slider for coating : if it’s set to 0, the decal will basically disappear. It’s recommanded to leave it at 100°.
Here is cutoff angle set to 0 :
Here it is at 100° :
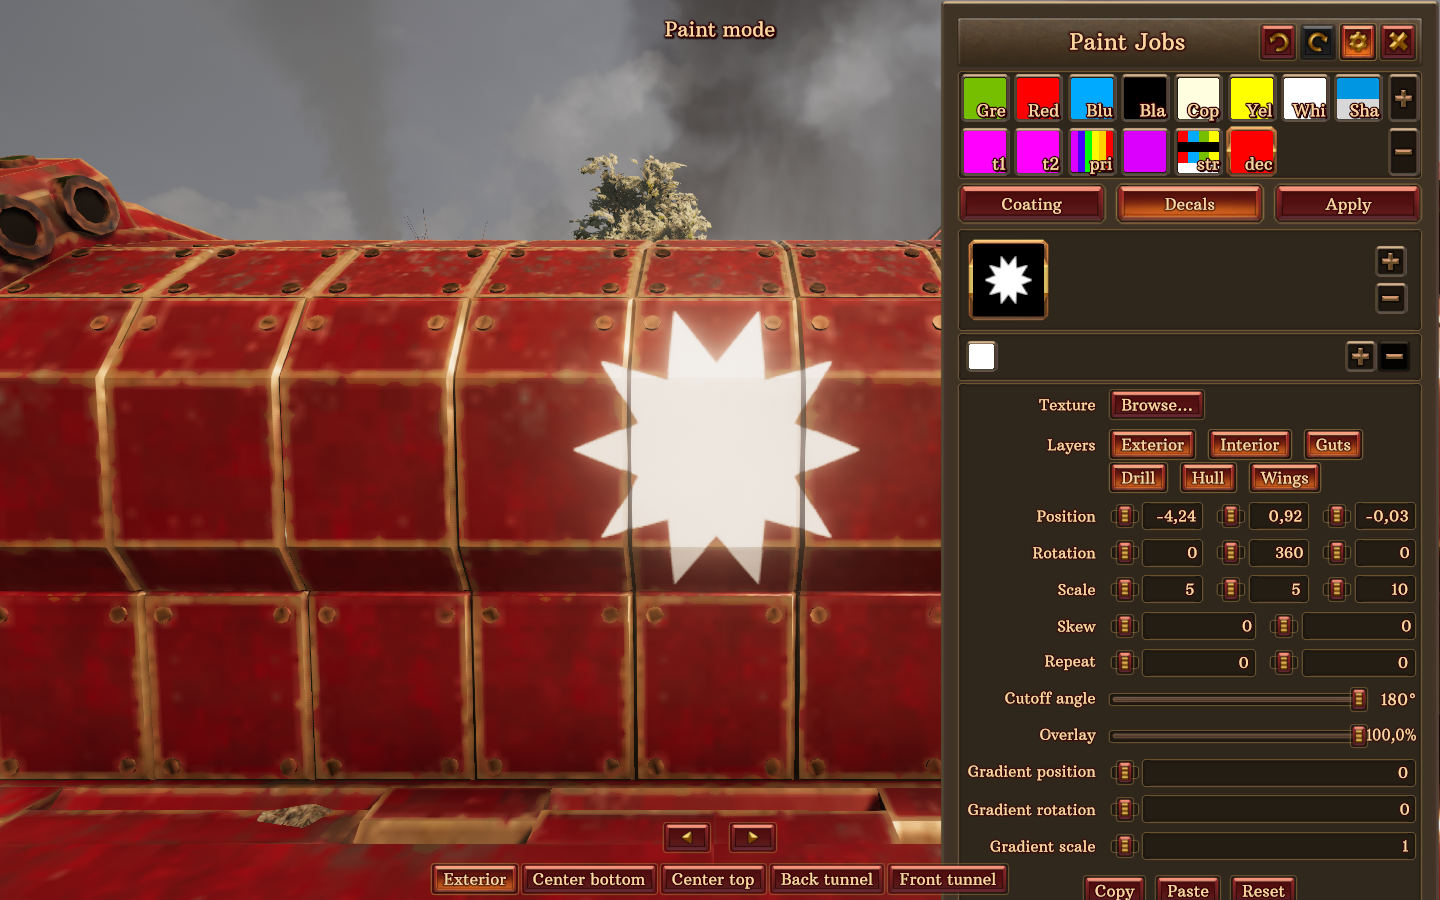
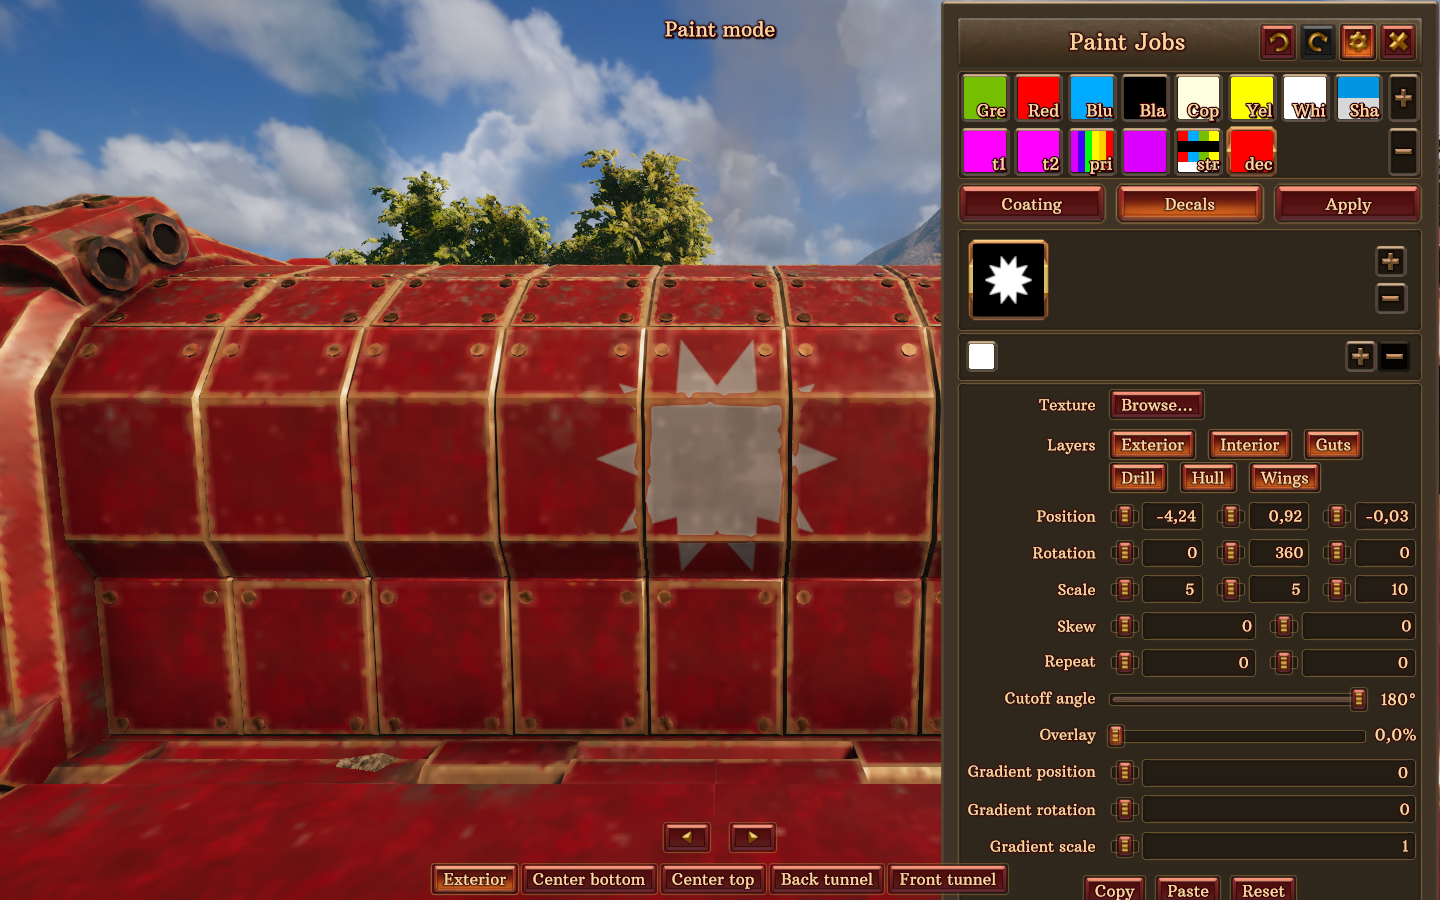
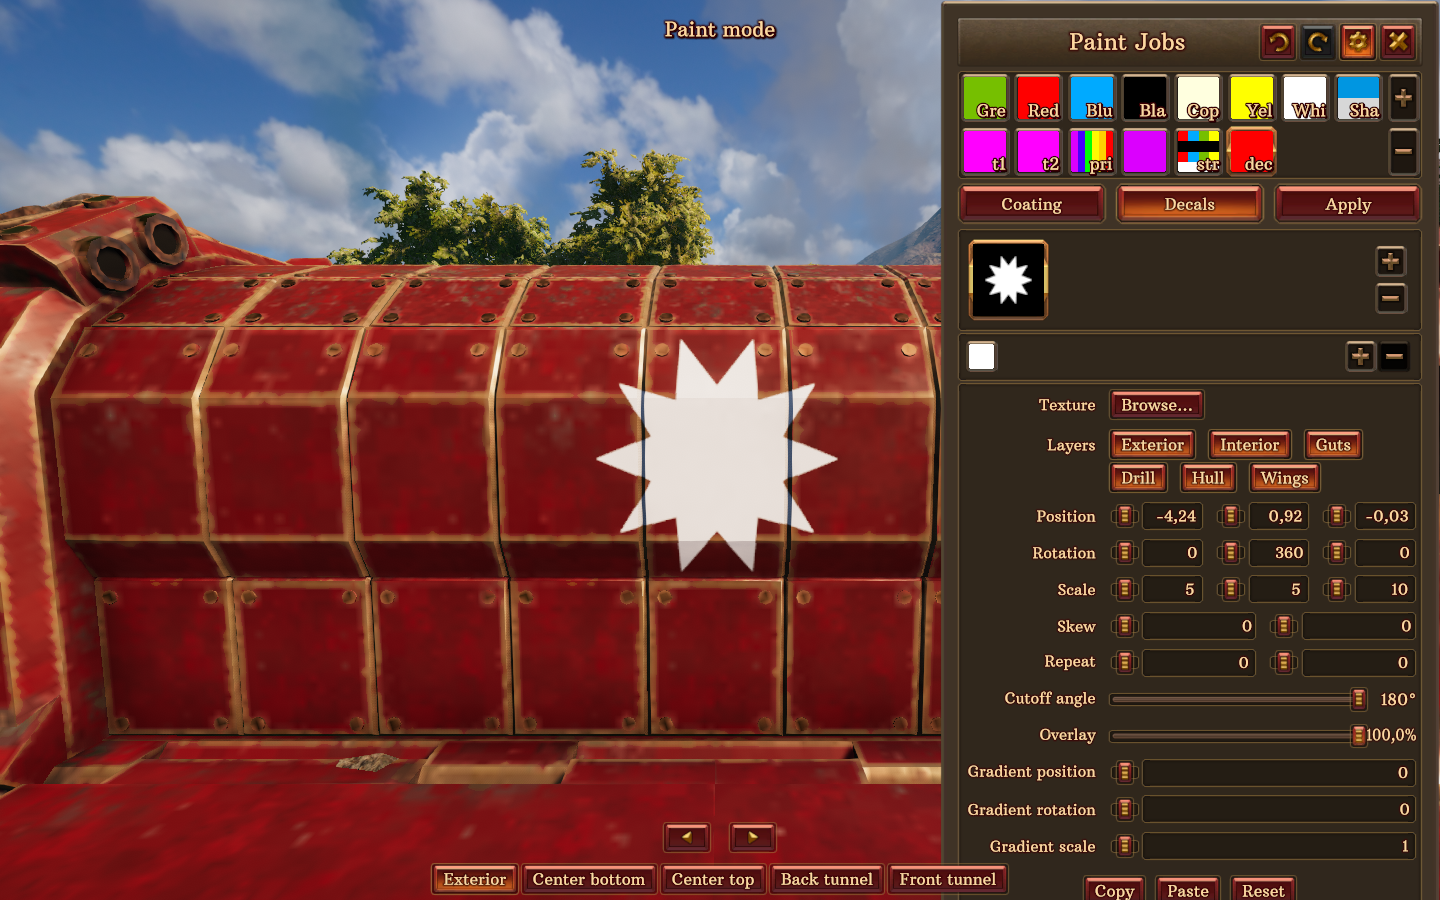
Overlay can be compared to transparency : If you put it at 0, the decal will be hard to see. If you put it at maximum (100%), it’ll be very clear.
Here’s overlay at 0% :
Here it is at 100% :
The last 3 parameters are for the gradient, for if you have multiple colors on your decal.
Gradient position will move the gradient stripes.
Gradient rotation will rotate around what line the gradient goes.
Gradient scale is like “tiling” for coating : it changes how large the gradients are, which makes more or less stripes appear.
The copy/paste buttons at the bottom are exactly what you expect. They will copy the data of the decal you have selected, even the texture, the color, etc.
Advice and advanced techniques
In this section, I will give you some advice and explain a few tricks I found out while messing with Drillship painting.
First off, here’s my advice to those of you who really want a unique paintjob for their ship :
1 : You don’t have to go overboard. One or two stripes, rotate them a little, a few decals here and there, and you can already get a really cool paintjob. There’s no need to have each different cm² a different color, no need to fil the entire ship with decals, etc. Simple can be beautiful !
2 : Mess with the parameters on your own. You can see what each pre-made paintjob has as settings, and use that as inspiration – but everything I taught you in this guide, I learned it by swinging the sliders all around and seeing what changes. Try doing this, change some values, have fun with the stuff ! If you don’t like what it does, you can always undo ; and if you do, you can keep it, and tune it more precisely to get exactly what you want. Don’t wait for someone else to do it for you !
Now, here’s a trick I learned that might interest some of you out there :
Getting more than 4 decals
The 4 decal limit per paintjob might be frustrating in certain situations. Here’s a way to bypass this limit :
Let’s start by this simple situation. I have used the 4 decals for one paintjob.

Now, I want them on the wall next to it too, so let’s apply this paintjob to it :
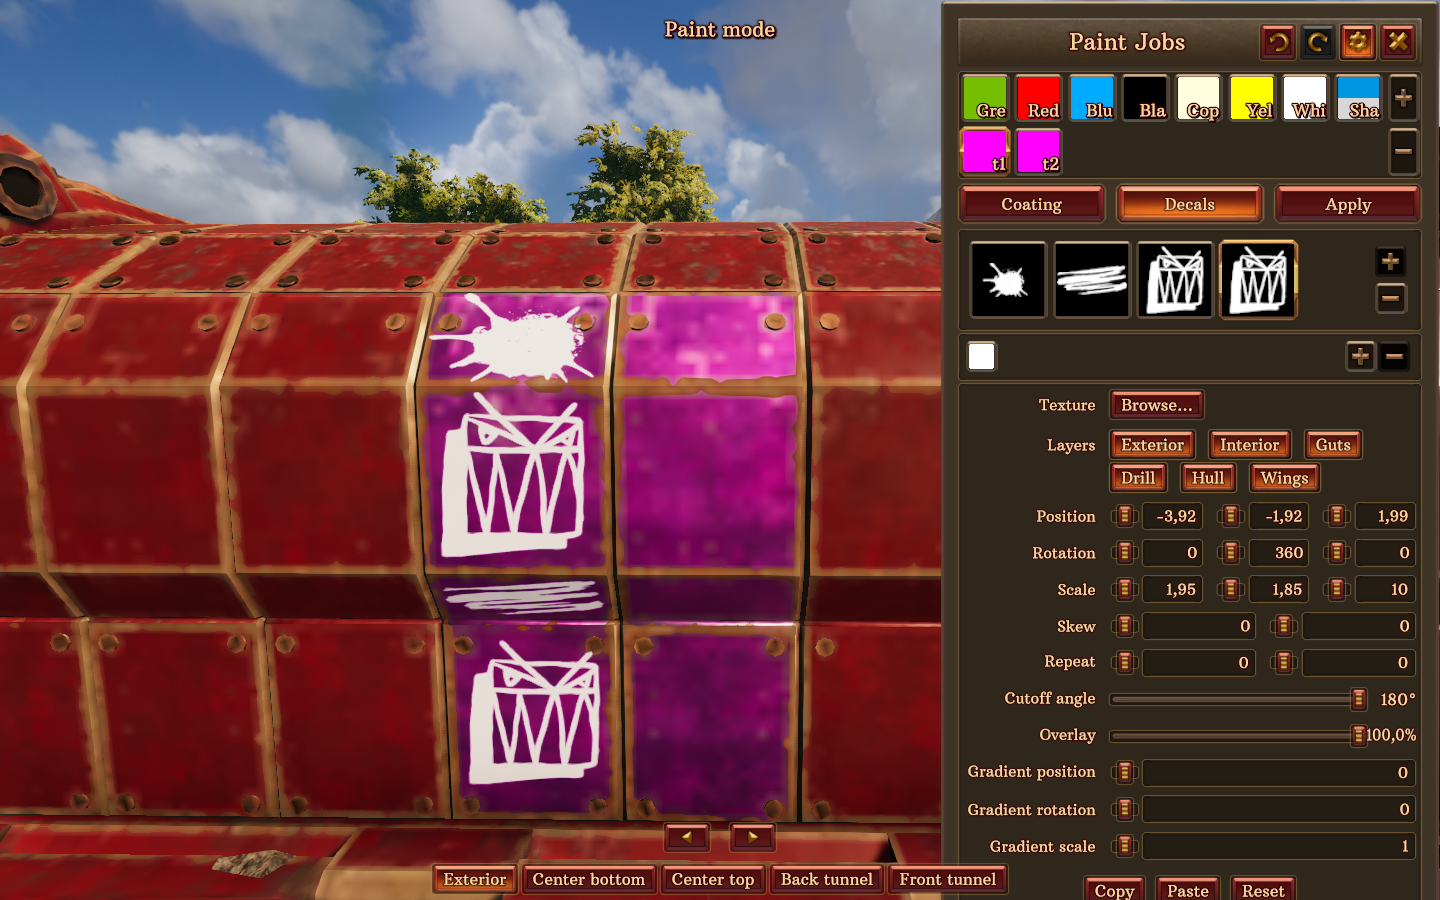
Uh-oh. The decals aren’t there. (The repeat feature might solve some of these issues, but it can be limiting too sometimes.)
Having the same paintjob applied means the decals are shared between these two walls.
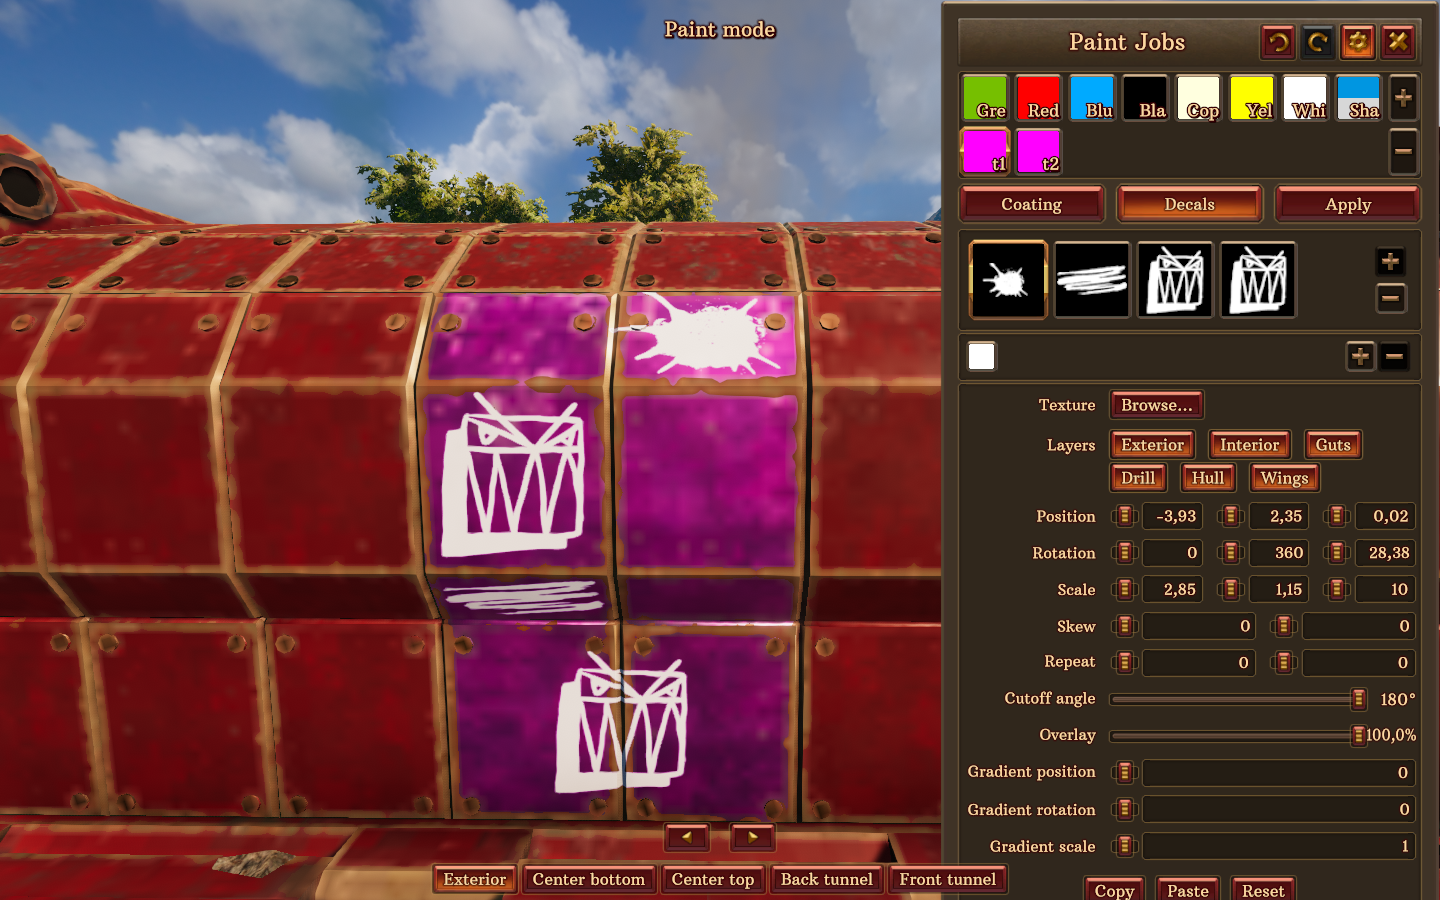
But what if I want different decals ?
Let’s create a new paintjob. Here, I named it “T2”. I gave it the same coating and applied it to the right wall. This means I now have 4 decal slots ready to be used on this wall !
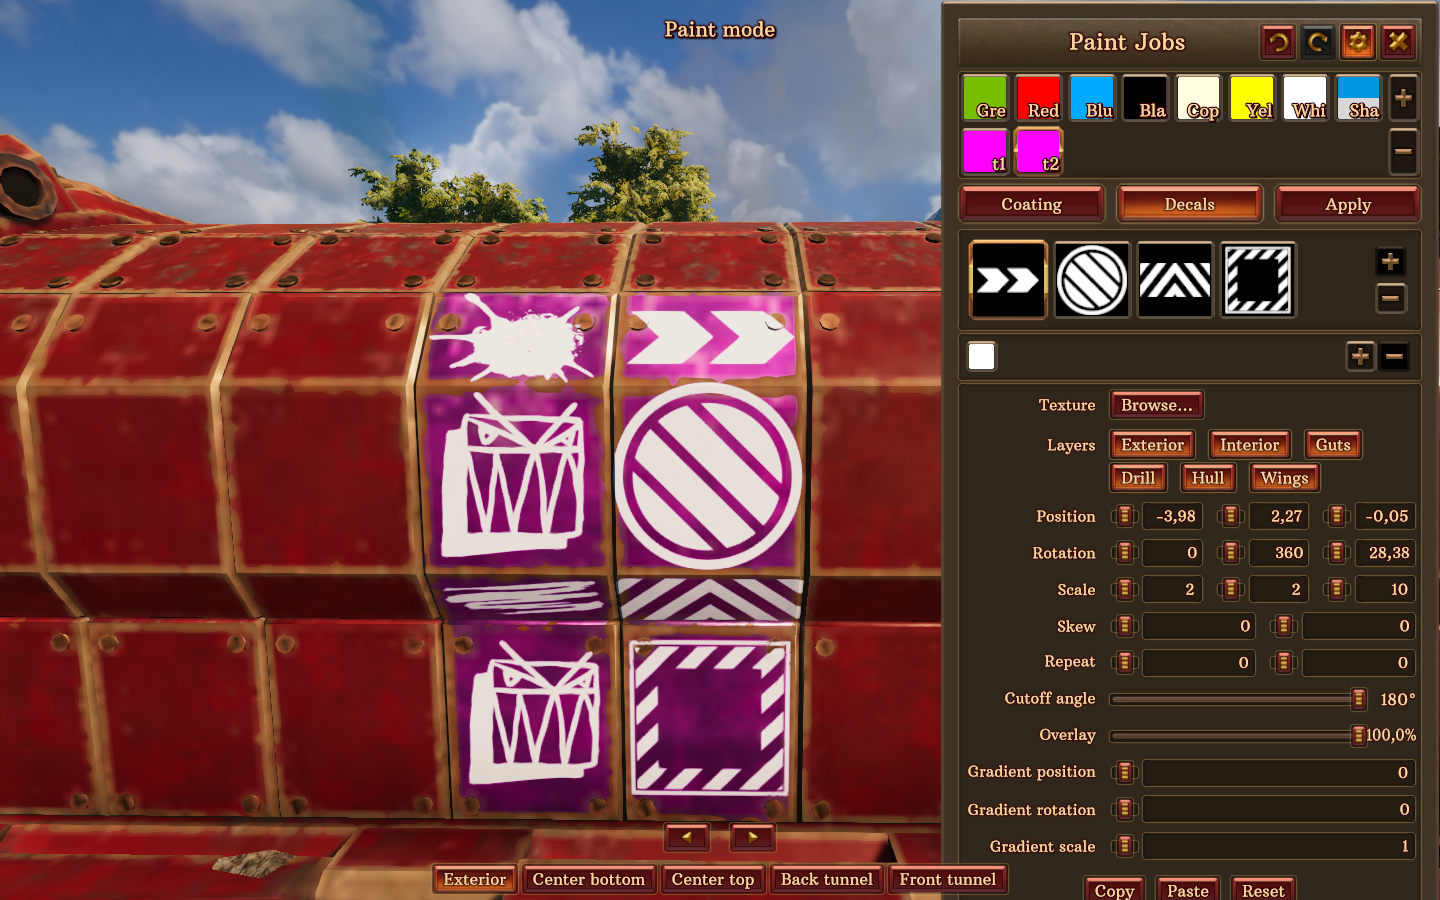
And there you go, you now have 8 different decals on two different walls.
However, note that using this technique has some downsides.
First off, these are two different paintjobs, meaning the decals aren’t shared. You can’t have one on the two walls at the same time, for that you would need to have the same paintjob applied to both walls, which comes back to the original issue of the 4 decals limit.
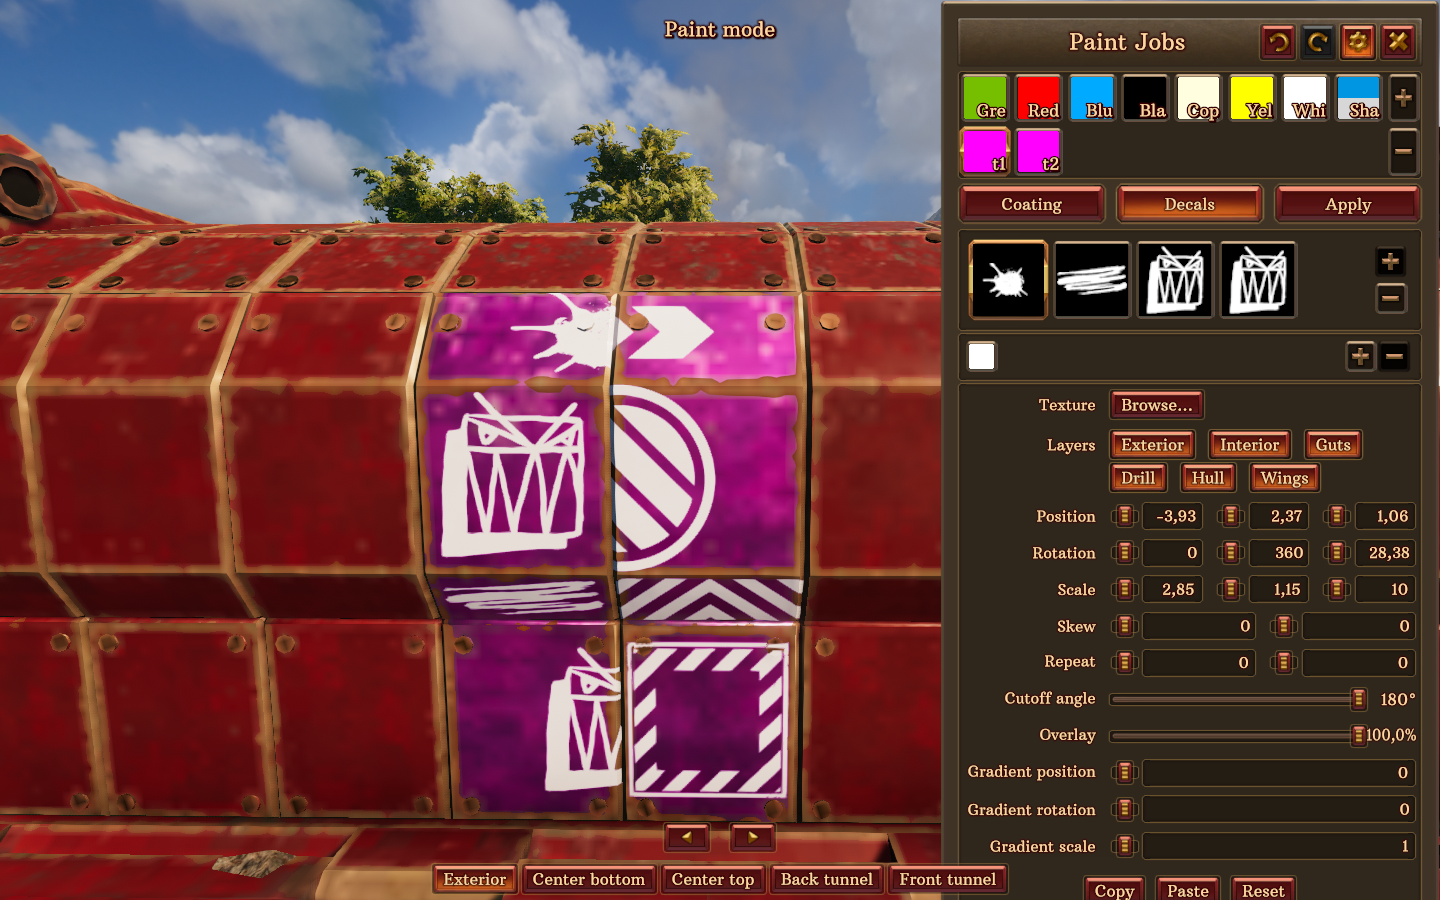
And the other bigger issue, is that this uses two paintjobs. If you use this technique a lot, you will surely quickly hit the 16 paintjobs limit, and I don’t have any tricks to bypass this one. So, use this trick with moderation.
I don’t have other tricks and techniques yet, but I might add more in the future if I find out more ! You can also explain the ones you found in the comment, I might add them here and credit you !
This is all for Volcanoids Drillship painting – a Guide for all hope you enjoy the post. If you believe we forget or we should update the post please let us know via comment, we will try our best to fix how fast is possible! Have a great day!

Leave a Reply