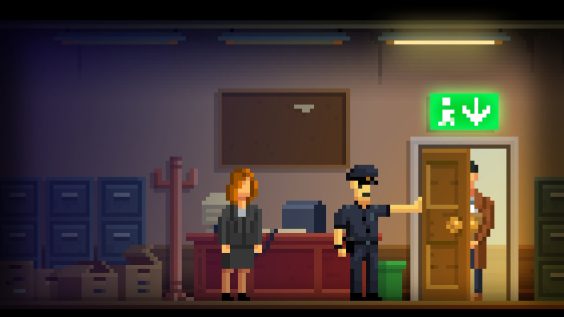
Full text walkthrough with pictures where appropriate, no achievement help
Misc
Raxa, like Dooley, has something to say on every single screen
There will be formatting later
Case 1: Missing, Presumed Darkside
TV Studio
Go right
TV Station Hallway
Talk to Mystic Lady
Take the STAR STAR out of the bin
Enter the Dressing Room
Dressing Room
Take the Crystal, get MELLITE
Take the DIDGERIDOO
Look at Fan Posters, talk to Psychic
(Try to take the Key)
Leave room
TV Station Hallway
Go right
TV Station Reception
Take DELIVERY BOX
Open DELIVERY BOX with STAR STAR, get GLASS BOWLS
Go outside
TV Station Parking Lot
Give GLASS BOWLS to any one of the kids
Pick up BAG OF NUTS
Go back inside
TV Station Reception
Go left
TV Station Hallway
Enter the Dressing Room
Take the LOCKBOX KEY
Go back out
TV Station Hallway
Go left
TV Studio
Combine DIDGERIDOO with BAG OF NUTS, get NUT CANNON
Use NUT CANNON on Squirrel
Go through the door
TV Station Storage Room
Open the Lockbox with the LOCKBOX KEY, get GO BAG
Go all the way to the parking lot
TV Station Parking Lot
Give GO BAG to Psychic
Switchboard Building Exterior
Get CRIME SCENE TAPE from the car
Use CRIME SCENE TAPE on entrance
Enter the building
Switchboard Building Interior
Examine the Switchboard
Go upstairs
Switchboard Building Roof
Search the toolbox, get SKETCHY ADDRESS
Go back outside, enter the construction worker office
Construction Worker Office
Talk to Tyrese, get MANIFEST
Combine SKETCHY ADDRESS with MANIFEST
Leave the office, drive off with the car
Go to the Auction House
Auction House Exterior
Examine the stall, get STALE PIZZA
Enter the building
Auction House Showroom
Take the Faberge Acorn from the bin
Leave the building, drive off
Pier 13
Give MELLITE to the bear, get ROBOTIC BIRDS
Examine SOVIET TECH, get VHS
Go through curtain
Black Market
Look at Transceiver
Talk to Wang, “I need that transceiver”
Go back to the car, drive off
Junkyard Exterior
Enter
Junkyard
Take OLD TUBE OF SOLVENT
Go right
Machinery
Throw STALE PIZZA on crusher/conveyor
Go left
Junkyard
Take broken console, get BROKEN JOYCHILD™
Leave, drive off
Pier 13
Give the BROKEN JOYCHILD™ to Mark, get FIXED JOYCHILD™
Enter the Black Market and go all the way right
Alleyway
Give the FIXED JOYCHILD™ to Man In Big Coat
Go through the vent
Cookie Bakery
Take SEA HAG COOKIES from the box
Leave the room, go left
Cookie Shop Exterior
Give SEA HAG COOKIES to Man With Tiny Hammer, get AUCTION GAVEL
Go back to the car, drive off
TV Station
Go all the way to the Dressing Room
Dressing Room
Use make up on the ROBOTIC BIRDS, get PAINTED BIRDS
Go back to the car, drive off
Pier 13
Go all the way to the bakery
Cookie Bakery
Switch PAINTED BIRDS with the real ones
Go back to Wang
Black Market
Talk to Wang, “I did the thing”, get TRANSCEIVER
Go to the car, drive off
Auction House
Go to all the way right
Bidding Room
Show AUCTION GAVEL to guard
Go through door
Backstage
Take SOVIET MANUAL and LOOM
Go back to the car, drive off
TV Statiion Reception
Give VHS to receptionist
Go outside to the parking lot
Go to the hallway, enter the left door
Edititing Room
Use OLD TUBE OF SOLVENT on the FAKE FABERGE ACORN, get REAL FABERGE ACORN
Give REAL FABERGE ACORN to Marv
Look at tape
Go to the car, drive off
Pier 13
Talk to Mark, get SOVIET TECH
Drive off
Junkyard
Go all the way right
Machinery
Interact with the door
Office
Get TANGLED WIRES
Take art from the fridge, get GREMLIN ART
Go back to the car, drive off
Switchboard Building Exterior
Enter construction worker office
Use mug of tea on GREMLIN ART, get REPLACEMENT PAGES
Go to the car, drive off
Auction House
Go to the Bidding Room
Bidding Room
Use REPLACEMENT PAGES on podium, get PHONEBOOK PAGES
Go back to the car, drive off
Switchboard Building Exterior
Enter the building
Switchboard Building Interior
Use TRANSCEIVER and PHONEBOOK PAGES on Switchboard
Combine TANGLED WIRES with LOOM
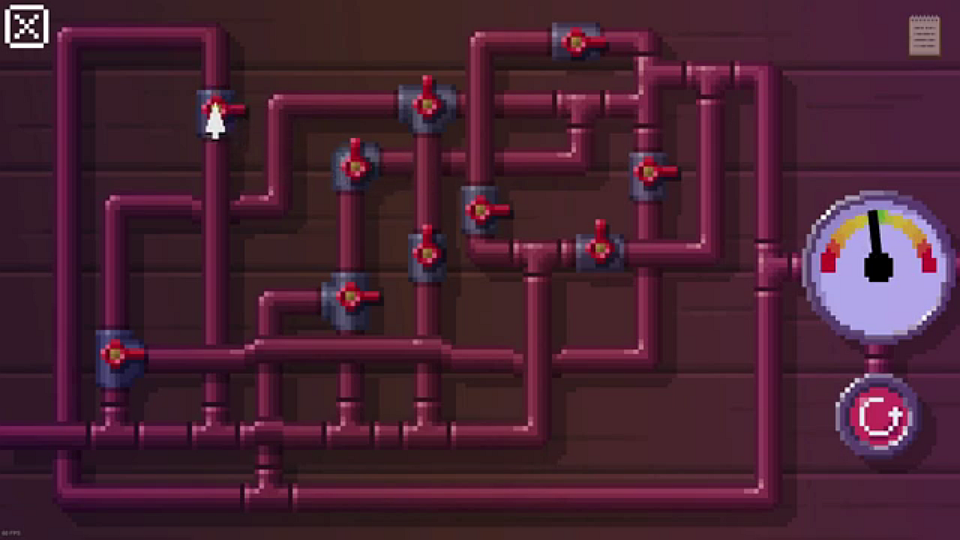
Yellow (uppermost left) one up, blue (bottom left) down, yellow all the way up, green(second from bottom) down, red (second from top) up
Get UNTANGLED WIRES
Use UNTANGLED WIRES on Switchboard
Use Switchboard
Set the wires the the last shape (screenshot coming), then hit dial
Get DOOLEY’S CLUES
Go to the car, drive off
Apartment Exterior
Enter the building
Apartment Interior
Take GYM BAG, search the coat to get CHALK, take CANDLES
Use DOOLEY’S clues on Conspiracy Board
Unselect (turn grey) all locations besides Laundromat, then click the green circular button
Leave Apartment
Apartment Roof
Use CANDLES, CHALK, and GYM BAG on the raised block
CASE CLOSED
Case 2: Twilight Years
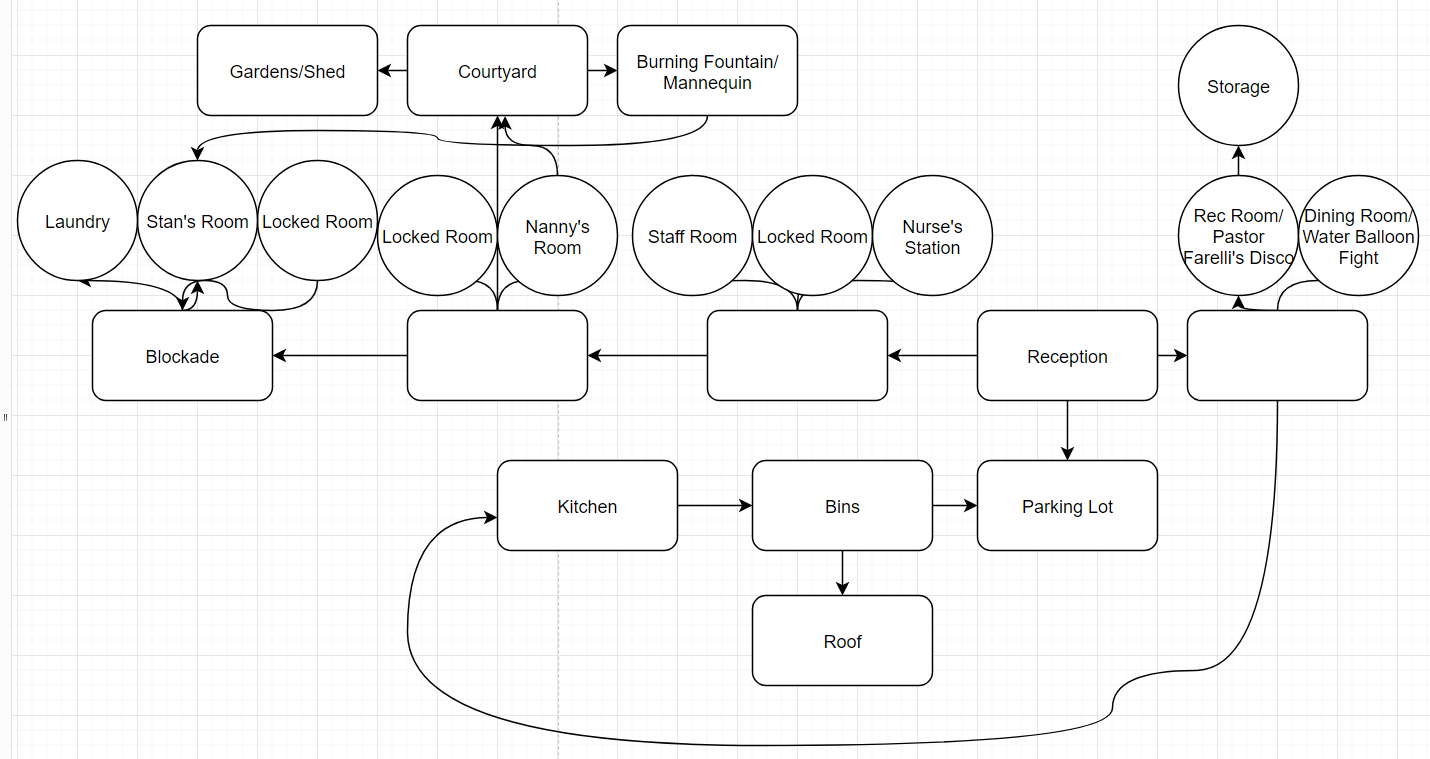
(Click to enlarge)
No “go there” this time due to having a map and location headlines
Parking Lot
Go inside
Reception
Go to Nanny’s Room in the West Wing
Reception
Talk to Receptionist, exhaust all options
Bins
Pick up box, get MEDICAL STICKERS
Climb Ladder
Roof
Grab a BROOM from the collection of brooms
(Talk to the Fair Maiden)
Kitchen
Grab the POTS AND PANS
Take the SCISSORS
Courtyard
Go left, enter the shed
Take the HAMMER
Go right to the fountain
Use the BROOM on the burning mannequin
Put POTS AND PANS on the mannequin
Hammer the POTS AND PANS
Take the armour off of the mannequin, get MAKESHIFT ARMOUR
Grab the fountain topping, get BROKEN FOUNTAIN ORNAMENT
Laundry
Grab TEDDYBEAR
Reception
Use SCISSORS on stack of magazines, get MAGAZINE CLIPPINGS
Rec Room
Give BROKEN FOUNTAIN ORNAMENT to Pastor Farrelly, get SUPER SOAKER
Dining Room
Use SUPER SOAKER on either old person
Take balloons, get WATER BALLOONS
Nurse’s Station
Combine MEDICAL STICKERS and MAGAZINE CLIPPINGS, get DOCTORED (HAHA!) CLIPPINGS
Give DOCTORED (HAHA!) CLIPPINGS to nurse
Take DICTAPHONE
Use WATER BALLOONS on vat of denture gum, get GUM BALLOONS
Parking Lot
Throw GUM BALLOONS at squad car
Grab discarded banner, get BANNER
Roof
Give MAKESHIFT ARMOUR to Fair Maiden
Dining Room
Press the switch
Put DICTAPHONE in TEDDYBEAR, get POSSESSED TEDDY
Combine POSSESSED TEDDY with BANNER, get POSSESSED TEDDY WITH ROPE ATTACHMENT
Put POSSESSED TEDDY WITH ROPE ATTACHMENT on fan
Press the switch again
Rec Room
Use the storage door
Storage
Take the PAPER and the SELF-ASSEMBLY TABLE
Nanny’s Room
Get CUPS OF TEA and SANDWICHES
Take the CREDIT CARD from the shelf
Open the closet
Grab the knitting needles and twine, get KNITTING NEEDLES
Talk to Upsidedown Man In Closet, exhaust options
Leave the room through either door
Burning Fountain
Use CREDIT CARD on lit-up door
Take RED SHIRT
Laundry
Put PAPER in gap under door
Use KNITTING NEEDLES on closet, get CLOSET KEY
Use CLOSET KEY on closet
Grab GARLIC
Grab photo, get CLASS PHOTO
Search dresser, get SMELLY KEYS
Bins
Use SMELLY KEYS on bins
Search the third bin, get FILM PREVIEWS
Nanny’s Room
Combine CLASS PHOTO with FILM PREVIEWS, get EVIDENCE
Show EVIDENCE to Upsidedown Man In Closet
Leave the room and go right once
Staff Room
Take the keys, get HEX KEY
Search the toolbox, get SCREWDRIVER
Take the animal throw, get WHITE THROW
Laundry
Put RED SHIRT and WHITE THROW in the washing machine
Use the washing machine, get DYED THROW
Rec Room
Use SCREWDRIVER on lights, get DISCO LIGHTS
Roof
Put DISCO LIGHTS on lightning rod
Courtyard
Go left
Put DYED THROW in bandstand
Put SELF-ASSEMBLY TABLE in carpeted bandstand
Assemble the SELF-ASSEMBLY TABLE by putting the parts in the right spots on the left, get BÖRKED TABLE
Combine GARLIC and SANDWICHES, get GARLIC SANDWICHES
Put CUPS OF TEA and GARLIC SANDWICHES on BÖRKED TABLE
CASE CLOSED
Case 3: Druid’s Delight
Docks
Enter boat
Take picture, get PICTURE FRAME
Go back out
Enter caravan
Talk to harbourmaster, get SPIRITS
Leave caravan
Go right
Pub Exterior
Enter pub
Pub Interior
Give SPIRITS to bartender, get A PINT
Go back to harbourmaster
Docks
Give A PINT to harbourmaster
Try using the phone
Leave caravan
Go behind caravan (hotspot between telephone pole and caravan)
Examine generator
Go back to main Docks screen
Talk to boatman
Go to the pub
Pub Interior
Take bowl of chips, get GREASY GREASE PAPER
Back to docks
Docks
Combine SPIRITS and GREASY GREASE PAPER, get UNGUENT and BOTTLECAP
Give UNGUENT to boatman, get BIODIESEL
Go behind the caravan
Put BIODIESEL in the generator
Enter caravan
Use phone
Go to the pub
Pub Interior
Combine AMERICAN DOLLARS with PICTURE FRAME, get FRAMED MONEY
Give FRAMED MONEY to bartender, get ONE IRISH PUNT
Leave pub
Pub Exterior
Give ONE IRISH PUNT to taxi
Castle Exterior
Enter castle
Go right two screens
Grove Exterior
Enter grove
Grove Interior
Talk to Officer Dooley, get PIECE OF ROBE
Talk to Archdruid, “I eh, I need to borrow your stick, I think…”, get SHILLELAGH
Talk to teenage girl, get POITIN
Combine SHILLELAGH and PIECE OF ROBE, get TORCH, UNLIT
Examine limestone rocks, get FLINT
Combine FLINT and BOTTLECAP, get TINDER KIT
Use TINDER KIT on TORCH, UNLIT, get TORCH, LIT
Go back out
Grove Exterior
Talk to druid wielding knife, get KNIFE
Go left
Icehouse Exterior
Touch loose rock base, get ROCK
Go right to castle gate
(Castle Gate
Talk to butler, “where could I find a key to the greenhouse?”
Go left)
Greenhouse
Throw ROCK at apples, get APPLES
Go right
Castle Gate
Cut APPLES with KNIFE, get APPLE SLICES
Give APPLE SLICES to butler, get GREENHOUSE KEY
Go right
Greenhouse Exterior
Use GREENHOUSE KEY on greenhouse door
Look at soil thermometer, get SOIL THERMOMETER
Examine herbs, get STANKY HERBS
Go back out
Go to the icehouse
Icehouse Exterior
Use SOIL THERMOMETER on gate
Enter
Icehouse Interior
Pick up strange Os, get THREE PUNCTUATED CIRCLES
Go to the grove
Grove Interior
Show THREE PUNCTUATED CIRCLES to Archdruid
Leave
Go all the way right
Castle Gate
Go through the front door
Castle Lobby
Go upstairs
Landing
Enter the right door
Landing Bedroom
Enter the ensuite
Combine TORCH, LIT and STANKY HERBS, get BURNING HERBS
Use BURNING HERBS on vent
Go back to the landing
Landing
Open attic door with the string at the top right of the screen
Climb ladder
Attic
Enter dollhouse
Dollhouse
Take HURL
Look at windup doll, get WINDUP KEY
Go back to the lobby
Castle Lobby
Use WINDUP KEY on grandfather clock, get COGS
Go downstairs
Kitchen
Go right
Larder
Take COOKING LARD
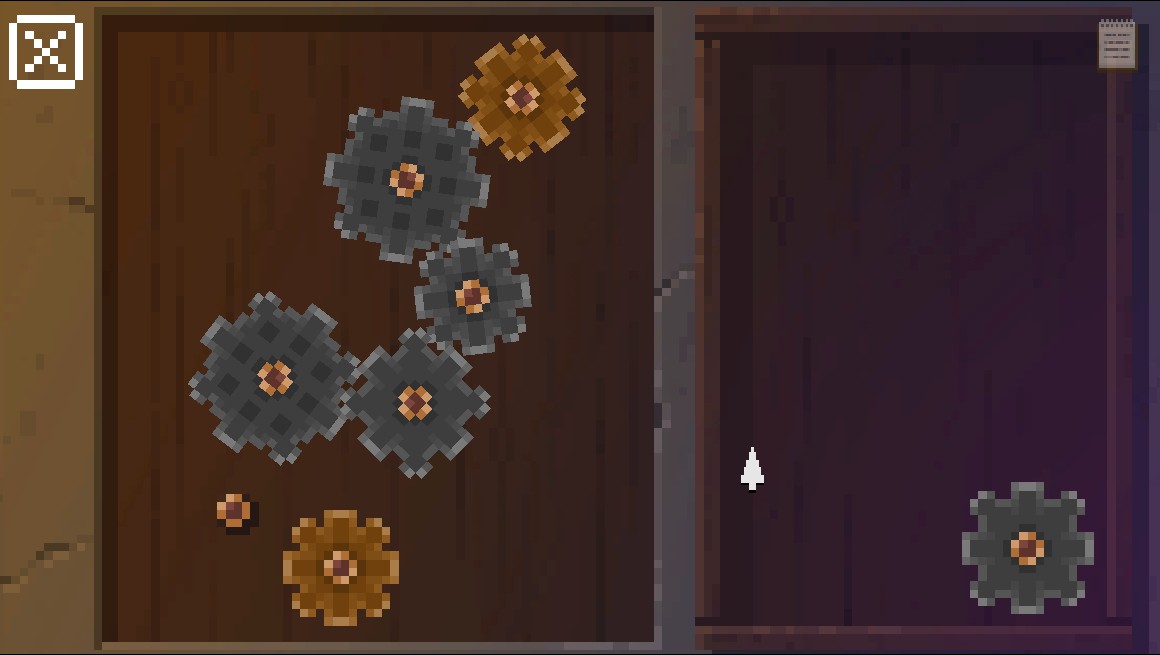
Use COGS on dumb waiter
(Click to enlarge)
Enter dumb waiter
Dining Room
Take VINEGAR
Look at portrait
Look at leftmost statue
Leave room
Dining/Drawing Room Hallway
Look at portrait
Enter dining room
Dining Room
Look at middle statue
Leave room
Dining/Drawing Room Hallway
Enter drawing room
Look at portrait
Go back to dining room
Dining Room
Look at rightmost statue
Go to castle lobby
Castle Lobby
Look at portrait
Go back to dining room
Dining Room
Look at statue second from right
Go to landing
Landing
Look at portrait
Go back to dining room
Dining Room
Look at statue second from left, get ROLLING PIN and SUNSTONE
Leave room
Go to the grove
Grove Interior
Show SUNSTONE to Archdruid
Go to landing bedroom
Landing Bedroom
Use VINEGAR on painting (yay, moon logic), get HANDLE
Go to the icehouse
Icehouse
Combine ROLLING PIN and HANDLE, get CRANK
Put CRANK in the well, get BUCKET OF WATER
Go to the drawing room
Drawing Room
Put out the fire with BUCKET OF WATER, get EMPTY BUCKET
Look at the fireplace
(Click to enlarge)
Go to the greenhouse
Greenhouse Exterior
Put some coal in the EMPTY BUCKET, get BUCKET OF COAL
Go back to drawing room
Drawing Room
Climb secret ladder
Go through door
Secret Room
Put BUCKET OF COAL in coal furnace
Use TORCH, LIT on coal furnace
Put SUNSTONE on rocket
Press button on control panel
Go to the icehouse
Icehouse Exterior
Hit the well with the HURL, get CRANK
Go to the attic
Attic
Climb ladder
Roof
Use COOKING LARD on rusty old doors
Put CRANK into hole in the wall
CASE CLOSED
Case 4: Funfair Dismissal
Carnival Entrance Exterior
Take JUMP LEADS from squad car
Enter
Carnival Entrance Interior
Go left to the cans game
Cans Game
Talk to the game man, get THROWING BALL
Give THROWING BALL to Dooley, get ROBOT TOY
Talk to Norman, hot dog guy, “one hotdog, please”, get HOTDOG
Go left
Animals/Clown Court
Enter the animal enclosure
Talk to Tam, get KNIFE
Leave, enter court
Talk to clown judge
Go to the duck game
Duck Game
Take HOOK
Combine HOOK and HOTDOG, get BAITED HOOK
Use BAITED HOOK on the green duck, get JUDGE’S BOOK
Go to clown court
Animals/Clown Court
Give JUDGE’S BOOK to judge
Talk to clown lawyer, get CLOWN CAR KEYS
Leave
Use CLOWN CAR KEYS on clown car
Carnival Entrance Interior
Use KNIFE on ROBOT TOY, get CIRCUITRY and JAGGED METAL
Put CIRCUITRY into broken elephant
Connect JUMP LEADS to clown car
Start the clown car
Go right
Horse Carousel
Take BALLOON
Take BROKEN HORSE’S HEAD
Cut the BALLOON with JAGGED METAL, get POPPED BALLOON
Attach POPPED BALLOON to broken poles
Use BROKEN HORSE’S HEAD as slingshot ammunition, get MACHINE INSTRUCTIONS
Leave enclosure and go all the way right to the cotton candy stall
Cotton Candy
Talk to the vendor, “could we have some candy?”, get ASSORTMENT OF CANDY
Examine reel for lights below the stall, get LIQUIRICE POWER CABLE
Take T-SHIRT CANNON left of the bear
Go left
Haunted House
Talk to knowledgeable hookman, get HORROR HOOK
Enter house
Go through door to hall of mirrors
Pick third, first, third mirrors
Tesla Chamber
Take ROPE
Leave house
Go to the ferris wheel
Ferris Wheel
Take LADDER
Climb wheel
Combine HORROR HOOK and ROPE, get GRAPPLING HOOK
Combine GRAPPLING HOOK and T-SHIRT CANNON, get GRAPPLING GUN
Fire GRAPPLING GUN at “further up”
Climb rope
Connect LIQUORICE POWER CABLE to RoboChicken
Go right
Tunnel Of Love Entrance
Take loose heart, get LOVE HEART CASE
Go to the duck game
Duck Game
Use LADDER on giant duck
Combine ASSORTMENT OF CANDY with LOVE HEART CASE, get THANK YOU GIFT
Give THANK YOU GIFT to game runner
Take DUCK’S CAPACITOR from giant duck
Go to the tunnel of love
Tunnel Of Love Entrance
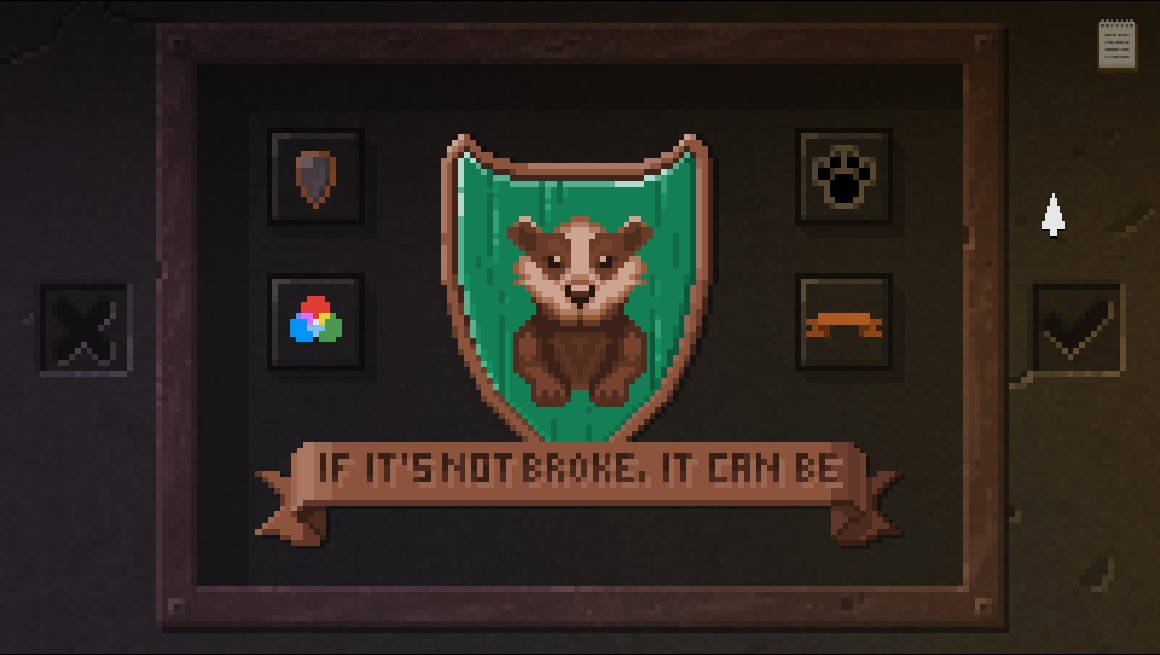
Fiddle with the mechanism
(Click to enlarge)
Go back to Tesla’s room
Tesla Chamber
Give DUCK’S CAPACITOR to Tesla
(Talk to Tesla, “why haven’t you zapped it, yet?”)
Game Show Stage
Talk to Pox, “eh… yes?”
High Striker Screen
Take whip, hoop, and hammer, get WHIP, METAL HOOP, and MALLET
Use MALLET on METAL HOOP, get RESHAPED HOOP
Combine RESHAPED HOOP with WHIP, get HOOK WHIP
Attach HOOK WHIP to hook (side of Pox’s screen)
“Arnival” Sign Screen
Take box, get BOX COVER
Press button
Give BOX COVER to Tommy or Archie
Take the letter L, get LARGE L
Hit the lighting rig with LARGE L
Go right
Box Screen
Grab nail, get LOOSE NAIL
Use LOOSE NAIL on McQueen
Use LOOSE NAIL on everyone else
Open the lid
Fish Belly Lab
(Click on map)
Click on navigation controls, set to 567
Case 5: Royal Fumble
To be continued
Hope you enjoy the post for The Darkside Detective: A Fumble in the Dark walkthrough, If you think we should update the post or something is wrong please let us know via comment and we will fix it how fast as possible! Thank you and have a great day!

Leave a Reply