Introduction
Good day and welcome to the Quake Champions community!
First off, I’d like to inform you that English is not my main language but my second and I have mostly learned it through self teaching. So if you see any badly structured sentences or unpolished text, please excuse me.
Second, I’d like to inform you that this guide was written based on the June 6 update of 2018. So if the newer patches have changed some features or numbers, do not be confused as I will not update my guide to the latest patches since the game is still in Early Access and is receiving many different ones.
While you’d think with the addition of different champions with different stats and abilities would make the match come down to what champion you’ve picked, I must inform you that you could not be more wrong. While champions are added to fit the game into the new generation of games (where players seem to enjoy having different classes and abilities), the core of this game is still a Quake arena game. So no matter what champion you choose, you can’t win unless you know how to properly use every gun. Because by the end of the day it all comes down to using the weapons, along with other things such as Health and Armor stacking, strafing and etc. However this is not to imply that character abilities do not matter. They do, but they are only there to fit the player’s play style.
The purpose of this guide is to share with you my knowledge and understanding of the Quake Champions’ weapons; Learning their strengths, weaknesses, correct use and tactics. However I will share only most of my knowledge. The rest I will leave for you to learn by yourself.
If you have never played any of the previous arena type Quakes (Quake 1 & 2 multiplayer, Quake 3 and Quake Live) before then this guide will be of most use to you. If you have, it will still provide you with some very useful information and tactics.
Now, let’s get you started so you can start gibbing!
Terms and Basics
There are a few terms and basics you need to know about before heading onto the main information:
First of all if you’ve played any other game similar to the Quake arena games, you’ll know that the key to staying alive is moving. You have to stay on the bounce. Stopping can mean death (though not always). There are skills that are necessary for you to learn; You have to learn to run and gun, lock your aim on a moving target, predict where your enemy’s next position will be and many other skills but don’t let the number scare you away. These are all skills which you can and will develop throughout your gameplay.
Right now we’re just here to talk about the weapons and how to use them.
Now, let’s get started with some of the terms you need to know:
-
Hit-scanning Weapons:
The term “Hit-scan” or “Hitscan” is used for weapons that when fired, hit their target without any delay. As it is the term in most games (Half-Life, Counter-Strike, Call of Duty, Team Fortress and etc.).
In other games like Arma, Battlefield or Starwars Battlefront where it takes time for the bullet to reach its target, they are not considered Hitscanning weapons, even though they may shoot bullets. They are called projectiles which are explained below. -
Projectile:
Projectile weapons are those that when fired create an entity bullet. Meaning that the bullet enters the world as a separate entity which will travel on its own direction and distance at a visible speed . For example, an RPG is considered a Projectile Weapon because you can actually see its rocket traveling the distance while a rifle at close range is considered a hitscanning weapon.
Most projectile weapons (such as the ones in Quake) can be dodged depending on its speed and distance from you. -
Shots to the Limbs:
Unlike most games, Quake Champions does not have a different damage multipliers for hitting the arms and legs. It doesn’t matter which body part of your opponent you hit. Whether you hit his torso, arm, leg, toe or even his head, the damage output will be the same.
-
No Headshots:
As mentioned, hitting your enemy in the head will not deal any extra damage.
Although finishing off an enemy with a Heavy Machine Gun bullet or Railgun shot to the head will award you with the Headshot medal, it will still not inflict any extra damage to your target. -
Health and Over healing:
-
Max Health:
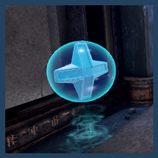
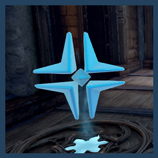
The maximum health is the amount of health the player can heal back up to by using Health Orbs.
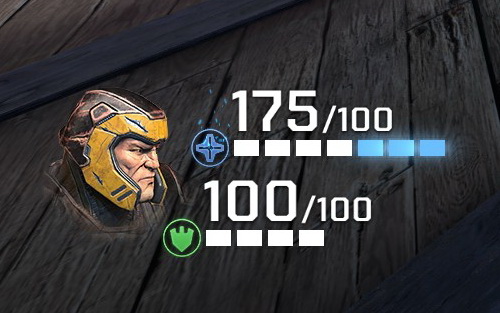
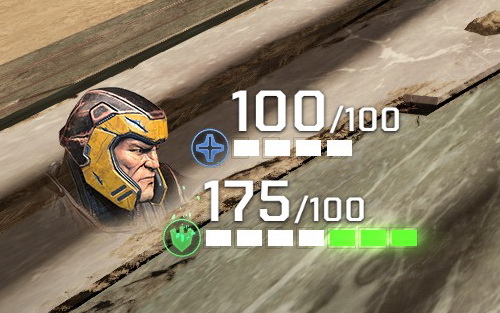
The term Over Heal or Over Health is an extra amount of health the player can gain which will go beyond his maximum health. The obtained extra health will gradually decrease back to the maximum health with the passage of time (1 point per second). It is similar to Team Fortress 2’s Medic Gun Overheal.
Currently the only two pickup items that can grant you overheal are the Mega Health and Strogg’s Stroyent cells. -
Spawn Health:
The Spawn Health is the amount of health you spawn in with which is 125 (since the June 6 update). 25 points more than your max health which is considered as overheal.
This “25 extra health” feature was added to decrease the number of Spawn Kills.
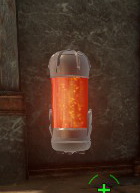
Health Orbs heal the player’s health by 25 points. They do not grant overheal and respawn every 15 seconds. A prefect item to restore your health. They are usually placed around the map in singles or duos.
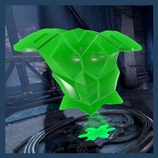
The Mega Health will heal the player by 100 health points. Should the player be full on health or need less than 100, he can gain up to 75 points of overheal. The Mega Health respawns 30 seconds after being picked up.
This item usually spawns in areas where you’re vulnerable to fire from many directions. So be careful when reaching for it.
The only other pickup which can grant the player overheal is Strogg’s Stroyent Cells.
These cells are dropped from players killed by Strogg players (assists don’t count) and can only be seen and picked up by Strogg players of both teams. Each cell grants the player 25 health and can also grant overheal. -
Armor Damage Intake, Base, Max and Overcharged Armor
Again like the health system, each player will start with a base armor and maximum armor and can increase it beyond the maximum limit which we call Overcharged Armor. Just like the overheal, this extra armor will decrease with the passage of time until it reaches the maximum armor amount (1 point per second). -
Armor Damage Intake:
When a player has armor, the damage he receives is not simply divided between his health and armor. Approximately 66.6% (2/3) of the taken damage is absorbed by the Armor while only 33.4% (1/3) of the damage is drained from the Health. For example, if you were to be hit by a direct rocket (which deals 100 damage), your armor will decrease by 67 points while your health will only decrease by 33. Therefore even if your health is much lower than your armor, you can still survive a great deal of damage without getting killed. So always try to keep your Armor stacked up and overcharged.
-
Max Armor:
The maximum amount of armor a player can obtain using Shields.
-
Base Armor:
The amount of armor a player spawns with which is lower than the max Armor and in the case of light champions, none existent.
-
Armor Pickups:
Armor Shards: Armor shards are drop from killed players and grant the player 5 armor points each and can overcharge him. Each killed player drops 3 armor shards.
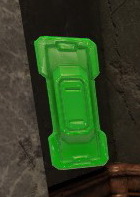
Shield: Shields grant the player 50 armor points. They have specific spawn points in each map and will respawn 30 seconds after being picked up. They do not grant overcharge.
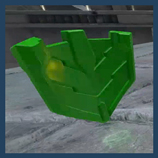
Mega Armor (also referred to as Red Armor or Heavy Armor) grants the player 100 armor points. Should the player’s armor reach its maximum limit, the extra armor will be granted as overcharge up to 75 points. The Mega Armor respawns 30 seconds after being picked up.
This item usually spawns in areas where you’re vulnerable to fire from many directions. So be careful when reaching for it. -
Weapon Spawn Locations
Knowing the exact location of each weapon is vital in competitive games. As soon as you spawn into a match you need to start picking up better weapons and stack up on weapons, ammo, health and armor.
While weaker weapons may be located around the map, the stronger ones such as the Rocket Launcher, Lightning Gun and Railgun can spawn in dangerous areas like choke points or open places where you are either vulnerable or find yourself in a bad position to fight (same goes for Powerups and Mega pickups). It is necessary to be prepared when trying to reach for the bigger guns as you may pick a fight just by going there.
How much health and armor each champion has can be vital information in knowing how much damage they would need to be killed which is explained at the Champion Related section of this guide.
Now, let’s start with the weapons already:
Gauntlet
Tags: Starter, Melee, Finisher, High Damage
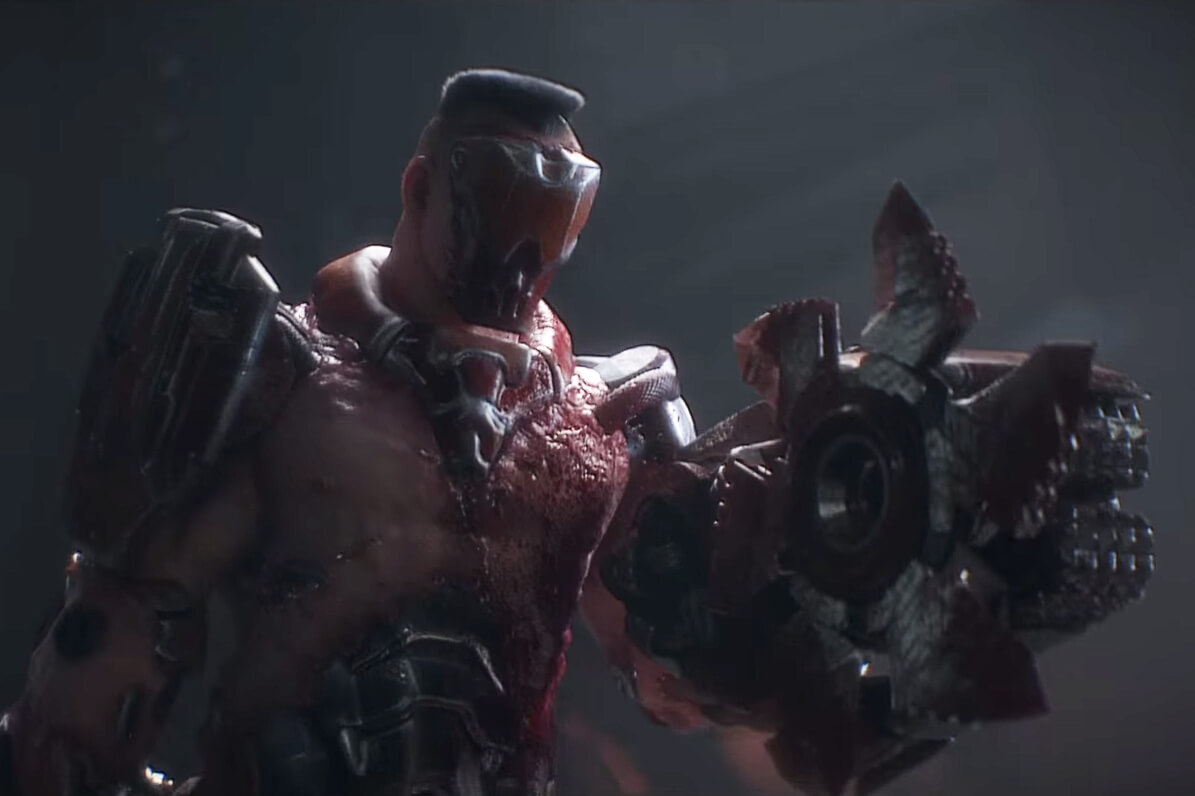
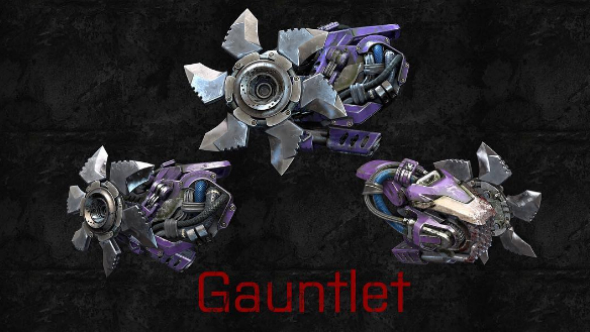
The Gauntlet serves as Quake’s melee weapon. It is worn on the hand like a gauntlet (as the name says) with a big sharp spinning fan-like blade attached with meat grinders underneath. It is given to all players no matter what Game Mode is being played (even in Instagib).
Its maximum range is about 1 meter and will deal 75 damage per hit. Whenever a player is hit with the Gauntlet he is pushed back a little to avoid getting instantly killed. The Gauntlet is considered a finishing weapon rather than an active one. Meaning that you should use other weapons to decrease your targets health with until it is considered low and then move in with the gauntlet for the kill.
While it may seem dangerous and stupid to run at your opponent with a melee weapon, it can be useful and necessary to do so in certain situations. Mostly in tight places where there’s not much space between you and your target.
Upon killing an enemy with the Gauntlet you will earn the “Humiliation” medal. Simply because its humiliating to get killed by a melee weapon when you’re wielding a bigger weapon such as a Rocket Launcher.
When running at your enemy with the Gauntlet, it is vital to acknowledge what weapon your opponent has as some weapons can ruin your tactic or severely influence it for the better or worse;
- Heavy Machine Gun: If your opponent is holding a HMG, then there’s really not much to stop you from charging at him with the Gauntlet other than the distance.
- Super Shotgun: If he has a Super Shotgun, he may shoot you from point blank dealing 140 damage which MAY result in your instant death. Or he may panic, miss his shot and give an open opportunity to kill him.
- Super Nailgun: Since the Super Nailgun does 20 damage per hit and at close range not much estimation of the target’s movement is required, you may be shred to bits by all the Nails he’s gonna throw at you. So it is advised not to use the Gauntlet in this situation.
- Tri-bolt: This one is a 50-50. If your opponent has good aim, he can fire up to 3 direct shots in your face per click or he might miss you completely. Not really anything advised here other than the usual “close distance” situation.
- Rocket Launcher: If your enemy is holding a Rocket Launcher then it will most likely go down bad for you. Your opponent will probably shoot rockets at your feet which will throw you around a little bit, messing up your movement and dealing damage to you. If he lands a direct hit on your face then it will deal 100 damage which may kill you instantly. There is also a slight chance that he will panic, start spamming rockets without much aim and end up killing both you and himself. Overall it’s not advised unless you are right infront of his face.
- Lightning Gun: The Lightning gun has a push-back force which will keep pushing you back and stalling you which will result in you dying before even reaching your target. So again, not advised unless you are right infront of his face.
- Railgun: If your enemy is holding a Railgun, there’s a high chance that he will get scared and miss his shot, giving you an open opportunity to shred him with your Gauntlet. The Railgun’s slow reload time makes leaves your opponent vulnerable as he cannot switch weapons during this time either. However, players with a higher level of skill may shoot you accurately and possibly kill you.
While we did read what could happen in each scenario, they can still all be ignored if you’re close enough to the enemy. By that point it won’t matter if he’s even got a Rocket Launcher. You take out your Gauntlet and slice that guy into pieces.
So don’t be scared of using it. I only described the worst case scenarios of each weapon. Not what usually happens. What usually happens is that you slice away and p*ss of the opponent…well, not that much. If he’s been playing QC for a while he won’t get p*ssed. More of a “Damn it! I should have…” or if he’s really calm, he might even applaud you in his head. So don’t be afraid to use it. It feels awesome!
Starter weapons
Starter weapons are the three weapons you are allowed to pick from for spawning with and cannot be picked up from the map or killed players. These three weapons consist of Machine gun, Nailgun and Shotgun.
Because of their low damage It is advised that you look for a better gun as soon as you spawn/respawn into a match. Although while they are considered weak and starter weapons, they are still able to do serious damage if used correctly, so do not underestimate them.
Now let’s have a look at each of them:
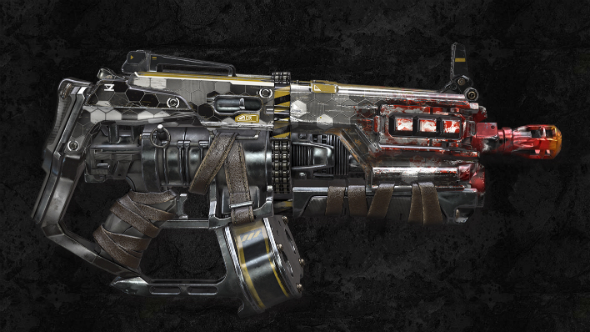
Machine Gun:
Tags: Starter, Hitscan, Rapid, Close-Long Range
The starter Machine gun (also referred to as Weak Machine Gun and Starting Machine Gun) fires hit-scanning bullets in a rapid state with very small (but considerable) delay between shots with each shot dealing 9 damage. This weapon is mostly useful for medium to long range.
Because of its low damage and slow firing speed, it is recommend to avoid any fights until you pick up a better weapon.
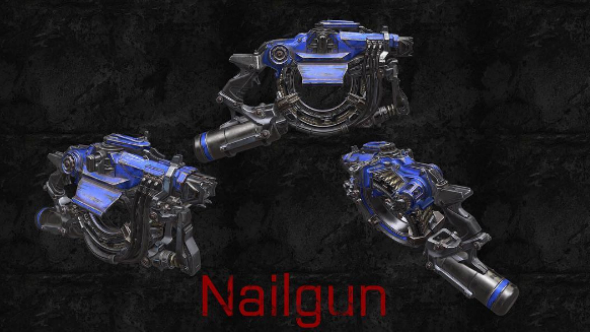
Nailgun:
Tags: Starter, Projectile, Rapid, Close-Medium Range
The Nailgun fires nail-like projectiles in a rapid state with each nail dealing 10 damage. The nails explode on impact creating a very small splash radius (less than half a meter) which can damage the user if his distance from his target is not kept. The nails also have a small push-back force which is greater in the Super Nailgun. This weapon is most useful at close to medium range because of its projectile based nails. Also because of its projectile based nails which travel with a slow speed and are visible, your opponent can side-step every one of the nails if you aim directly at him. If you want to land your shots it is vital that you estimate where your moving target is heading before firing. For example, if your target is heading from the right of your screen to the left of your screen, you must fire ahead of him (left of him) based on how much his speed, your distance and your projectile speed is. If he is close, you’ll only need to aim a bit left. If he’s further, you have to aim further left. This is a skill which you will develop the more play and use projectile based weapons so no worries on the calculations.
At longer ranges it takes a long time for your nails to reach their target and by then your opponent has moved out of the line of fire. So at longer ranges it is best to switch to another weapon or avoid fighting to look for a better weapon.
The Nailgun also has a special blind fire tactic for hitting an enemy as he emerges in your sight which I will explain in the Super Nailgun section.
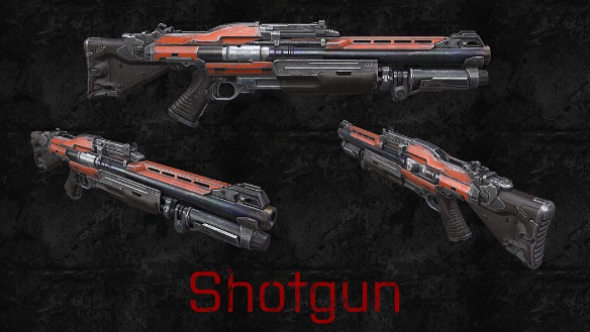
Shotgun:
Tags: Starter, Hitscan, Close Range, Slow Rate of Fire, Finisher
The starter Shotgun fires a spread of hits-canning pellets at your aiming direction, with each pellet dealing 5 damage. Its damage output is determined by the number of pellets that hit your target which depends on the distance and your aim. If only one pellet hits, it deals 5 damage while if all your pellets hit it will deal 90. Landing all pellets will also earn you the Point Blank medal.
This weapon can be deadly at close range (with good aim) and almost useless at far range. So if you are holding this weapon and confront an enemy further away from you, it is best to avoid him and look for a better weapon. If evasion is impossible, then you must close the distance and land direct shots on his torso to make sure all your pellets hit.
Additional Stats Info:
Number of pellets per shot: 18
Fire pattern: Two rings of 9 pellets
Heavy Machine Gun
Tags: Hitscan, Rapid, Semi-Finisher, Close-Long Range
The Heavy Machinegun (also simply referred to as Machine Gun) has an almost fast rate of fire with a long accurate range with each hit dealing 10 damage. The Heavy Machine Gun is the only weapon to deal more damage when zoomed in.
When zoomed in, the HMG’s rate of fire will be decreased but its accuracy and damage will be increased, making it much more effective at longer ranges. Damage output is increased to 15 damage per shot when zoomed in, great for finishing off injured enemies from afar.
This weapon is useful at medium ranges where you can rapidly fire at your target dealing 10 damage per hit. With enough distance using the scope can result in both better and worse results depending on your aim. But using the scope is mostly suggested for finishing off injured enemies or taking small chunks out of their health.
Because of its low damage it is advised to use this weapon only when your target’s health is low or when you have no other better weapon in hand for the situation.
If you manage to decrease your targets health below 40%, this weapon can finish him off pretty good because of its hit-scanning bullets and rapid firing state.
Using with Quad Damage: When you have Quad Damage picked up, this weapon can become pretty deadly with each hit dealing 40 damage and each zoomed in hit dealing 60 damage. The base health+armor for most champions (which are the Medium champions) is 150, so if you shoot at them unzoomed, they will only require 4 hits and if fired zoomed in, they will only require 3 hits.
But still other weapons such as the Super Shotgun and Super Nailgun are more advised to use when Quad Damage is active. Although again, you can switch to the HMG at the end to finish them off quickly.
Stat Info:
Normal: 3×40=120, 4×40=160
Zoomed: 3×60=180, 4×60=240
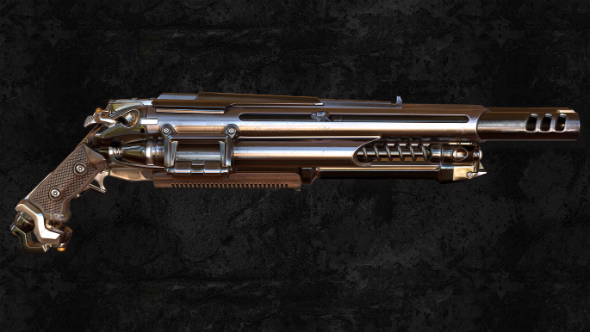
Super Shotgun
Tags: Close Range, Finisher, Slow Fire Rate, High Damage
The Super Shotgun (also referred to as Double Barrel Shotgun) can be a deadly weapon in the right hands. Once again like the starter Shotgun, its damage output is based on the number of pellets that hit your target which depends on the distance and your aiming. So try to use it in close quarters and always aim for the torso.
The amount of damage you can deal with this gun ranges from 5 (which is when only 1 pellet hits) to 140 (when all pellets hit). Landing all pellets will also earn you the Point Blank medal and a satisfying view of your opponent turning into pieces.
While the Super Shotgun’s damage output can be high, its slow firing speed (1050 millisecond reloading time) makes aiming matter a lot when firing as a missed shot can result in losing a big chunk of your health or even death.
This weapon is mostly used as a finisher; Meaning that the main damage is dealt to your target with other weapons and the finishing blow will be dealt with this shotgun to save you both time and health.
Should you encounter an enemy at medium to long range when you have no other weapon than the Super Shotgun it is advised that you evade fighting or close the distance between you and your target to try and hit them from a closer range.
In tight spots where the use of Rocket Launcher can deal self damage or is not picked up, the Super Shotgun can be very useful as it can deal 40 more damage than a direct rocket (which deals 100). But it will still require you to have a good aim and practice.
While playing as Visor and next to a doorway, if you use your active ability and see an enemy coming towards you, you can camp behind the doorway and fire at the enemy when he tries to pass. Dealing a solid 140 damage. The second shot you fire at them will depend on yourself. You could try to finish them off with the Shotgun again or use another weapon such as the Rocket Launcher.
Jump Pad Trap:
A special tactic used around Jump Pads can deal severe damage. If you’re next to a Jump Pad and there’s an enemy fighting you, launch yourself to the upper ledge with the Jump Pad (this tactic is best used in high jump pads).
Once you’re at the top, don’t run away. Stay close to the edge but not enough to be shot or seen. Now pull out your Super Shotgun and wait. Your enemy will most likely launch himself up using the Jump Pad to chase you. Once he’s up in mid air in-front of you, unload your shotgun into his torso. If you aim well, you can deal a solid 140 damage, killing him instantly or severely damaging him, enough to let you to finish him off from above (in this case its probably best to finish them off with the Rocket Launcher since you have the higher ground).
Although keep in mind that the opponent player might get a Rocket Launcher shot at you during this scenario. It doesn’t happen much but when it does, it won’t be pretty. So don’t be surprised.
Be sure not to be on the end of such scenario. If however you know that your opponent is low on health and while you’re aware of the risks and still decide to follow him, either jump on the Jump Pad with the Rocket Launcher in hand or the Super Shotgun. The Super Shotgun will be a matter of who shoots first. If you fire first, you can kill him without taking damage. If however you’re using the Rocket Launcher, there might be a small delay between firing and killing your target (because of the rocket speed) which may cause you to get shot and aside from that you might even cause self damage if the opponent is too close.
Super Shotgun with Quad Damage is like toast with breakfast:
When Quad Damage is picked up, the Super Shotgun can become a deadly weapon which can kill players that are even 20 meters away. The point blank damage turns from 140 to 560. So as you can imagine even a small portion of that can be fatal and will grant you easy kills.
Just remember that it will still not be a good weapon at long ranges so you should switch to another weapon.
Additional Stats Info:
Number of pellets per shot: 28
Fire pattern: 3 Rings of 9 Pellets, plus one centered pellet
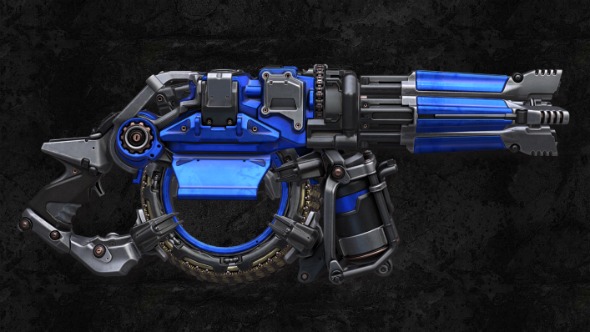
Super Nailgun
Tags: Projectile, Close-Medium Range, Rapid
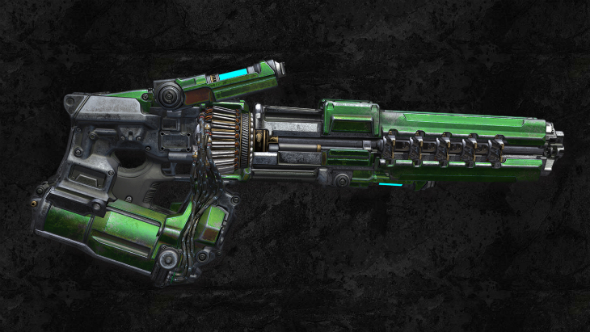
The Super Nailgun (also simply known as Nailgun) is a spinning-barrel gun (default skin) which fires nail-like projectiles with a high rate of fire (1 every 110 ms). Each nail deals 20 damage (twice the amount of damage the Starter Nailgun does) which makes it a deadly weapon at close range. But beware, as said for the starter Nailgun, the nails explode on impact creating a small splash damage (with half a meter radius) which can damage the user if his distance from his target is not kept.
The Super Nailgun also has a knock back force of 6. Self knock back however is 28. What unit this uses I have no idea but just keep in mind that it will push you back a lot further than it will push back an enemy. Which is why you can use the Super Nailgun to wall-climb (will not explain how) at the cost of Health and Armor. The starter Nailgun also has knock back but I do not know how much.
Upon picking up this weapon you will get a stack of 100 nails and each box of nails will grant you 50 extra. The maximum stack of nails you can carry is 150.
Again, because this weapon is projectile based, you will have to aim ahead of your enemy to hit him. This weapon is most useful at close to medium range but can also hit enemies at long range blindly.
A special tactic which I call “Blind Firing” or “Pre-firing” is used for long ranges to hit enemies unexpectedly as they emerge.
For example, let’s say we are in the Blood Covenant map and at the bridge stairs and about to go up. A good tactic is to start firing at the end of the corridor (at the Slip Gate) as soon as you get up, even if there’s no one there. Why should one do this? Because the nails are slow projectiles which take time to reach the end. In this period if someone comes out of the Portal/Slip Gate or enters the hallway, he will be caught by surprise and hit with a few nails. As each nail does 20 damage, even if only 3 of your nails hit, you will deal 60 damage to him without even getting close to him which is pretty good. If however one does not walk into into this trap, his path will still be blocked because of the load of nails passing by. It is best to move in a zig-zag pattern to ensure nails are fired in every part.
However do remember that using this blind fire technique will also reveal your position.
While the blind fire technique can be used offensively, you can also use it as a defensive tactic when trying to flee. Say you’re running away from an enemy and enter a curve or turn. While you are passing you can still fire nails at your back (mostly at the edge of the inner wall). If the enemy is chasing you and not far behind, he might catch a few (if not more) of your nails and either slow down or stop following you, or if you’re really lucky, die by them.
If you’re on the end of such situation, stop following him until he can no longer fire nails at you blindly or take another route.
Similar to the Super Shotgun, Super Nailgun and Quad Damage go together like bacon and eggs:
The Nailgun is my other go-to whenever I pick up the Quad Damage. As each nail will then deal 80 damage. 2 hits? 160 damage. 3 hits? 240 damage. 4 hits? 320 damage! There’s nothing that can stand a chance infront of it.
Now the Super Shotgun can deal even more damage with just 1 shot, so why do I prefer the Super Nailgun? Because the Super Nailgun is an automatic weapon which means you don’t have to worry much about missing your shots and the delay between them. This is most noticeable when compared to Railgun. While the Railgun can one-shot almost everyone (360 damage per hit), missing your shots can cost you a lot, even your life. So using an automatic weapon can be much more safe.
Also because of the Super Nailgun’s projectile based nails I can maneuver around with my shots pretty good to catch an enemy coming out of cover off guard. Although this is also a disadvantage at longer ranges where it takes time for my nails to reach my enemy, letting him take a few shots at me before dying.
Oh and not to forget that you can carry 150 nails with you so will probably not run out of ammo during the Quad period if you use your shots right.
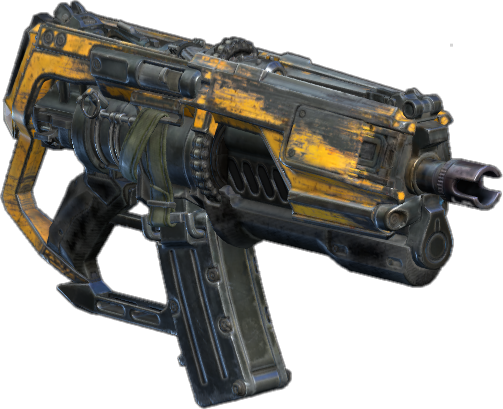
Tri-bolt
Tags: Projectile, Fuze Time, Explosive, Team Weapon, Bullet Drop, Close-Medium Range
The Tri-bolt used to be the most hated weapon in Quake Champions and sometimes called the worst weapon in-game.
It is not the worst weapon in the game anymore. That title was only given to it because of two reasons:
1. It has replaced the Grenade Launcher from the previous Quake games which was a favorite among many players. And considering how it was nothing like the Grenade Launcher, they hated it.
2. In the previous patches it was much slower, harder to use and sometimes completely useless, usually resulting in the wielder’s death. And so, only those who are stubborn enough to not let go of the past will still continue to call it the worst weapon in game.
In the newer versions it has a higher firing and projectile speed so it can be used pretty well.
When the Tri-bolt is fired, 3 time fused projectiles are fired rapidly (125 ms delay between each bolt) which stick to the surface they land on and create small explosions after a brief period. The explosive bolts are armed upon firing, not when the bolts make contact with a surface, resulting in bolts being able to explode mid-air creating an array of explosions around your enemy.
They explode 0.5 second after they are fired. Therefore the Tri-Bolt is the only weapon other than the Lightning Gun to include an actual range limit, which I think is something around 50 meters.
The shots also explode on impact when they hit an enemy. Be it that you shoot a bolt directly into an enemy or an enemy walks on one of the placed shots on the surfaces. Each direct hit deals 45 damage. This is the only weapon to include a bullet drop factor, but its projectiles travel faster than the Rocker Launcher’s.
The number of remaining shots shown in your HUD are not the number of bolts that will be thrown but the number of times you can press your fire button.
The main strength of the gun is in three things:
- The amount of damage it does when it hits an enemy directly.
- Shots can explode around your target.
- Getting people off your tail (Update: 26/3/2019: With the recent patches and balancing, this weapon is no longer useful in direct combat and only good when fleeing from combat)
1. As mentioned, when a shot hits an enemy it explodes on impact and deals 45 damage. Since three shots are fired rapidly, you can land up to 135 damage with each press of the fire button. But because it’s a projectile based weapon it will require some skill to use.
2. Because of the fact that the shots explode on impact, it is a good weapon for medium range where the shots explode mid air. Once you get the hang of its range, you can fire shots into an enemy from this distance and the shots will explode around him. This technique means that you really can’t miss. If your bolt hits him directly, it will inflict 45 damage and if it doesn’t, the explosion can still cause up to 44 damage (9 at least) depending on the distance between the explosion and the opponent.
If the distance is right, all that matters will be how well you can aim your 3 shots. The closer the better.
3. When you’re running away and you have someone on your tail chasing you, this weapon can be really useful. As you’re running away, aim back and fire the Tri-Bolt on the floor and walls. When the enemy reaches the landed bolts, their fuse would have ended and they will explode around your target, damaging them and maybe even stopping them from chasing you. The best place for this tactics is in corridors and tight placers where you know the path the enemy is going to take.
However try not to be on the receiving end of this situation. If you are, then either stop chasing that opponent and choose a different route or instead increase your distance so that his bolts explode before they get close to you. But since this increased distance can make you lose your target, I’d suggest going with the first option and taking another route which you think can take you to him.
Powerup Team Tactic:
A great use of the Tri-Bolt in Team Based matches is when the Powerup (Quad Damage or Protection) is about to spawn. Let’s say there are enemies around the Poweup spawn. As your team moves in to kill and grab the Power Up, you can momentarily block the enemy from picking up the Powerup.
Since most players usually stand on the Power Up spawn point a few seconds before it spawns, you can fire your Tri-Bolt shots directly at the Powerup’s spawn point to prevent the enemy from standing there and if they dare to, take heavy damage. Since there is no friendly fire in Quake Champions your team can easily move in and grab the Powerup when it spawns.
Even if this tactic does not prevent the enemy from grabbing the Powerup, it can still deal massive damage to the one who picks it up making easier to kill him and steal the Powerup.
However this tactic is not always good. Sometimes it’s better if you move in with the Rocket Launcher instead. This Pickup-Prevent tactic is best used for when the whole enemy team is standing near the Powerup and you do not have a Rocket Launcher picked up. Otherwise it would be much more useful to spam rockets at your enemy while your teammates move in for the grab since it can lead to higher damage output with direct shots dealing more damage than the direct bolt damage.
Rocket Launcher
Tags: Projectile, Explosive, High Damage, Close-Long Range, Main Weapon
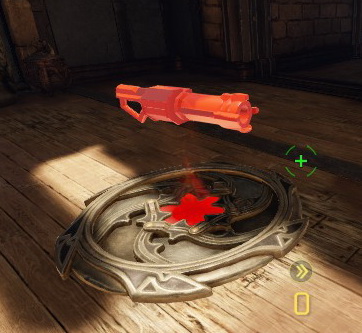
The Rocket Launcher is one of the most powerful weapons in all Quake titles.
It fires Rocket projectiles which can travel any distance without any bullet drop. The Rocket Launcher is best used at close range. At medium range the Lightning Gun may serve better.
The rockets explodes on impact with a small but deadly splash explosion radius.
Upon picking up the Rocket Launcher the player receives 10 Rockets and can add to that amount to a maximum of 25. Each rocket box pickup grants the player 5 extra rockets.
Usually it’s better to aim the Rocket Launcher at your target’s feet rather than his torso. Why? Because shots fired at the opponent’s torso can be evaded or simply miss because of bad aiming, but shots fired at their feet can rarely be avoided since even if they are missed, they explode on impact with the ground dealing great splash damage. However when a rocket is fired at your target’s feet, it will slightly throw him into the air. A direct hit to his torso can be more useful for your next shot as hitting the ground underneath him will deal less damage because of his distance from the ground.
A rocket’s damage can vary depending on the distance of the explosion from your target. It vary from 1 to 99. If you manage to land a direct shot on an enemy, meaning that your rocket hits his body rather than his surroundings, it will deal a solid 100 damage which can instantly kill him if he’s low on health or sevrely damage him.
The Rocket Launcher can also be used for Rocket Jumping. What is that? Rocket jumping is when you shoot a rocket at your feet when jumping to give yourself a massive boost and throw yourself into the air. Instead of receiving the 100 damage of a direct rocket, you will only receive 50. This tactic is used in two situations:
1. Getting to higher places and around the map: If you fire the rocket directly at your feet you can jump very high and get to higher places. If you give it some angle, you can throw yourself into the desired direction, making very long leaps and giving yourself a speed boost.
2. Getting a higher ground in a fight: Much like in Team Fortress 2 where Soldiers would shoot rockets at their own feet to throw themselves into the air to fire at you from above, the same tactic can be used in Quake Champions. However, it is less used as there are no items to decrease self damage and this tactic may only be used if you are stocked on health and armor and you know your opponent is low on health. I’ve mostly only seen this tactic used by pro players.
Because of the Rocket Launcher’s slow projectile speed, it can be fired at corners, doorways, portals/slip gates and etc while moving, so if an enemy happens to step foot there, the rocket would hit him or around him and damage him without the two of you even being in the same room. Much like the blind fire with the Super Nailgun, This tactic is most useful at long ranges.
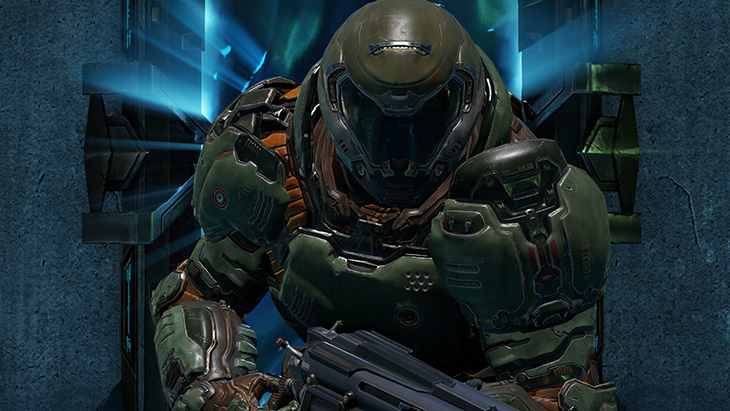
Though the Rocket Launcher is pretty good, it has a nemesis. One of the most hated champions in Quake Champions, hated by almost half the QC community; The Doom Slayer.
Doom Slayer’s passive ability is the ability to double jump. How does this effect a Rocket Launcher fight? As we know, all player mostly aim their rockets at their opponents feet to make sure they don’t miss. Even if their opponent jumps he will still receive a good amount damage. But in Doom Slayer’s case, he can double jump. Meaning that he will get much further from the explosion and receive very little damage. This makes dealing damage to him difficult considering how he will constantly be double jumping around.
That’s it? No. This double jump ability gives him 2 edges in a Rocket Launcher fight: Better evasion (which I explained) and higher ground.
Higher ground: When Doom Slayer double jumps, he gets a much higher height from the ground where he can shoot rockets at you from above where it’s hard to for him miss and even if he does he will still deal great splash damage. Similar to when you Rocket Jump. Except that it does not require Doom Slayer to Rocket Jump himself up, but only to press the jump key twice. So when fighting Doom Slayer while using a Rocket Launcher remember it can get pretty bad pretty quick. So don’t be surprised. Try using other other weapons such as the Lightning Gun or landing precise shots.
Airborne and Mid-Air shots:
A special trick used with the Rocket Launcher is to hit an enemy when he is in mid air.
There are two medals for such an occasion: Mid-Air and Airborne.
- The Mid-air medal is awarded when you kill a mid air enemy with the Rocket Launcher. Whether you kill him with a direct rocket or splash damage does not matter.
- The Airborne medal is awarded when you hit a mid air enemy with a direct Rocket.
Note that killing an enemy with a direct Rocket will earn you both medals.
Though a mid air kill is very rewarding, it is also very difficult to pull off. You will require great aim and prediction of your target’s movement in air.
Let’s divide it into a few steps to make it easy.
- First, you need to have your target thrown in the air. This can be achieved by firing rockets at your target’s feet. While it will throw them into the air a little, it may not be enough to keep them up there. It will probably just throw them up a maximum of 1 meter. But if the opponent happens to jump when you fire the rocket, he may be thrown into the air up to 5 meters and then you can proceed to step two.
Another way to get your enemy into the air are Jump Pads, though they require the enemy himself to walk into it and be thrown up. One way to get them to use it is to use it yourself and then wait at the top for him to follow like you would to with the Super Shotgun.
Another situation is when a player is leaping across a fall where he will spend a great distance in mid air. Though this one may be the hardest to hit due to his speed. - When your target is thrown into the air, you must have a good skill in predicting where he is going to be when you fire your rocket and when it travels the required distance. This is a skill which you can develop through time and practice. It’s like a sixth sense as the “Psychic” achievement suggests (Psychic achievement is rewarded by earning 25 mid-air rocket shots).
- And the final step: All or Nothing. This isn’t really a step, more of an ending. You have had your target thrown into the air, you have made your calculations and fired your shot, now is the key moment that will decide whether or not you can wear your “Deal With It” shades. Should your rocket hit your target, you will not only earn the Airborne medal but will also feel butterflies in your stomach like never before!
BUT, if you miss your shot, well, you miss! There’s nothing to it. What happens next can differ in different situations. You might still manage to kill your opponent, you might run away, you might get killed or both of you might get killed by both your rockets being fired at the same time. That’s it.Although remember that killing your mid-air opponent does not always have to be with the Rocket Launcher. Heavy hitscanning weapons such as the Railgun and Super Shotgun (depending on the distance) may get you better results (should you remember to use them). When using these two weapons you no longer have to predict anything since your weapon will be hitscanning.
Though do remember that if an airborne enemy is stuck to a wall or is close to a wall, firing at the wall next to him can also deal some good damage depending on your aim and his distance from the wall. Killing him in such a scenario will earn you the Mid Air medal.
Lightning Gun
Tags: High DPS, Hitscan, Rapid, Close-Medium Range, Main Weapon
The Lightning Gun produces a constant stream of hit-scanning electricity which deals 7 damage every 55 milliseconds. This means dealing around 127 damage per second if your aim doesn’t go off (which it probably will). The Lighting Gun is the only other weapon in game to have an actual range limit. At far distances (more than 75 meters I think) the stream ends and cannot hit anything (while other weapons can hit but lose their usefulness).
The Lightning Gun is a deadly weapon which can be wielded as one of your main gunn in the match. Using this weapon requires the ability to lock your aim on moving targets and keep it locked until they die.
The Lightning Gun is best used at medium range. If the range exceeds from medium then switch to a long range weapon such as the Railgun. If the range is close then it would probably be best to switch to the Rocket Launcher (or if the RL is not picked up, the Super Shotgun). It is vital for you to learn to switch weapons on the fly and use the best one for the current situation.
Unlike the Rocket Launcher, the Lightning Gun does not deal high damage per hit but high damage per second. So keeping your aim locked on your target will fry them in mere seconds.
If you’re low on health and are passing by a doorway which you think you might encounter someone, it is best to switch to another weapon like the Rocket Launcher to deal a higher amount of damage with 1 hit. Because if you only have enough health left for 1 shot or can’t hit more than 1 shot as you pass by, it better be one that counts and deals a good amount of damage and not just a simple 7.
A tank’s biggest enemy is not the Rocket Launcher but the Lightning Gun. Tank champions are bigger in size which make locking your aim onto them much easier. They are very easy targets for the Lightning Gun and you can probably roast them in seconds.
The tank champions with such weakness are Scalebearer, Sorlag, Clutch and Keel.
Clutch is basically the biggest target in the game and anyone can hit him without missing. So switch to the Lightning Gun when encountering him (except in certain scenarios where the other weapons would shine more).
Since the Lightning Gun has a knock back force, it can push mid air enemies back or if fired at them from underneath, extend their time in mid air. During this period they cannot do much and will take a huge amount of damage without being able move and evade your attack. Most of the times a player is caught in such a situation is killed in seconds.
Such a tactic can be very useful for when an enemy uses a Launch Pad. If an enemy launches himself into the air with it you can fire at him from below, keeping him in the air and ultimately killing him with no effort.
Be sure to not be on the receiving end of such scenario! However if you are, your only hope is to fire direct rockets at your enemy (which you may only be able to fire one). If you succeed, you will either kill them or throw them around messing up their aim and saving yourself. Though this requires quick reaction time for you to pull of because you will have a very limited time (mere seconds).
Again, because of its knock back force, the Lightning Gun is prefect for keeping back the Scalebearer and Doom Slayer. Both of these champions are dangerous in close quarters and can close the distance between you and themselves with their Active Ability and finish you off before you even land your second hit. Using the Rocket Launcher in such scenarios can also be dangerous because you may simply miss or damage yourself or not finish them off quick enough because of its slow firing speed. In these situations the Lightning Gun can save your life. If you lock your aim onto them and keep firing while moving back, you can keep them back or slow them down, all the while dealing damage and finally killing them or evading their attack. Should you happen to deal great damage and evade their attack, you can finish them off with a rocket.
Also keep this in mind when playing as Scalebearer or Doom Slayer as other players will definitely use the same tactic on you.
Railgun
Tags: High Damage, Slow Rate of Fire, Close-Long Range, Finisher
The Railgun is one of the iconic weapons of the Quake series (too bad it wasn’t in Quake 1 :/ ).
Basically it counts as the game’s compact sniper rifle. Each Railgun shot deals 90 damage no matter which body part of the opponent is hit.
With each shot fired, the weapon will need time to charge up, load up or cool down depending on the weapon skin you are using (for example the Quake 4 Violator will need to cool down). This “reload” time period is not short and can cost you your death at close ranges if you do not pay attention to it.
Alongside the Lightning Gun, the Railgun is also a tank’s biggest weakness due to his big size. It is much easier to hit Clutch with the Railgun than to hit Nyx with it.
The Railgun is basically used in two main situations: Damage Dealing & Finishing Blow
-
Damage Dealing:
During a match, if the the opponent player is not close to you but you see him or know that he’s going to pass from a certain area, you can basically snipe them to deal 90 damage without even getting close to him. This attack will not kill them (unless they are heavily damaged) but it is useful for delivering a sudden blow to the opponents health and armor.
What you do next will depend on your situation. Follow your prey and finish him or use another tactical approach.This tactic is most useful for Visor as he can use his Piercing Sight Active Ability (or in simple terms, his “wall hack”) to see where his opponent is going and await him with a deadly shot.
A tactic used for damage dealing takes place exactly where blind fire with the Super Nailgun in the Blood Covenant bridge. Once you’re about to get up the bridge, take out your Railgun. There’s a pretty high chance that someone’s going to be infront of you. Either on the bridge or near the Rocket Launcher spawn or near the Powerup Spawn. Once you’ve climbed enough stairs to see the slipgate at the end, zoom in and fire at the first target you see. Since it has popular spots, there will be an 80% chance that you will see a target to shoot at.
Once you fie and hit your target, what you do next is up to you. You can jump down the bridge to avoid a frontal approach (since the enemy now knows where you are now) or you keep on going while firing nails or rockets. But remember that whether you choose to jump down or keep on going, check the right side of the bridge where the Railgun spawns. There’s a chance that an enemy player (Visor usually) is standing there, waiting for you to show yourself so he can take a shot at you. -
Finishing Blow:
During everyday fights, when you deal a good amount of damage to your enemy, instead of dealing another 50-80 damage with another weapon which could cost you both time and health, you can simply swap to your Railgun and deliver a final blow to your target with one single well-placed hit which deals 90 damage.
It might sound hard and crazy but it is a very useful trick and you WILL see other players use it.
Although beware that this tactic can fall flat in tight rooms as a missed shot can cause you a big problem in close quarters.But just remember that this trick requires you to have good aim and a good hand in using the Railgun because if you miss that shot, you may not get a second chance. However, if you pull it off (which believe me, with practice you can) you will save yourself a lot of health and armor.
Instagib:
Instagib (short for Instant-Gib and also known as Instakill) is a Game Mode where all players spawn equipped with only the Gauntlet and the Railgun and will compete in a Deathmatch. But the main factor of this Game Mode is that it only takes 1 shot to kill your opponent. When an opponent is shot in this mode he will be gibbed. That’s where the name InstaGib comes from.
Though all players are given the same loot, they can still choose their champions themselves and the active and passive ability of those champions are still present. But with one major difference is that any damage dealt with their Active Abilities (be it 7 damage or 100), will instantly kill their target. But REMEMBER, this does NOT apply to passive abilities such as the Scalebearer’s heavy weight. If he stomps you, you will receive the damage you would normally receive and will NOT die.
As you already can tell having different Champions with different Active Abilities present in this Game Mode makes it unbalanced.
First, their size will greatly effect their death ratio. A bigger champion like Clutch will be shot more easily than a thinner champion like Nyx.
And as for their Active Abilities, Visor can easily spot everyone in the map and run and gun them (which is why 90% of the Instagib matches end with Visor being the winner).
Keel can insta-kill players with each of his grenades.
Strogg can kill players with just 1 shot from his Peeker (please don’t do this, it makes for a very stupid and unbalanced match).
Galena can kill anyone with her Totems.
Scalebearer can even crush Clutch with his Bull Rush.
Ranger’s Dire Orb can kill anyone if it even manages to deal 1 damage (which is also very annoying).
And so on…
Medals:
There are a few medals which can be obtained with the Railgun. The neutrual ones (those that any champion can achieve) are “Impressive” and “Combo Kill”.
- Impressive: The Impressive medal requires you to land two consecutive shots with the Railgun (it doesn’t matter if it’s not the same target).
To achieve the Impressive medal you do not need to hit two targets rapidly in a few seconds or in one Railgun pull out. No, you can hit one target, then use another weapon for a while, then switch back to the Railgun, hit a target and still receive the medal. - Combo Kill: This one is given in the Finishing Blow scenario I described earlier. If you deal a good amount of damage to your target (not just a simple 10 damage) and finish them off with a Railgun shot, you will be awarded the Combo Kill medal.
There are also a champion related Railgun medals like Visor’s Shooting Range or BJ’s Mein Leben but I’m not going to explain them. You can look them up yourself.
Extra Info:
Where in the previous patches zooming in the weapon would deal more damage, since the June 6 update the Railgun will deal 90 damage whether you zoom in or not. So if you happen to watch older gameplay videos do not get confused by why your shots don’t deal extra damage.
Powerups
Quad Damage
Quad damge quadruples your damage (makes you deal x4 times your weapon’s base damage) which turns any weapon in game into a deadly unstoppable weapon. Even the starter weapons!
But be ware, though your weapon’s damage might have been buffed, your health, armor and resistance will remain the same. So you can still take a rocket in the face and die. Which is why it is suggest to not run very far from your teammates during this period to prevent yourself from dying and handing the Quad to the enemy. Same way vice versa, should your teammate happen to pick up the Quad Damage, accompany him to make sure that he does not get overwhelmed and die. And if he does, make sure to pick it up before the enemy does.
CAUTION:
With the increase of damage comes the increase of self damage. When Quad Damage is equipped, be careful not to shoot rockets too close to yourself or you might end up blowing yourself up and handing the Quad Damage to the enemy team. Same goes for the Tri-bolt and the Super Nailgun.
Let’s take a look at their damage output when Quad Damage is picked up:
| Weapon | Normal DMG | Quad DMG |
| Gauntlet | 75 | 300 |
| Machine Gun | 9 | 36 |
| Nailgun | 10 | 40 |
| Shotgun | 90 | 360 |
| Heavy Machine Gun | 10 | 40 |
| Super Shotgun | 140 | 560 |
| Super Nailgun | 20 | 80 |
| Tri-bolt | 45 | 180 |
| Rocket Launcher | 100 | 400 |
| Lightning Gun | 7 | 28 |
| Railgun | 90 | 360 |
Protection
When Protection is picked up, only 34% damage of a weapon’s normal damage will be received. During this period, while your weapons may not be affected, your resistance will be. So you can be more aggressive and rush into your enemy’s face with even weaker weapons without much trouble. But don’t get too cocky! You might be more resistant but that doesn’t mean you can’t die. A lone soldier can and will get killed if he gets ambushed. So try not to go too far from your teammates and do not get cornered.
It is also recommended to accompany your teammate who has the Protection to make sure that he does not die and if he does, you would pick up the Protection before the enemy does.
Here are a few modified damages (received) during Protection period:
| Weapon | Normal DMG | Protection DMG |
| Super Nailgun | 20 | 7 |
| Lightning Gun | 7 | 2 |
| Rocket Laucnher | 100 | 34 |
| Keel’s Grenade | 75 | 25 |
And so on…
Champion Related
During a fight it is vital to know who you are fighting and what that champion is capable of. Knowledge of their strengths and weaknesses will inform you of which weapons to use and which not to use.
First, let’s start with their base health and armor:
Each character spawns with 100 health (plus 125 overhealh) and armor which can both be increased by pickups. It is necessary to know the base HP+AP for each champion to know how much resistance to expect from them. Since the base HP+AP is what they spawn with, the base HP+AP should be the least resistance you should expect from them as they will have most certainly picked up extra health and armor.
Base Health+Armor on spawn (the 25 overhealth is not counted):
- Light Champions: 100 Health + No Armor
- Medium Champions: 100 Health + 50 Armor
- Tank Champions: 100 Health + 100 Armor
| Light (100) | Medium (150) | Tank (200) |
| Anarki | Ranger | Scalebearer |
| Nyx | Visor | Sorlag |
| Slash | Galena | Clutch |
| BJ | Keel | |
| DOOM Slayer | ||
| Strogg |
Scalebearer:
The Scalebearer’s active ability (Bull Rush) not only grants him the ability to deal damage by colliding with someone but it also provides protection during this period. During his rush the damage he receives is halved. Keep this in mind when fighting him, otherwise you’ll get crushed.
It is recommended to side step out of his way to avoid any damage, even if you’re holding a Rocket Launcher.
Damage received during Bull Rush:
| Weapon | Normal DMG | Decreased DMG |
| Super Shotgun | 140 | 70 |
| Rocket Launcher | 100 | 50 |
| Lightning Gun | 7 | 4 |
| Railgun | 90 | 45 |
And so on…
Nyx:
Nyx is a thin and agile champion but in terms of armor she is weak..
Because of her small hitboxes hitting her with accurate weapons such as the Railgun can get a bit difficult. Her small size also decreases the Super Shotgun’s effective range on her (a smaller target means less pellets hitting from the usual range).
While many weapons can be effective against her, the Rocket Launcher can be most effective against her because of its splash damage.
Ghost Walk:
When you’re fighting her and she enters Ghost Walk, remember, she will probably not leave the room but follow you to hit you in the back as soon as she phases back into the world. To counter such an attack, run in the direction you want to but backwards (looking at your back while holding your S key). When you feel that she is about to spawn, start firing. If the Nyx player has not experienced such scenario before, she will keep running at you in a straight line and catch every bullet/rocket/nail/grenade or etc that you fire at her. The Super Nailgun works perfect in this counter measure.
I personally killed two different Nyx players (in two different matches) this way. When they phased out, I kept running but after two seconds later I turned back and started firing nails with the Super Nailgun. To my expectation, they were both following me and when they spawned in they caught every nail I had fired at them and died.
Keep this trick in your mind for both when you’re playing as and against Nyx.
Anarki:
Mostly same as Nyx but with much faster speed.
Slash:
Same as Anarki mostly but beware of her passive ability to launch you in the air by crouch sliding. So try to side step out of her path.
Clutch:
Clutch is the biggest champion in the game. A very vulnerable target for the Railgun and Lightning Gun. The Lightning Gun is suggested against him in most situations as it’s near impossible to miss him.
From far ranges the Railgun serves well and from close range the Super Shotgun will be deadly.
Clutch’s Shield:
Playing against Clutch
- Clutch’s shield can absorb any amount of damage without breaking. So shooting his shield is basically a waste of ammo. But when Clutch tries to attack, his shield will be deactivated for a moment (0.7 second), giving a brief opportunity to damage him. During this time its best NOT to use projectile weapons as the opportunity might close before the projectiles reach him. Its best to use a single shot hitscan weapon. If the distance is little, you can use the Super Shotgun to deliver a severe blow. If it’s further, the Railgun can deal 90 damage with 1 hit.
- While Clutch’s shield can block bullets, players can still pass through it. So if you’re really close to Clutch when he has his shield up, you can run/jump through his shield and shoot him. This tactic can be very useful for Scalebearer as he can use his Bull Rush through his shield and into his face, dealing 75 damage.
- One extra thing to remember is that his defensive active ability can turn into an offensive one at any given time. If Clutch hits his active ability button again his shield will turn into a strong mining laser which works exactly like the Lightning Gun (but with a longer range) and will catch you off guard, dealing a lot of damage. So be careful and do not be surprised.
Playing as Clutch:
As mentioned, while your shield is active, should you fire your weapon your shield will deactivate for a brief moment, leaving you vulnerable. So it is best to use heavy single shot weapons such as the Rocket Launcher, Railgun and Super Shotgun instead of automatic weapons like the HMG or Lightning Gun that deal less damage and leave you more open.
Doom Slayer:
As mentioned in the Rocket Launcher section, Doom Slayer’s double jump ability allows him to easily dodge rockets and gain higher ground in rocket fights. So it is best to use a good hitscanning weapon such as the Lightning Gun or Super Shotgun against him. Though you still need to have a good aim because he’ll still be double jumping around.
Strog and Peeker:
Strogg’s Active Ability is a very dangerous one. His Peeker can rapidly fire plasma shots (1 per 110 millisecond) which deal 20 damage each and by pressing his active ability button again he can launch his Peeker towards you which will explode on impact, dealing a maximum of 100 damage like the a direct rocket.
When facing an enemy Peeker, it is vital to destroy it quickly before the user has time to shoot you or launch it towards you.
Since it is a small flying target, it is very hard to hit it with projectile weapons. So it is suggest to use hitscanning weapons. Since the drone user usually launches it forward after it takes damage, it is best to use a heavy hitscanning weapon such as the Super Shotgun or Railgun to finish up the drone quick before for the user can launch it. But remember that a missed shot with the Railgun can be fatal. The drone has 90 health so It’s all or nothing.
Also when fighting the Peeker, if you manage to catch the Strogg sitting nearby it would be better to concentrate your fire on him rather than his drone. Having one fight is better than picking two by destroying the drone first and then the Strogg himself.
Bonus: RL vs LG
(This section was added on 27/6/2018)
As a bonus for reaching 10k visitors with your support, I will explain which of these two main guns will serve best in the three main ranges; Close, Medium and Long. I will exclude the usage of other weapons for combo kills such as the Super Shotgun and Railgun. I will only compare the RL an LG.
Rocket Launcher vs Lightning Gun:
Both these guns stand as devastating weapons that can kill players in a matter of seconds.
So which one is stronger? There isn’t a solid answer because it depends on the situation. And that is why you must know the situations in which one weapon can beat the other. Although keep in mind that what is said below is mostly what chances are, not a solid 100% chance that it will always go down this way;
- Close Quarters:
If there’s little distance between you and your enemy then the Rocket Launcher can prove dominance over the Lightning Gun as it can deal more damage in direct hits.
In close quarters, not much prediction is required to land direct hits with the Rocket Launcher so you can blast your enemy into pieces with at least two shots.
However, it will still come down to your aim. If you cannot land good shots and die to your enemy who was using the Lightning Gun, you can’t really blame anyone but yourself. It’s nobody else’s fault that his aim was better than yours. Practice and make your aim better to win duels.
Although do remember that switching to the Rocket Launcher at close range greatly increases your chances of winning but still doesn’t guarantee a win. A skilled player can still overcome the obstacles and win with the LG. - Medium Range:
While the Rocket Launcher can dominate at close range, the Lightning Gun fries players into crispy treats at medium range.
At medium range, not only does the Rocket Launcher require prediction to fire but it will also take time for the Rockets to even reach their target; Meaning that the opponent could simply dodge them if possible.
While the Rocket Launcher will find problems to deal with, the Lightning Gun will shine as it is its best moment. The Lightning Gun hitscans so no prediction or time is required for it to deal damage and at medium ranges it is also much easier to lock your aim on your opponent compared to close range. So when the range is something around medium, switch to the Lightning Gun for better results. However it is important to remember that you will still require good aim to win and also there might be a chance that your target pulls off great shots which hit you directly in the face and kill you. This can depend on the opponent’s skill, your aim (which affects how long this duel will take) and last but not least, luck. Your opponent may not be skilled at all but he could still get lucky and pull off direct rocket hits and such which leave you in pieces.
Again, switching to the Lightning Gun at medium range will greatly increase your chances but does not guarantee a win. - Long Range:
At long range both the weapons act poorly as the Lightning Gun’s stream ends and the Rocket Launcher’s rocket’s can simply be dodged.
However the Rocket Launcher could still deal some serious damage in the right hands and in the right place. Such places are corridors/hallways and places where you have the higher ground.
But even so, it is recommended to switch to other weapons depending on your surroundings. In most cases, the Railgun will prove useful.
Good luck!
I have shared with you most of my knowledge of QCs weapons. The rest you should learn by yourself. Just don’t forget that every weapon has a time and place. If you can learn this well, then you can be unstoppable. Try to bind your weapons to keys around your WSAD keys for faster weapon switch.
I hope you found this guide helpful and learned something new. It is time to get out there and put your knowledge to the test.
But remember, while knowing may be half the battle, the other half is performing what you have learned. And as everyone knows you cannot perform these without spending time practicing them. You do not become a pro in just a few hours but over time. Be strong, persistent and never give up. If life throws 5 rockets at you, respawn and throw 10 rockets back at it! Each match will only give you more practice and experience.
If you spend your hours right, analyze your mistakes and figure out what you’re doing wrong and how to fix them, you too can become one of the Pro players of Quake Champions.
I wish you good luck and a life full of fun matches!
Now get out there and kick some a**!
Author’s Note:
I’m from Iran and my main language is Farsi/Persian.
And even though my ping never goes lower than 110, I still play Quake Champions daily. That’s how much I like this game. I may never even get close to the top pro players but it doesn’t matter. I know my limits and I don’t dislike the fact that I have them. I’m here for fun. I play on my own level and enjoy the game in my own manner.
But that doesn’t mean I will stop trying to improving. No, sir. In each game I try to become better at weapon switching, map controlling, item pickup, ability usage and etc. If I want to improve then each match will be my field of practice and so should it be yours.
At this time of publishing this guide, I have played 94 hours. And each hour spent has only made me better.
Update 6/27/2018: On June 23rd (or some day around that) the guide reached 10k visitors. Thank you all for your great support! Your comments, views, likes, favorites and sharing has made this guide Quake Champions’ Most Popular Guide of the Year and the Second Top Rated Guide of all time! Again, thank you all so much for your support! You have given me such great positive energy that I could never dream of. And in great time too! I was actually in my final exams at the time of this occurrence 😀
The RL vs LG section was added on this occasion as a small bonus and thank you for your support. Good luck fragging out there!
Here we come to an end for Quake Champions All Weapons Guide – Damage – Strength hope you enjoy it. If you think we forget something to include or we should make an update to the post let us know via comment, and we will fix it asap! Thanks and have a great day!
- Check All Quake Champions Posts List


Leave a Reply