Introduction
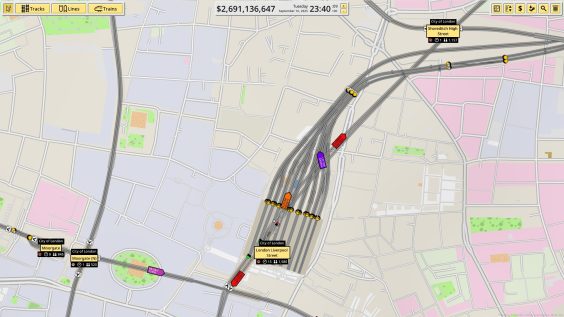
Many people appear to be having some difficulties with using the signalling system in Nimby Rails, often because they are trying to do something more complicated than is possible at the moment, or (if some of the public screenshots are anything to go by) are just putting in waaaaay too many signals. In this guide I hope to show some basic setups and then some offer guidance on how to mitigate problems.
*I am still experimenting with some signal setups, and may add more examples later on*
Basic Principles
There are five “signals” in Nimby Rails:
– One Way – trains will only travel over that bit of track in the direction of the arrow. Serves no other function.
– Platform Train Stop Point – Does what is says on the tin. It allows you to define where on a platform a train will stop. Does nothing else.
– Simple Block (signal) – The most basic signal light. The cone of light should point towards approaching trains. The area behind the light (ie where the black bit of the icon is) is the area that that signal controls.
– Block Balise – Defines the end of a “block”… Place further along the track to end the section that you want to be controlled by signals.
– Path Signal – A more complex and powerful type of signal. Reserves a “path” for a train, rather than blocking the whole block. These come in two flavours, one that “Always limits path” and the default “limits path in one direction”. Think of the former as being a path signal in one direction, and a balise in the other, the latter is just a path signal for the direction that it faces.
What is a Block?
The word “Block” is likely causing confusion, it has many meanings in English. In our case, it means a section of track.
In Nimby Rails a block is the area of track defined between the “back” of the signals and block balises.
When setting up a signal system, keep it simple and remember these principles:
– You only need to have signals where tracks cross, or to protect single track sections.
– You don’t need signals on sections of tracks that don’t branch or have junctions.
– Trains in Nimby Rails do not currently collide with a train in front of them that is travelling in the same direction, they just automatically stop in time.
– Block signals will only let one train at a time into a block. Path signals should only let one train onto any path at once.
How to signal a simple junction
The layout below shows how to setup a simple junction with two-way running. I’m British so am using left-hand running, but just swap each signal and balise to the opposite track for right-hand running. Simplicity is the key here.
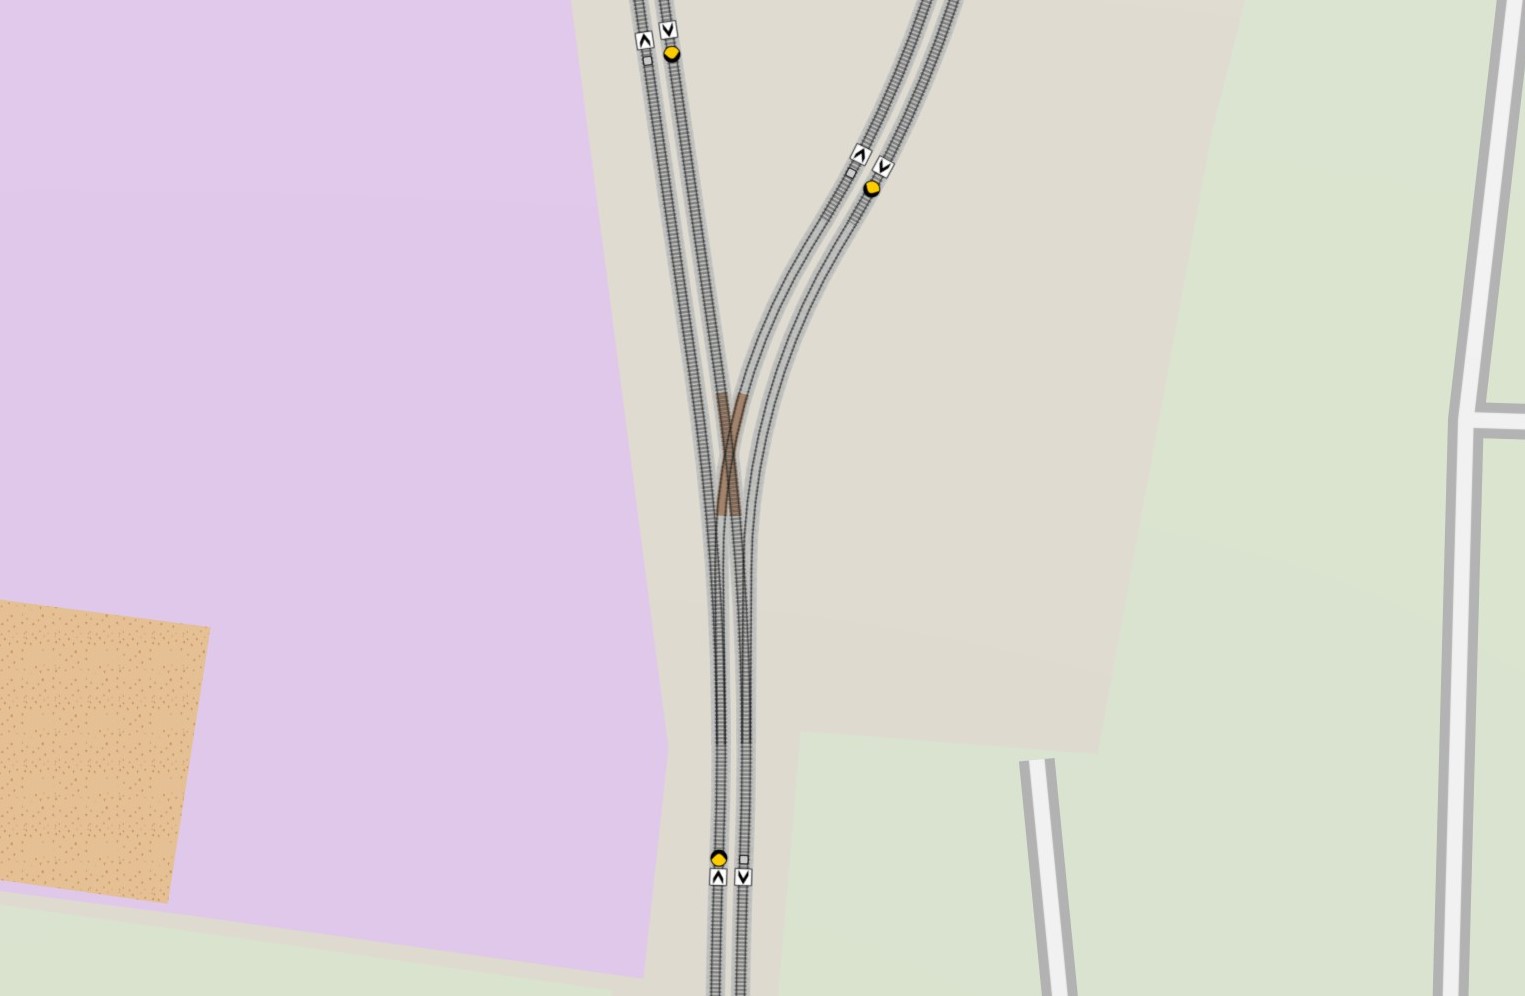
I like to use one-way arrows fairly liberally as trains like to take all sorts of routes back to stations.
You can also use this setup with block signals, it will just be a bit less efficient.
Signalling a Single-Track Section, or a double-track passing loop
At times you may want to have a single-track section between two double-track sections, or the other way around. This is one place where block signals are a better idea than path signals. For that you need this setup:
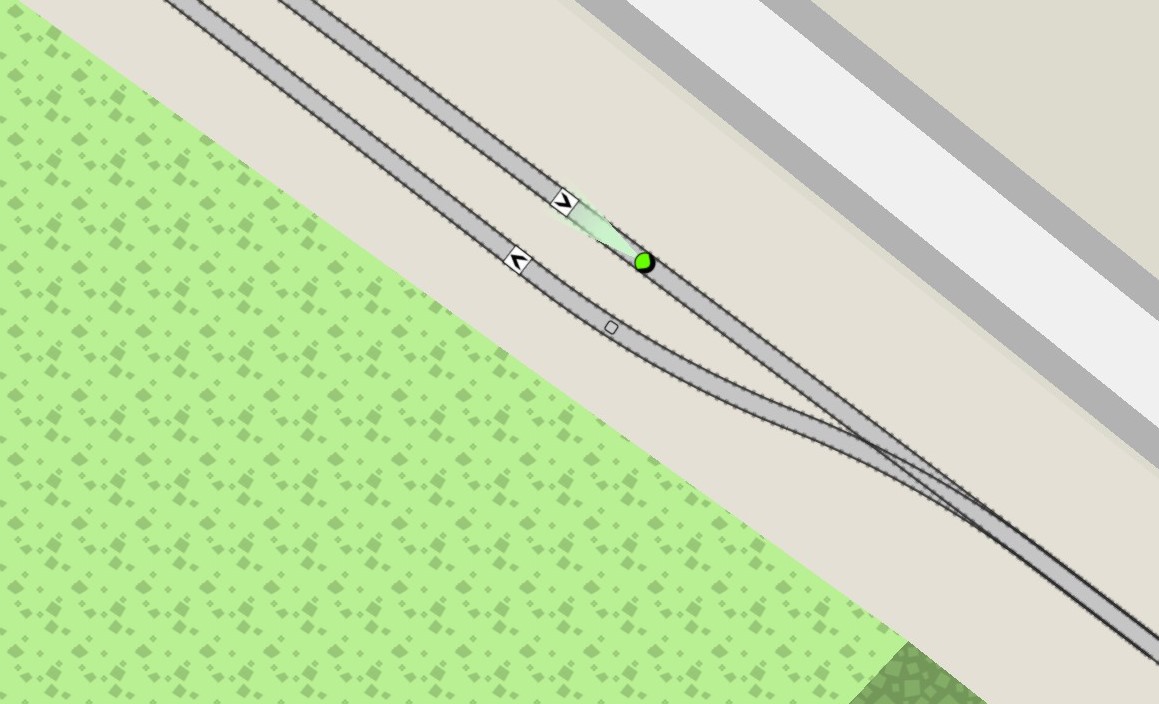
Note that the other end of this “block” is where the track goes back to being double-track.
That is all you need. Place that every time you go from single to double or double to single. DO NOT place any signals on your single track section unless you want it to only run one-way for whatever reason. A single track section must be a single block with only one train in at a time to avoid collisions.
Terminus Stations
Terminus stations are a bit more difficult, but much easier now we have path signals.
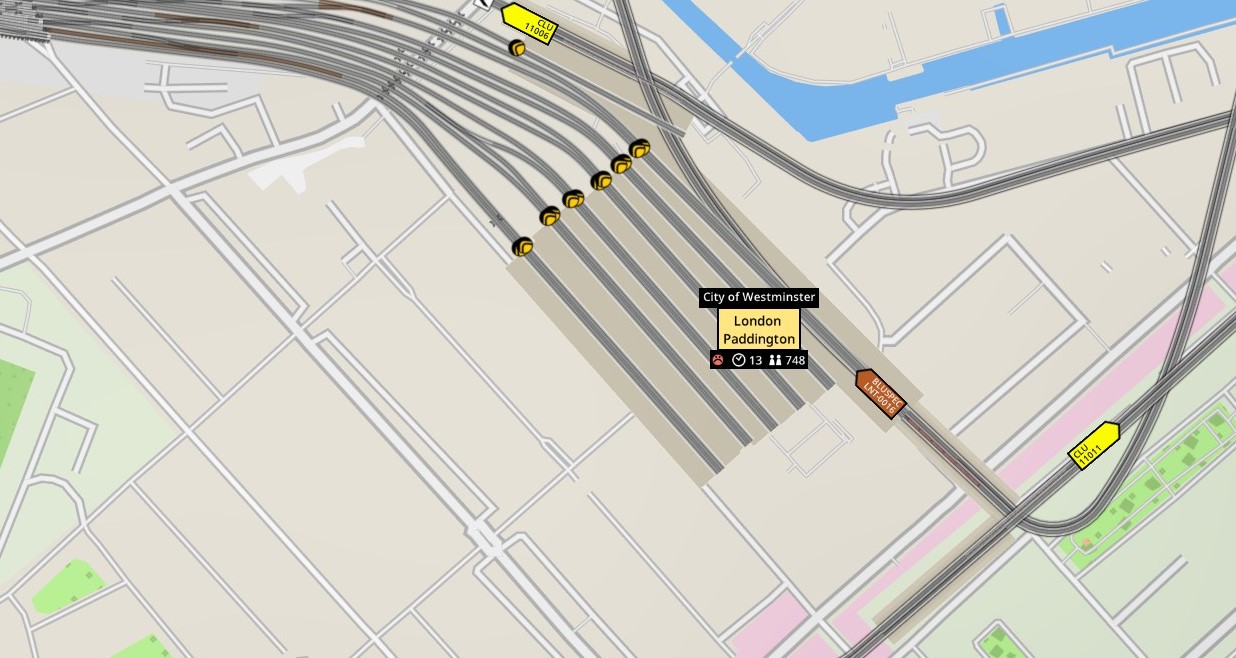
– Place outward facing path signals at the end of every platform as above. Then have all the crossovers or whatever you want outside the station. After your crossover section, then place “Limit All” path signals for trains heading towards the station. Any section after that should only contain one-way track.
– Place block balises at the terminal end of the platform (ONLY do this with platforms, changes in v1.2.12 make this a bad thing at sidings).
– That’s about it.
Tips
– Have only one line using any one platform. This is actually fairly realistic, though less of a problem now we have path signals.
– If two lines have to share the same piece of single track, try to set up your line timings so the trains alternate (ie Line A – Line B – Line A – Line B)
– Minimise the number of signals that you use. Less is more.
– Signals placed on bi-directional track sections will cause issues as the current pathing algorithm doesn’t see beyond the next signal that faces the same way. A train could be waiting at an opposite signal beyond that and you’ll likely get a lock-up or collision.
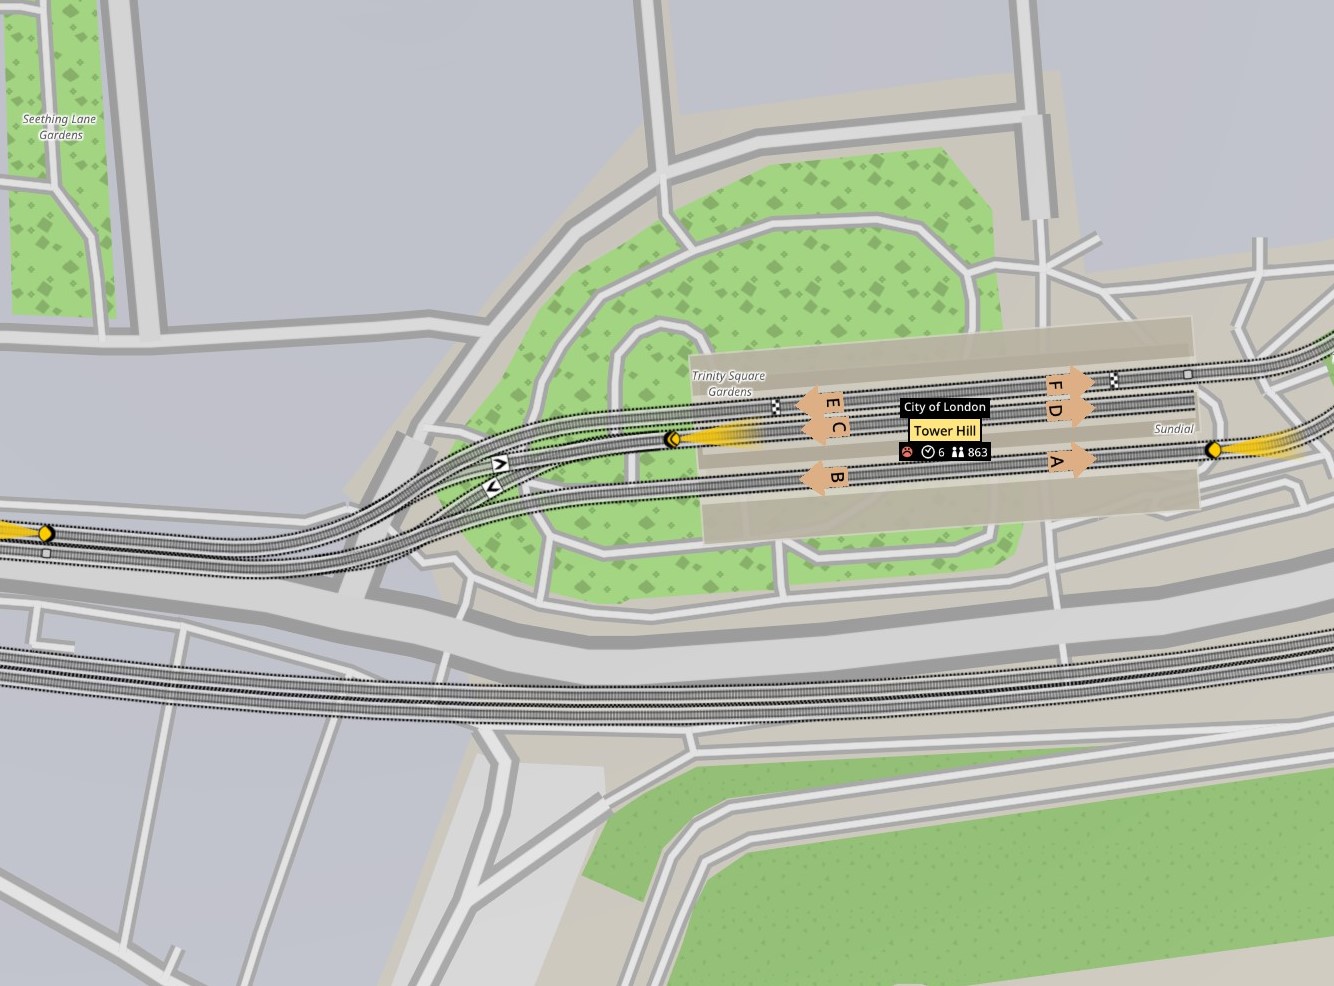
– Having a platform that is used both as the end of a line and a through platform is asking for trouble. Use a “bay” platform as here at Tower Hill:
Or send your terminating train through the platform and onto a branch for it to turn around upon, as seen in this setup on the bottom 2 platforms at Harrow and Wealdstone:
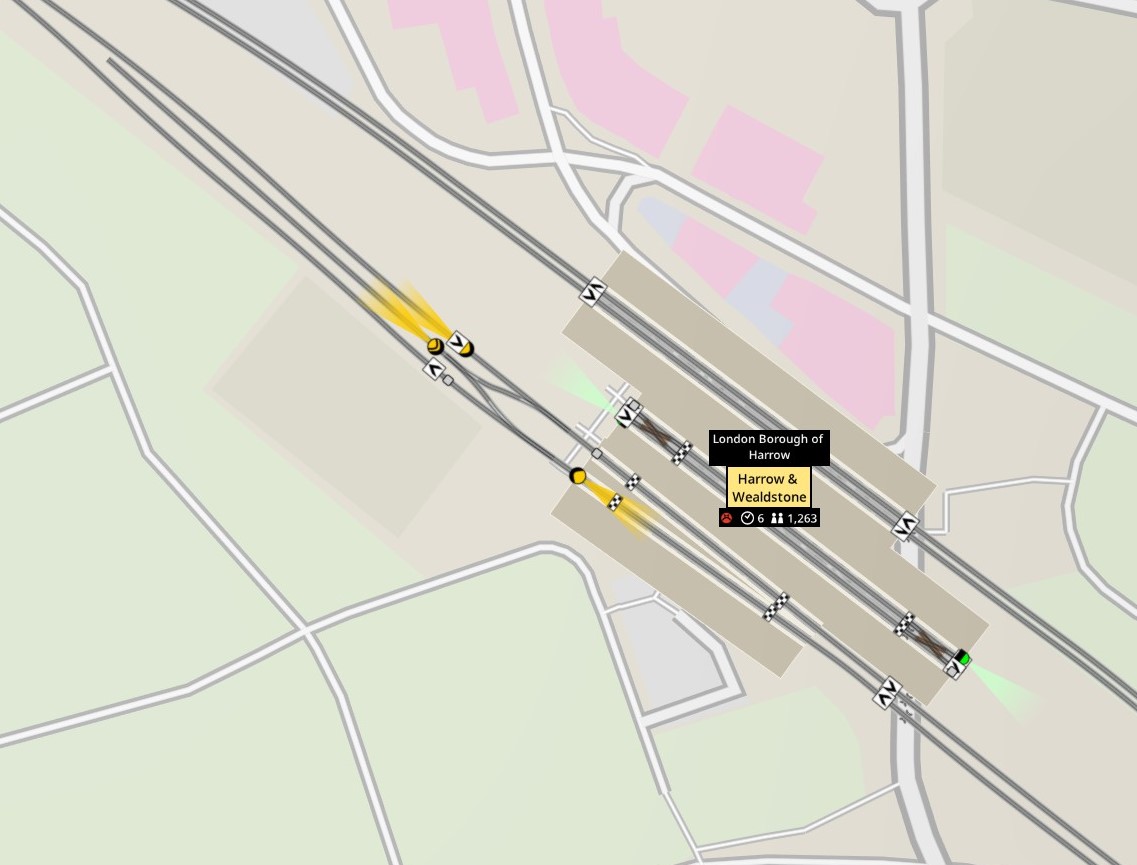
The type of path signalled used is important in both these cases, as the train approaching the terminus or siding needs to see beyond the signal that faces the other way.
General Tips
– Keep it simple. Less is definitely more with path signals.
– For more complicated sections of crossovers and junctions start by just placing Limit All path signals at the entries to that section and balises at the exit. Then if that causes train jams try carefully adding more signals in-between, but click on individual signals as you place them to check which paths they cover. Avoid any signals on bi-directional sections of track.
– Don’t be afraid to use one-way arrows fairly liberally. I find that trains going to depots will just turn around at any station and then potentially collide.
– I have also had issues with trains leaving service having passed a signal and then re-routing to a collision; placing signals further back from the collision point has helped with this. Almost all of the collisions that I get now are caused by trains returning to depots as they just take the quickest route. Most can be avoided when I improve the track/signal design.
– Avoid single track if you can, it has very limited capacity.
Here we come to an end for NIMBY Rails How to use Signals Updated! hope you enjoy it. If you think we forget something to include or we should make an update to the post let us know via comment, and we will fix it asap! Thanks and have a great day!

Leave a Reply