Your one-stop-shop to all Arenas info in Project Nexus
♥—Welcome—♥
This is a comprehensive guide of the game’s features.
Compiled both from information of other guides on steam,
and my personal experience with the game after finishing it twice.
THIS GUIDE DOES NOT CONTAINS SPOILERS.
This guide will not contain any in-game dialogue or bosses. Only general tips and info.
This guide will be updated whenever there is new information.
The guide is also getting filled out more as I have time to write.
planned
- game basics
- tips for all levels
- full gameplay of every stage from the start
With that said, the rest of the guide is split into categories, please skip things that are of no use to you, and good luck on your journey of Madness.
Starter Tips
Being proud doesn’t get you anywhere.
Your first few levels will be hard, so if you have issues just bump down the difficulty to easy.
You don’t earn any XP or money for failing a wave anyways, so it’s just wasted time.
Your main goal at the start is to get experience.
So get in there and kick a little a*s in the Sleep-walker training program before you take on armadas of trained mercenaries.
You can unlock abilities without going to the gym area all the time.
By pressing I to open your inventory,
you can equip weapons without opening the storage chest,
as well as train abilities by switching to the other tab.
You can also use this to switch weapons between waves while deployed.
You can also use this menu to see what skills your hirelings have, and to give them weapons.
♣—Character stats—♣
Focus skills (What you lose, and what you get.)
For the short version:
If you have a Focus on a particular genre of murder,
you gain twice the stat points from unlocking its abilities,
aswell as getting 3 extra abilities to unlock.
However if you are Weak in a skill, you lose out on quite a few abilities,
aswell as not getting ANY stat points for unlocking it’s abilities.
The special abilities you unlock are for having Focus in a skill are:
A focus into fisticuffs lets you (fists)
- Always STUN enemies in 10 punches.
- Dodge Tackle enemies.
- Guard against bladed attacks with just your hands.
A bruteish dedication to sticks lets you (melee)
- Knock away weapons of enemies with smaller sticks than yours
- Block bullets
- AND deflect bullets with more precision than the average Madness OC
Being a gun-fu master lets you (guns)
- Run around without losing any accuracy
- Gain confidence and hit more shots whenever you hit an enemy
- Always hit, even if someone tries to dodge.
Going pro in parkour inexplicably lets you (athletics)
- Throw swords right trough multiple heads
- Jump over the heads of your enemies
- Sprint with such reflexes that you dodge bullets coming from behind
Take these into consideration when picking your
♦—Level Tips—♦
Sleepwalker Program
Technically the first level, and also the only one that doesn’t kill your crew.
You read that right, your 3 5 man squad of hirelings can’t die in this mission,
so it’s perfect for getting them up a few levels before deploying them into real combat.
On your first playthrough of this level (if you’re somehow having issues with it) you should
just start Yeeting ░░░░.
Yup, just throw all those handy weapons your enemies start bringing in after the first wave,
it works absolute wonders, as all the holograms die in one or two hits even if you have no skills.
Generally, focus on avoiding getting ganked by backpeddaling.
Pit Stop
Your first mission, as well as the first Siege mission of the game.
Your goal is to protect four gas pumps,
you lose a fourth of the money you’d get from the mission if one gets destroyed.
half if two get destroyed, a quarter if three get destroyed,
and the mission FAILS if all the gas pumps get destroyed.
Things you should know before going in:
You have a gun in your inventory which you can equip, as well as throwable rocks.
Bandits will attack in waves.
Some will attempt to break the barrier on the right side of the level, which lets in more enemies.
While most of them will focus on either you or the pumps.
Word of caution, zombies appear on wave 3.
They come from the ground randomly around the map, stay sharp and don’t get swarmed.
Try saving your ammo as much as possible,
only use it to deal with the zombies, and to deal with people attacking the pumps quickly.
At the end of the third wave a MAG unit will show up,
avoid it’s attacks by dodging towards it, and behind its back.
Fast Track
This is the first Infiltration mission of the game.
It’s unlocked after the first story mission.
It’s one of the moderately difficult stages.
The enemies here have guns, a few have melee weapons.
I recommend saving your guns until after the first wave.
As the difficulty and amount of enemies quickly goes up.
After the first deployment you should have a few hirelings at your disposal,
give them some nevada protectors, it’ll be enough for them to survive most of this mission.
For the first wave, I recommend staying on the roof, keep your hirelings up with you as well.
If you start running low on health or TAC-Bar, jump down, you’ll be fine. usually.
For the second wave, try staying on one side of the room as long as you can, taking out as many enemies as you can. Once they start closing in on you, run to the other side, and repeat.
For the third wave is usually where you will start losing HP on your first playthrough.
a HalfMAG agent appears here, when charging particles appear under his legs, DODGE.
The fourth wave can be easily cheesed by staying on the roofs and killing the enemies climbing up to you. If they happen to get up to you, just jump down, get to the other roof, and repeat. Another HalfMAG appeares here, he’s easy to kill with all the weapons dropped by the rest of the enemies.
Slaughter Time
Probably the easiest arena in the game.
Unlocked after the second story mission.
Most of your enemies only have their fists, and you can easily defeat them.
Even just with the basic fist/melee abilities.
No enemies in this level use normal bullets, making your Tac-Bar useless.
Rely more on dodging and your own legs.
In the later waves you will see a HalfMAG Unit with a rifle.
It isn’t very dangerous, just run around it in circles and smack/shoot it when its not firing.
Haunting at Nevada House
The second Siege mission of the game.
Unlocked alongside Slaughter Time.
This one is honestly just time consuming.
The enemies come slowly, none of them have ranged weapons.
the only thing you have to “worry” about is not letting them destroy the gates.
If the gates happen to break, grab some planks from the room on the left and patch them up.
Don’t let the outside enemies near the table in the middle room.
If they successfully activate it the mission fails.
Surprisingly, this level doesn’t contain any zombies during it’s required waves.
Even though it takes place in a haunted mansion.
Tip:
There are vents on both of the edge rooms which allow you to teleport between them.
You probably won’t be needing these.
?—Game Mechanics—?
Important things:
Your hirelings never die permanently, instead going to the medbay.
You can pay to heal them immediately, or wait 15 minutes to lower it to a fraction of the price.
You can also buy Cloning Pods.
- 2000$ for the first
- 4000$ second
- 8000$ third
- 20000$ fourth which is currently useless, as you can only bring 3 hirelings in V1.01
these let you ressurect your hirelings as soon as you get out of a level
for the lowered price you’d normally get for waiting 15 minutes.
You can hold Control to give your hirelings instructions for where to move and stand.
LMB=Move there
MMB=Stay there
RMB=Select which hireling to command (works both on models and on name list)
Weapon Workshop
After finishing the second story mission, you unlock a very useful table in several locations.
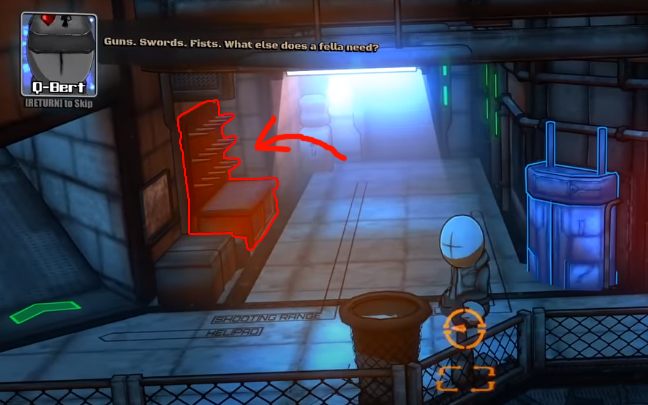
The first place you will notice it’s right next to your quartermaster, behind your storage chest.
This workshop allows you to upgrade your weapons with attachements that:
- Increase damage
- Make your guns look cooler
- Increase accuracy
- Change ammo types
- Increase magazine size
- Reduce recoil
- Silence your weapons
and if you picked Tinkerer as your origin,
you can turn anything into a rocket/plasma launcher.
These attachements cost very little to add and give you back your money if you remove them.
They do however also add to the size of the weapon, so if you want to dual-wield modified pistols, make sure you can hold normal sized weapons.
You unlock more attachements as you finish missions.
(Attachements unlock list coming soon)
Boon tokens
What are those orange baseballs you’re getting? I wondered that too.
After you finish the contract Fickle Friends,
you can exchange these for new colors for your clothes, your skin, your blood, and Alphaware.
It might seem impressive but in reality they really aren’t.
Alphaware are stat upgrades which aren’t very impactful as you can only have one at a time.
After you buy one that fits your class, you don’t need any more.
Now then.
You wanna make yourself glow?
You’re gonna need more tokens.
How do you get more tokens?
Simple. You just hunt down these drones.
These drones only spawn in endless arena waves. (Waves after completion of level)
They spawn on all difficulties but their spawnrate is vastly increased on Hard and Madness.
WARNING: Boon tokens do not transfer between Imprints
Known bugs
Infinite Money*
This bug is limited to the Tinkerer origin, and requires you to finish the Slaughter Time arena.*
https://steamcommunity.com/sharedfiles/filedetails/?id=2621003946 – [steamcommunity.com]
In V1.01 If you dash trough a doorway in the storymode, you clip out of bounds, sometimes being able to walk on the background, sometimes falling out of the world.
○—THE END—○
For now…
The guide is still being updated, expect the rest of the level’s tips very soon.
New RAM is arriving soon, once that gets here I’ll have more time to find more useful strategies.
Good luck on your journey to complete Madness!
Hope you enjoy the post for MADNESS: Project Nexus All Arenas Detailed Info, If you think we should update the post or something is wrong please let us know via comment and we will fix it how fast as possible! Thank you and have a great day!
- Check All MADNESS: Project Nexus Posts List


Leave a Reply