
This is a tutorial on how to host your own server for Longvinter.
Requirements and prerequisites
This guide is for Windows systems. For Linux servers follow the guide on Linux GitHub page – [github.com]
- System requirements:
- Broadband internet connection
- Router with the ability to port forward
- 64bit Windows 10 system
- Min. 3 GB RAM
Also requires that Steam is installed into the system.
https://store.steampowered.com/about/ – [steampowered.com]
Install GIT BASH version control software to easily update the server when new update is rolled out.
https://gitforwindows.org/ – [gitforwindows.org]
HOX YOU ALSO NEED git lfs – [github.com]
You also need to open ports on your home router to allow traffic go trough. This process is greatly different from what type of router you have
Open both TCP and UDP protocol ports.
For Steam open: 27015 & 27016
For Unreal Engine open: 7777
Downloading the files
Server files are stored in Github
https://github.com/Uuvana-Studios/longvinter-windows-server – [github.com]
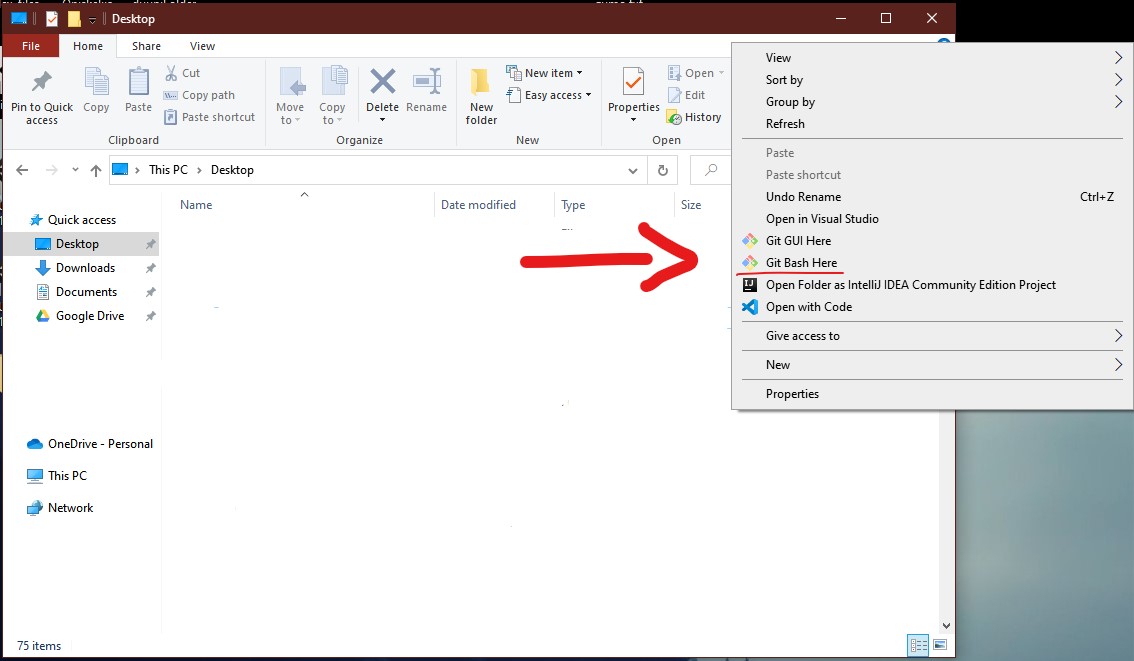
The easiest way to install them is to right-click and git bash to the folder where you want to install the server files. You can also use CMD if you installed just GIT and not the GIT BASH.
Enter the following command to clone the GitHub repository to your wanted folder:
NOTE: cloning creates a new folder for the files so no need to make a folder for the repository beforehand
git clone https://github.com/Uuvana-Studios/longvinter-windows-server.git - [github.com]
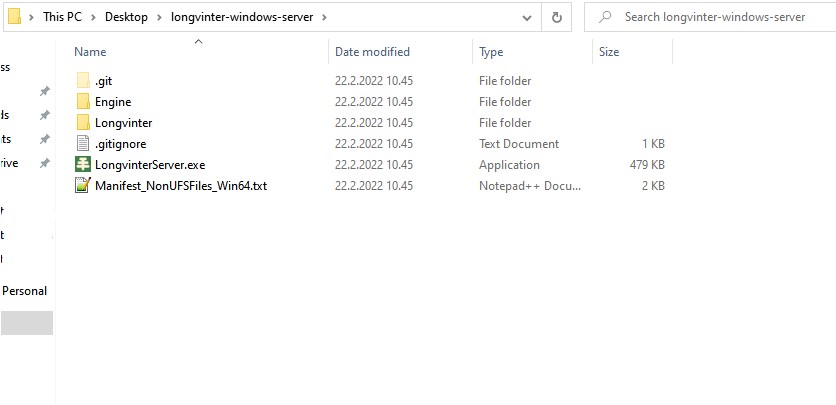
Once the cloning is done you should see the following files inside the folder command created.
You now have installed the server!
Customizing The Server
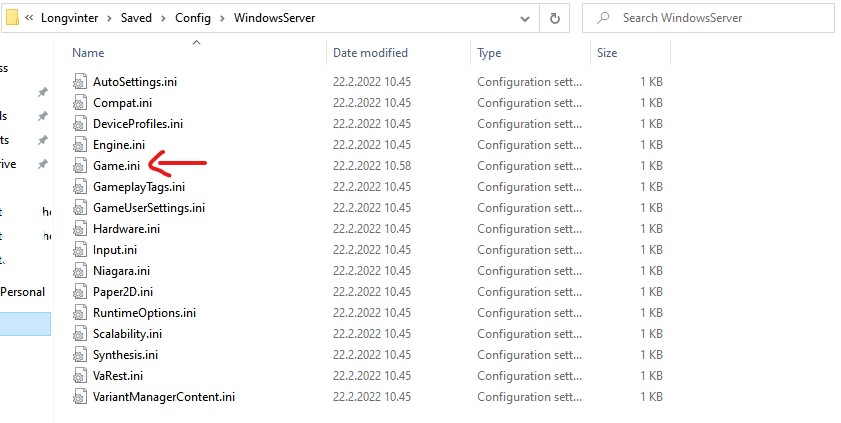
You can customize some server parameters by editing the Game.ini config file
Go to server folder and navigate to Longvinter ->Saved -> Config -> WindowsServer
Here you should create a new file and name it Game.ini
Open it for edit. You can use any text editor you want.
Add the following content inside this file.
[/game/blueprints/server/gi_advancedsessions.gi_advancedsessions_c]
ServerName=Unnamed Island
MaxPlayers=32
ServerMOTD=Welcome to Longvinter Island!
Password=
CommunityWebsite=www.longvinter.com - [longvinter.com]

[/game/blueprints/server/gm_longvinter.gm_longvinter_c]
AdminSteamID=97615967659669198
What do different params do?
– ServerName: Name that shows up in the server browser. Please don’t call your server with an OFFICIAL name. We want players to clearly know if they are joining a server that is hosted by other players!
– ServerMOTD: Server message that is on signs around the island.
– MaxPlayer: Maximum allowed players that can connect at any given time.
– CommunityWebsite: This allows you to promote a website in the same place where the server message is shown. This link can be opened in-game.
– Password: Add your password here. Use only numbers and letters. If left empty there is no password on the server.
Starting The Server
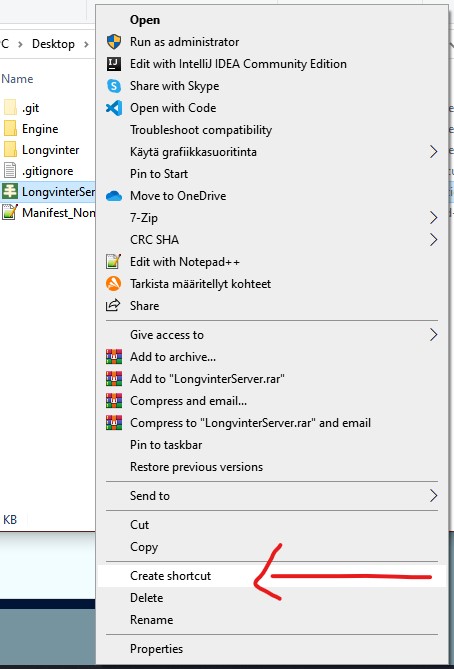
For easy starting and closing, I recommend creating a shortcut for LongvinterServer.exe
Right-click the file and press create a shortcut.
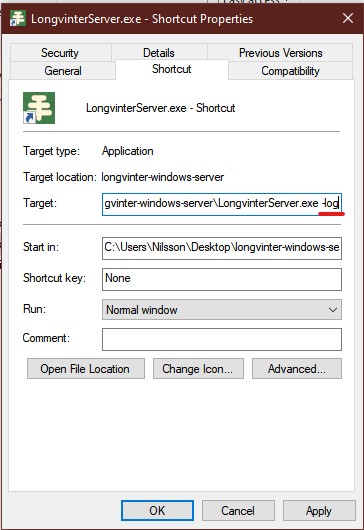
Then right-click the shortcut and open the Properties panel, here you need to edit the Target field in the shortcut tab.
Add the -log to the right side of the path. This is telling the program that we want to open a command panel for the server program. This helps us verify that the server starts correctly
After edit just Press “OK” to save the edit.
Then you can start the server with the shortcut. If the console is not opened you need to close the server using Task Manager.
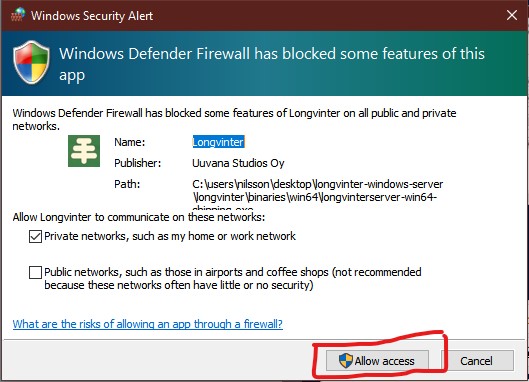
Allow the server access trough your windows firewall.
To verify that server started correctly look for these 3 lines in the console window
If these lines are not present look further up the command line for any error or other warnings that are Steam related.
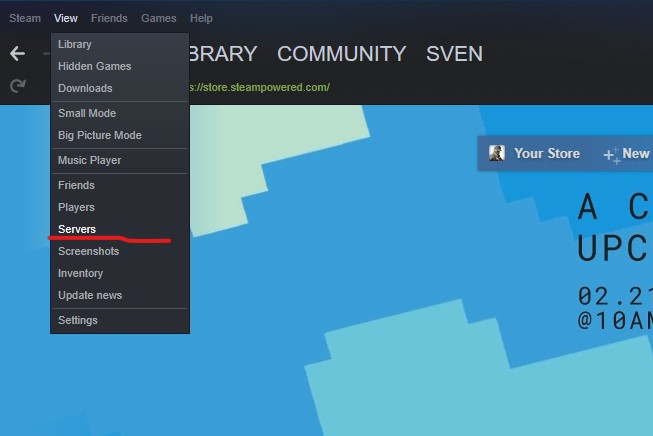
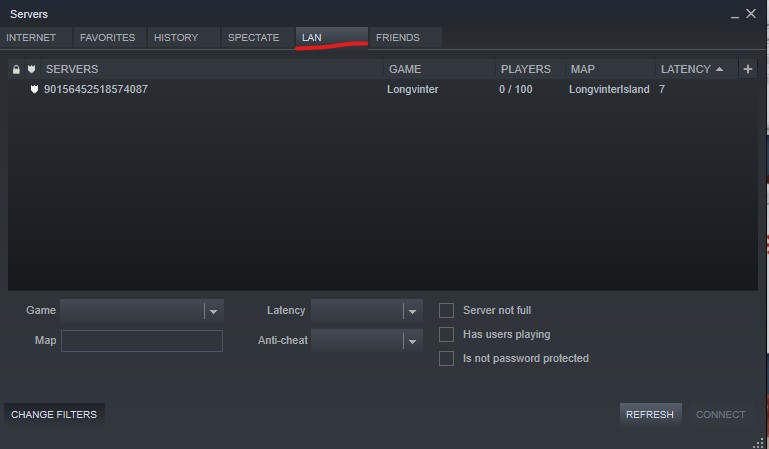
You can also use the Steam server tool to see if your server is visible in the LAN space.
If your server shows up on the LAN tab but not in the game’s server browser. This indicates that there is either firewall problem with your windows or the ports of the router are not configured correctly.
Updating To Latest build
I suggest you update the server every time you start it. The best rule of thumb is that if your game has updated in steam. This means you also have to update the server.
Updating is done by opening the server folder in GIT BASH or in CMD as I showed earlier. The difference is that you now have to be inside the folder and not where it is located.
First, verify that you are in the folder by typing:
git status
If console prints:
fatal: not a git repository (or any of the parent directories): .git
This means you are in the wrong folder and you cannot pull the update from here.
Updating is simple. Just execute these two lines separately
git restore .
git pull
This is all for Longvinter How to Make Dedicated Server Guide hope you enjoy the post. If you believe we forget or we should update the post please let us know via comment, we will try our best to fix how fast is possible! Have a great day!


안녕하세요
만들어주신 가이드로 잘 만들고 실행중에 아래와 같은 error code로 문의드립니다.
Error: UpdateSession: Succesfully updated session ‘서버이름’ with id ‘xxxxx”
위와 같이 error code가 발생하고, 게임 서버 리스트에는 나타나지만 접속이 되지 않습니다.
어떻게 해결해야할까요??
hello
Follow the guide you made to create a server and contact us with the following error code while running.
Error: UpdateSession: Succesfully updated session ‘servername’ with id ‘xxxxx”
An error code occurs as above, and it appears in the game server list but cannot be accessed.
how should i solve it??
hello first of all thank you for creating this guide really helpful, i encounter problem like you mention before that my server can’t show up in the server list i tried to configure my router since i already follow the step properly. could you specify the configuration for the tcp and udp example for a router that you use