In this guide we are covering all the basics of the game to help you with your adventure: from exploration tips to combat info. The goal is to help you get out of sticky situations without holding your hand and letting you experience things by yourself.
Introduction
First things first: this guide will be spoiler free. It will only show images from the first areas of the game and the 6 starting classes.
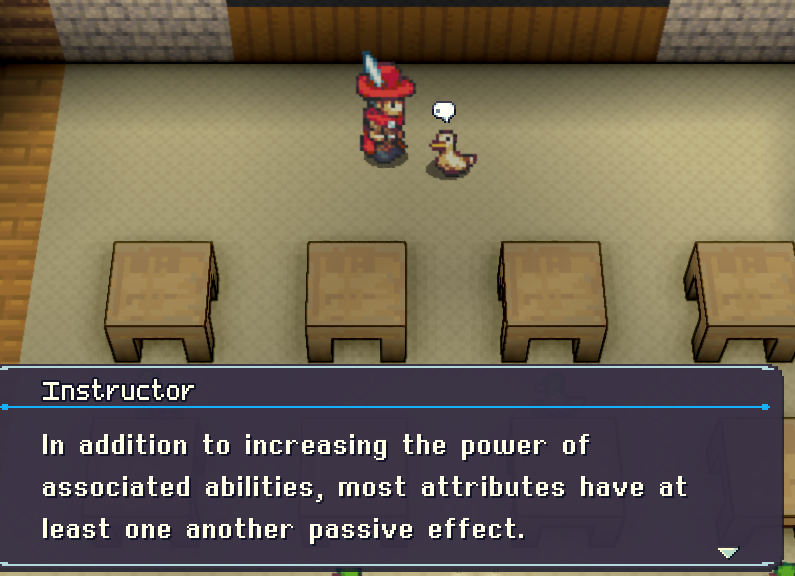
Most of the information compiled in this guide can be gathered in game via specific NPCs (the ducks have the knowledge) on top of general tips to help you out survive the wilderness.
Each section is self contained so if you are here for a specific topic you can jump to its section and skip the rest. Just like the game itself, you are free to create your own journey through this guide.
Exploration
Before getting into any fight comes the exploration.
Improving and making the most out of exploration can boils down to a few key aspects:
- Keeping your eyes open at all times
- Taking as many relevant notes as possible
- Interacting with everyone and everything
- Knowing what your character can reach or not
Keeping your eyes open at all times
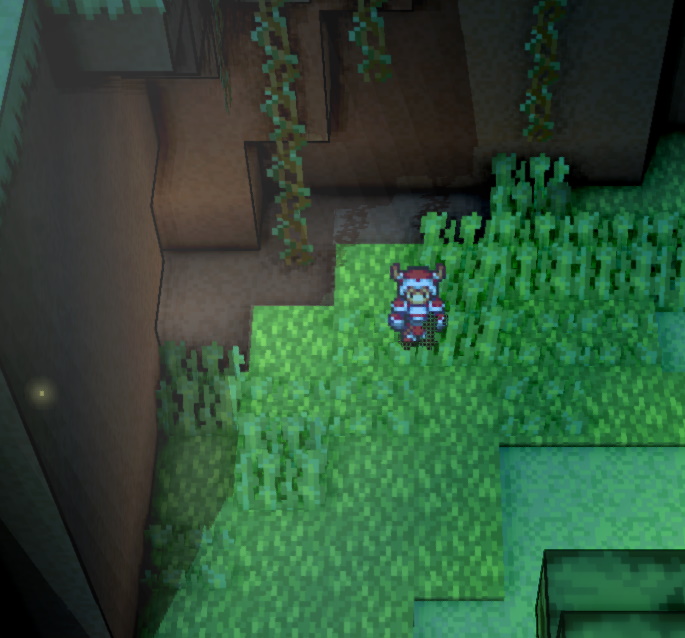
Always question whether there’s so something over here or over there. Be on the lookout for small holes in a wall, oddly placed objects and try to see if any place can be reached are good habits to build in your exploration.
For example here the light coming from the rock on the left side of this image indicates us that there might be a secret passage in this wall and perhaps a secret cave ?
Taking as many relevant notes as possible
If you find a map (the physical object/key item) of a location then you can have both a minimap appearing on screen during exploration and can also check that location on your world map in the menu.
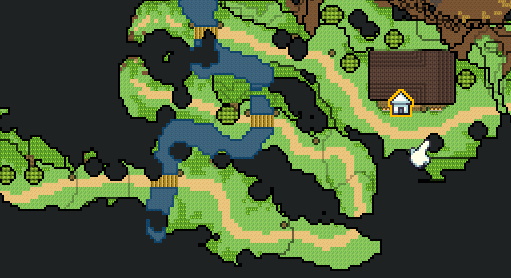
You can place markers on the map to take notes of interesting things you might have seen and want to remember. Maybe you want to keep track of all the home points you come across ? Perhaps you saw a chest you could not reach just yet and want to remember where to go when you finally are able to reach it. Or you just faced an optional boss or monster that was too strong for you and want to remember where it was to beat it later.
Here is an example of our adventurers marking the location of a home point and a place to rest for later.
Even if you don’t own the map of a location yet, you can still take notes outside of the game on a notepad file or an actual real life notepad (I know, crazy). You will be happy when you realize 20 hours later that you noted where to find that super cool boss that give an even cooler weapon in endgame!
Interacting with everyone and everything
Every NPC in the game has something to say that will be useful to you to some extent. They always are to the point and don’t linger on endless dialogs so feel free to ask everybody what they have to say, you will be rewarded for it.
If you are not in the mood to speak to everybody in town make sure to come back and talk to them as soon as you are in the mood for it. You might miss out on juicy pieces of info or good rewards otherwise.
Knowing what your character can reach or not
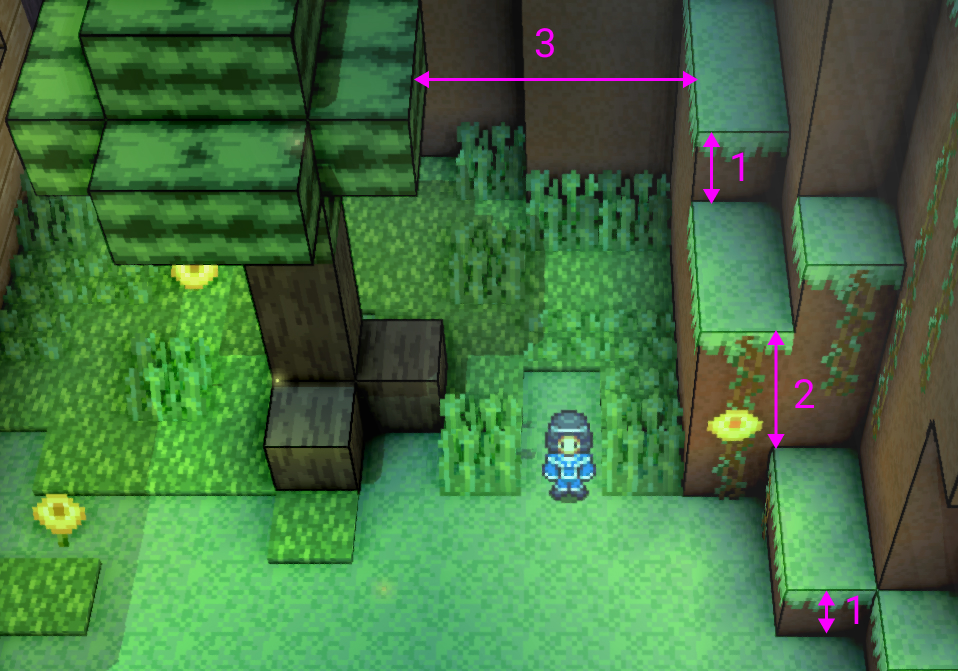
By default your character can jump two cubes high and clear gaps of 3 cubes (barely) long. This is changed when you unlock mounts (no spoiler remember).
A good habit to have is to always keep in mind what your character is capable of and scan the environment to know if you can make a jump. Chances are: if you can make a jump then you will have a reward on the other side of that jump.
As soon as you unlock a mount, learn what this mount can and cannot do and what kind of new places it can open up for you.
Here is an example of what our Cleric adventurer can do in this situation.
We first see a series of 1, 2 and 1 cube high jumps that are doable by our little buddy.
Then that big gap is also actually doable as it’s only 3 cubes wide meaning that our Cleric can in fact climb on top of that tree giving him access to new locations and rewards.
The most important at first is to identify everything that is below 3 cubes high (what you canclimb on) and all gaps that are 3 or less cubes wide (what you can cross).
Team Composition
Before getting in a fight you might want to improve your team as a whole and have a strategy before fighting big baddies.
The goal here is not to tell you “this is the most optimal, play this” but rather to give you the building blocks to help you make your own party of capable fighters.
Let’s take things step by step.
Step1: make your own goals/strategy
At first you will want to have a general goal for your team. This goal will constantly be challenged, questioned and threatened by more and more difficult combat encounters (which is ok, don’t worry).
For example let’s say our player wants to have a very traditional and balanced party composition and have each party member filling a single role.
In this case, the goal is to define each party member role and to maximize their effectiveness at that specific role. The healer is here to heal, the tank is here to tank, the mage is here to deal magical damage and the last one is here to deal physical damage.
From there, our player will know better how to choose classes, passives and equipment for each of the 4 party members. The healer might start on a Cleric or Warlock class, the tank on a Warrior or Monk class and so on.
Now let’s say our traditional and balanced team is hitting a brick wall because a boss uses a tactic the party can’t handle. For instance, the boss uses exclusively group-wide attacks with a vast majority of physical attacks and occasional party-wide magic.
Our new goal is to have the entire team able to withstand the constant barrage of party-wide attack while dishing constant damage to finish the fight before going out of resource (usually MP first then HP).
Solutions are plenty but for example the tank and the physical damage dealer could learn the Counter passive from the Monk class to effectively counter-attack every party-wide physical attack. The healer and the mage could both learn the Storm Stance from the Wizard class to also counter-attack with lightning spells everytime they are hit.
From there we can make sure to improve the physical defense of our team enough for them to survive the hit and eventually use tools like Eye Gouge from the Rogue class to blind the boss before it attacks our party.
You see with this example that formulating a clear goal helped us dealing with our brickwall and the boss ended up being a cakewalk all of a sudden.
Step 2: choose the right classes for the right situations
As you progress through the game you will unlock many more classes than the starting 6. Across the board all classes have their use with some being more versatile (typically the first 6 are excellent classes that fit more traditional playstyles) than others (some classes can have more specific playstyles).
It’s important to note what impact choosing a class has on your adventurers. Your main class defines the followingo:
- equipment based on that class (for example a Warrior has access to varied weapons whereas a Cleric has a much more limited range)
- the class commands (skills, spells and stances)
- how your stats grow on leveling up (more on that in the next section)
Your character can then equip any passive they learned from any class on top of gaining access to commands from a single other class (and only their commands, the stat growth and the equipment accessible are not influenced).
Step 3: thinking about your character’s stats
Upon leveling up, your adventurer gains stats based on their currently equipped class. You can tweak this growth in a building in the capital city (you get access to it fairly early on in the story and you can’t really miss it don’t worry).
When you pick a class, you can see a star rating of every stat in the game for that specific class: this represents the class’ stat growth.
There is no real good or bad way to go here but usually it’s best to specialize your characters in a few key stats as much as you can. You can see in the tooltip of the commands you use what stats they use in their calculation.
On top of impacting commands directly, stats also have a bonus effect as follow:
- Strength: increases Defense Pierce (meaning that your attacks are more effective against high Defense enemies)
- Vitality: gives a multiplicative bonus to your Defense and reduce the amount of damage taken per turn by status like Poison, Bleed and Burn
- Dexterity: increases your chance to inflict critical hits and the damage dealt by critical damage (be careful this is mostly true only with physical attacks)
- Agility: increases Accuracy and Evasion
- Mind: increases Resistance Pierce (meaning that your spells are more effective against high Resistance enemies)
- Spirit: gives a multiplicative bonus to your Resistance and increases the amount of health recovered from heal per turn effects like Regen or Chakra
- Speed: the higher the speed the faster your character can act and the more turns they will have comparatively to other persons in combat
- Luck: generally helps against bad luck for everything related to a % chance and help with having better rolls of damage when you have Variance
Step 4: completing your team with good gear and passives
Now that you know what class and what stats you want each of your characters to have you can start thinking about gear and passives.
Generally you will want to make the most out of your characters and play on their strength.
For example if your tank is not meant to deal high amount of physical damage but you still want them to do cheap damage regularly you could give them the Counter passive and a dagger inflicting 1 turn of Bleed or Poison on hit so that they constantly apply Bleed or Poison to enemies attacking them with physical attacks.
Sometimes you might want to adapt to the situation and change your passives and gear accordingly. Let’s say an enemy has particularly devastating fire magic and is very frequent in the area you are exploring. Then you might want to maximize the Resistance of each of your party members and see if you can mitigate fire damage through clever use of gear.
Bonus tips
To round this guide nicely here is a rapid-fire section of tips you might find useful:
Use the quick menu
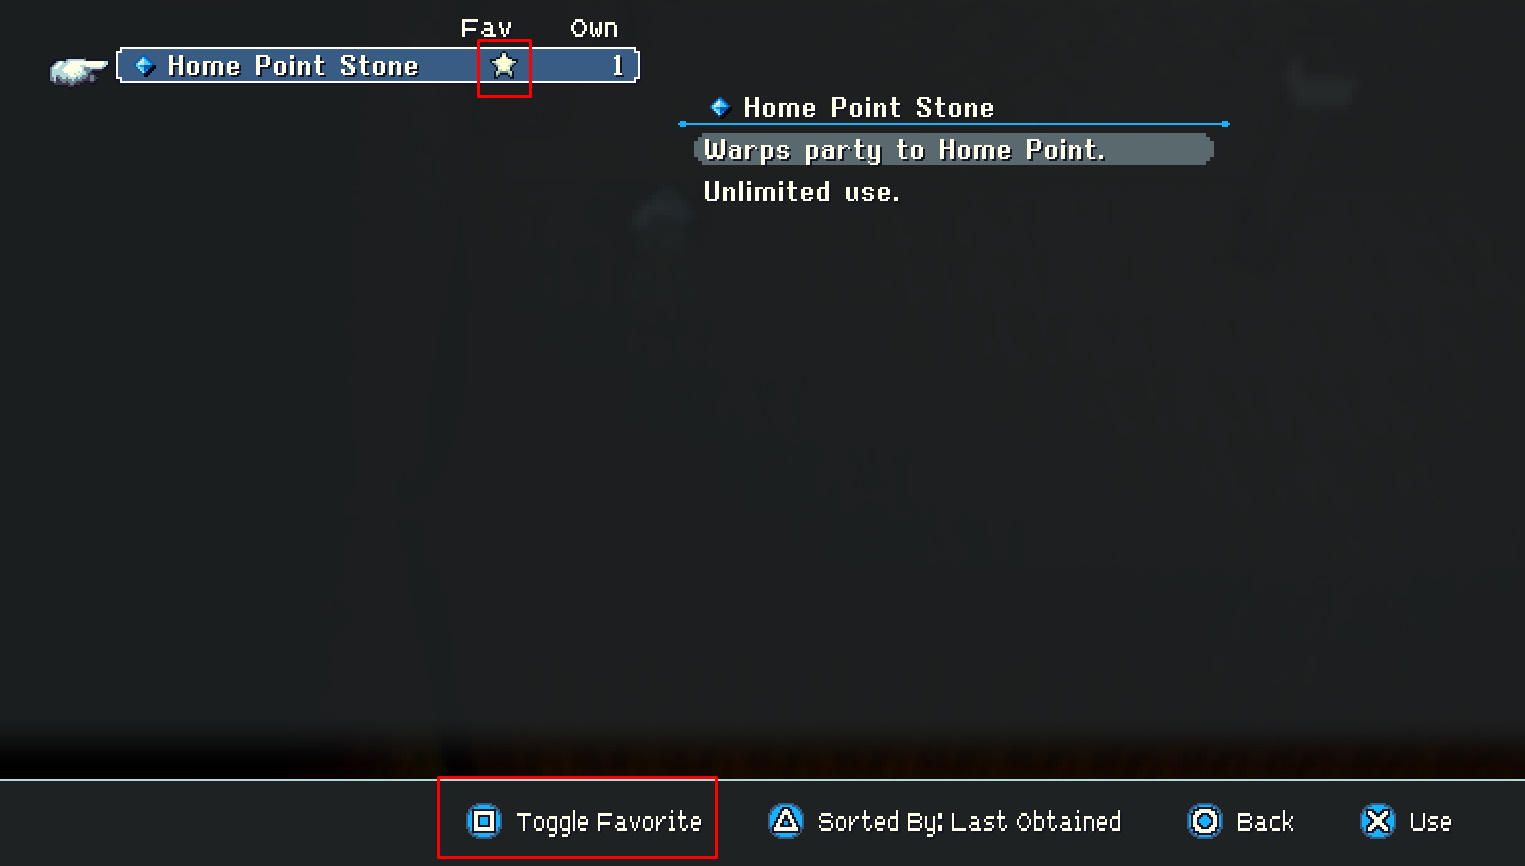
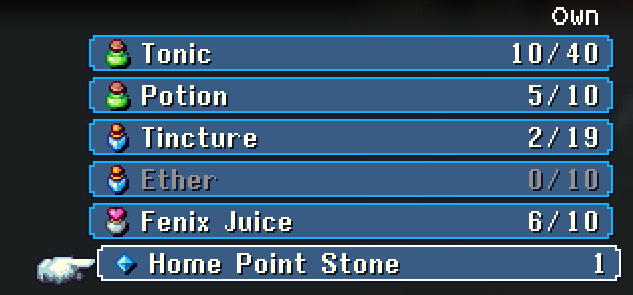
To first add items to your quick menu go in your Item section of the menu and put the selection over any “usable” items (basically tools and consumables). You will then have an option to toggle items as favorite which basically make them appear in your quick menu.
Pressing X, Square or Y (depending on your controller, or its keyboard equivalent, sorry) opens the quick menu when you are out exploring. Items are always in the same order with consumables on top nicely sorted followed by tools. By the end of your adventures your quick menu might start to be pretty packed but it will still be your fastest option to use tools and consumables (which you will most likely do a lot). It is worth nothing that selecting again a mount tool in the quick menu makes you dismount if you want to just use your leggy-legs to walk around instead.
Set your home point cleverly and use your Home Point Stone whenever you need
Your home point is a potentially very effective tool to move around quickly and go about the world. You don’t always need to change your Home Point to a new stone you come across depending on what you are doing. For example if you want to try a bunch of tricky jumping action you might want to choose the closest Home Stone to that place and as high up as possible as well. Dying send you back to your Home Point so be careful if you let your Home Point being too far you might have a bad surprise. Lastly your Home Point is where you will start your game if you save and quit and then come back to it.
So please save yourself some unnecessary back tracking and use that shiny Home Point Stone.
(You will find shards and stones later that help you out even more with world navigation but I won’t spoil the surprise for yourself)
Get out of your comfort zone
This is true both for exploration and combat: don’t let yourself settle too long in your comfort zone. Try to go in places you never thought you could even go to. Try class, gear, passive combinations you wouldn’t think would even work. It might not always work out of your but you will make some nice discoveries and spice things up nicely!
Enjoy the journey, not the destination
Crystal Project is really built with Adventurein mind. The point of the game is the adventure, the discoveries, the stories you make along the way. Don’t focus too much on the destination and try to just enjoy the moment.
On the flipside, don’t stay too focused on traditional ways to explore things and situations. There is almost always several ways to reach your objective both during exploration and combat. Your experience will be different from other players’ and that’s normal and part of the charm of the game.
Here we come to an end for Crystal Project Basic Gameplay – Adventure & Combat Guide hope you enjoy it. If you think we forget something to include or we should make an update to the post let us know via comment, and we will fix it asap! Thanks and have a great day!
- Check All Crystal Project Posts List

Leave a Reply