
In this guide I describe how to upgrade Thrustmaster T150, TMX and T300 Thrustmaster wheels with a simple replacement of standard plastic tensioners with ball bearings.
Warning
Actions described in this guide will void warranty for your steering wheel! Think twice before proceeding.
Disassemble the wheel only when it is not connected to electricity network!
For disassembly use either your floor or some low table, because the wheel has small parts that are very easy to lose, which will prevent you from modding anything at all.
Upgrade subject
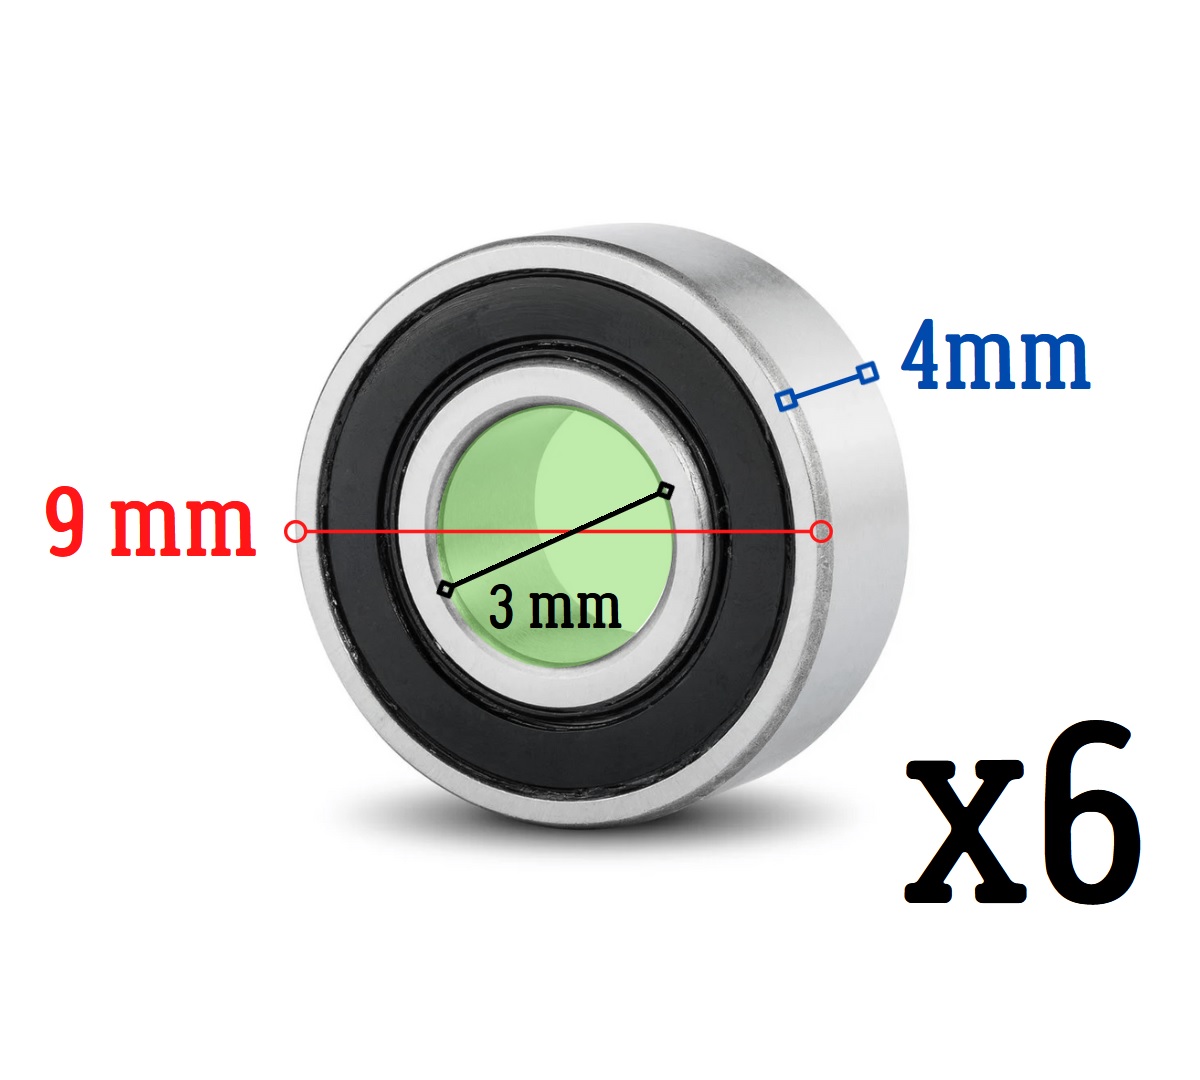
The upgrade is a simple replacement of plastic tensioners for the wheel’s belt with ball bearings (3x9x4mm). These ball bearings have less friction with the wheel, which helps the motor to provide feedback as there’s less need to fight the friction. The feedback should become clearer and it will be easier to understand when the car starts to oversteer.
The ball bearings, which are needed before we start:
3mm – inner diameter.
9mm – outer diameter.
4mm – the width (or depth) of the ball bearings.
In total you’ll need 6 of those.
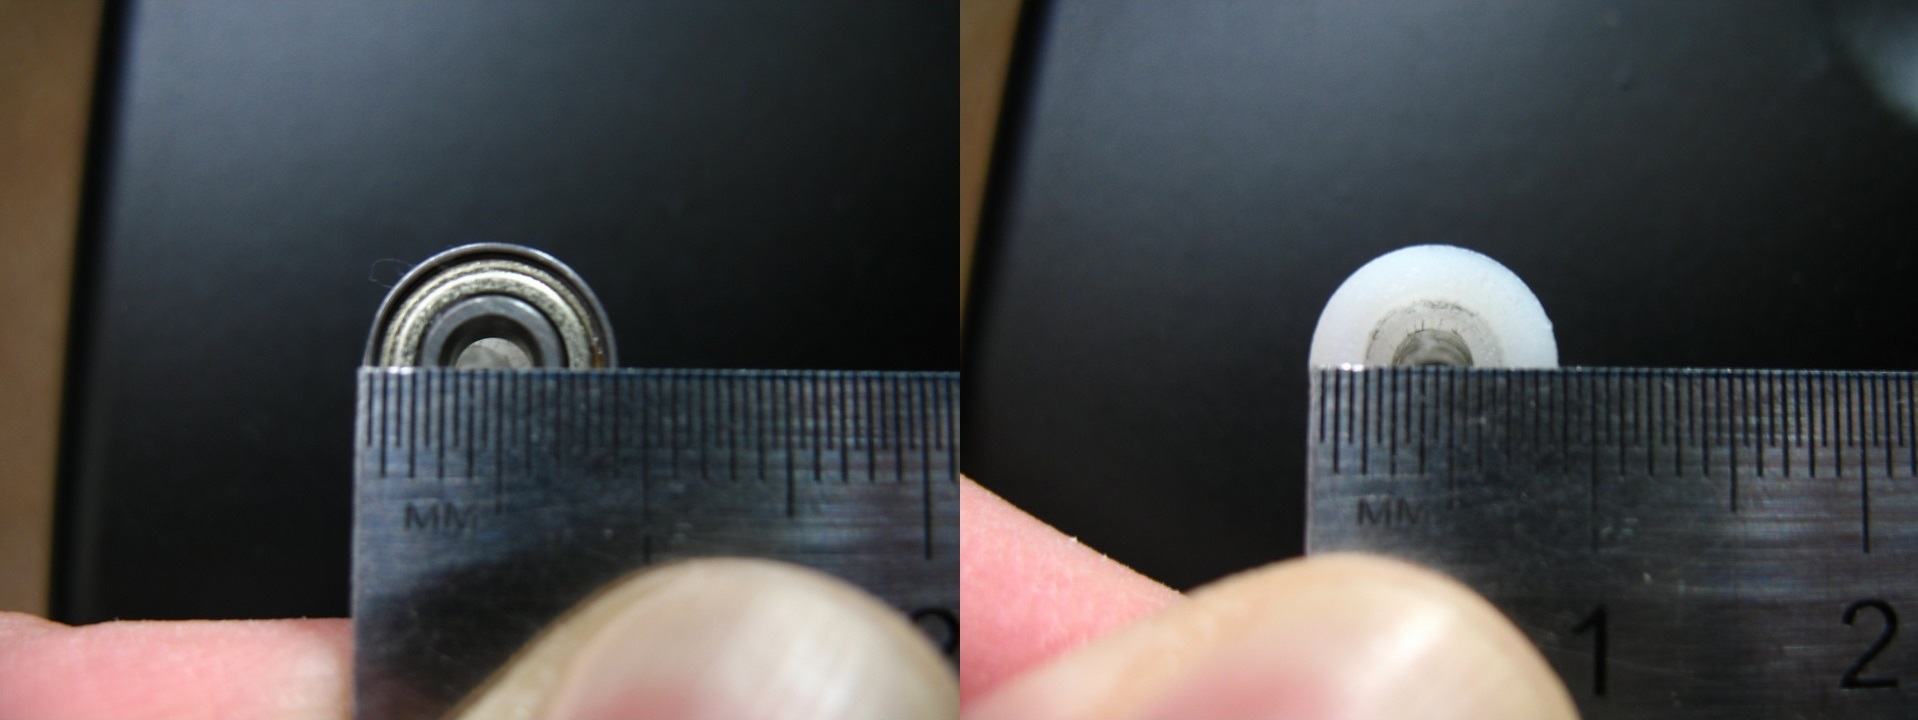
Some guides advise you to use 3x8x4mm instead of 3x9x4mm and they’re wrong.
The reason for this is in the picture below, you can clearly see that the stock tensioner has an outer diameter of 9mm and not 8:
Wheel base disassembly
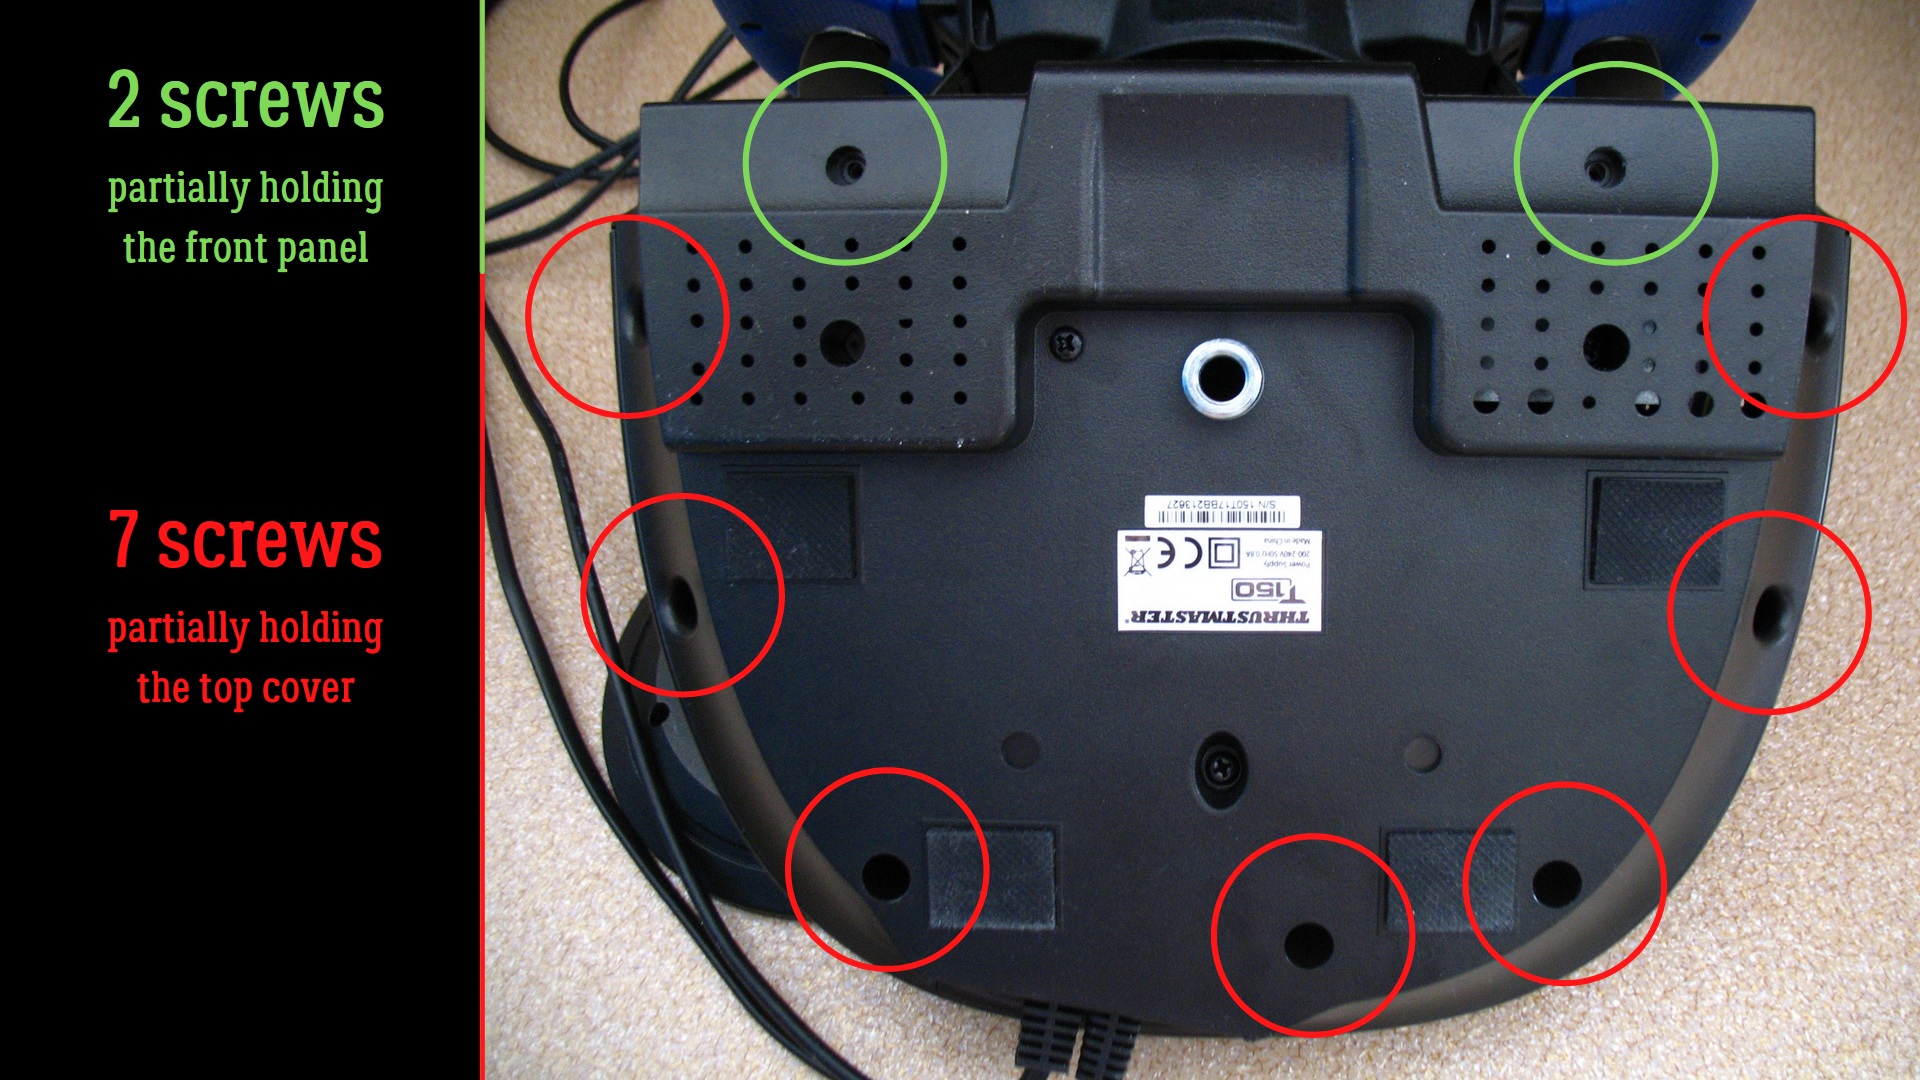
Top cover and front panel
7 screws which partially hold the top cover.
2 screws which partially hold the front panel.
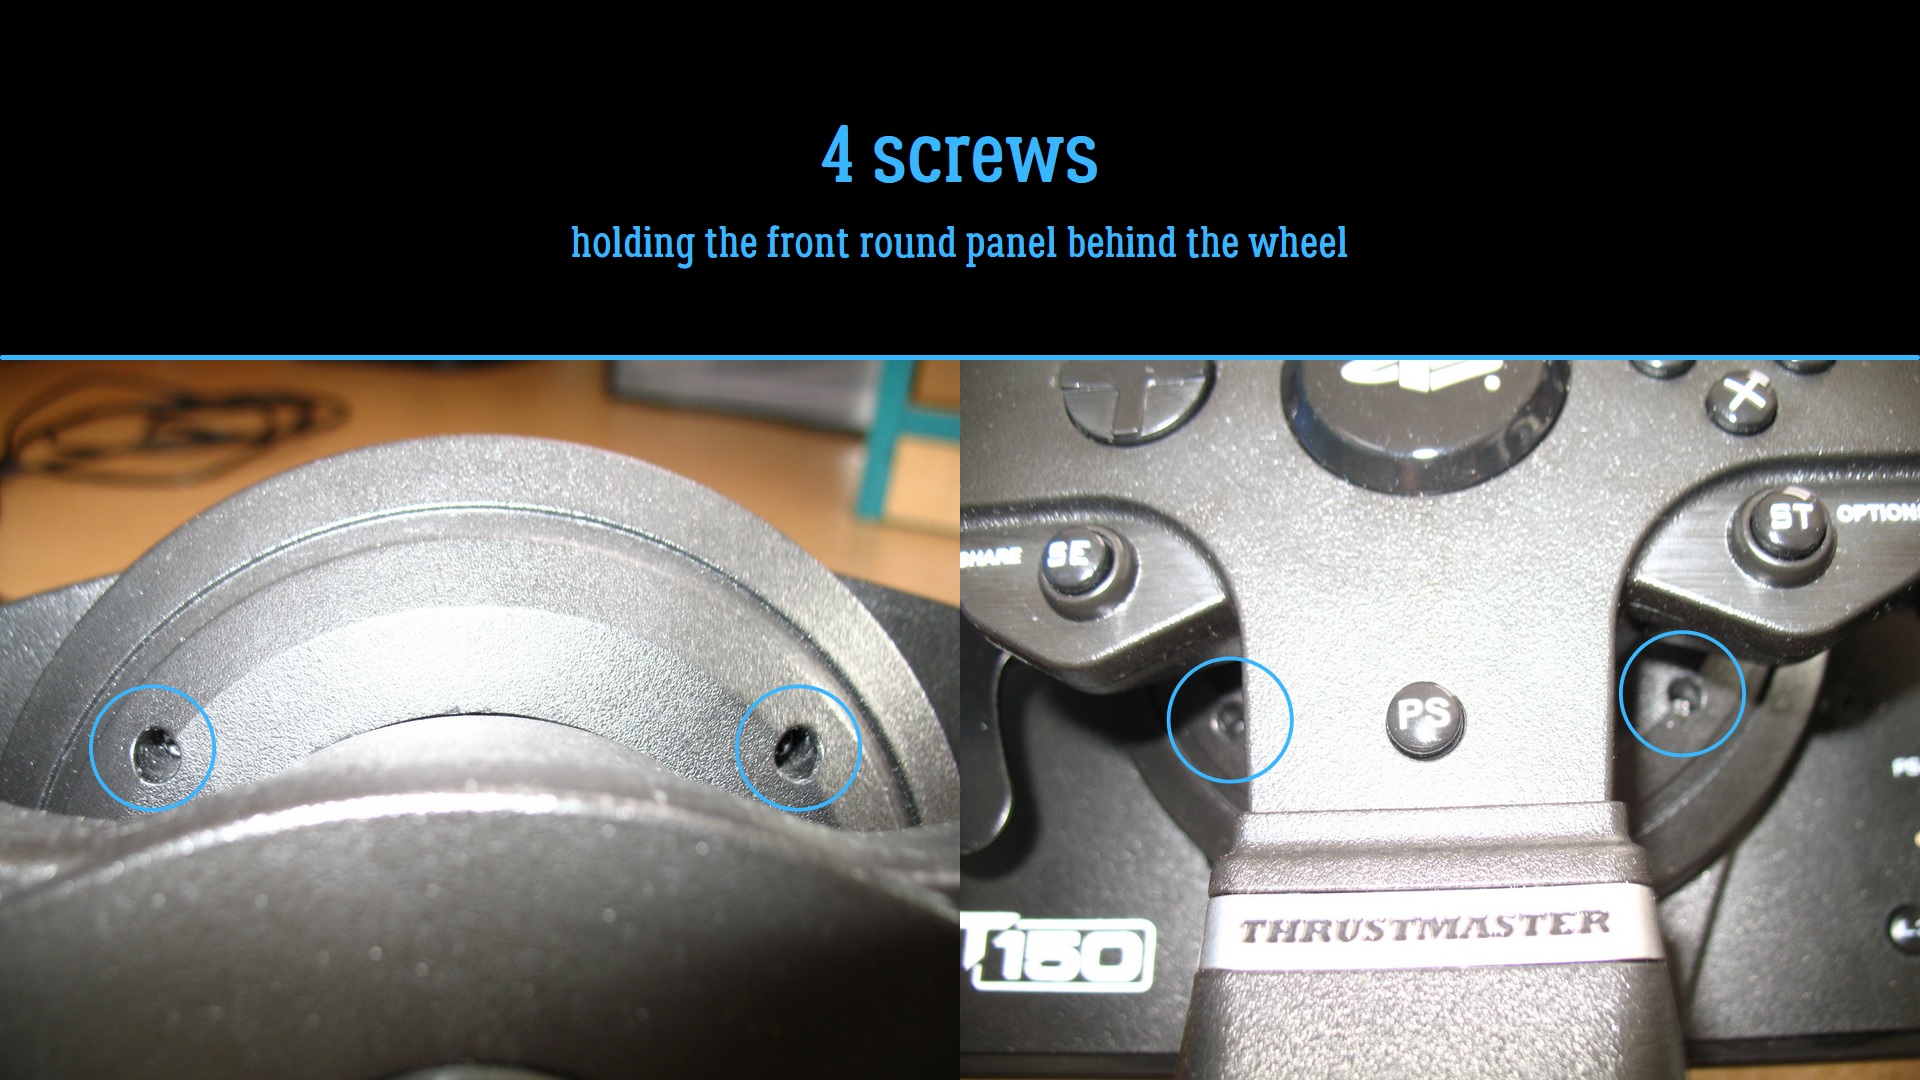
Round panel
It is found directly behind the wheel and is held by 4 screws, 2 on top and 2 at the bottom. They’re identical to the screws that hold the top cover.
Taking the top cover off
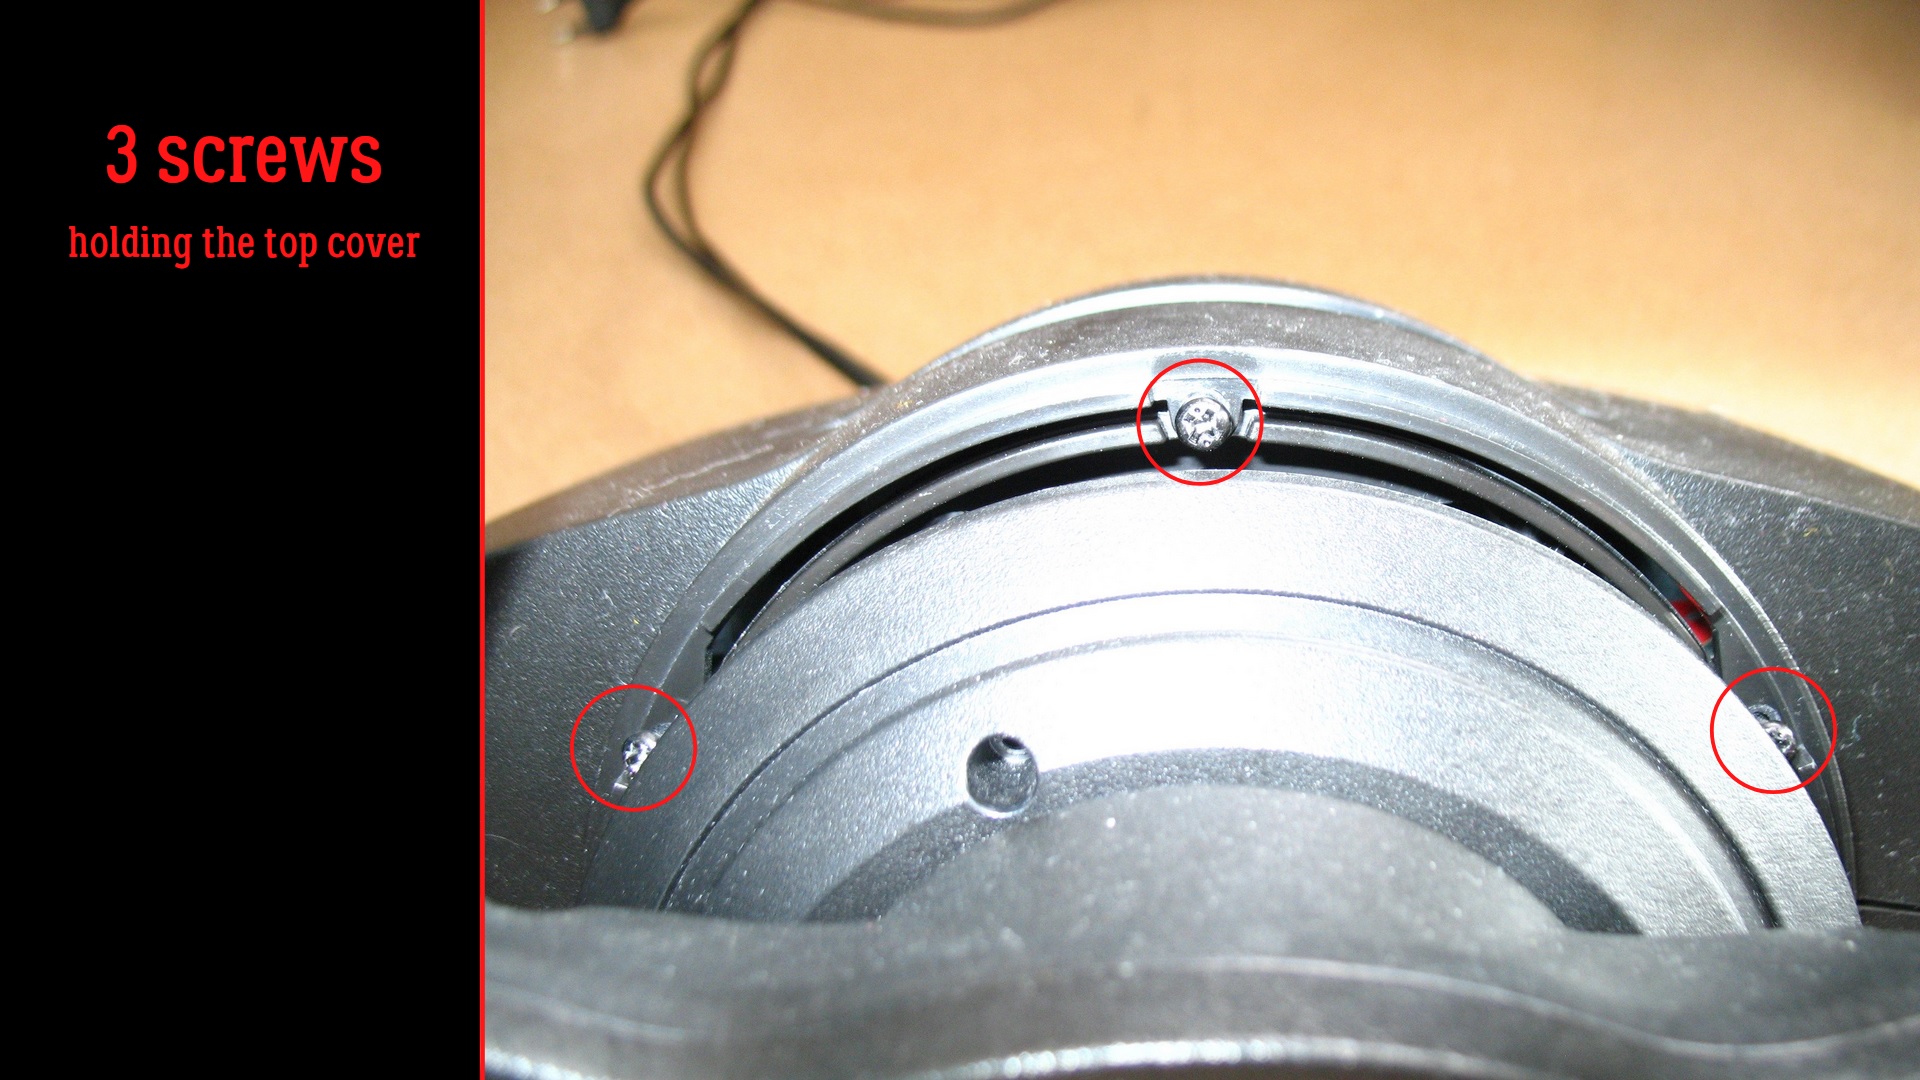
Right behind the round panel you will find 3 more screws that hold the top cover. Unscrewing them will finally allow you to take the top cover off. Those 3 screws are also identical to those, that hold the top cover from the bottom of the base.
Disconnecting the wheel connector from the board
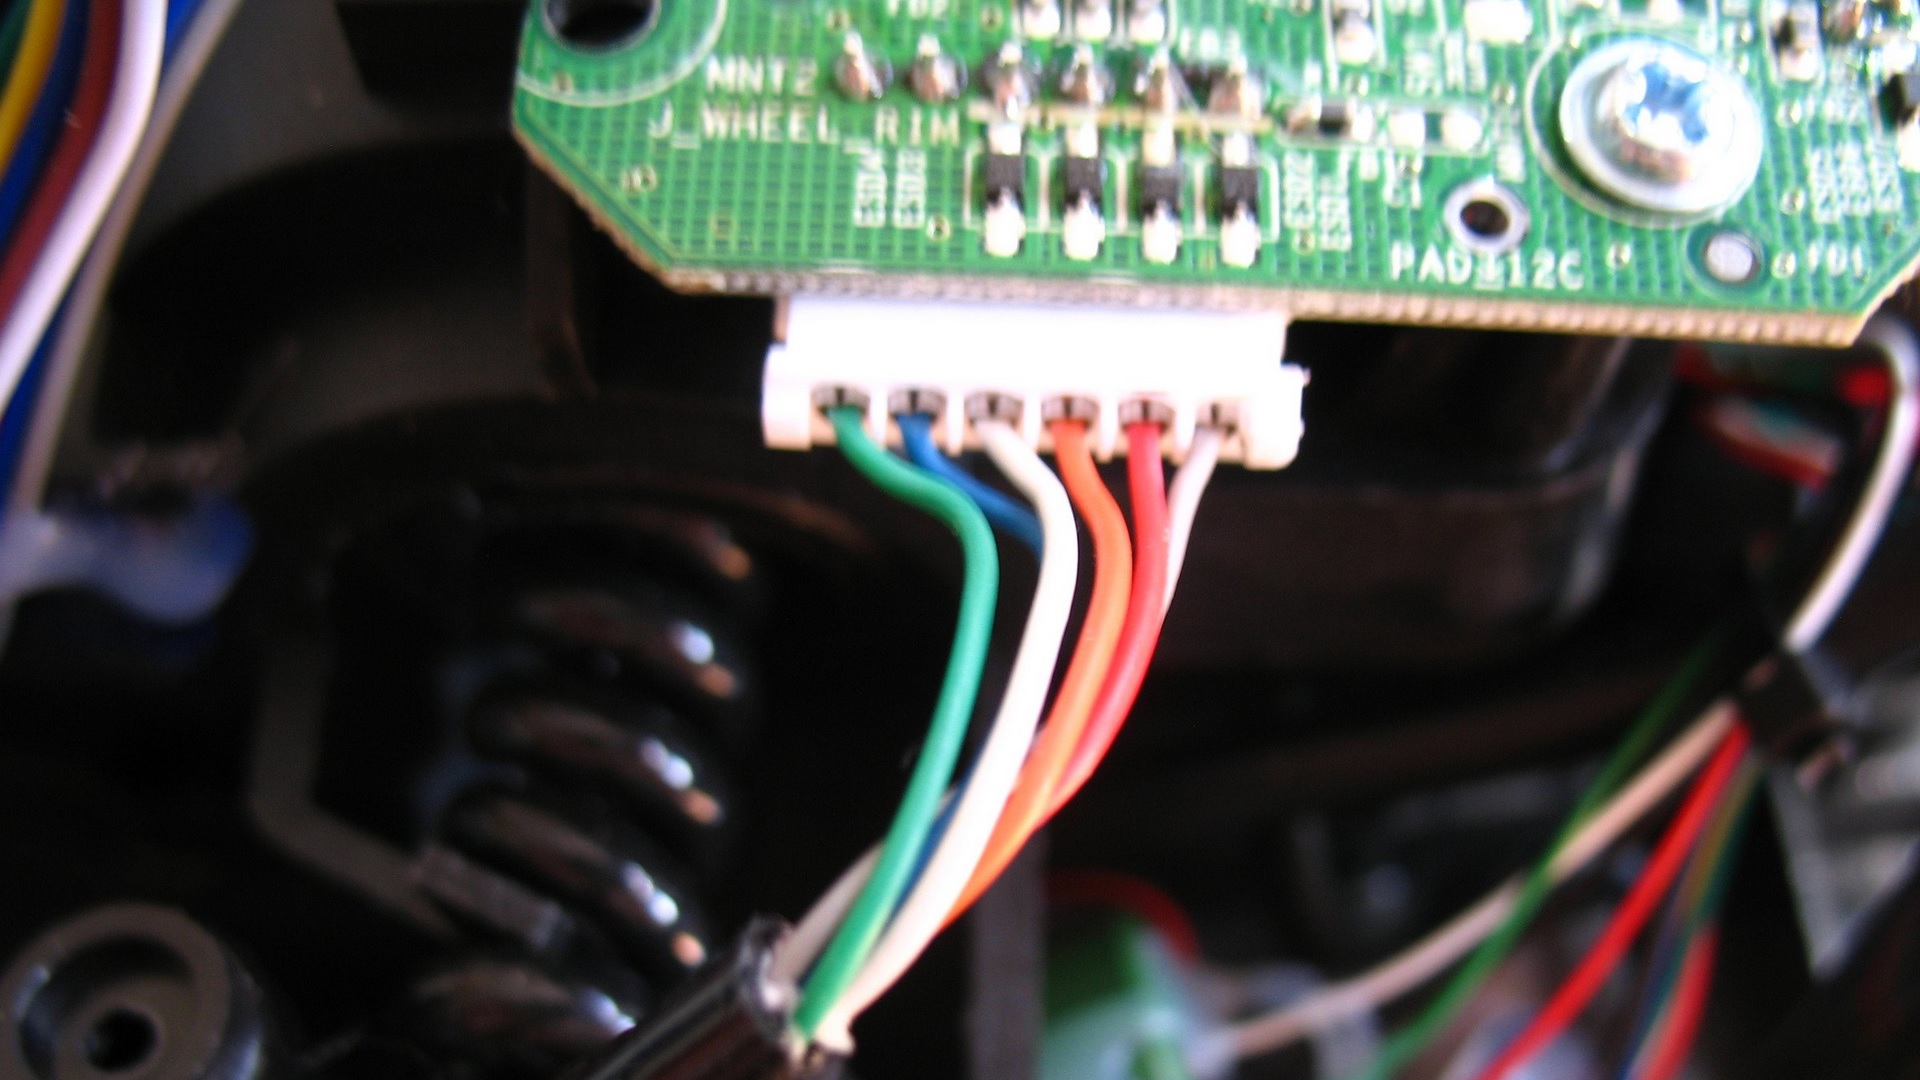
Gently disconnect the wheel connector from the board.
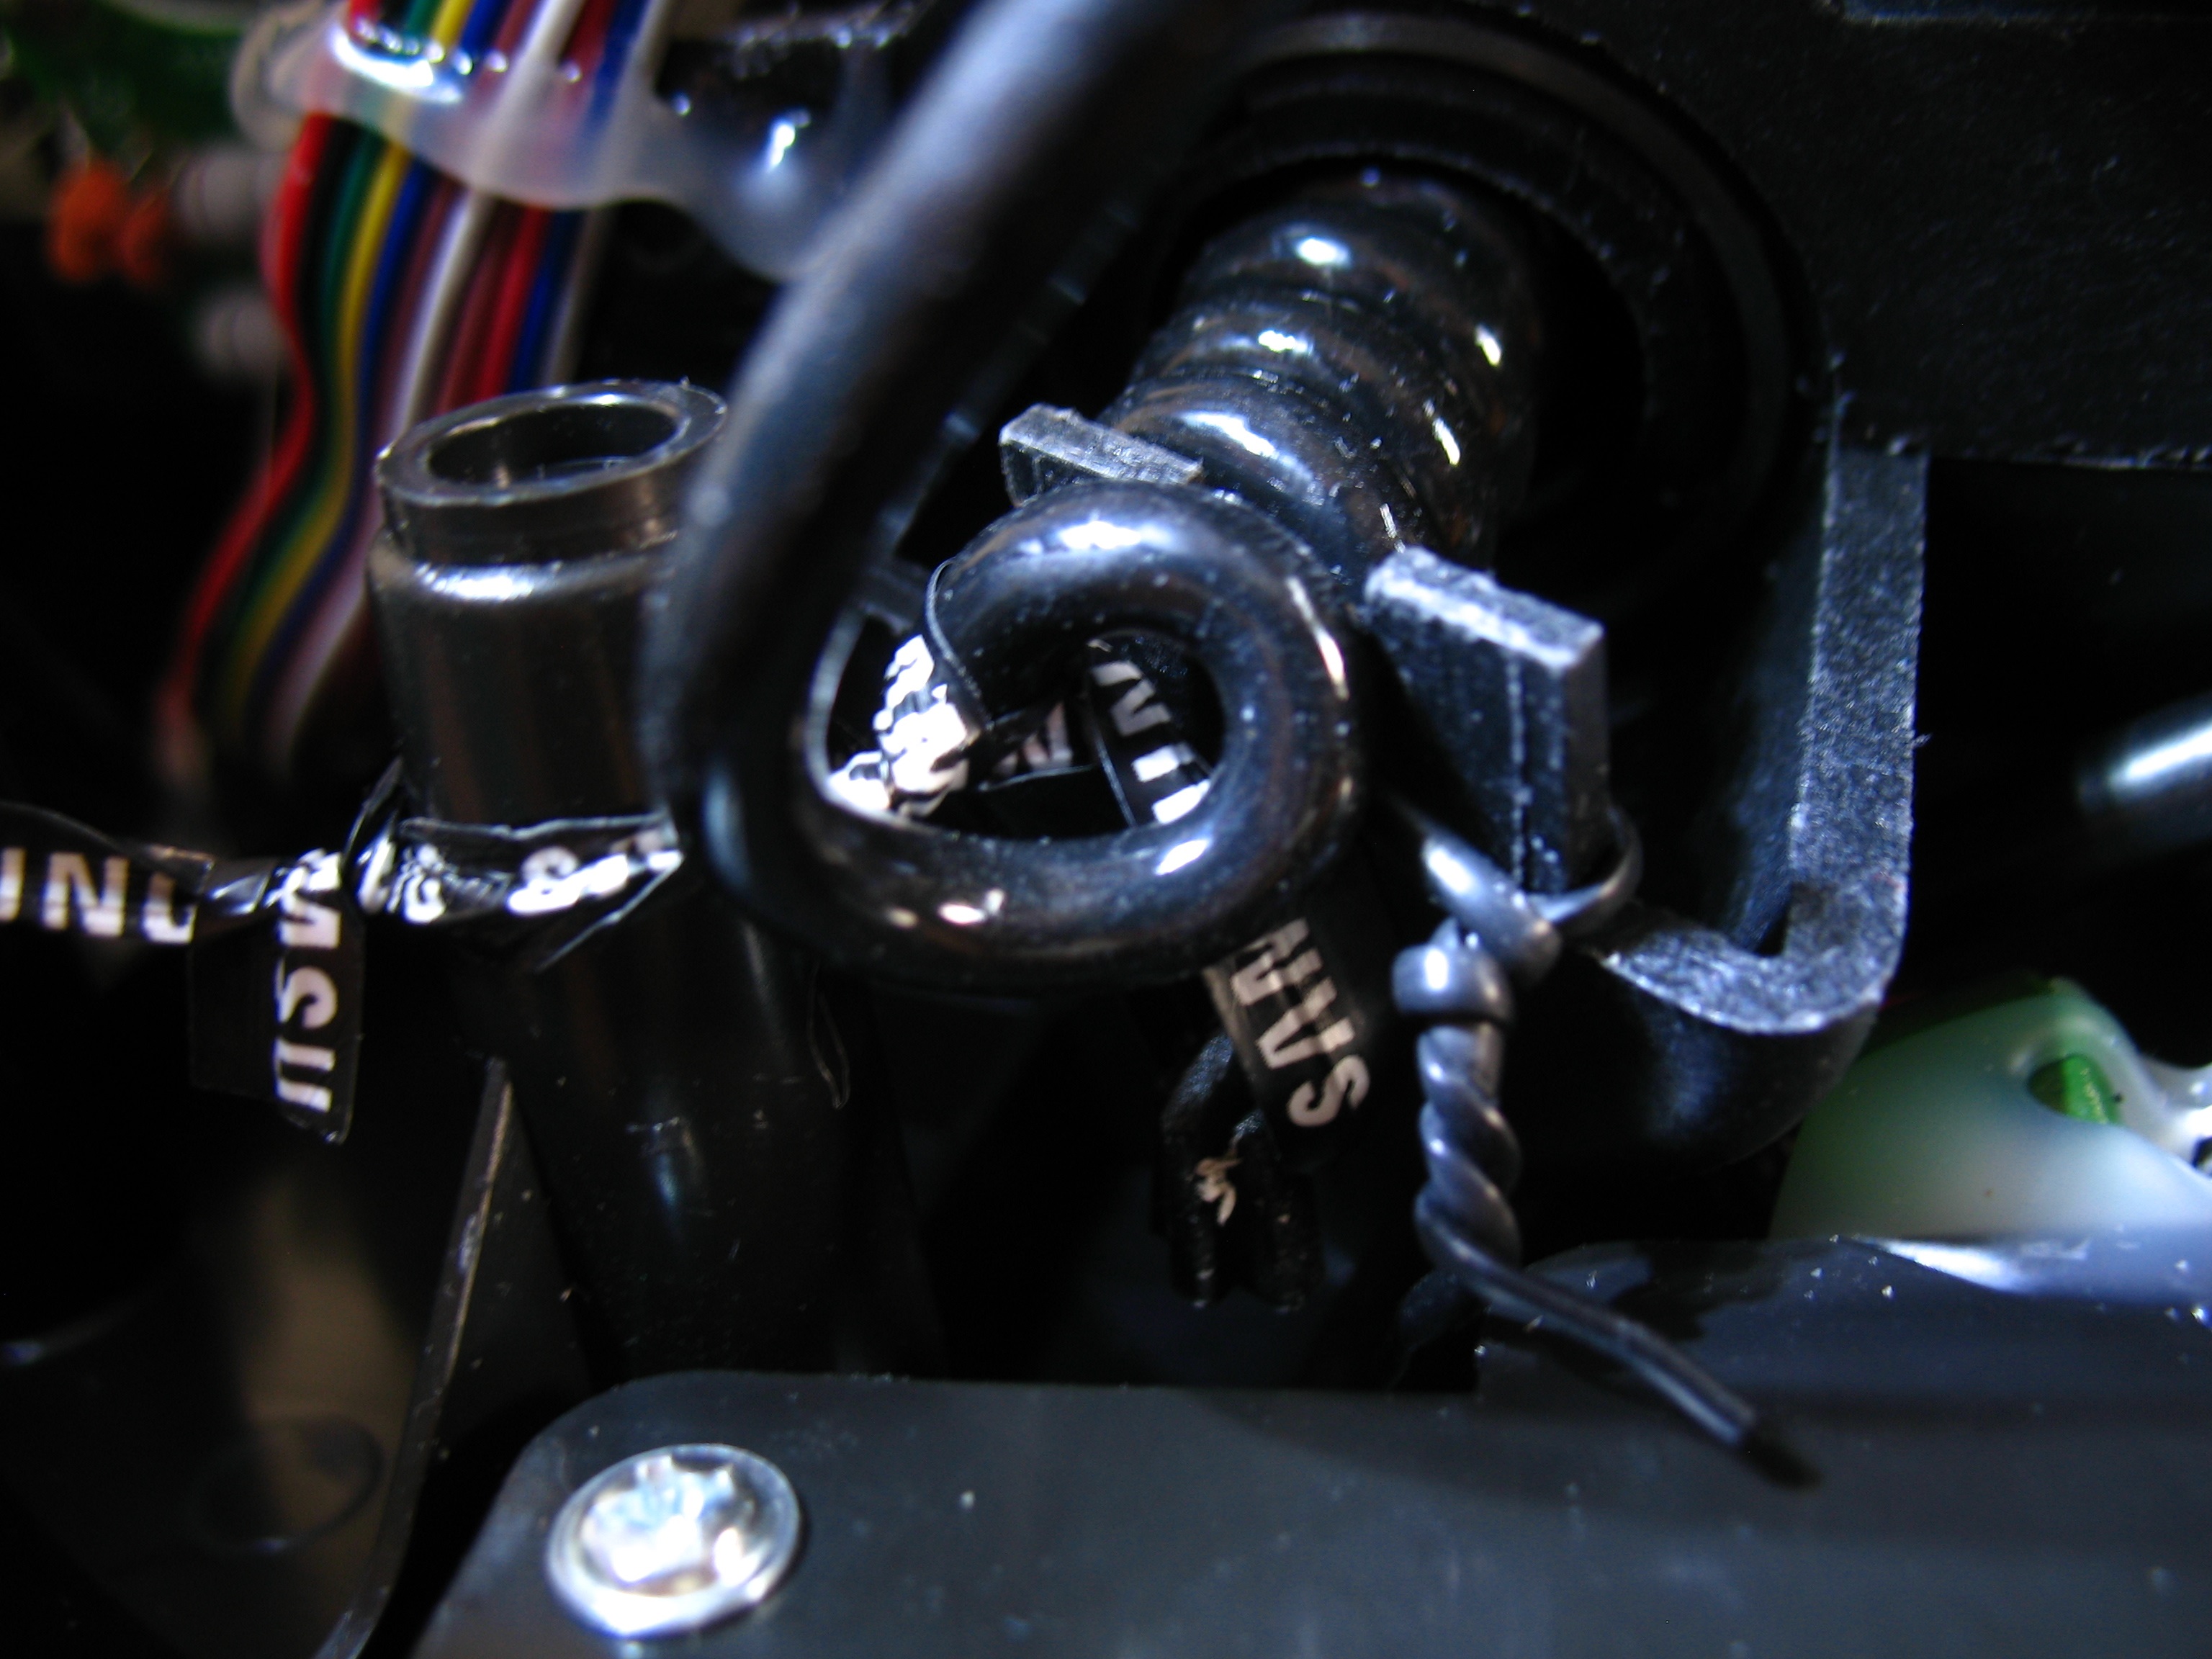
The wheel cable will also be held in place by 2 cable ties, you will have to cut them in order to free the cable. Later you can replace them with simple wires that are used to tie phone charger cables and such.
Taking the wheel rim off from the base
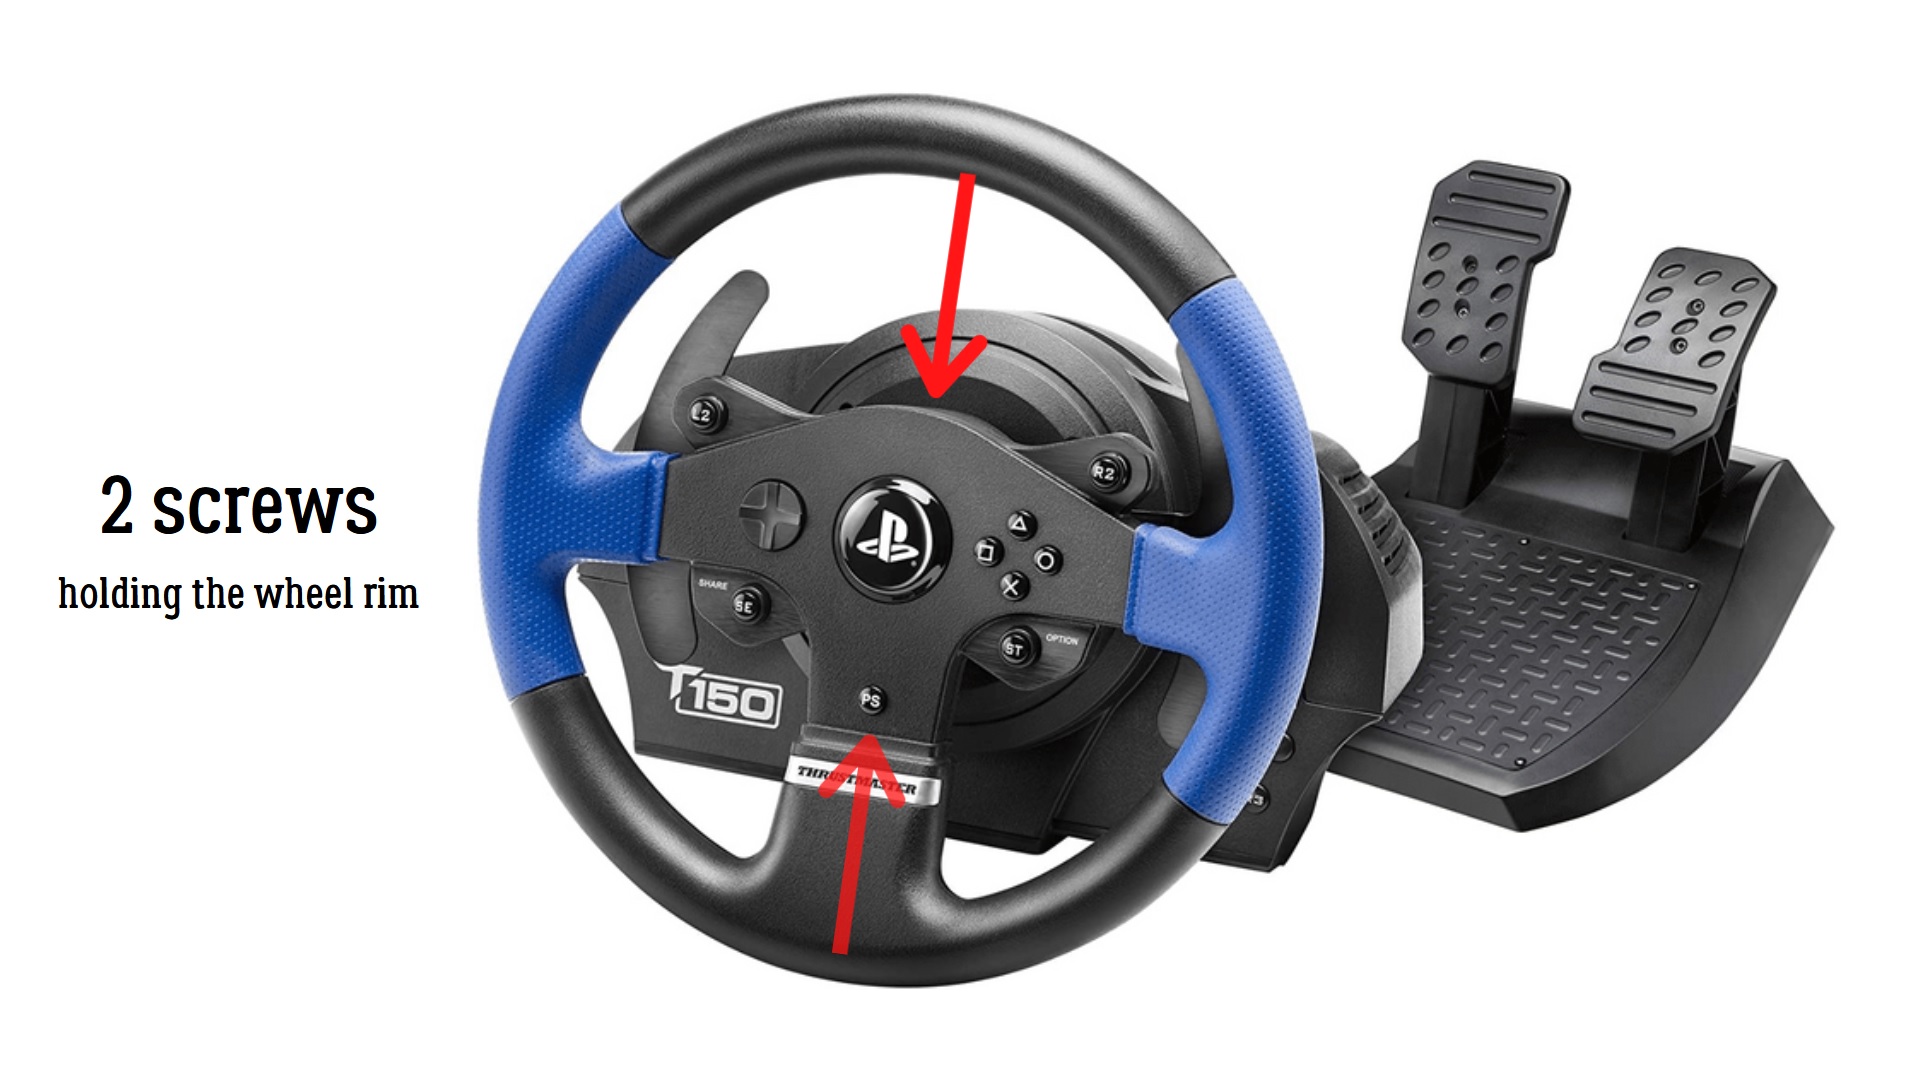
Unscrew two large screws from the top and the bottom of the wheel shaft to take it off. Be gentle with taking it off and make sure the connector you disconnected earlier doesn’t get stuck inside the shaft, it happens sometimes.
Taking the front panel off
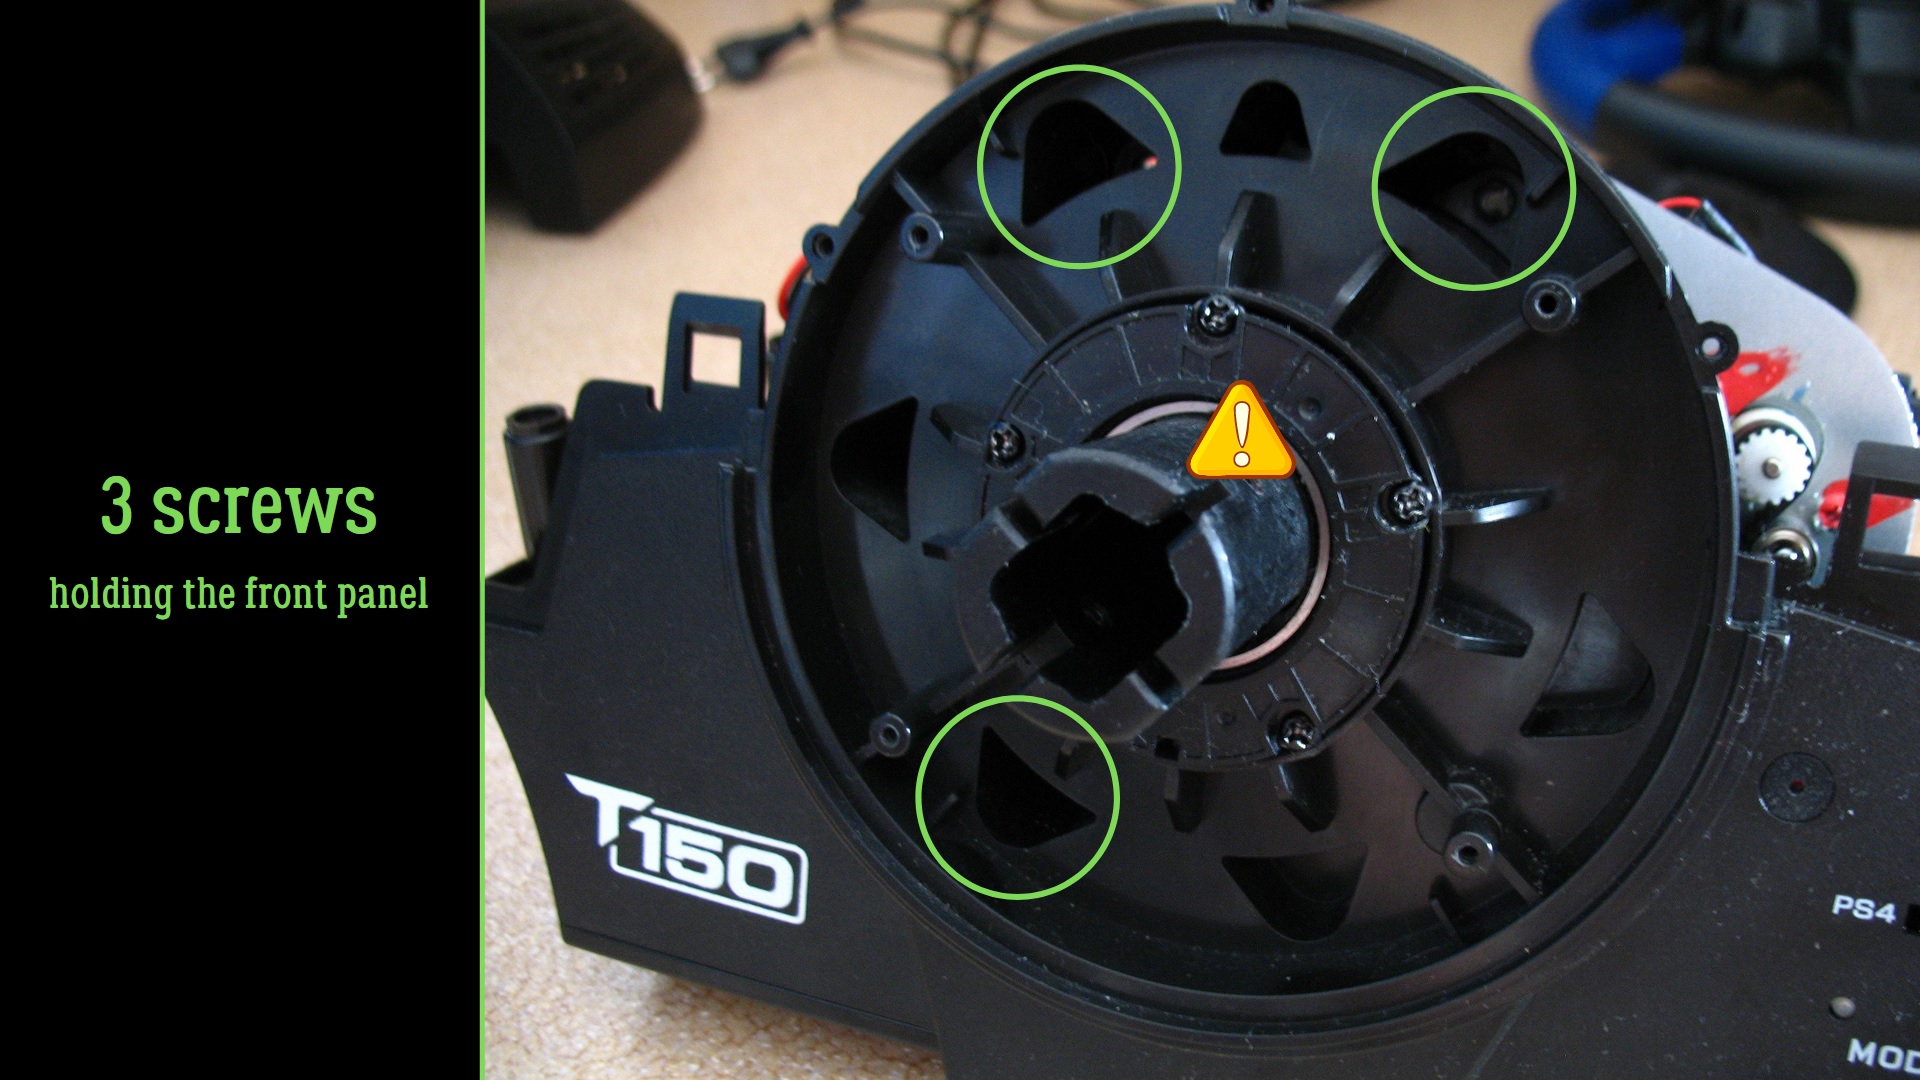
After unscrewing 3 silver screws that hold the front panel (marked with green circles in picture) you will be able to take it off. Do not force it too much though, because at the bottom-right corner of it, where the PS4 > PS3 switch is, a small board is also connected and is fragile. Behind the front panel you will find the tensioner mechanism, which means you’re finally ready to perform the upgrade.
Bear in mind that you do not have to unscrew the 5 black screws marked with the exclamation sign in the picture, as it is a part of the front panel and doesn’t prevent you from taking it off.
The result
You’re almost there, just a little bit of work remains.
Replacing the tensioners
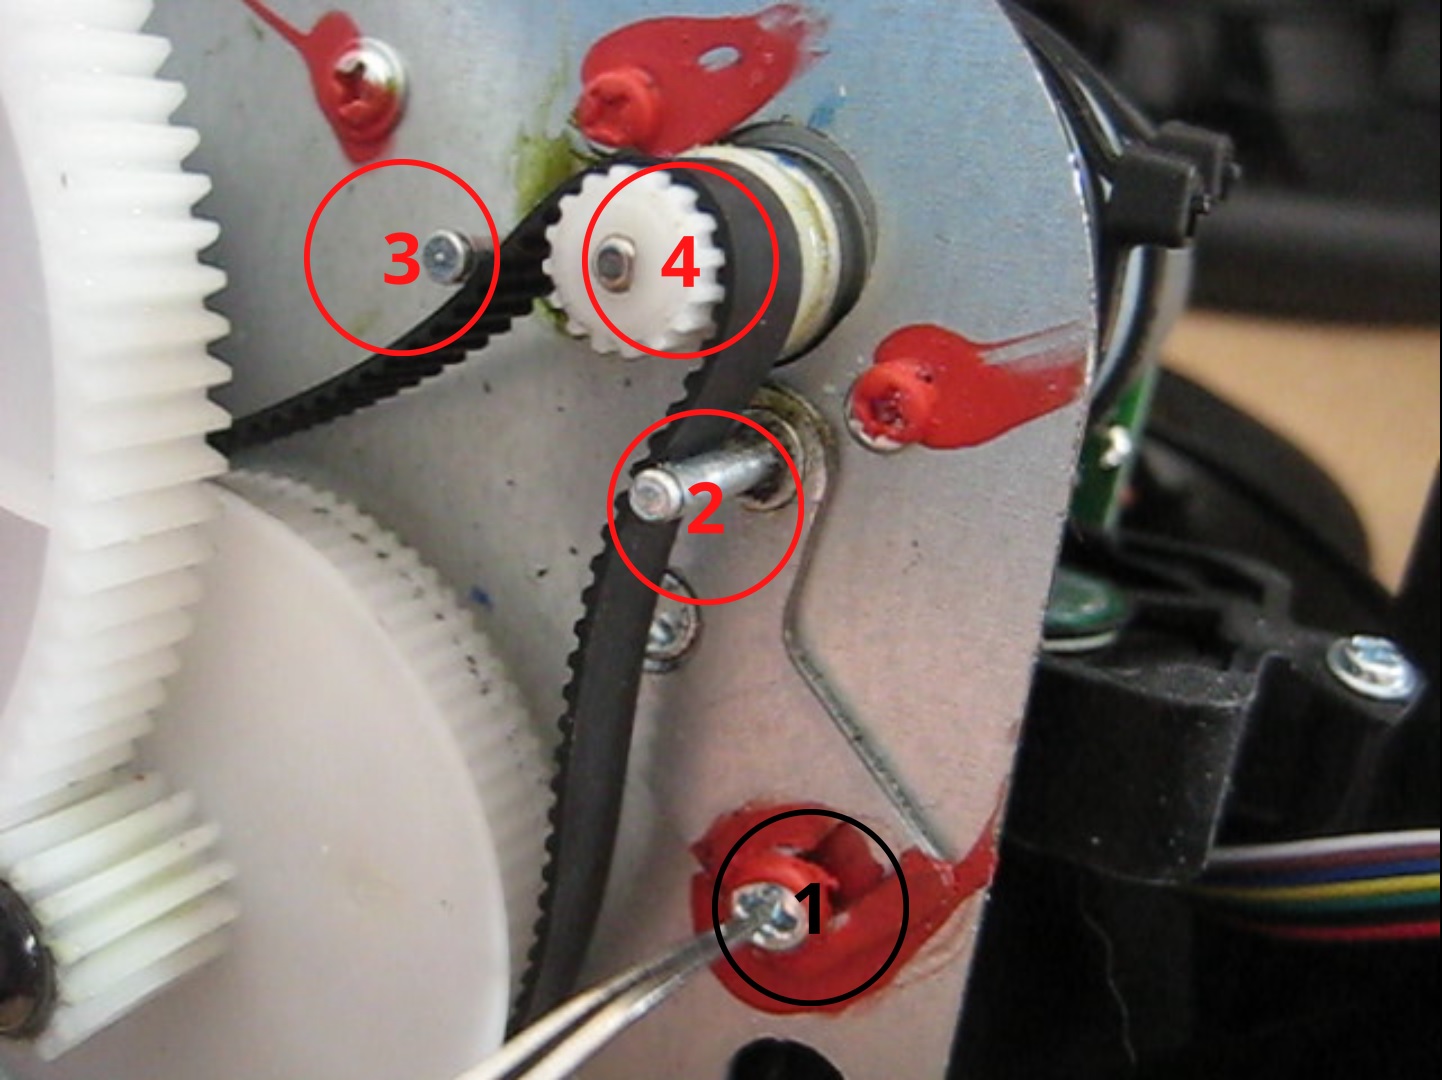
When you’ll put aside the front panel you’ll see the following picture.
1 – screw that is responsible for the overall tension.
2 – lower tensioner shaft.
3 – upper tensioner shaft.
4 – the gears of electric motor that transfer the force on the wheel. This is basically all your feedback.
The process
1) Take off the screw (1 on the picture) to ease the tension on the belt.
2) Gently take off the E-clips from the both of the tensioners’ shafts (2 and 3 on the picture). Also remove all spacers and rubber gaskets that go with standard tensioners.
Keep the E-clips, because you will need them later for the assembly, without them you’ll be in trouble!
3) Before taking off the belt, mark the position of the motor gear and the bigger gear that is connected by the belt with it. This will help you to avoid to recenter the wheel afterwards. Take off the belt from the motor gear (4 on the picture).
4) Put 3 ball bearings on each shaft and put the E-clips back to hold them.
5) Put the belt on the motor gear (4 on the picture). Use the markers you made earlier to put it correctly.
6) Get the small metal piece with the tension screw (1 on the picture) in its default position to inscrease the overall tension.
The result
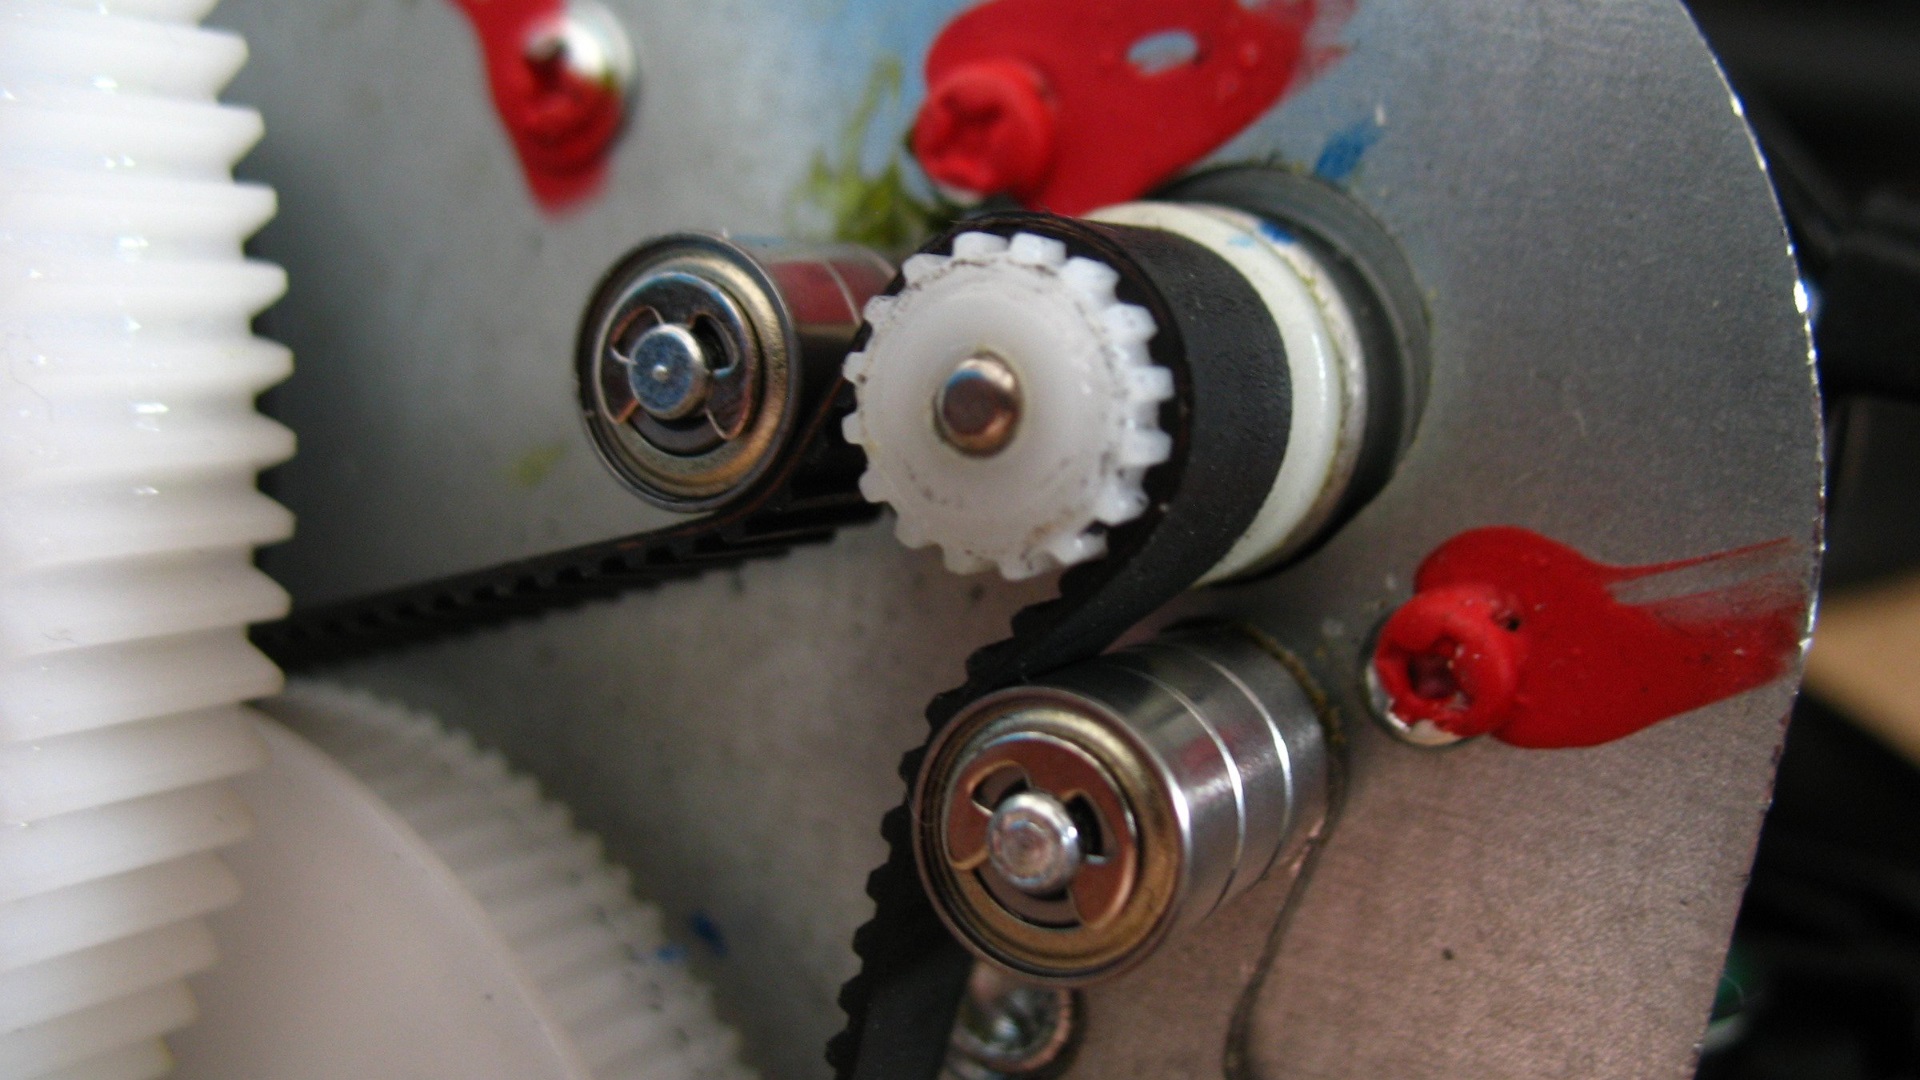
It’s done! Now you will see the following picture:
You can assemble the wheel in the reverse order and enjoy drifting!
Troubleshooting
After assembling the wheel make sure it’s working correctly by accessing the control panel settings.
If you see that the wheel is not centering correctly, don’t get upset, there are 2 solutions that will help you to fix it.
Solutions
1) Use the official Thrustmaster guide for wheel calibration (page 2): https://ts.thrustmaster.com/faqs/eng/thr_eng_00158.pdf – [thrustmaster.com]
This guide tells you how to recenter the wheel. For this make sure the wheel is physically centered and hold SE, ST and MODE buttons up until the red light on the wheel base flashes. After that the wheel should be centered as new.
2) You can also disconnect the faulty wheel and remove all drivers and firmware from your PC. Reinstall the Thrustmaster driver, connect your wheel and use the Firmware update. After this the wheel should recenter itself and be ready to use.
The End
After this mod, the wheel should have a better feedback and have less friction as it would with standard tensioners.
I hope this guide was helpful to you.
This is all for CarX Drift Racing Online How to Upgrade Thrustmaster T150, TMX and T300 Thrustmaster Wheels Guide hope you enjoy the post. If you believe we forget or we should update the post please let us know via comment, we will try our best to fix how fast is possible! Have a great day!

Leave a Reply