
This guide covers using the basic menu to import and display a custom image as the background in Keysight
Requirements
[Guide written using Keysight version 1.5.0]
You will need an image file. That’s it! Keysight supports .PNG and .JPG (or .JPEG) images up to a maximum resolution of 16,384 x 16,384.
Walkthrough
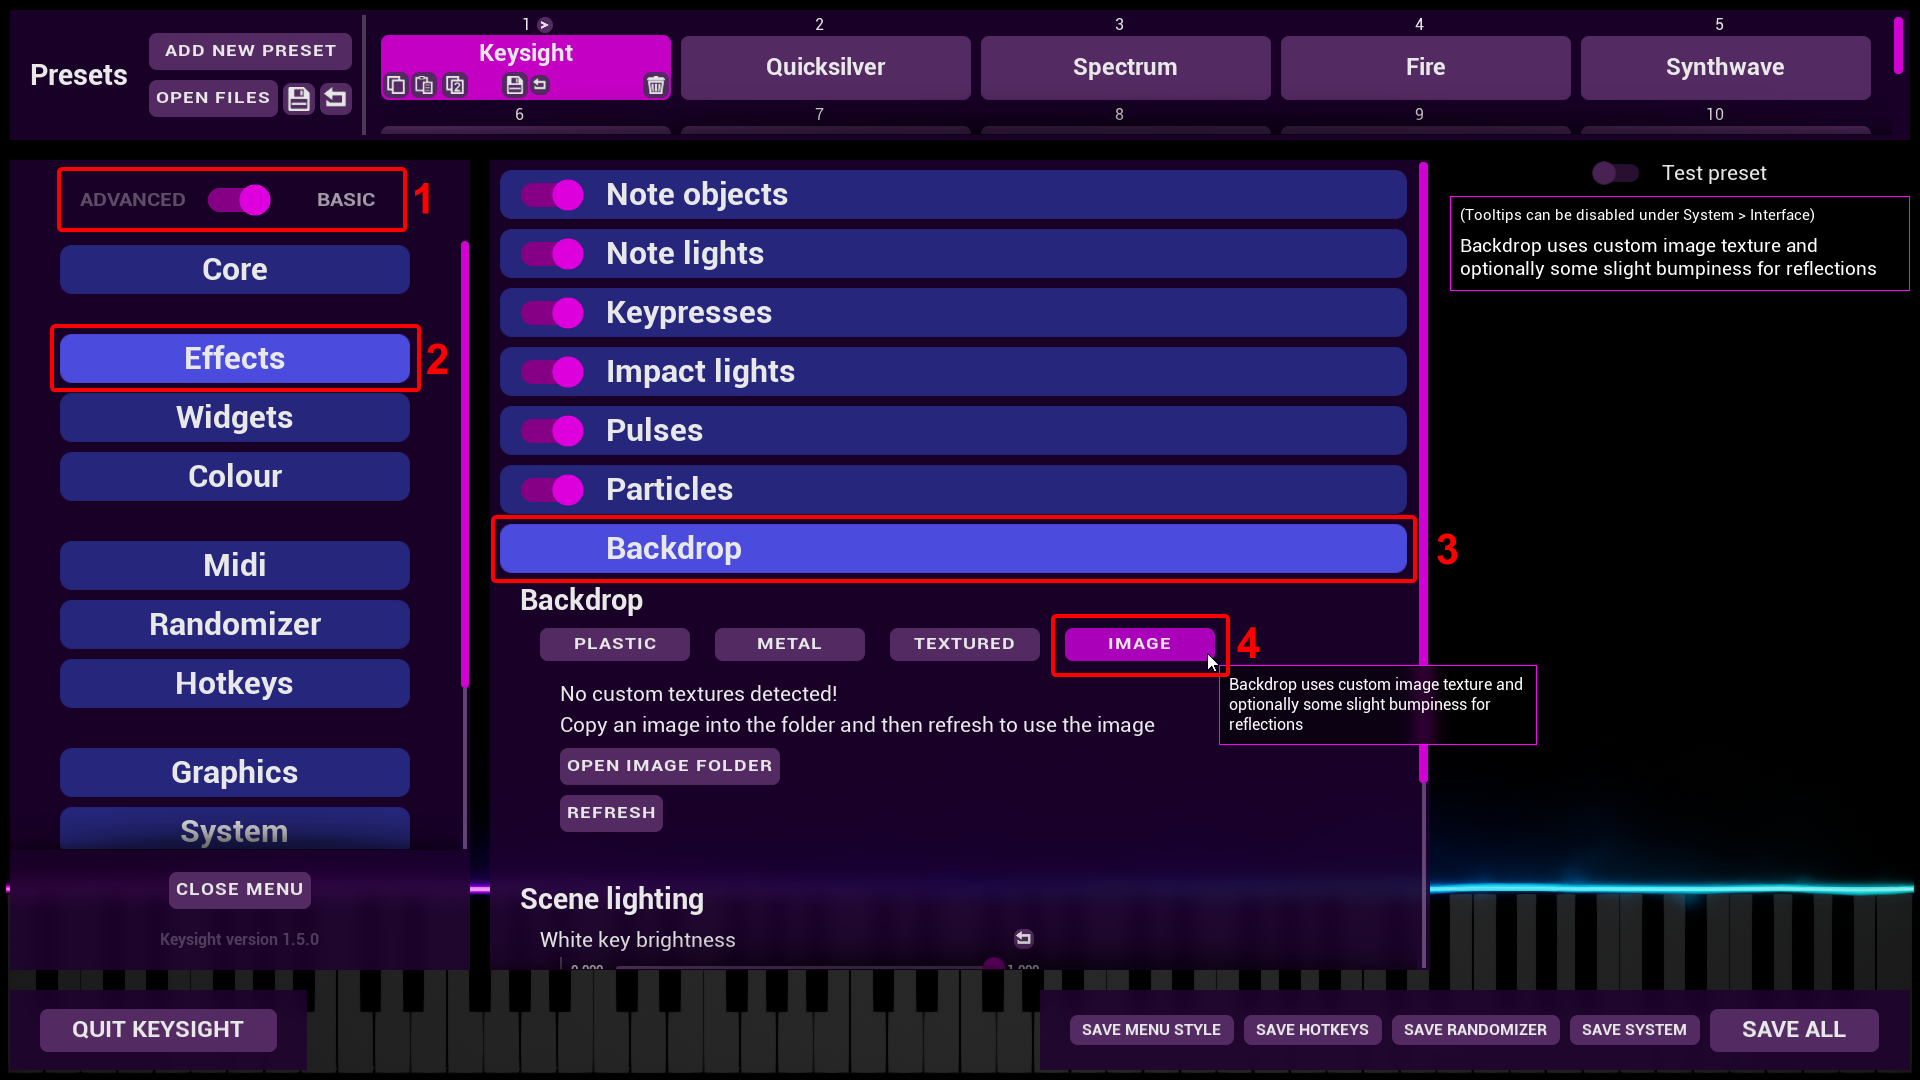
- 1 – Ensure the menu is in Basic mode
- 2 – Enter the Effects main tab
- 3 – Enter Backdrop sub-tab
- 4 – Select IMAGE mode
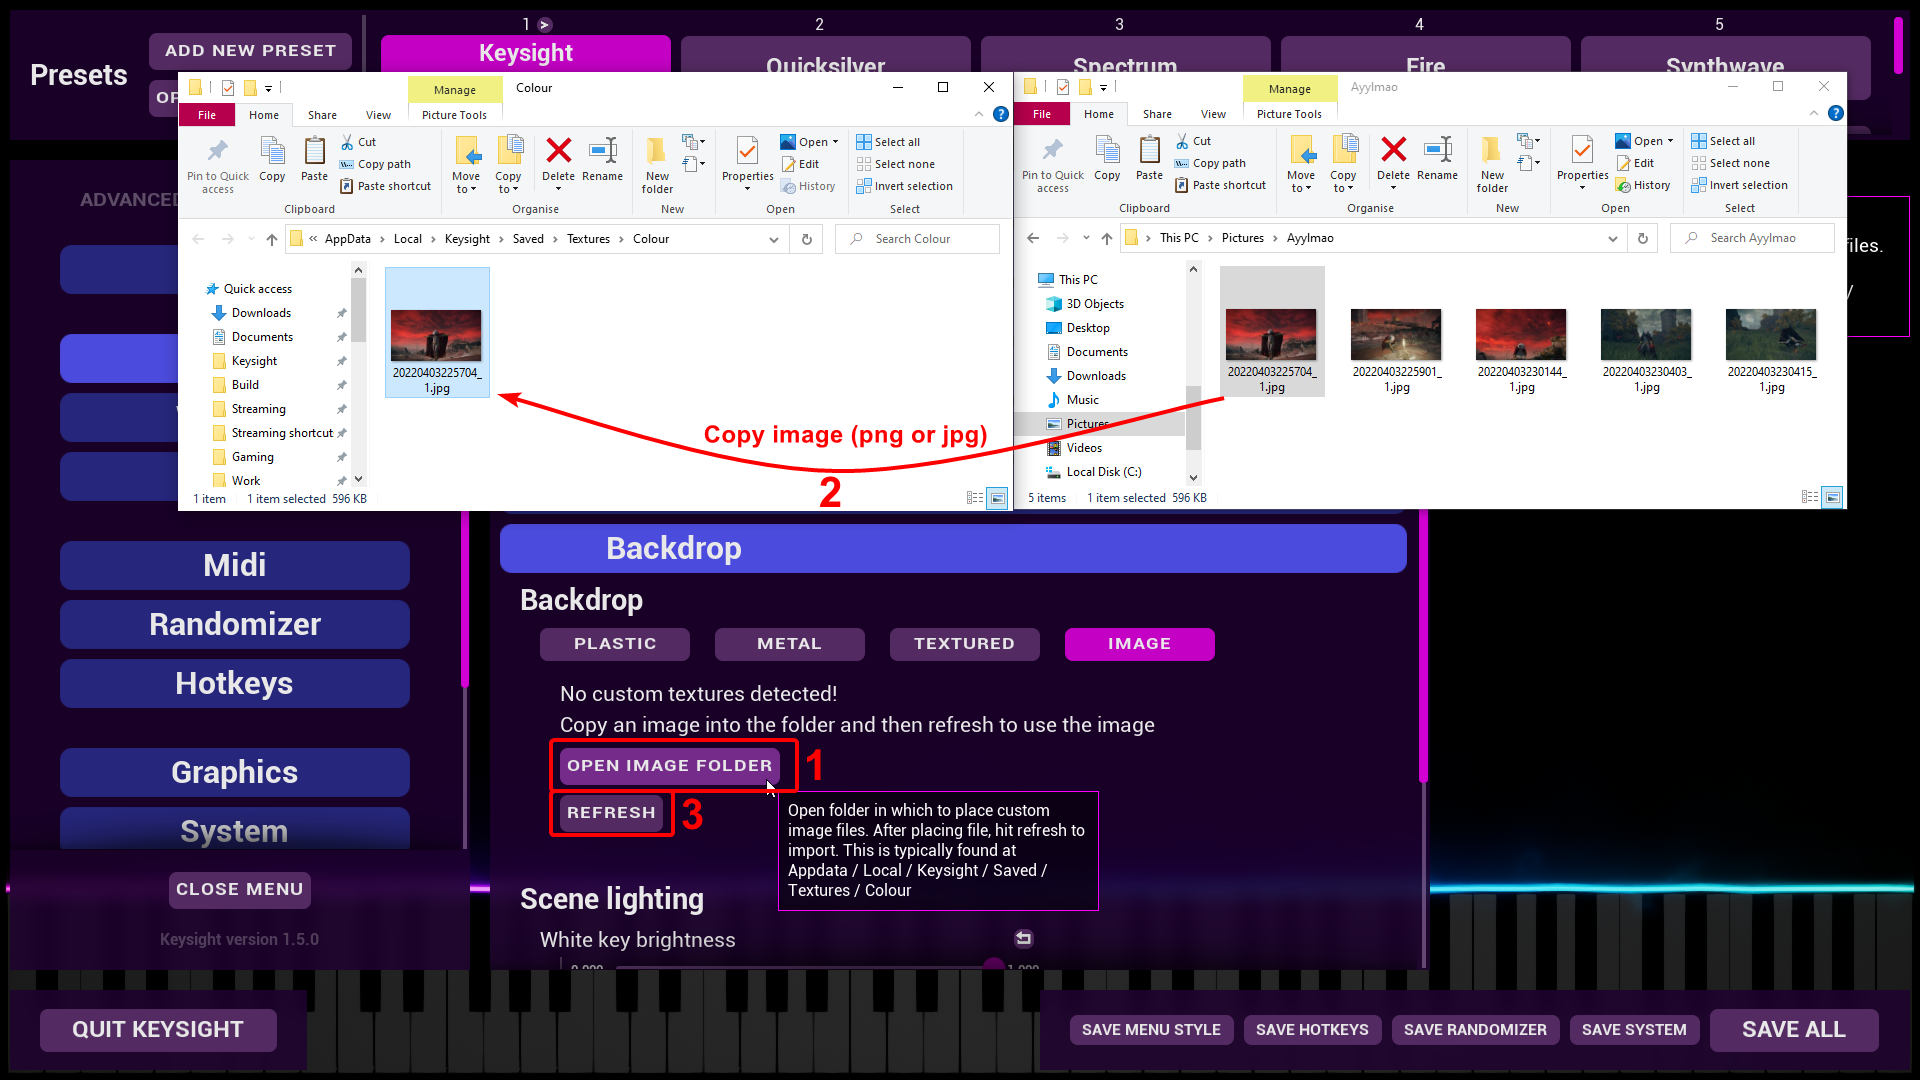
- 1 – Click OPEN IMAGE FOLDER. This opens the custom texture location that the backdrop pulls images from
- 2 – Copy your desired image into this folder from wherever it is on your computer
- 3 – Click the REFRESH button to load your texture into Keysight
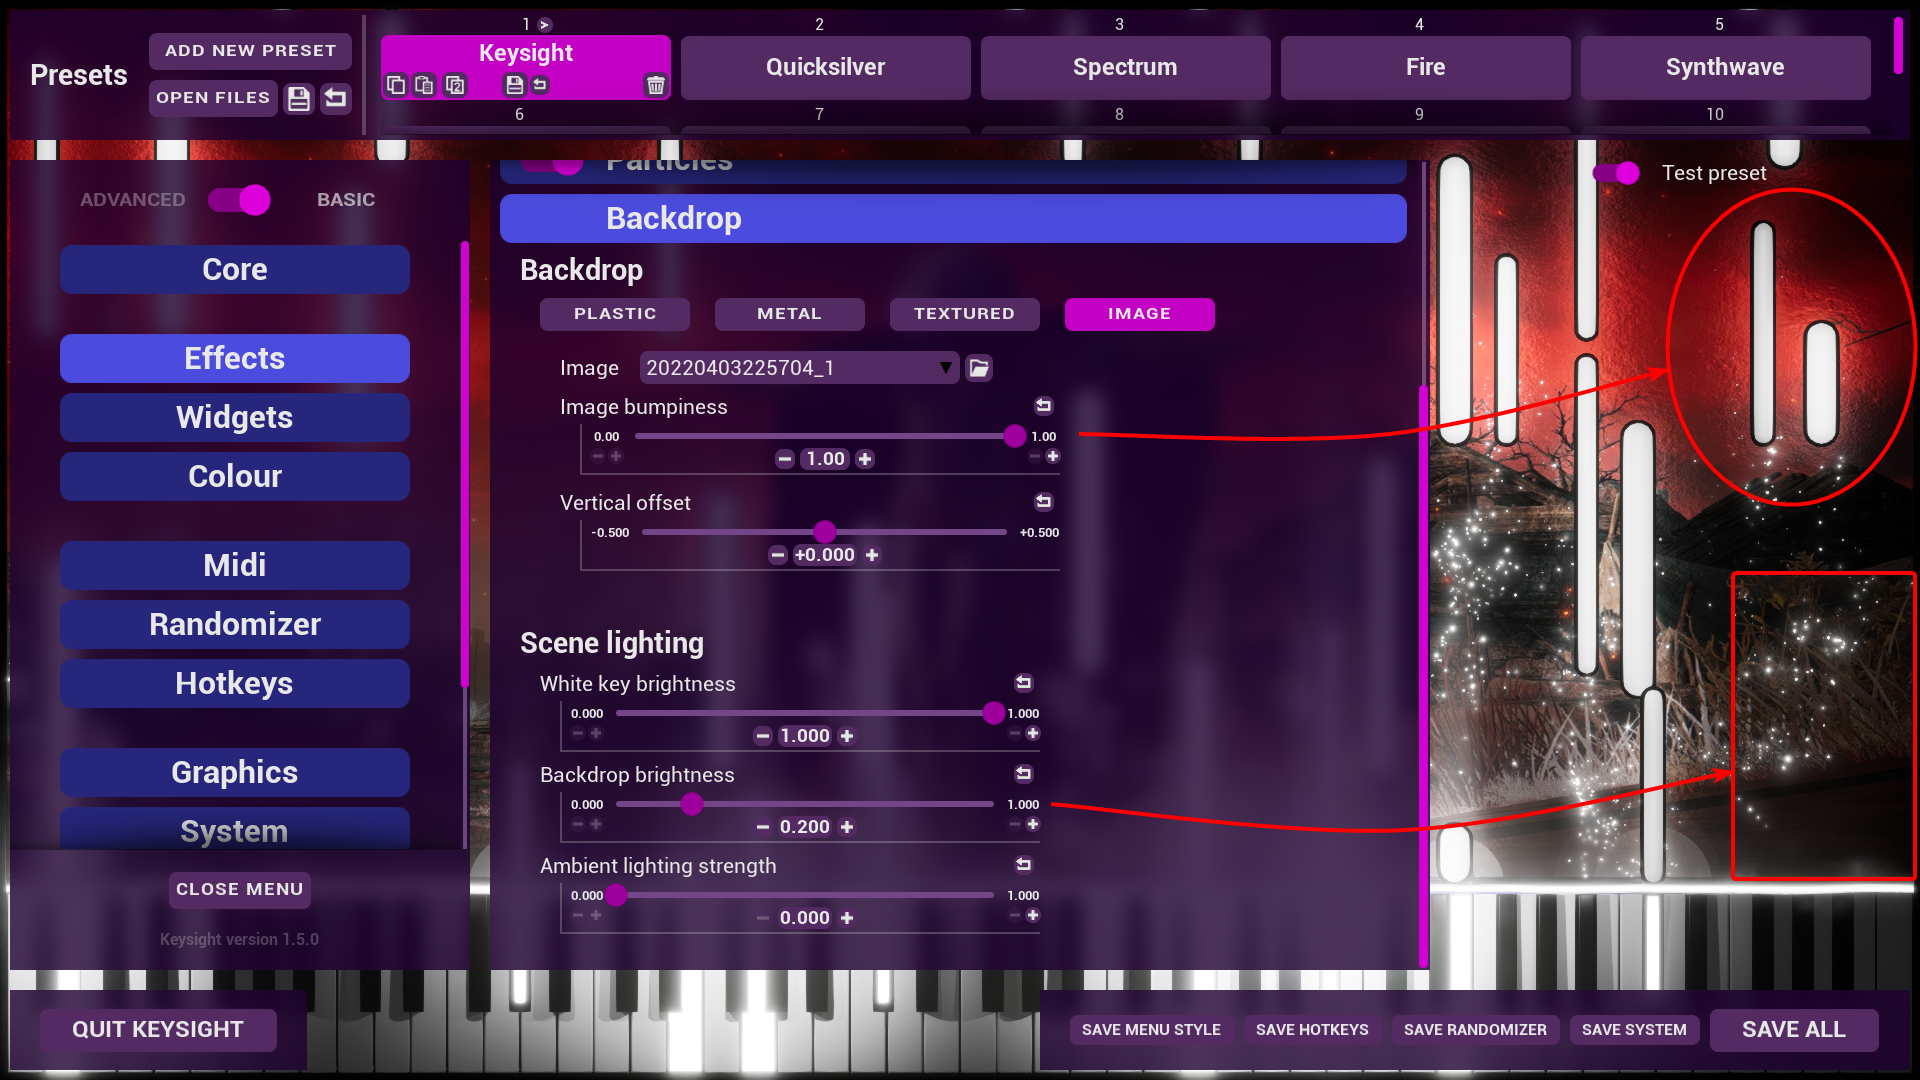
- Now simply select your image from the dropdown menu that appears. Done!
If you are using the Ultra graphics preset, the backdrop is not illuminated by default. If you want your image to be always visible, regardless of notes being played: increase the “Backdrop brightness” slider.
Additionally for Ultra graphics users: “Image bumpiness” relates to the paint/concrete-like details visible in lighting around notes. It’s personal taste, but a little bit of this can really “sell” the image as a part of the scene versus an artificial layer.
Things to be aware of
If your image fails to display properly, it is likely in a non-standard, unsupported colour format. Try making a new file in something like Photoshop or GIMP with the same resolution, importing your image, and then saving that image back out of the program and importing the new one. I’ve seen this happen a grand total of once in over 2 years, but I thought I’d mention it anyway.
Having a lot of contrast in your backdrop image can cause the lighting around notes in Ultra graphics mode to have a distracting amount of brightness variance. This is especially true of coloured images + coloured lighting, since shining a blue light on a red image will simply show black, so if you use a red and blue alternating custom backdrop image and a blue light, you functionally get a blue light which intermittently cuts out in parts of the backdrop.
The backdrop material can be incredibly finely tuned in the Advanced menu under Scene > Backdrop > Material. The basic menu exists to give the fastest and easiest way to getting a custom image loaded, but if you do not enjoy the results then it can absolutely be configured a lot further! But advanced configuration exits the scope of the guide; if you have something you wish to know more about (or have a guide written on), let me know in a comment!
TL;DR
– Head into basic menu’s Effects > Backdrop, select IMAGE mode
– Copy an image into the folder that opens when clicking OPEN IMAGE FOLDER
– Hit refresh to load it. Select it from the dropdown, adjust sliders to taste
This is all for Keysight How to import and display a custom image hope you enjoy the post. If you believe we forget or we should update the post please let us know via comment, we will try our best to fix how fast is possible! Have a great day!
- Check All Keysight Posts List


Leave a Reply