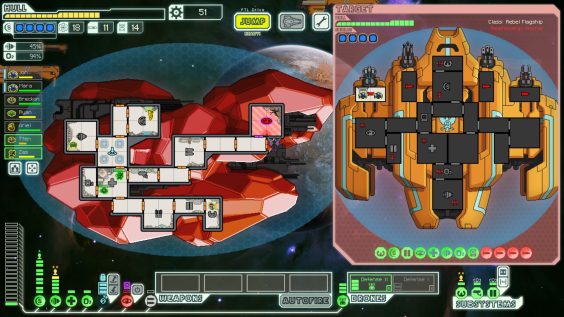
About this guide:
This guide is written for complete beginners who have moderate experience in FTL, and have no experience in modding! Although, this guide can be used for anyone. Feedback is appreciated!
Useful Tools:
These are the tools you want to start making your own ship!
- subsetgames.com – https://subsetgames.com/forum/viewtopic.php?t=17102
- subsetgames.com – https://subsetgames.com/forum/viewtopic.php?t=24901
- An Image Editing Software, IE www.getpaint.net – https://www.getpaint.net, www.adobe.com – https://www.adobe.com/products/photoshopfamily.html, etc. (Not Required)
Terms/Vocabulary:
Some people (like me when I started out) will be confused about some terminology. Here’s a big list of some of them!
- Hull Image: This is the ship itself! The base ship image
- Floor Image: This is the floor of the ship, adds contrast between the rooms and hull of your ship. Make sure to add one or your ship is going to look real ugly!
- Cloak Image: Although the game automatically makes your hull image transparent when you cloak, there are still outlines and glows you want when you cloak on your ship.You can not have one but be warned! There will be an error icon in one of your rooms you can’t get rid of!
- Shield Image: Yes, you can customize the shield image. Change the color, shape, size, whatever. All the players ship shield images in the stock game are the same, they just have different sizes. They are different image files because the resolution needs to scale with the ship! Or else you may have an over sized shield or an under sized shield.
- Thumbnail Image: No, this is not youtube. These are the image you see when you go on the ship list.
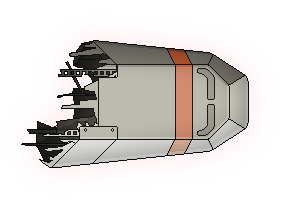
- Gibs: These are the images that you see when you ship blows up! Its all the parts that split off your ship when you get destroyed.
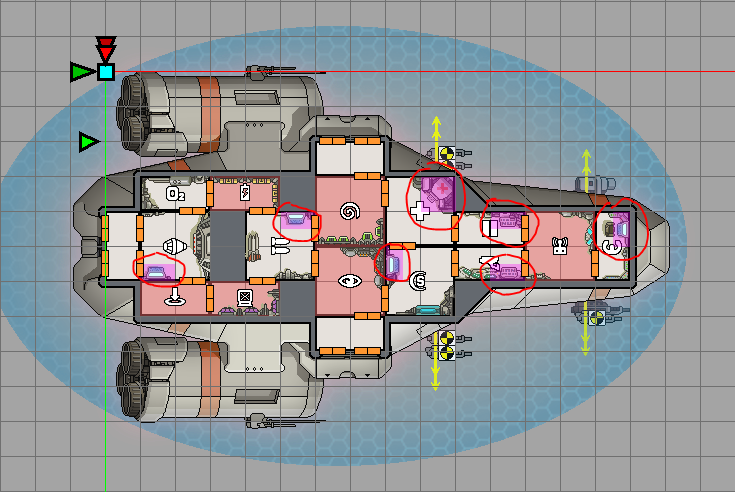
- Station: In weapons, shields, piloting, doors, sensors, and engines, you can have a crew member in that room and man it for bonuses. The station is where the first crew stands to man the system. In superluminal, your station placement is indicated by a purple square! Medbay also has one, but it LIMITS where your crew can stand, and crew cant stand in the spot you have a station inside the medbay. This is what causes a 4 square medbay to only have 3 spaces for crew! You can remove it though, so you can make a true 4 person medbay!
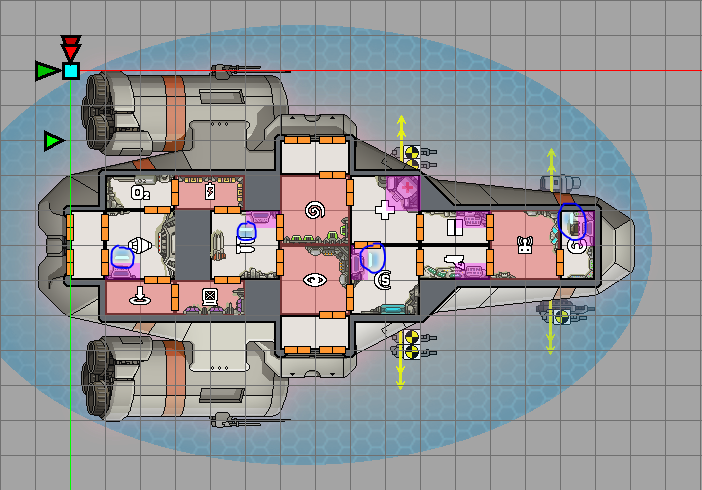
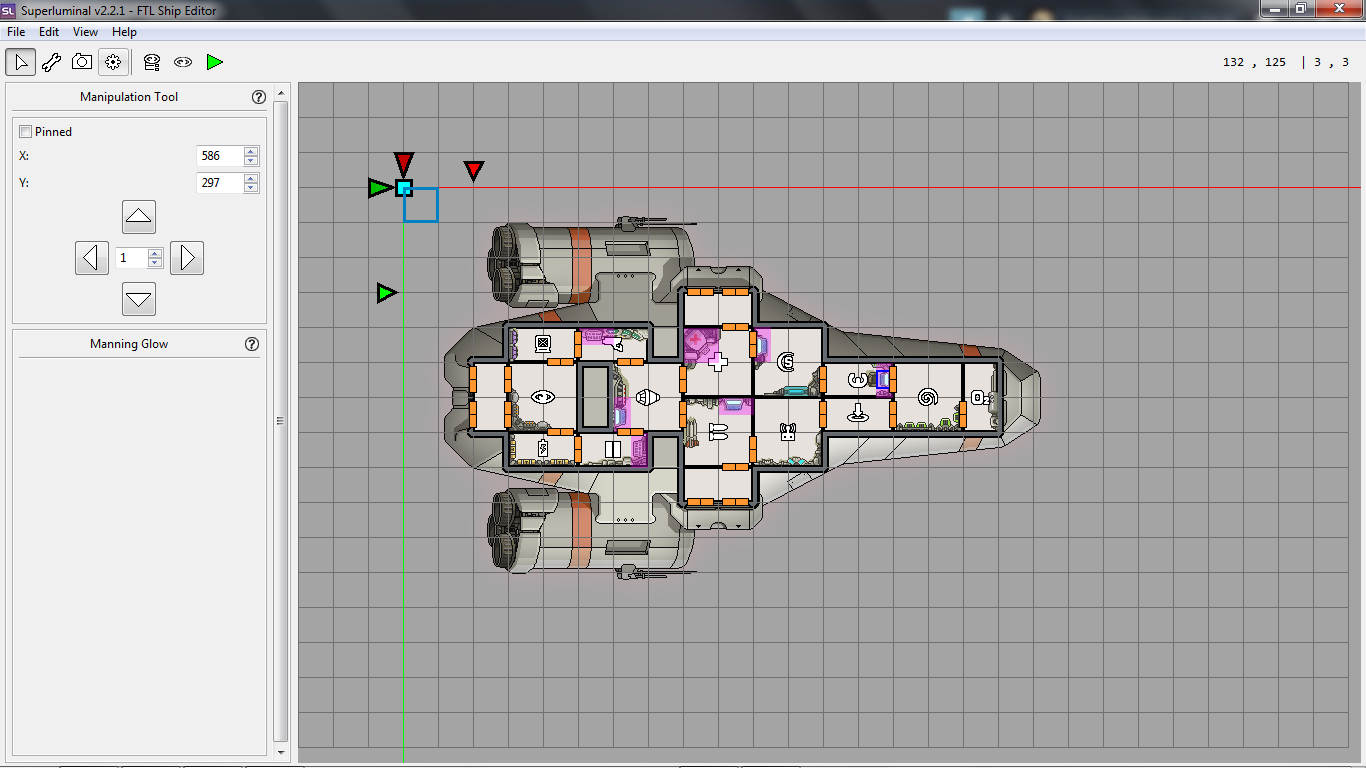
- Manning Glow: In Shields, piloting, engines, and and weapons, there is a computer screen with a glow on it. This glow is its own image though. You have to manually put it onto the computer in the room, or else you are going to have a floating blue screen glow in your room! However, we don’t have these in doors or sensors, even though we can man them! In the image below, notice how the glows are offset! You don’t want this to happen, as it looks ugly!
- Interior Image: The interior image is the image that appears inside your room, which has all the machines, and computers. There are multiple in the game assets you can choose upon, but more about that later in the guide. NOTE: Clonebay and Teleporter don’t have interior images. In the image below we can see a shield interior image. You won’t see the floor, as the Interior is a PNG and is a completely separate from the floor.
Acquiring Game Assets: Slipstream Mod Manager
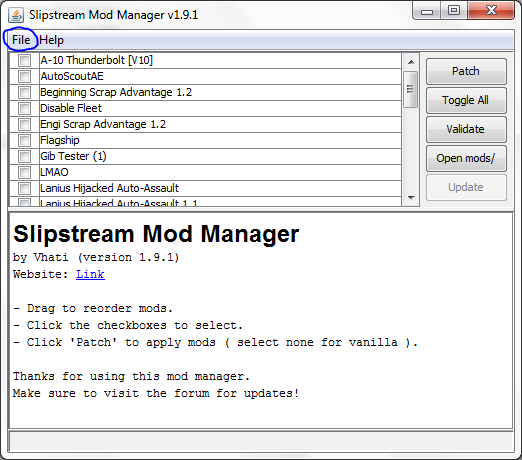
First thing we need to make ships are stock game assets! To do this, we will use Slipstream Mod Manager. Once you have it installed and direct it to your game directory and your FTL.dat file, open the app and FOLLOW THESE INSTRUCTIONS: In the top left of the app, there is a button that says “File”. Click it. Now, click “Extract Dats”. Make a new folder somewhere you want all these files to go, and extract it there. Wait and you have the game assets!
Working with Superluminal: Making a Kestrel
Superluminal is easy to use! To get us familiar with it, we are going to make a Kestrel A using the game assets. Open up your Superluminal, go to the top left and select “New Ship”. Now you have a blank canvas. Lets fill this up.
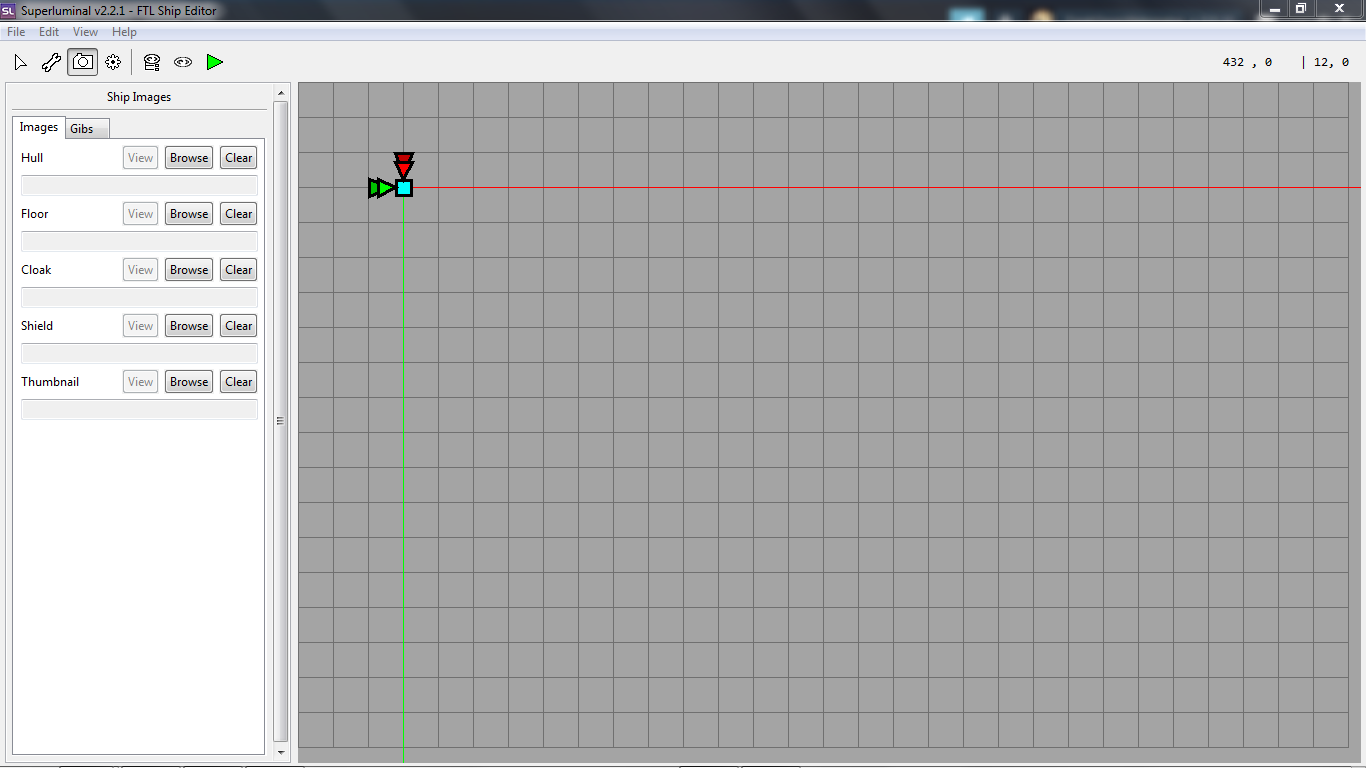
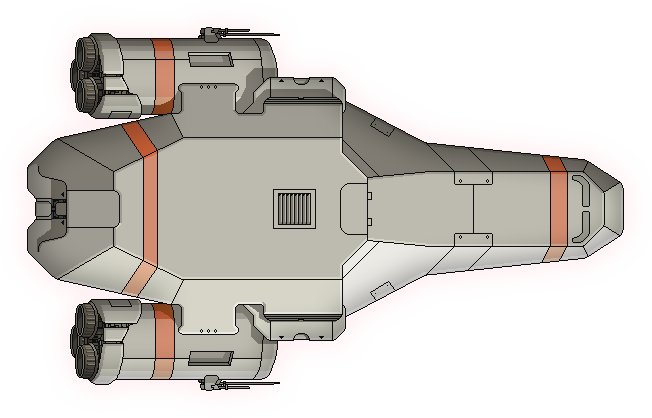
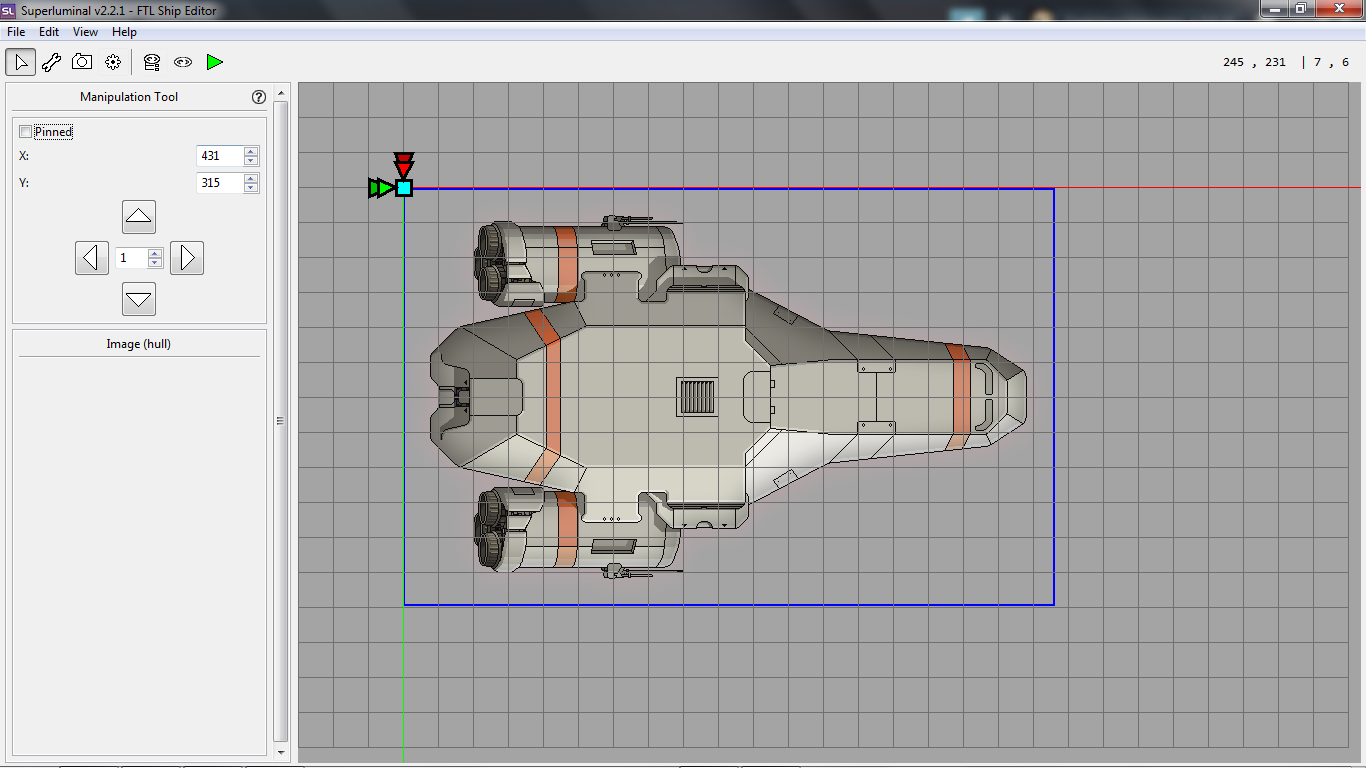
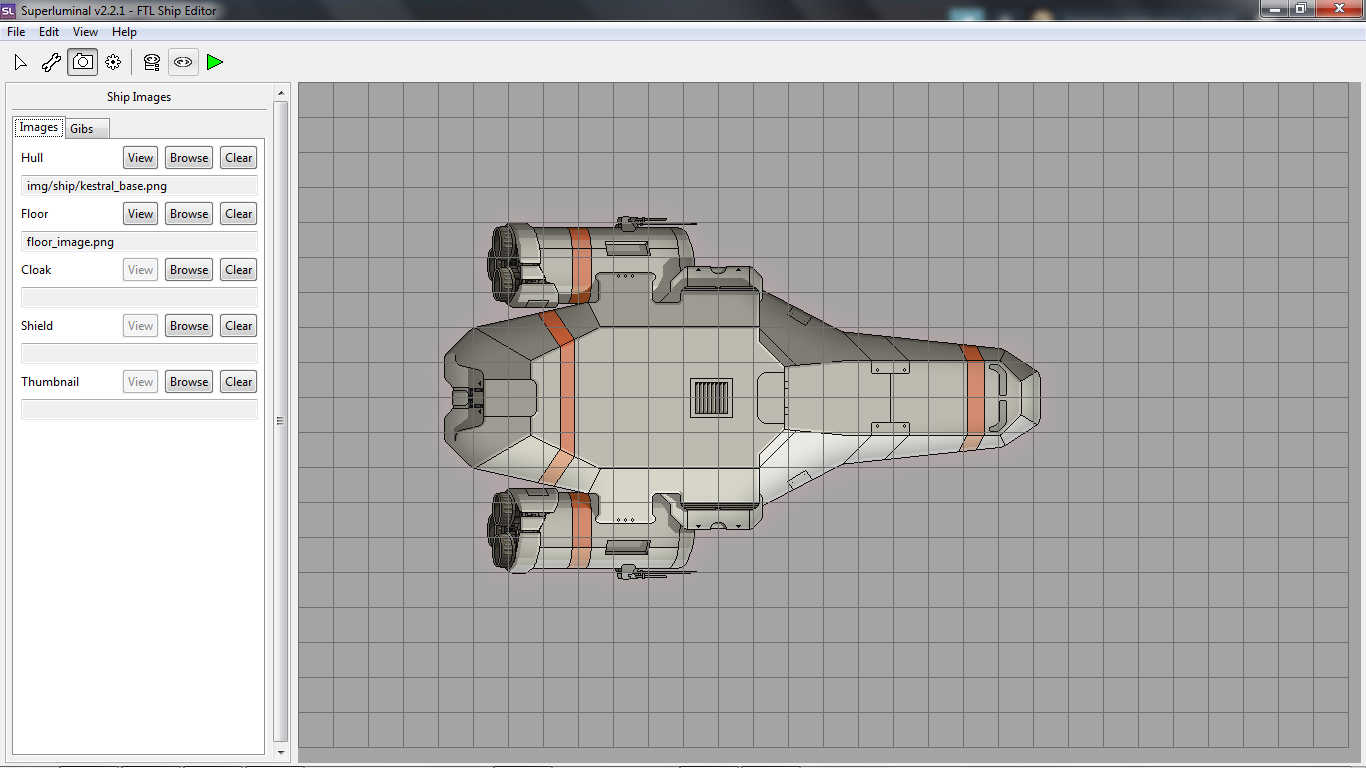
- First think we do is get a hull image. Make sure you have your superluminal on your Ship Images tab, click the camera icon by the top to get there. We will use the stock Kestrel image file. Now, first thing you should know is that Superluminal directly accesses the FTL game assets, but we ourselves can’t actually access them, in case we need to edit them or something. That’s why we need to extract them so we have them and are able to access them! Next to hull in the images tab, click “Browse”, then click Database. Navigate to image\ship\, and there find kestral_base.png. Now you will have a Kestrel in the top left. You should notice that the image has a blue box around it. Line it up on the red and green lines. Now we move on to making the rooms. Reference the image below to see what you should have by this point.
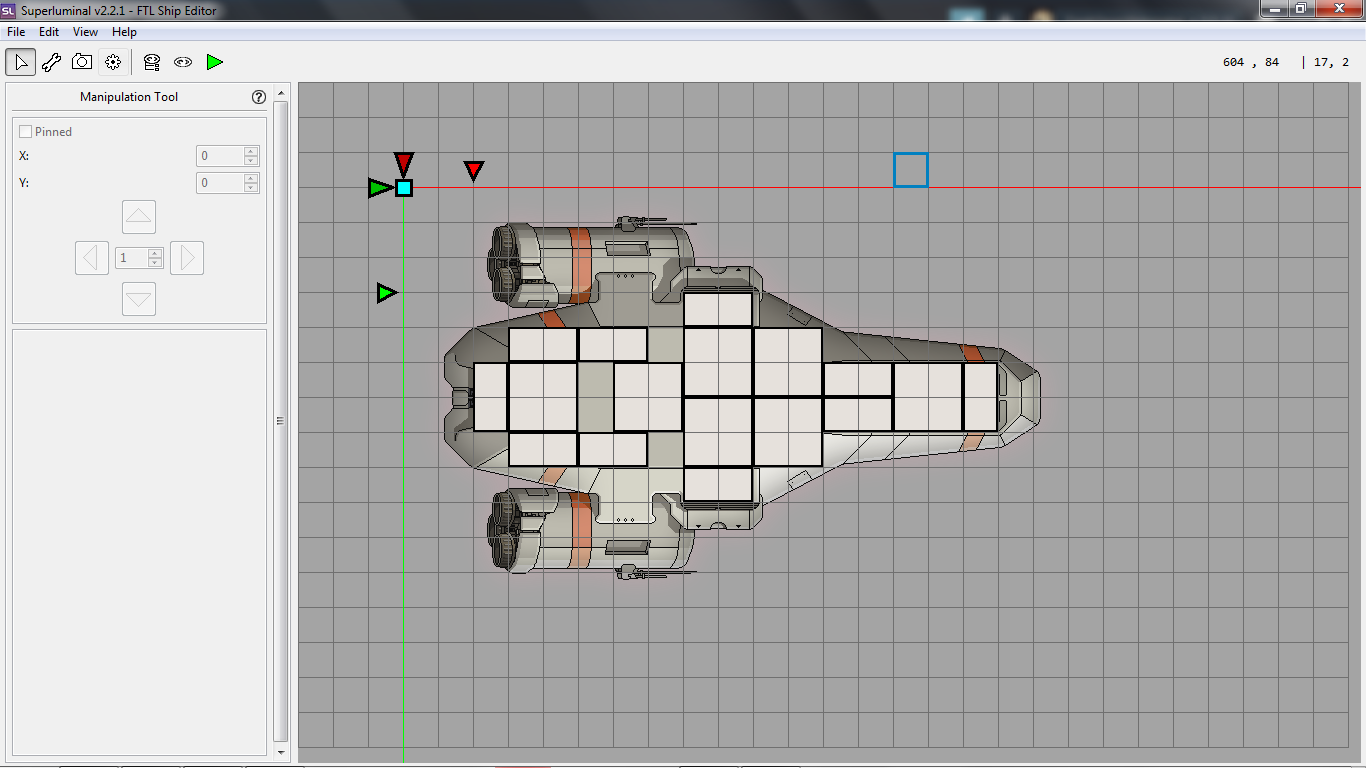
- Our next step is to make a room layout! We have 2 rules of thumb for room layouts. You want to only use 2×2, and 1×2/2×1 rooms. The second rule is to have a room for each system, which is around 14, excluding artillery. It’s time to get creative with your room layout now! For the sake of the guide, we will attempt to follow the stock Kestrel A layout. Click the Wrench Icon at the top left, and select “Room Creation Tool”. The Icon looks like a square with 4 other squares inside. This tool is easy to use. Just click and drag! Your rooms can float a bit off the hull, but try not to do that. The only thing that matters is that the rooms fit inside the shield (About that later). You may need to adjust the position that the hull is on to better fit the rooms on the hull, because you can only fit the rooms on the squares. You can use arrow keys to make small precise adjustments. Make sure to use the Manipulation Tool if you want to move something. You should have something like this now:
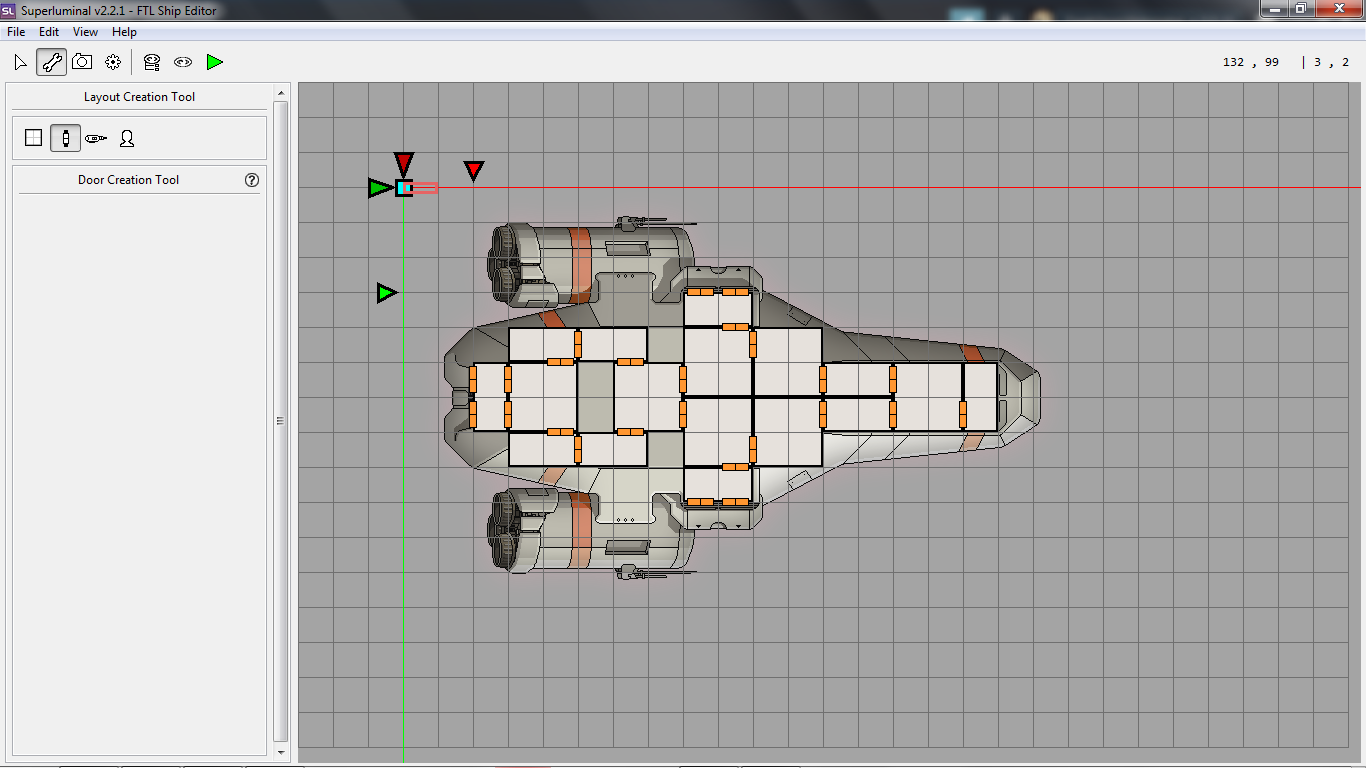
- Next step is to make doors and airlocks. This is easy. Just select the wrench/layout creation tool, and than click Door Creation Tool. You can now make airlocks and doors inside your ship now. Click on the edges of the squares inside the ship and on the edge. Refer to the image below to see what you should have.
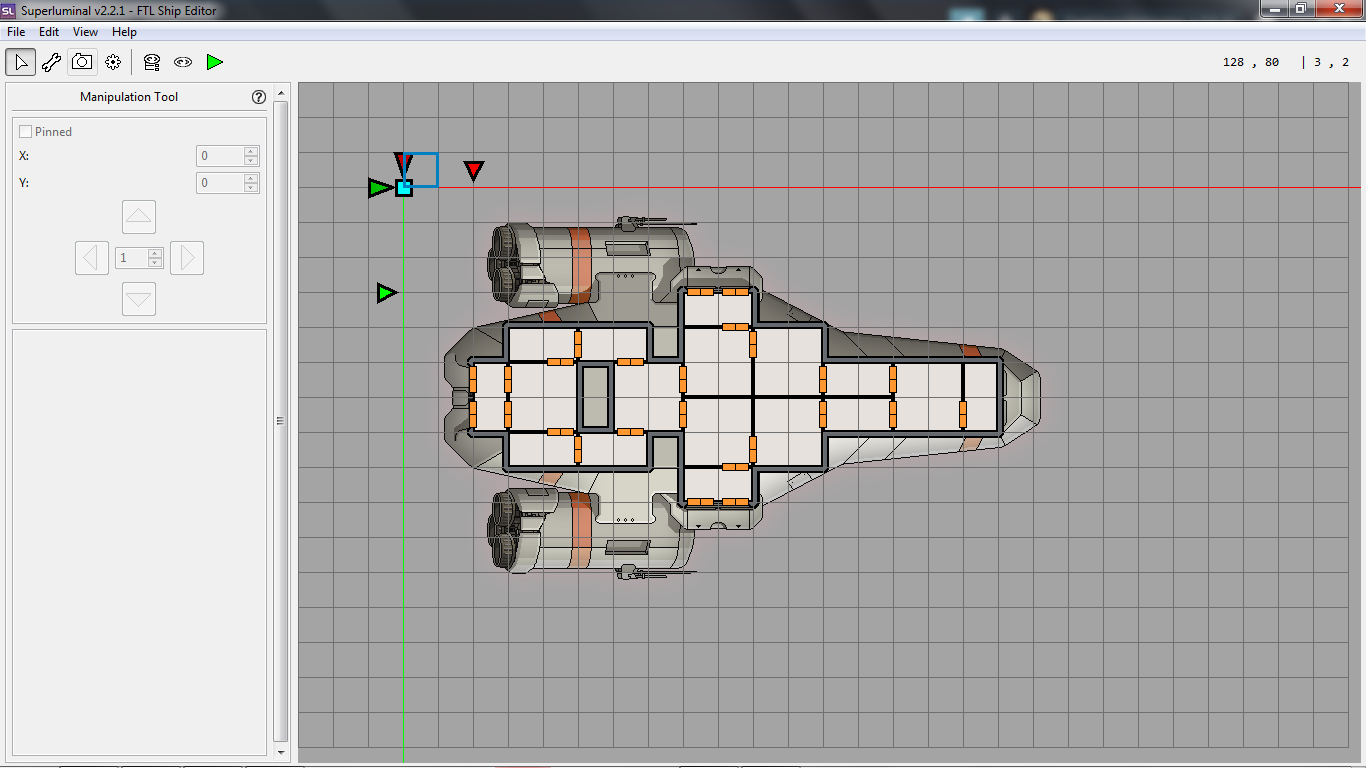
- Now we are going to generate a floor image. This is a quick step. Go to Edit in the top left, click it, than click “Generate Floor Image”. You will see a window with various options. If you need to, you may change some of this like color or thickness, but we don’t need to change anything here. Now you will have a floor image. It’s offset though. We will use the Manipulation tool to move this. Move it into the correct position, use arrow keys if needed. Now it should look like you have an outline around your ship.
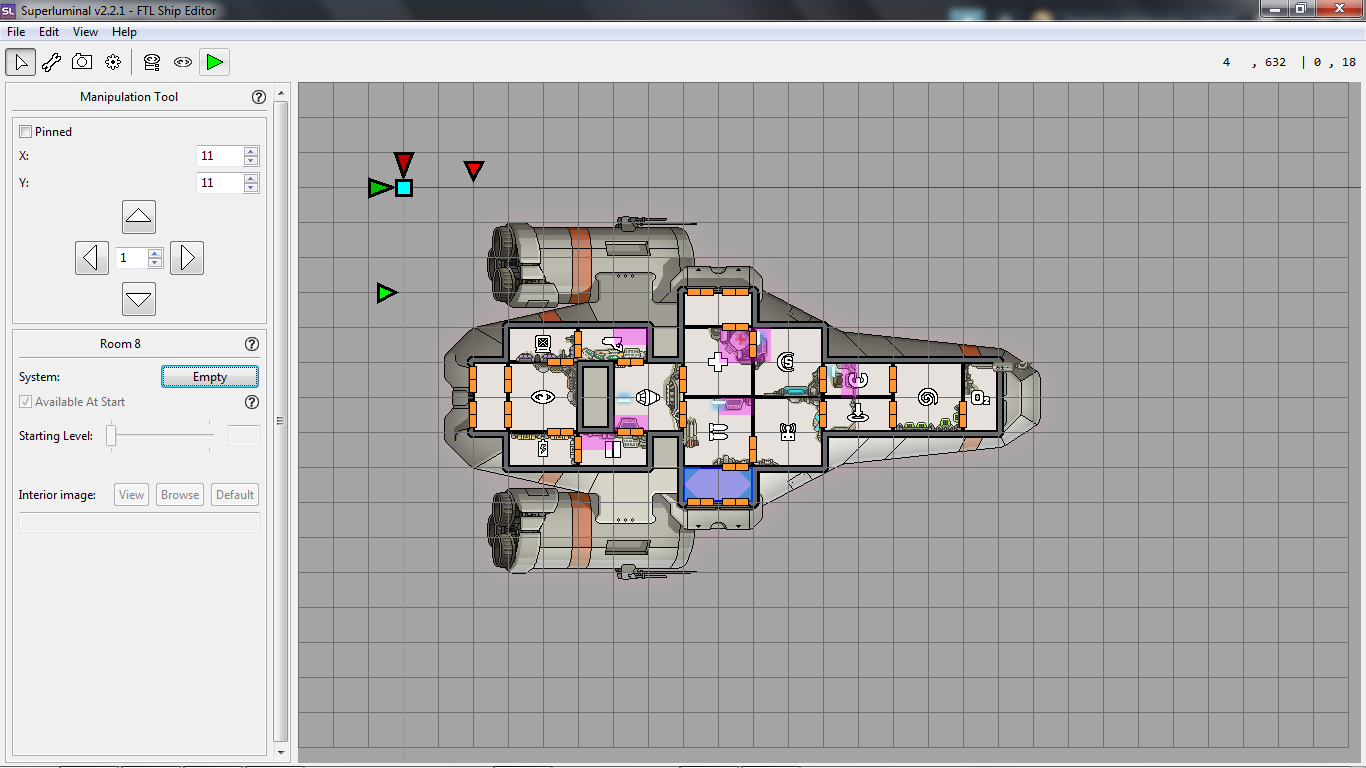
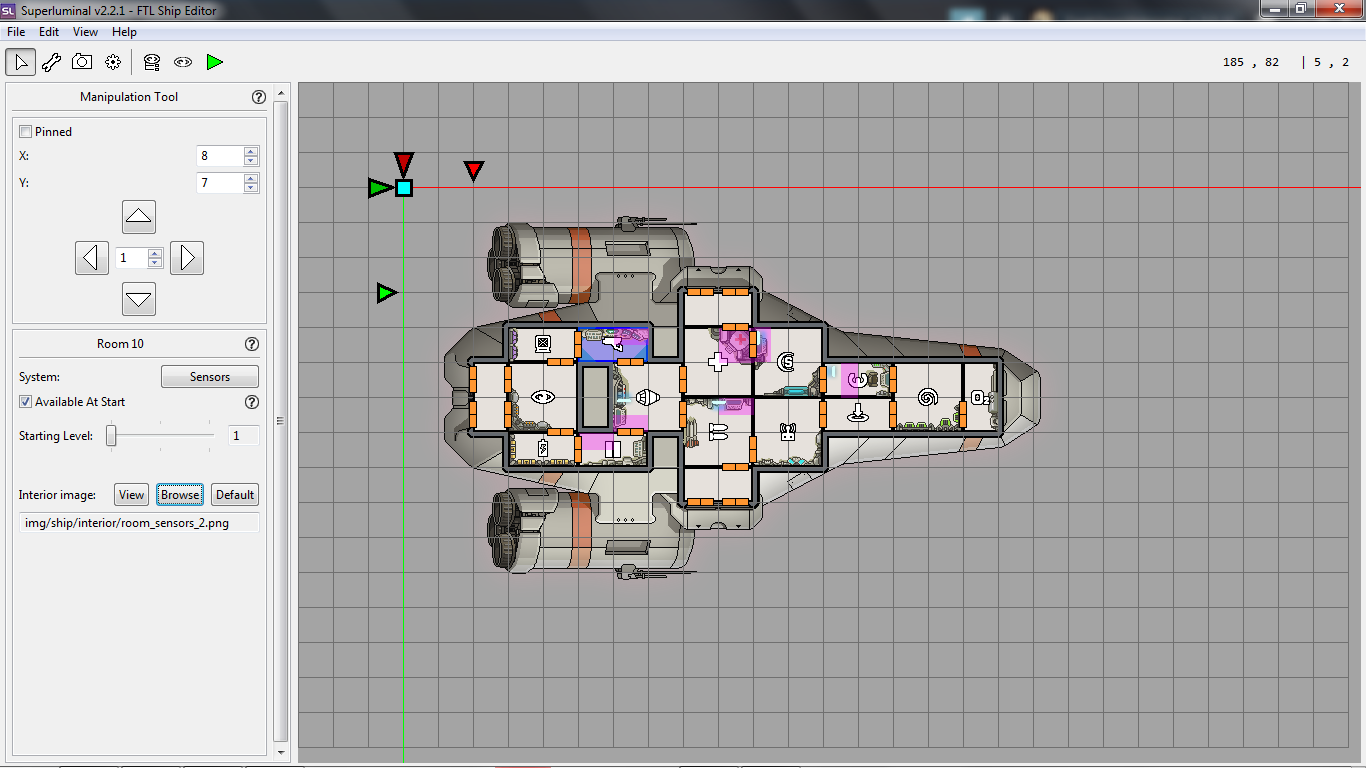
- Next thing we do is assign systems. Another easy step. Select the manipulation tool, click a room, and assign it a system. In case you mess up with a system placement, right click the room and under the assign button, click the system you have in the room and click unassign. NOTE: You can assign multiple systems in the same room. You only want to do this with the Medbay and Clonebay. You can make a system available at start on the left tab. Only make Piloting, Weapons, Shields, Engines, Oxygen, Doors, and Sensors available. If a room has a pink shade, that means it wont be available at start. Make sure to remove Clonebay for start. Starting levels should be Kestral default, refer to ftl.fandom.com – https://ftl.fandom.com/wiki/The_Kestrel_Cruiser for that. Replicate what I did in the photo below. For the sake of guide, I am going to purposely move around some rooms so it is different than the stock kestrel.
NOTE: I FORGOT TO REMOVE STARTING SYSTEMS IN THE IMAGES.
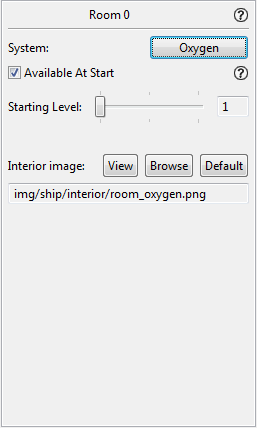
- Now we are going to change the interior images. Notice that our ship is a complete mess now. Room art is floating all over the place, blocking doors, etc. This won’t make any gameplay differences, but it looks ugly. Lets fix this. Lets start with the oxygen system. Click/select it, and at the left you will see the interior image part.
Here, you want to click browse. Click database, than navigate to img\ship\interior. This step is easy but it takes a bit of time. Here you see a bunch of different images for the interior. Find the one that corresponds with your system (oxygen in this case), and find a system that matches the shape of your system best, and doesn’t get in the way of doors. Do this for every single system. With this ship layout, you wont be able to get the pilot room and cloaking room to not block doors, but thats okay. NOTE: Cloaking has 2 interior images, one is the normal one, and the second is the activation glow. Make sure to set to the correct ones. If you are using room_cloaking_11 image, than use the equivalent with the activation glow. At the end, you should have this. Looking a lot better now. (Note: Don’t forget the medbay like I did!)
- Next thing we are going to do is station placement. Notice that we have floating room glows and mispositioned stations. Lets fix this. Go back to the wrench and select “Station Placement Tool”, First make sure you have “placement” selected, than click the squares with the monitors, computers, keyboards, medbay image, etc. Than select Direction, and based on the direction that the computer is facing, select it and click on the square. Once you are done with that, move the monitor glows to the correct locations. Do that by using the manipulation tool. Once you are done, it should look something like this:
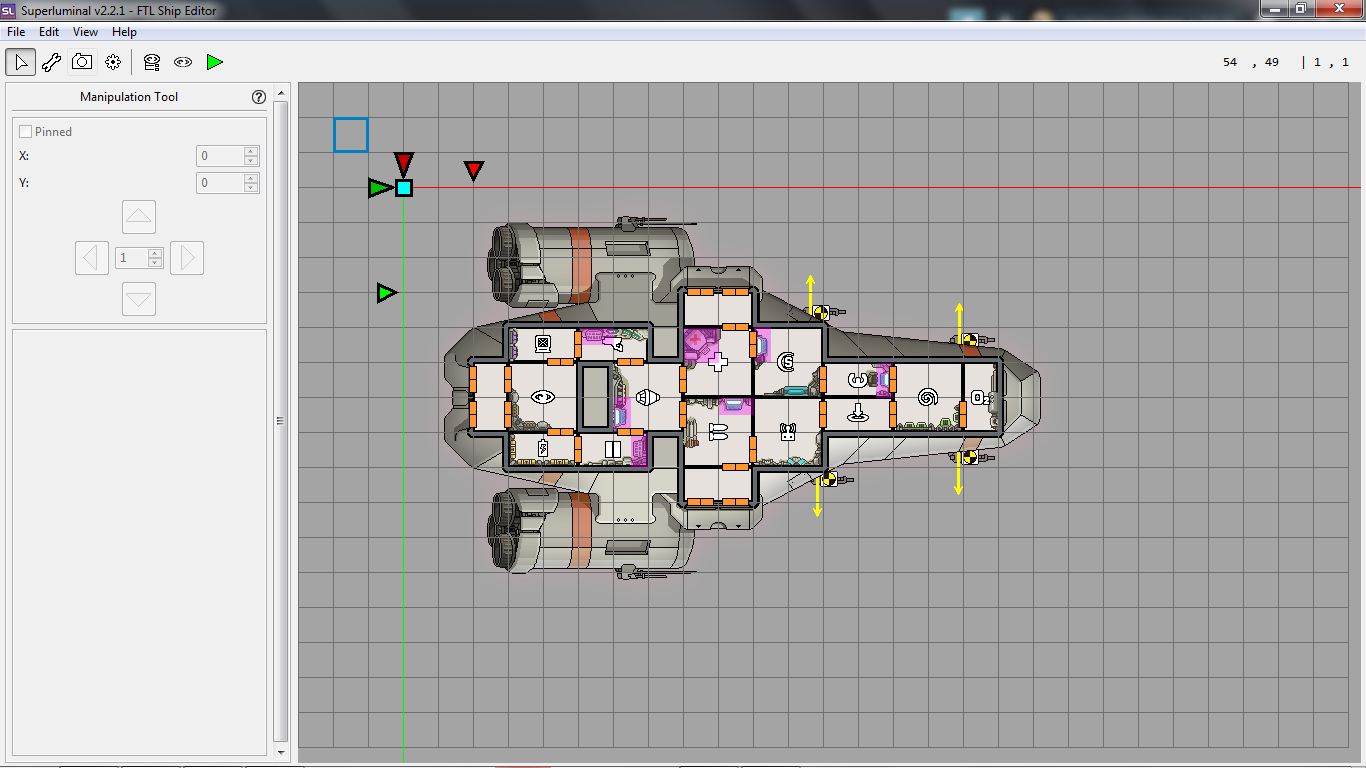
- Next thing we do is add weapon mounts. This is easy. Go to the Layout Creation Tool tab, then click Weapon Mount Creation Tool. Make sure to have the rotate option on, and select mirror if you need it. Make sure you select the correct power up direction. You only need 4-5 weapon mounts. The fifth slot is used by artillery if your ship has it. Your ship should look something like this when you are done.
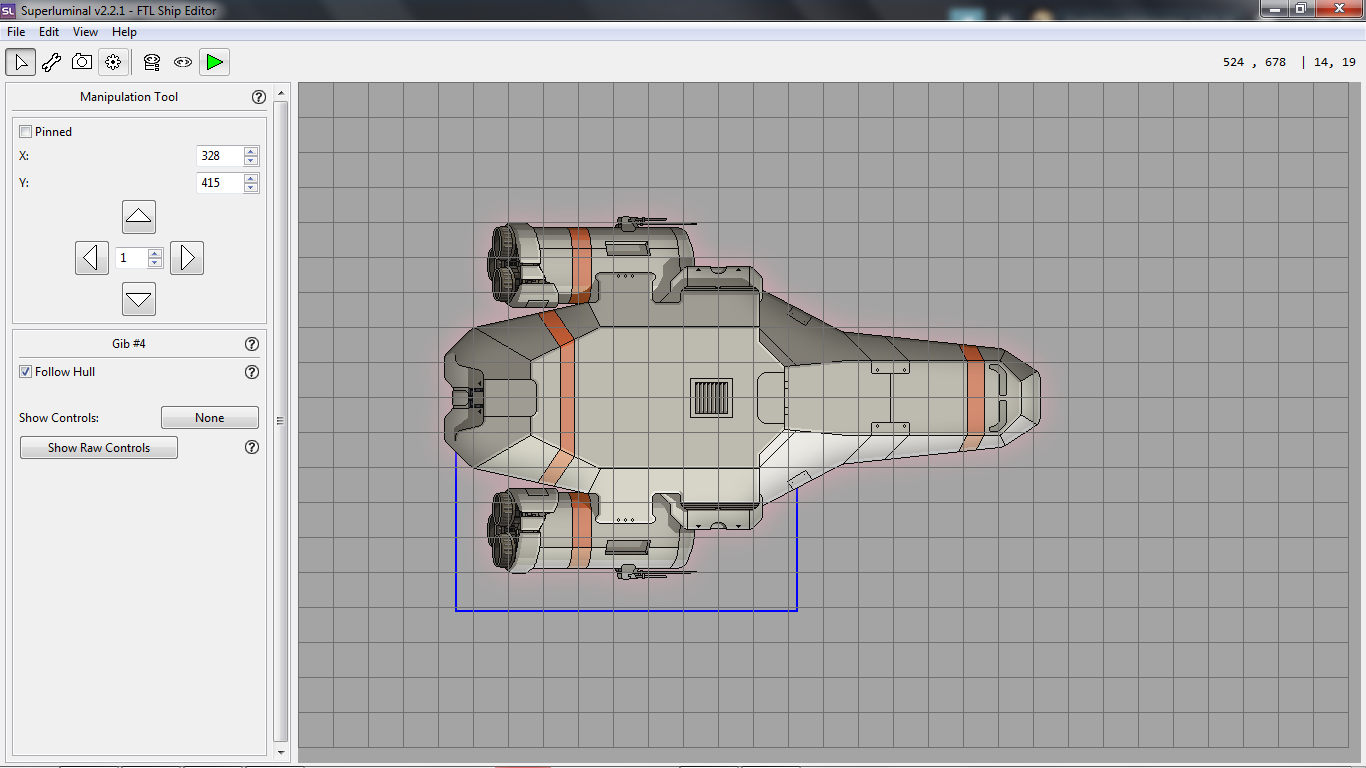
- Next step we will do are gibs. First thing we do here is go to “view” at the very top of your window. There, under ship components and ship images, disable showing everything but gibs and hull. Now your window should look like this:
Working with Superluminal: Making a Kestrel Part 2
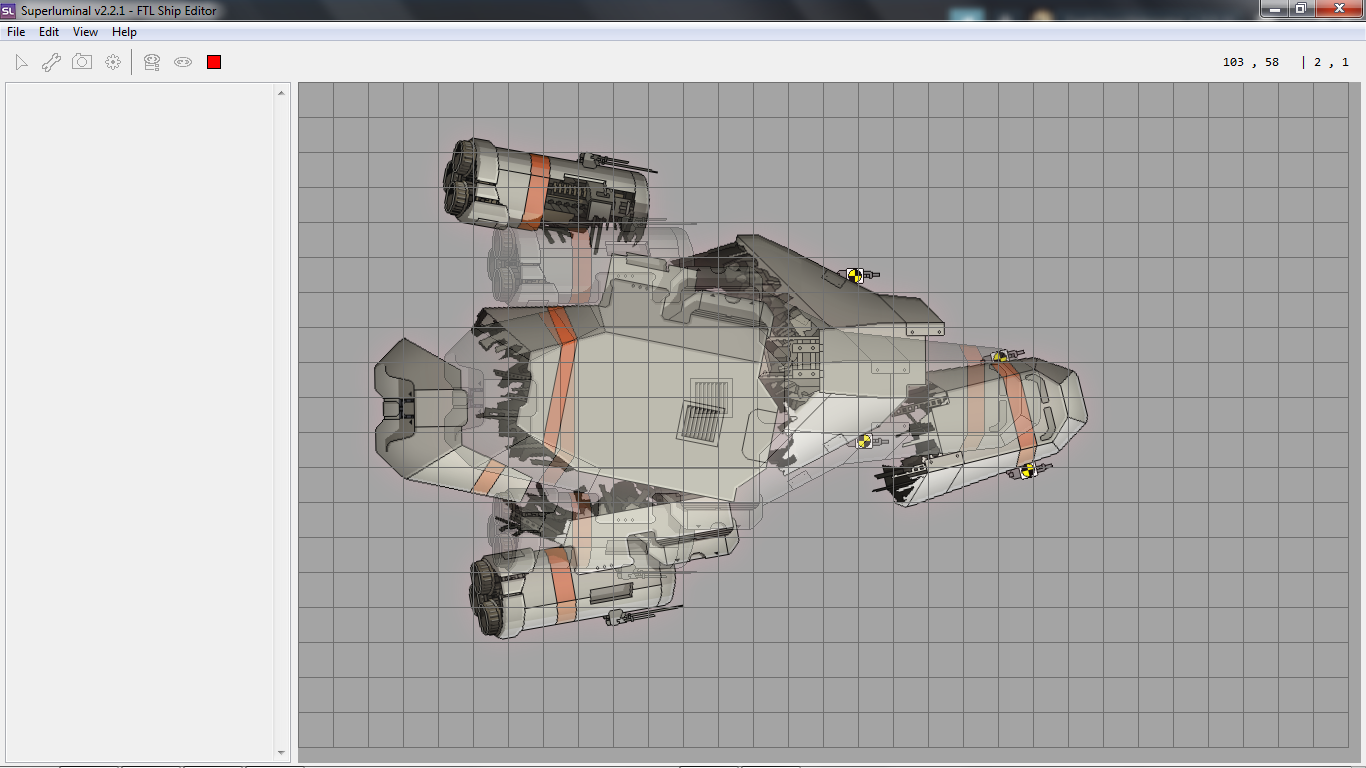
- Now select the camera/ship images tab. Now click gibs. Gibs are pretty hard to draw manually, but thank god we have game assets. Click New Gib, then database. Navigate to img\ship, and find the 6 kestrel gibs, named kestral_gib1, kestral_gib2, all the way up to 6. Upload them, than line them up with the hull. Use arrow keys for fine adjustment. Enable and disable viewing hull to see if you can see a difference between your hull and gibs put together. You can enable and disable viewing hull bu just pressing 6 on your keyboard. You should not be able to see a difference, besides shading. If you are having trouble selecting something because another gib is in the way, click the overview button by the top, expand gibs and hover over your gib list to find the one you are having trouble clicking. Click the gib on the list to select it, and you can use your arrow keys to adjust it. Your end result should look identical to the hull, other than some shading.
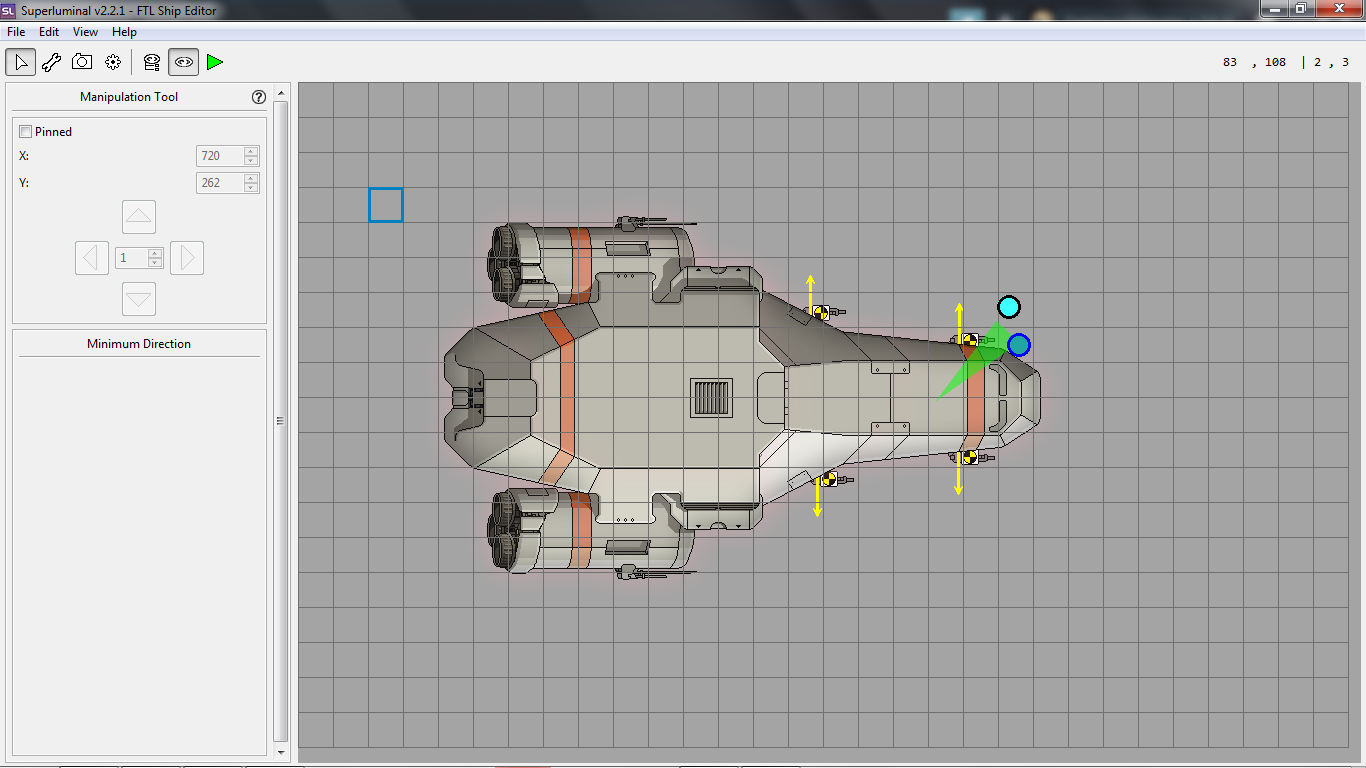
Now we are going to attach the weapons to the gibs, so they float off with them. Show weapon mounts in the view panel, and click them. You have an option to link them to a gib now. Link your weapon mounts to the gib its attached to, and your done! You can select the gibs using the ship overview. - Now we program the gibs. It’s not as hard as it sounds. Click on your gibs and next to “Show Controls”, click none. Click direction. The Green area shows the direction your gib can float off to. Drag the small circles around to make the green into a thinner cone. Do this for all gibs. Make each gib float in a separate area.
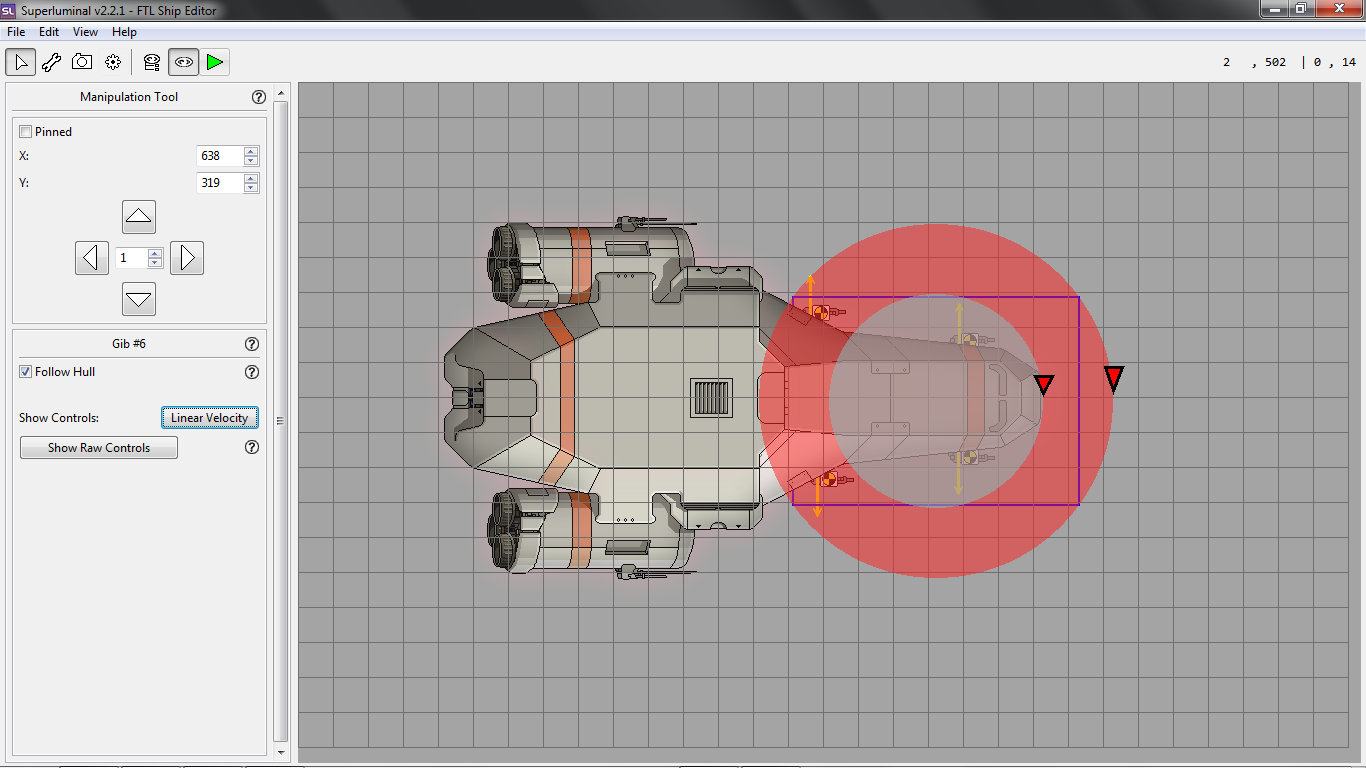
Now, next to show controls, select linear velocity. This will control the speed your gibs move. Red controls maximum speed, grey controls minimum speed. Do this for every gib, give each one a speed that seems right for the size, shape and position. Once you are done, you can click the green play button at the top to see what your animation would look like! Adjust speed and direction to your liking.
Our last step for gibs is angular velocity. This will make your gibs spin a tiny bit. Next to show controls, select angular velocity, and make the circle pretty small. This step isn’t required, and I personally don’t touch it much, but It adds a nice rotation. The bigger the circle the faster it spins. If your gibs look good to you, you’re good to go!
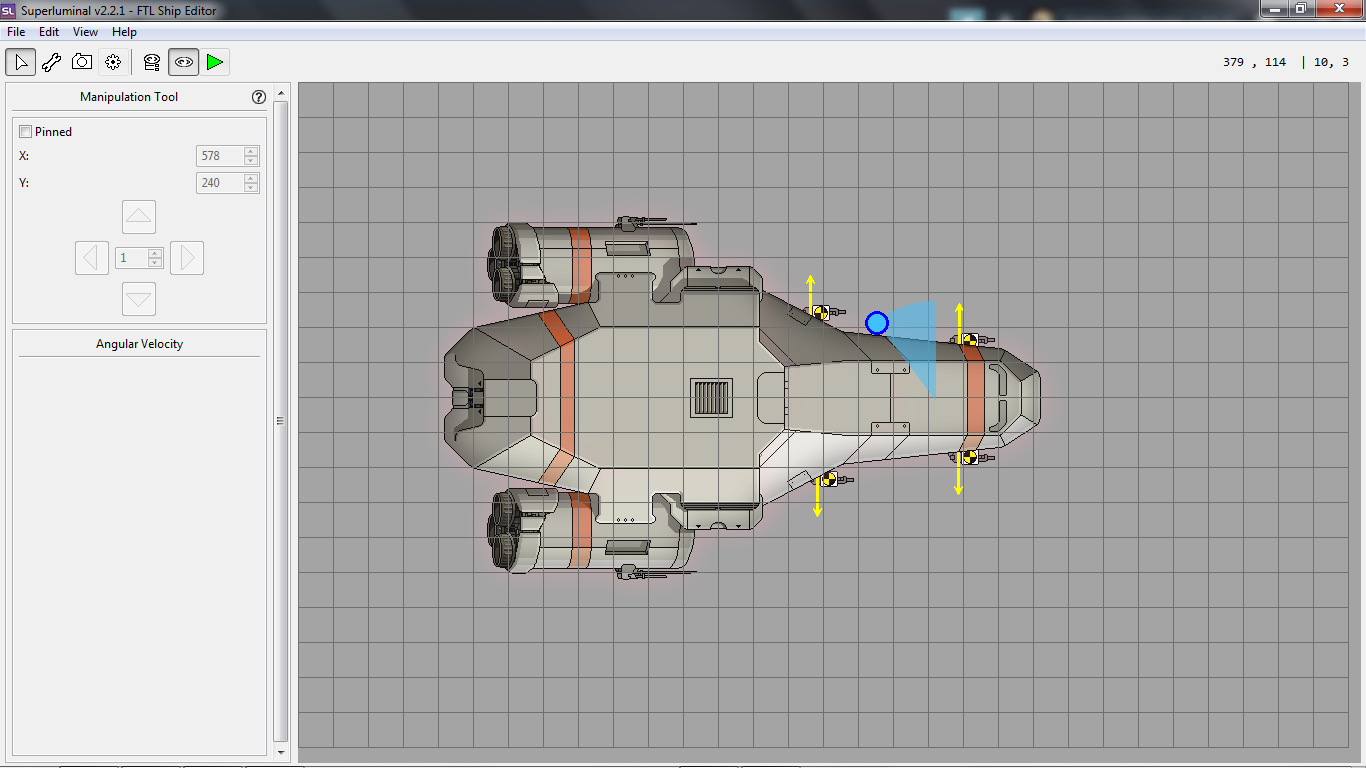
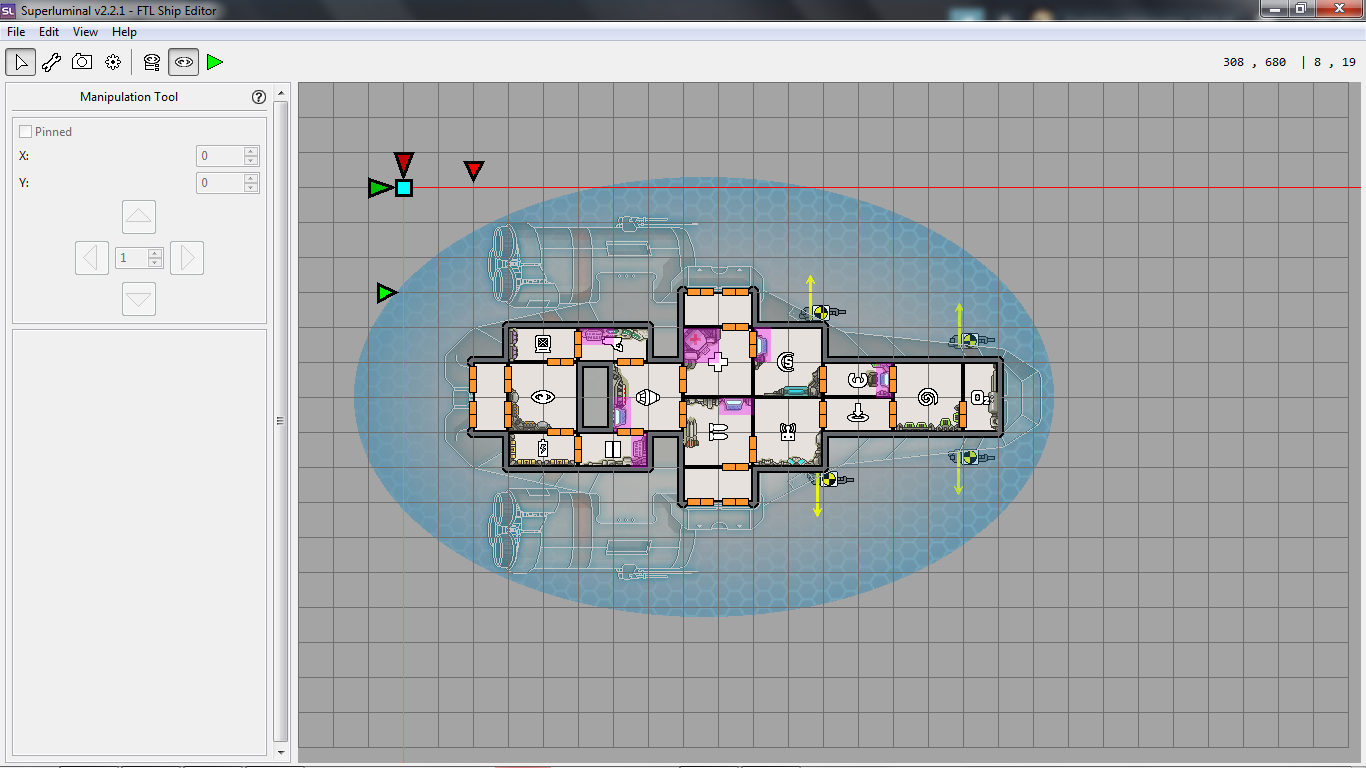
- The next step is finishing up ship images. Add the cloak image for the kestrel using the same method as last time. Browse, Database, img\ship\ and find the kestrel cloaking image, kestrel_cloak.png. You don’t need to adjust any image placement here. Then add a shield image. Same thing, just with the kestrel shield. Make sure all rooms fit inside the shield (the shield itself acts as its own hitbox), and make sure its centered. Then thumbnail. You find the thumbnail in img/customizeUI. After all of that is done, disable view gibs, press the view cloaked appearance button by the top, and you should have a ship that looks like this:
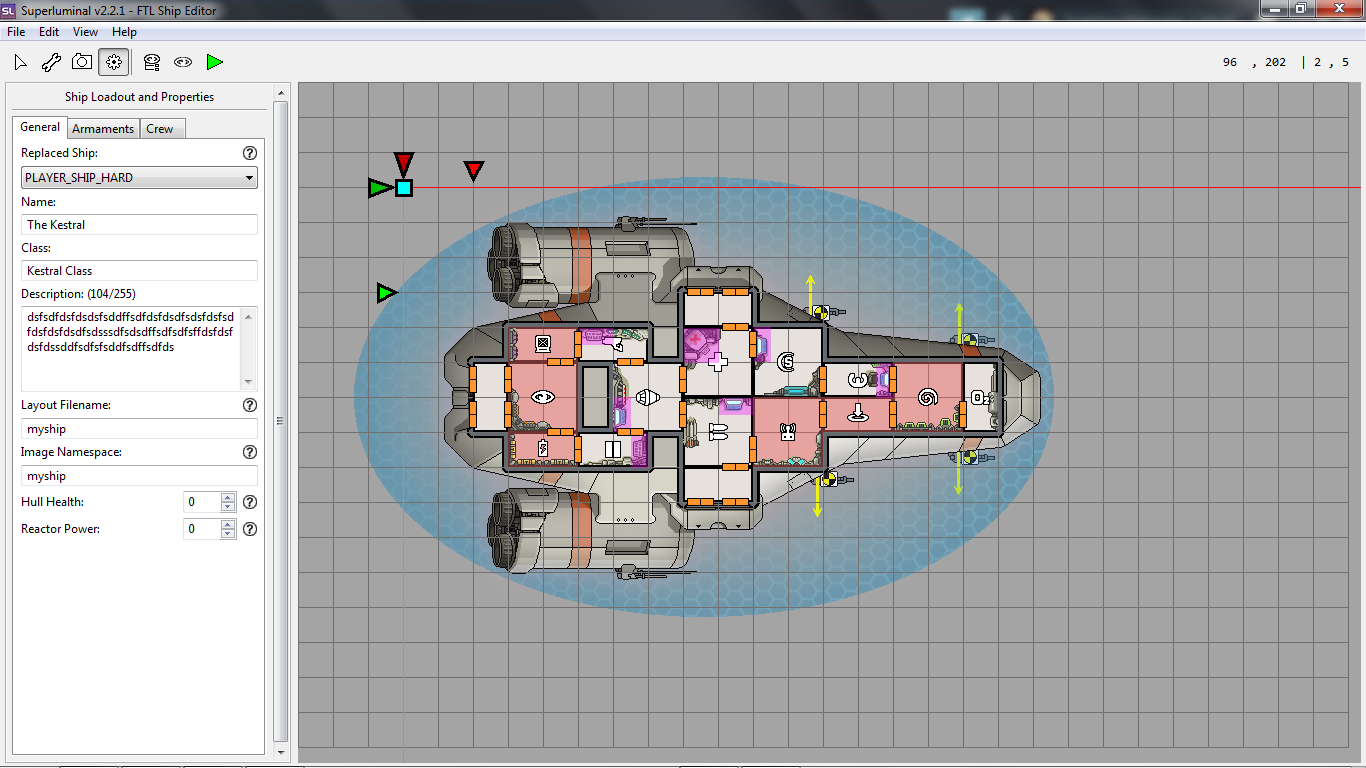
- Next step are general ship settings. Click the gear in the top left, and you have your ship settings in front of you. You can change what ship this is going to replace, but keep it as PLAYER_SHIP_HARD. (Note: HARD ships are the kestrels.) You can customize the name of your ship here. Name it to whatever, but I’m going to change it to “The Kestrel”. Ship class is seen in the ship list menu when you hover over a ship. Just change it to “Kestrel Class” here. You can write whatever in the description, customize it to your liking. Layout filename and image file name can be whatever. Hull heath can be anything 1 and above, default is 30. Reactor power is your base reactor power. Just use the default start for the Kestrel (8). At the end it should look like this (Note for image, just found out at this point that I forgot to remove starting systems, and I also forgot to change hull health and reactor power here):
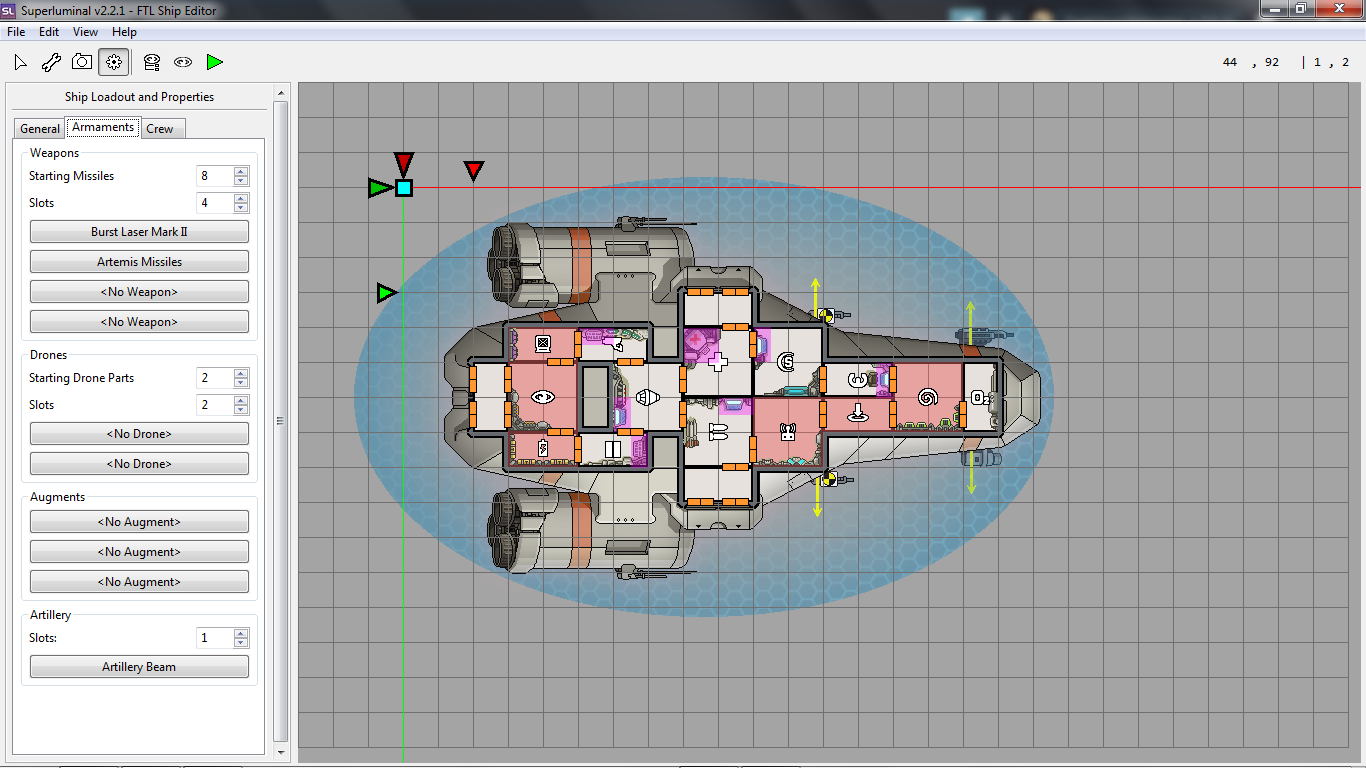
- Next step is to change Ship Armament settings. Same tab, just change from general to armaments. Starting missles should be 8. Slots are 4. Give yourself a burst laser 2 (LASER_BURST_3), and Artemis (MISSILES_2_PLAYER), don’t use the non player variant. Those 2 weapons should be in the front, so move the weapon mounts around if you need to. Give yourself 2 drone parts, and 2 drone slots. Don’t select any drones. You can also select augments here, but we are not going to for this guide. Now we have artillery. We are not on an artillery ship, so we aren’t going to mess with it, even though it says we have a slot and have an artillery beam. Refer to the image below to see how it should look:
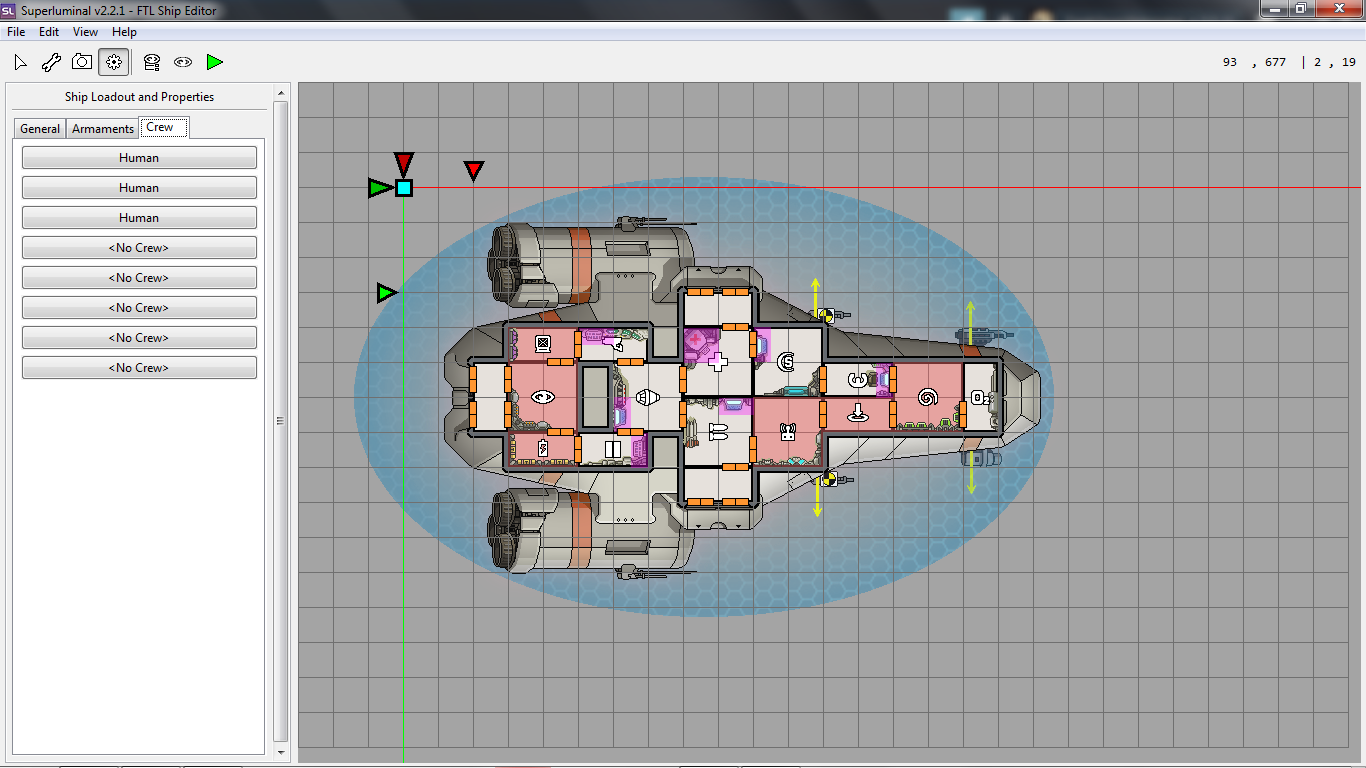
- Next step is crew settings. Just head over to the crew tab, and give yourself 3 humans.
- IMPORTANT STEP: Once you are done with your crew, go to edit at the top left, and click “Calculate Optimal Offset”. Do this as one of your last steps.
- Congratulations! You have made your own ship in superluminal. A scuffed Kestrel. Your last step is to save it. Go to File at the top left, and click “Save Ship As”. Make a folder somewhere and save your ship in it as an FTL file. HOWEVER, if you would like to make a custom weapon for it, save as resource folder as well. Will cover weapons in another guide.
Playing Your Kestrel
Congrats! You have made your ship. Now how do you play it? The answer is in slipstream mod manager. Inside the folder for slipstream mod manager, there is a “mods” folder. Drag or copy your .ftl file in there, and then open the app. Select your mod by clicking the check mark, and press the “Patch” button. After that finishes, launch the game and you can now play your Kestrel!
Making your own ship:
If you want to make your own ship instead of just a Kestral, here are some things you should know.
- Your ship hull resolution should be around 650×450 resolution. Anywhere around that number and your ship will be a good size to work with.
- Your thumbnail should be around 191×121 resolution.
- Ships above around 35 power will crash the game if you activate a backup battery, get power hacked, or fly into a nebula storm. You can prevent this using a mod called subsetgames.com – https://subsetgames.com/forum/viewtopic.php?t=35230.
- If you ever want to test our your ship, there are many mods out there to test it out. An honorable one is subsetgames.com – https://subsetgames.com/forum/viewtopic.php?t=22613
More of my guides:
I will make a guide in the future on how to make simple modded weapons, and I will link it here.
Conclusions
Hope this guide helped you in any sort of way! If it didn’t, I would like your feedback! If it did help, all I ask of you is to just rate this guide with a thumbs up. Thanks a lot!
Here we come to an end for FTL: Faster Than Light FTL Modding: Making Ships Using Superluminal hope you enjoy it. If you think we forget something to include or we should make an update to the post let us know via comment, and we will fix it asap! Thanks and have a great day!
- Check All FTL: Faster Than Light Posts List



Leave a Reply