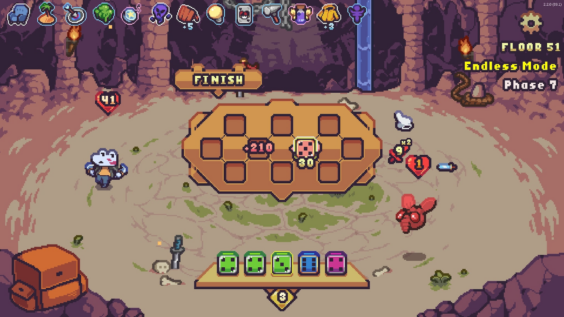
All Achievements and Walkthrough in Die in the Dungeon: Origins
Hey there, gamers! Ready to crush those tricky achievements in ‘Die in the Dungeon: Origins’? Buckle up, ’cause I’ve got the ultimate guide to help you steamroll through this challenge. Let’s dive in:
Step 1: Grab a Terrain Dice
First things first, snag yourself a Terrain Dice. Think of it as your secret weapon. Jazz it up with Flash, Hollow, and Heavy to really get things cooking.
Step 2: Score Bullseye and Mark of the Chosen One Relics
Next up, get your hands on the Bullseye Relic – it’s a game-changer early on. Don’t forget the Mark of the Chosen One Relic for that extra edge.
Step 3: Keep Your Deck Lean and Mean
Time to trim the fat off your deck. Stick to the essentials – one Terrain Dice, one Attack Dice, one Block Dice, one Heal Dice, and a wildcard of your choice. Focus on Attack and Block Dice first.
Step 4: Mix and Match with Killer Relics
Some Relics are just meant to be together. Check these out:
- Unpolished Shards: Power up all your Glass Dice by 3.
- Evergreen Sap: Let your Terrain and Healing Dice scale infinitely in each battle.
- Forge Hammer: Perfect for Heavy Dice, giving you a solid advantage.
- Scavenger Beak: Find those key resources faster.
- Star Yo-Yo: Zip through battles by wiping out enemies on turn one.
- Other cool stuff like Moon Chakram, Blinding Lightbulb, Toxic Cloud, and Dancing Shurikens: Great for chipping away at tough foes.
- Providential Vial: Get a consistent start every time.
- Munchable Dopamine: A health boost without the hassle.
Step 5: Pro Tips and Tricks
- No rush to complete the build before facing the Boss. Take it easy.
- This setup shines for the “Reach Floor 50” and “Deal 100 Damage in one attack” achievements. It might even go on forever, but you gotta do the math.
- Skip the Heavy attribute on Dice that aren’t already Glass and Flash – it’ll mess up your game.
- Watch out for the Bug affecting the Mark of the Chosen One boost. It’s a sneaky one.
- Feeling adventurous? Try adding a second Terrain Dice or upgrade to something like the Grow Attack Dice. It’s cool, but not a must.
- Heads-up: Stick to 24 or fewer Relics to avoid a softlock, where you can’t fill all dice slots during events.
The Magic Behind the Madness:
With just 4-5 Dice in your deck, you’ll draw them all every turn. A single Dice on the Board gets a 6x value boost. Flash Dice? That’s where the magic happens.
Let’s break down the math (assuming you’ve got Bullseye, Mark of the Chosen One, and Unpolished Shards):
Drop a Terrain Dice with a value of 6 in the center, and boom, you’re looking at a +42 boost (+36 without Unpolished Shards).
Boosted Damage: How to Hit Harder:
Slap an Attack Dice with a value of 6 next to it, and you’re dishing out **(42 [Square Boost] + (6 [Dice Value] x 3 [Mark of the Chosen One] + 3 [Unpolished Shards])) x 2 (Bullseye) = 126 damage**. That’s a knockout punch for most Floor 50 enemies.
Without Unpolished Shards, you’re still hitting for **108 damage**. Just Mark of the Chosen One? You’re at **36 damage**, enough to cruise to Floor 50.
Got Evergreen
Credit to : Migan

Leave a Reply