Introduction
Sequel to my https://steamcommunity.com/sharedfiles/filedetails/?id=2263886064 for Obscure.
Since it got an unexpectedly positive reception I figured people would appreciate if I analyzed the sequel, too.
I wasn’t able to look into the game files this time but once again all the data was gathered through Cheat Engine and vigorous testing.
Like my previous one, this guide is divided in 3 main sections: general mechanics, weapons and enemies.
Since Obscure 2 is a more ambitious game than its predecessor, I felt that my guide had to be so too.
Each main section is spread out in more sections to analyze the specific details more thouroughly.
However, if you’re looking only for the numerical values you can skip right to the comparison tables.
General mechanics (Health and healing)
Health
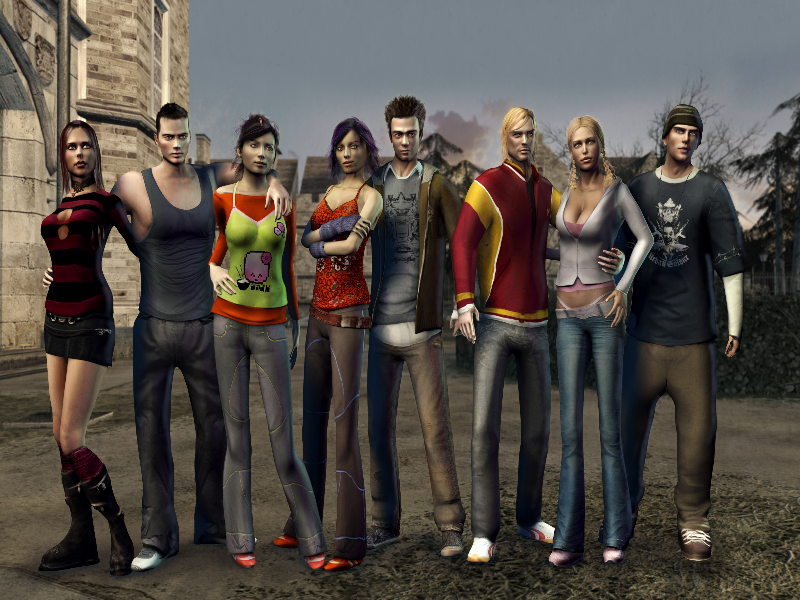
All playable characters have a maximum of 100 HP.
You can tell how much health a character has by looking at your character portrait; the more you’re hurt, the more it is filled with blood.
However, it’s a bit unreliable as it always looks like your character has less HP than they actually do.
For example, when Corey wakes up from the nightmare, he looks like he has 1 HP when in reality he has 20 HP left.
Sometimes, it looks like your character is about to die when they are not even INJURED.
If you drop below 40 HP you become INJURED.
Your walking and running animations will be different and your movement speed will be slower as a result (except when aiming).
Unlike the first game, characters don’t have different stats (except Amy who’s slower than the rest of the cast) and work exactly the same in combat (aside from some slight animation differences between male and female characters).
The only exception is during bossfights where AI teammates take HALF DAMAGE from all attacks (so don’t feel bad about using them as meat shields :D).
There are no defensive or evasive maneuvers in the game but all animations that make you stand in place (except reloading and attacking) will make you invulnerable, such as reloading your battery, filling up your syringe, getting stunned, being stuck in a grab (you’ll take damage from the grab itself but you and your assailant can’t be damaged by other attacks) and anything ledge-related (climbing up or down, jumping, dropping down, pulling someone up as Corey).
Corey can still be damaged while shimmying across a ledge and will fall down after 3 hits but he can’t fall if there isn’t a spot below to land on.
What sets each character apart is their APTITUDE which is only used to solve puzzles, unlock secrets and progress the game.
Also gone is permadeath: once a character is dead it’s game over and you need to reload a save.
Each character has their own HP that is kept thoughout the game and it’s not shared among others so be wary of that when the game sometimes switches characters.
You might abandon a character with low health only to get to stuck with them later in the game.
At specific story moments, however, your HP will change:
-The invincible Treemen at the end of Corey and Mei’s dream will damage both characters regardless of whom they hit.
-20 seconds after inspecting Amy’s body, Mei will get decapitated, ending the dream sequence.
When she wakes up, she has 100 HP again.
-Corey wakes up in the bathroom with 20 HP (as mentioned before) but he goes back to 100 HP after he drinks the ENERGY DRINK in the cutscene (which by the way you still keep in the inventory afterwards).
-The second Kenny bossfight heals Corey and Shannon to full when it starts.
-After defeating the Friedmans, Stan and Shannon wake up with 90 HP.
Healing
Like in the first game, you can use ENERGY DRINKS or FIRST-AID KITS scattered throughout the game to heal yourself or your teammate.
ENERGY DRINKS heal 30 HP (same amount as before but now you can heal your teammate, too).
FIRST-AID KITS heal 60 HP (15 HP less than before).
Unlike the first game though, you now also have access to the SYRINGE which lets you create 3 different types of serum.
Some monsters leave their HEART on the ground after dying.
HEARTS disappear once you leave an area without picking them up.
Interacting with them after obtaining the SYRINGE will trigger a 3 second animation where the syringe meter gets partially filled.
Once the meter gets full you’ll automatically create the strongest serum available at the moment.
Initially, you can create a SERUM (which heals 50 HP) after collecting 6 Hearts.
After the first upgrade, you can create an IMPROVED SERUM (which heals 75 HP) after collecting 8 HEARTS.
After the second upgrade, you can create a POWERFUL SERUM (which heals 100 HP) after collecting 9 HEARTS.
If the syringe meter is not full yet but you have enough to create a SERUM or IMPROVED SERUM you can create it by using the syringe.
It’s actually quite easy to do so on accident as after interacting with a HEART you’ll automatically equip the SYRINGE and therefore you’ll create a serum if you press the action button more than once near a HEART.
Luckily, this actually works in your favor as, in my opinion, SERUM is better than its upgraded versions.
Though you get more value from the upgraded serums (e.g. it takes 9 HEARTS to heal 100 HP with a POWERFUL SERUM while it takes 12 HEARTS to heal 100 HP with 2 SERUMS), I personally think it’s safer to just create SERUMS so that you can heal more frequently as it’s quite risky to drop into low HP to use the upgraded serums.
General mechanics (Inventory, supply conditions and battery)
Inventory
Inventory ITEMS are shared between all characters at all times while WEAPONS only get shared with characters who meet the original finders.
For example, Kenny and Amy can find a GOLF CLUB and a GUN at the start the of game.
When you later play as Corey and Mei, you won’t have these weapons until you reunite Kenny and Amy.
Same for the CHAINSAW and the SHOTGUN you find as Corey and Amy or the SPIKED CLUB you find as Sven and Amy if you manage to save Jun.
Only when the 2 pairs reunite at the hospital you’ll get to keep at once all the weapons found.
Weapons, once equipped, can be instantly switched at will while items must be cycled through the item menu.
Each item takes 0.2s to scroll and actions such as selecting an item and shifting through/selecting its options make the menu stay for 1.5s.
Keep it in mind because while the menu is open you can’t do any actions (interacting with environment, aiming and attacking) so if you’re healing in the midst of a fight try to get some distance from your assailants while you’re stuck in this state.
After defeating the Friedmans, your entire INVENTORY will be emptied.
Regardless of what you picked up throughout the game, you’ll later find a FLARE GUN with 9 flares and a BAG.
The contents of the BAG depend on how many CHESTS you opened throughout the game.
The BAG always contains 5 FIRST-AID KITS, the BAT, GOLF CLUB, HOCKEY STICK, SPIKED CLUB, GUN, SHOTGUN and DYNAMITE but ammo varies depending on how many CHESTS you opened.
If you opened:
-Less than 2 CHESTS (you didn’t get the CROSSBOW), you get 60 GUN bullets, 40 SHOTGUN shells and 4 DYNAMITES.
-2 CHESTS (you got the CROSSBOW but didn’t get the FLASHBALL), you get 50 GUN bullets, 35 SHOTGUN shells, 3 DYNAMITES and 3 CROSSBOW arrows.
-3 to 5 CHESTS (you got the CROSSBOW and FLASHBALL but didn’t get the MINI SMG), you get 50 GUN bullets, 35 SHOTGUN shells, 2 DYNAMITES, 2 CROSSBOW arrows and 10 FLASHBALL grenades.
-6 or 7 CHESTS (you got all the secret weapons), you get 50 GUN bullets, 30 SHOTGUN shells, 2 DYNAMITES, 2 CROSSBOW arrows, 10 FLASHBALL grenades and 120 MINI SMG bullets.
The only weapons missing in the end are ENERGY BASED WEAPONS and FLASHBANGS.
You can still, however, bring a STUN GUN or UBER FLASHLIGHT in the last bossfight by finding one in the last CHEST.
If the last CHEST contains a FLARE GUN but you already got one from the corpse you’ll get 3 additional flares.
If the last CHEST contains a CROSSBOW, FLASHBALL or MINI SMG, the ammo found in the BAG will be adjusted accordingly.
For example, since the CROSSBOW comes with 2 arrows, you’ll only get 1 additional arrow in the BAG.
Same applies to the FLASHBALL (10-4=6) and the MINI SMG (120-30=90).
Supply Conditions
Obscure 2 takes a lot of inspiration from the Silent Hill games, even moreso than it predecessor.
One central mechanic that was borrowed from Silent Hill 3 is what the gamefaqs.gamespot.com – https://gamefaqs.gamespot.com/pc/914765-silent-hill-3/faqs/36889 refers to as Supply Condition.
How it works in Obscure 2 is that, once you enter a room, certain items might not spawn if you exceed a certain quantity in your INVENTORY.
More specifically, as detailed in this gamefaqs.gamespot.com – https://gamefaqs.gamespot.com/pc/939096-obscure-the-aftermath/faqs/53528, the exact Supply Condtions are:
<5 ENERGY DRINKS.
<3 FIRST-AID KITS.
<21 GUN BULLETS.
<10 SHOTGUN SHELLS.
<2 CROSSBOW ARROWS.
<12 FLASHBALL GRENADES.
<9 FLARE GUN FLARES.
<3 FLASHBANGS.
Should you exceed one of these limits, you can only get an item by re-entering a room when meeting the Supply Condition.
Some item spawns are fixed and you’ll obtain them even if you exceed the required amount. These are:
1. After entering the “Picasso door” – 7 GUN BULLETS.
2. Near the “Finally outside” save flower – 14 GUN BULLETS.
3. After entering the “Freud door” – 14 GUN BULLETS.
4. In the box after picking the first lock in the dam – 7 GUN BULLETS.
5. Behind the panel that Sven can open with a valve in the sewers – 2 CROSSBOW ARROWS.
6. In the turbine room – 10 SHOTGUN SHELLS.
7. Beyond the electrified puddle that Corey can climb over – FIRST-AID KIT.
8. Outside the dam – FIRST-AID KIT.
9. Behind the double lever panel before entering Leafmore – FIRST-AID KIT.
10. Outside the Leafmore library – 14 GUN BULLETS.
11. Locker in the corridor with the crane – 1 FLASHBANG.
12. In the classroom with the jerrycan – 10 SHOTGUN ROUNDS.
13. Before entering Leonard’s room – 10 SHOTGUN ROUNDS.
For every single item spawn, consult the guide I just linked above.
Bossfights (with the exception of the first one) contain boxes that have their own Supply Conditions.
These can spawn:
–ENERGY DRINK (if at least one character has <50 HP. You can get more than 5).
–FIRST-AID KIT (if at least one character has <25 HP. You can get more than 3).
–7 GUN BULLETS (if you have <14 GUN BULLETS AND <10 SHOTGUN SHELLS AND all your other weapons are empty. If you don’t have the SHOTGUN you can disregard the <10 SHOTGUN SHELLS requirement).
–5 SHOTGUN SHELLS (if you have <14 GUN BULLETS AND <10 SHOTGUN SHELLS AND all your other weapons are empty. These will not spawn if you don’t have the SHOTGUN).
The big boxes in the second Kenny encounter can only be broken by him and get automatically replaced while the boxes in the next bossfights need to be broken by players and will respawn after 20 seconds when out of view.
These are the only boxes in the game that respawn.
Battery
The light mechanic from the first game is gone and it’s not returning in the second game.
Characters come already equipped with flashlights that they automatically use in dark places but you can’t use them against enemies as they are not surrounded by dark spores anymore.
In its place there’s a new BATTERY mechanic which serves as a shared ammo pool for 3 different weapons (CHAINSAW, STUN GUN and UBER FLASHLIGHT).
The BATTERY‘s max capacity is initailly 100 points but can be upgraded by Dr. Richard James to 160 and 225.
To recharge the BATTERY you can interact with POWERBOXES which reload at 20 points/sec or by upgrading the battery, which immediately brings the BATTERY at max value.
The STUN GUN and CHAINSAW can be used as long as you have energy available while the UBER FLASHLIGHT requires at least 25 energy points to fire.
At specific story moments, the BATTERY gets reset to:
-70 when playing as Kenny and Amy in the Brotherhood.
-70 again when also playing as Corey and Mei in the Brotherhood.
-1 when playing as Sven and Mei at Fallcreek.
-1 again when returning to the Brotherhood.
The BATTERY is shared between all characters at all times so be wary of these sudden changes.
General mechanics (Stuns)
Here I’ll be covering everything about stuns, explaining its related mechanics and establishing the terminology that will be used in the Weapons and Enemies sections.
Each attack in Obscure 2, both from players and enemies, temporarily incapacites the target to interrupt their actions and/or movement giving the attacker an advantage, unless the target is immune to specific stuns or temporarily unaffected.
Since this can lead to perpetual stuns (aka stunlocking), there are some measures put in place to mitigate stunlocking for both players and enemies.
Getting hit during a stun will reset the animation, applies to both players and enemies.
After a player’s stun animation ends or gets reset, blunt melee weapons will knock enemies down for the next 1s, except for a few that are immune (Ogre, Fly, Surrogate mother, Evolved student, Dark Kenny and Leonard Friedman).
Enemies also have some countermeasures when hit during a stun animation or for the next 1s, (or in simpler terms when hit twice in a quick succession) which usually consists in a quick dash to safety.
They’ll usually dash forward to close the distance if you’re hitting them afar or dash away from you if you’re attacking them at close range.
Enemies don’t get stun immunity like players do with the exception of only one enemy, the Ogre.
When hit twice with a melee weapon, it will roar and get stun immunity during its animation and the next 1s.
Grabs and some enemy attacks can cause the screen to shake, blur and partially cover the edges.
This is tied specifically to some attacks and not the stuns themselves.
Dark Kenny and Leonard Friedman are immune to all stuns.
These are the terms I’ll use to indicate the stun’s severity:
- Flinch: causes the target’s model to shake slightly but other than that it’s the only stun that doesn’t lock in an animation. Players hit while they’re aiming will get interrupted out of it (except for Surrogate children‘s attacks) and players hit while they’re runnning will be stuck running in a single direction for 0.3s.
- Stagger: causes a brief stun (about 0.5s). Enemies stand in place while players get pushed slightly.
- Step back: causes the target to jumn back slightly.
Players will trigger this when running into black spores (which deal 0 DMG) or one of the dam’s environmental hazards, such as electrified water, steam or turbines (which deal 1 DMG).
Players hit from behind will stumble.
Be wary that the turbines actually clip through your character and hit multiple times or even kill you if you stumble in specific spots.
The only other environmental instant death happens if you destroy the pillar under the Professors’ room and don’t get to safety in 4 seconds, resulting in debris crushinh you.
Enemies such as Rams, Flies and Evolved students will usually leap back after being twice in quick succession at close range or randomly after hitting you a couple times. - Stumble: causes the target to fall on their knees and quickly get up.
Replaces the player’s step back, knockback, knockdown and sweep animations when hit from behind.
Evolved students can stumble, too. - Knockback: similar to the stagger but pushes back both players end enemies.
Players hit from behind will stumble. - Knockdown: causes the target to fall on the ground.
Players hit from behind will stumble. - Incapacitation: causes the target to fall on the ground as if they were dying, laying on ground, and sometimes start twitching. Triggered in enemies by the stun gun and flashball.
Ogres hit by the flashball will rest on their knees and single arm instead of laying on the ground.
Players can only experience this when touching a save flower. - Kneel (player only): causes the target to momentarily crouch on their knees and get back up.
- Sweep (player only): causes the target to fall flat on their face.
- Throw (player only): the target gets launched in the air.
- Blind (enemy only): only triggered when you use the Uber flashlight against Obscure 1 types as they are very susceptible to light.
Treemen will briefly cover their face and then roar while Evolved students will fall on their back (incapacitation) and crawl away for a bit. - Retreat (enemy only): the target will constantly back away.
Caused by powerful weapons such as the Flare gun, Mini SMG and sometimes the Uber flashlight. - Shred (enemy only): Chainsaw-specific stun (mostly), applies when using the charged attack.
All regular enemies coming in contact with your active Chainsaw will be stuck in place until you either run out of battery, interrupt the attack or get interrupted.
Does not apply to basic attacks nor bosses.
Some attacks are tied to one specific stun while others randomly alternate between two stuns.
For example, Surrogate children‘s basic attacks always cause flinch while the Ogre‘s attacks cause either a knockback or throw.
The same applies to player attacks.
Weapon comparison table
Introduction
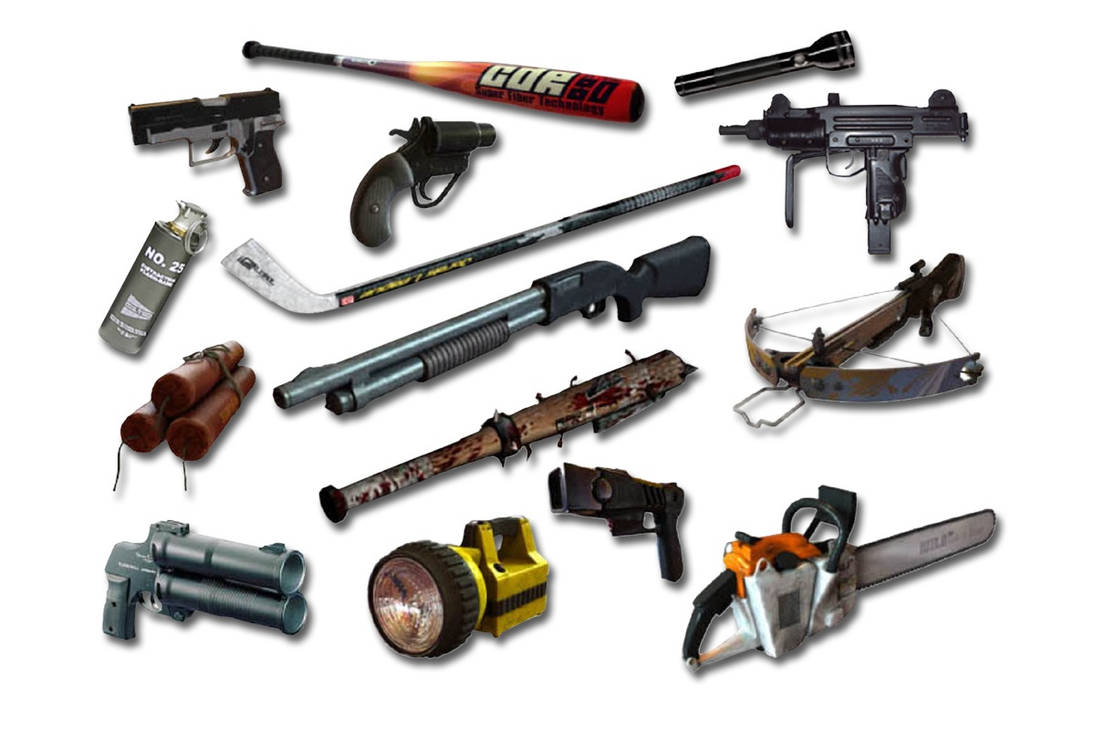
Here are the stats an basic properties of all the game’s weapons.
Go the next chapters for more detailed information on each weapon.
Damage is measured in HP while speed is measured in seconds.
All weapons take 0.1s to draw (except for environmental objects since they can’t lock on targets).
Weapons can be divided in 4 categories depending on their quirks:
- Environmental objects.
- Melee.
- Ranged.
- Throwables
Male and female characters have different speeds since their animations are different.
In the speed sections, highlighted numbers indicate the full animation duration while numbers in brackets specify their windup/active/recovery times, unless they don’t have windup/recovery times.
Only during the active phase you can deal damage.
Windup and recovery is when you are stuck in an animation before and after an attack but are not dealing damage.
While holding the aim button, you can attack while holding the forward or back button but you can’t attack while holding the left or right button.
Probably an oversight.
Reload animations and almost all attack animations lock you in place.
Only ranged weapons allow you to move while shooting.
Unlike the first game, each weapon has their own ammo pool and distinct ammo pickups which can’t be shared across different weapons.
The only exception are Battery powered weapons such as the Chainsaw, Stun gun and Uber flashlight which don’t have ammo pickups so they can only be reloaded by recharging the Battery at Powerboxes.
Melee weapons need to lock onto targets again after an attack or combo, adding 0.1s downtime.
Ranged weapons actually let you move freely during recovery (but you still have to wait in order to shoot again).
Reload times in brackets indicate (the time it takes to reload/recovery).
Reload animations can’t be interrupted manually but if they get interrupted by an attack or a loading before you are in recovery you have to reload again.
The Shotgun has multiple reload times because it reloads 2/2/1 shells at a time.
Throwable weapons need to be detonated before you can actually draw them so the numbers in brackets indicate (detonation/draw/throw + reload).
Unlike ranged weapons, reloading happens automatically.
If you are using the last Dynamite/Flashbang you will skip the reload animation.
As soon as you press the aiming button you will initiate a countdown timer for the explosion (5.4s for Dynamites and 4.4s for Flashbangs).
The timer is reset if you stop aiming before you throw, whether you interrupt manually or get interrupted.
As long as what you’re throwing is in your hand, the timer can only drop to 0.6s so that you don’t blow yourself up or waste a Flashbang.
In this case, the timer will resume only after whatever you’re throwing phisically leaves your hand.
Environmental objects
| Name | Damage | Attack Rate | Reload Speed |
| Spotlights | 0 DMG | 0 | 1 |
| Boxes/Chairs | 30 DMG | Pickup 0.9 (0.3 bend down + 0.6 get up) M/F Smash 0.82 (0.4/0.2/0.22) M 1.02 (0.4/0.2/0.42) F |
N/A |
Melee
| Name | Damage | Attack Rate |
| Bat/ Hockey Stick/ Golf Club | Medium 7/8/14 DMG Low 15 DMG High 12/0 DMG |
Medium 1 hit 0.76 (-/0.4/0.36) M 0.69 (-/0.26/0.43) F 2 hits 0.69 (0.4 + 0.29) M 1.09 (0.26 + 0.14/0.22/0.47) F 3 hits (short) 1.45 (0.4 + 0.2 + 0.2/0.2/0.36) M 1.88 (0.26 + 0.14/0.22/0.47 + 0.1/0.29/0.4) F 3 hits (long) 1.91 (0.4 + 0.2 + 0.2/0.37/0.55) M 2.01 (0.26 + 0.14/0.22/0.47 + 0.1/0.36/0.46) F Low 0.82 (0.5/0.32) M/F High 1 hit 0.89 (-/0.46/0.43) M 0.92 (-/0.46/0.46) F 2 hits 1.29 (0.46 + 0.3/0.3/0.23) M/F |
| Spiked club | Medium 9/10/16 DMG (+2/+2/+2) Low 20 DMG (+5) High 13/0 DMG (+1/+0) |
Same as above. |
| Chainsaw | Medium/High 15/15 DMG Low 20 DMG Charged 50 DMG/s |
Medium/High 1 hit 1.1 (0.2/0.3/0.6) M 0.9 (0.2/0.3/0.4) F 2 hits 1.45 (0.2/0.3/- + 0.3/0.15/0.5) M 1.55 (0.2/0.3/- + 0.5/0.25/0.3) F Charged 1.2 (hold 0.4 + 0.65/0.15/-) M/F Low 1.65 (0.5/0.5/0.65) M 1.32 (0.5/0.44/0.38) F Trees 2.4-3.7 (hold 0.4 + -/2-3.3/-) M/F Roots 3.1 (hold 0.4 + -/2.7/-) M |
Ranged
| Name | Damage | Attack Rate | Reload Speed |
| Gun | 15 DMG | 0.65 (-/0.2/0.45) M/F | 2.1 (1/1.1) M 2.05 (1/1.05) F |
| Stun gun | 5 DMG/sec | 0.4 (0.2/-/0.1) | N/A | Shotgun | 0-60 DMG | 1 (-/0.7/0.3) M 1 (-/0.5/0.5) F |
2.05 (0.9-1.2-1.65/0.4) M 2.12 (0.9-1.2-1.65/0.47) F |
| Crossbow | 125 DMG | 0.73 (0.1/0.43/0.2) M/F | 1.65 (0.8/0.85) M/F |
| Flashball | 30 DMG | 0.4 (-/0.2/0.2) M/F | 1.8 (1.2/0.6) M/F |
| Flare gun | 150 DMG(10/s * 7s + 80) | 0.2 (-/0.2/-) M/F | 1.98 (1/0.98) M 1.78 (1/0.78) F |
| Uber flashlight | 40 DMG (90 against Treemen) | 1 (1/-/-) | N/A |
| Mini SMG | 50 DMG/s | 6/s (-/-/0.1-0.2) | 2.7 (1.5/1.2) M 2.4 (1.5/0.9) F |
Throwables
| Name | Damage | Attack Rate | Reload Speed |
| Dynamite | 15-150 DMG | Far 1.67-2.14 (1.15/0.1/0.42 + 0.47) M 1.63-2.18 (1.15/0.1/0.38 + 0.55) F Short 1.55-2.07 (1.15/0.1/0.3 + 0.52) M 1.75-2.05 (1.15/0.1/0.5 + 0.3) F |
0.47-0.52 M 0.3-0.55 F |
| Flashbang | 250 DMG | Far 1.37-1.84 (0.85/0.1/0.42 + 0.47) M 1.33-1.88 (0.85/0.1/0.38 + 0.55) F Short 1.25-1.77 (0.85/0.1/0.3 + 0.52) M 1.45-1.75 (0.85/0.1/0.5 + 0.3) F |
0.48-0.52 M 0.3-0.55 F |
So in summary, male characters are (overall) faster with: Boxes/Chairs, Blunt melee, Flare guns and Throwables.
Female characters are (overall) faster with: Chainsaw, Handgun, Shotgun, Mini SMG.
Both are good with: Spotlights, Stun gun, Crossbow, Flashball, Uber flashlight.
A pretty even distribution.
Weapons (Environmental objects)
Environmental objects are weapons that can’t be added to your inventory and can only be used on the spot.
You can’t use the regular aim and attack buttons with them.
Instead, you have to interact with them with the action button while close to grab them and then use the action button again to attack.
You can’t use other weapons while using environmental objects.
There are 2 types of environmental objects: spotlights and boxes/chairs.
Spotlights are:
- Ranged. You can hit targets at a distance.
- Stationary. They can’t be moved and you can’t move either while using them.
- Reusable. Can be used infinitely, although they have a 1s cooldown after using them for 5s straight.
- Harmless. They can’t damage enemies or break objects. They can, however, momentarily scare enemies away and dispel black spores from objects.
The spores on the box dissipate in 5 seconds while the spores on the door dissipate in 6 seconds.
Boxes/Chairs are:
- Melee. You can only hit targets near you.
- Moveable. You can pick them up and move them around, although that locks you in the aiming position, which massively slows you down.
In order to freely move and use weapons again you have to either attack, get attacked or have your teammate move to a different area. - One-use. Immediately break after attacking or being attacked while holding them.
- Harmful. Works exactly like other melee weapons. They can damage enemies, staggering them briefly (they can stagger teammates as well but won’t damage them), and destroy other objects.
In fact, they are often conveniently placed near glass doors and obstacles you have to destroy in order to progress the game to save you the hassle of opening the inventory in case you don’t currently have a melee weapon equipped.
The only difference between boxes and chairs is that the former can sometimes drop items when broken.
These spawns are fixed, except during bossfights.
The latter are instead typically used in the game as obstacles to block doors, forcing you to break them or push them aside.
Weapons (Melee)
Melee weapons are weapons that hit enemies in close proximity.
Their attacks can be lead to combos.
Once you start an attack, you have 0.25s to keep pressing the attack button to extend the combo.
There are 2 types of melee weapons: Blunt weapons and the Chainsaw.
Blunt weapons are swift but are not as damaging as other weapons while the Chainsaw is a bit slow but packs a serious punch.
Blunt weapons
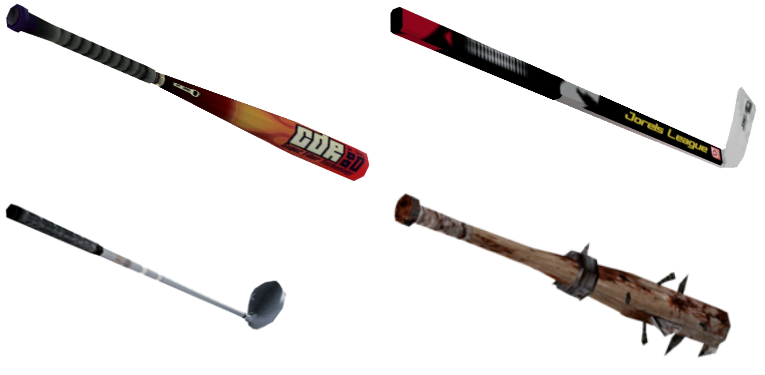
- Bat
- Hockey stick
- Golf club
- Spiked club
These are the only weapons in your inventory that don’t use any resources.
Their main use is to break dispensers, boxes or other obstacles and crush Surrogate children.
Using them by themselves in combat usually results in a HP loss so their best use is to fend off opponents if they get too close and quickly switch to ranged weapons.
Like in the previous game, there’s 3 melee weapons which are reskins that work exactly the same and a fourth melee weapon (the Spiked club) which… is also a reskin that works exactly the same but deals slightly more damage.
These 4 melee weapons have 3 different attacks depending on your target’s locked-on spot’s height.
If you and your target are at the same height, you do a 3-hit combo.
If your target is above you, you do a 2-hit combo.
If your target is below you, you do a downward smash.
At the 3rd hit of your regular combo, your character will randomly either stand in place, which has short range but is very fast, or step forward and lunge, which keeps you locked in the animation for longer but hits further and knocks enemies down.
The second hit of the upward combo seems to be buggy as it knocks enemies back but deals no damage, I tested it as thoroughly as I could.
Normally, melee attacks stagger or more rarely knock back enemies.
After being hit, your melee attacks will instead knock down enemies for the next 1s.
Melee attacks can stagger teammates, too.
However, if you are locked onto a target, you won’t hit your teammates, even if your weapon clips through.
Evolved students and Treemen can get staggered by melee weapons but will interrupt this stun by attacking.
To access Fallcreek’s basement and get the Spiked club you have to reach Jun in 6 minutes once the countdown timer appears.
Once in the corridor outside her room, you have to attack the monster holding her in 3 seconds or she’ll die anyway.
As mentioned before, melee weapons are best used for crowd control instead as they are very fast (since they have no windup) but lack the firepower of other weapons.
Blunt melee weapons are better suited for male characters as they have better range and faster animation.
The 2-hit combo for male characters is especially devastating since it lacks a recovery animation allowing you to quickly switch to a more powerful weapon or just spam it non-stop.
It’s even faster than using a single hit so when playing with male characters forget about the other melee attacks and learn to use the 2-hit combo properly.
You can a break a box faster by using a melee weapon but if there’s more than 1 box it takes more or less the same time so, in that case, you just grab the box normally so that you don’t have to switch to your melee weapon.
The Chainsaw
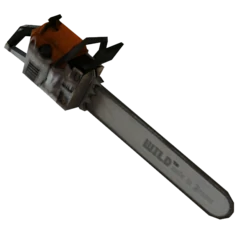
The Chainsaw is a hybrid weapon that works similarly to other melee weapons but consumes resources (battery) when it’s used.
Tapping the attack button will let you perform either a 2-hit combo (if your target is the same height as you or higher) or a single downward slash (if your target is below you).
These attacks usually stagger or more rarely knock back enemies.
Holding down the action button for at least 0.4s will initiate a charged attack.
As long as you hold down the attack button, you and your enemy are stuck in place until you either interrupt the attack, get interrupted by an enemy/teammate/loading or simply run out of battery.
Only bosses won’t get stunned by this attack.
This is the only weapon in the game that has a secondary attack.
The Chainsaw can also be used to chop trees and Leonard’s roots, which is necessary to progress the game.
The Chainsaw is recommended for female characters as they have slight faster aniamtions.
The 2-hit combo is not recommended to due how slow it is unless you are surrounded and want get some breathing room.
The downward slash is very effective against Surrogate children since it has a long range and can hit multiple of them at once.
The blunt weapons‘ downward smash is faster but can only hit one enemy at a time so I recommend Chainsaw over blunt weapons against those small critters.
The charged attack is very powerful and can quickly dispatch any enemy but I’d recommend to use it mainly against Rams and Evolved students because other enemies have better reach and can potentially interrupt you.
The Battery comsumption for each animation is pretty inconsistent since it depends on how long the animation lasts and there aren’t any fixed values.
Based on the charged attack, the CHAINSAW consumes 10 points/sec by default.
The 2-hit combo consumes around 3/1.5 battery points for males and 3/2.5 battery points for females.
The downward slash consumes around 5 battery points for males and 4.4 battery points for females.
Chopping a tree consumes from 20 to 33 battery points, since you don’t need to do the full animation.
Chopping one of Leonard’s roots consumes 27 battery points.
Like other melee weapons, the Chainsaw can stagger teammates if you’re not locked onto a target but won’t damage them.
Weapons (Ranged)
There are 8 ranged weapons:
- Gun
- Stun gun
- Shotgun
- Crossbow
- Flashball
- Flare gun
- Uber flashlight
- Mini SMG
5 of these ranged weapons (Gun, Stun gun, Shotgun, Uber flashlight and Mini SMG are hitscan if you’re in range of your target and have a direct line of sight (although you can still hit through some obstacles if they don’t have collision).
3 of these ranged weapons shoot projectiles that phisically travel in the air and must collide with the target to have effect.
Ranged weapons are what you’ll mostly use thorughout the game since they give you an edge against most enemies who are close range fighters.
Plus their ammo is plentiful, they can do a lot of damage quickly and can apply a wide variety of stuns.
Each Ranged weapon has their own quirks.
Gun
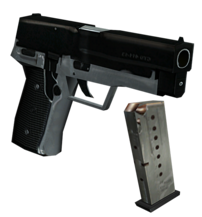
The Gun is probably the most conventional weapon in the game.
It’s a single-target hitscan weapon.
It just shoots enemies, that’s it. No alternative attacks or gimmicks.
Its attacks mostly either stagger or (more rarely) knock back.
Ogres, Surrogate mothers and bosses will simply flinch.
Even though it’s not as powerful as other ranged weapons, it can still a be useful tool to kill enemies at a distance before they can get to you.
Very effective against Flies, Evolved students and Treemen since it interrupts their attacks.
Stun gun
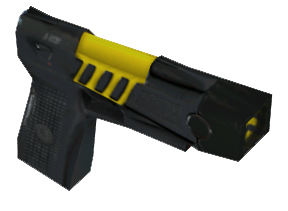
The Stun gun is a hitscan single-target weapon.
As the name implies, the Stun gun is very good at stunning monsters (except bosses).
Enemies hit by the electricity will slow down (about 37.5%) and will get incapacited after 2 seconds.
The incapacitation persists as long you keep firing.
Surrogate mothers will get shredded, instead.
The result is essentially the same but it has a quicker recovery.
Jedidiah Friedman is immune to this weapon but still gets slowed down by it.
Although it technically deals 5 DMG/sec, it’s prone to miss a bit the further away you’re from your target so at lock-on range it actually deals ~4.4 DMG/sec.
Very effective if you’re against at most two enemies so that your teammate can focus on the other the other foe.
However, enemies in larger numbers will probably interrupt your stun so it’s not recommended.
Shotgun
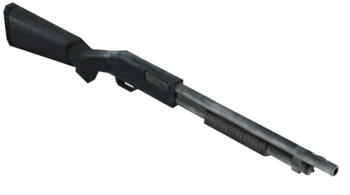
The SHhotgun works similarly to other videogame shotguns.
It’s a single-target hitscan weapon.
The closer you are to your enemies, the higher the damage (up to 60 DMG).
At lock-on range it deals around 35 DMG so it’s still pretty good.
Once you are locked onto an enemy you can walk backward until you’re so far away that you deal 0 DMG but I never got below 27 DMG while playing normally.
This is the only weapon that partially reloads multiple times during the animation.
At medium/long distances, the shotgun can either stagger or knock back while at close range (and I mean literally in the enemy’s face) it will knock down most enemies.
(Ogres and Treemen get knocked back instead).
Crossbow
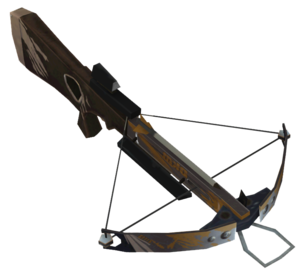
The Crossbow shoots explosive projectiles that knock enemies to the ground (as well as you or your teammate if you’re caught in the explosion).
Second most powerful weapons in the game, which is why ammo is rare and you’ll mostly have only 2 arrows at a time.
Not much else to add.
Best reserved for bosses or large groups of enemies.
Flashball
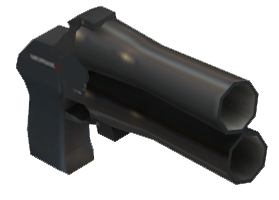
The Flashball shoots explosive projectiles that incapacite enemies for about 3 seconds.
Ogres hit by a Flashball will rest on their arm instead of falling to the ground, resulting in a quicker recovery.
Perfect for setting up deadly combos with other weapons such as the Shotgun or the Chainsaw.
It also shoots and reloads incredibly fast, very solid weapon.
Essentially an upgrade to the Stun gun.
Flare gun
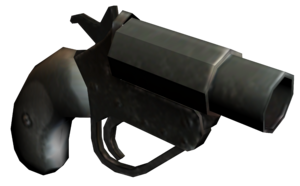
The Flare gun shoots small, slow-moving projectiles that stick onto enemies, dealing damage over time and making them retreat.
Surrogate mothers hit by a flare will roar in place instead of retreating.
Bosses don’t get stunned by flares.
Since it only has 1 flare in the chamber it’s best used at the start of a fight to get rid of an enemy (or stun them or and drain most of their HP) and then switch to other weapons.
Uber flashlight
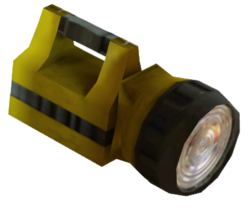
The Uber flashlight deals hitscan damage to enemies, in a wide area and depletes the entire battery, regardless of how much you have left.
To use the Uber flashlight you need at least 25 battery points.
Causes Rams to get knocked back, Evolved students and Treemen to get blinded and Surrogate mothers to retreat.
Deals 20 DMG against Surrogate mothers, 80 DMG against Rams and 90 DMG against Treemen.
Crowd control counterpart to the Flare gun.
It doesn’t deal enough damage to 1-shot most enemies but it hits multiple targets.
Use it at the start of a fight to scare enemies away and remove about half of their health, then finish them off with other weapons.
Mini SMG
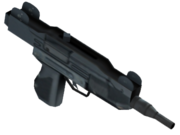
It wouldn’t be an Obscure game without an overly complicated final weapon.
Like the Laser from the first game, the Mini SMG is an hybrid weapon.
It’s an automatic hitscan weapon.
The way it works is that it’s programmed to shoot 6 bullets/second dealing 50 DMG/sec.
The complicated part is that it doesn’t fire bullets individually but rather each bullet is a “charge” that lasts 0.166 seconds.
So let’s say that you fire for 0.1 second and stop.
You still haven’t used a charge so you need to fire again for 0.066 seconds to completely deplete a charge.
Pressing the fire button wastes an extra 1 charge so it’s not advised to fire in short bursts, just feel free to go full auto.
It causes regular enemies to retreat.
Surrogate mothers get shredded, instead.
Weapons (Throwable)
Throwable weapons are can be thrown and will explode after a certain amount of time.
Damaging enemies, objects and sometimes players in a wide area.
If you’re locked onto a nearby target the throw animation and trajectory changes accordingly.
There are 2 types of throwable weapons: Dynamite and Flashbang.
Dynamite
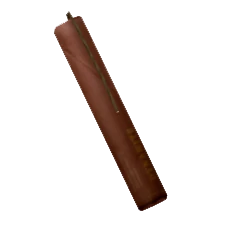
The Dynamite is only found in 2 spots, right before you need to blow up a wall.
If you run out of Dynamites before blowing up the hospital’s wall you can create it again but after the wall is gone the ingredients will disappear from your inventory.
The Dynamite is more effective for game progression rather than combat.
It takes 1.15 seconds to detonate, explodes after a short delay and, most importantly, it’s the only weapon that can damage or outright kill you or your teammate.
It’s so harmful that it’s probably more beneficial to not use it all.
If you’re adamant about using it, be sure that you and your teammate are very far away from your target.
Personally I only use the first two dynamites it to blow up the hospital wall, then throw it the classroom’s hole to get rid of both the Flies and the wall.
Then I immediately use the Dynamite found in there to eliminate the Evolved students in the corridor outside to purge from my inventory from this dangerous tools.
One good use you can make of the Dynamite is to throw it in the tunnel leading to the Friedmans so that you can break a pipe and drop a First-aid kit hidden on top of it.
Flashbang
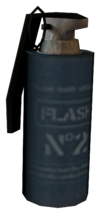
This one is actually good to use in combat, schockingly enough.
Compared to the Dynamite, it detonates and explodes quicker, it deals more damage, has more range and, most importantly, it’s completely harmless to players aside from a short blind.
The Flashbang is the only weapon that can completely deplete any enemy’s HP in a single hit, with some exceptions.
Dark Kenny in the first encounter could theoretically survive but there aren’t any Flashbangs before that.
The Surrogate mother can also survive but will be left with a handful of HP and no Surrogate children around.
Leonard Friedman is the only enemy that’s completely immune to Flashbangs just like in the first game.
Enemy comparison table
| Name | HP | Attacks | Heart? |
| Ogre | 125 HP | Melee 15 DMG Grab INSTAKILL |
Yes |
| Ram | 60 HP (120 after the boat section) | Melee 10 DMG | Yes |
| Surrogate children | 1 HP | Melee 1 DMG Choke 2 DMG/0.5s |
No |
| Fly | 45 HP | Melee 10 DMG Choke 3 DMG/0.5s |
No |
| Surrogate mother | 300 HP | Melee 5 DMG Tongue drag 0 DMG/s (INSTAKILL) Summon (Spawns 3 Surrogate children) |
Yes |
| Dark Kenny 1 | 325 HP (1st phase) 50. HP (2nd phase) |
Melee 15 DMG Spores 10 DMG |
No |
| Evolved student | 80 HP | Melee 10 DMG | Yes |
| Dark Kenny 2 | 175 HP (250 to 75) | Melee 15 DMG Spores 10 DMG Jump 5 DMG Steam 1 DMG |
No |
| (Gordon) Treeman | 200 HP | Melee 15 DMG Decapitation INSTAKILL |
Yes |
| Jedidiah Friedman | 120 HP (1st phase) 16. HP (2nd phase) 235.2 HP (3rd phase) |
Shoulder bash 10 DMG Double slash 15 DMG Running chainsaw 20 DMG Single slash 25 DMG |
No |
| Leonard Friedman | 150 HP | Sweep 10 DMG Shockwave 15 DMG Root grab 0 DMG |
No |
| Dark Kenny 3 | 200 HP (250 to 50) | Melee 15 DMG Spores 10 DMG Jump 5 DMG Tail devour INSTAKILL |
No |
Regular enemies (Obscure 2 types)
Ogre
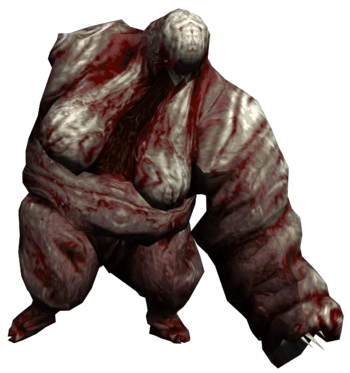
First real threat in the game.
Slow and tanky.
ATTACKS(5)
MEDIUM
1)DOUBLE SLAP: lunges forward to reach further.
2)ARM EXTENSION: rare attack used to reach you if you’re stuck in weird places.
CLOSE
She will alternate between the 3)SLAP and 4)TACKLE.
Both work exactly the same, with short range and very fast recovery (0.2s) aside from some slight hitbox differences.
Her attacks randomly knockback or throw you (+screen shake).
5)DECAPITATION: grabs you if you have 15 HP or less.
Once it starts it’s basically game over, you can’t run away from it nor interrupt it as the ogre becomes immune to damage and stun.
Her attacks grant her immunity to any stun during active and recovery phases (but not windup except for her grab).
She’s the only monster that can damage other enemies.
Can’t be knocked down by melee weapons nor staggered by the gun.
STRATEGY
Wear her down from a distance with ranged weapons since she doesn’t have any dodges or fast traversal.
If she gets too close, use weapons that stun to get some some distance (such as the stun gun, shotgun or the flare gun).
If you are low on ammo, you can hit her twice with a melee weapon to make her roar and give you a bit of time to get some distance.
Do NOT stay in melee range for too long since the roar grants complete stun immunity during the animation (1.4s) and the next 1s allowing her to easily retalliate.
Ram
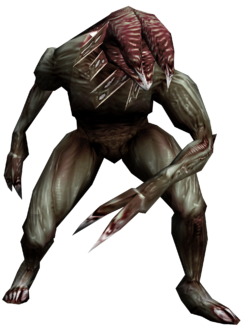
One of the most agile enemies, constantly dashing around to close the gap or avoid your attacks.
Tends to attack in groups.
ATTACKS(7)
FAR
1)RAM: charges into into you, sweeping you (+screen shake).
During this charge it can’t be staggered.
This attack is pretty rare.
MEDIUM
2)LEAP: jumps at you, either staggering or sweeping you (+screen shake), and then dashes back.
CLOSE
Alternates between a 3)DOUBLE SWIPE (flinch+stagger), a 4)PIERCE and an 5)UPPERCUT, causing knockback.
It sometimes dashes back after its short range attacks to avoid you retalliating with a melee weapon.
If you are in a higher elevation, it will attempt to reach you with a 6)JUMP SWIPE or 7)BITE.
These 2 attacks are virtually unused as in the only intended situation where they happen (pulling Mei up in the Brotherhood’s library) both players are immune to damage.
STRATEGY
If there are more enemy types at once you should definitely target Rams first.
Any weapon is effective against them but an efficient strategy I found is to alternate between ranged weapons and melee weapons.
Hitting them twice from afar will make them dash forward while at close distance they will leap back so alternating between the two is a good way to keep them at bay.
The CHAINSAW‘s charged attack is very effective against them because of their tendency to run straight into you.
The normal 2-hit combo is also moderately effective since it can hit multiple targets at once.
Surrogate children
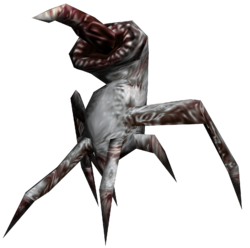
Weakest enemies in the game.
They only have 1 HP and their basic attacks deal 1 DMG.
They are usually just meant to annoy you instead of being an actual threat.
ATTACKS(3)
MEDIUM
1)JUMP: closes the distance.
SHORT
Spams 2)BITE and 3)POKE or crawls on your head to 4)CHOKE you.
The grab can be interrupted by a teammate.
If uninterrupted, it lasts at least 2.5 seconds dealing a minimum of 10 DMG.
Basic attacks cause flinch.
STRATEGY
If there’s nothing blocking your progression, you can just simply ignore them.
If you want to get of rid of them, don’t waste any ammo.
The fastest way to kill them is to use is the stun gun since it kills them from a distance.
If they get too close, you can use the chainsaw‘s donward slash since it has a long range and it can hit multiple enemies.
If you want don’t want to waste any ammo or battery, you can also just use the regular melee weapons and crush them one by one.
Fly
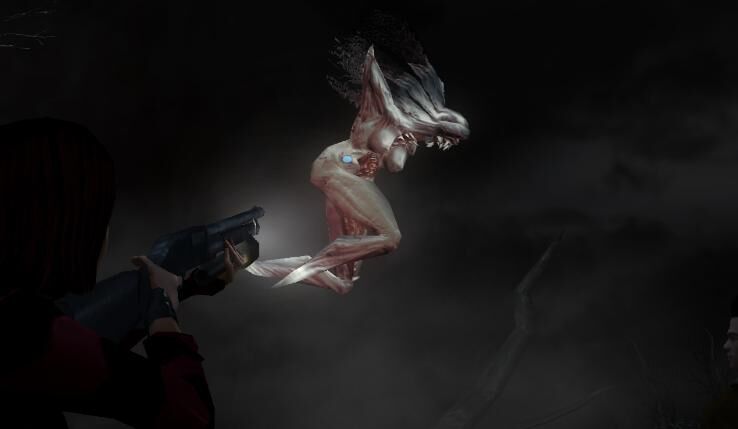
The only flying enemy in the game and the 2nd lowest HP (45 HP).
Always attacks in groups.
The air counterpart to the Ram.
ATTACKS(5)
MEDIUM
1)CHARGE or do a 2)KICK FLURRY, causing knockback.
CLOSE
Alternates between a 3)KICK/4)DOUBLE KICK, making you flinch, or 5)CHOKE you with her legs.
The grab can be interrupted by a teammate.
If uninterrupted, it lasts at least 2.5 seconds dealing a minimum of 15 DMG.
Like Rams, her main strategy is to is get up close and personal by constantly dashing forward, hit you a couple times and then fall back to avoid melee retalliation (which is quite an easy feat due to her airborne status).
And like Rams, they will dash after being hit twice (forward if they’re far, backwards if they’re close).
STRATEGY
Since melee attacks are tricky to land, ranged weapons such as the Gun and Shotgun are recommended to quickly drain her low HP.
In a specific scenario, aka the Leafmore classroom where you have to blow up a wall, you can immediately throw a Dynamite in the hole where they spawn to get rid both of them and the wall.
If you have to resort to melee, both the blunt weapons and the chainsaw are valid choices.
Just remember that melee weapons reach further while the chainsaw reaches wider.
However, the best strategy I found is to simply ignore them and use their airborne status against them.
Since they’re floating in the air, they can’t block your way like other creatures and it’s actually pretty easy to run under them where they have a hard time hitting you.
Surrogate mother
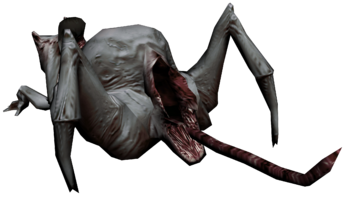
Tankiest non-boss enemy.
Quite a low threat since, like her Surrogate children (who always accompany her), her attacks are inoffensive (5 DMG).
ATTACKS(6).
FAR
She will either 1)SUMMON (spawning 3 surrogate children) or do a 2)TONGUE GRAB.
The grab can be interrupted by a teammate.
It takes around 3.5s to free yourself.
At max range it takes 14 seconds to drag you all the way and, if uninterrupted, it results in INSTANT DEATH.
MEDIUM
3)TONGUE SWIPE: extends her tongue out, either staggering or throwing you.
CLOSE
Alternate between a 4)LEG STOMP, sweeping or staggering you (+screen shake), and a 5)DOUBLE LEG STRIKE, making you flinch.
If you approach her from behind, she will 6)STOMP, sweeping you (+screen shake).
STRATEGY
Looks very intimidating but is actually very harmless.
Her high HP and low damage make it very appealing to just ignore her completely.
In combat, focus on the Surrogate children to make her even less threatening.
Unlike other monsters, she doesn’t have any measures to prevent stunlocking so when she’s left alone you can very easily beat her to a pulp even with just melee weapons.
Due to clipping quirks, you can kill her very fast by stunning her with the Stun gun and then finishing her off with a melee weapon.
Spawns 8 Surrogate children on death.
Since they spawn all clumped together, you can easily take them out with an AOE weapon such as the Chainsaw or Flashball before they scatter.
Regular enemies (Obscure 1 types)
These are enemies returning from the first game.
Appropriately, you’ll mostly find them at Leafmore.
They have received damage nerfs as their attacks can only deal 10-15 DMG (while previously they could deal up to 30-40 DMG) and the Treeman can’t trigger its one-shot attack at will anymore but only when players have 15 HP or less.
Evolved student
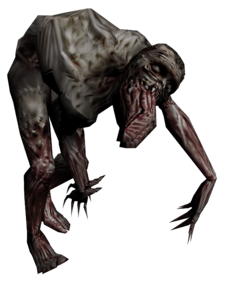
Always attacks in groups.
Will momentarily replace Rams at Leafmore as they function similarly.
ATTACKS(3)
MEDIUM
1)LEAP: Stops in its tracks momentarily and then leaps towards you, staggering you (+screen shake).
CLOSE
2)SWIPE/3)DOUBLE SWIPE: repeatedly scratches to wear you down, making you flinch.
Will occasionaly dash backwards or to the side.
STRATEGY
Melee attacks don’t stagger or knockdown against it so going melee is suicidal.
The Chainsaw‘s charged attack, however, is very effective as it tends to run straight into it.
Ranged weapons are also a valid option since they easily stunlock it.
You can also consider using the Uber flashlight since it can hit multiple of these enemies at a time, cutting their health in half and making them back away for a while.
Note: the Flashball has a weird bug where it can’t make this enemy’s HP go below 1 HP so keep that in mind.
(Gordon) Treeman
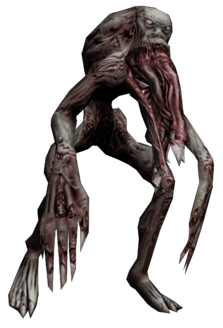
Will momentarily replace Ogres at Leafmore as they function similarly.
ATTACKS(4)
MEDIUM
1)]DOUBLE HAMMER: slighly lunges forward and brings both fists down, sweeping you off your feet (+screen shake).
CLOSE
Alternates between a 2)SWIPE, which sweeps you off your feet (+screen shake), or a 3)BACKHAND, making you kneel.
DECAPITATION
Its grab works exactly like the Ogre’s, only triggers if you have 15 HP or lower and it’s game over once the animation starts.
The first 2 Treemen you meet as Stan and Shannon are bugged and can’t trigger the grab though.
That means they can’t kill you.
STRATEGY
Acts very similarly to Ogres but is overall slightly weaker.
Just like Ogres, this enemy is a real threat in close proximity but, unlike Ogres, it’s very easy to stunlock with ranged weapons (which can even interrupt its attacks) so as long as you keep your distance you should be fine.
It also has less range and is less aggressive since it will roar after successfully stunning a player or being blinded with the Uber flashlight.
Melee weapons can’t stagger it but they can knock it down so, if you’re in a corner, try to run away as soon it roars or is knocked down.
Because of the shorter range, you can even stunlock it with the Chainsaw‘s charged attack.
Bosses (Dark Kenny)
Kenny’s mutation
You have 55 seconds to solve the elevator puzzle before Kenny’s dark spores reach you.
Once the timer expires, the spores will deal 10 damage/sec and you will be stuck in place coughing and unable to move.
You can still, however, use healing items or interact with and complete the puzzle if you are standing in front of it.
Dark Kenny 1
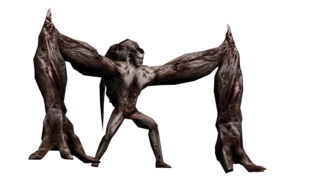
Obscure 1’s main protagonist turned into Obscure 2’s main antagonist.
By far Obscure 2’s most threatening enemy, with a wide variety of moves and attacks to keep you on your toes.
ATTACKS(5)
LONG
1)SPORE TOSS: generates a handful of spores and then tosses it onto you.
It can home in on targets slightly and generates a small AOE where it lands.
Makes your character flinch on hit.
2)LEAP: jumps right in front of him and then back to his initial position, knocks you down.
MEDIUM
3)SWIPE: quickly inches forward and swats you with his arm, throwing you away.
CLOSE
4)SLASH: waves his arm around, sending anyone in close proximity flying.
5)DOUBLE SLAM: jumps in place and hits the ground with both his arms outstretched, either staggering you or throwing you.
STRATEGY
Due to an unfortunate bug, the screen will turn completely black if he goes for a LEAP (usually after throwing 2-3 spores) so you have to defeat him very fast.
It’s recommended to use powerful weapons such as the Crossbow and the Shotgun as you need to rapidly deal 825 DMG (500+325) to defeat him.
Melee weapons are practically impossible to use against him as his close and medium range attacks are fast, have a long range and will always throw you away making long distance fighting the only viable option.
In this encounter, Kenny will never move unless he’s attacking so stay at a distance and move left and right to dodge his spores.
Dark Kenny 2

Kenny’s back with a few new moves and gimmicks.
ATTACKS(7)
LONG
1)SPORE TOSS: generates a handful of spores and then tosses it onto you.
It can home in on targets slightly and generates a small AOE where it lands.
Makes your character flinch on hit.
2)LEAP: jumps right in front of him and then back to his initial position, knocking you down.
3)JUMP: switches between one of his 3 positions by either jumping in front of him (or on the wall) and then his target location, destroying a box in the process so be wary if you’re using one as cover.
He can sometimes jump right over a box, which means the box won’t be destroyed but you can get hit regardless.
Getting caught in this attack will throw you.
4)STEAM: hits a pipe nearby making steam momentarily burst from the ground, staggering you.
Steam will burst nonstop on his 3rd phase.
MEDIUM
5)SWIPE: quickly inches forward and swats you with his arm, throwing you away.
CLOSE
6)SLASH: waves his arm around, sending anyone in close proimity flying.
7)DOUBLE SLAM: jumps in place and hits the ground with both his arms outstretched, either staggering you or throwing you.
STRATEGY
Starts the fight with an immediate SWIPE which is probably why your health gets replenished fully in this bossfight.
Like the previous encounter, he’ll mostly stand still but now he has 3 spots which he’ll cycle through.
There also also 3 big boxes which you can use as cover from his spores but if you stay behind for too long he will eventually break them.
Once broken, these boxes can sometimes release items and will immediately be replaced.
When his health goes down to 75 he’s stunned for 18 seconds, the bare minimum time for you to turn the lever completely by yourself (just in case your partner is not cooperating).
After that his health goes back to 250 whether you manage to turn the lever or not.
If you turn the lever while he’s not stunned he’ll push the thingy back.
You need to drop it on him while he’s stunned 3 times.
The JUMP attack (which deals 5 DMG) refers to when he switches locations.
The attacks where he jumps in place with his arms outstretched or where he lunges forward and then goes back to his initial spot still deal 15 DMG (and can actually sometimes clip through and deal 30-45 DMG).
You need to deal a minimum of 525 DMG to kill him.
You can skip the 2nd and 3rd phase of this boss by staying close to him after pulling the levers for the first time and wailing on him with the Shotgun and Gun, draining his health so quickly that he’ll get stunned again before he can get up.
Dark Kenny 3
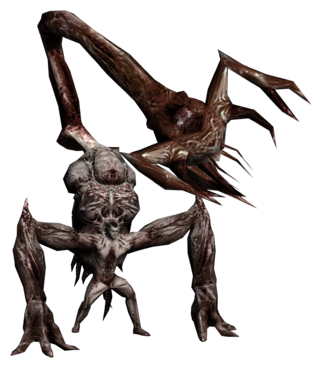
The final bossfight.
Kenny’s back (again) stronger, faster and bigger.
He’s now grown a tail which makes his attacks faster and reach further.
ATTACKS(9)
LONG
1)SPORE TOSS: generates a handful of spores and then tosses it onto you.
It can home in on targets slightly and generates a small AOE where it lands.
Makes your character flinch on hit.
2)JUMP: switches between one of his 4 positions by either jumping in front of him (or on the wall) and then his target location.
Getting caught in this attack will throw you.
3)SPORE BARRAGE: instead of manually grabbing spores to throw, he’ll shoot them directly from his tail at a very fast rate. The last spore has better homing properties and is almost guaranteed to hit.
Makes your character flinch on hit.
4)TAIL SLAM: his LEAP has now been replaced, instead of jumping he just reaches you with his tail, which is faster and has better reach.
Knocks you down.
5)TAIL SWEEP: an upgraded version of the SWIPE, it’s a bit slower but hits in a wide area near him, throwing anyone caught away.
6)TAIL DEVOUR: if you’re standing at a certain distance in front of him, he’ll charge up his tail and grab you, killing you instantly.
MEDIUM
7)SWIPE: quickly inches forward and swats you with his arm, throwing you away.
CLOSE
8)SLASH: waves his arm around, sending anyone in close proximity flying.
9)DOUBLE SLAM: jumps in place and hits the ground with both his arms outstretched, either staggering you or throwing you.
STRATEGY
Starts the fight with an immediate TAIL SLAM to immediately show how far he can reach now.
The strategy isn’t very different from the last encounter to be honest.
Like in the last encounter, in order to kill him you need to turn some levers to drop a thingy on him.
This time you have to do it 4 times but you can also do it while he’s not stunned if you don’t get interrupted.
At the beginning of the bossfight he’ll stand in the same spot and you have to pull the levers next to him.
After that, he’ll jump to a locked panel and smash it open.
You can now pull the other 3 sets of levers.
The remaining 2 panels can only be opened by lockpicking and absorbing spores.
Since these actions take a lot of time (for example, absorbing spores takes at least 10 seconds and pulling down the levers takes 4 seconds), it’s safer to do them while Kenny’s recovering.
It’s still possible to do it while he’s actively harassing you but that requires timing and luck.
He doesn’t take damage while he’s jumping or he’s in a high place.
Be wary of his newly grown tail as it has incredible reach, can shoot spores very fast (only after recovering or when he’s in a high place) and can even 1-shot you if you’re standing right in front of him.
When he’s shooting spores with his tail, focus on dodging if you’re being targeted since you don’t have a window of time to retalliate.
Just stay at a distance, even moreso than before because of threatening his tail is.
Bosses (The Friedmans)
This section is dedicated to the bossfight involving the Friedmans, Leonard and his son Jedediah.
While you technically fight both in the same encounter, only one of them will be active at a time.
The Chainsaw is mandatory to complete this fight.
Jedidiah Friedman
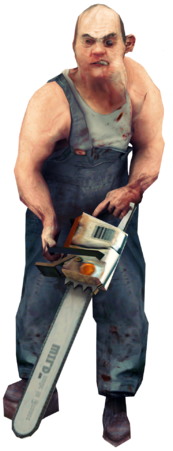
Fights alongside Leonard Friedman.
ATTACKS(4)
MEDIUM
1)CHAINSAW DASH: runs forward for a couple steps and brings his chainsaw down, knocking you to the ground.
CLOSE
2)DOUBLE SLASH: wayes his chainsaw around twice, staggering you.
3)CHAINSAW SLASH: slashes in front of him with his chainsaw, staggering you.
Can also turn around and hit you if you’re trying to ambush him from behind.
4)SHOULDER TACKLE: quickly pushes forward, either staggering you or knocking you down.
STRATEGY
Most damaging enemy in the game (he’s the only enemy that can deal more than 15 DMG with a single attack).
He’ll limp towards one of the players to knock them down and either keep on attacking or switch to the other players.
After a melee attack, he can sometimes wave his chainsaw over his head referencing Leatherface from Texas Chainsaw Massacre.
Due to his limp, he’s slightly slower than players so it’s advised to keep your distance and use ranged weapons.
Unlike other bosses, he’s tecnically still an human being so he’s susceptible to some staggers and stuns like other enemies (except when he’s attacking).
Once his HP gets to 1 he runs to his father to regain health, knocking down anyone on his path.
During this time you’ll fight against Leonard instead.
His HP goes back to full after you either cut one of Leonard’s roots, 35 seconds pass before you drain Leonard’s HP or its root stays on the ground for 15 seconds.
He doesn’t take damage or get stunned from the Stun gun (he still gets slowed down though).
He also doesn’t get staggered/stunned from the Chainsaw‘s charged attack, Gun, Flashball, Flare gun, Uber flashlight and Mini SMG.
After chopping one of Leonard’s roots with the Chainsaw, his max HP grows by 40% (120+40%=168 and 168+40%=235.2).
You need to deal a minimum of 973.2 DMG (523.2+450) to win the bossfight.[/td]
Leonard Friedman
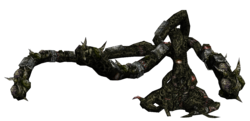
Fights alongside Jedidiah Friedman.
Only becomes active while Jedidiah is recovering.
ATTACKS(3)
LONG
1)EARTHQUAKE: hits the ground with a root, sending a seismic wave in the nearby area which knocks you down.
MEDIUM
2)ROOT SWEEP: swipes one of his roots in a wide area, throwing you.
CLOSE
3)ROOT GRAB: most harmless attack in the game.
When the last root falls to the ground, Leonard will grab whoever gets close to it in a last attempt to stop you.
This grab doesn’t deal any damage, it only delays the inevitable.
STRATEGY
Leonard can hit in an incredibly wide area but he has a few blind spots, namely right next to him and at the edges of the room.
You can safely stand in these spots to shoot him until one of his roots falls to the ground.
Melee weapons can’t reach him.
After dropping his HP to 0, one of his 3 roots drops to the ground and starts bleeding.
It stays down for 15 seconds and can only be destroyed with the Chainsaw.
After its root either goes back up or gets cut, Leonard’s HP get back to 150.
If you don’t cut the root though, each time Leonard heals Jedidah he loses 10% of his current HP because of the bleeding.
This effect gets cancelled once the bleeding root gets chopped down with the Chainsaw.
To end the fight you need to cut all 3 of his roots.
Immune to Flashbangs.
You need to deal a minimum of 973.2 DMG (450+523.2) to win the bossfight.
Conclusion
Thanks for reading!
This guide took a bit longer than expected since Obscure 2 is a bit more mechanically complex than its predecessor so I felt that focusing only on the stats would not do the game justice.
Obscure 2 is mostly considered to be inferior to its predecessor due to stripped mechanics from the first game such as flashlights, different character stats and permadeath but I feel like the new mechanics introduced by Obscure 2 such as anti-stunlocking measures, quick switch weapons and more weapon/enemy variety more than make up for it.
Admittedly, I was a bit disappointed too at the very beginning of my first playthrough yet I still had a very good time even though I couldn’t quite put my on finger why exactly.
After analyzing the game in-depth I figured it out.
This game is not supposed to be played like the first one.
Combat in the first game was pretty simple.
Most guns were single target hitscan weapons and enemies would react to hits by either ignoring them or backing away slightly when shining the flashlight for a couple seconds.
The only valid combat strategy was basically to dump magazines onto enemies without restraint.
In Obscure 2, however, each weapon has a different purpose.
Weapons can kill a single target fast, hit multiple targets at once, keep enemies stunned, interrupt attacks or a combination of these.
Some weapons hit fast while others need a bit of time.
Likewise, each enemy now has specific weaknesses and resistances to certain weapons that are important to take note of.
Spamming a single weapon and hoping for the best will result in enemies retalliating.
The game gives you the ability to quick-switch weapons on the fly so that you can alternate between weapons that hit fast and temporarily neutralize enemies and then swap mid-combat to hard hitting weapons to finish them off.
The game’s combat is purposefully designed to flow better than the first game thanks to reduced enemy damage and anti-stunlocking measures that ensure a dynamic back and forth between players and enemies instead of one party steamrolling the other.
The new enemies are faster, can dash around and will try counter spammy playstyles.
Their attacks are designed to interrupt you and disorient you instead of just brute force your health bar with high damage or straight up instakill attacks.
I hope this guide inspired you to play Obscure 2 in new, fun ways.
Maybe next time you can try out some out of the box strategies such as interrupting enemies with a Gun shot to get closer with the Shotgun.
Or using the Stun gun or Flashball to setup a Chainsaw charged attack.
My favourite combo is to knock enemies down and then finish them with a Box/Chair.
It’s completely impractical but man it’s tons of fun.
If you have a coop partner then it’s even better!
You can put in action even more elaborate strategies and combos.
Just go out there, get your style meter going and most importantly, have fun! 😀
Jedidiah Friedman’s render and the “all weapons” image were taken from www.deviantart.com – https://www.deviantart.com/darkcapilla while all the other renders of weapons and enemies were taken from obscure.fandom.com – https://obscure.fandom.com/it/wiki/ObsCure_Wiki run by Press_Release (you’re the best, man!).
I anticipate that this guide might be a bit overwhelming at times, so feel free to write in the comment section below if you need anything or you spot some mistakes.
Hope you enjoy the post for Obscure 2 IN-DEPTH STATS AND MECHANICS Guide (plus other neat stuff), If you think we should update the post or something is wrong please let us know via comment and we will fix it how fast as possible! Thank you and have a great day!
- Check All Obscure 2 Posts List


Leave a Reply