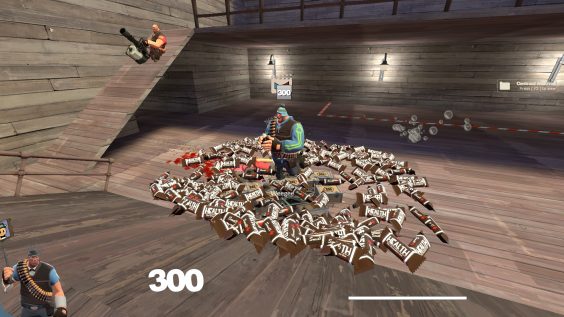
An Opening Statement
Engineer, in a 12v12+ environment, is one of the most potentially impactful classes in the game thanks to his ability to construct sentries, dispensers and teleporters to assist his team in area denial and aid doing the objective.
While Engineer is a very defense-oriented class, you can play Engineer with a wrench and be, in my opinion, more effective than a Gunslinger Engineer, so long as you’re smart about it. While it definitely isn’t easy, and at times can be very intense, involving a lot of multitasking, metal management and tracking of your own team (especially your Medic, should you have one), your team will usually be thankful for you, whether you win or lose.
This guide can be a bit wordy, it’s hard not to be when talking about Engineer. I’ll have a tl;dr at the end for just rapid-fire tips, but I highly encourage you at least read a bit of it and look at the images provided to get an idea on what this playstyle entails.
This playstyle is all about teamwork and helping your team. It’s your duty as an Engineer to provide dispensers for health in ammo in the bravest of positions, sentry guns to back your team up in intense fights, and teleporters to get them back in the action as fast as possible should things go wrong. Again, it isn’t easy, but it’s extremely rewarding and very effective.
I’m also not the best at being not-redundant and sometimes I zone out while writing, so apologies for any spelling mistakes or weird wording.
First Things First: Your Loadout
So, first things first, your loadout is EXTREMELY important. Engineer is very slightly below average class in terms of power outside of his buildings. He can definitely outdamage a Medic and Spy in a 1v1 fight, but that’s about it consistently. Scouts, Soldiers and Demoman all have more mobility and power, and it’s impossible to rival the DPS of a Heavy or the burst damage of a Sniper, and Pyro is a very variable class, but it’s more in his favor than yours without your sentry. While a Sniper can definitely be beaten by an Engineer at mid-close/close range, just hope he doesn’t quickscope you. So, ideally, we want to have the best we can have for defending ourselves while still being able to play around your buildings effectively. Classes live and die by their loadout, so this is the important first step.
Loadout: Primaries
Primary
The Engineer is a very cool class in the sense that he doesn’t really have any bad weapons outside of the Pomson, which is a primary slot. So everything but that is off the table, and if you’re familiar with Engineer I shouldn’t have to say why, but to summarize it’s a very underwhelming weapon that’s pretty much a downgrade in just about every way with the slow projectile shots, low damage and borderline useless upgrades overall for the Engineer.
That leaves all of his other primaries, all of which are solid choices for this type of playstyles.
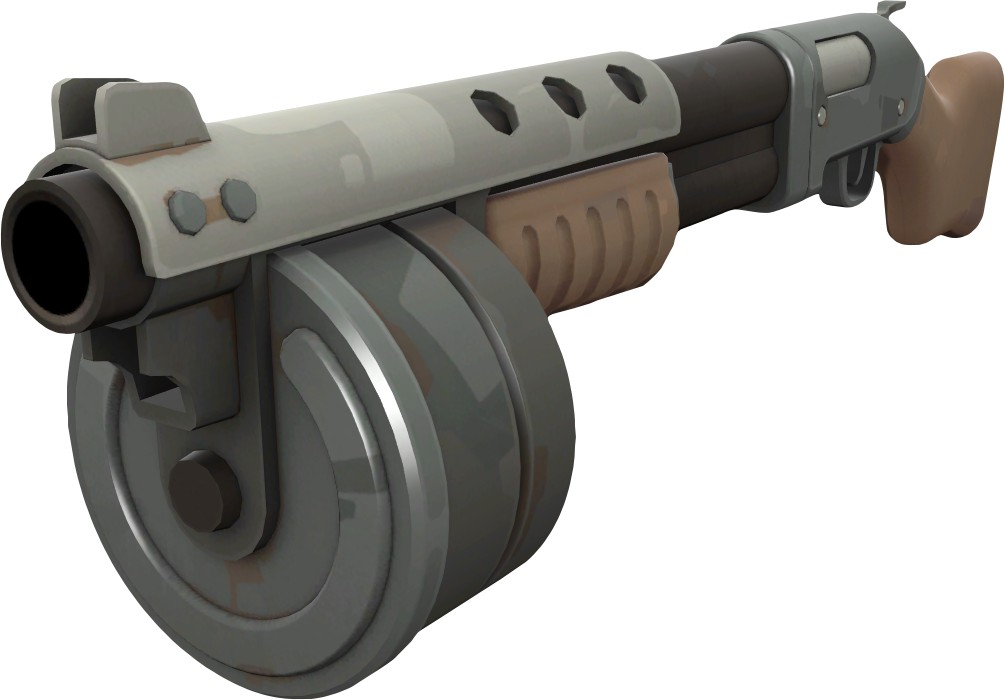
Stock: Stock is always a good choice. Good at close to medium range, and solid damage. This is one I heavily recommend if your aim isn’t the best, as it’s just a solid and reliable weapon.
Frontier Justice: This one takes some skill, strategy and solid decision making to utilize properly. It can be an incredibly powerful weapon, but difficult to use due to the decreased clip size, meaning you’ll definitely want to be hitting your shots. I personally don’t use it, but you can form a very fun playstyle using it revolving around constantly rebuilding and destroying your sentry to get some juicy kills with your shotgun to help your team.
Panic Attack: The Panic Attack will be doing more damage at close range than Stock and the FJ without any crits, so if you prefer to play up-close and personal or are on an indoors map, this can be good. The fixed bullet pattern also gives you more consistency you don’t get on servers with random bullet spread enabled. However, should a server have bullet spread off, you’re likely better off with Stock.
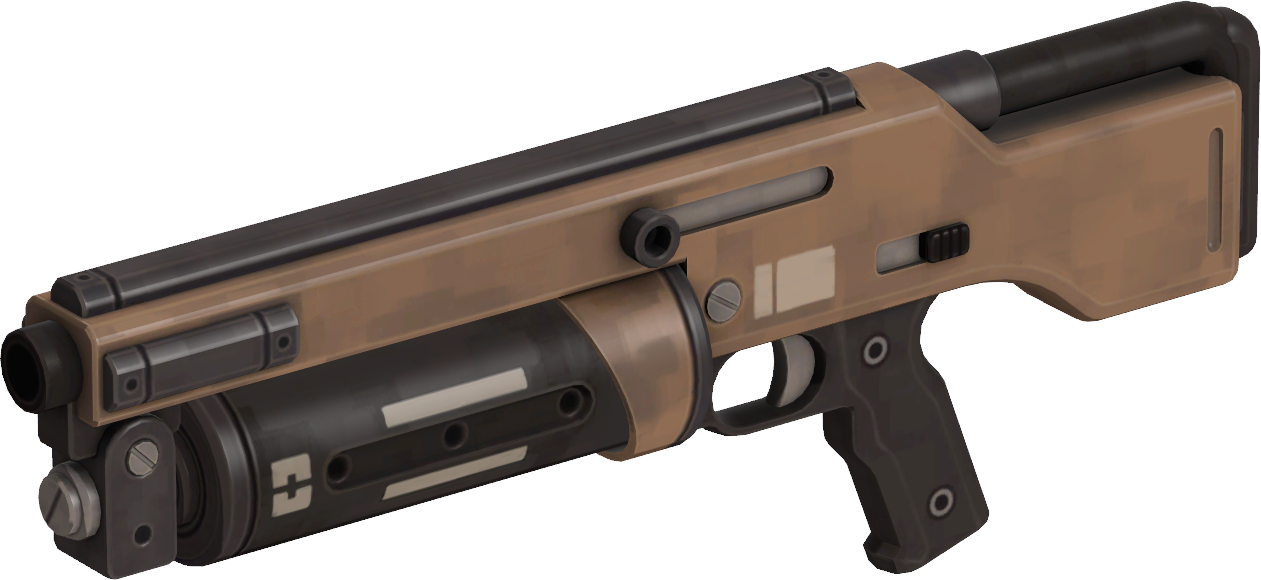
Widowmaker: If you can hit your shots, you’ll do just fine, but without a pistol or wrangled sentry you’ll be lacking a lot in ranged potential. If you can use it good, it’s pretty damn good.
Rescue Ranger: This is a unique one. You’ll be severely lacking in the self-defense department without a pistol and be required to play more around your buildings, but will allow you to heal your builds as well as the builds of others and grab your buildings from a range. While this weapon works best on defense, you can be pretty unpredictable with your sentry placements, as well as maintain your sentry easier without putting yourself at as much risk. While I do think the shotgun is more suited for this playstyle of aggressively wrenching, I think the Rescue Ranger can be a pretty fun weapon to experiment with in this form of aggression.
This is down to preference. As long as it isn’t the Pomson, you can’t really go wrong. Since I do want to give you consistency, however, your most consistently strong option will likely be Stock or the Panic Attack, and Widowmaker if you’ve got good aim.

Loadout: Secondaries
Secondary
Pistol: Strong and solid, amazing as a backup to the shotgun, but your absurd ammo pool + the fact you’ll be having a dispenser built and you’ll simply just be touching it every now and again means you’ll have essentially infinite ammo with it. This can be a really solid option if you want to be a more aggressive Engi without reliance on your sentrygu n to supplement your damage or aim.
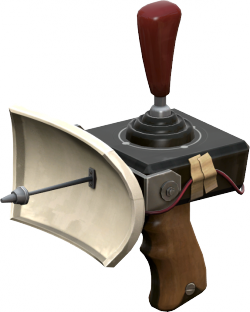
Wrangler: Probably your best option 99% of the time. Pistol can be more fun at times, but your Wrangler is probably the most effective for this playstyle due to the power of Level 3s and the tanking ability granted by the Wrangler. The manual aiming also of course lets you shoot people out of the Sentry’s range, which can be very helpful in covering yourself and your team. It also opens up Wrangler-jumping.
Short Circuit: Personally, I don’t use it too much, at least for this kind of playstyle. It’ll be good on Payload maps, usually until the final choke (sometimes, if you can keep touching the cart even during that chaos you’ll always have infinite metal) but I find it doesn’t synergize well with the emphasis on using Engineer’s buildings super aggressively with a Wrench, requiring much more metal than a Gunslinger would. The Short Circuit’s ammo cost for the actual important part, the right click, conflicts very heavily in most scenarios. Maybe you can use it at the start of Dustbowl 1-1 or on the cart, but that’s about it. Of course, feel free to experiment.
The most ideal weapon of choice is the Wrangler, however, the Pistol can be both good and fun depending on the nuance of your playstyle or the map. It’s just in most scenarios, the tanking potential is just too good to pass up, and as you’ll be playing around your builds anyways and be using your sentry aggressively, you won’t need a pistol all that badly. The Wrangler is just ridiculously good.
Loadout: Melee
Melee
Your melee is your most important weapon for this build. You need to pick it smart, and there’s a pretty clear-cut choice. Keep in mind the Gunslinger is not considered here due to this being an offense wrench guide. While the +25 bonus health the Gunslinger provides is nice and minis can be annoyingly effective, I think wrenches can overall be more supportive to your team thanks to Wrench Sentries, when upgraded, far outclass the Mini outside of buildspeed. I find myself not needing that HP bonus much, as in most scenarios when I die from something that isn’t a headshot or backstab, I would have probably died there even with the bonus health.
Stock: The stock is reliable. That’s about all I need to say about it. You can’t really go wrong, but there is a better choice.
Southern Hospitality: It’s not bad, but it’s just boring, and also really doesn’t help us accomplish what we want with this build, and can sometimes be a detriment too with no crits and fire vulnerability.
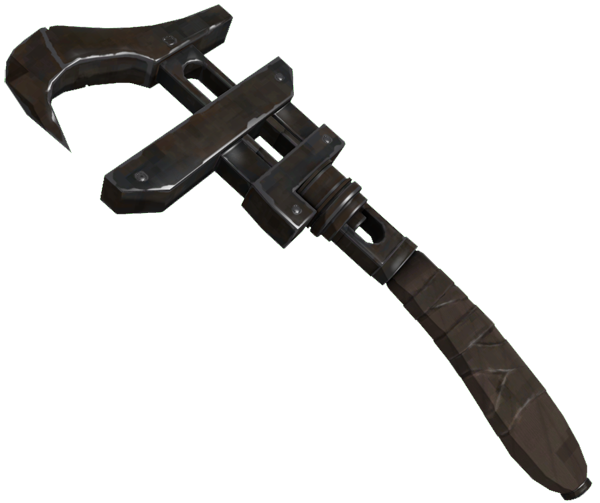
Jag: The best option by far for this build and playstyle, offering you both faster swinging and faster construction time. This weapon still does pretty fine damage, especially if your server has random crits enabled, and the repair rate isn’t really a detriment due to your swing speed. The most important part is that it’ll just get everything built up really fast. Dispensers building just a teensy bit faster can give your team a massive edge, and being able to constantly rebuild sentries at high speeds is always going to be good.
Eureka Effect: The cheaper teleporters and R-key teleportation is nice, however building and moving things, one of the big aspects of this playstyle, is slower with this wrench. This wrench is ALL about Teleporters though, and if your team is strong and could benefit from getting to the frontlines faster, you could probably help out a lot with this. I encourage you to try and experiment with it, as I have yet to. It’s amazing for set-up, as well, and can be really strong when juggled with the Jag.
Your best option for this playstyle is the Jag, due to the massive amount of build speed bonus and firing speed being massively impactful to the offensive effectiveness of your builds. Speed is key, and the Jag grants you it. If you had to pick only one of my recommended options, let it be the Jag.
Your Buildings, Your Team and You
As a Wrenchineer, you’re going to be lacking in the HP department, being just as squishy as Scout and Sniper, but unlike Sniper you won’t be towards the backlines and unlike Scout, you don’t have a lot of mobility options outside of sentry jumping, which can take a hefty HP cost and usually implies you’re also using the Rescue Ranger to move your gun afterwards. Playing around your buildings is incredibly important, but what’s even more important is moreso playing around your team.
Once you get up to a chokepoint your team will have trouble punching through, the first few things you should probably do is throw down a dispenser behind cover, but not far from the chokepoint. Dispensers come prebuilt with 25 metal inside them, on top of healing your and your team as well as providing ammo. Getting a Dispenser up as fast as possible is important, and the Jag excels at this as dispensers will give your team more longevity in being able to hold ground and build up strength to push forward, even a Level 1 helps a lot.
And that’s the thing. Your buildings, for the most part, are expendable. With the Jag, your have massive bonus buildspeed and not only can get your builds set up once you start building or after you’ve moved them, but you can rebuild something destroyed incredibly quick. Whenever your Sentry, Teleporter or Dispenser gets destroyed, always plop one down as fast as you can as a Level 1 is ALWAYS better than no build, and a sentry overlooking a Level 1 dispenser can be lifesaving for your team.
Your sentry is a powerful building because of the fact that it kills people really good in a wide area. There are still things worth defending on offense. Ideally, outside of push situations, your sentrygun should be protecting your team and other builds more than trying to get some killstreak with. It’ll do a much better job than a Mini at keeping your team and builds safe, and lets your team take their time and gives them plenty of ammo to help them deal with the opposing team.
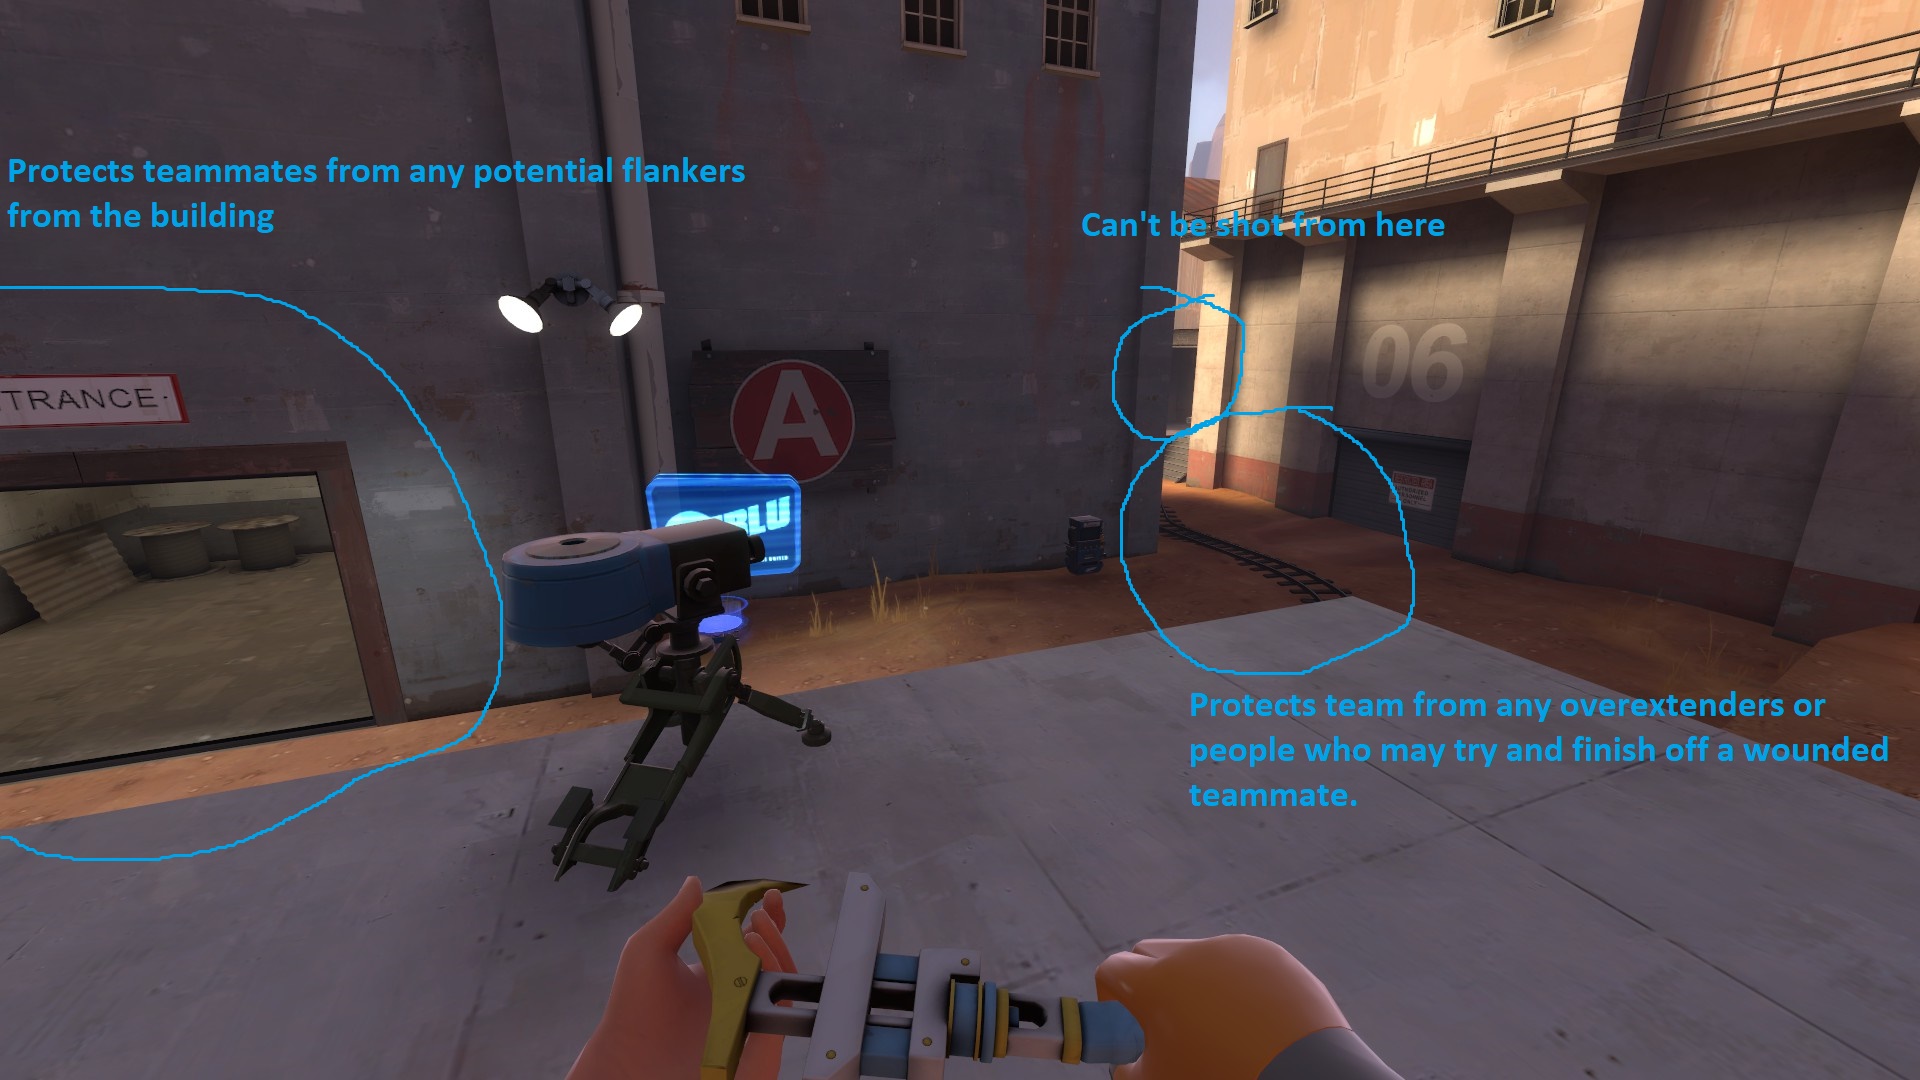
In this example, you can definitely move your sentry to be on the ground with your dispenser, although bear in mind that you shouldn’t put your sentry and dispenser next to each other, nor should the sentry be near the wall. You want to shoot people as they’re coming around the corner, not once they’re around it. Not only that, but you also want to discourage a Demoman from targetting your sentry, and then he ends up breaking your dispenser and killing your 3 teammates healing from it as well, things he didn’t even know were there.
Your Medic and Team Pushes
The Medic is the single-most gamechanging class in the entire game thanks to the existence of the Medigun and Ubercharge. A team with a medic is likely to do far better than a team without a medic. However, in a 12v12 scenario, you’re leaving a medic with 11 other people to heal (implying you have only one medic.) Dispensers can not only help out the Medic with his job of keeping the team alive, but the Engineer can provide the Medic (as well as the team) a dispenser to help keep the Medic alive long enough to attempt an Uberpush.
Now, here’s the thing about the Medic and the Engineer. Despite the two being in different categories on the game’s very narrow-minded class selection screen with Offense, Defense and Support, Medic and Engi are the two true support characters of the game with what they can provide to their team. With an Ubercharge, the Medic is essentially saying “Push forward, now!” and a team with a coordinated Uberpush tends to be highly effective.
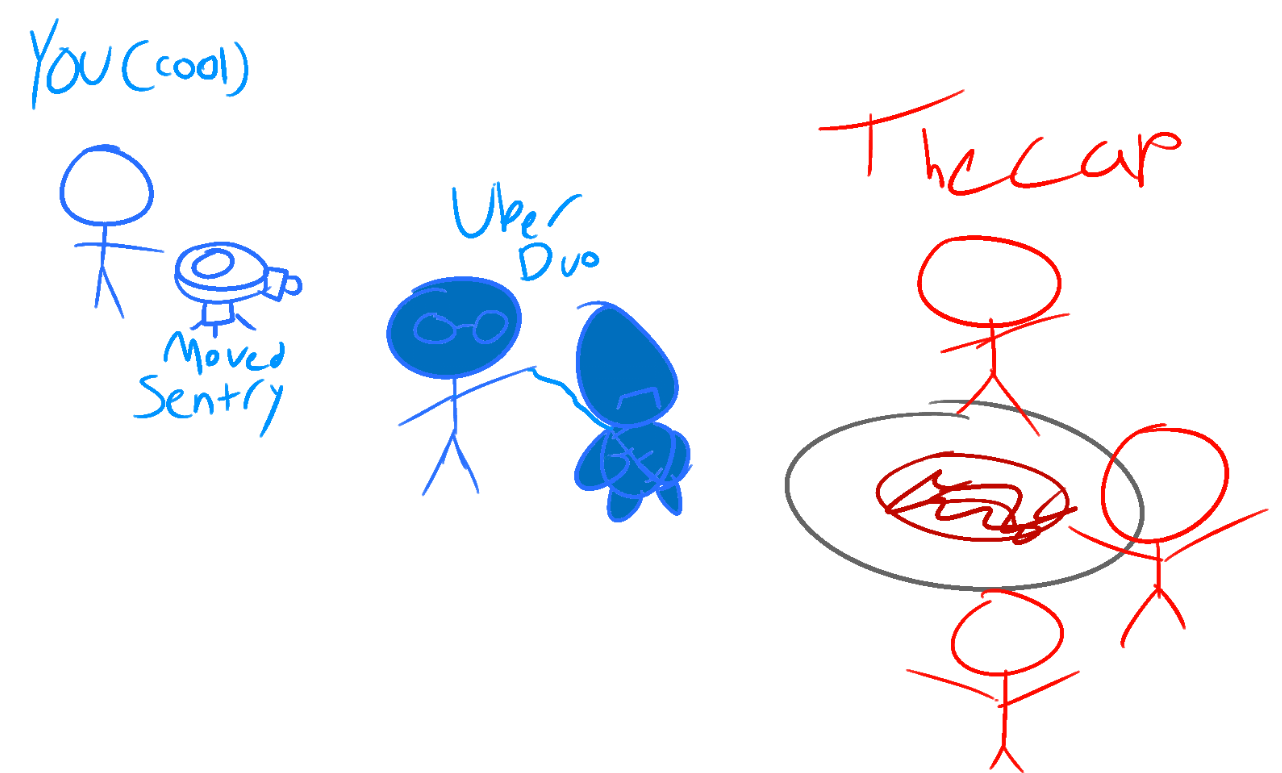
However, this applies to you, too. At this point, you’ve basically got a Level 3 of every building, most importantly for this situation your sentry. Your team’s Medic hits the Ubercharge on a Soldier/Demo/Heavy and everyone starts pushing in. What should you do in this situation? Believe it or not, even if you’re in a pretty ideal spot, you should move that gear up.
Here’s a highly detailed drawing made by me to basically show what’s going on here. The Uber duo pushes in, and at that point it’s pretty worth to try and get your Level 3 in there behind the Uber pair, enough to cover them when it runs out or to clean up any remaining enemies and help your team get in.
The Jag grants you incredibly fast build speed, and your Wrangler will allow you to place your sentrygun just about anywhere and still let it be effective. While your team’s uber draws any fire of enemy sentry guns and usually leads to their destruction, this is prime time to put up a sentry of your own near the chokepoint or the objective. Any sentry is an advantage, but a Level 3 overlooking an objective after a strong push gives your team a MASSIVE edge over the enemy, and can significantly help your team is properly maintained long enough for them to cap or push, which usually won’t be too hard for them with a Level 3 guarding them.
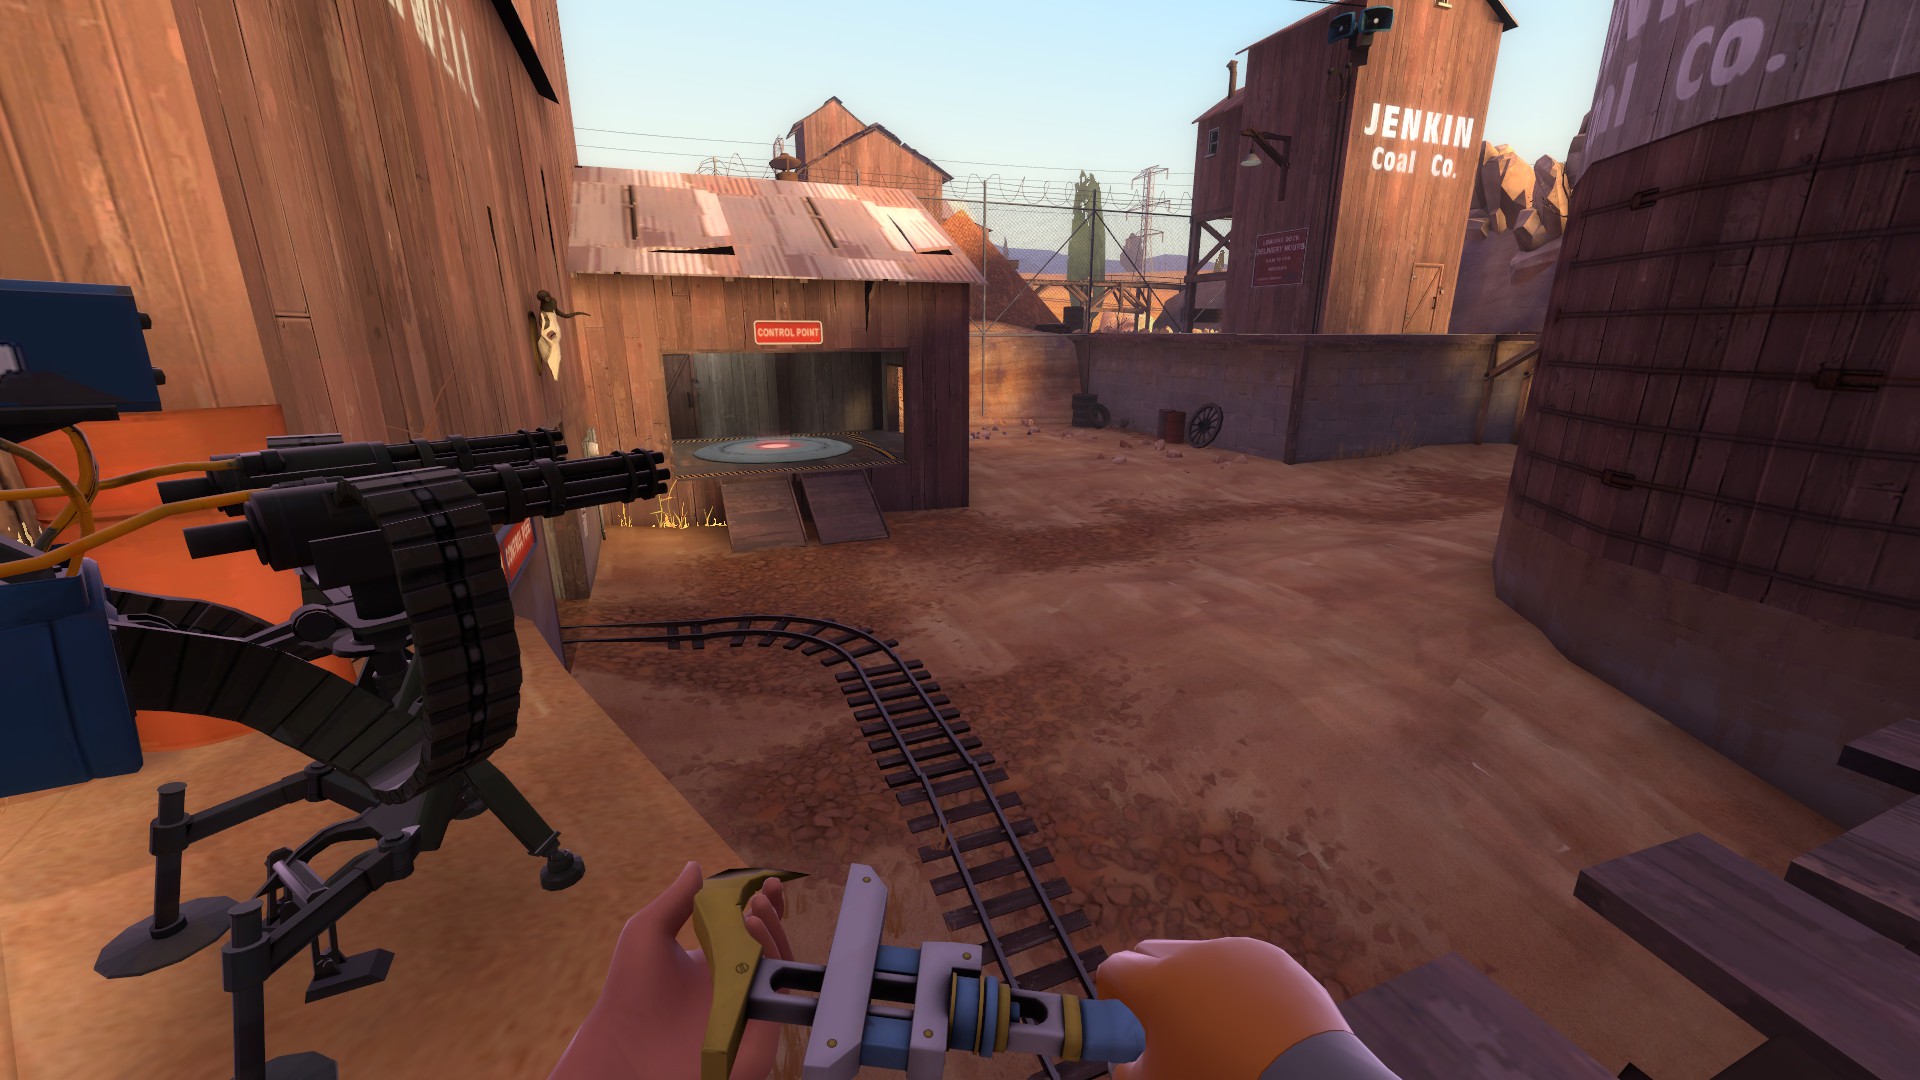
This spot, while doesn’t reach too far beyond the point itself, does cover your team in actually standing on the point and will punish anyone who tries to push onto it. With the Wrangler, you can defend your sentry better and strike from even farther away.
Keep in mind, if your team somehow manages to get on the point even without an Uber, you should definitely consider moving at least your sentry up temporarily. I give the example of an Uber as it’s the most realistic, easy and safe situation for you, as the Engineer. You don’t need an Uber to tell you when to move up, you should always be keeping track of how well your team is doing so you can help them accordingly. Keep in mind you can also do this with just chokes in general, places that require a big push.
Sometimes it may also be better to just shoot the person trying to destroy your sentry should they see you setting it up. Most people always prioritize the sentry first when an Engi starts building his sentry, whether it be minis or regular sentries. The most knowledgeable/dangerous players will know to kill you first, but doing that can be easier said than done due your team and lots of things going on at once.
The Power of the Teleporter
So, we’ve established in the last chapter that Medics are the class that decides WHEN a team pushes, based on the Medic’s ubercharge, and the power that comes with that. However, the biggest strength of an Engineer as the Medic’s only brother in the near pure-support department, the Engineer decides WHERE the team pushes.
The last point of Mercenary Park can be a pretty tough one for Blue Team to punch a hole into and get on that point and cap. This is when you have to ask yourself as the Engineer, where would the best place for your team to push through and hold be at?
Would it be on the first floor, where most Engis usually build at?
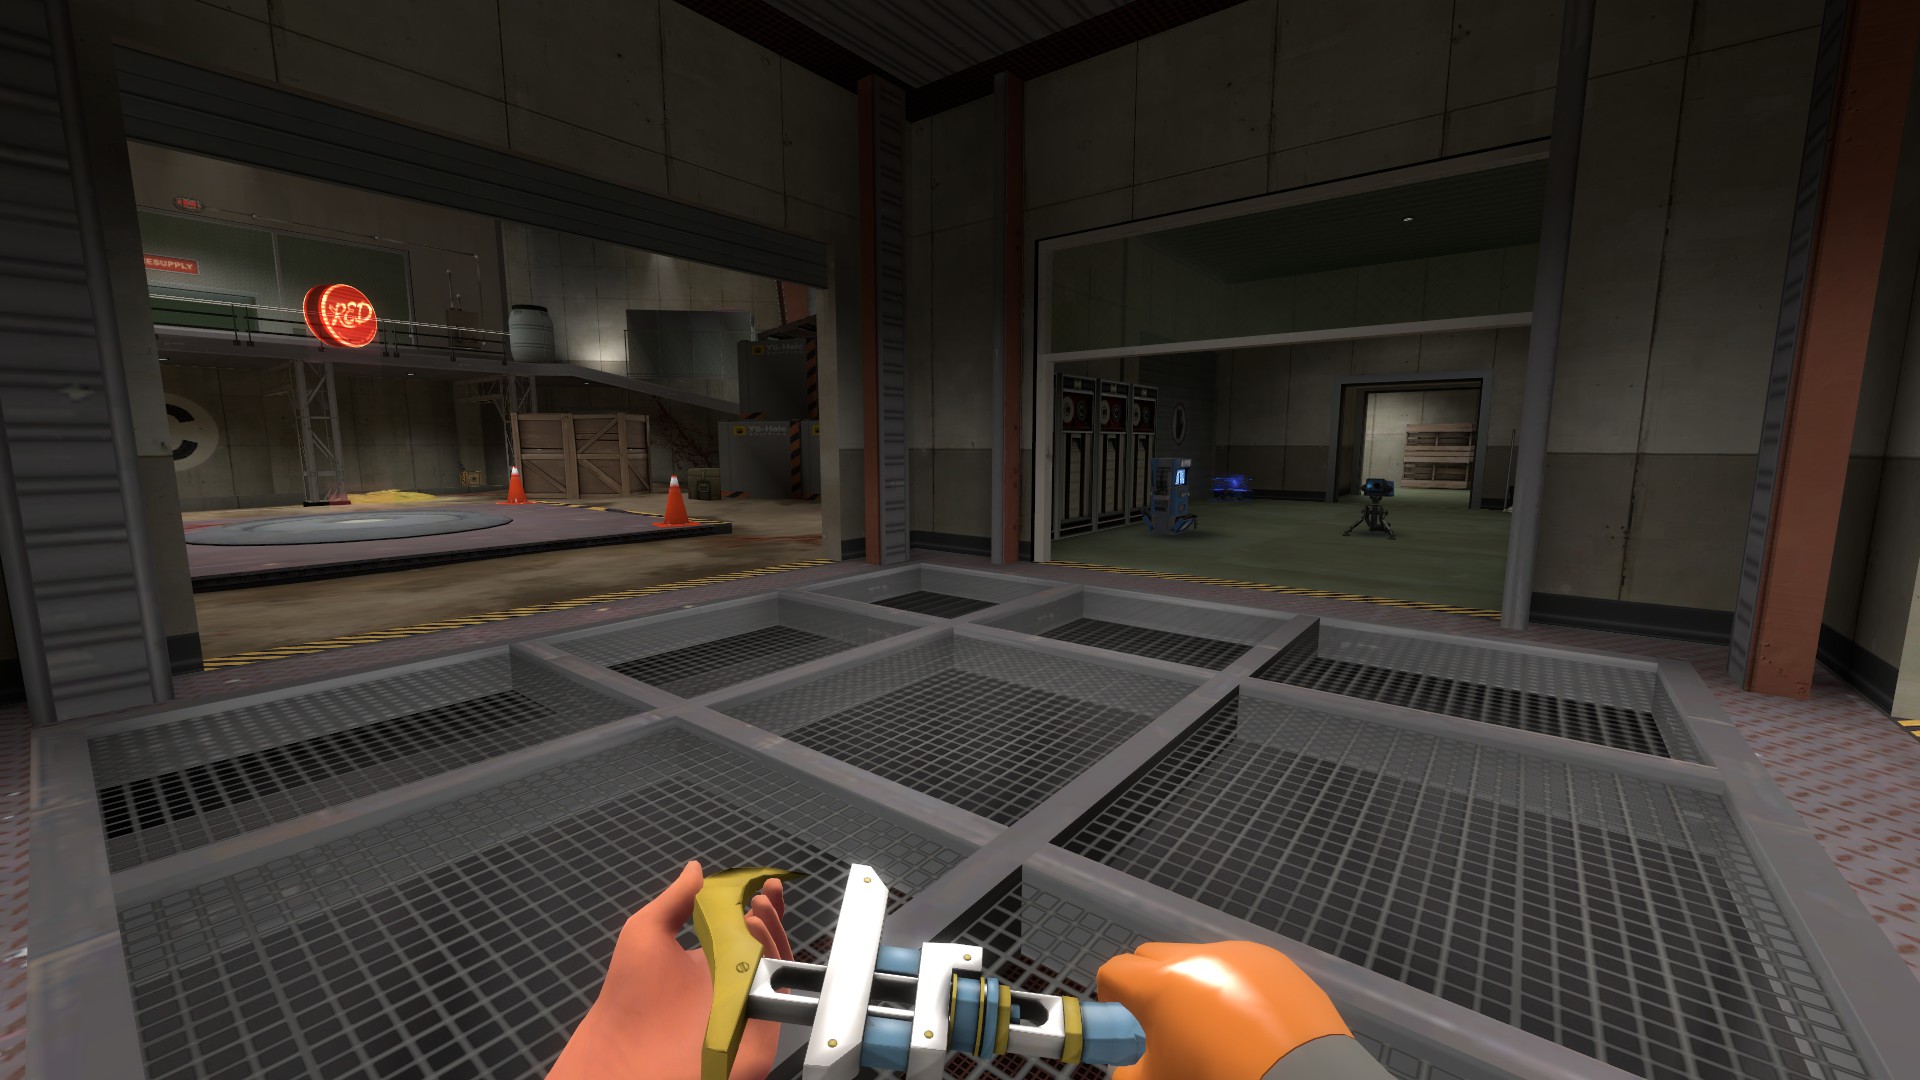
This spot, while still better than no spot, doesn’t really offer much for the Engineer or his team. The team has really only one option forward, a very tight door in a very tight hallway. Not to mention, with this being on the first floor, the red team can comfortably come from above and spam explosives down there in an attempt to destroy your builds. For ease of your team and overall safety, this isn’t the best place to be making your team coordinate at.
So, how about something like this, instead? Relatively in the same area and pretty easy to get to as Blue Team. If there’s enemies up here, you can always ask your team to help, although whether or not they help is variable, most teams enjoy having teleporters and dispensers.
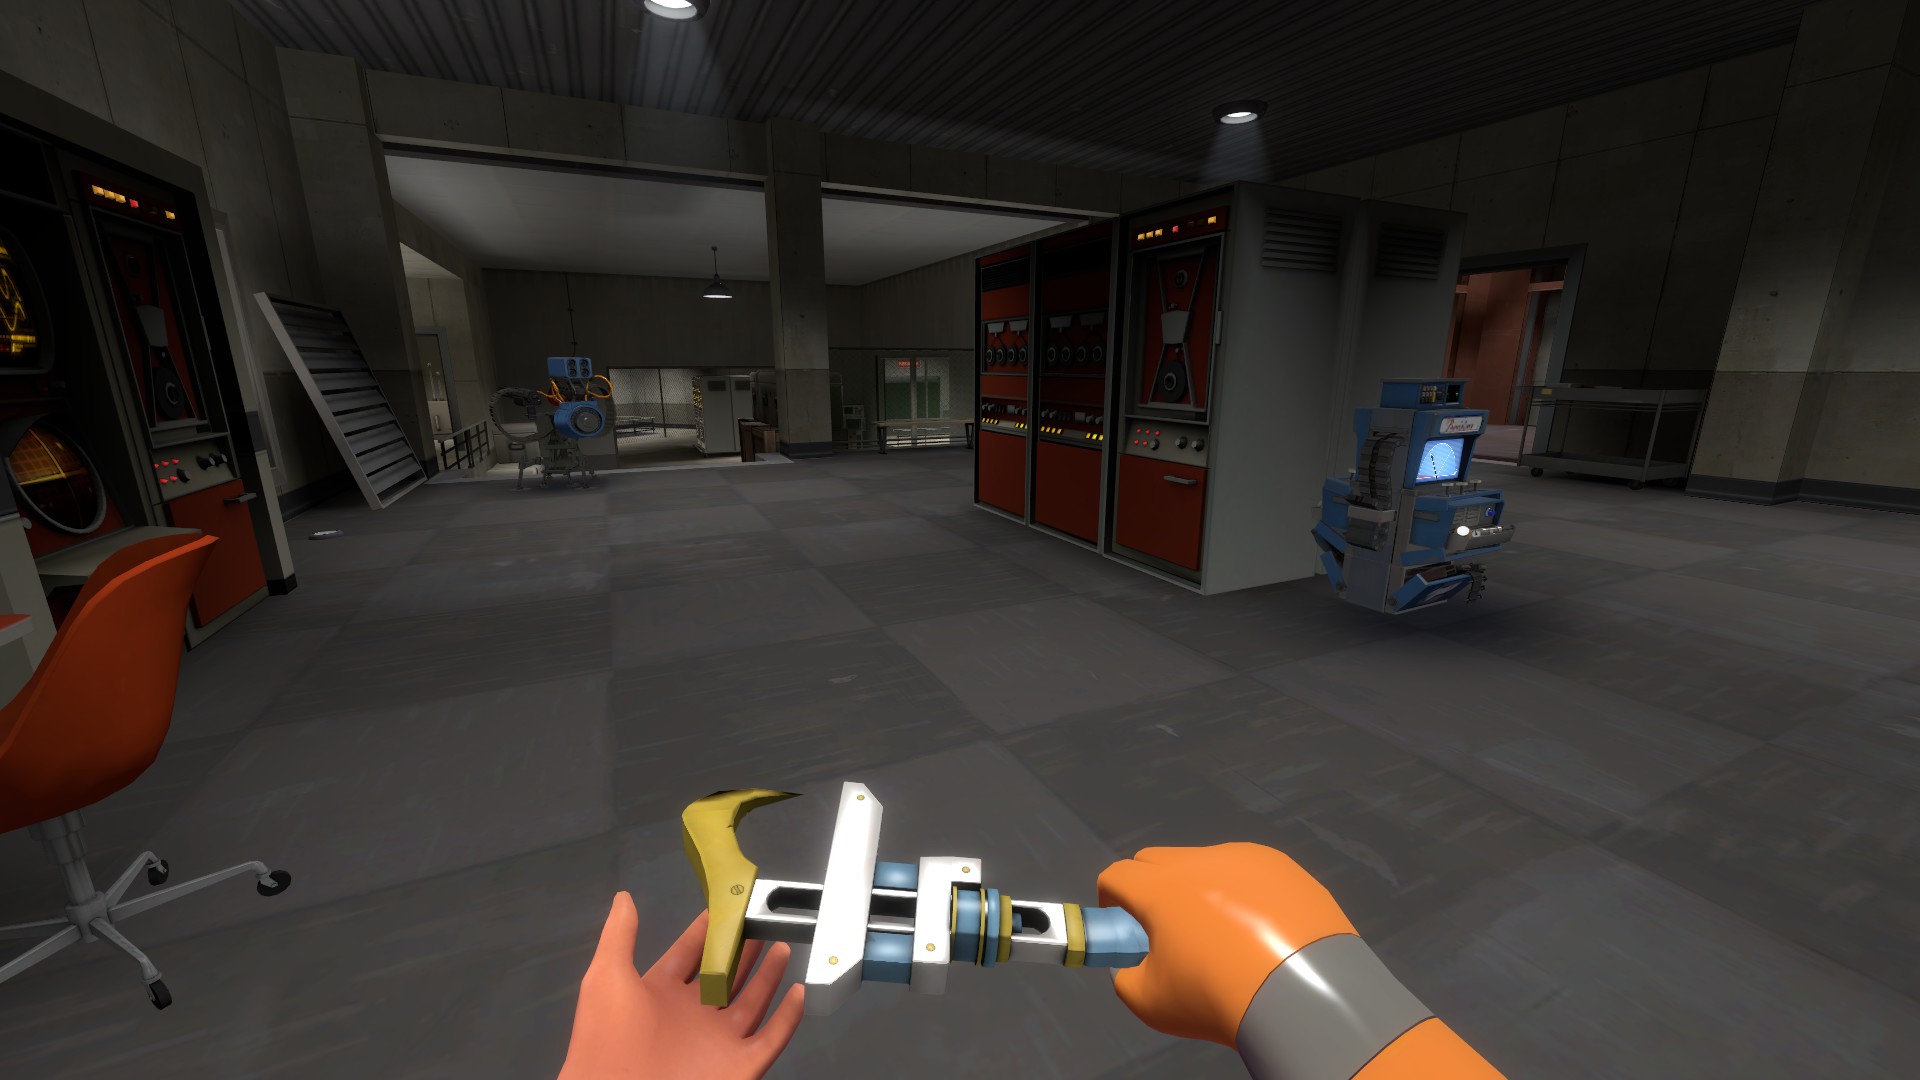
This spot, compared to the last one, is pretty amazing. It gives your team a good view of the point and where everything actually is from the safety of the second floor behind glass, as well as multiple entry points onto the point. The only problem would be that it’s pretty close to their spawn and can be chaotic to hold, but that’s life as an Engineer on the frontlines who’s trying to help his team out to the best of his ability.
No spot is ever perfect. Each spot has their own strengths and weaknesses, and as the Engineer you always want to pick the best spot not for you, but your team.
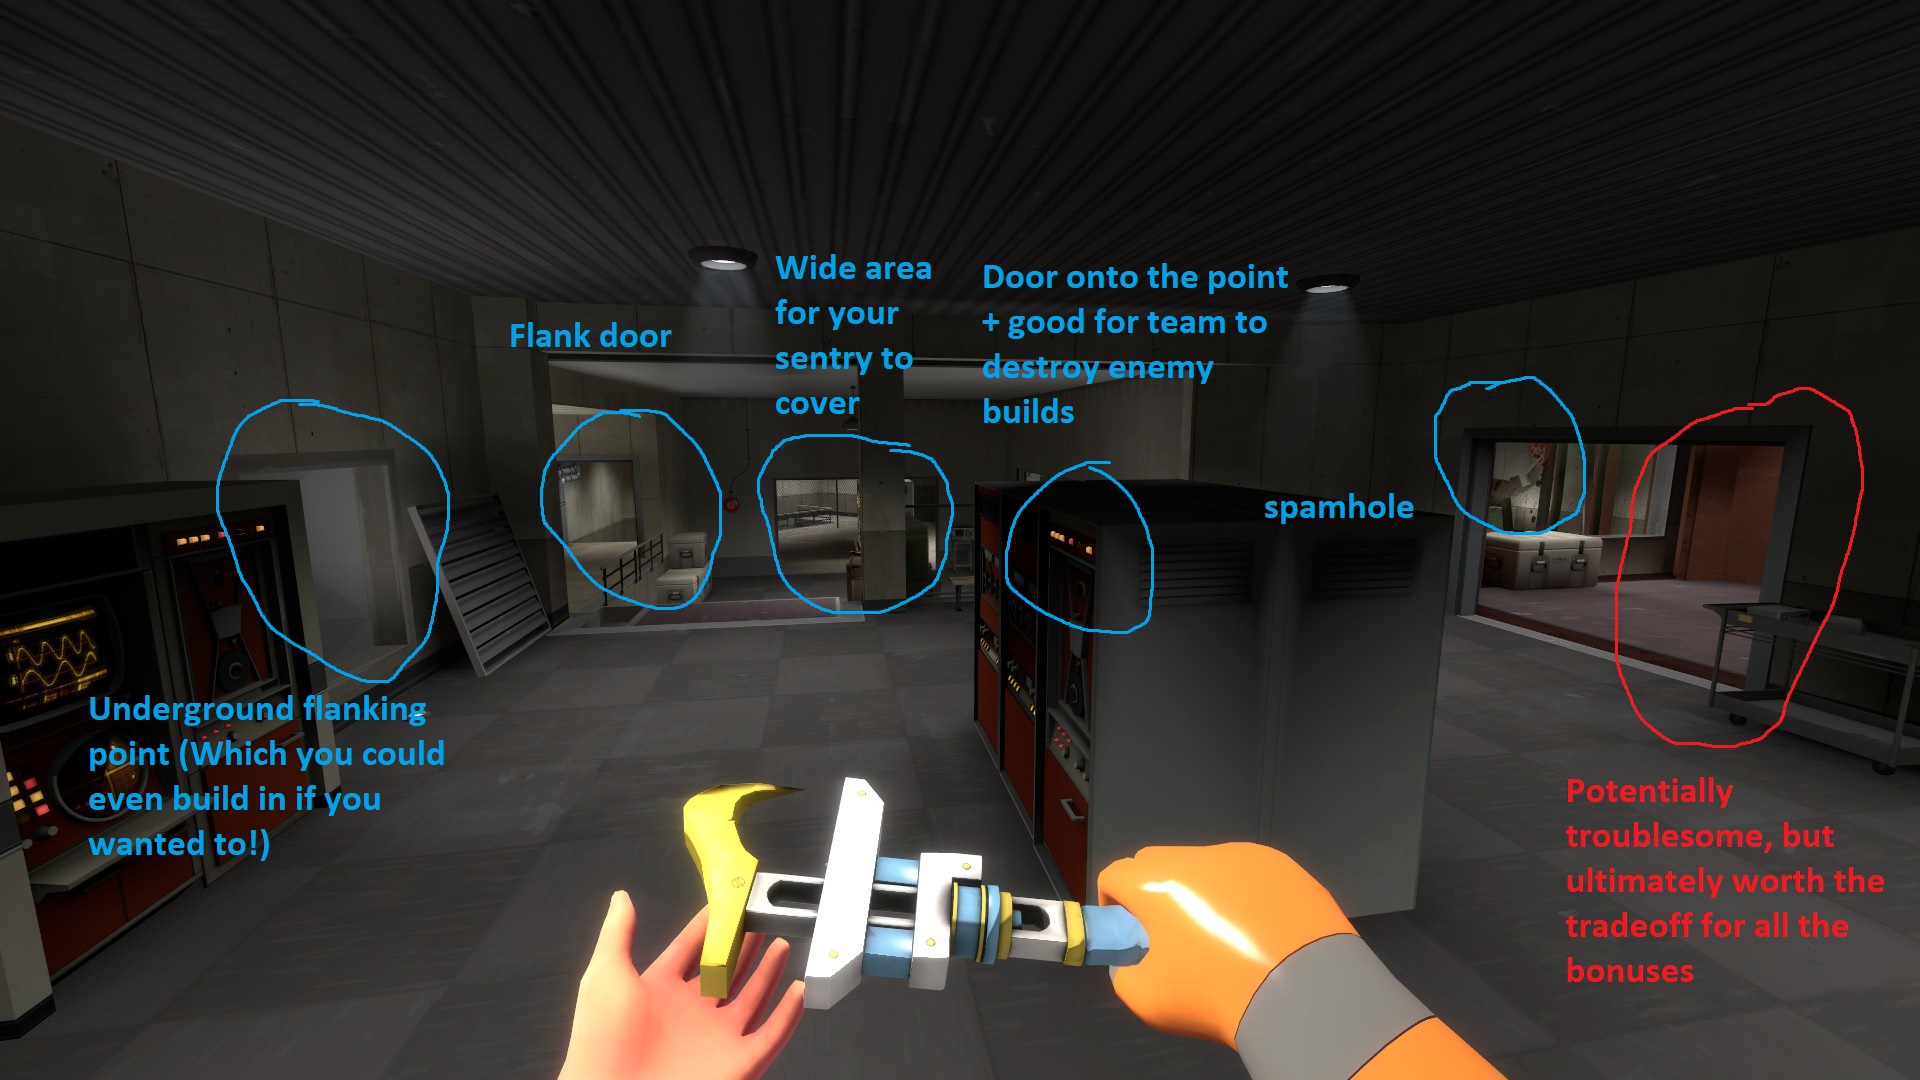
It is worth saying that with this spot specifically, I’ve noticed Demomen love the spamhole. They’ll help you reduce the negatives of that easy flanking point into your room, as well as the rest of your team.
Aiding your team’s Engis
You probably won’t be playing Engineer 24/7. That’s okay. As an Engi main, I still play plenty of other classes, primarily Heavy and Medic. So here are just some quick tips for how you can help out an Engi not just on Blue, but in general as each class.
All Classes:
- Communicate with your Engi on what your team can benefit the most from, whether it be voice commands (Finally, saying you need a dispenser here and actually meaning it!) or asking them nicely for something in team chat.
- Always let the Engineer through his own teleporter first, then let any medics through. After that, it’s up to the rest of the classes to decide who goes first.
- If the Teleporter isn’t Level 3 outside of spawn, you’ll save your Engineer and team a lot of time by switching to Engi for a few seconds and upgrading it yourself, then switching back to your preferred class.
Scout:
- Your Bonk Atomic Punch can be used to help draw fire from enemy sentry guns, which can aid your team in destroying them, which lets your Engi push his buildings in as well.
- If an Engi is carrying something and burning, use your Mad Milk to extinguish him. If he panics and doesn’t put it down, he’ll lose a built building he’s carrying.
- Don’t worry, Boston Boy, feel free to use teleporters so long as no one is behind you waiting and it’s a Level 3 teleporter. It’ll help you both out, anyways.
Soldier:
- Accompany your Engineer if you see him moving things and you have the time. Dispensers can be a big help to you, so it’s good to return the favor as the Engi will be very vulnerable, and as the Soldier, you basically have no bad matchups against other classes in the entire game.
- Your mobility and splash damage is some of the best in the game, and you can be very effective in spychecking and catching spies trying to hurt your Engi off-guard.
Pyro:
- Always kill the Spy first before trying to unsap a building with the Homewrecker/Neon Annihilator.
- Airblast is one of your strongest tools as a Pyro. Utilize it whenever you can around Engi builds, as the Dispenser will cover the ammo cost. Whether it be airblasting projectiles, to airblasting Uber duos.
Demoman:
- If your Engi is dead or occupied, you can place stickies around his builds and detonate them should you believe a Spy is approaching his buildings. This is also good to do when healing and/or replenishing and reloading your ammo.
- Once a spy is revealed, Demoknights far outclass Spies in their usual preferred method of combat; Melee. Never spare a spy, always gain a head.
Heavy:
- Something all Heavies should remember is that they’re a Heavy! They’re big and tanky, and with an Engineer supporting them they really will never run out of ammo or healing. Use your sheer mass to protect him and his builds, and always try and cover him when he moves.
- Communicating with your Medic is important, and if you have an Engi, be sure to communicate with him too on being ready to potentially move his sentry up to assist, as you’re one of the most dangerous classes when ubered. Most pub Engis probably won’t as either they don’t know how to talk or are running Gunsligner and will probably do so anyways, but if you’ve got a friend in VC, let them know, too!
Engineer:
- Dispensers are important, and the more Engis there are the more metal is needed. Always place a dispenser down so it can generate metal in the background and help your team, even if you don’t plan on upgrading it for awhile.
- Always try and keep dispensers as upgraded as possible for more metal for all the Engis.
- It’s always good to keep your buildings as spread out, but still within reach of other Engis as possible. That way, you can still cooperate, but it makes it harder for your enemies to wipe out all your buildings at once.
- There’s really no Engineer main that doesn’t, but if for some reason you haven’t, you should consider watching Uncle Dane videos as they tend to have a lot of valuable information on how to play Engineer effectively.
Medic:
- Give your Engis overheal. Especially if the Engi is playing pretty aggressively, ESPECIALLY with the Wrench, he will benefit greatly from it. His lower healthpool generally also means he’s a lot faster to heal to regular full HP.
- If your Engineer is good at hitting shots and he has the Widowmaker or Revenge Crits, it might genuinely be effective to pop uber on him, however this is generally pretty risky and you’re usually much better off going with the usual Heavy/Demo/Soldier, of course.
- Teammates gather around dispensers. Most Medics run the Crossbow, so don’t be afraid to shoot people on dispensers with bolts.
Sniper:
- A surprisingly efficient duo, hanging around your Engis dispenser gives you HP and ammo, and to return the favor you can keep your eye and ear out for spies. Both of you hate the class, and both of you can protect eachother very well. Sniper doesn’t require a lot of tips, other than just hitting his shots and not getting too tunnelvisioned.
Spy:
- Spy can probably do the least to help his Engineer other than backstabbing people trying to hurt his builds. However, the Spy can communicate a lot of things to his team. Knowledge is power, even in a game as chaotic as TF2, and communication is key.
- If he’s fighting someone, feel free to step in. You have a revolver after all, and your Engi will appreciate any help he can get in a fight, especially against a Soldier, Demoman or Heavy.
Know when to hold, know when to fold
A good skill in any game is to know your limits, and it still applies here. This skill applies to all classes, but some more than others. A Soldier doesn’t have nearly as many limits due to his extreme power, damage type versatility as well as general large amounts of damage potential, health pool and having some of the best movement options in the game. The Engineer never has that luxury too much. Not only are you a high priority target for certain classes like Sniper and Demoman, two ridiculously powerful classes in different ways, but you also have the existence of Spies who have a weapon designed to mess with you. Knowing all your various limits at all times is a key factor, as due to the Engineer being a pretty squishy guy with mediocre solo damage output via shotgun in most situations as well as the fact you have to juggle all your buildings, you need to know when it’s the most optimal time for a strategic retreat.
As long as you’re alive, you can always rebuild. This goes for any style or team of Engi. There are only a few instances where dying as Engi isn’t that bad, which is usually just to tank your sentry during overtime or when other Engis are around your builds, but just like any class one of your major priorities should be to not die.
As I said though, this isn’t just an Engi skill, it’s an all-class skill. Sometimes you need to acknowledge when you’re up against a good enough of a combination of players where this may not work as effectively. This isn’t necessarily a skill issue, but maybe the team just has one really good Demoman that’s doing his job well and making sure you can never get set up, or maybe there’s a Spy main who’s a little too obsessed with elementary-aged anime girls who just keeps making your day bad.
A big part of this playstyle is helping your team, and if you can’t get your builds set up and maintained for more than a minute, it may be better to switch off to another class. The three classes you can generally never go wrong with are Soldier, Demoman and Medic. People will always appreciate a medic simply just being there and making an effort, while Soldier has tons of versatility and power and essentially has no bad matchups in the game. With Demoman, as long as you’re playing actual demolition-man and not knight and are aware that Demoman is best at mid-range, you’ll be fine.
You may also want to consider switching off if you have 3 or more Engineers on Blue. 2 can usually be pretty okay as long as one is maybe also running Minis, but on a 12v12 you start getting to the point where you’re missing out a bit on your team’s potential at that point.
Rapid-Fire Tips/Summary
So, in short:
- Your Team is your priority. Always aim to help your team.
- In most scenarios, Dispenser first. The order of Sentry and Teleporter are up to you, as a Tele is very cheap. Depending on your situation, you may need a sentry more than you need a teleporter.
- Your buildings are expendable and can be built fast with the Jag. Don’t be afraid to test your luck with even more brave building placements to help your team push forward. It’s best to not do with this with the teleporter unless it’s a very hidden spot.
- Your Medic tells the team when to push with his Ubercharge. Try and move your sentrygun up to cover the objective you guys are trying to push onto/through during this point to help solidify the push as a success, the stealthier you do it the better, and placement is important, slightly less so with the Wrangler.
- Your Medic tells the team when to push. Your teleporter tells the team WHERE to push from. Put your exits in where you deem would be the most optimal place to have your team attack from, and set up the rest of your builds there as well. High ground is almost always good.
- Sometimes, a sudden out-of-nowhere cheeky sentry placement can work out very well for your team. However, if it doesn’t work, try not to test your luck again unless you’re sure they won’t notice it. Managing Risk and Reward is important, and don’t keep taking risks if they aren’t yielding rewards.
- Again. This can be a very risk/reward playstyle, and you want to reduce the amount of risk as much as possible until key moments. Feel free to take risks in regards to your builds, but don’t constantly send them off to their death as that’ll only hurt you and your team.
Conclusion
From my experience, using the Wrench on defense has felt significantly more impactful than using the Gunslinger. Being able to build teleporters and dispensers faster, and the long-range power of a Level 3 with the Wrangler, as well as just the Level 3’s regular area-denial potential, the Engineer’s potential in 12v12 scenarios is very, very high. Your builds aren’t meant for just you, they’re meant for everyone to use, and you want them to use them as often as possible with as much convenience as possible. If you keep that in mind and act on it, you’ll do just fine.
Here we come to an end for Team Fortress 2 Aggressively Defensive: Tips and Strats for Offensive/BLU Wrench Usage hope you enjoy it. If you think we forget something to include or we should make an update to the post let us know via comment, and we will fix it asap! Thanks and have a great day!
- Check All Team Fortress 2 Posts List


Leave a Reply