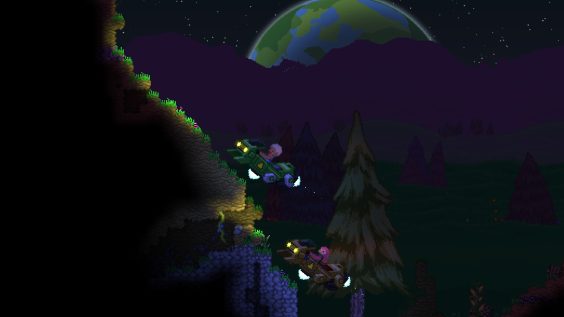
The NFS is a trade union from the book I’m writing. It started as an acronym that I used in this game to not say “HMS” or “USS” when naming ships and basically had to come up with a meaning for it on the fly. I use the term NFS here to mean a ship built using my method.
It’s easy to pick up and easier to master. Once you’ve got it you can build nice ships without diving into too much effort for a character to be worth it.
Mods You Won’t Live Without
This is a BYOS guide, as such you’ll need FU BYOS or the standalone BYOS. While I have built with MadTulips before, I haven’t had nearly as many playthroughs with it. Most of what you learn here transfers over, though!
Tools to Make Your Life Easier
Spawnable Item Pack and its many compat addons (only ones for mods you have in your pack!)
Aurora’s Sit Mod (Without Retexture)
Elithian Races (for those sweet sweet background doors)
This Guide Requires
Build Your Own Ship of some flavor (standalone, FU, Madtulips…)
Rexmeck Item Editor Pro
Block Anchors (from Place Blocks Anywhere!)
Carbon Recommends
the two Official FU BYOS all races patches if you’re using that – some servers I’ve been on don’t use them and it’s frustrating
FR patches for as many of your pack’s races as you can find, as having FR support often comes with BYOS support if you don’t have the two BYOS patches
Mods that add blocks and are not incompatible with your pack
This guide was made using my BENZNE modpack. It’s a chunky boyo but it serves me and my endless need to build spaceships well.
Setting Up Your Character to be a Proper Shipyardie
/admin
/fullbright
Upgrade your matter manipulator all the way. For longer term characters it might also be worth it to go and get your scanmode. Since this guide made you go get Elithian, pop one of those matter manipulator reskins once you’ve done this. No reason, I just like the Avikan manipulator better than the base game one.
Open up Rexmeck, click the big green matter manipulator. Change blockRadius to 10, save, save. Change tileDamage to 80, save, save. Save the entire thing over your original manipulator by choosing the manipulator button again in the dialog that occurs when you save from this screen. Exit out of all menus.
/spawnitem distortionsphere_tech
Accept the quest and the rewards. Go into your [c] menu and craft yourself a set of block anchors. You are ready.
Divergent Instruction #1
IF YOU’RE USING MADTULIPS, THIS SECTION IS SKIPPABLE.
If you’re using standalone BYOS, I don’t know if this section is skippable. If you don’t have to talk to SAIL to choose what shiptype you want in standalone BYOS and it starts buildable, skip this step. If not, choose to build your own ship.
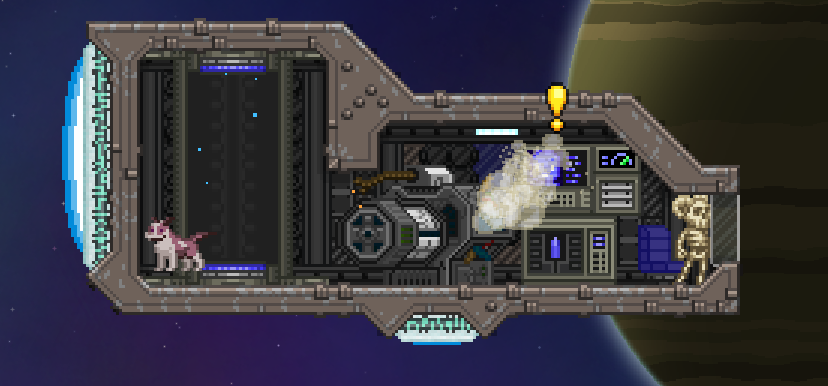
For FU BYOS people, it does not matter. Do not choose Vanilla, but you’re going to tear it all down anyway, so any Frackin preset ship can be used. For ease of destruction, I recommend the Miniship preset.
The one that looks like this:
Gut the original
Pick up your ship spawn teleporter, fuel hatch, captain’s chair, and SAIL terminal. You’ll need those.
Press F+W to no-clip if you’re using Aurora’s, and go outside of your ship. If you’re not using Aurora’s, you’ll probably be fine but it will take so much longer.
Destroy your ship, let the blocks fall out of sight. You won’t need any of THAT garbage anyway.
Place one of those block anchors, this is where the fun begins.
Obtain Your Block Pallette
Whether you use SIP or make a platform for an Industrial Workbench, you need blocks to build a ship. For an NFS style ship, you’ll need:
A non-directional, non-sloped, non-transparent block, preferably some kind of tile for your frame
A sloped non-transparent block for your hull
A transparent block for windows
A non-directional non-transparent block for “depth”
A vertical block for “columns”
A horizontal block for “rows”
A non-directional non-transparent block for “filler”
Any block for “ballasts”
A platform
(Optionally) Water or healing water for a pool
You can choose to get your ship parts and furniture now, but you won’t need it for a while. Here is a screenshot of the block pallette (in above order) I’ll be using for these example screencaps.
Lay Out The Frame
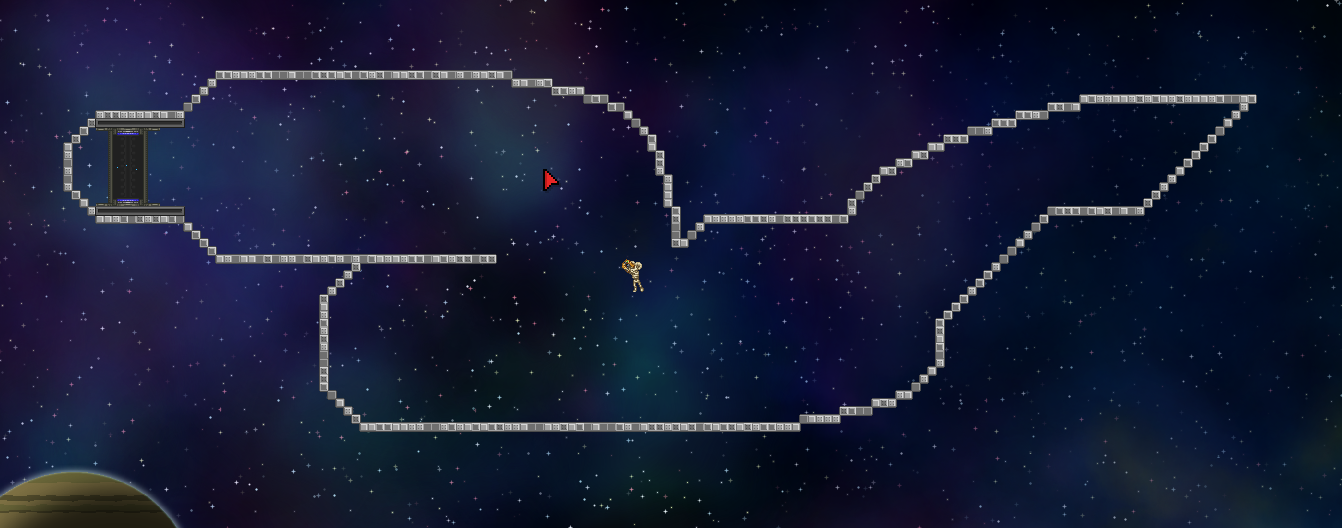
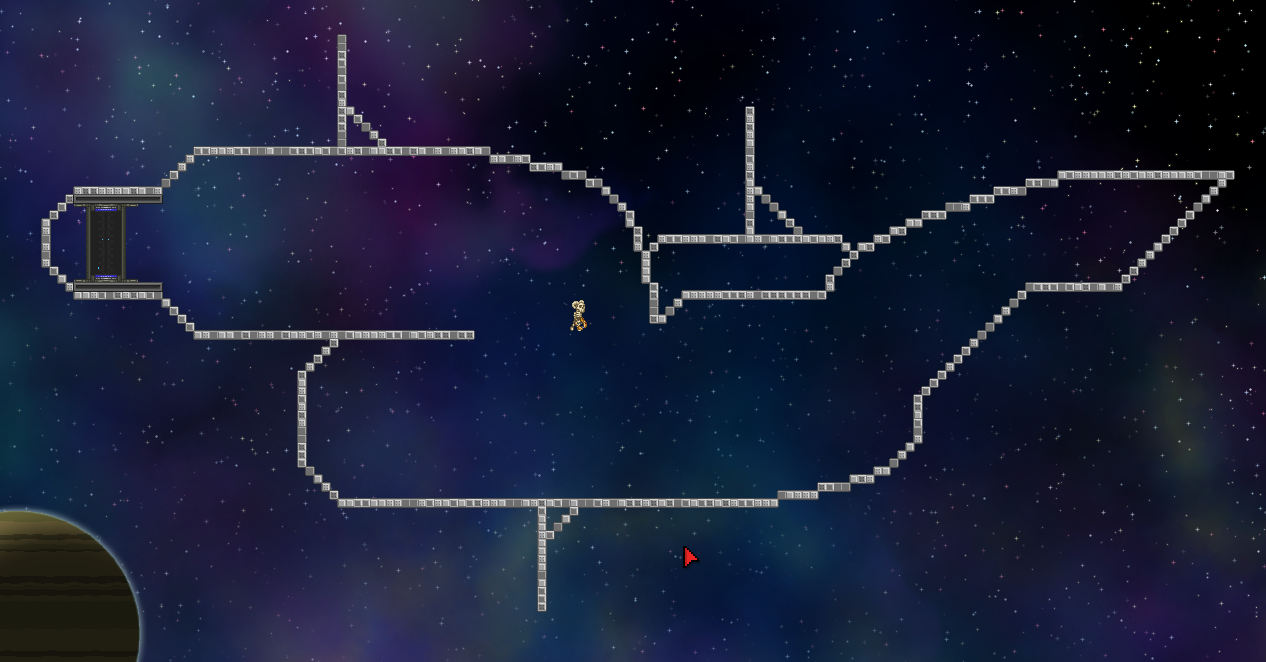
Use your frame block here. Whether you want a long tube (word of caution, Long Tube ships WILL end up looking like spacecocks. You can’t do anything about it.) or you want a weirdo ship that curves in on itself and has holes in it you can’t access (we call these “ballasts”), or you want a ship that looks like someone salvaged a bunch of other ships and strapped them all together into one big ship, what matters is that you have an outermost loop. There should be no gap between sides of the frame less than 7 blocks wide within the ship interior. (for the part where your ship spawn teleporter is, the distance between the floor frame and cieling frame should be 12 – this is because you have a blcok’s worth of hull on both ends and 10 blocks of teleporter.
For FU BYOS users, have a few “fins” to place some extra boosters on.
For the example, I have chosen to lay out this shape: two cabins and a bulkhead.
For further example’s sake, I have added a ballast and fins.
Coat Your Frame with a Hull
Use your hull block to coat your frame in a 1-block wide hull on either side. The inside of the ballasts and the inside of the triangles for the fins should be kept bare – we’ll get there, trust me. This part should take less time but more blocks, since you’re just tracing your original drawing here.
You should end up with something that looks kinda like this:
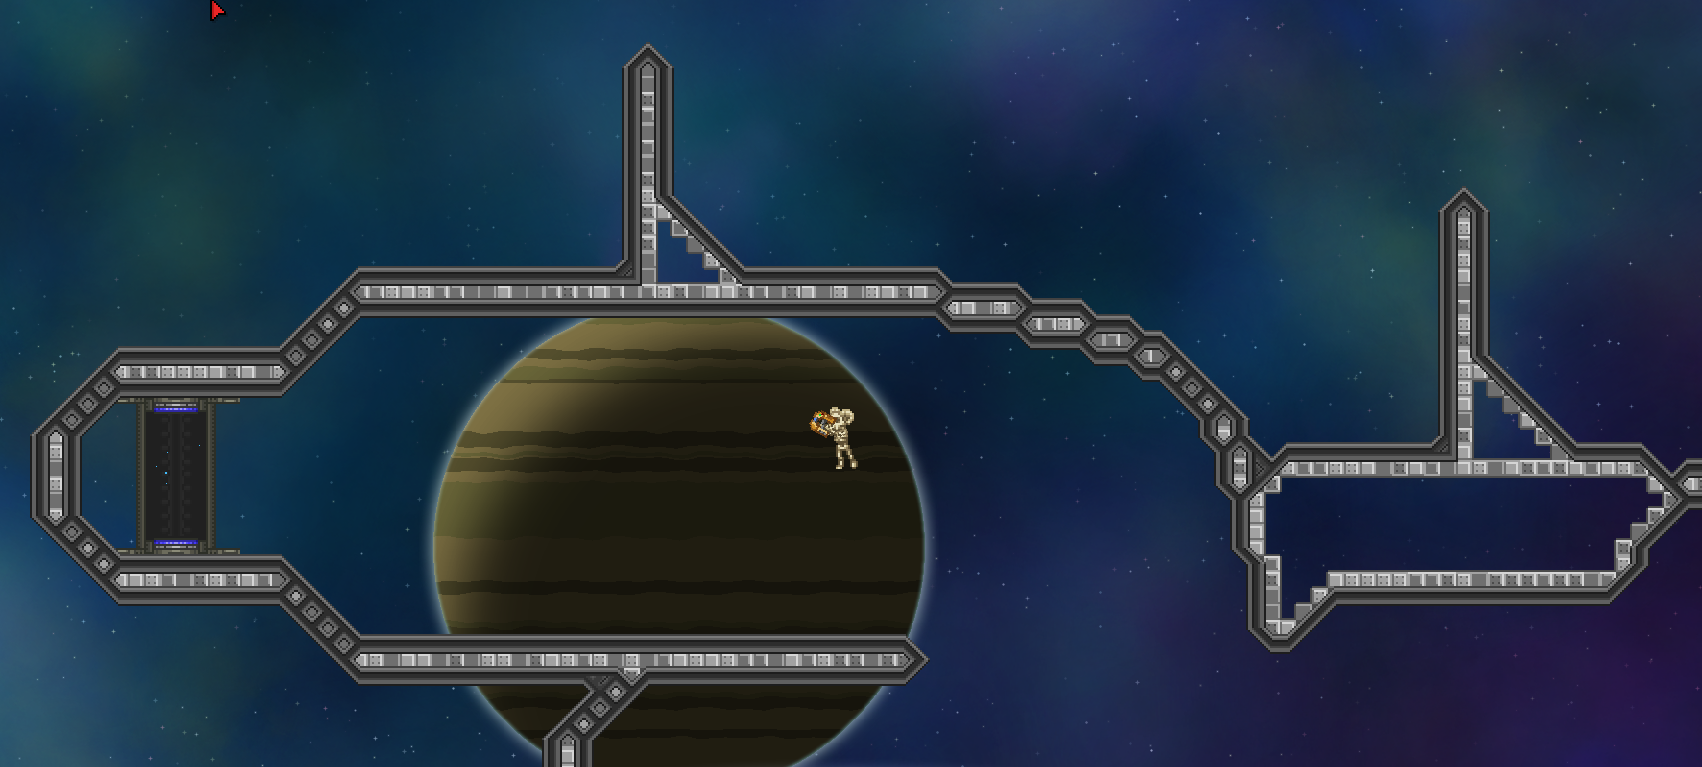
Remember, yours and mine don’t have to look exactly alike – this is a stylistic tutorial, not a “build my ship” tutorial. By my usual standards, this example ship is ugly so far.
Fill Your Ballasts and Section Off your Interior
Remember that ballast filler block I made you pick out?
Use the front layer inside the fins. For the big ballasts that we’ll place stuff inside later, use the background layer, like so:
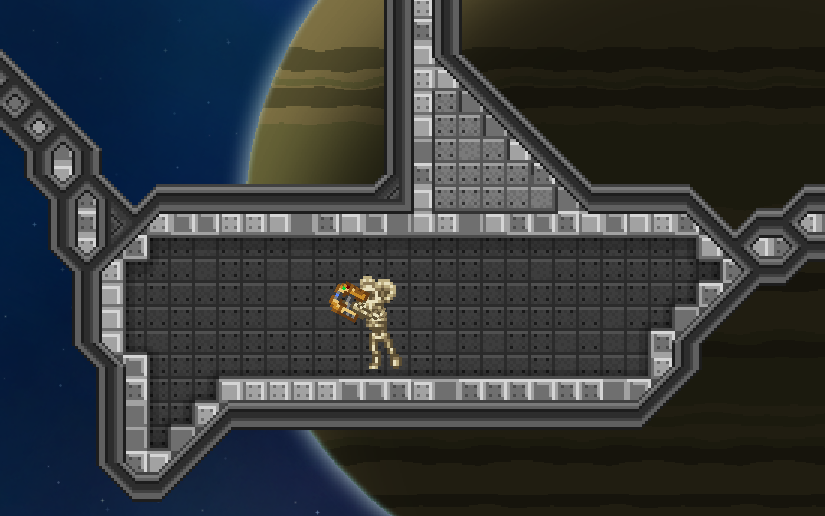
Next is a bit trickier, especially if you did a wacky shape or used lots of diagonals. Section off your ship’s background layer with those row and column blocks into mostly rectangular shapes. There will be a few small non-rectangles, but don’t worry, we have a contingency plan for those we’ll get into later.
Here’s how I chose to divide this one:
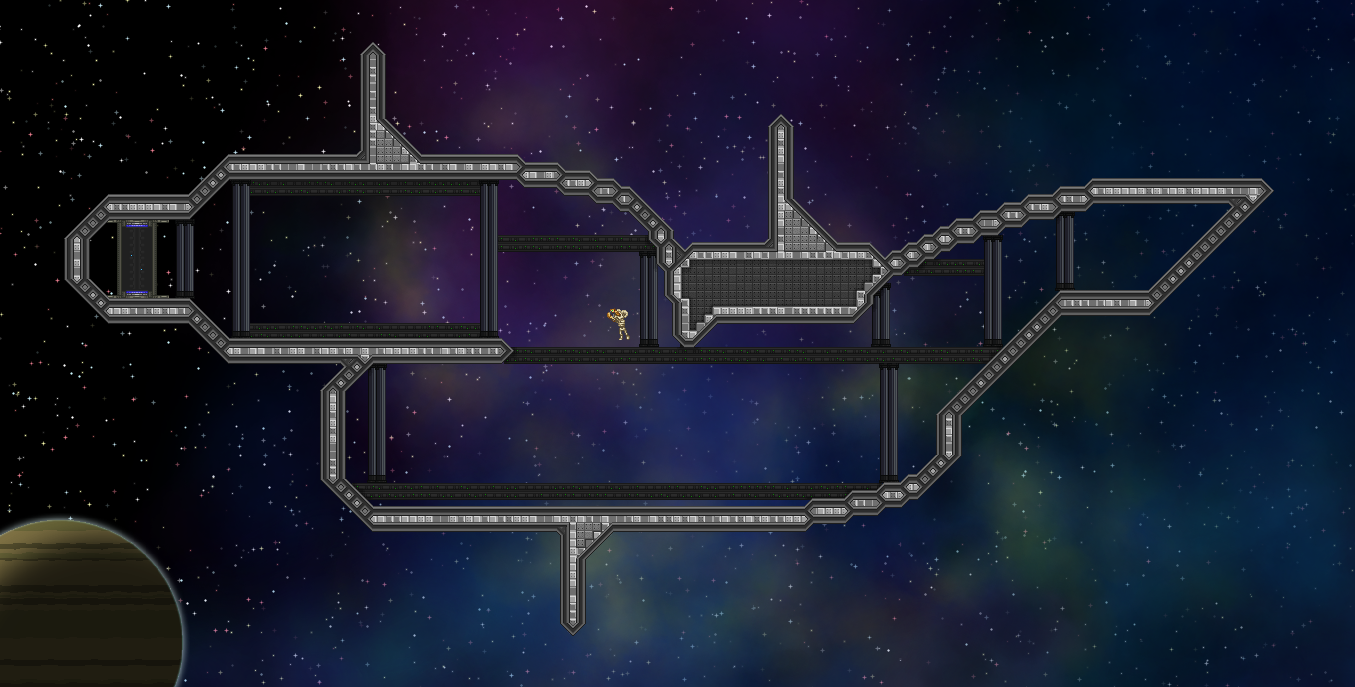
Complete the Background
Larger sections use your “depth” block for two layers, the inside of which is lined like another section. The remaining space gets glass. Smaller sections just get the glass. For non-rectangular sections, use your regular filler block (NOT YOUR BALLAST FILLER) and your depth block at your discretion. Wherever your bridge is should be “oops! all glass.”
Larger sections complete:
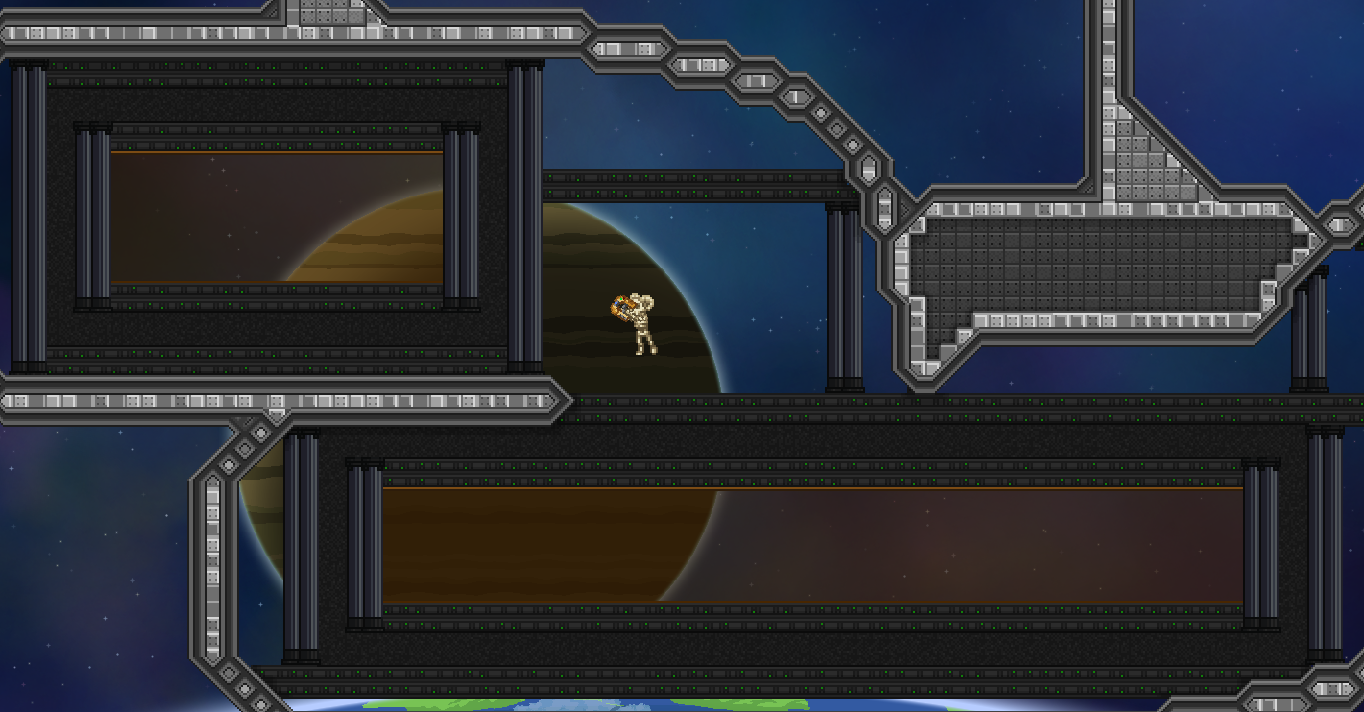
Small sections complete:

Fill zones filled:
haha so fun story that character got corrupted starbound is such a well coded game
so now you get to deal with not having pictures anymore
thanks starbound
Make It Work
This is where you add your teleporter to the main cabin, your fuel efficiency and FTL drive to the inside of your ballasts if it’ll fit and on top of the outside of your ship if it won’t, your FTL boosters to the fins and the butts of your cabins, your ship booster to the bottom and the top (yes you can put them there) of the outside of your ship, and your Captain’s Chair, fuel hatch, and SAIL terminal to wherever you decided to make your bridge.
With Fuel Efficiency:
(F in the chat for my save files)
With Boosters:
(of all files why the one I was making a guide with?)
With Bridge and Teleporter:
(I mean cmon)
Aesthetics
Tables. Chairs, Crew bunks. Lighting, for goodness sake. Fancy Ship Plaque optional
Completed Ship:
(It’s just too unfortunate. maybe one day I’ll take brand new screenshots of a different ship build)
Now go out there, and represent the New Fleet Schiebelain and the Blue Talisman Shipyarding Company in your adventures!
MadTulips full guide when?
Eventually. Depends on the next time my group wants to play without Frackin.
MadTulips was fun to build with last time I touched it though, so I definitely do want to do it again sometime.
This is all for Starbound How to Build Your Own (NFS) Ship Guide hope you enjoy the post. If you believe we forget or we should update the post please let us know via comment, we will try our best to fix how fast is possible! Have a great day!
- Check All Starbound Posts List


Leave a Reply