Introduction
I started playing Saga Frontier way back when it launched on the Playstation 1, in the golden age of Squaresoft (when you could throw a dart at a board with every Squaresoft game on the market and not miss a good game). Saga Frontier, despite being an amazing game, was actually considered one of Square’s weaker titles at the time (it was competing with other titles of theirs such as Final Fantasy 7, Final Fantasy Tactics, Parasite Eve, Brave Fencer Musashi, Xenogears, etc. All games you should play if you haven’t by the way).
Some awkward translations and ill explained mechanics aside, one of the main things that made it hard for people to get into compared to other titles was how monstrously difficult it was compared to similar games – or games in general. The game does very little to hold your hand, and every random encounter could easily be your last one. I played the original with the Strategy Guide, and still got roflstomped as a kid. Now that the remaster is back, it’s time for revenge.
What follows is a guide I decided to make after replaying this game blindly from the remaster (I never actually beat *any* of the stories in the original legitimately, and somehow the game was hard even if you were using a gameshark. I must have been real bad. :P). What’s different today is we won’t be using a cheat device, but just a better understanding of what you need to succeed.
Let’s get to it.
Getting Started – General Advice
No matter which character’s story you are playing, there are some general things to keep in mind.
Feel Free to Flee
One of the most wonderful filthy casual updates to have come from the remaster is the ability to run away from random encounters. Seriously, we didn’t have this back in the original, and when you least expected it some frilly lizard would jump out of a hole and end your whole career because it decided you needed to fight a kraken today. I basically went through like two campaigns before I ever fled an encounter because I forgot that it was an option we have no (old habits I guess).
Remastered has the ability to flee from encounters you don’t want to partake in. While you shouldn’t have to do it all the time, it honestly knocks a huge portion of the game’s difficulty down (no more accidentally ending up fighting 5 enemies who are stronger than you while you were all alone on the way to the ATM machine). If you run into an encounter and you really don’t like the look of it, just leave. If you’re grinding levels and you run into something that’s gonna throw off your groove, just walk away. Be the bigger man, even if it means being a coward.
Keep a Few Save Files
Especially if you’re new to the game, I recommend making a save after every event or scene that transpires, before entering a “dungeon”, or after completing one. In my experience, two different saves and the quick save is usually paranoid enough if you’re a newbie. Also, many characters have a point of no return in their main quest and the devs were kind enough to give you a clear warning in in those cases that I’ve seen. You should obviously make a backup save before you head on, just in case you are hopelessly outmatched (but with this guide you shouldn’t be).
Humans are the Master Race
Humans are to everything else what PCs are to Consoles. This might be a bit of a bold statement for some, especially seeing how powerful mystics, monsters, and mechs appear early in the game, but I will die on this hill.
Humans are the easiest of the races to level. They get better at things simply by doing them, and are pretty close to the least restricted in terms of items (mechs actually win in pure itemization comparisons), but they still beat out mechs in most cases because they can raise their stats without having to rely solely on their equipment (mechs often have to trade stats for utility). They can also learn a lot of skills simply by doing them.
I’d recommend having at least 3 humans on most teams. Asellus is basically a human with mystic options so she counts too.
IMHO, the next best race is probably tied between Mechs & Mystics, and then Monsters. Don’t get me wrong, Monsters have the potential to be the big stronk, and they can seem to become enormously powerful easily during the early portions of the game if they transform into something really good, but they are too reliant upon their forms for statistics and you really have to know what you’re doing to not accidentally screw up your monster’s progression (they are incredibly easy to screw up for beginners or anyone who hasn’t given a thorough reading to a monster guide online, and you can accidentally end up as a 300 hit point monster with bad stats in a 800 hit point world). Worse yet, you’re very limited on what sorts of cool and useful abilities you can get on your monster because you need certain abilities to achieve specific end-game forms (for example, if I recall correctly, you must have fang, stone breath, and tail slap to become a black dragon, which is a decent end-game form – though I did beat the game using a Trisaur form, but my human and mech companions carried Riki’s butt over the finish line).
Mixed Martial Arts
Unarmed, sword, and gun techniques are all considered to be warrior-techs, so you can mix them without upsetting any mastery bonuses you want early game (mastery is overrated but it’s actually very useful early game). Humans can learn these simply by using them. What’s more interesting is that unarmed attacks seem to scale their effective weapon attack power based on some formula derived from your base attributes more so than weapons (meaning that if you have crappy gear, it might be more effective to punch your enemies into submission), so don’t hesitate to have all your warriors learn some basic martial arts.
For example, you can give any hobo a Null Sword (60 power) and they can hit for about 600+ damage with a generic sword swing, but give a character with 99 strength a broadsword (11 power) and you’ll be lucky to break 200, but a generic Punch delivered by my party’s mage will routinely inflict 600+ damage all by itself (said mage has physical stats in the 70s-80s). Obviously they’re not going to start out with damage like that, but there seems to be a good bit of overlap between the stats used for swords and for unarmed combat. This also helps with resistances as detailed below.
The Right Tool For the Job
Different attacks also have different elements. For example, most sword attacks naturally deal slashing damage, almost all martial arts (unarmed) attacks deal blunt damage, and almost all gun attacks deal piercing damage. This is another reason why having mixed abilities on your warriors is a good idea. The same is true for elements (cold, heat, shock, spirit).
If you try to use Blunt attacks on jelly monsters, you’re going to deal very, very little damage. So in these cases, it might be a good time for your martial-arts master to draw a sword and start spamming double-vertical instead of trying to rely on his really cool mega shining suplex or whatever it is he or she usually does.
Mages can benefit as well. The realm spell Energy Chain usually deals great damage for its cost, but is comically ineffective against enemies such as Frost Crystals, but the light Sunray (same cost) will roast them just fine because that foe happens to be especially vulnerable to heat-based attacks.
Anti-Attacks
There’s a number of skills in the game that include notes such as “Effective against undead” or “Effective against airborne enemies” in their tooltips. These abilities basically ignore your target’s defenses if they happen to qualify. For example, the spell Sunray is effective against undead, so even if the undead creature is super resistant to fire and magic, Sunray will still BBQ them. Skills like Swallow Slice function similarly against flying enemies, etc.
Keep Your Distance
It is a good idea to keep a “ranged” sword skill (Swallow Slice, Wheel Swing, Tornado Slash, Twin Gale, etc) on your warrior heroes for dealing with enemies that hurt you when you strike them. This includes any enemy that has a heat, cold, or shock aura (including ones you accidentally give them by setting them on fire with skills like Blaze), as well as pesky undead fear auras on enemies like Banshees and Liches (the auras will confuse your allies and then they might just kill you in their confusion). Simply using these ranged options will allow you to avoid getting burned, frozen, zapped, or driven out of your mind when striking them.
Save Your Money – At First
Most of the gear you can buy early game is pretty trash (sometimes literally), and you will probably be able to simply find better loot in dungeons and battles for a while. The exception to this is the junk buying trick in Scrap, which is actually a good way to become OP early on in Riki’s story.
There are plenty of good things to buy though. You can most definitely cruise through the game using only store-bought items, but that will come later. Your initial goal should be amassing a mere 3300 credits and then you can make infinite money by using the gold exchange (see the next chapter, Making Money).
Making Money – On a Budget
You need to have money to make money. In this case, you’ll want a minimum of 3,300 credits, and then you can break the game using the gold exchange in Koorong.
3,30. credits can seem like a lot at first, but you can often find bags of 100-400 credits lying around in dungeons. You can also sell unwanted weapons to the guy in Nakajima Robotics in Shrike.
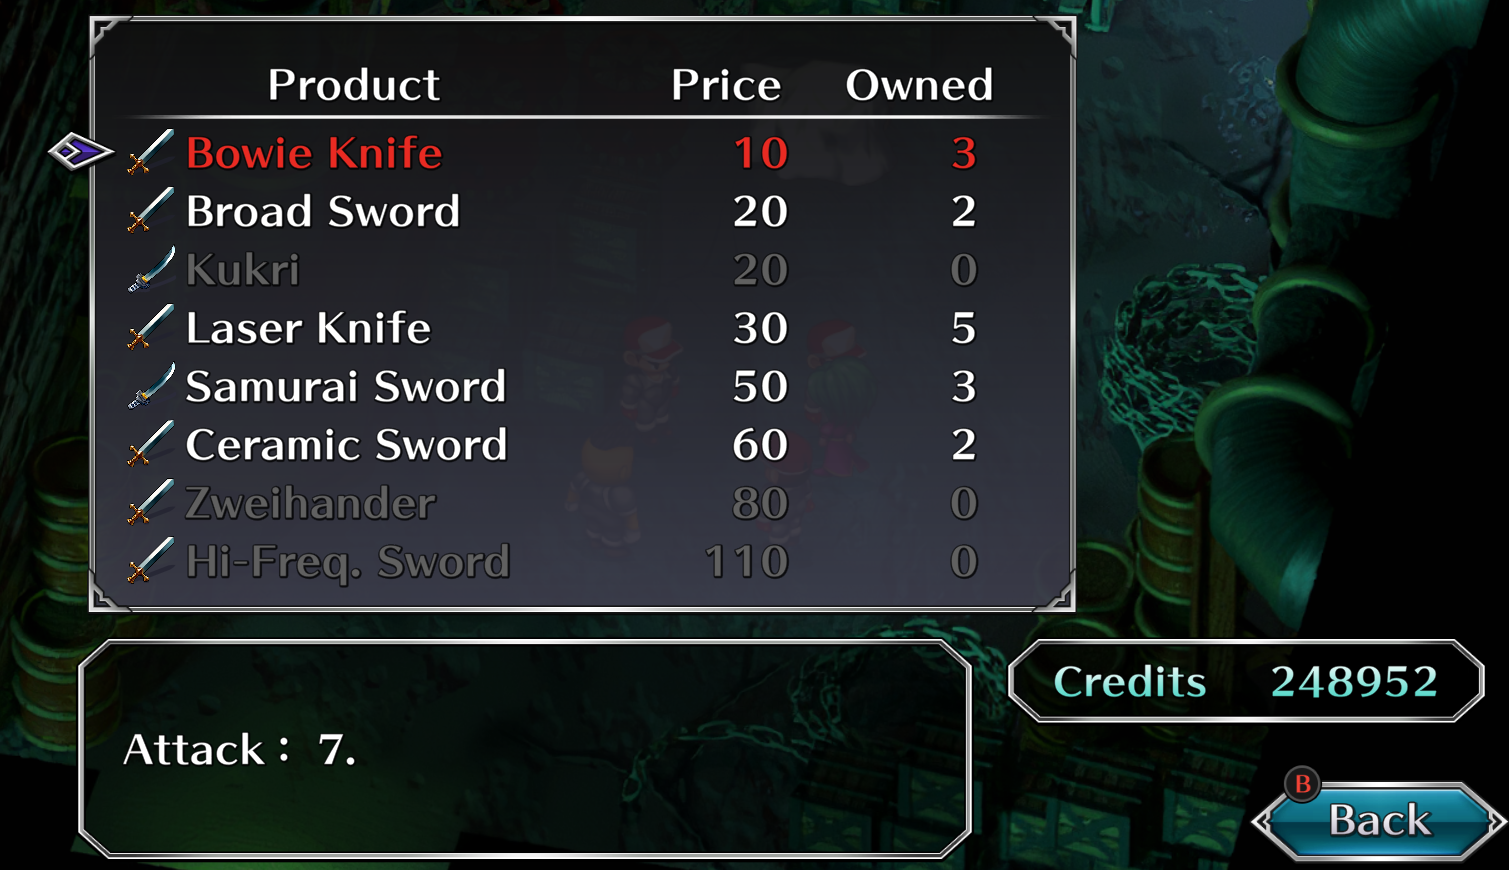
You can sell unwanted leather items to the guy in lower Koorong.
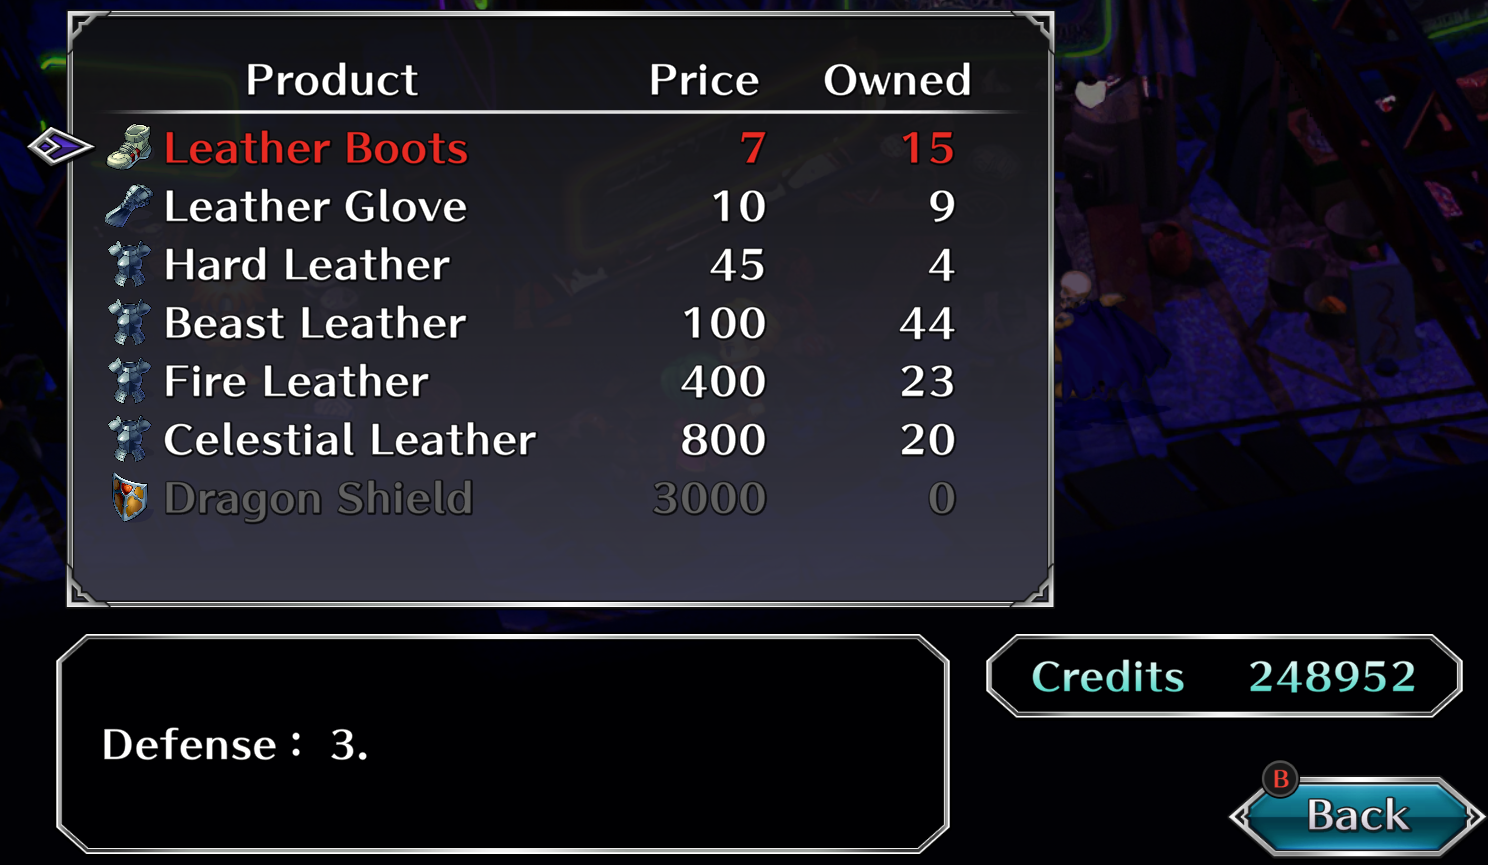
And can sell these items to the junk shop in Scrap.
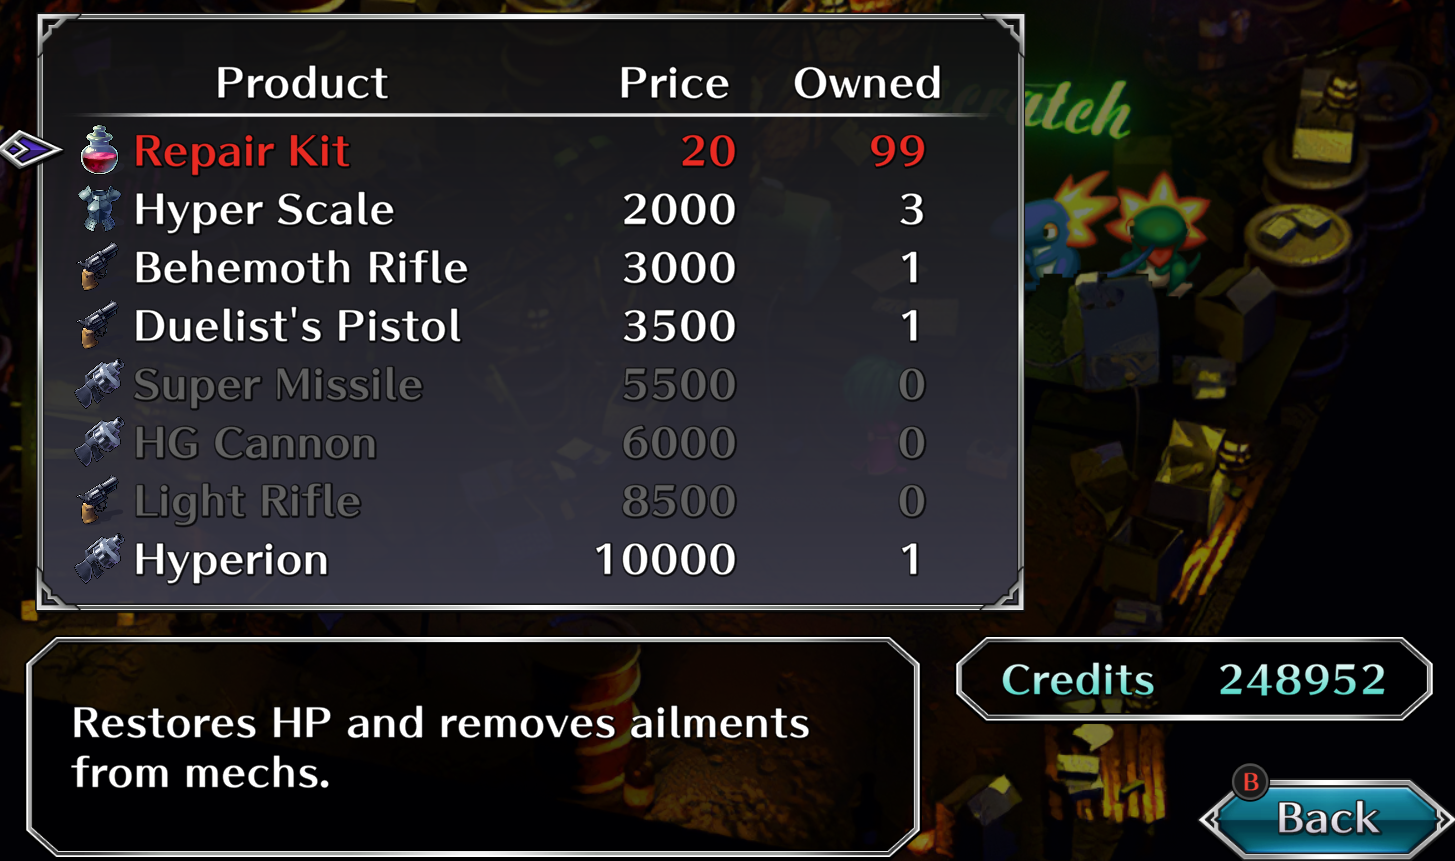
In fact, you can actually get all you need by simply going to the western ruins in Shingrow. If memory serves, there’s about 1100 credits worth of bags lying around, and you can find both a Hyper Scale and Duelist Pistol within. This means you can start this trick by simply going and getting the Duelist Pistol, selling it in Scrap, and then returning to Koorong and you will have enough money for the the return trip (100 credits to go to Koorong) and still have 3400 credits (or more) to begin the process.
The Gold Exchange
The building just after you leave the port of Koorong is the gold exchange.
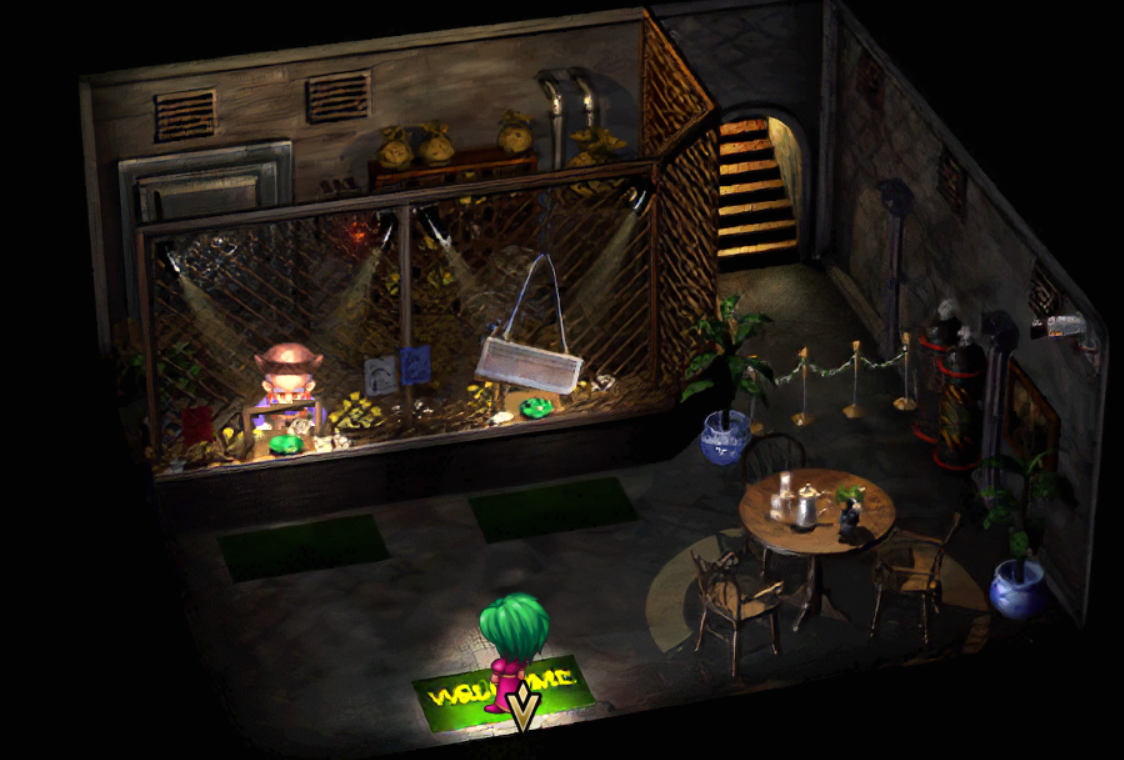
The gimmick is simple but initially confusing. You can hold up to 50 gold ingots at a time. The price you can sell the gold ingots for is higher the more gold ingots you have, and the price goes down the fewer you have. Buying gold ingots is similar, the more gold ingots you have, the more expensive it is to buy them (meaning you literally cannot make a profit buying and selling them solely in Koorong).
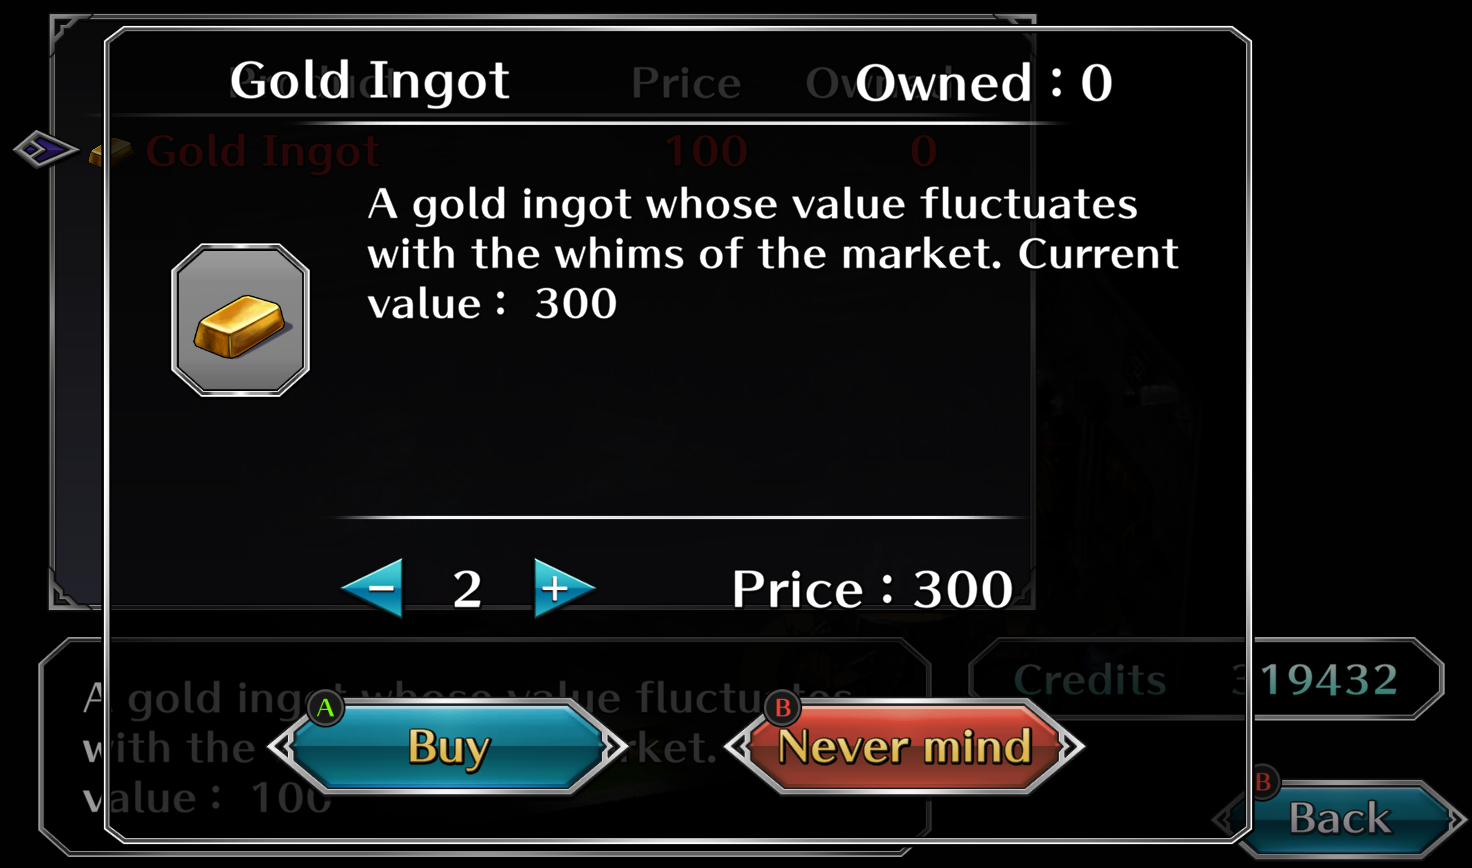
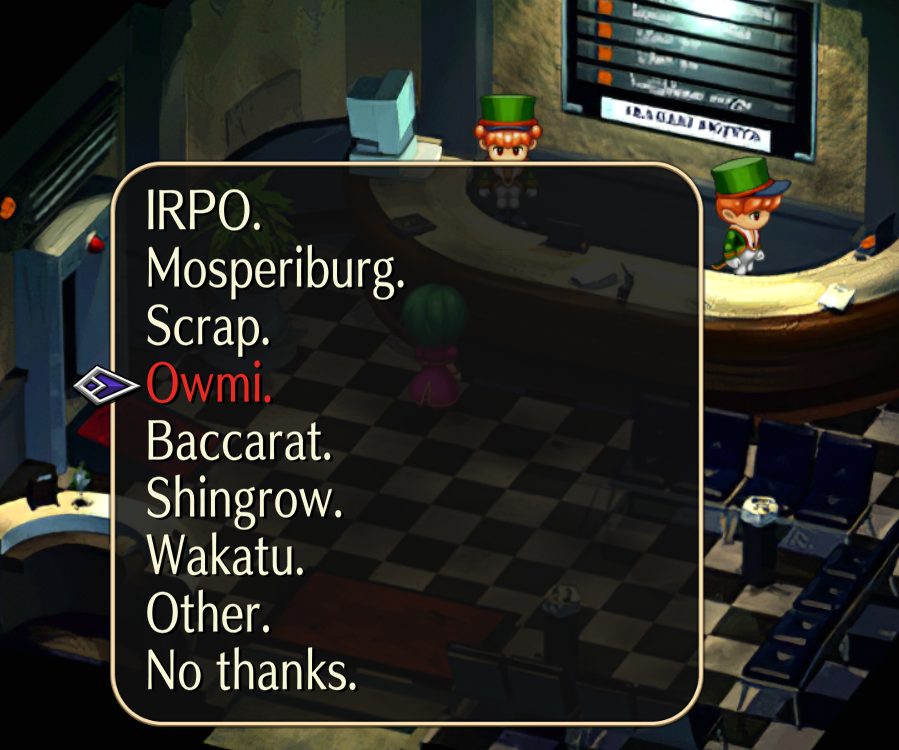
However, what you should do is buy exactly 2 gold ingots from Koorong as shown in the image above (this will cost you exactly 300 credits). Any more and the price will jump over 500 credits, and you never want to buy higher than 500 credits. Now go back to the port, ask to travel to Omwi. From Omwi, you can travel to Nelson.
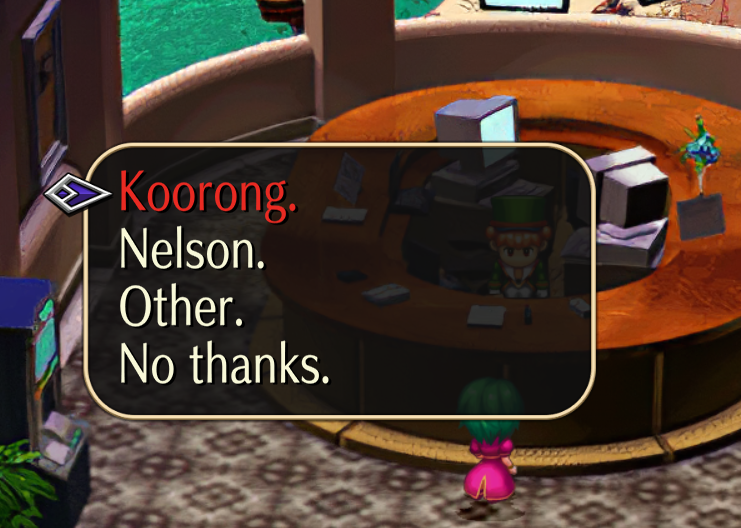
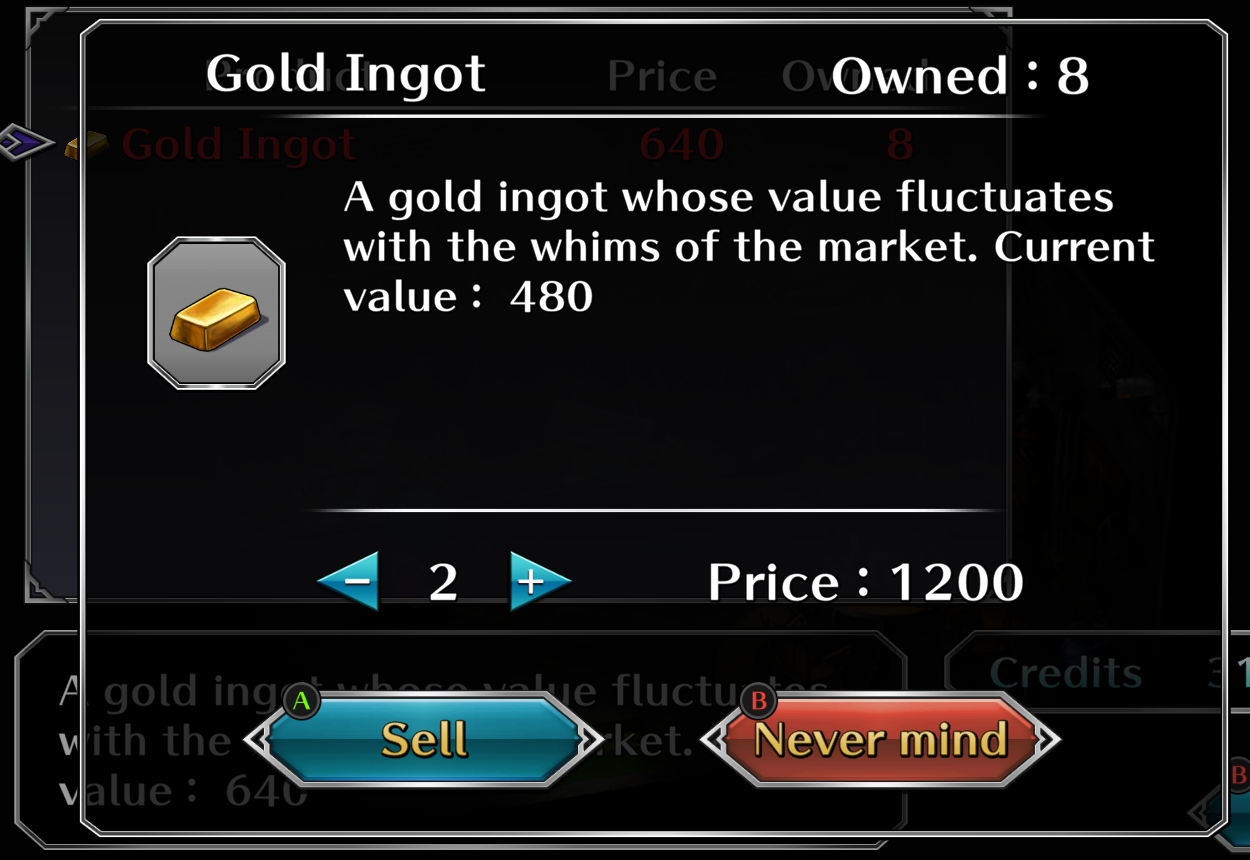
When you get to Nelson, go into the first building. There is a man there, wearing a miner’s hat, that will sell you gold ingots at a flat rate of 500 per ingot, regardless of the price of gold in Koorong. You’ll want to buy all you can from him. The absolute minimum you can have total and still make a worthwhile profit is 8 ingots (which is why I said to get a minimum of 3,300 credits, so you can buy your first two in Koorong for 300, and then another 6 from him for 3,000 credits). If you can afford more, go ahead and buy more, but from here on out I will be assuming that you have only the bare minimum to start this up.
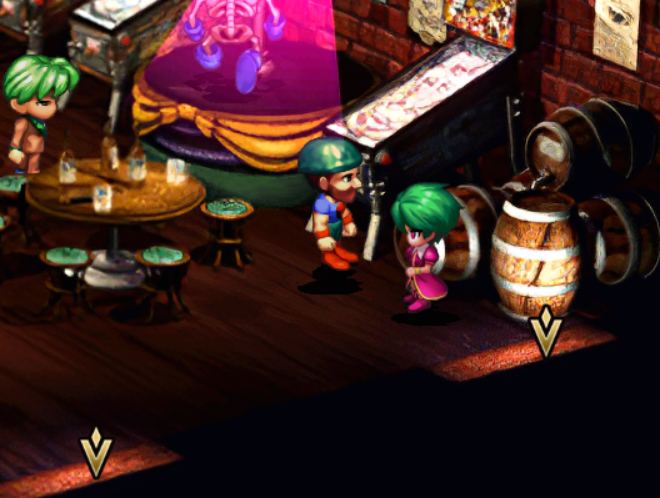
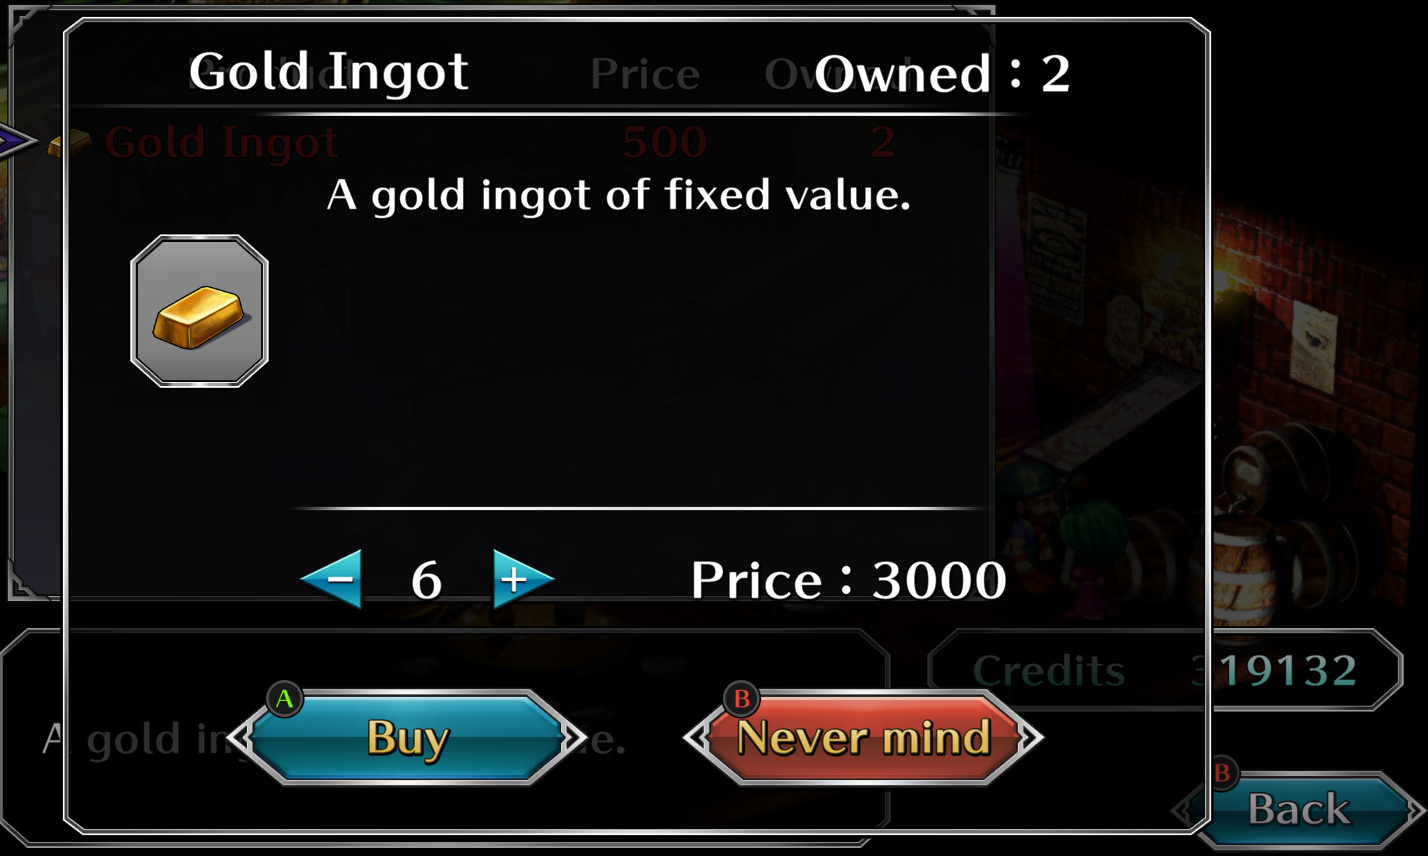
Now return to the gold exchange in Koorong. With 8 ingots in your inventory, the cost of gold has risen. Offer to sell your gold ingots until the price drops to 480 (if you’re using the minimum credits, this means you will sell exactly 2 ingots for a total of 1200 credits). This means you can buy your ingots back in Nelson for 1,000 credits with a 200 credit profit. So we sell two ingots, and then make the trip a couple more times, buying as many ingots as we can each time). The more ingots you have, the more of a profit you can sell them for (again don’t sell at a price below 480). With the minimum initial investment, we’d make 200 credits each time we make the exchange, but after the third time we now have 600 additional credits. Since the guy in Nelson will sell us an ingot for 500, that means we now aren’t just recovering our sold ingots, we are now getting more ingots, so we return to Koorong with 9 ingots instead of 8 and the starting price is now higher again, and we can sell 3 ingots for 1920, giving us a profit of 420 credits per trip.
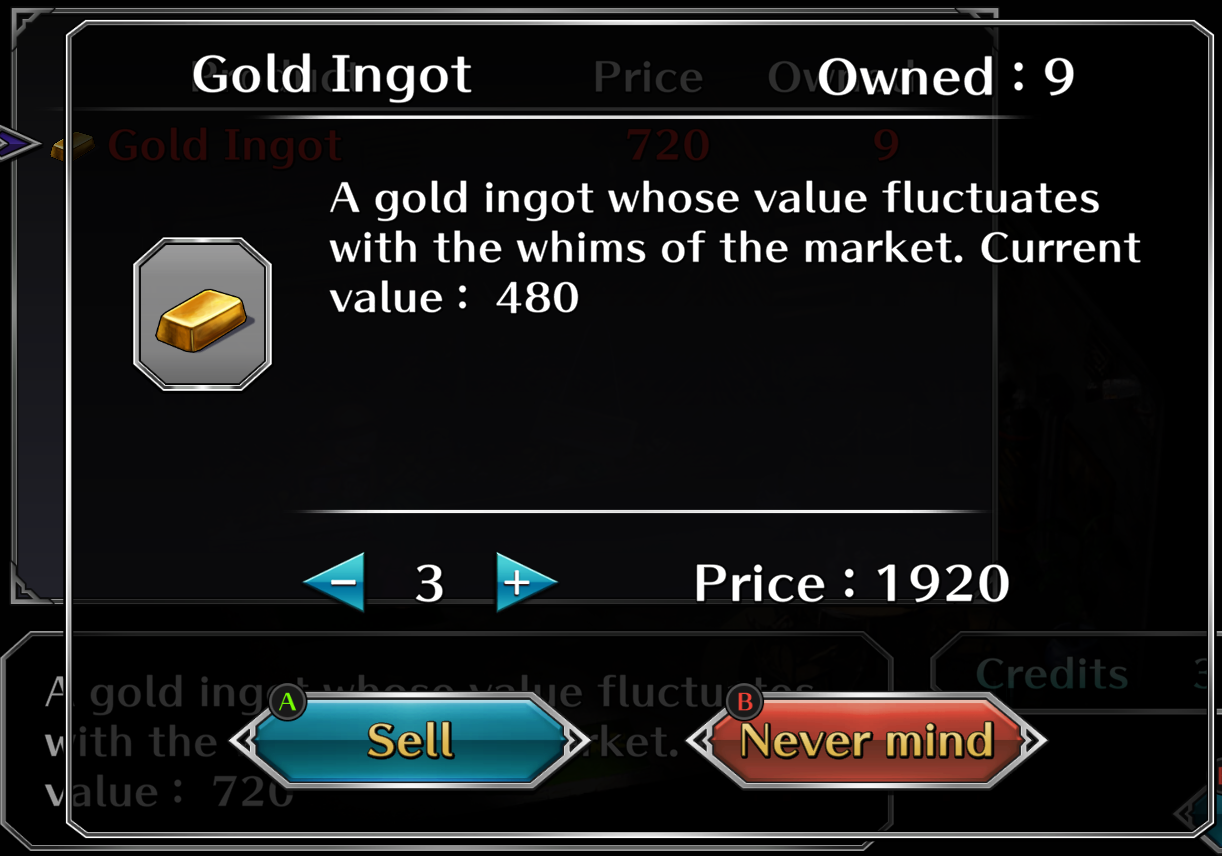
Now it will only take us 2 trips to Nelson before we can buy additional ingots. When we come back with 10 ingots, then it begins to snowball faster and faster. You can see from the images where this is going…
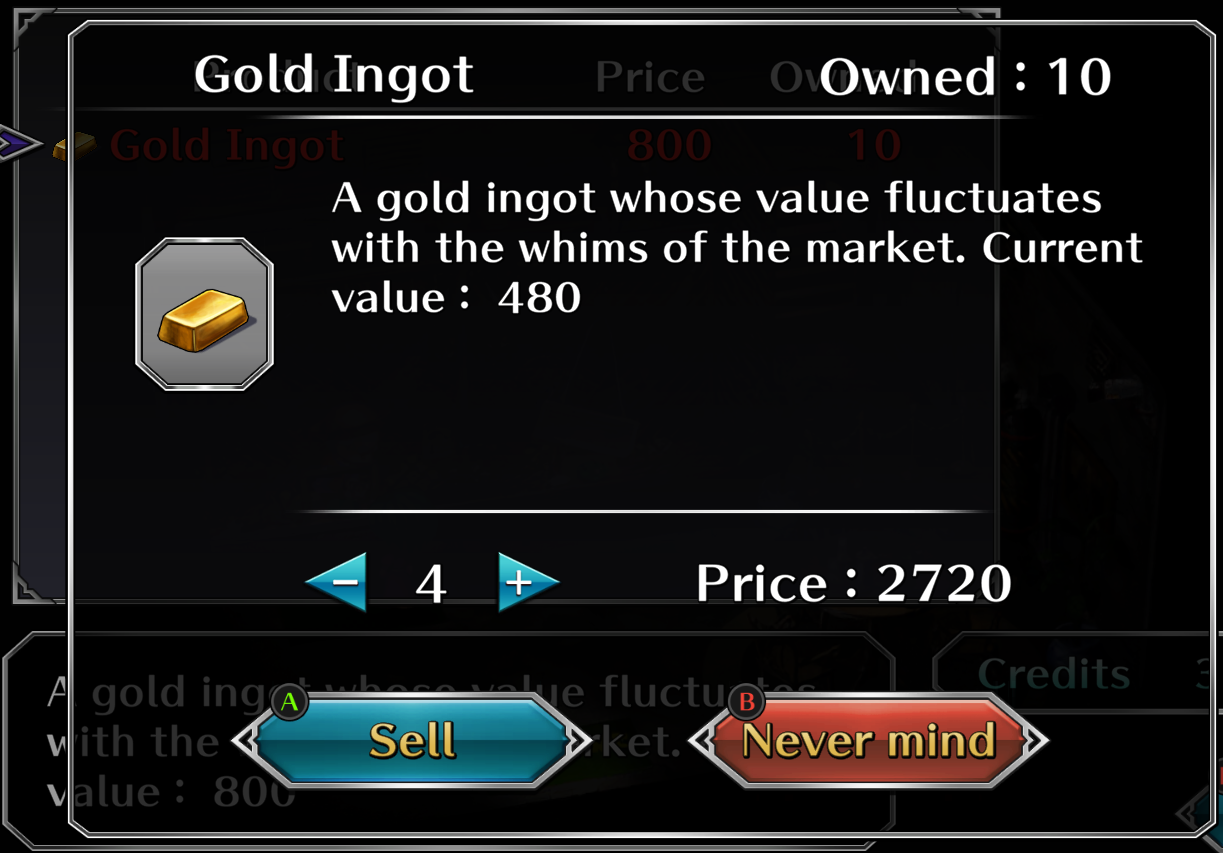
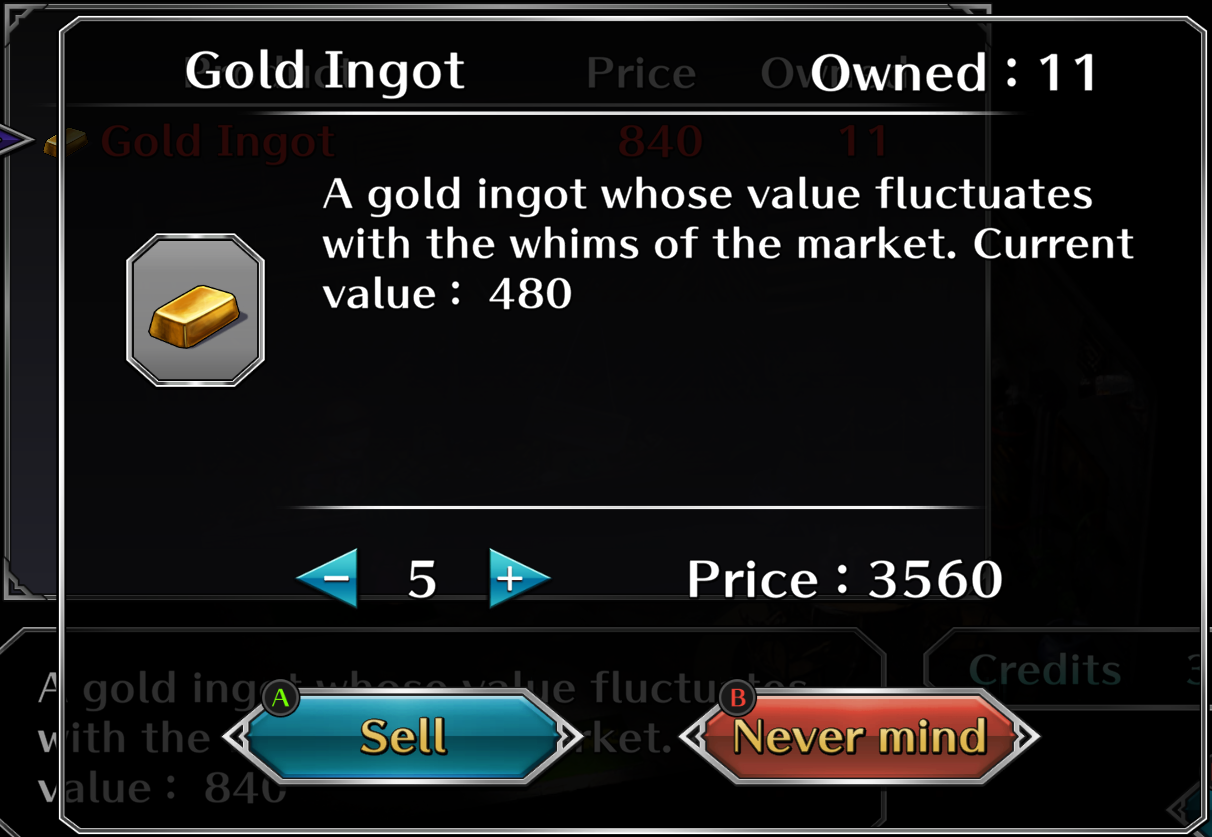
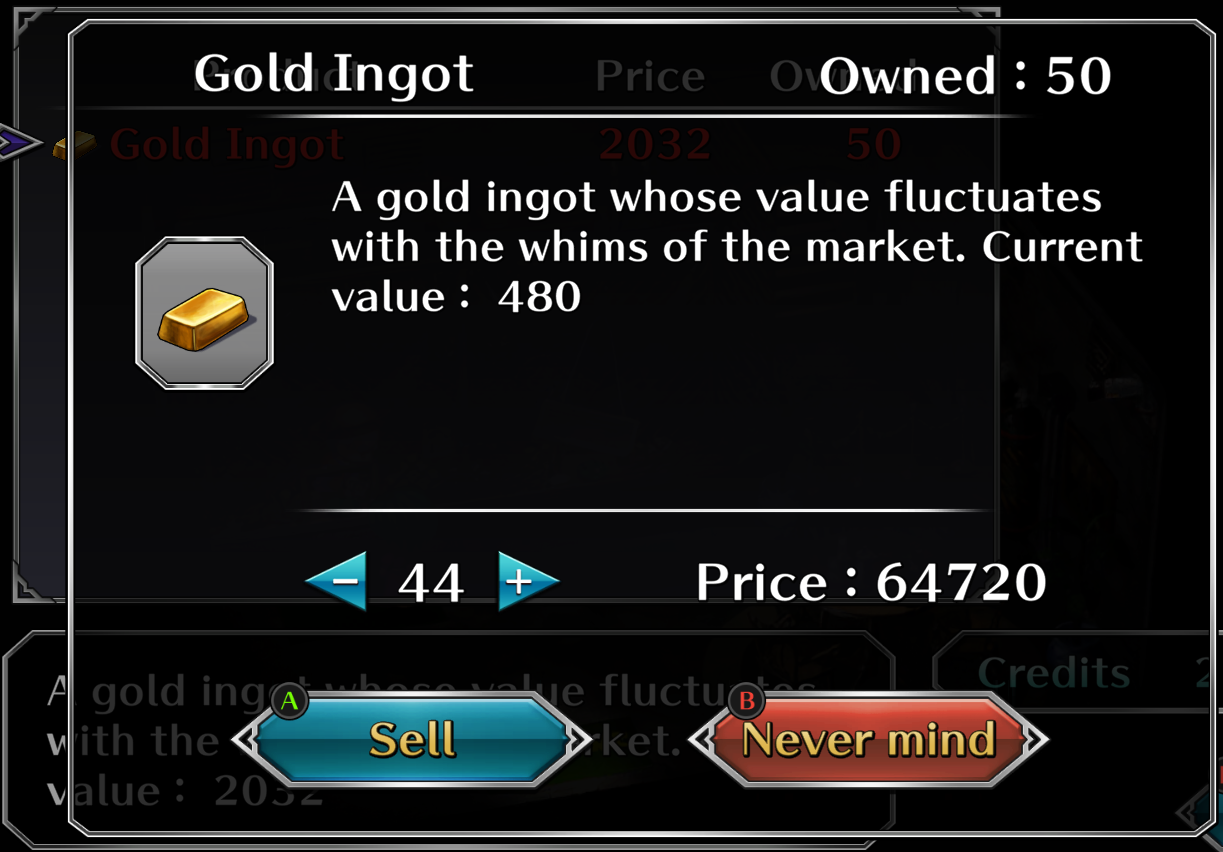
Just stop your selling at 480 and you’ll be rolling in cash in a damn hurry. Once you reach the maximum of 50 gold ingots (which will take less time than you might expect), you can sell 44 at a time before the price drops to 480, netting you a profit of 42,720 credits per trip, and you can just keep 50 gold ingots on you so you can restart the process anytime you want if you get a little spend-crazy during your adventures.
The Best Offense
The original reason I started this guide. IMHO, the most under-appreciated aspect of building your party is their defenses. I’ve done a little diving through lots of old guides for the game and noticed they vary rarely offer helpful itemization information, or if they do, it’s almost always centered around dealing more damage (using things like fang or flower amulets to improve your damage output, using expensive high powered skills with mastery, etc). Problem with that is, you have to be standing to deal damage, and every turn you have to revive someone is an enormous loss in damage output.
For example, let’s say you have a finely oiled killing machine. Except some purple monkey drops a rock on his head and now he’s kinda dead. He’s a 0 hp and loses a life point. Well, while he is in this state, he is dealing exactly 0 damage. He also won’t deal any damage on the turn you revive him. And it’s going to take another party member’s turn to revive him, so they aren’t dealing damage either. And if they revive him, and he (or someone else) gets knocked down again, you can end up with a “death spiral”, where you are frantically just trying to keep your party on their feet while the enemy rips you apart (you can’t actually get a good window to kill the enemy). Worse yet, you’re going through your resources (life points, items, spell points, weapon points, etc) really fast, and this is just some random monkey you bumped into on the way to Mecha Godzilla King Murder or whatever boss you’re trying to reach. Good luck with that.
I’ve been playing through each of the heroes’ stories over the past several days, and it pretty much always ends up with me just casually rolling over bosses like it wasn’t a big deal. In fact, I don’t think I ever even had to stop and heal a party member during Red or Asellus’ end-game boss fights, and was just casually dismantling the enemy with low-tier offensive attacks that I used ’cause combo sparkles are pretty. Believe me, it is so much more relaxing than riding the death spiral.
Resistances, Evade-%, and Element Resist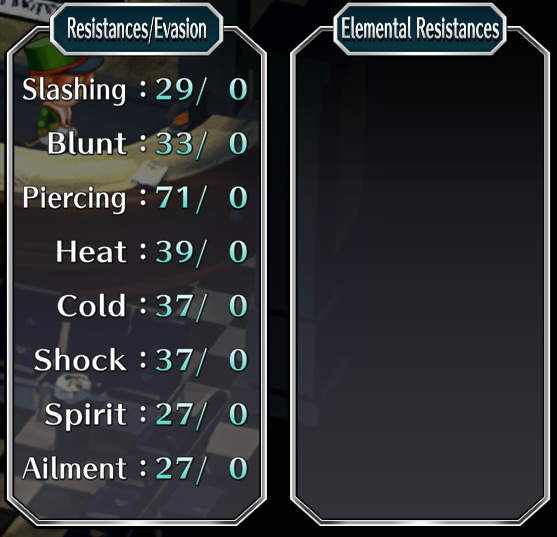
There’s a lot of different kinds of defenses in Saga Frontier, and they are not all super clear on what they do exactly, or how to prioritize them. Lets give them a quick look. As you can see in the image provided to the right, your defenses are sorted by physical type (slashing, blunt, piercing), elemental type (heat, cold, shock, spirit), and ailments (negative status effects). As best as I can tell, these are %-based damage reductions (e.g. if you have a 37 cold resistance, you take 37% less damage from cold). Evasion is roughly how frequently such attacks will be outright negated. You generally see your evasion-% rise by equipping shields. Evade-% isn’t totally accurate in every case (some attacks have a sort of evade-piercing quality, but such attacks are simply harder to evade, I don’t think it ever makes the chance 0% even on crappy shields).
Elemental Resistances are a whole other ballgame. If your character has an elemental resistance, you are outright immune to anything of that element. This is in my opinion the most critical consideration for your defenses, especially mid to late game. Encounters that are essentially impossible can be made into cakewalks with elemental resistances. Let’s have a look at how to use them.
Elemental Resistances
For our example, we will be looking at our helper Mr. Slime. Mr. Slime is a monster that has some very nice innate elemental resistances (it’s too bad the monster’s chassis is so weak).
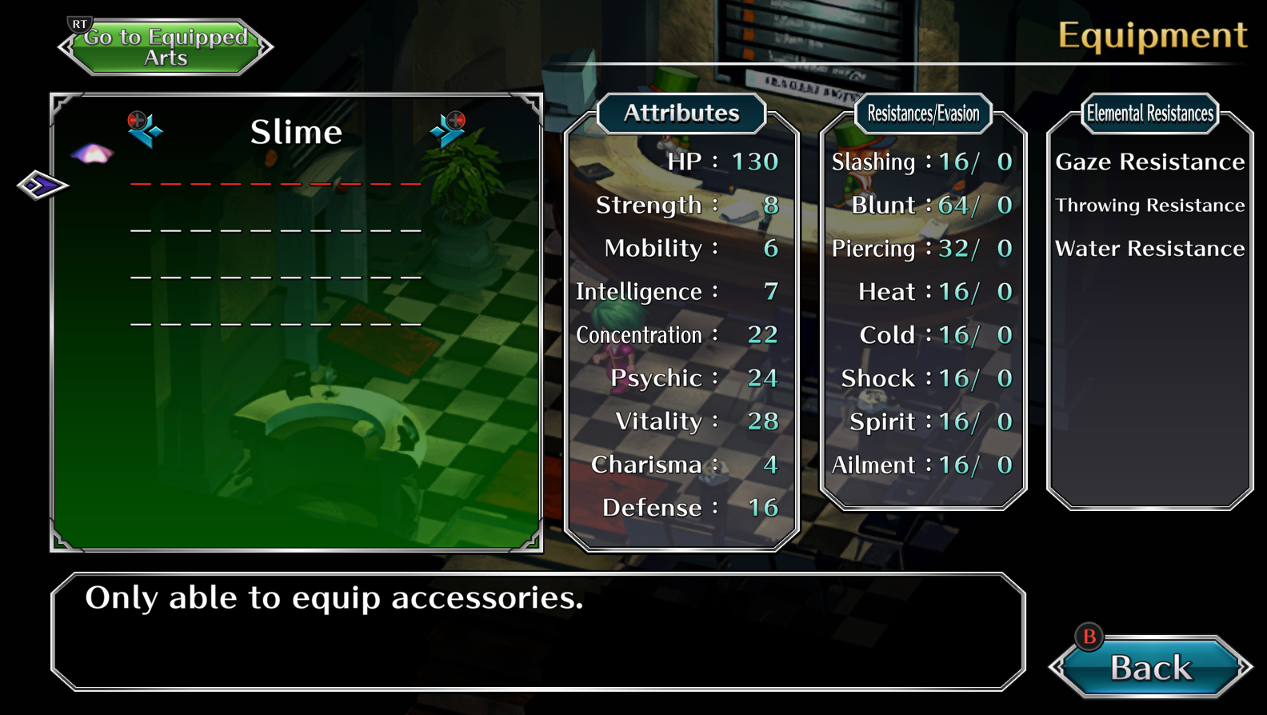
As we can see, he is immune to all gaze-attacks (e.g. charm gaze, hypnotism, etc.), throwing attacks (e.g. tumble, rolling cradle, etc.), and water attacks (e.g. water cannon, acid, even maelstrom – screw you kraken). That’s a big pile of some of the worst abilities in the game right there. But what if we could give http://him…more?
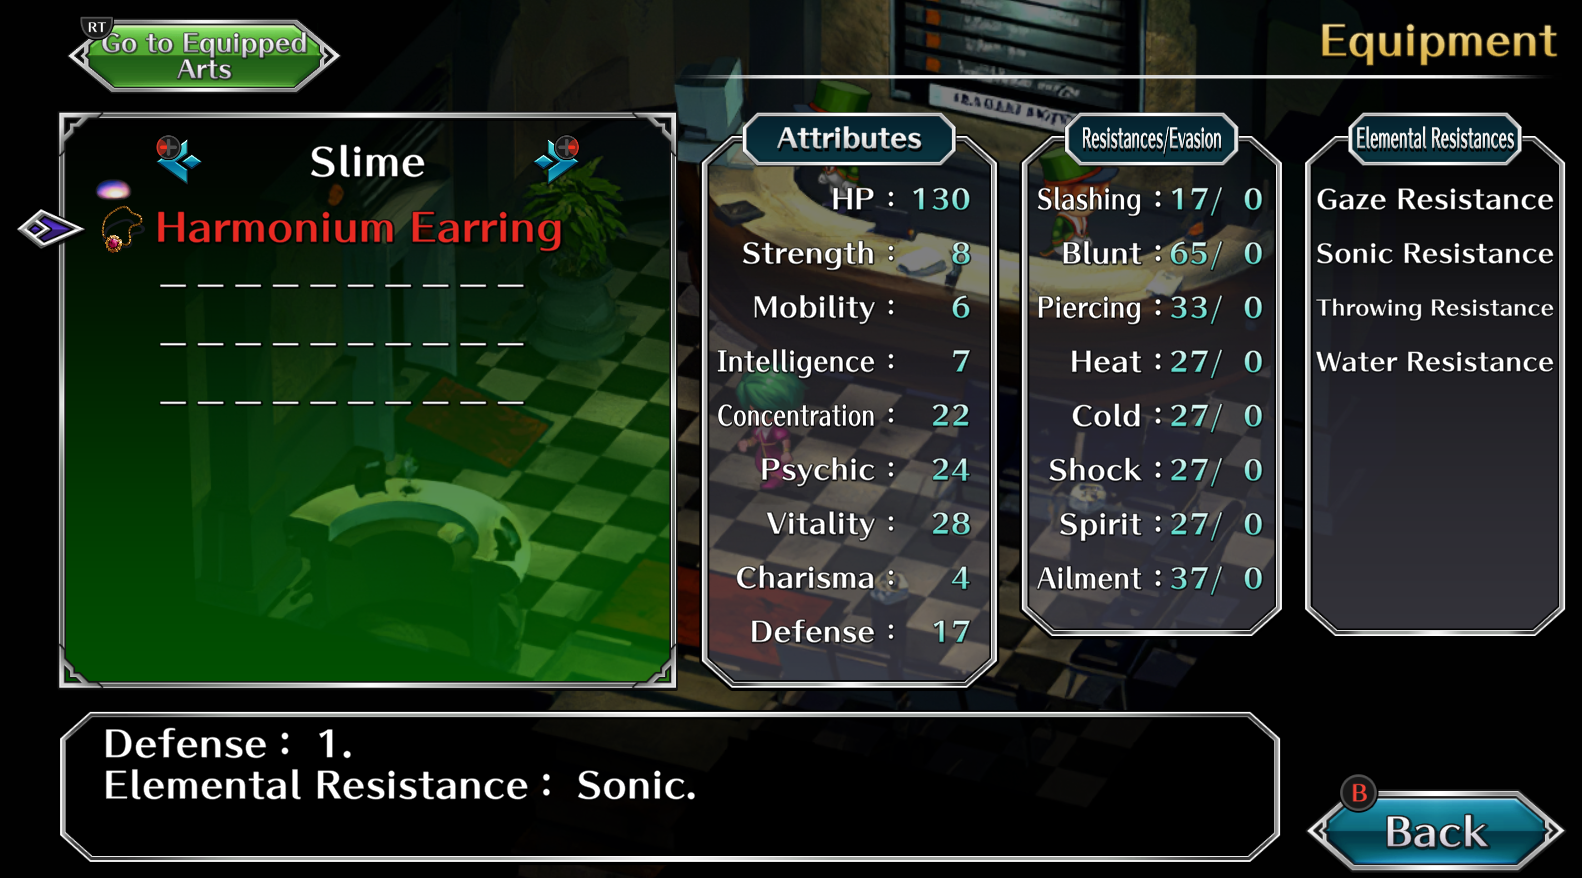
By simply adding this Harmonium Earring accessory, Mr. Slime is now also 100% immune to all sound-based attacks (e.g. scream, supersonic, oscillation, lullaby, etc.). He’s now immune to like 90% of the most awful things to be on the receiving end of in this game.
My Gear
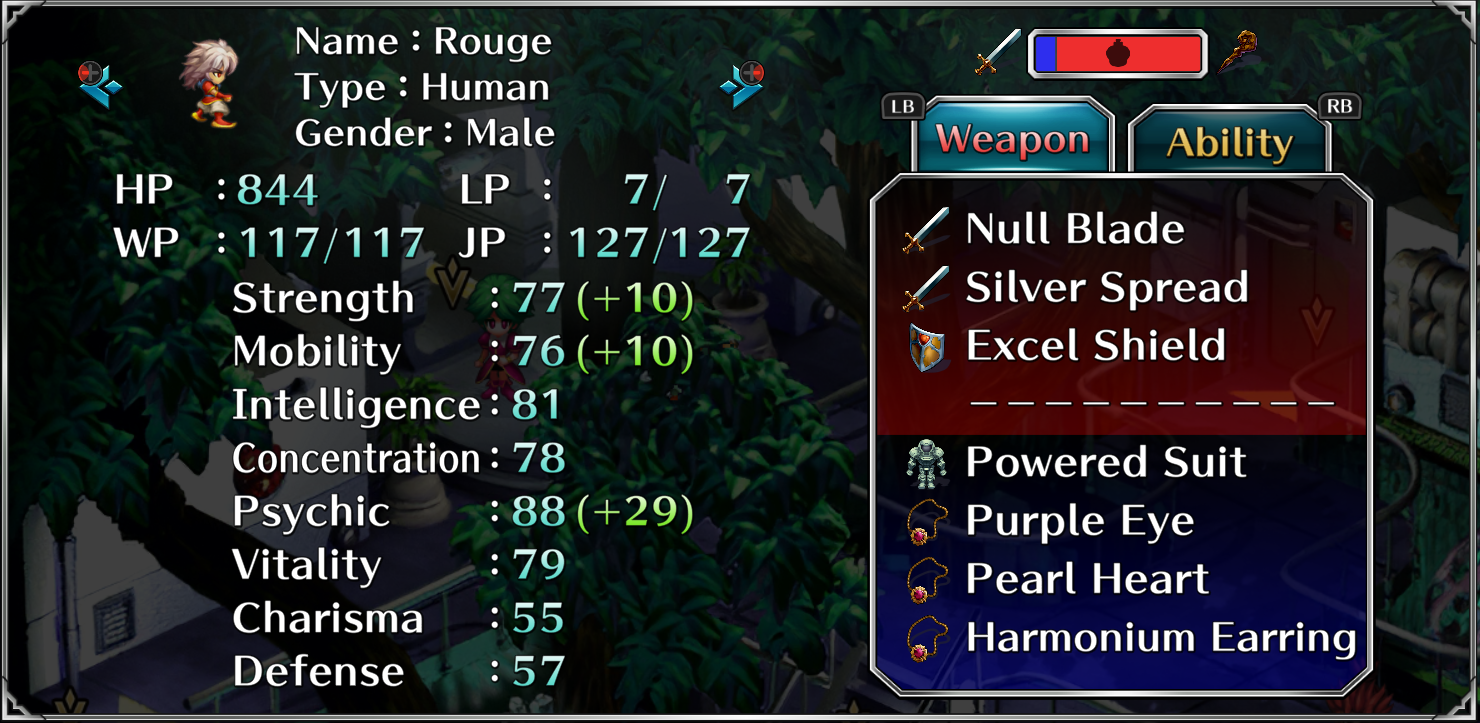
I have most of my party set up with a loadout that looks something like this. This character has good defenses and is immune to blindness, immune to sonic, immune to gaze, and immune to water. You’re basically ready to take on the world. I’ll usually pair these with weapons like Null Swords (60 power).
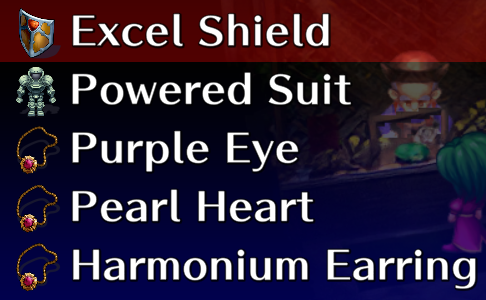
There are some better items that you can find on specific quest lines, but these items are plenty to see you through the final boss of most campaigns and all of them can just be bought for credits (making them available to all characters in all playthroughs, even before New Game+ has been unlocked).
Equipment Checklist
Once you’re rolling in dough, you can just utterly destroy this game by visiting a few places to get well equipped. Most of your gearing up can be done in upper Koorong. In Upper Koorong (right) near the gold exhange and port, there is the medicine merchant, where you can buy healing and recovery items from.

In Upper Koorong (left) near the restaurant and dress shop is a woman selling military grade armors (the real prize here is the power suit, but you can buy gloves, hats, and boots from her and the other vendors in Koorong, for mystics who are stuck in mystic armor). There is also a ladder next to her that leads down into a tunnel (monster free) where they sell guns and swords.

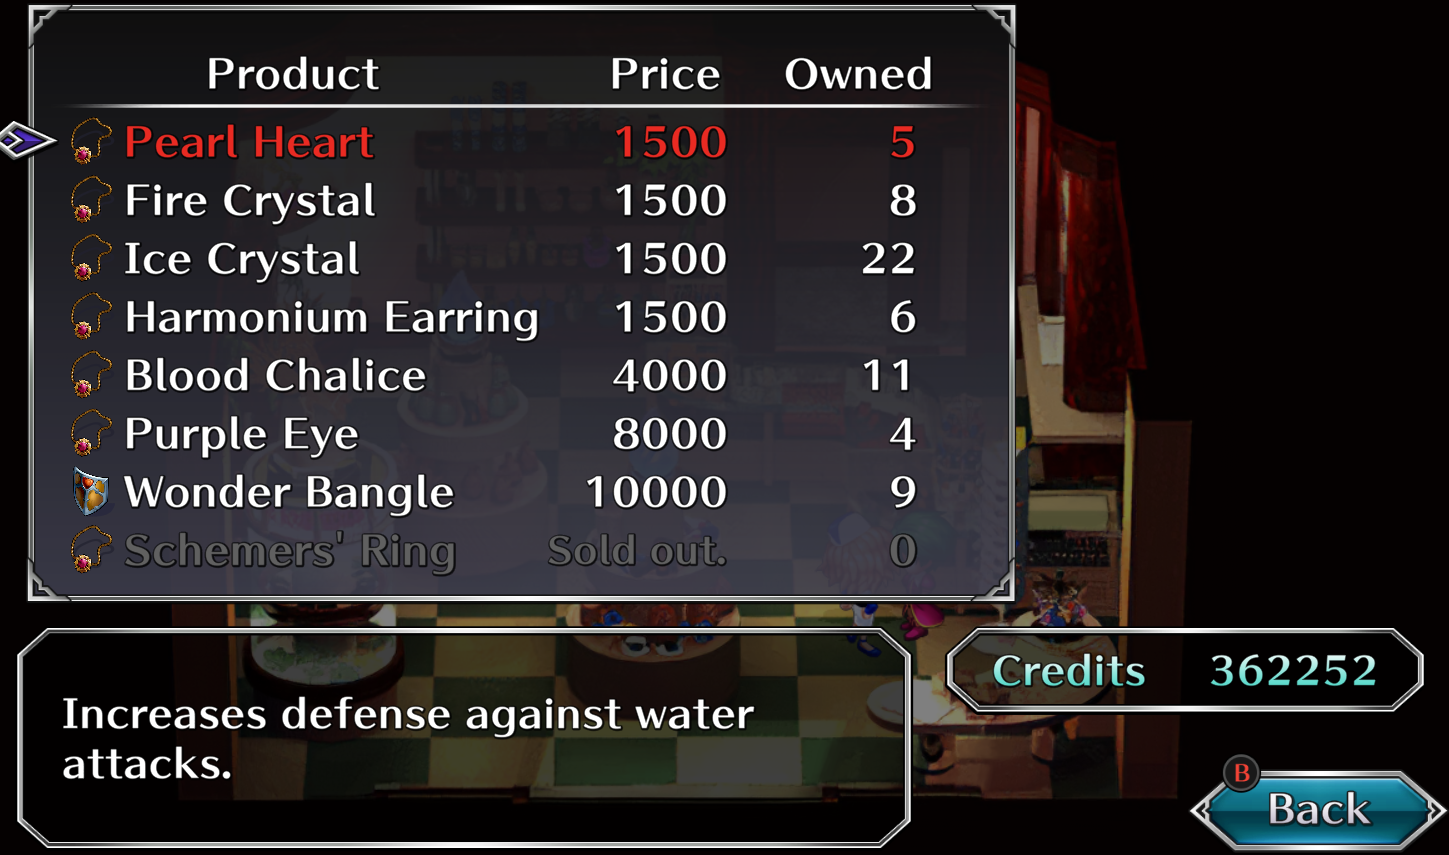
You’re now ready to kill anything that moves and laugh at most attacks, but we’re not done. We need those elemental resistances, so for that we’re heading to Manhattan and the Jewelry store in the Mall. Here you can buy tons of accessories that ward off bad things. In my opinion, the real winners here are Pearl Heart, Harmonium Earring, and Purple Eye, as these will make you totally immune to all Water, Sonic, and Gaze attacks, which in my experience tend to be the worst of the worst when it comes to enemy attacks.
Finally, you’ll want to go to Scrap and check the upper right hand corner of the Junk shop for Junk Armor, where you can buy find Excel Shields in high supply. There are better shields in the game (like the Dullahan Shield), but they generally require a lot of grinding hard foes at a low drop rate, and the Excel Shield is more than capable of taking you through the end game.
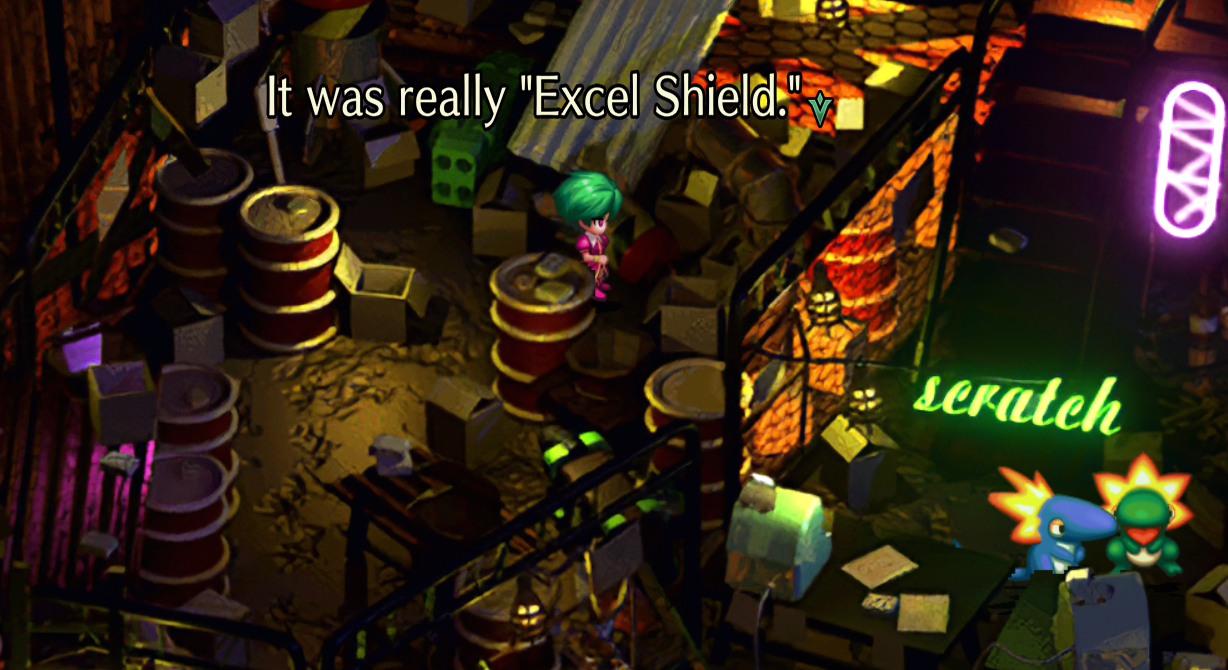
Getting the Excel Shield to appear in the shop can be a little tricky, and there are a few ways. The simplest one is just have 800+ hit points on your main character, but the most reliable way is actually to manipulate how much currency you have and then try to sell something, which sets the hidden values to the ones you want due to the way the game handles some of its internal data. Simply have a number of credits between 1,792 ~ 65,535 or between 67,328 ~ 131,071 (higher values can still work, but it cycles around so if you aren’t finding them you can just increase your credits until you do, or go on a buying spree until you’re within the simpler range). As far as I am aware you needn’t even actually sell anything, simply attempt to do so. Thanks to the Saga Frontier mechanics FAQ on GameFaqs for explaining the credit data trick.
Congratulations, you now have weapons and armor that are more than capable of taking you through the end-game. It is entirely possible to clear pretty much every campaign on just null swords, power suits, trinkets from the mall, and excel shields (honestly you could probably even get by with shell shields bought from Nelson if you don’t want to use the Junk Shop bugs).
Magic Checklist
It might come as a surprise, but I’m not going to tell you to go on an epic quest to get the best magic in the game. You can, and maybe even should just for the fun of it, but to be entirely honest I have run all over 4 of the campaigns so far without ever actually doing anything with the mega magic quests (I did finish the Rune magic quest for Emilia and Asellus but mostly for funsies or because I was killing time until the next Asellus event).
It is entirely possible to function and clear the game effectively with minimal magic investments. In my personal opinion, the most critical spells for arcane and rune magic are actually the ones you can get without even acquiring the gift. My best recommendations for these are:
Light Magic (Luminous)
- Ghale Blast* (requires Gift for light magic to learn)
Rune Magic (Devin, Tent)
- Vitality Rune
- Freedom Rune
Arcane Magic (Devin, Little House)
- Shield
- Grail
Mind Magic (Kyo, Doujou)
- Mind Heal
Optional But Nice
- Saber (Arcane)
- Victory (Rune)
- Sunray (Light)
- Starlight Heal (Light)
- Energy Chain (Realm)
- Psycho Armor (Realm)
- Psychic Prison (Realm, Blue/Rouge only)
These spells are going to be useful for covering everything you’ll need for grinding and boss fights. The Victory Rune is nice, but it’s best for characters focusing on weaponry, so you can actually skip spending a skill slot on it and just give them a Runeblade as an off-hand weapon (your swordsmen will want 2 weapons to use abilities like Twin Ghale anyway) which allows them to cast it themselves, so use the Null Blade for the hitting and the Rune Blade for the casting.
Everything else beyond these is mostly situational or to make you feel like you have the biggest ♥♥♥♥ in the world (even the girls) by using incredible tricks like [Time] Overdrive + [Shadow] Shadow Servant + [Rune] Stasis to take infinite turns. Absolutely astounding but wholly unnecessary to just dominate this game (but the options are there if you want to pursue them)!
My Personal Loadouts and Explanations
I will usually teach Rune Magic to the majority of my team, and leave Arcane Magic to one guy in the party (usually Rouge or a dedicated caster). This is because Grail is situational and won’t come up a whole lot if you’re properly warded against negative status effects, and the Shield spell targets your whole party. However, Victory, Vitality, and Freedom are all single-target spells and you will want to get them up early in an encounter. So the way I open most boss fights is having 4/5 party members cast Vitality Runes on themselves, and my mage cast Shield. Then on the next turn, I have one member cast Vitality on the mage, while the remaining 4 characters do whatever is appropriate (usually delivering a relentless beating too graphic to provide screenshots of).
When your characters have good defenses (good armor, resistances, etc) and solid HP pools, the Vitality rune pays large dividends. I have gone through several end-game boss fights without any of my characters getting KO’d. Pre-end game boss fights are even easier. In many cases bosses were effectively helpless against my heroes, as they would rarely deal more damage than my heroes were healing automatically each round (and if they popped something really big, a simple Mind heal was generally good enough to get them from critical to full health).
I generally will just use Energy Ray (or Saber or Sunray) as a cheap offensive spell (0 if mastered, 1 if not) for general use, and Ghale Blast for everything else. There’s rarely a reason to keep a ton of different damage spells, and Ghale Blast is good for just about everything (targets all foes, hits really hard, and despite its appearance hits with Heat, Cold, and Shock, so little to nothing actually resists it in any meaningful way that they wouldn’t have resisted everything else).
Starlight Heal is a convenience spell. Mind Heal is also good for allowing characters to heal themselves (also removes all status ailments) and has a side benefit of getting a pretty high priority for the AI when they are confused (which means instead of killing your whole party, they might just heal themselves and remove their confusion too).
Psychic Prison makes some boss fights a joke, but is only available if you have Rouge or Blue as a member of your team.
Building Heroes – Skill Loadouts
What will probably come as a shock to many is that I do not recommend specializing your heroes when it comes to skills and character progression. In the early parts of the game I am all on board for having some characters be dedicated martial artists, swordsmen, gunslingers, and mages, if only for that sweet, sweet mastery discount (double vertical for 0 WP is delicious).
However, when it becomes comfortable to do so – and by comfortable I mean you can handle random encounters in backalley Koorong without being in real danger – I recommend diversifying your team’s skills. Start teaching your warriors magic, and your mages combat techniques. There are three major reasons I recommend doing this.
Reason 1 – Flexibility is Power
If each member of your team is the only member of your team that brings a particular strength to your party, if something happens to that team member, your party lost that option entirely. A simple example would be a dedicated mage or healer (if they go down and you have nobody who can pick them up, then you’re just lost out on their contribution and skillset entirely).
This is also important when it comes to damage resistances, and why I suggested diversifying your attacks in the basic tips section. Being able to go from slashing to blunt to piercing to magic attacks on an as-needed basis can help you get around a heavily armored or immune defense.
Without giving away any real spoilers, there is a particularly annoying boss encounter that can be met in a couple of the campaigns which basically just dodges every physical attack you can throw at them and immediately counters it. This is supposed to be a really hard wall for most characters, so much so that the developers actually expect you to lose the first time or two you encounter them and the game can continue on. However, mama didn’t raise no losers here. 100% of my characters just put down their swords and started unleashing Ghale Blast over and over and over until said boss cried to go home.
There’s also something beautiful to be said about having skills like Deflect on every member of your party, including your mages, and the spare WP to use them (and it stacks with the deflect provided by the Light Sword spell, last I checked).
Reason 2 – More Resources
As best as I can tell from playing around with it myself, there comes a point of diminishing returns when it comes to developing your WP and JP. A lower values it develops really quickly, so there’s a good chance that I can probably go from 0 WP / 70 JP to 60 WP / 80 JP in the span of time it would have taken me to hit 0 WP / 90 JP. Or something like that.
This means that you are less likely to run out of juice on a long mission or dungeon run. If you start running low on magic power, have your mage start crushing everything with twin ghale sword skills, or have all your warriors start blasting things with ghale blast.
Reason 3 – Stat Growth
I’m not going to pretend to understand the absolute mechanics of stat growth (or bore you with them if I researched it), but suffice to say that the actions you are taking influence your stat growth. From my own experience, fighting with swords and fists both seem to do great things for your physical stats, and guns seem to do well for some physical and mental stats, and magic does great for your mental stats.
Let me tell you, it’s very, very nice to have mages with high quickness and vitality. It really helps them get off clutch spells like Grail before your charmed or confused companion nukes your entire team into oblivion, or can eat a direct shot from the biggest baddest badguy on the block and just shrug it off and heal through it with Vitality Rune regeneration. The same is true for your front-liners as well. Also, the damage caused by auras (like when you’ve been set on fire) seems to be based on your mental stats like spells, and there is something hilarious about having a giant monster set your entire front-line on fire, dealing a measly 60 damage, only to eat 600+ damage from the very fire they spat on you when they decide to try to hit you with their own physical attacks.
Some Examples from my Games
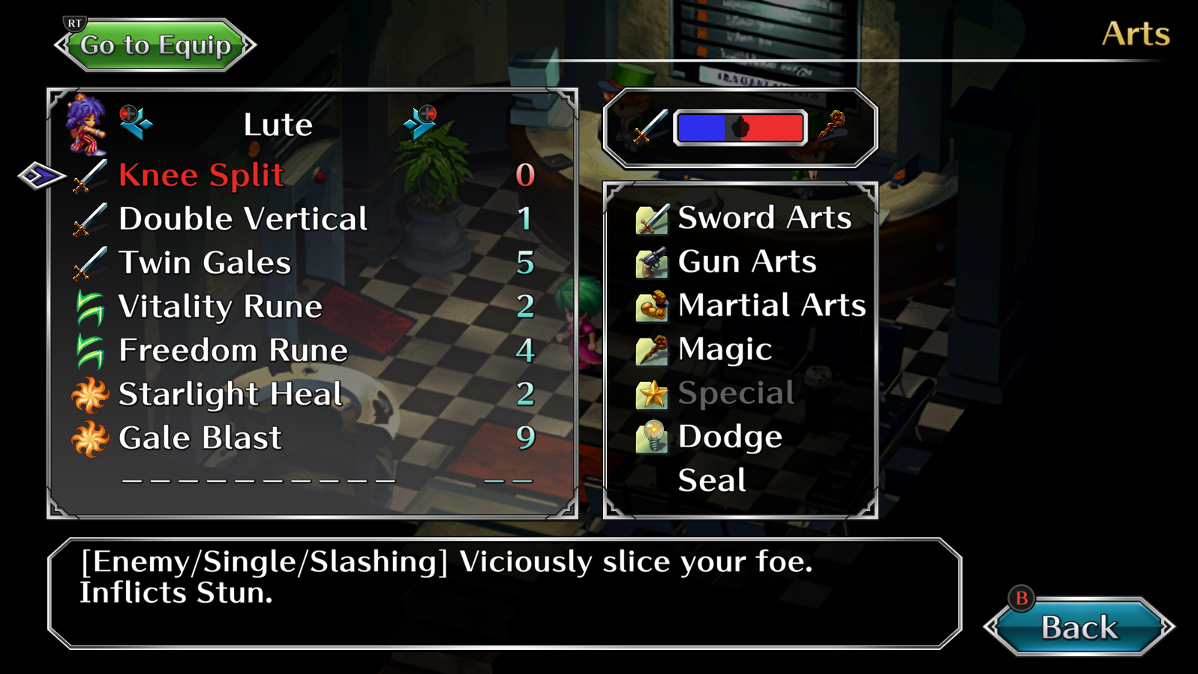
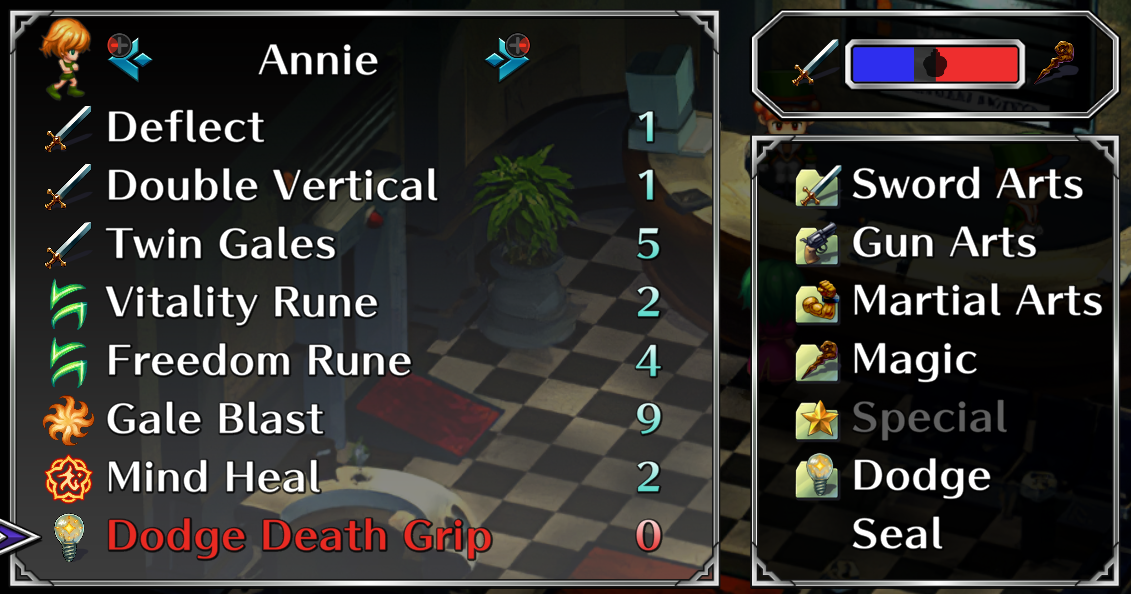
Here’s how characters in my games end up looking by mid to end game. These screens were taken from a party that has already roflstomped the end boss of Asellus’ quest. I just reloaded this game from just before her point of no return. They were able to take the final boss with such ease that I actually (for gits and shiggles) pretty much just held down the “confirm” button for the entire fight after the initial 2-round setup and never actually stopped to heal. Won with no KOs.
Warriors
For general adventuring and grinding, I’ll usually have my front-liners look something like this.
– Deflect
– Double Vertical
– Twin Ghale
– Ghale Blast
– Mind Heal
– (Empty/Optional)
– (Empty/Optional)
– (Empty/Optional)
This gives them a routine low-cost but high powered physical (double assault), a powerful physical AoE (twin ghale), a powerful magic attack (ghale blast) to use in emergencies, and a strong self heal, and deflect because it’s an awesome defensive power. That leaves 3 slots open to spark new skills in during routine encounters.
For bosses, I will generally add Vitality and sometimes Freedom runes and might swap out double vertical for attacks with more oomph, or single-target ranged attacks like swallow slice (if using twin-ghale is wasteful but you need to avoid touching the boss).
Mages
For general adventuring and grinding, I’ll usually have my dedicated mage look something like this.
– Cheap Offensive Spell (Energy Chain, Sunray, Saber)
– Ghale Blast
– Shield
– Grail
– Starlight Heal
– (Empty/Optional)
– (Empty/Optional)
– (Empty/Optional)
I’ll then either fill in with an extra buff (such as Psycho Armor) or Mind Heal (major self heal and status remover), or if I have already had the opportunity to train them with physical combat, I might drop some defensive abilities on them (deflect, sway back, etc), and give them something like twin-ghale, or maybe Light Sword (last I checked the regular Deflect and the Deflect granted by light sword seem to stack for determining how frequently you will parry attacks, which can get silly awesome if you’ve got the WP to sustain it – and you should).
Building Heroes – Grinding!
Grinding can actually be very satisfying in this sort of game, especially due to your characters growing a little stronger after each fight (so rather than grinding and grinding waiting for that next level, your brain gets a delicious hit of dopamine after every fight), and you can see their improvements immediately if in small increments.
The Remastered Edition also gives us a beautiful button to speed up combat to x2 or even x3. For me the ideal pace is x2. It makes battles feel very fast paced and exciting, and the fact you can dump twice as many monsters into a meat grinder and guzzle them down like a super protein smoothie in the same time is icing on the bloody sunday.
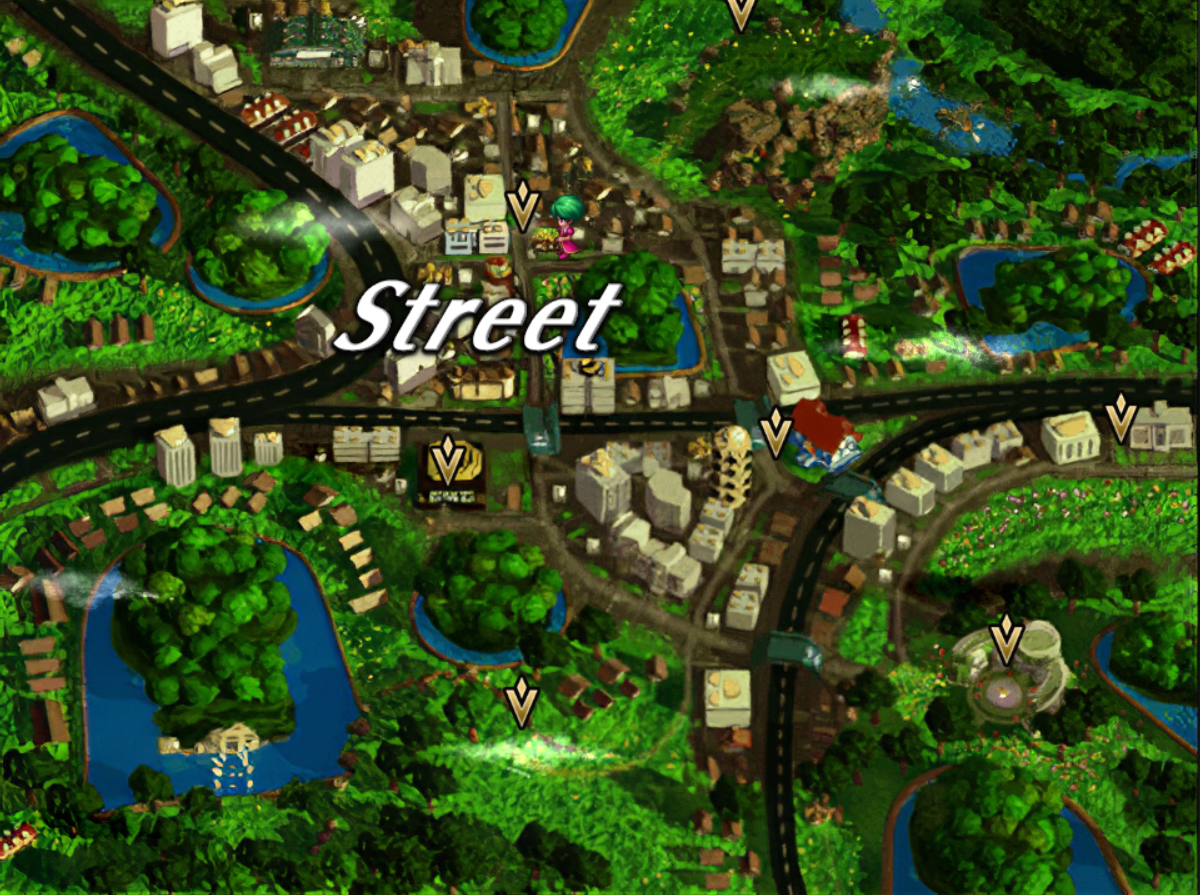
I have exactly two favorite grinding places. The lower koorong backstreets (where you can find the mystic doctor Nusakan), where the three bird-monsters flutter around, and the Bio Laboratory in Shrike. You might wonder why these are my favorites, and the answer is simple.
Koorong never gets particularly hard as it’s essentially the baby-hub of the game. The enemies pretty much cap out at stuff like Wyverns and T-Walkers, so the encounters aren’t particularly troublesome if your party is geared and ready to go. You can walk onto the map, fight the enemies, walk back off, return, repeat. There’s even an inn on the next map, so you can quickly recover when you’re doing some mega grinding.
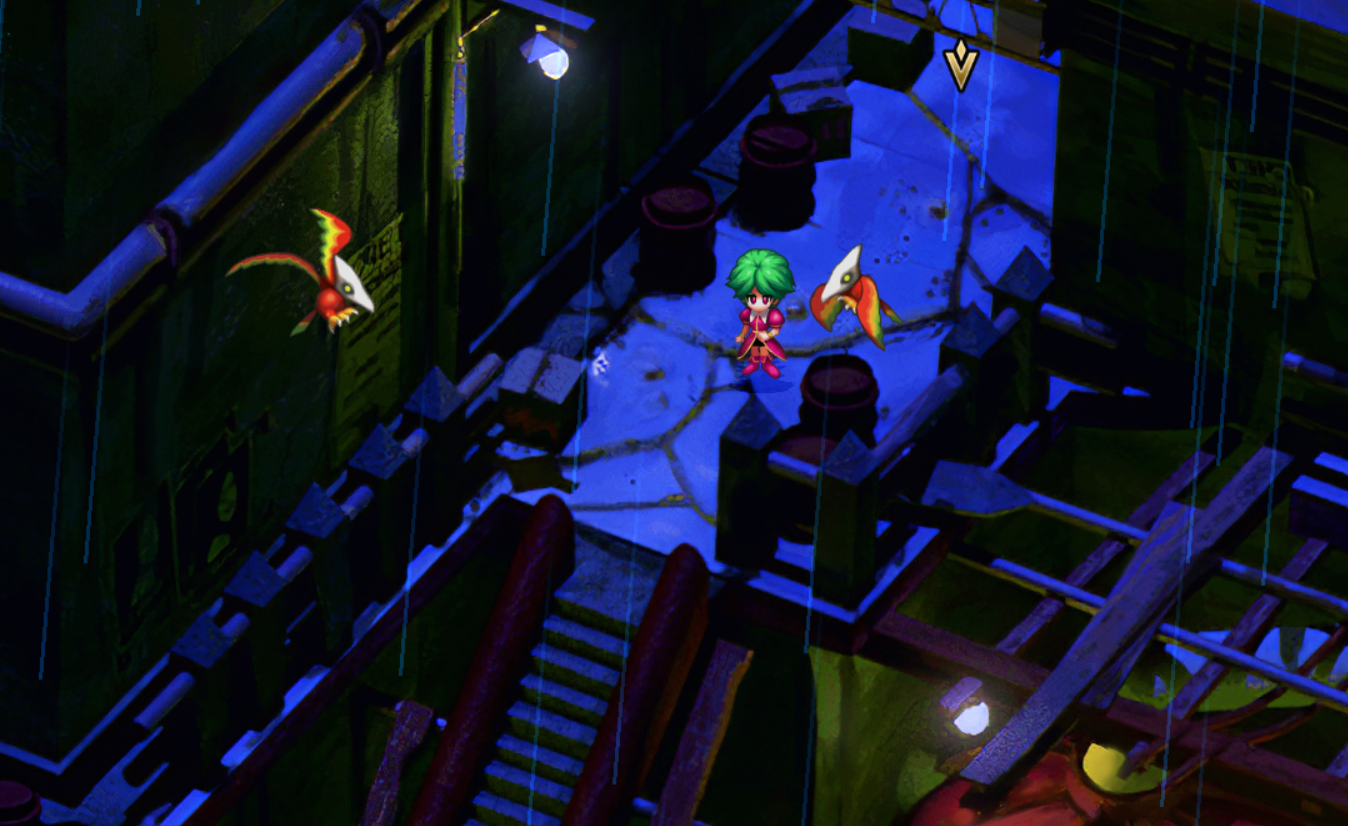
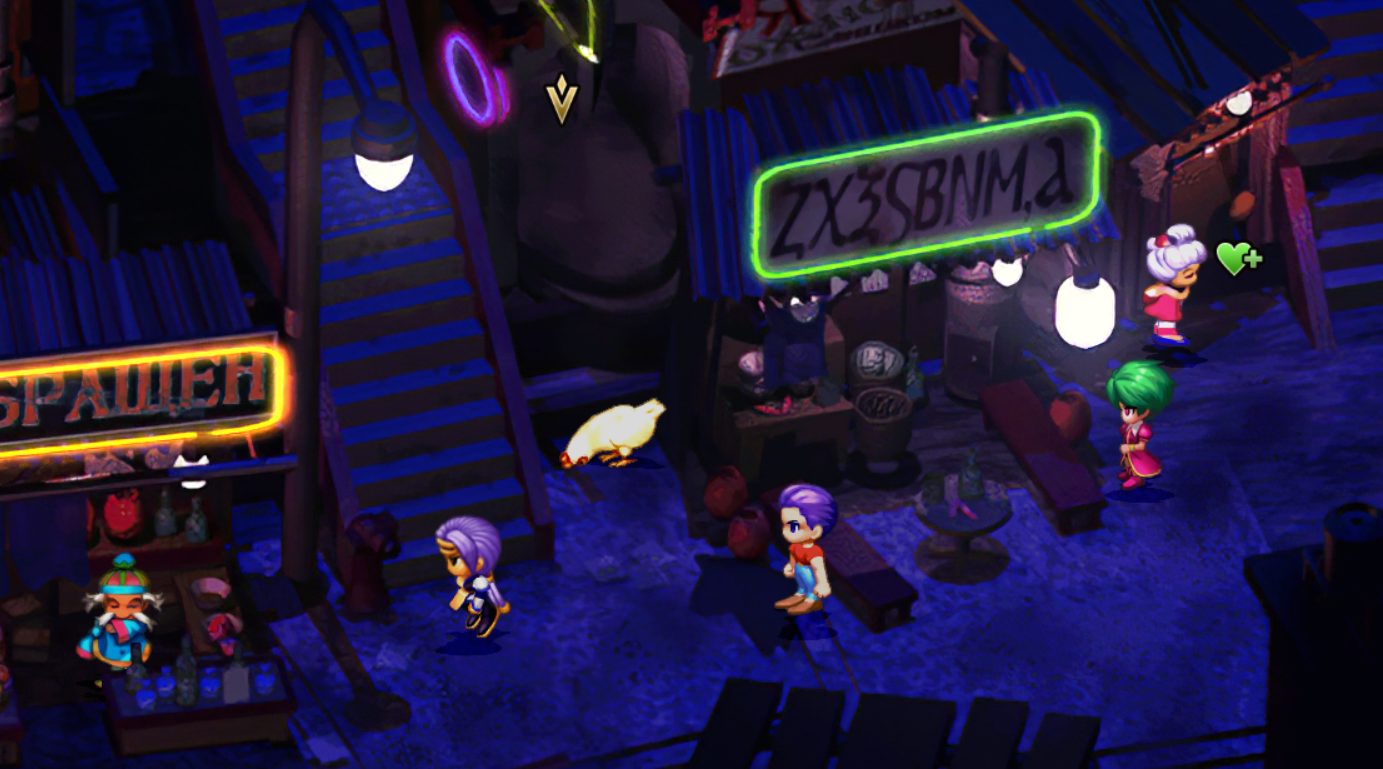
This makes Koorong an ideal place for developing underpowered character traits. When you want your mage to spend some time poking things with his fists, or have your entire party just unload full clips of weak guns at enemies to develop gun skills, or train poor Lute (who began with 0 JP in my game) to become an arch-mage (to train magic onto a character with 0 max JP, you have to give them all magic skills so they get the -1 cost reduction and then spam spells like Sunray like they were going out of style).
While you are here, try to get Tornado Slash/Twin Ghale on all of your characters, and you can also unlock the Light Magic spell Ghale Blast for them as well if you can (you’ll need to get the gift for light magic by doing the Luminous Labyrinth in Luminous). It will come in handy just a bit later…
You can use this area to grind skills and WP/JP, and to level up your statistics into the mid ranges (around 50s I’m pretty sure you can hit without slowing down much) as much as you want, but you will probably not get to “make the end game bosses cry for mercy” leveling here. This is the stepping stone. For the big gains, you need to go to the Bio Research Lab in Shrike. In this fresh hell, you can casually grind your stats incredibly quickly (you can literally go from around 600 hp to around 800 hp in about 15 minutes, it’s kinda crazy), and raise your stats to super high levels too (70+ in everything). Like everything else in this guide, I’ll tell you how to do it without breaking a sweat.
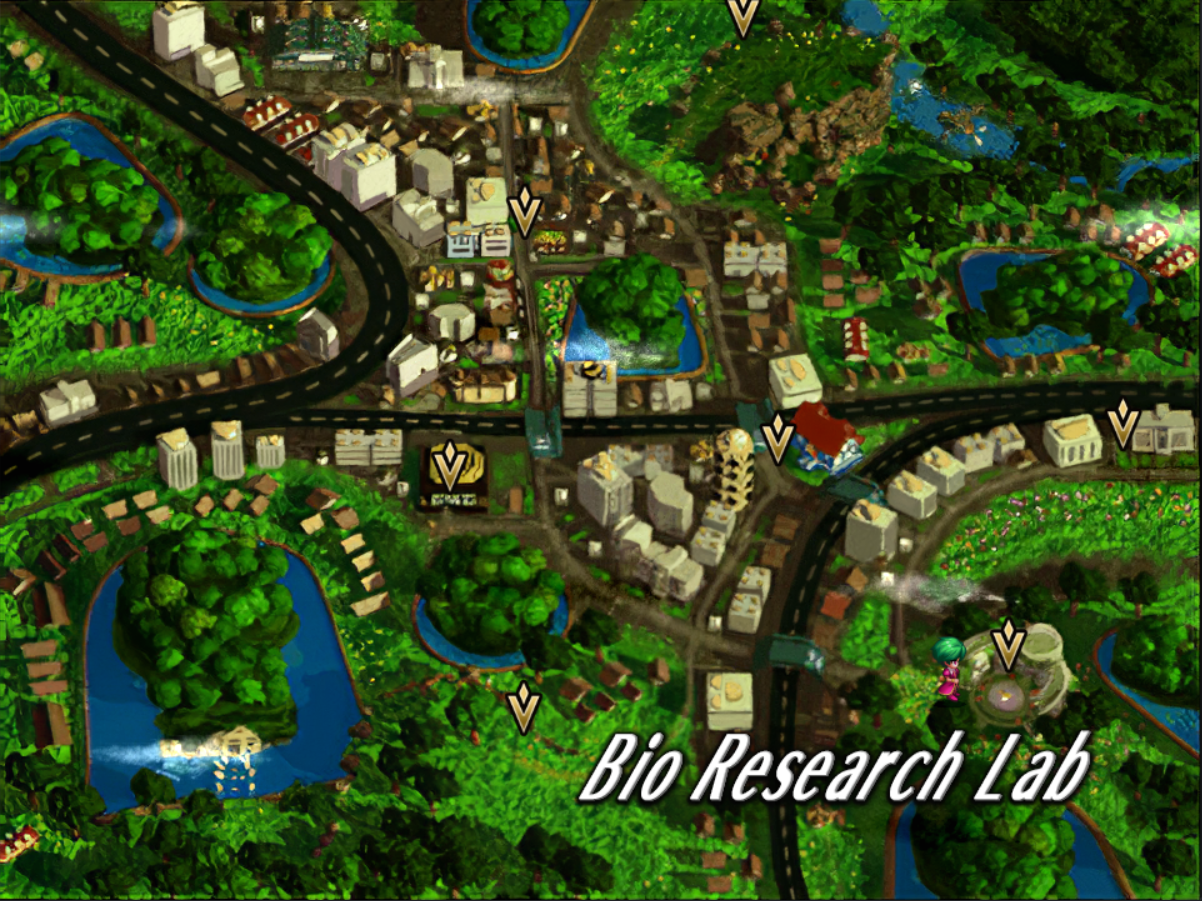
Before you go to the Bio Research Lab, I humbly suggest you equip all of your characters with Twin Ghale (or Tornado Slash if you don’t have Twin Ghale) sword technique and/or the Ghale Blast spell, all of which can be unlocked in the koorong backstreets or just while adventuring. Once you have it on all of your characters, it’s time to break this game wide open. If it’s your first time here, and you’re new, I’d suggest saving before entering (but this guide should have you well prepared for the next step).
Enter the lab, and you will be presented with a beautiful sight. Do not be fooled. Every cute little scientist is full of piss and vinegar fermented in hell’s hot cellar. Fortunately, we only need one of them, and that’s this little guy hiding behind the trees when you first enter the laboratory. See, this little guy is a plant-monster encounter, and I have – through intense and rigorous abuse testing – found that this encounter is more of a quantity over quality sort of deal. The worst enemies that will spawn here are Crystal Trees and flying Thunder Dragons (the thunder dragons would be scary but they won’t be for us).
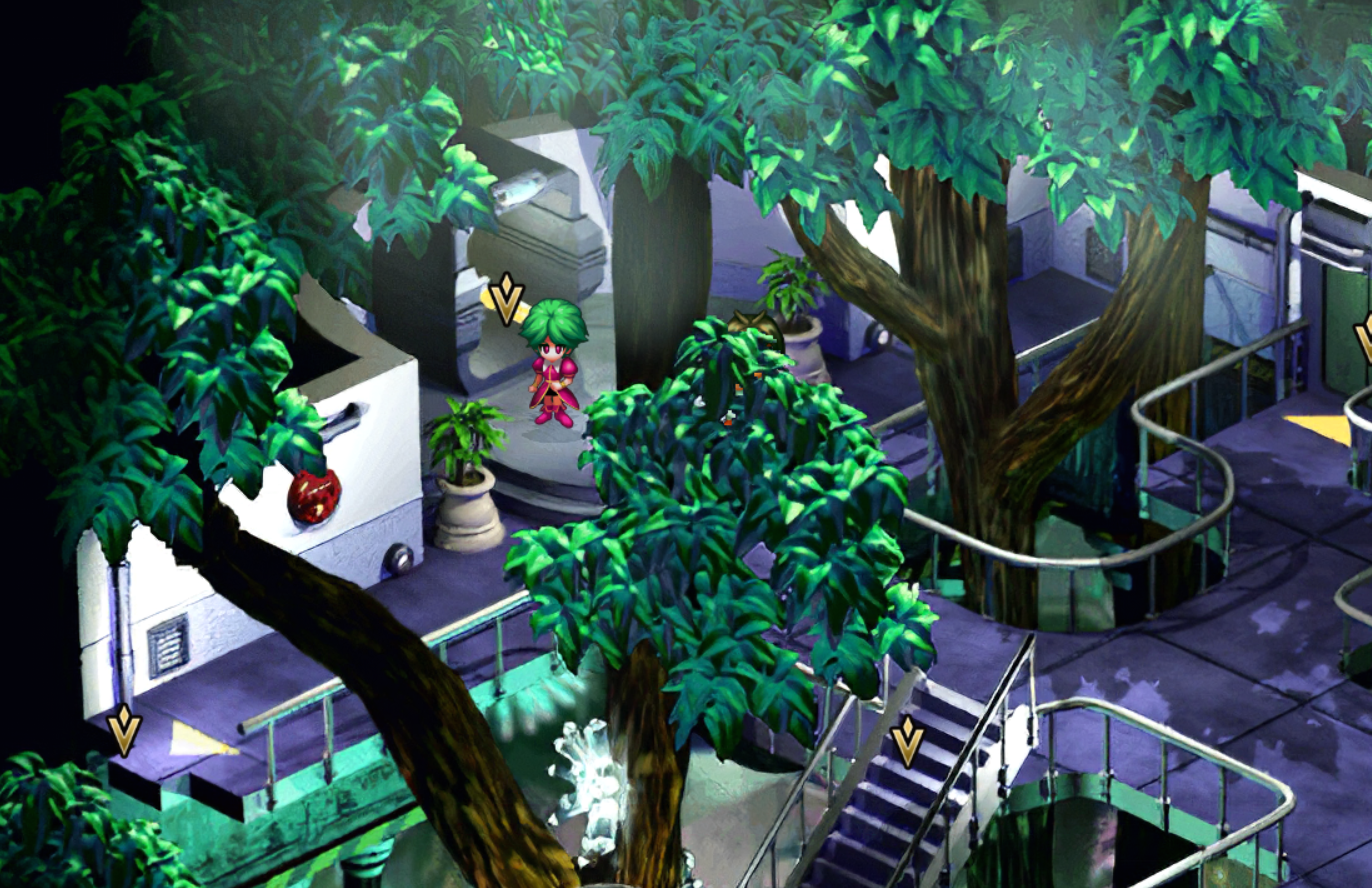
Simply run into this guy and have every member of your party go absolutely ham with their big AoE attacks like Twin Ghale and Ghale Blast. Don’t let up, don’t show mercy. Heck, you don’t even need to use a different attack if only one of them appears. If your party is using any kind of decent gear, you will be throwing over a thousand damage per character at every single foe on the field (and said attacks will generally ignore the defense of the worst foes like the thunder dragons).
When you wipe the floor with everything, simply walk out and then right back into the lab, rinse and repeat. Shrike has a free rest spot on the main street of the city, so when you run low on WP and JP, just hop on over there, take a quick rest, and then come bully the nerds some more. Before you know it, your characters will be rocking stats like these.
Optional – Early Game Shrike
Shrike is one of the premier hubs for adventuring in this game. It has a free inn on the Streets where you can heal up, and three dungeons on its outskirts – Sei’s Tomb, Mu’s Tomb, and the Bio Research Lab. Mu’s Tomb is part of the Rune Magic questline, and the Bio Research Lab is a late game dungeon for grinding your stats (there’s not a lot of treasure just lying around in the lab so just avoid it for now).
However, both Mu’s Tomb and Sei’s Tomb are a good source of early game items and money. Since the enemies are relatively scaled to your progress, you should be able to complete most of the dungeons without triggering their final bosses, and get your party an early leg up in the process.
Mu’s Tomb
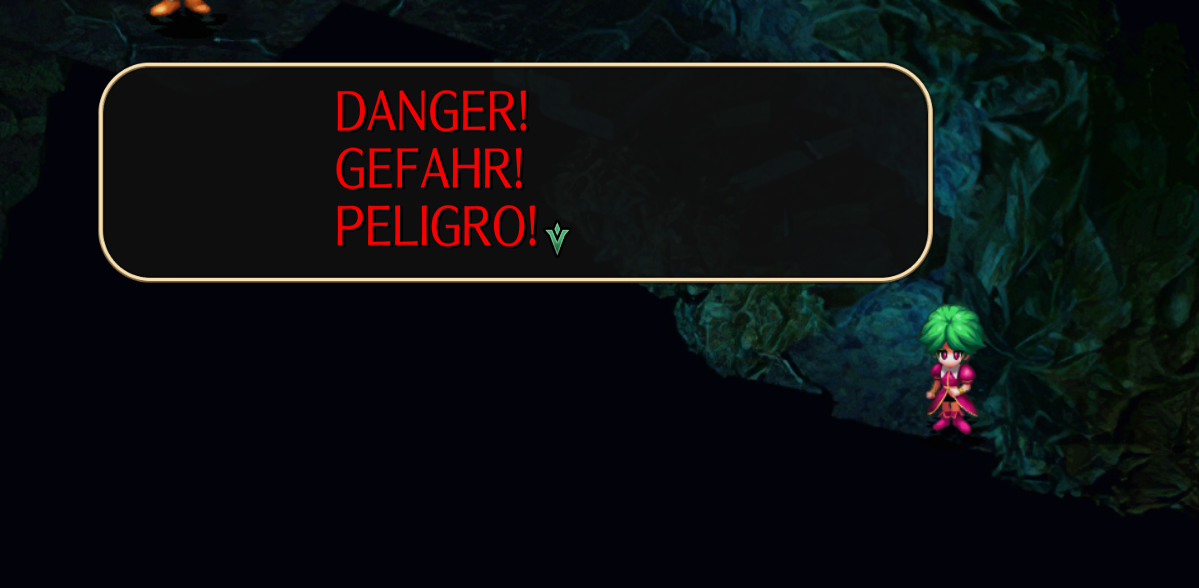
If you’re on the quest for Rune Magic (get it from the rune magic shop in Devin), you can go into the “danger” section of Mu’s Tomb. You can find about 700 credits scattered around, a katana (very strong early game sword), a blood chalice (a good accessory), and a shadow dagger (a good off-hand item for a mage as it raises psychic a bit). While exploring, if you come to a room with a giant pile of monster bones lying there, turn around and leave unless you are ready to challenge the boss for the Victory Rune (you shouldn’t unless you are both ready and have all the friends you want to receive the gift for rune magic, as anyone who misses any of the 4 runes will not get it and you cannot return to the rune locations after you have obtained them).
Sei’s Tomb
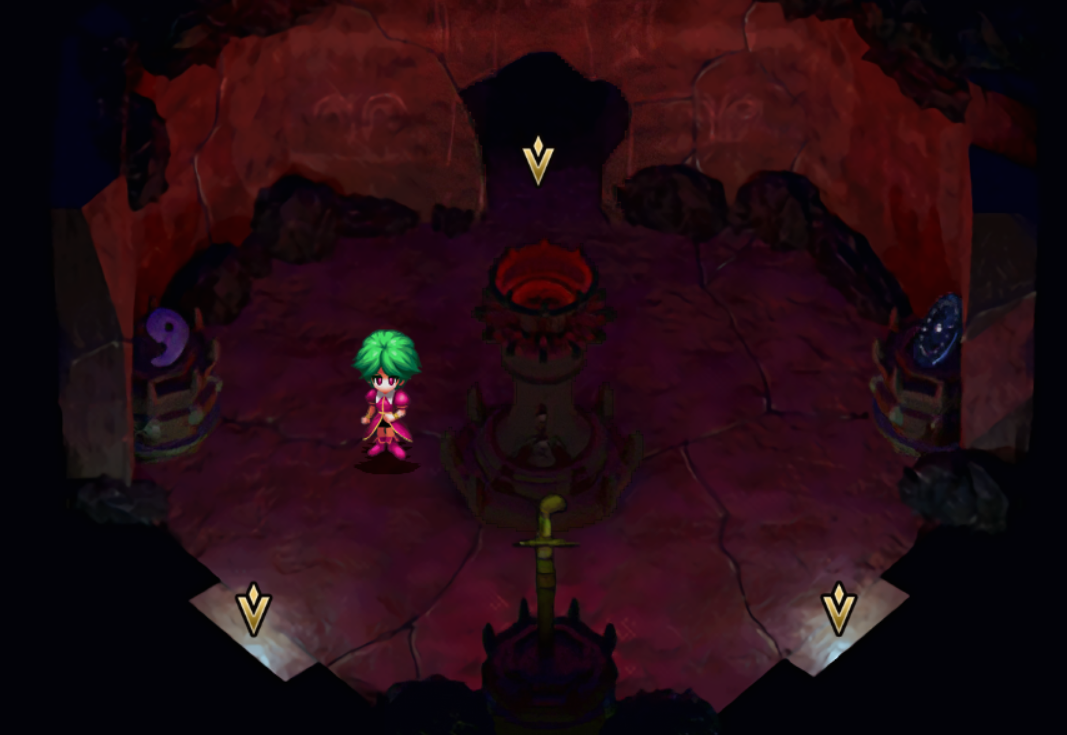
The gist of Sei’s Tomb is you collect three relics hidden in the tomb, then place them upon the glowing alters to open King Sei’s tomb for a major boss battle to get either the super strong Kusangi sword or have the undead lord join your party as a monster.
But you could just…not do that. Early game, King Sei will knock your teeth in, but the monsters wandering the halls should be relatively weak due to battle rank scaling. Each of the relics are guarded by a pair of dead knights, but a full party shouldn’t have too much trouble with them if you are even modestly prepared. Each of the relics is actually a really good item on its own, so just leave with the relics and return later when they have fallen out of style and you’ve got your big girl/boy pants on.
Optional – Early Game Shingrow Ruins
Shingrow has a pair of dungeons that are pretty good for early game, but the real winner for the earliest of early game play is western ruins. As far as I know, for most characters except for T260G there’s no special significance to this dungeon, nor are there any boss fights that I am aware of (none that I wandered into while exploring it anyway).
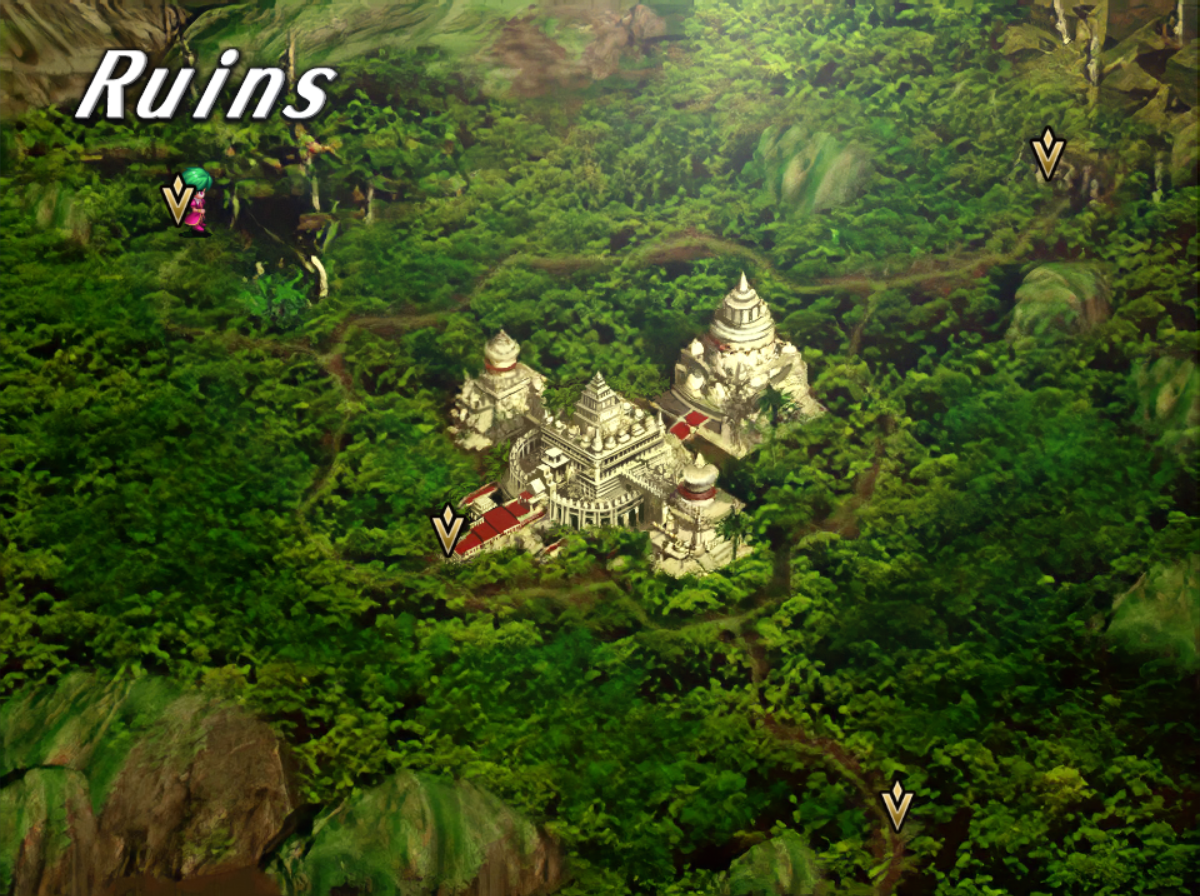
This place has some really amazing early game loot just lying around. Since there’s no forced battles, there’s not really anything stopping you from just fleeing every encounter you come across to casually walk through the dungeon and take all of it. Cheesy, but delicious. Depending on your party’s strengths you might not need to run at all (but an ill-prepared party should definitely avoid the bats unless well guarded against sonic attacks).
Inside this dungeon you can find a lot of credits lying around (something like 1200 total), a Jump Suit armor, Memory Board for your mechs, a Hyper Scale armor, a Bolt Thrower heavy gun, and a Duelist Pistol. Even if you don’t want them, the Hyper Scale and Duelist Pistol can be sold in Scrap for 2000 and 3500 credits respectively. This means all you have to do to begin the gold exchange process (see Making Money – On a Budget in the table of contents) is just visit this dungeon and pick up the loot and sell it. Then you will be rolling in credits. Not bad for just visiting and taking a casual stroll through an ancient ship.
Optional – The Junk Shop Trick
This one is pretty famous (there’s already a half dozen guides for it floating around) but I wanted to include it here for completion’s sake.
Basically, the junk shop in scrap is a grossly overpriced pile of trash, where you dump a sum of your hard earned lucre all over these greedy lizards and they let you rummage through their garbage in hopes you find something beyond the rejects from an antique roadshow.
HOWEVER
It can also be an unlimited source of legitimately decent gear, because of an exploit so ingrained in the fanbase of this game that the devs left it in the remaster as a feature rather than fixing it. Thanks devs, we appreciate it.
Performing the Technique
Simply enter the shop, pay them what they ask, and then go collect your goodies. Then, before leaving, return to the counter and tell them you would like to sell a Hyperion. If you do have one, simply don’t complete the sale, and if you don’t have one, it won’t matter. Just try to select it. Then leave the trade window and walk back into the junk heap, and you will find that you can select 7 more items from the heap. When you’ve hit your limit, simply go try to sell them the Hyperion again, and repeat.
The quality of the items you can find mostly depends on the max Hp of your main character, but all of that is completely negated when you try to sell an item, because of some beautiful snafus in the game’s code, telling them that you would like to sell a repair kit (if you have a repair kit and you should have a repair kit since you find them left and right in the junk pile) will cause the game to instead check your current credits. A value of 1,792 ~ 65,535 credits in your account will result in the best items available. The information about credits affecting the item quality was gleaned from the wonderful gamefaqs.gamespot.com – https://gamefaqs.gamespot.com/ps/198537-saga-frontier/faqs/58412 on GameFAQs. Credit where it is due. ♥
This means that if you’re at the beginning of the game and are broke (such as when playing Riki), you can sell off the unwanted Repair Kits to the merchants until you have around 1800 credits and then you’ll get the best items you can find. Items at this tier include…
– High Frequency Sword (Sword)
– Cyber Suit (Suit)
– Excel Shield (Shield)
– Thunderbolt (Heavy Weapon)
– Lethal Dragoon (Gun)
– Mirror Glass (Helmet)
Most of these items are really darn good early to mid game. The Cyber Suit is essentially the poor-man’s Powered Armor, the Excel Shield is the best shield money can buy (and is good enough to take into the end game), and the Lethal Dragoon is (I think) the most powerful non-heavy firearm you can buy (it is also available for sale in Koorong). The Thunderbolt is a legitimately powerful heavy weapon as well, and ideal to drop on a Mech early game.
Optional – New Game + Exploits
The New Game+ is an amazing new feature of the Remastered edition of Saga Frontier. It is unlocked when you beat a hero’s campaign for the first time. It’s also quite useful for getting a head start on each subsequent playthrough, or amassing a consolidated collection of the wondrous artifacts scattered through the different campaigns. It can also be used to get multiple copies of certain special weapons and armors.
For example…
Phantasm Farming
The Phantasm (formerly Asura in the PS1 version) is a sword that is available in Asellus’ quest before you leave Fascinaturu. You have to have White Rose in your party, and then speak to the ogre fellow in the house in Rootville. The Ogre is a smith that uses Life Points as currency. Buying items from him will permanently drain your character of Life Points, so that sucks. However, he does sell some good items, the most noteworthy being the aforementioned Phantasm which is an exceptionally powerful (70 power) sword with special attack animations and a built in counter attack.
If you have New Game + unlocked, you can get as many of these swords as you wish, by starting a NG+ as Asellus, then going and buying the items you want (coughing up your precious life points in the process). Once you have, save, and then start another NG+, importing your data from the previous save. You will begin the game with the Phantasm, without having to vomit up your life force for it. If you have the patience for it, you can do this multiple times to get +1 phantasm each time, if you don’t mind going through the intro multiple times.
Other Considerations
For the truly elitist of completionists, you can also replay through the campaigns to amass multiples of other rare items such as the Kusangi, Lion Sword, Spriggan Suit, unique Trinkets found in some heroes quests (such as the Angel Brooch in Emelia’s quest), and so on.
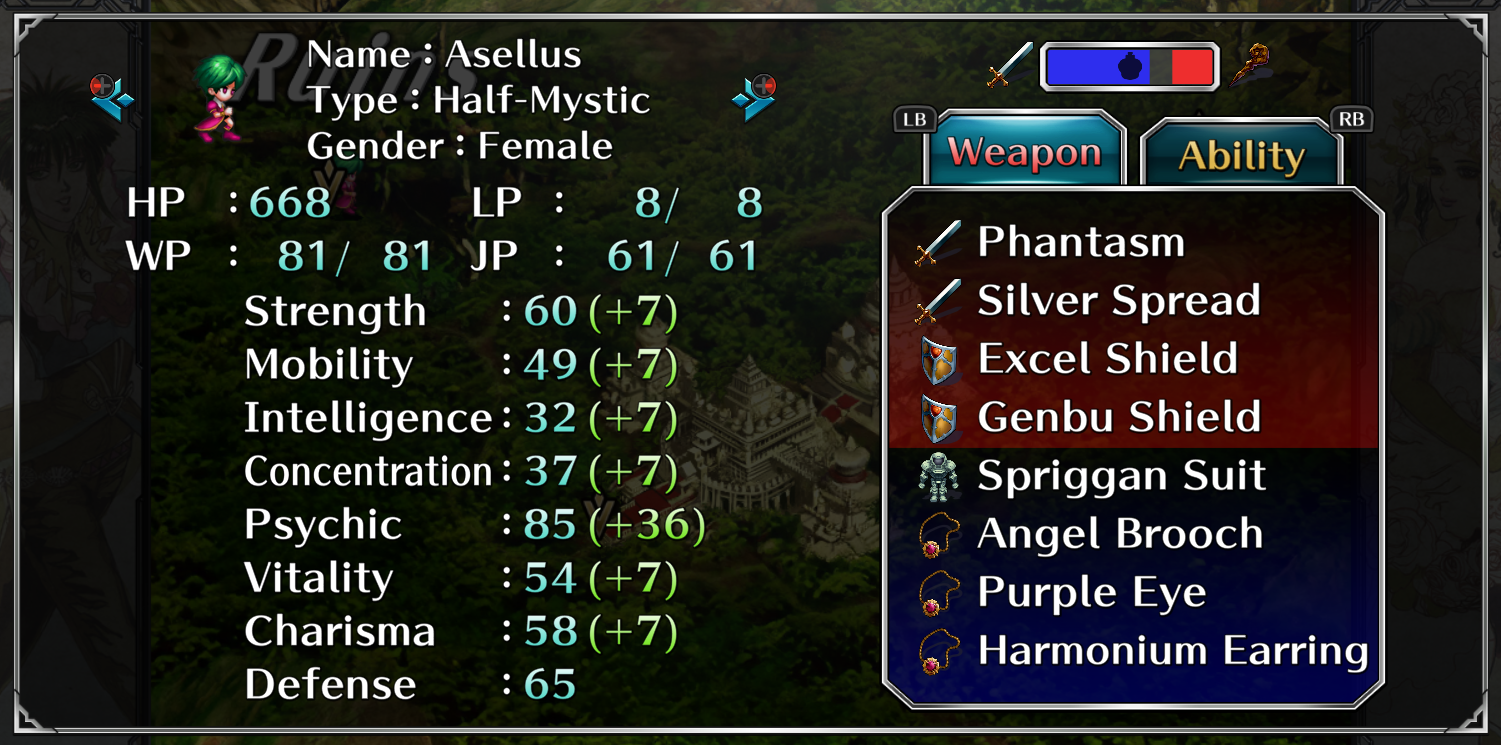
EDIT: I was made aware that the above image may cause some confusion. Shields do not stack (whichever shield is in a higher slot will take priority for evade-%s). However, the Genbu shield has a secondary effect of giving immunity to water, which works even if it isn’t your primary shield. Asellus in the above picture is using the Genbu shield to save an armor slot for an additional accessory (in this case, the Angel Brooch from Emelia’s questline which provides immunity to several bad status ailments).
Character Tips – Asellus Kraken Crushing
In the Remaster, Asellus now has new options for leaving her starting location. This seems to have been a mixture of restoring cut content and fixing plot holes, as well as likely making the game more accessible for new players (the original campaign route – which is still available – was a newbie slayer). So I decided to include a helpful bit of advice for getting through what is generally considered one of the cruelest jokes of the original path.
If minor spoilers bother you, then stop reading this and only return if you take the original route and then are getting absolutely schooled by the sick joke of a mandatory encounter that will likely return you to this guide or another or make you cry about wanting a Steam refund.
Original Route – Follow Advice
Early in the game you will encounter a fellow that tells you how to leave your starting location. The journal will then tell you that there is an alternative route. Simply do not take the alternate route (accepting help from a pair of kind strangers) and follow through with the advice given. This will take you through the game’s original route, which drops you off in Owmi.
Owmi
While in Owmi, you will learn that there’s a mermaid mystic being kept in a mansion nearby, and you gotta help her get home. Unfortunately, you have to go through a monstrous kraken to get her where she’s going. Fortunately the kraken here is toned down from the ones found in random encounters and in other questlines, but it’s still a sick joke by the developers, as it will routinely use an attack that hits every member of the party for massive damage, often enough to one-shot poor Asellus and White Rose (especially if you haven’t done much fighting up until now).
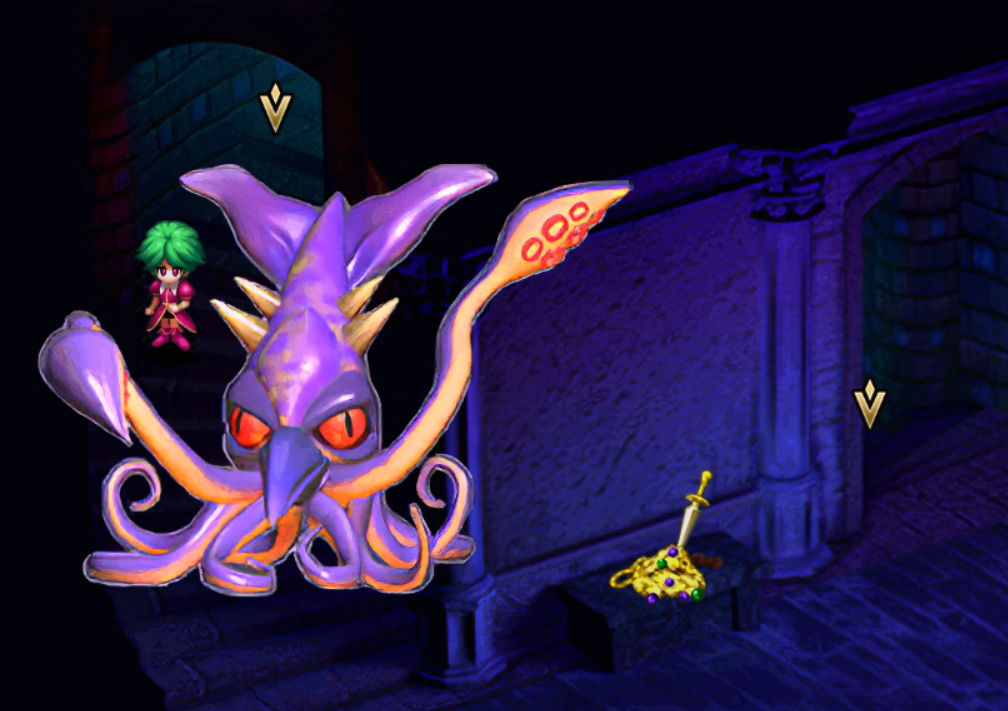
However, your Mermaid companion is 100% immune to these water based attacks, and she comes equipped with items that give immunity to water damage. So the best thing to do for this fight is to just take any items she has that grant immunity to water damage and equip your other characters with them (I can’t remember if there’s enough for both White Rose and Asellus). The mermaid also has a full-party heal that costs 1 life point per use, but she really shouldn’t be going through many of those anyway.
This should probably be enough to make it through the fight without too much trouble, even if you didn’t buy the Phantasm while in your starting location. Of course, if you began this campaign as a New Game+, there’s a pretty good chance you should already have some superior weaponry and some Pearl Hearts or other items that give water immunity, so feel free to take sweet vengeance for all us newbs that got destroyed by this thing in our youth.
More to Come…?
I’m still playing this game, and this is far from comprehensive, so might add more things as I find them relevant or worth mentioning. Hope you enjoyed the guide. ♥
Here we come to an end for SaGa Frontier Remastered Getting OP Fast – A Beginner’s Guide for Not Dying hope you enjoy it. If you think we forget something to include or we should make an update to the post let us know via comment, and we will fix it asap! Thanks and have a great day!
- Check All SaGa Frontier Remastered Posts List


Leave a Reply