Intro
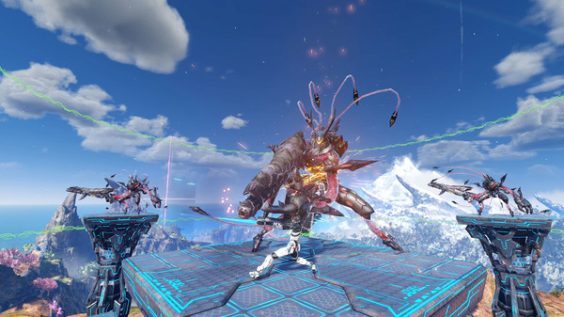
Challenge Mode is a special game type accessed in the original PSO2 game where you go through set maps and made do with what the game mode provides for you, like a rougelike game. Mission: Violent Tremor has you choosing a class archetype to use throughout the entire mission unlike the other CM missions which both gives more control to what you end up playing and changing it to be more of how your team is composed for success at the start.
You obtain the Star Gems by ranking on the leaderboards, as each CM quest gives you a point total at the end which is used for placement. Unlike the other two quests, this one has a hard score cap – 7368 which you guarantee you 1st place alongside everyone else. The reward for doing so is by the end of each week, you obtain 100 Star Gems and a Gold Trophy room item for the top rank. You can do this on every ship as each leaderboard is ship based.
You will need at least 4 players or 8 players to achieve the max score. No number inbetween those two. This guide will go step by step in what you’ll need to do for these runs.
To get the max score, you will need to make sure all your players pick Rush classes (Ranger, Hunter, Bouncer) or Attack classes (Fighter, Braver, Gunner) in the quest. If you die once without a Challenge Doll in this quest, you cannot obtain the maximum score and therefore requires a reset of the run.
This guide will lay out each spawn section on every map of the quest and will give general instructions on how to clear it. Just remember that survival is very important, 4 out of the 5 maps in this quest is not timed so feel free to take as much time as you need and pace yourself well.
A quick note about rankings: Each ship (including shared ship) has their own Challenge Mode blocks where your scores for each run is recorded into it’s leaderboard. You’re free to post your rank on all of the ships as long as you specifically go to that ship’s CM block to rank.
For free users, this means at minimum they can rank on their own ship + shared ship for 200 SG in total. If you were use your free character slots on two different ships (You don’t need a specific level to run CM, it’s unlock automatically) this means up to 400 SG by getting max score on this quest for each ship. A one-time payment of 500 AC for the last ship can make this 500 SG. – You just need to get the max score for all these runs.
Quest specifics
During the quest, there will be certain things you’ll need to do extra in it to achieve the maximum score for the SG payout. There’s not any tricky roles to do like VR management in this quest but your MPA needs to be aware of these in the quest in any case.
The most important thing to always keep in mind: Dying without a Challenge Doll automatically disables you from getting the maximum score. This is because you lose an average of 20 total points off the VR energy meter, and reviving only restores about 10 Points back. This means you need 2 Small capsules to get back to 100%, and therefore you loose 4 points by doing so.
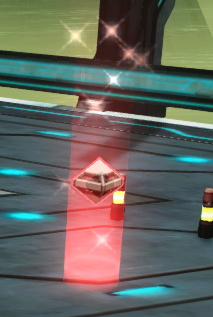
Make sure you always pick these up when you see them. They always appear if you get the Rappy+Switch combo at the end of Mission 1 and Mission 4, giving a total of 2 extra lives to play with for each person.
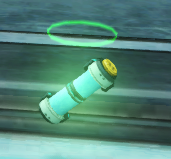
This is a VR capsule. To make matters simple, you make sure you pick these up in order to reach max score (they pay out 2 extra mile bonus if you pick them up at 100% VR)
Remember that you lose the ability to achieve max score if someone dies without a Challenge Doll because you cannot obtain the overfill bonus without getting back to 100% again. So just pick these up as soon as you see them.
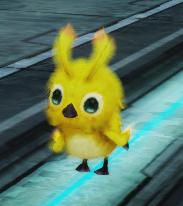
Rappies spawn in specific locations in the map, other than providing some extra exp they are used to open the locked fences at the end of the map that contains items like Grinders to use at the interval shop. Make sure one person goes and find these on the map.
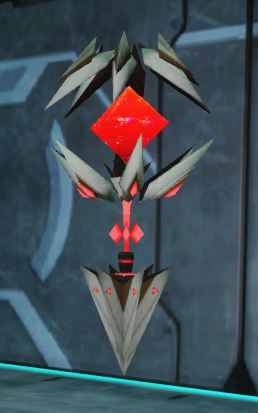
These switches in general are required to both dictate what boss you’ll get at the end of a quest as well as opening another fence at the end of the map. You always want to make sure you activate them – the person who goes after the Rappy spawn should also make sure to hit these as well.
Class choice
If you were curious on what would be a good class loadout for each player count, here’s the generally well tested combinations that are popular to use:
8 Players (All Rush)
———————-
x8 Hunters (Very safe, but potentially very slow.)
x1 Ranger, x7 Hunters (Use of Launcher PAs and Ranger tools for better mobbing, but RNG heavy start)
x1 Ranger, x1 Bouncer, x6 Hunters (Best team comp in general, though two users who are quite frail compared to the Hunters. Almost no reliance on RNG needed.)
8 Players (All Attack)
———————-
x4 Gunners, x3 Fighers, x1 Braver (General balanced team comp for all Attack.)
x4 Gunners, x4 Bravers (Removal of Fighters in order to make certain sections easier due to Braver kit and generally a more safe comp.)
4 Players (All Rush)
———————-
x4 Hunters (Very safe, Very RNG heavy)
x1 Ranger, x3 Hunters (Use of Launcher and Ranger tools for good mobbing, but RNG at the start.)
x1 Bouncer, x1 Ranger, x2 Hunter (The recommended team. No RNG needed and all the required tools to both clear easily and very fast – just keep in mind the squishier classes)
x2 Bouncer, x1 Ranger, x1 Hunter (If you want a faster clear speed in exchange of general tankiness of hunters.)
4 Player All Attack classes is still under search, we recommend sticking to 8 player only MPAs for all Attack runs.
===========================================================================
Here’s a quick overview on what each class offers:
Rush – Start with 3 Monomates. Ability to use Double Jump, and access to Build-Up Photon Art/Complex Photon Art. Begins at Level 70.
Bouncer
Weapon: Ideal Jet Boots-C
Units: Weapons Barrier x3
Class Skills: Dodge Auto-Field / Critical Field (lv.5) / Photon Blade Fever (lv.5) / Photon Blade Fever UP (lv.5) / Photon Blade Escape (lv.5) / Jet Boot Focus / Jet Boots Escape (lv.5) / Soaring Blade Focus / Next Jump / First Arts JA / Step Advance (lv.3) / Step JA Combo / Step Jump / Air Reversal / Just Reversal
Photon Arts/Techs: Heavenly Kite (lv.1) / Justice Crow (lv.1) / Dash Wing (lv.1) / Strike Gust (lv.1) / Gran Wave (lv.1) / Surging Gale (lv.1)
+Complex Photon Art
Ranger
Weapon: Ideal Rifle-C
Units: Weapons Barrier x3
Class Skills: Stun Grenade / Gravity Bomb / Blight Rounds (lv.3) / Panic Shot (lv.5) / Jellen Shot (lv.10) / Mirage Shot (lv.5) / Bullet Keep / Dive Roll Shot / Keep Roll Shot / Tactics Trap (Iv.1) / Next Jump / First Arts JA / Dive Roll Advance (lv.6) / Step JA / Step Jump / Air Reversal / Just Reversal
Photon Arts/Techs: Satellite Cannon (lv.1) / Impact Slider (lv.1) / Diffuse Shell (lv.1) / Triple Shot (lv.1) / Cluster Shot (lv.1) / Cosmos Breaker (lv.1)
+Complex Photon Art
Hunter
Weapon: Ideal Partizan-C
Units: Weapons Barrier x3
Class Skills: Massive Hunter (lv.5) / War Cry (lv.10) / Iron Will (lv.1) / Sword Focus / Wired Lance Focus / Partizan Focus / All Guard / Healing Guard / Just Guard PP Gain / Charge Parrying (lv.1) / Flash Guard 1 (lv.10) / Flash Guard 2 (lv.5) / Tech Flash Guard (lv.5) / Not Bad (lv.5) / Next Jump / First Arts JA / Step Advance (lv.3) / Step JA Combo / Air Reversal / Just Reversal
Photon Arts/Techs: Guilty Break (lv.1) / Rising Edge (lv.1) / Blaze Parry (lv.1) / Holding Current (lv.1) / Wild Round (lv.1) / Spin Dance (lv.1) / Slide End (lv.1) / Sacred Skewer (lv.1) / Speed Rain (lv.1)
+Complex Photon Art
Attack – Start with 1 Trimate + 3 Monomates. Begins at Level 70.
Fighter
Weapon: Ideal Twin Dagger-C
Units: Weapons Barrier x3
Class Skills:
Brave Stance (lv.10) / Brave Critical (lv.5) / Fury Stance (lv.10) /
Fury Critical (lv.5) / Overload (lv.1) / Adrenaline (lv.1) / Critical Strike (lv.5) / Deadline Slayer (lv.10) / Crazy Heart (lv.5) Attack PP Restorate (lv.10) / Double Saber Focus / Twin Dagger Focus / Knuckle Focus / D. Saber Wind Parry / T. Dagger Spin Move / Knuckle Focus Boost / HP Up 1,2,3 (Lv.10) / All Attack Bonus 1 (lv.5) / First Arts JA Addition / Step Advance (lv.4) /
Step JA Combo / Step Jump / Air Reversal / Just Reversal
Photon Arts/Techs: Tornado Dance (lv.17) / Surprise Dunk (lv.17) / Acro Effect (lv.17) / Raging Waltz (lv.1) / Bloody Sarabande (lv.1) / Quick March (lv.1) / Ducking Blow (Iv.1) / Decimator (lv.1)
Braver
Weapon: Ideal Katana-C
Units: Weapons Barrier x3
Class Skills: Average Stance (lv.10) / Average Stance UP (lv.5) / Katana Combat (lv.4) / Combat Escape (lv.1) / Combat JA Bonus (lv.1) / Combat Finish (lv.1) / Rapid Shoot (lv.1) / Attack PP restorate (lv.10) / Katana Focus / Counter Edge / Counter Bonus / Attack Bonus (lv.3) / Bullet Bow Charge Bonus (lv.1) / Braver Combination / All Attack Bonus 1 (lv.5) / Step Advance (lv.3) / Step JA Combo / Step Jump / Air Reversal / Just Reversal
Photon Arts/Techs: Nocturnal Blossom (lv.1) / Eviscerating Bloom (lv.1) / Lunar Flourishing (lv.1) / Master Shot (lv.1) / Torrential Arrow (lv.1) / Million Storm (lv.1)
Gunner
Weapon: Ideal Twin Machine Gun-C
Units: Weapons Barrier x3
Class Skills: Chain Trigger (lv.10) / Chain Finish (lv.10) / Chain Finish Bonus (lv.1) / Twice Chain / Attack PP Restorate (lv.10) / T. Machine Gun Focus / T. Machine Gun Mastery (lv.5) / Zero Range Advance 1 (lv.10) / Perfect Keeper (lv.4) / All Attack Bonus 1 (lv.5) / First Arts JA Bonus / Dive Roll Advance (lv.6) / Step JA Combo / Step Jump / Dive Roll Shot / Air Reversal / Just Reversal
Photon Arts/Techs: Grim Barrage (lv.1) / Satellite Aim (lv.1) / Gunslinger Spin (lv.1)
Build-Up/Complex Photon Arts
Because the Rush classes allows the use of Complex/Build-Up Photon Arts, and it’s very likely a lot of players may have never even used one before here’s a quick info dump on what they are:

You can sort of think of these like mini-Hero/Phantom Time finishers, you are required to use these actions during the quest for success. You get more charges by doing more damage against enemies especially with AoE or weak point hits, and only certain weapons have their own BPA as well as much much charges they use. Keep in note of these weapons and make sure you pass them around if other people need them during the middle of the quest.
If you’re doing the all Attack route, you can just ignore this section.
Build-Up/Complex PA weapons:
——————————————-
Sword – 3 Charges (Not Recommended, but should be used in M2 if you didn’t get anything else.)
Knuckles – 3 Charges (Not Recommended, but should be used in M2 if you didn’t get anything else.)
TMG – 2 Charges
Jet Boots – 2 Charges (Bouncer class starts off with these, which is extremely helpful.)
Launcher – 1 Charge (Required weapon choice for everyone for CPA usage.)
Bow – 1 Charge (Required, 1 person needs to have this), has two modes:
Standing version: Shoots out a rain of arrows that deals x3 hits at any one mob under it’s attack.
Moving version (Press an input while pressing the BPA button): Shoots out a wide volley of arrows that deal one hit to any mob it touches.
(All Rush) MISSION 1
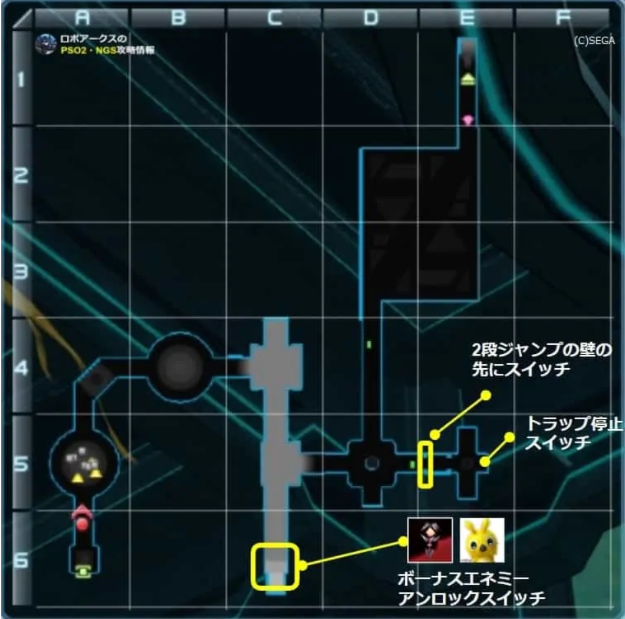
Remember to get the Rappy and Switch spawn as shown on the map.
This Map is not timed – take as much time as you need to clear it safely without dying.
Spawn 1 – King Yedi + Yedi Group
Starting off as soon as the quests begins, have a Ranger use a Gravity Bomb to group up all the mobs together so that everyone can easily AoE the pack down quickly. Bouncer can use Surging Gale as well to group up the mobs. If you don’t have either classes, then just make sure you kill the King Yedi first by hitting it’s weak point on the back first – King Yedis will enrage if any of the smaller mobs die first to keep in mind.
Keep in note of the healing pad back near the very start, it will fully heal you once so feel free to use it to save on healing resources if needed. There is a moving spike trap forward after the spawn, they deal very high damage so make sure to dodge through it proper.
If you are a Hunter in this quest, always keep in mind that you have Healing Guard, so you can just keep perfect blocking attacks to slowly heal up (You also have Heal Share, so you can slowly heal your teammate as well!)
Spawn 2 – Oceanids spawns
The Bloomegara at the front can inflict poison on you, so watch out. The Banoridian also has the ability to stun you when they clap.
Like the first spawn, it’s recommended to still group them up all together as best as possible with either Grav Bomb and/or Surging Gale then use your strongest AoE attacks. Feel free to also try and use ranged attacks if you need to back off a bit when they start using the more dangerous attacks.
Keep in mind of the black orbs that float around, they deal a good chunk of damage to you and can even inflict poison sometimes. They get destroyed by a single attack, but you’ll want to keep at a range if you’re trying to get rid of those.
Spawn 3 – Gannagam + Ban Ogakibar
The Gannagams only use their lightning attacks here. If you want to try do it fast, gather the Ogakibar’s to one of the Gannagams to AoE them all down. For safety, just have everyone split them apart proper to avoid collateral damage.
Spawn 4 – Kodotta Idihta (Close Range WP Shield)
There’s a small path forward that leads to both the Rappy and the switch, have one person go foward to deal with these two objectives.
The boss here has a shield that makes them take less damage from any source of damage that is not dealt within close range of them, so just stick close to it and DPS it down as fast as you can.
Spawn 5 – Supernatural enemies
There’s a good selection of different mobs here, but keep in mind the most dangerous ones will be the Minotaur, the Salamander, and the Omega Wolf. The Minotaur will begin to charge soon after it spawns in, and the Salamander will shoot out a line of fire as well so make sure you dodge those proper. You can gather all of them together or have different group gather certain mobs to the other corners, whichever way that you can deal with all the mobs without dying.
There is a wall behind the Golem/Salamander, any one of the players (preferably the Bouncer) should double jump behind the wall which contains a VR Capsule, an Orc mob, and a wall switch. Hit the switch and grab the VR. You can ignore the Orc mob, it’s not needed for the max score.
You can have the player that goes behind this wall grab the aggro of some of the mobs too before jumping over, they mobs will endlessly try to jump above the wall to no avail when they’re behind it making it a little more easier to take them out.
The Orc back here only does one thing: Throw barrels. This can be abused for a Hunter to keep blocking for group healing.
There is a laser trip fence trap that cycles around the room. You don’t need to worry about this trap too much, as it won’t ruin your max score run at all – it will spawn some extra mobs in the next wave though so it will still make the quest a bit easier if you don’t trip it at all.
Spawn 6 – Falspawn group
2 Guwonda and 2 Briarda blocks the path forward here. If you happened to trip the laser trap from the last part, then 3 Predicahdr will also spawn as well. If you didn’t manage to hit the wall switch from the last area as well then this section has laser fences that damages you when touched, so it’s quite important you did that step from before.
Careful of the Briarda spawn, they can use a ranged attack that spits out projectiles that not only deal a notable amount of damage, but can inflict poison and is very prone to stunlocking you to death. Play it real careful around these mobs and make sure you both keep moving and point it away from other players. The other mobs act normally to their usual AI.
There is a small VR capsule here, be sure to pick it up.
Spawn 7 – ESCA Ragne
He behaves like he normally does, but just be mindful on how you position him when he puts up a wall, it is possible for him to trap himself into a corner with no way to get to him besides destroying the webs.
Range always starts with a jump attack when it spawns in (unless you manage to dash close enough to it before pulling it off) and be sure to have sounds on, if it roars with a sound it’ll call down lightning blasts. If it does the roar animation, but doesn’t play a sound it will jump shortly after and you’ll have a few seconds to catch back up to it before it pulls up a web wall.
The best way to kill it both quickly and safely is to simply just double jumping straight into it’s weak point in the back and only focusing on that weak point. Every single attack Ragne does will never hit you if you sit right on top of it’s weak point.
Once killed, you can enter onto the next stage. Be sure to pick up all the boxes that contains Grinders, a Challenge Doll, and a guaranteed Ideal weapon. There’s a small VR Capsule too.
Before heading onto the next map, if you gotten a Bow, Launcher, Twin Machine Gun, or Jet Boots from the box be sure to equip them or give them to someone else who would need it for Build-up Photon Arts usage in Mission 2 and beyond. it’ll be very important.
(All Rush) MISSION 2 pt.1/2
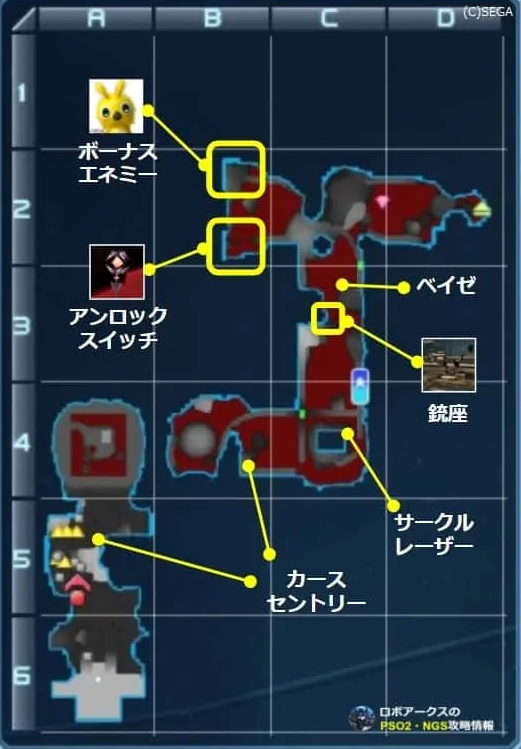
Remember to get the Rappy and Switch spawn as shown on the map.
This Map is not timed – take as much time as you need to clear it safely without dying.
Build-Up Photon Arts use recommended here.
Spawn 1 – Zorula + Orcahba wave
Keep in mind of the Orca ships, if anyone is currently at a range while it’s attack it’ll fire 2 missiles that home into any one person. There is no visual tell other than it moving towards your direction when it gets close to you and they both deal a good amount of damage and a small AoE effect. It can also otherwise fire off Mines while moving backwards (Even more dangerous than the missiles) or start to fire a laser (Easy to dodge and a good time to hit it’s weakpoint easily.)
Zorula’s aren’t too dangerous, but try not to get hit by them anyways as they can easily stunlock you into a combo easily wasting a doll. They are suspect to suction attacks, so if you have use a Gravity Bomb/Surging Gale to gather them and AoE them down together.
If you have gotten a Bow from the previous map, then it’s recommended that a Hunter takes the Bow and uses the moving BPA version (Hold an input when using BPA) to get rid of the majority of the mobs and weaken the rest.
This map features corrupted turrets that rapidly fires bullets that don’t deal too much damage, but has a high chance of inflicting posion onto you. You’ll want at least one person taking these out either at a range or just taking all their aggro at close while they get rid of these.
Spawn 2 – Yuguldrahda + Solza Brahda army
This whole stage is very dangerous, but potentially this is the spawn that will get people not used to it.
There is a huge group of Yuguldrahda’s that spawn right in, and they’ll immediately run to get in aggro range of anyone to initiate their attacks that can very well one-shot or just combo anyone from full health. Make sure you use Gravity Bombs/Surging Gale to AoE them down as fast as you can – you can also attempt to separate them between the players so they don’t cause too much collateral damage.
If you have a Bow or Launcher, make sure one of the Hunters have either of these weapons to use the BPA here, make sure you try to take out as much of the Yuguldrahdas as you can. If you’re using the Bow BPA, make sure you using the moving version (Hold an input while using the BPA button.)
There will also be 3 Solza’s in the back row. They don’t do too much, but they do place around a damaging field from their attacks that will make fighting in the area a little awkward if left to their own devices for too long. They also have infection cores which shoots out ranged attacks. They’re pretty flimsy though, so any attacks like Strike Gust can easily launch them and have them unable to attack so 1-2 people can go and stunlock them.
More corrupted turrets are around the back area, be sure to destroy them when you can.
Spawn 3 – Nove Ringahdarl + x3 Hyudo Azure
Before you go forward into the spawn range of this, if you have a Jet Boots or a Bouncer in your party, they should go in solo first so they can use the Jet Boots BPA to ideally get rid of all of the Hyudo spawns and deal a good amount of damage to the Nove to make this section easier. You’ll want to position you character to around this part of the map:
Other CPA weapons can work, but Jet Boots are the most consistent here for what you’d want to do here. With whatever you decide to do it with though, just make sure you only use at least 1 BPA here.
Nove has the same moveset as he normally do, but since he spawns in the middle of the pool he might have some trouble getting back to the safer spots. If anyone has aggro (Likely the one who used the BPA) just lead it back to a safe area, like the part where you did the last section in. Go after it’s infection core or respect mechanics by destroying it’s rings for a down phase, just make sure you can kill it without dying yourself.
In the case you do have to deal with the Hyudo’s, just try and hit it’s small weakpoint as best you can to damage it. It’s easier to deal with all it’s attacks by splitting them up and away from the main group on the boss since it’s attacks are quite wide and a little tricky to dodge.
Before you head onto the next spawn, make sure you have someone with any BPA stocks left with one of the BPA weapons to use (Preferably Jet Boots, but any other can work.)
Spawn 4 – El Scudo + x3 Habalsa
Alongside the mobs that spawn in, you’ll immediately start a Baize emergency trial that it located at the following spawn from the next one. With proper play, it shouldn’t be too hard to clear this but many a parties definitely have failed this trial. (You don’t actually need to clear the baize trial though, as it won’t lock you out of a max score or anything important. HOWEVER this means you’ll have to deal with a constant rain effect that will constantly apply poison to you, even if you were to cure it with a star/sol atomizer until the rain stops. This will very likely leave you at 1 HP for the rest of the map.)
Make sure only the person with the BPA weapon goes in first, so they can set up to use the BPA on the El Scudo. Check the timestamp on this video to view how you can do this section:

Any CPA weapon can work, but just keep in mind for two if you have to use them:
Launcher – You can kill before the final hit of this, but just be mindful that you don’t get iframe during the main animation which can very likely get you killed by the Habalsa’s projectiles during it.
Bow – You have to use the Standing version of the BPA (No inputs when pressing the BPA button) to kill the Scudo.
If you don’t manage to kill the Scudo here, then he’ll apply Deband for the whole pack. This means you will only deal 1 damage to the enemies until the effect runs out, giving you less time to deal with the baize.
Other than the Halbalsa backing the Scudo, there’s more corrupted turrets and also the black orbs floating about, as per usual make sure someone deal with these to lessen the chance of poison being inflicted.
When going forward, the little area to the left has both a Miles crystal and a VR capsule, don’t forget to grab these!
Spawn 5 – x4 Bareel + Radilugo
The small pathway up to this spawn set has a whole group of re-appearing orbs along the main path, these can easily kill someone if not careful. Running around through the red water might prove the safest despite the potential chip damage you’ll get.
Once you do get to the spawn, be vary careful when moving around: there’s 4 corrupted trap panels that constantly shoot out damaging waves that will kill if you happen to get overlapped by them. The Radilugo especially will just spam it’s suction move to have you get hit by these.
If you have either a Launcher or Bow, then you can easily get past this section by just using said BPA to kill all of the spawn and move forward.
If you don’t, then for both Hunters and Rangers it’s really best just to stay at a range and use your ranged attacks to slowly get rid of them (Sacred Skewer or Sat Cannon respectively) Bouncers, if they get Soaring Blades, can use PBF to chip away at them too, but they can just get behind all the packs by using Gran Wave to head to the back most spawn and use normals/Surging Gale to attack them.
No matter what though, it’s absolutely not worth it to try and disable the traps. you’ll just get hit during the animation which will likely kill you. You’ll also just have to jump over them no matter what, just make sure your character model doesn’t touch a red line and you’re good.
(All Rush) MISSION 2 pt.2/2
Spawn 6 – Orcahba + Dizolsabers
Depending on how fast you made it here, then you’ll either need to have at least half your group go and hard focus on the Baize to destroy it, or just keep a safe distance and wait for it to explode before going in. If the baize has been at max size when getting here, then unless you have a BPA that multi-hits it is most likely a lost cause trying to destroy it.
On the left side there is two pressure platforms that lead into a turret someone can man. The Dizolsabers spawns on top these first so they’ll likely be lowered, but you can easily have someone double jump onto the turret after it’s been raised a little bit. Once on the turret, the main thing you’ll want to use it on is the Baize to destroy it first. If you have any extra ammo, you can use it to help kill the other mobs here if they’re still alive.
Alongside the baize, an Orca ship and 2 Sabers spawns in. You definitely don’t have a lot of room to work with here, so best to split all of them apart as best you can. The person that’s on the turret can use the rest of the ammo to help kill the mobs if needed after the baize have been dealt with.
Be sure to pick up the VR capsule here.
Spawn 7 – Falz Arm
A couple of things to note of this version, is that there is only one hand to deal with and while it can do it’s grouping formation it will only do two attacks when the two hands are present. It will go back to being one hand after two attacks are done.
In addition, there is a path to the left that leads into the Rappy and switch spawn. Make sure someone goes through here to deal with these objectives.
It’s otherwise a normal standard affair with dealing with this boss, just remember you can hide behind the various walls for some of the more trickier attacks if you aren’t too confident in dodging him; staying alive here is priority after all.
If you have a Launcher, you can use 1-2 BPA here to help kill it a bit faster. Just in case though, you’ll want to try and not use any BPA here so you can save up for the later stages since you’ll be using BPA a lot more after this map.
Once you killed the boss, break the boxes, grab the miles, and be sure to pick up the VR capsule here that’s strangely the only one in this quest that’s not marked. It’s near the exit so be careful of rushing forward before grabbing everything.
(All Rush) Interval 1
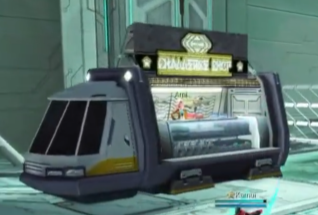
Here’s a quick checklist of the important things you’ll want to do here, since after all there’s actually not a lot to do but it’s all important.
- Ask each member how many Build-Up Photon Arts they have on hand. You’ll want to make sure you have organized use of your BPA this point onward for success.
- With all your grinders, buy as much Star Atomizers as you can. They are the most cost efficient items to buy to keep everyone alive.
- If someone needs it, share your unused Monomates/Dolls with someone who may need them. Hunters are very tanky in this quest, so they can give up their extra healing to those who died earlier if needed.
- Have 7 people in your party trade in a Launcher for their second wep at the trader. One person (generally the Bouncer) needs to have a Bow for their second weapon.
In terms of weapon selection for each class, outside Ranger you’ll have to stick with just one main weapon throughout the rest of the quest. Here’s the most recommended ones:
Hunter: Sword
Ranger: They should always have both Rifle and Launcher regardless.
Bouncer: Soaring Blades
And yes as stated before, your second weapon will always be a Launcher or a Bow, as this will be your sole BPA stick. Do not use any other weapon for BPA.
(All Rush) MISSION 3
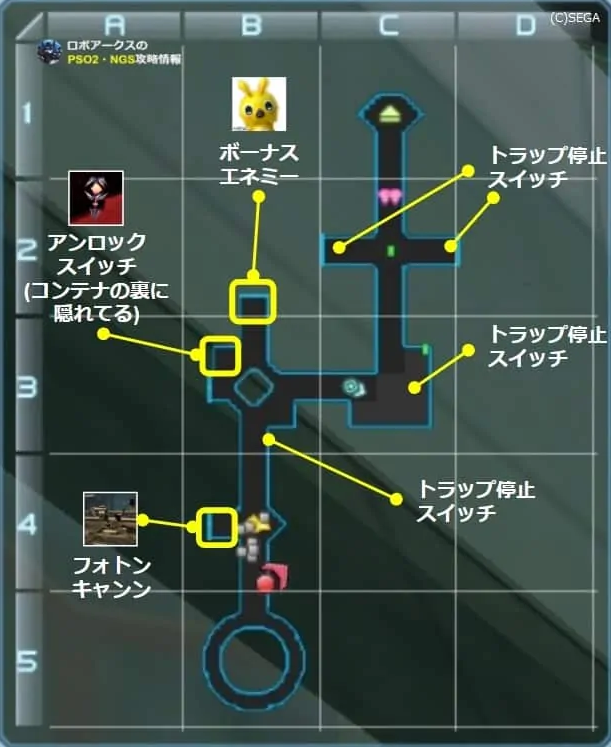
Remember to get the Rappy and Switch spawn as shown on the map.
This Map is not timed – take as much time as you need to clear it safely without dying.
Spawn 1 – Radilugo + Gawonda wall
Recommended 1 Launcher BPA use on this spawn.
There are two photon turrets at the side for this group, the quickest way to deal with this pack is to have the Ranger(s) use Gravity Bomb to group them up, Bouncers can use Surging Gale to achieve this as well, and have the person who is using Launcher BPA to try and hit all the mobs with the attack when they’re grouped up. Two people can go onto the turrets and help out further.
The turrets here will still be used for the second spawn, so make sure people are still manning them.
Spawn 2 – Tainted Automata group
Varied Automata enemies appear here, and there’s a bit to do in this section.
For the mobs, have a majority of the people grab aggro of all of them and pull them backwards towards the photon turret. The people on the turret will then fire their shots at the mobs as it still does the most damage against them.
In addition to using the Turret, when the fence goes down for the Automata to spawn, have the turret that’s on the closer side to use one of the shots to kill the Rappy that’s a little above all the spawns. Here’s a clip of how to do this:
https://www.twitch.tv/discogreninjafrog/clip/DignifiedCogentMallardDatSheffy-kRSFjxQwKgCw079k
There is a button switch on one of the top platforms to the right, and the main switch on the left side near the back. As shown on the map, have one person activate both of these so you don’t have to deal with the damaging laser traps around the room. If the turret didn’t/forget to hit the Rappy at the backside of this area, then this person can do and deal with it as well.
Or hey, you can just unga your way through this pack. As long as you clear the objectives and kill all the mobs here in any successful way, make sure clear communication is used in these next few spawns coming.
Spawn 3 – x3 Saberdigul + Veldfodrus
Recommended 1-3 BPA use here.
When you come near the next part there is a jump pad leading into the area. This section is very important to pull off properly, so we’ll go by it step by step.
As soon as you use the jump pad. DO NOT MOVE FROM THE SPOT WHERE YOU LANDED. You’ll want to take out your Launcher/Bow and hit all the switches from around the small room you’re as this will deactivate all the spikes around you. Yes you can hit every switch at a standstill too, just use the TPS view for the one on the left side.
Once this is done, have a Ranger use a gravity bomb at the center of the room. When you see the Gravity bomb go off, the player who will use the first Launcher BPA must move forward to spawn the mobs, and when they are grouped up by the suction use the BPA to kill off them instantly. If you have done this properly, then the Sabers will be no more and you’ll only be left to deal with the Fodrus.
Now with this boss left, the safest way to deal with it is to destroy it’s red bits all around it’s body. Every time you get rid of a pair of red bits, it’ll get stunned slightly. In the meanwhile, someone else can use 1-2 BPA stocks from a Launcher to help kill it faster. If done properly, then this section should go by extremely fast and not really a threat at all to begin with.
Letting any of these mobs go free especially before deactivating the spikes is very likely on grounds for a reset since they hit really hard, and generally like to stunlock you.
And yes there is a turret here. I purposely didn’t mention it here because you do not use it for this section, but for the one after this.
Check the timestamp on video to see how it’s done:
https://www.youtube.com/watch?v=QqWv3fgy7ZM?t=868″ target=”_blank”>https://www.twitch.tv/discogreninjafrog/clip/DignifiedCogentMallardDatSheffy-kRSFjxQwKgCw079k
There is a button switch on one of the top platforms to the right, and the main switch on the left side near the back. As shown on the map, have one person activate both of these so you don’t have to deal with the damaging laser traps around the room. If the turret didn’t/forget to hit the Rappy at the backside of this area, then this person can do and deal with it as well.
Or hey, you can just unga your way through this pack. As long as you clear the objectives and kill all the mobs here in any successful way, make sure clear communication is used in these next few spawns coming.
Spawn 3 – x3 Saberdigul + Veldfodrus
Recommended 1-3 BPA use here.
When you come near the next part there is a jump pad leading into the area. This section is very important to pull off properly, so we’ll go by it step by step.
As soon as you use the jump pad. DO NOT MOVE FROM THE SPOT WHERE YOU LANDED. You’ll want to take out your Launcher/Bow and hit all the switches from around the small room you’re as this will deactivate all the spikes around you. Yes you can hit every switch at a standstill too, just use the TPS view for the one on the left side.
Once this is done, have a Ranger use a gravity bomb at the center of the room. When you see the Gravity bomb go off, the player who will use the first Launcher BPA must move forward to spawn the mobs, and when they are grouped up by the suction use the BPA to kill off them instantly. If you have done this properly, then the Sabers will be no more and you’ll only be left to deal with the Fodrus.
Now with this boss left, the safest way to deal with it is to destroy it’s red bits all around it’s body. Every time you get rid of a pair of red bits, it’ll get stunned slightly. In the meanwhile, someone else can use 1-2 BPA stocks from a Launcher to help kill it faster. If done properly, then this section should go by extremely fast and not really a threat at all to begin with.
Letting any of these mobs go free especially before deactivating the spikes is very likely on grounds for a reset since they hit really hard, and generally like to stunlock you.
And yes there is a turret here. I purposely didn’t mention it here because you do not use it for this section, but for the one after this.
Check the timestamp on video to see how it’s done:

Either way, be sure to pick up the VR capsule and Miles crystal and read up on the next spawn to initiate phase two, so to say.
Spawn 4 – Dralberouge
Before even moving after clearing the last wave, you now need to have 7 people fall backwards to the earlier point of the map while one person goes forward to spawn in the Berouge. This person will grab the aggro, lead it back towards the small arena. You’ll want to make it stuck between the box pillar on the edge so that the people the went back towards the previous area can stay at a range and use their Launchers to safely take out the boss here. Don’t use a BPA here, it is a waste of resources.
It may take awhile to get this running proper, since the AI can be quite random here. Don’t fret too much if it doesn’t get stuck and flies away towards everyone else, just keep trying to get it stuck in the area.
When it is stuck, remember the turret? The person who lured the boss to the trap should go onto the turret after they lose aggro and use it until it runs out of ammo. If you manage to find it’s weak point quickly by destroying it’s sharp wing parts on it’s back arms/legs, then it should melt quickly.
Check out this clip to see how it’s done:
After all that, there is a VR Capsule, more grinders, and extra Challenge Doll and some Miles that you’ll need to pick up before moving onwards.
(All Rush) MISSION 4
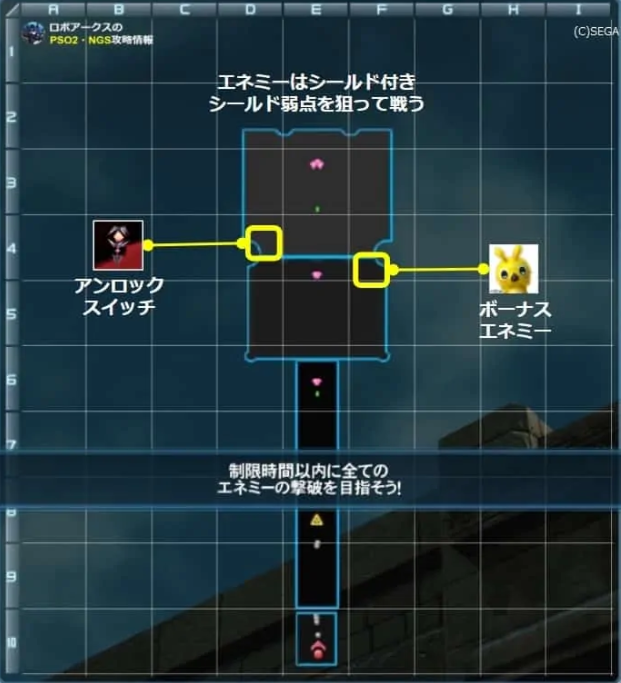
Remember to get the Rappy and Switch spawn as shown on the map.
This mission is timed! As soon as one person goes through the telepipe after entering the map, you’ll start a trial that lasts roughly 3-4 minutes and you’ll have to get to at least the very last spawn of the trial or you’ll lose the ability to get the maximum score and have to reset the run. You’ll need to carefully use the BPA as described below correctly to match the timer properly.
When using BPA on here, just remember to make sure all the Hunters at the end of the stage should have 2-3 BPA left to make the last stage very easy. Rotate the BPA job amongst the MPA if needed.
Spawn 1 – Fang Banther (Close-ranged attacks WP shield)
1 Launcher BPA use recommended.
Remember that any shield does not reduct from the damage a BPA does, so don’t worry about positioning when using them.
This is an otherwise normal Banther fight, just try and do as much damage as you can against it. Be sure to have someone on Star Atomizer duty when the mpa takes a lot of damage against this mob.
Spawn 2 – Krabahda wall + Zeshraider (Close-ranged attacks WP shield)
1-2 Launcer BPA use recommended.
There is a long line of Krabahda’s that covers the Zesh behind, you can easily use a Gravity Bomb/Surging Gale to group the crabs together though and AoE them down quickly. Generally only about 2-4 people focusing on this group should be enough to kill them off fast.
The Zesh should be dealt with by hitting it’s right leg in order to stun it for awhile (Make sure you keep hitting it after you destroy it’s leg or it’ll regain it’s balance!) then if you have a ranger, use Weak Bullet to hit the infection core while 1-2 people with Launcher use their BPA on the infection core. This should be enough to nuke it quickly, or at the least bring it down to very low hp to finish it off normally.
Spawn 3 – Gigur Gunnegam (Attacks from Front side WP shield)
1-2 Launcher BPA use recommended.
This one is very simple: When it spawns, just focus on it’s infection core. Wtih a Weak bullet, 1-2 CPA use, and just everyone focusing on the core as soon as it spawns it really should die in just seconds.
He can potentially waste a lot of time otherwise, which could very well be on grounds for a reset this late into the run.
Don’t forget the VR capsules and the Miles before using the jump pad after!
Spawn 4 – Jahmagrs Horde + Plosiogrs (Attacks from Front side WP shield)
1 Bow CPA use recommended. 1 Launcher BPA use recommended.
The elephant enemies spawn in as soon as you use the jump pad; the person with the bow should move in first and use a moving Bow CPA to AoE all the smaller spawn first. That leaves with the Plosiogrs, in which if you have the extra stock you should try and use a Launcher BPA here, since it’s a pretty annoying boss to deal with especially with it’s shield.
On the upper right portion of the arena sits a rappy, if you need the extra grinders have one person go and deal with it.
Don’t forget the Miles and VR before jumping onward!
Spawn 5 – x2 Dark Emperappy (Close-ranged attacks WP shield) + Stage 3 Evilion Dragon (Close-ranged attacks WP shield)
2 Bow CPA use recommended. 1-3 Launcher BPA use recommended.
Hopefully you have enough time to deal with this spawn. The person with the Bow should move forward first and when they’re in the proper position should use 2 moving Bow BPA back to back to both nuke the Dark Empes and break the Dragon’s tail crystal so everyone can start doing full damage to it.
If you’re wondering how to properly pull it off with success each time, the position you need to be when using the BPA on Bow is just foward of where the VR capsule lies. Check timestamp on this vid to see both the Bow BPA positioning for this spawn and the one before:

When only the Dragon is left, just watch out for all of it’s attacks since it’ll both be some of the most damaging moves in this quest and will inflict burn on you. If needed, use Launcher BPA to kill it faster especially if you’re running out of time.
On the lower left of this arena, there is a switch. Have someone activate it before you leave this area.
If you managed to clear this spawn before the time runs out, then you’ve achieved all the main objectives to get the maximum score for this quest. Don’t forget to grab the VR and the Miles.
Spawn 6 – Black Tagami
This mob spawns right after the dragon, but just to note that it’s not actually required to be killed to get the max score. This enemy just awards you with extra EXP which for this run isn’t entirely needed but might as well kill it if you got the time to spare.
It will always take 1 damage from any source. You need to attack it’s yellow orbs with any multi-hitting attack until it breaks, in which the next hit will kill it. Do not use a BPA on this enemy.
Don’t forget to grab the VR and the Miles. If you didn’t hit the switch from the bottom left part of the area, then make sure you do before teleporting onwards.
(All Rush) Interval 2

There’s actually not a whole lot needed to buy here honestly, in fact you could really just go straight to the teleporter if you’ve done well.
If someone doesn’t have a doll by this stage, then make sure someone with 2 left shares one to those.
If you feel like you need extra healing, then just get more Star Atomizers or Tokyo Burgers for healing.
(All Rush) MISSION 5
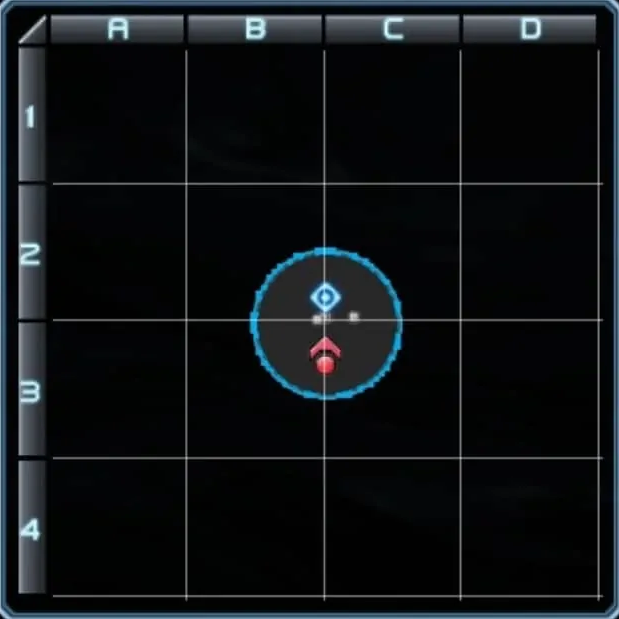
The boss here you’ll fight is Omega Angel.
He has access to all his normal attacks, but it really doesn’t matter if you’ve managed to save up your BPA stocks.
Just have everyone spam their BPA against the boss. Be sure to stay at a bit of a range since his suction+stun attack will cancel out your BPA’s animation, but otherwise he’ll melt in seconds with all the BPA firing off.
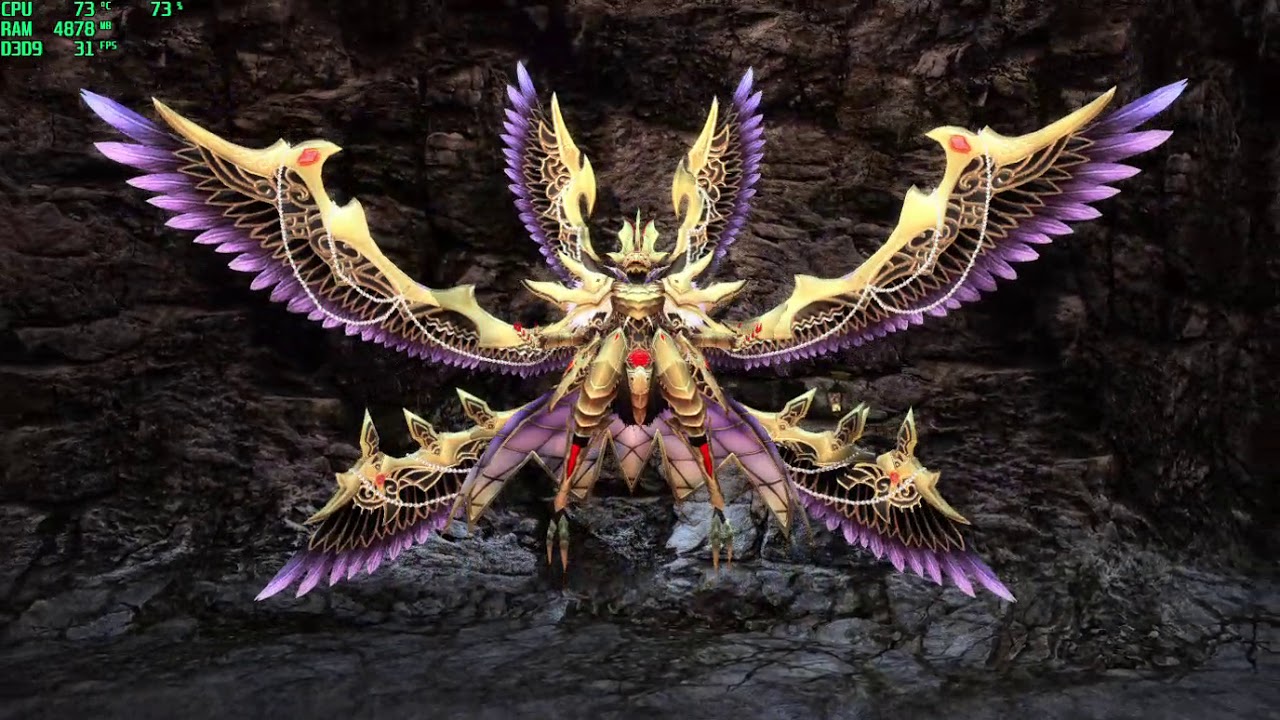
Congrats if you managed to achieve the maximum score here!
(All Attack) MISSION 1

Remember to get the Rappy and Switch spawn as shown on the map.
This Map is not timed – take as much time as you need to clear it safely without dying.
Spawn 1 – King Yedi + Yedi Group
Starting off as soon as the quests begins, have the Gunners use Gunslinger Spin to gather all the mobs in one place, so the MPA can use their own AoE attacks to kill quickly. If you somehow don’t have Gunners (You really should), then just make sure you kill the King Yedi first by hitting it’s weak point on the back first – King Yedis will enrage if any of the smaller mobs die first to keep in mind.
Keep in note of the healing pad back near the very start, it will fully heal you once so feel free to use it to save on healing resources if needed. There is a moving spike trap forward after the spawn, they deal very high damage so make sure to dodge through it proper.
As a general note for the rest of this quest for certain classes:
Fighter – do note that after Limit Break ends when activating it, you get fully healed! You can use this as a free heal if needed.
Braver – You have access to Rapid Fire which makes Bow very powerful during the run, don’t forget to use to keep up the DPS. One volley of arrows from Rapid Fire should restore roughly 90+ PP if all of the arrows hit.
Spawn 2 – Oceanids spawns
The Bloomegara at the front can inflict poison on you, so watch out. The Banoridian also has the ability to stun you when they clap.
Like the first spawn, it’s recommended to still group them up all together as best as possible Gunslinger Spin. Feel free to also try and use ranged attacks if you need to back off a bit when they start using the more dangerous attacks.
Keep in mind of the black orbs that float around, they deal a good chunk of damage to you and can even inflict poison sometimes. They get destroyed by a single attack, but you’ll want to keep at a range if you’re trying to get rid of those.
Spawn 3 – Gannagam + Ban Ogakibar
The Gannagams only use their lightning attacks here. If you want to try do it fast, gather the Ogakibar’s to one of the Gannagams to AoE them all down. For safety, just have everyone split them apart proper to avoid collateral damage.
Spawn 4 – Kodotta Idihta (Close Range WP Shield)
There’s a small path forward that leads to both the Rappy and the switch, have one person go foward to deal with these two objectives.
The boss here has a shield that makes them take less damage from any source of damage that is not dealt within close range of them, so just stick close to it and DPS it down as fast as you can.
Spawn 5 – Supernatural enemies
There’s a good selection of different mobs here, but keep in mind the most dangerous ones will be the Minotaur, the Salamander, and the Omega Wolf. The Minotaur will begin to charge soon after it spawns in, and the Salamander will shoot out a line of fire as well so make sure you dodge those proper. You can gather all of them together or have different group gather certain mobs to the other corners, whichever way that you can deal with all the mobs without dying.
There is a wall behind the Golem/Salamander, any one of the players should go behind the wall which contains a VR Capsule, an Orc mob, and a wall switch. Hit the switch and grab the VR. You can ignore the Orc mob, it’s not needed for the max score.
You can have the player that goes behind this wall grab the aggro of some of the mobs too before jumping over, they mobs will endlessly try to jump above the wall to no avail when they’re behind it making it a little more easier to take them out.
There is a laser trip fence trap that cycles around the room. You don’t need to worry about this trap too much, as it won’t ruin your max score run at all – it will spawn some extra mobs in the next wave though so it will still make the quest a bit easier if you don’t trip it at all.
Since you don’t have access to double jump with Attack classes, you can use the ramp to get enough height with a jump to travel across the wall with Gunner’s Grimm Barrage. Gunners can also just S-Roll behind it.
Spawn 6 – Falspawn group
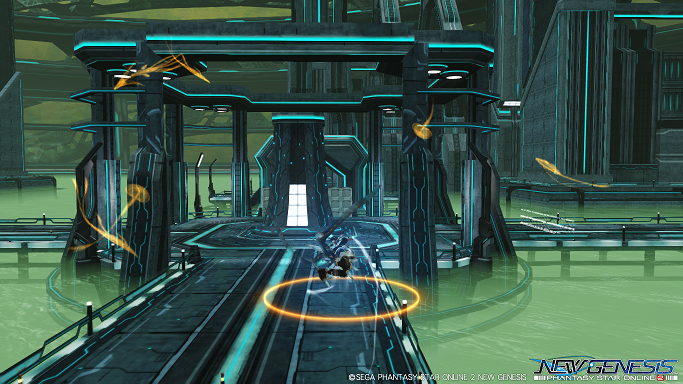
2 Guwonda and 2 Briarda blocks the path forward here. If you happened to trip the laser trap from the last part, then 3 Predicahdr will also spawn as well. If you didn’t manage to hit the wall switch from the last area as well then this section has laser fences that damages you when touched, so it’s quite important you did that step from before.
Careful of the Briarda spawn, they can use a ranged attack that spits out projectiles that not only deal a notable amount of damage, but can inflict poison and is very prone to stunlocking you to death. Play it real careful around these mobs and make sure you both keep moving and point it away from other players. The other mobs act normally to their usual AI.
There is a small VR capsule here, be sure to pick it up.
Spawn 7 – ESCA Ragne
He behaves like he normally does, but just be mindful on how you position him when he puts up a wall, it is possible for him to trap himself into a corner with no way to get to him besides destroying the webs.
Range always starts with a jump attack when it spawns in (unless you manage to dash close enough to it before pulling it off) and be sure to have sounds on, if it roars with a sound it’ll call down lightning blasts. If it does the roar animation, but doesn’t play a sound it will jump shortly after and you’ll have a few seconds to catch back up to it before it pulls up a web wall.
The best way to kill it both quickly and safely is to simply just jump straight into it’s weak point in the back and only focusing on that weak point. Every single attack Ragne does will never hit you if you sit right on top of it’s weak point. Fighters and Gunners both have PA’s that has them travelling onto the weakpoint easily. Bravers will have to use their PA to gain height slowly.
Once killed, you can enter onto the next stage. Be sure to pick up all the boxes that contains Grinders, a Challenge Doll, and a guaranteed Ideal weapon. There’s a small VR Capsule too.
When opening the Box at the end, if you gotten another classes main weapon be sure to give it to them.
(All Attack) MISSION 2 pt.1/2

Remember to get the Rappy and Switch spawn as shown on the map.
This Map is not timed – take as much time as you need to clear it safely without dying.
Spawn 1 – Zorula + Orcahba wave
Keep in mind of the Orca ships, if anyone is currently at a range while it’s attack it’ll fire 2 missiles that home into any one person. There is no visual tell other than it moving towards your direction when it gets close to you and they both deal a good amount of damage and a small AoE effect. It can also otherwise fire off Mines while moving backwards (Even more dangerous than the missiles) or start to fire a laser (Easy to dodge and a good time to hit it’s weakpoint easily.)
Zorula’s aren’t too dangerous, but try not to get hit by them anyways as they can easily stunlock you into a combo easily wasting a doll. They are suspect to suction attacks, so if you have use a Gravity Bomb/Surging Gale to gather them and AoE them down together.
Have the Gunners go in with Gunslinger Spin to gather the Zorula’s for AoE. Remember that G.Spin has guard frames in the front of your character. Try and make sure that the Orca ships don’t deal collateral damage with their missiles when fighting it.
This map features corrupted turrets that rapidly fires bullets that don’t deal too much damage, but has a high chance of inflicting posion onto you. You’ll want at least one person taking these out either at a range or just taking all their aggro at close while they get rid of these.
Spawn 2 – Yuguldrahda + Solza Brahda army
This whole stage is very dangerous, but potentially this is the spawn that will get people not used to it.
There is a huge group of Yuguldrahda’s that spawn right in, and they’ll immediately run to get in aggro range of anyone to initiate their attacks that can very well one-shot or just combo anyone from full health. Make sure you use Gravity Bombs/Surging Gale to AoE them down as fast as you can – you can also attempt to separate them between the players so they don’t cause too much collateral damage.
As per usual, the Gunners with Gunslinger Spin is king ♥♥♥♥ AoE dealer here and with the guard frames, it should be very safe for them to solely deal with the pack here. Both Bravers and Fighters do have ways to deal AoE at a relatively safe range too.
There will also be 3 Solza’s in the back row. They don’t do too much, but they do place around a damaging field from their attacks that will make fighting in the area a little awkward if left to their own devices for too long. They also have infection cores which shoots out ranged attacks. They’re pretty flimsy though, so any attacks like Strike Gust can easily launch them and have them unable to attack so 1-2 people can go and stunlock them.
More corrupted turrets are around the back area, be sure to destroy them when you can.
Spawn 3 – Nove Ringahdarl + x3 Hyudo Azure
Nove has the same moveset as he normally do, but since he spawns in the middle of the pool he might have some trouble getting back to the safer spots. If anyone has aggro (Likely the one who used the BPA) just lead it back to a safe area, like the part where you did the last section in. Go after it’s infection core or respect mechanics by destroying it’s rings for a down phase, just make sure you can kill it without dying yourself.
With the Hyudo’s, just try and hit it’s small weakpoint as best you can to damage it. It’s easier to deal with all it’s attacks by splitting them up and away from the main group on the boss since it’s attacks are quite wide and a little tricky to dodge. If you managed to get a Bow, then the Braver can easily use their PA’s to get rid of these spawns very quickly.
Before you head onto the next spawn, make sure you have someone with any BPA stocks left with one of the BPA weapons to use (Preferably Jet Boots, but any other can work.)
Spawn 4 – El Scudo + x3 Habalsa
Alongside the mobs that spawn in, you’ll immediately start a Baize emergency trial that it located at the following spawn from the next one. With proper play, it shouldn’t be too hard to clear this but many a parties definitely have failed this trial. (You don’t actually need to clear the baize trial though, as it won’t lock you out of a max score or anything important. HOWEVER this means you’ll have to deal with a constant rain effect that will constantly apply poison to you, even if you were to cure it with a star/sol atomizer until the rain stops. This will very likely leave you at 1 HP for the rest of the map.)
Depending on how many Gunners you brought here, then it is possible for every gunner (At least 4) to go in first and use Chain Trigger on the Scudo and pop it off with Gunslinger Spin/Sat. Aim to kill it quickly, but the timing and coordination is very tight. It’s actually sometimes better to just let the Scudo do it’s thing and try and DPS the pack down fast as soon as Deband goes down.
If you don’t manage to kill the Scudo here, then he’ll apply Deband for the whole pack. This means you will only deal 1 damage to the enemies until the effect runs out, giving you less time to deal with the baize.
Other than the Halbalsa backing the Scudo, there’s more corrupted turrets and also the black orbs floating about, as per usual make sure someone deal with these to lessen the chance of poison being inflicted.
When going forward, the little area to the left has both a Miles crystal and a VR capsule, don’t forget to grab these!
Spawn 5 – x4 Bareel + Radilugo
The small pathway up to this spawn set has a whole group of re-appearing orbs along the main path, these can easily kill someone if not careful. Running around through the red water might prove the safest despite the potential chip damage you’ll get.
Once you do get to the spawn, be vary careful when moving around: there’s 4 corrupted trap panels that constantly shoot out damaging waves that will kill if you happen to get overlapped by them. The Radilugo especially will just spam it’s suction move to have you get hit by these.
The Gunners can easily clear out these enemies with the use of Gunslinger Spin, and Bow Bravers can help chip in with ranged attacks of their own. It’s usually the Gunner’s job to deal with this spawn either way.
No matter what though, it’s absolutely not worth it to try and disable the traps. you’ll just get hit during the animation which will likely kill you. You’ll also just have to jump over them no matter what, just make sure your character model doesn’t touch a red line and you’re good.
(All Attack) MISSION 2 pt.2/2
Spawn 6 – Orcahba + Dizolsabers
Depending on how fast you made it here, then you’ll either need to have at least half your group go and hard focus on the Baize to destroy it, or just keep a safe distance and wait for it to explode before going in.
Since every class here deal more damage than the Rush classes, it can be a viable strat to zerg rush the Baize until it’s destroyed. Generally if it does get to explode, your chances to survive after that is pretty low thanks to the poison.
On the left side there is two pressure platforms that lead into a turret someone can man. The Dizolsabers spawns on top these first so they’ll likely be lowered, but you can easily have someone double jump onto the turret after it’s been raised a little bit. Once on the turret, the main thing you’ll want to use it on is the Baize to destroy it first. If you have any extra ammo, you can use it to help kill the other mobs here if they’re still alive.
Alongside the baize, an Orca ship and 2 Sabers spawns in. You definitely don’t have a lot of room to work with here, so best to split all of them apart as best you can. The person that’s on the turret can use the rest of the ammo to help kill the mobs if needed after the baize have been dealt with.
Be sure to pick up the VR capsule here.
Spawn 7 – Falz Arm
A couple of things to note of this version, is that there is only one hand to deal with and while it can do it’s grouping formation it will only do two attacks when the two hands are present. It will go back to being one hand after two attacks are done.
In addition, there is a path to the left that leads into the Rappy and switch spawn. Make sure someone goes through here to deal with these objectives.
It’s otherwise a normal standard affair with dealing with this boss, just remember you can hide behind the various walls for some of the more trickier attacks if you aren’t too confident in dodging him; staying alive here is priority after all.
Once you killed the boss, break the boxes, grab the miles, and be sure to pick up the VR capsule here that’s strangely the only one in this quest that’s not marked. It’s near the exit so be careful of rushing forward before grabbing everything.
(All Attack) Interval 1

Here’s a quick checklist of the important things you’ll want to do here, since after all there’s actually not a lot to do but it’s all important.
- With all your grinders, buy as much Star Atomizers as you can. They are the most cost efficient items to buy to keep everyone alive.
- If someone needs it, share your unused Monomates/Trimate/Dolls with someone who may need them.
- Have all your Fighters trade in one weapon for a Launcher.
- Gunners can give up their gained weapons to give to the fighters – they only use TMGs and it’s a ranged weapon anywho.
- Bravers should always have a Katana + Bow combo
Fighters can pick any weapon they want here that’s within their class range (Twin Dagger, Knuckles, Double Saber) but recommended weapon here is the Twin Dagger.
(All Attack) MISSION 3

Remember to get the Rappy and Switch spawn as shown on the map.
This Map is not timed – take as much time as you need to clear it safely without dying.
Spawn 1 – Radilugo + Gawonda wall
There are two photon turrets at the side for this group, the quickest way to deal with this pack is to have the Gunner(s) use Gunslinger Spin to gather up all the mobs together so that the other classes can use their AoE attacks to melt them down quickly. Two people can go onto the turrets and help out further.
The turrets here will still be used for the second spawn, so make sure people are still manning them.
Spawn 2 – Tainted Automata group
Varied Automata enemies appear here, and there’s a bit to do in this section.
For the mobs, have a majority of the people grab aggro of all of them and pull them backwards towards the photon turret. The people on the turret will then fire their shots at the mobs as it still does the most damage against them.
In addition to using the Turret, when the fence goes down for the Automata to spawn, have the turret that’s on the closer side to use one of the shots to kill the Rappy that’s a little above all the spawns. Here’s a clip of how to do this:
https://www.twitch.tv/discogreninjafrog/clip/DignifiedCogentMallardDatSheffy-kRSFjxQwKgCw079k
There is a button switch on one of the top platforms to the right, and the main switch on the left side near the back. As shown on the map, have one person activate both of these so you don’t have to deal with the damaging laser traps around the room. If the turret didn’t/forget to hit the Rappy at the backside of this area, then this person can do and deal with it as well.
Or hey, you can just unga your way through this pack. As long as you clear the objectives and kill all the mobs here in any successful way, make sure clear communication is used in these next few spawns coming.
Spawn 3 – x3 Saberdigul + Veldfodrus
When you come near the next part there is a jump pad leading into the area. This section is very important to pull off properly, so we’ll go by it step by step.
As soon as you use the jump pad. DO NOT MOVE FROM THE SPOT WHERE YOU LANDED. You’ll want to take out your Launcher and hit all the switches from around the small room you’re as this will deactivate all the spikes around you. Yes you can hit every switch at a standstill too, just use the TPS view for the one on the left side.
Once this is done, the Gunner(s) go forward and position themselves so that when they spam Gunslinger Spin on the Sabers that spawn, it will both gather them up in one spot and have all their attacks blocked by the PA animation. Bravers and Fighters should chip in and help melt down these mobs quickly with their own PAs.
Now with this boss left, the safest way to deal with it is to destroy it’s red bits all around it’s body. Every time you get rid of a pair of red bits, it’ll get stunned slightly. Anytime it’s stunned, dump as much of the highest damaging PA’s you have onto it’s weak point to try and kill it ASAP.
Letting any of these mobs go free especially before deactivating the spikes is very likely on grounds for a reset since they hit really hard, and generally like to stunlock you.
And yes there is a turret here. I purposely didn’t mention it here because you do not use it for this section, but for the one after this.
Check the timestamp on video to see how it’s done:
https://www.youtube.com/watch?v=QqWv3fgy7ZM?t=868″ target=”_blank”>https://www.twitch.tv/discogreninjafrog/clip/DignifiedCogentMallardDatSheffy-kRSFjxQwKgCw079k
There is a button switch on one of the top platforms to the right, and the main switch on the left side near the back. As shown on the map, have one person activate both of these so you don’t have to deal with the damaging laser traps around the room. If the turret didn’t/forget to hit the Rappy at the backside of this area, then this person can do and deal with it as well.
Or hey, you can just unga your way through this pack. As long as you clear the objectives and kill all the mobs here in any successful way, make sure clear communication is used in these next few spawns coming.
Spawn 3 – x3 Saberdigul + Veldfodrus
When you come near the next part there is a jump pad leading into the area. This section is very important to pull off properly, so we’ll go by it step by step.
As soon as you use the jump pad. DO NOT MOVE FROM THE SPOT WHERE YOU LANDED. You’ll want to take out your Launcher and hit all the switches from around the small room you’re as this will deactivate all the spikes around you. Yes you can hit every switch at a standstill too, just use the TPS view for the one on the left side.
Once this is done, the Gunner(s) go forward and position themselves so that when they spam Gunslinger Spin on the Sabers that spawn, it will both gather them up in one spot and have all their attacks blocked by the PA animation. Bravers and Fighters should chip in and help melt down these mobs quickly with their own PAs.
Now with this boss left, the safest way to deal with it is to destroy it’s red bits all around it’s body. Every time you get rid of a pair of red bits, it’ll get stunned slightly. Anytime it’s stunned, dump as much of the highest damaging PA’s you have onto it’s weak point to try and kill it ASAP.
Letting any of these mobs go free especially before deactivating the spikes is very likely on grounds for a reset since they hit really hard, and generally like to stunlock you.
And yes there is a turret here. I purposely didn’t mention it here because you do not use it for this section, but for the one after this.
Check the timestamp on video to see how it’s done:

Either way, be sure to pick up the VR capsule and Miles crystal and read up on the next spawn to initiate phase two, so to say.
Spawn 4 – Dralberouge
Before even moving after clearing the last wave, you now need to have 7 people fall backwards to the earlier point of the map while one person goes forward to spawn in the Berouge. This person will grab the aggro, lead it back towards the small arena. You’ll want to make it stuck between the box pillar on the edge so that the people the went back towards the previous area can stay at a range and use their Launchers to safely take out the boss here.
It may take awhile to get this running proper, since the AI can be quite random here. Don’t fret too much if it doesn’t get stuck and flies away towards everyone else, just keep trying to get it stuck in the area.
When it is stuck, remember the turret? The person who lured the boss to the trap should go onto the turret after they lose aggro and use it until it runs out of ammo. If you manage to find it’s weak point quickly by destroying it’s sharp wing parts on it’s back arms/legs, then it should melt quickly.
Check out this clip to see how it’s done:
After all that, there is a VR Capsule, more grinders, and extra Challenge Doll and some Miles that you’ll need to pick up before moving onwards.
(All Attack) MISSION 4

Remember to get the Rappy and Switch spawn as shown on the map.
This mission is timed! As soon as one person goes through the telepipe after entering the map, you’ll start a trial that lasts roughly 3-4 minutes and you’ll have to get to at least the very last spawn of the trial or you’ll lose the ability to get the maximum score and have to reset the run. Very fast and smart play is required here.
Spawn 1 – Fang Banther (Close-ranged attacks WP shield)
This is an otherwise normal Banther fight, just try and do as much damage as you can against it. Be sure to have someone on Star Atomizer duty when the mpa takes a lot of damage against this mob.
If you are a Braver, Katana Combat also has Katana Escape attached to it, making you invincible until the timer runs out so using it can help you deal a lot of damage against the boss.
Spawn 2 – Krabahda wall + Zeshraider (Close-ranged attacks WP shield)
There is a long line of Krabahda’s that covers the Zesh behind, you can easily have the Gunners use Gunslinger Spin to group these mobs together to melt them down together quickly. Bravers can also chip in by using Torriential Arrow if needed.
The Zesh should be dealt with by hitting it’s right leg in order to stun it for awhile (Make sure you keep hitting it after you destroy it’s leg or it’ll regain it’s balance!) then attack it’s weak point or infection core until it dies. This very likely requires two cycles to kill, so make sure you only do one leg at a time!
Spawn 3 – Gigur Gunnegam (Attacks from Front side WP shield)
This one is very simple: When it spawns, have the Bravers spam Million Storm on it’s infection core. This actually stunlocks with Gunne long enough to easily let the other classes kill it at a standstill, and if you have two or more Bravers doing this he practically can’t move at all!
He can potentially waste a lot of time otherwise, which could very well be on grounds for a reset this late into the run.
Don’t forget the VR capsules and the Miles before using the jump pad after!
Spawn 4 – Jahmagrs Horde + Plosiogrs (Attacks from Front side WP shield)
The elephant enemies spawn in as soon as you use the jump pad. Bravers can deal some decent AoE with the use of Million Storm, but just try not to spread any of the mobs far apart since they can be extremely erratic if left to their own devices.
On the upper right portion of the arena sits a Rappy, if you need the extra grinders have one person go and deal with it.
Don’t forget the Miles and VR before jumping onward!
Spawn 5 – x2 Dark Emperappy (Close-ranged attacks WP shield) + Stage 3 Evilion Dragon (Close-ranged attacks WP shield)
Hopefully you have enough time to deal with this spawn. At least 2-4 people should head to the back and deal with the two Dark Emperappies (Bravers recommended due to Katana Combat) try to face them away from people though, one of it’s attack is a 0 frame barrel roll that always one-shots regardless of HP.
The rest should focus on the Dragon’s tail crystal, since it needs to be broken before you can deal full damage to the rest of it’s body.
When only the Dragon is left, just watch out for all of it’s attacks since it’ll both be some of the most damaging moves in this quest and will inflict burn on you.
On the lower left of this arena, there is a switch. Have someone activate it before you leave this area.
If you managed to clear this spawn before the time runs out, then you’ve achieved all the main objectives to get the maximum score for this quest. Don’t forget to grab the VR and the Miles.
Spawn 6 – Black Tagami
This mob spawns right after the dragon, but just to note that it’s not actually required to be killed to get the max score. This enemy just awards you with extra EXP which for this run isn’t entirely needed but might as well kill it if you got the time to spare.
It will always take 1 damage from any source. You need to attack it’s yellow orbs with any multi-hitting attack until it breaks, in which the next hit will kill it.
Don’t forget to grab the VR and the Miles. If you didn’t hit the switch from the bottom left part of the area, then make sure you do before teleporting onwards.
(All Attack) Interval 2

There’s actually not a whole lot needed to buy here honestly, in fact you could really just go straight to the teleporter if you’ve done well.
If someone doesn’t have a doll by this stage, then make sure someone with 2 left shares one to those.
If you feel like you need extra healing, then just get more Star Atomizers or Tokyo Burgers for healing.
(All Attack) MISSION 5

The boss you’ll fight here is Omega Appregina.
Unlike the other boss, this one will definitely require a lot of attention to deal with. She has all her moves and her ultimate attack will one-shot if not blocked or otherwise iframed/parried.
The Gunners should try and CT her weakpoint or her head, whichever you can build chain from easier and burst her down as much as you can. It’s recommended you try and gain aggro ASAP to help with this.
If anyone else but the Gunner gets aggro, try and keep her facing towards the Gunners without moving too much. She can really move around the map if you let her which makes it harder for everyone involved.
Careful when using Limit Break on Fighter, since you’ll be in one-shot territory for any of her attacks. It’s best to not use it for damage at all and if you need to use it for healing, just back completely away from her (And be sure to not have aggro in any of these cases!)
Bravers definitely have the easiest time here, since Katana can both easily parry her attacks and even just have a total iframe button for 20 secs to ignore any of her attacks. Be sure to use Rapid Fire off cooldown when you can too, Bow with Master Shot does a surprisingly lot of damage against her weak point when fully charged.
Do try and call out if you don’t have any dolls left on this stage, and those that still have 2 dolls in their inventory should share one to those that lost it, don’t wanna reset after getting this far in after all.
Congrats if you managed to kill the boss and achieved the max score!
Credits/Special Thanks
Daicon/Yukkuri team (Specific mentions: Hespelin, Tikitai, Zekken, Unintentional, Nia, Axemented, Sophia, Ebi, Squigly, Xevel) – Yes I have to specifically name them. The NA testing crew so to speak.
Rushia, Uzu, Kat – General information providers to make this guide that much more informational
Ten Evil Stars, Suirano, Boom – the JP testing crew, so to speak.
RoboarksJP – made the maps you see here, check their guide as well: https://pso2roboarks.jp/mission-gekisin
Tori – yea
Video References
8 Player, All Rush classes Max Score (Hunter PoV)

8 Player, All Attack classes Max Score (Gunner PoV)

4 Player, All Rush classes Max Score (Bouncer PoV)

Here we come to an end for Phantasy Star Online 2 New Genesis Challenge Mode Guide – Mission Violet Tremor (CM3) hope you enjoy it. If you think we forget something to include or we should make an update to the post let us know via comment, and we will fix it asap! Thanks and have a great day!
- Check All Phantasy Star Online 2 New Genesis Posts List


Leave a Reply