
This part focus on mid-game to reach a self-sufficient colony that can run hundreds of cycles unattended.
Colony state when starting the mid-game
This part assumes you understand everything explained there and have already completed a few milestones to have a livable colony that won’t fail in the next hundred or so cycles:
- Basic food source: able to provide for your Dupes. I assume this is Mealwood, and will be talking about alternatives.
- Base rooms: you have a Great Hall, Barracks, a Pantry and a Bathroom.
- Hatch Ranch: with the goal of hatching Smooth Hatches. You should already have your first ones or they should be coming soon.
- Water Treatment: you have a closed loop to handle your Toilets/Sinks/Showers Polluted Water output.
- Coal Power Plant: you already have a Power Plant with a Transformer and a Smart Battery, relying on one or two Coal Generators.
So far, here are our processes to take care of the basic needs of your Dupes, assuming you have exactly 8 Dupes:
- Electricity: Dirt => Coal => Electricity, at an average usage of 1200kg/cycle of whatever basic Hatches are currently eating for a steady 600W (a single Coal Generator). It should be lower in reality, because you should save as much electricity as possible.
- Oxygen [requires 1000g/s]: Algae => Oxygen, at an average usage of 660kg/cycle of Algae to run 2 Oxygen Diffusers all the time, or 528kg/cycle for our exact need (800g/s of Oxygen for 8 Dupes).
- Food source [requires 8000kcal/cycle]: Dirt => Mealwood => raw Meal Lice, at an average usage of 400kg/cycle of dirt (not counting Hatches occasional Meat)
- Filtration medium: assuming each Dupe washes its hands (5kg), uses the toilets (11.7kg) and takes a shower (30kg) exactly one time per cycle for a total of 373.6kg of Polluted Water to filter, that’s going to be 75kg/cycle of sand. You also need to add Deodorizers, which will use a variable amount of sand.
Here are the things we need to handle that are currently ignored:
- Heat: generated by several buildings built so far. It’s hard to have a precise figure, but since the Coal Generator alone is 9KDTU/s, it’s probably going to be between 10KDTU/s and 20KDTU/s if you need to use a steady 600W, and can be a bit below 10KDTU/s if you are very conservative with electricity. Let’s assume 12KDTU/s for now, which is not a lot.
- Germy water: 53.6kg/cycle excess (polluted or cleaned) produced by Lavatories (6.7kg per Dupe, assuming one lavatory use per cycle for every dupe). That’s not a lot, but it’s worth mentioning.
- CO2: 9.6kg/cycle generated by breathing + 12kg/cycle generated by Coal Generators, assuming a steady 600W production for a total of 21.6kg/cycle.
To sum it up in a small table, ordered by kg/cycles:
| Resource | per cycle | Usage / Source |
| Raw mineral | 1200kg | Steady 600W |
| Algae | 660kg | Oxygen |
| Dirt | 400kg | Mealwood production |
| Heat | 12KDTU/s | Buildings heat generation |
| Sand | 75kg + variable | Water treatment + Deodorizer |
| Germy Water | 53.6kg | Lavatory excess water |
| CO2 | 21.6kg | Breathing + Coal Generators output |
To reach a long term sustainable base, you need to solve all those points in a way that doesn’t require using non-renewable resources, don’t leave by-products unhandled, and is heat neutral.
As you can see, there is a huge difference in importance: you can ignore the bottom three for a very long time. As such, we won’t cover those in this part. We will briefly cover CO2 handling at the end of this part, the sand will be replaced by Regolith when you reach space or can be produced with Rock Crusher or Pokeshells, and the excess water should be used to supplement a renewable water source, water some less important crops, or dumped somewhere (but it will take more than 100 cycles to fill your reservoirs).
Another goal is to make more use of Automation and Shipping, with the Refined Metal your Smooth Hatches should be starting to produce, to lower Dupes labor. They will be able to focus on other non-automatable errands.
It’s up to you in which order you tackle those points, and how you solve them will depend on the renewable resources available on your seed and which solution you prefer. There isn’t a single best option for each one. I will present them in a way that makes sense and works so you can follow along.
As an example, here is the plan I used for mid-game. You will notice that the Mealwood farm has been removed when adding the Dusk Cap farm, and the Barracks have been upgraded to Bedrooms, which take twice as much space. The other existing rooms were not modified.
Energy-saving tips
While you have a Coal Generator running, or perhaps two, it’s not a good idea to waste power until you get renewable electricity. Even when you do, saving energy is always a good idea until you get a large-scale power plant.
After you get your first Refined Metals, it unlocks Automation, which allows for some energy-saving measures for very cheap. This section will be a random collection of energy-saving tips.
Avoid double pumping
This is the most simple tip, but a lot of people don’t know about that: once a gas/liquid is pumped into a pipe, you don’t need any electricity to move it around in pipes.
If you vent gases/liquids outside pipes, you will need to pump them again later, which wastes power.
Instead you should build Reservoirs where you need to store gases/liquids and design your pipes in order to enable your system to safely stop at key points if things get backed up: for example, have an overflow for your closed bathroom loop, pay attention to your piping priority, and ensure you don’t pump things that would clog your pipes.
The main reasons to vent a gas/liquid in pipes are for infinite storage purpose (explained in Natural Gas part), to be able to bottle a liquid or to create an artificial atmosphere.
Avoid pumping partial packets
This is a small energy-saving measure, and might not be worth the effort in every situation, but by simply placing a Atmo/Hydro Sensor right next to your Pumps, you can ensure there is enough gas/liquid/to pump to avoid pumping partial packets, and only pump full packets of gas/liquid for maximum efficiency.
Different Pipe filters
There are 3 different ways to filter gases and liquids, but the first one you unlock is far from efficient:
- Standard filters: the Gas & Liquid Filters buildings, which use 120W and can overheat. The Liquid one even produces heat. While they are 100% reliable, it’s a lot of power just to filter gases/liquids.
- Automated filters: a Gas/Liquid Pipe Element Sensor combined with a Gas/Liquid Shutoff positionned just after do the exact same job, for a low cost of 10W when active. The big caveat of this filter is that it will fail to work properly if either output is backed up. A variant is to add a NOT Gate to filter something out: if you build it in a way that it only activates infrequently, it uses almost no power. For example, if you want to filter Oxygen in a mainly Oxygen pipe, detect Oxygen, add a NOT gate and the Shutoff will filter out anything that is not Oxygen. In the example screenshot, the top pipe will have Oxygen, and bottom pipe everything else.
- Automated Vent filter: very similar to the previous one, except it doesn’t use any power and instead releases the gas/liquid to the world. It’s very handy if there is a gas/liquid you don’t care about and just want to release in the surroundings. In the example, anything that’s not Oxygen will be ejected out of the pipe.
- Mechanical filters: those are a bit exploity, and rely on the fact that two different gas/liquid packets cannot be merged, but identical ones can. They use a Valve to limit the flow in a loop, and that loop must be primed with the target gas/liquid. Once the loop is primed, only this element will be allowed in, without any electricity usage. You can follow
to build one. They can fail in some conditions, refer to forums.kleientertainment.com – https://forums.kleientertainment.com/forums/topic/77191-mechanical-pipe-filter/ for more informations.
In my opinion, standard filters consume too much electricity to be useful in any long term build, and mechanical filters are too exploity and take too much involvement to build, so my preferred method is to use Automated Filters, and ensure nothing get backed-up when filtering is very important (in some cases, it’s not that important and I do not care if it fails).
Avoid using an Aquatuner when possible
I will be talking about it in the next part, but it’s very tempting to use the Aquatuner, especially coupled with a Steam Turbine. The combo of both, the ATST, has got to be one of the most overused builds.
In a lot of cases, you don’t have to: if you can transfer heat passively, do that: that includes dumping heat in a Cool Slush Geyser cold water, self-cooling a Steam Turbine, or passively transfering heat from a Metal Refinery to a Steambox. Those last 2 points, as well as the ATST will be explained in the next part.
Heating: Liquid Tepidizers are very efficient
If you are looking for heating, which is generally only the case if you start on Rime, the single most efficient heater is the Liquid Tepidizer, at 4.200DTU/s per watt. Just create a pool of water, place a Tepidizer in it, and in no time you will have hot water that can be used to heat anything you’d like with pipes.
On the other hand, because of its 85°C limit, it cannot be used to create Steam without a serious exploit (pulsing the Tepidizer to overcome the limit, which is one of the most extreme exploits because it allows infinite power creation), making the Tepidizer a really niche building.
The next best options are:
- Metal Refinery producing Steel: around 1.600DTU/s per Watt (or about 800DTU/s per watt for Refined Metals, except Gold which is much lower): this is a great option because it produces useful things while heating.
- Small Batteries: at 750DTU/s per watt (accounting for power runoff), they are surprisingly good and heat the atmosphere directly without piping. But you are going to need a lot of them to produce noticeable heating.
- Thermo Aquatuner: almost 500DTU/s per watt can be moved to some Water/Polluted Water. The issue is that while you are tying to heat something, you are left with a very cold coolant which must be disposed of. You must also find coolant that is hot enough so that heat can be dumped in it without freezing it.
- Glass Forge: at 250DTU/s per watt, it’s significantly worse than a Metal Refinery, and the output is less useful too.
- Space Heater: at 150DTU/s per watt, it’s a terrible option. For a building which main purpose is heating, it is really bad at its job.
(Optional) Building an unsustainable Metal Refinery
- Why: you don’t have Smooth Hatches yet but really want Refined Metals (for Automation, Shipping or Atmo Suits), or need some Steel (for Aquatuner in Steam)
- Prerequisite: Smelting, somewhere to dump heat
I advise against the unsustainable approach:
- You need to provide 1.2KW, which is the output of two Coal Generators. That’s going to be a lot of heat.
- 1.2KW is more than what a normal Wire can handle, meaning it will have to be close to your Power Plant and linked with Heavi-Watt Wire.
- Refining Gold produces 264KDTU/s of heat added to the coolant for Gold (which is the Refined Metal which produces the least heat, by far). Add to that 16KDTU/s for the refinery as a building and 18KDTU/s for two Coal Generators, for a total of almost 300KDTU/s. That’s a crazy amount of heat and you cannot get some of it back in the form of power yet, meaning you will need to dump it somewhere. For small batches, away from your base, it can be ok, but that’s really not sustainable.
- Refining Steel produce 2 339KDTU/s of heat, almost 10 times as much as Gold. Let’s just say it’s even less sustainable and wheezeworts are not an option.
- Since it’s there, you might be tempted to over-use it.
- And the most important reason in my opinion: it’s a bad habit to get too reliant on that, because on the hardest asteroids you won’t have a cold biome to dump heat into.
Please note that you are pretty much required to do that to kickstart your industrialisation when going the regular farming + industry path, and that’s a very common thing to do when you are more experienced. I advise against it when you are starting out, because it’s easy to have it doom your base.
A sustainable Metal Refinery will come in the next part after your colony is self-sustainable. In the meantime, Smooth Hatches will produce all the Refined Metal you need.
If you still decide to build one right now, it’s best to choose a place away from your base, in or near a Frozen Biome, insulate it from your base, and snake a liquid pipe through the Frozen Biome to cool the Metal Refinery coolant.
Note that Wheezewort cooling is not really an option: you would need 25 Wheezewort (with gold) to cool that much heat (obviously less if you don’t run it all the time), and it’s unlikely your map even has that many.
You can use either Manual Generators or Coal Generators, and you can add several to have a better throughput: 3 Manual Generators or 2 Coal Generators to have a Metal Refinery running all the time.
A safe coolant is Crude Oil, which has a large temperature range, but if you didn’t reach the Oil Biome yet, use Polluted Water and be careful of not cooling it under -20°C or heating it over 120°C to avoid breaking your pipes.
Here I took a bit of Polluted Water nearby, all the Pipes and Tempshift Plates are in Granite(the highest Thermal Conductivity available material so far).
I also recommend a control mechanism with a Liquid Pipe Thermo Sensor and a Liquid Shutoff to only send the coolant back to the Metal Refinery if it’s cold enough.
A good value is about 40°C. When the area starts reaching close to that temperature, it’s probably time to shut down this build or move the coolant loop somewhere colder.
Automated ranching
- Why: Reduce Eggs micromanagement, reduce labor
- Requirements: Refined Metals, Mechatronics Engineering skill, Research Solid Transport
This is the first mid-game step I advise, because eggs micromanagement is a chore.
You will need a lot of Refined Metals, like other steps going forward. If you don’t have Smooth Hatches yet, I advise to get started on Exploration, which doesn’t require any and can be done at any time, and do that as soon as your first Smooth Hatches produce Refined Metals.
In order to properly automate our Hatch ranch, we will need three rooms:
- The actual Ranch, which will get some improvements.
- An incubation room, where some eggs will be reserved to renew the Hatch population.
- A drowning room, to put excess eggs so that Hatchlings automatically drown when they hatch.
Note that the incubation and drowning room can be combined into a single room that do both, which I’ll call the Hatchery. In the designs below, the Hatchery is detached from the Hatch Ranches. As you will see later, it fits perfectly on the side of the Pacus farm I’ll show toward the end.
Let’s start with the ranch: it needs to be large, but you can restrict your Hatches movement with doors, as long as there is an open tile linking both parts as a single room:
- You only need one Auto-Sweeper to cover the part where Hatches lay eggs.
- You can use the rest of the room for buildings which don’t need to be in a specific room. Here you can see the Kitchen, explained in the next section.
- This slightly reduces travel time, improving efficiency.
That new ranch consists of 2 floors housing 5 Hatches each. At that point, 5 Hatches and 5 Smooth Hatches are a perfect amount, which synergize very well with unpowered Incubators.
We also added a Storage Bin to refill the Critter Feeder, and a Conveyor Loader that ships Eggs and Meat to the Incubator/Drowning room. Both are operated by the Auto-Sweeper, and Dupes just need to fill the Storage Bin with Critter food. I’ll explain the shipping in more detail in the next section.
The drowning part is really simple: eggs get dropped in a tile of water. Note that the bottom tile must have a full tile of liquid (1000kg of water, any 2 liquids stacked, or a door above) to drown the Hatchlings. Having a 2-tile height space which you fill with water is a very easy solution, but you’ll often encounter a 1-tile height space with a door above it to force drowning.
The incubators are there to “save” a few eggs to renew the Ranches population: unpowered, an egg will take 20 cycles to hatch. On the other hand, a Hatch lives for 100 cycles. That means a single unpowered Incubator will renew a population of 5 Hatches. Since we have 2 ranches of 5 Hatches, we need two of them. Designate one for regular Hatches, and one for Smooth Hatches.
The Critter Drop-Off is set to 0 Critters and Auto-Wrangle Surplus to automatically move any critters remaining there in a ranch. Later on, you might have a Wild Hatch ranch with a lower Drop-Off priority, so any excess Tame Critter dropped there will naturally starve.
You will notice the Conveyor Loader in that room: it’s optional but save a bit of Dupe labor. The next section will explain in detail the Shipping routes. For now, set it to accept Meat and Egg Shells
Once you are done, say goodbye to eggs micromanagement. From now on, I advise you to build the shipping from the start to save that headache.
There is an additional improvement you can make: instead of using Incubators and a Critter Drop-Off to make your Ranchers wrangle critters back into Ranches, you can use what’s known as a Pez Dispenser. A gif of the behavior is shown on the Compendium, and here is an example of an optimized and compact version of this that also acts as a drowner by dropping some liquids in the chamber, courtesy of Ishamoridin:
The automation relies on two critter sensors connected to an AND gate:
– the one in the ranch is set to “Below 8”.
– the one in the Pez Dispenser is set to “Above 0” and “Critters only”.
– the mechanized door with a NOT gate is there to trap Critters and drown the excess. When there is no live critter inside, an Auto-Sweeper above can take Egg Shells and Meat out.
This optimization is a bit overkill that early in the game in my opinion, and doesn’t fit with my own modular design, but it’s the most optimal form of Hatch ranching as it removes wrangling errands.
Shipping network & Kitchen
- Why: Reduce Labor, more Morale from meals
- Requirements: Refined Metal, Mechatronics Engineering skill
We briefly talked about shipping in the previous section. It’s now time to get a full shipping system which future ranches/farms will be able to plug into. The goal is to automate all the shipping around Critters output: Food and Lime ingredients.
Note: we are going to talk in advance about items that are going to be presented later, in the Dreckos, Pacus and Pokeshell sections, in order to have a full picture right now. Check back here when you add those to your colony.
An optimal route is Ranches => Hatcheries/Farm => Kitchen => Rock Crusher/Food Pit:
- Ranches can produce Eggs, Meat, Pacu Fillet, Lime ingredients (Egg Shells and Molts).
- Hatcheries receive Ranches input and produce Meat and Lime ingredients. They keep Eggs (to incubate, drown or leave to be wrangled later) and ship everything else to the Kitchen.
- Farms produce Vegetables which are shipped to the Kitchen. Optionally you can also send Seeds so that they are forwarded to the Food Pit to avoid the Decor penalty inside the Farms.
- The Kitchen receives all the previous inputs and cook the food. Cooked food is then shipped to the Food Pit and Lime Ingredients to the Rock Crusher.
- The Food pit receives Cooked food which is left in a CO2 atmosphere to prevent rot. It doesn’t have to be stored in fridges. Optionally seeds can be shipped there because it can also act as a debris storage.
- The Rock Crusher receives Lime ingredients to be processed into Lime. Lime is going to be a very important ingredient to produce Steel during late-game.
To sum up those process:
The Kitchen itself is very simple: just place an Electric Grill and a Gas Range side to side. The Gas Range requires Natural Gas, which will be presented later when talking about Natural Gas taming.
The free space on the side of a Hatch Ranch is a perfect place to build your Kitchen. Notice that I also added an Apothecary, which will be used to produce Medicine for the Hospital later.
Making a controlled atmosphere
- Why: next steps require specific gas to create a controlled atmosphere in some rooms
- Prerequisite: Research HVAC
We already have one such controlled atmosphere: the Pantry, which is filled with CO2 to prevent food from spoiling.
To make a controlled atmosphere in a room, you have several options:
- Passively let it fill with the expected gas. This only works in some cases, mainly with CO2, but most of the time you will need to use an active method.
- Using a Gas Vent. This works best if you have a Gas Reservoir close by, since you will need to build pipes all the way from the Reservoir or from a Pump to the Vent. A regular vent overpressures at 2kg/tile. If you need more than that, go for a High Pressure Vent, which can go up to 20kg/tile. Be careful with that though, Dupes will get Popped Eardrums if they are in an atmosphere with above 4kg/tile of gas.
- Using Canister Filler/Canister Emptier. This works best for small amounts of gas and if you have a Gas Reservoir or a Pump which is far away and you don’t want to build pipes all the way. On the other hand, it requires a floor tile with 3 tiles of height. There is no pressure limit with the Canister Emptier.
A Manual Airlock is generally enough to keep gases contained in a room, especially on unmanned rooms, but you also need to pay attention to where your doors are located.
Assuming you have Oxygen around:
- For a Hydrogen room (lighter than Oxygen), place doors at the bottom so that Hydrogen is trapped.
- For Chlorine/CO2 rooms (heavier than Oxygen), place doors at the top so that they are trapped under the Oxygen.
Later, we will see a better method to keep gases in a room reliably regardless of their weight, but for now that’s enough.
To gather gases, you have 2 options:
- the lazy option: having a Gas Pump feeding directly to your Vent or Canister Filler, optionally with a Gas Filter if you don’t have a pure gas atmosphere where your Pump is
- the controlling option: pump gas to a Gas Reservoir first, then use that for your Vent or Canister Filler. That allows you to easily keep an eye on gases levels and avoid having to move Pumps because their surrounding gas changed.
It’s up to you which option you choose, there is no clear winner. I went for the controlling option first, but in retrospect, I could have gone with the lazy option and it would have worked just as well.
What are those gases used for? Here are a few examples:
- Hydrogen: Drecko Ranch, Wheezeworts optimal usage
- Chlorine: Balm Lily/Phosphorite farm, Decontamination room
- CO2: Dusk Cap farm, Pantry
Plastic with Dreckos
- Why: plan ahead for Plastic production
- Prerequisite: available Hydrogen
We are going to start creating a controlled atmosphere right now, as it’s time to start ranching Dreckos, and more specifically Glossy Dreckos for Plastic.
Plastic usage
Before learning how to produce it, let’s see why we want Plastic soon:
- Steam Turbine: this is the main reason: Steam Turbines are great at cooling. I delayed getting them because they are complicated at first, but Steam Turbines are the only industrial-grade cooling solution currently in the game.
- Plastic Ladder: Fire Poles are good but only cover downward mobility. Plastic Ladders cover upward too. You won’t have enough plastic to replace every Ladder at first, be strategic about which one you upgrade. Consider using the https://steamcommunity.com/sharedfiles/filedetails/?id=2208398090 to identify most used Ladders.
- Comfy Bed: it’s a small upgrade over Cots that let Dupes sleep less, and let you upgrade Barracks to Bedrooms for +1 Morale. It’s a nice-to-have, but not as important as the previous ones, and some people prefer staying with Cots because they take less space.
There are other uses, and it will be useful to have a bit of plastic available for those, but beware of those
- Transit Tube: it’s really tempting, but it trades electricity for speed. It’s a late-game project, you should wait until Electricity is plentiful, and you’ll need more plastic than what a reasonable Glossy Drecko farm can produce in a short timeframe.
- Plastic Tile: it improves horizontal mobility, but it’s overshadowed by Metal Tiles, which have better decor and for which materials are easier to get.
- Mini Gas/Liquid Pumps: while there are some uses for Mini Pumps, they are way less efficient than their regular counterparts in general. I will cover a specific use case for the Mini Gas Pump in Liquid Airlocks.
Convinced you need Plastic? Let’s see how!
Just like Hatches, using Dreckos for Plastic rather than the industrial process lets you have low-profile production sooner, without any electricity consumption or heat production. Starting it right now is a good idea since it will require an evolution.
The only alternative for plastic production, the Polymer Press, requires some Petroleum, which means reaching the Oil Biome and refining Crude Oil to Petroleum. The building itself uses 240W, which isn’t that much, and can be made self-cooling, but it uses Petroleum, which will be best used as an electricity source and for rockets.
The overwhelming consensus is that Glossy Dreckos are better and that you should never build a Polymer Press, even when going for a farming/industrial path.
Drecko ranching
The evolution tree is much more simpler than for Hatches:
You simply need to get a Drecko to lay a Glossy Drecko egg. For that, feed them Mealwood to increase odds.
Regular Dreckos can eat Pincha Pepperplant, Balm Lily or Mealwood. Of those, you should only feed them Mealwood if you want to breed Glossy Dreckos, and Balm Lily otherwise.
Feeding Dreckos Balm Lily is great in theory: since Balm Lily don’t require any fertilization, you get a source of food, Phosphorite and Reed Fiber which only requires Dupe time (and a very controlled atmosphere, with Hydrogen at the top, Chlorine at the bottom, and optionally Oxygen in between for Dupes to breath before Atmo Suits). Since none of those is really a bottleneck for the playstyle described in this guide, I’m not going to cover it in detail. Plus it’s not as good as it seems:
- Food: there are better options (Pacus for example, covered later): Dreckos live for too long, hence a very low Meat output.
- Phosphorite: Glossy Dreckos should provide more than enough for your Wheezeworts and Hospital, and we are not going to use Fertilizer Synthesizers, grow Pincha Pepperplants or feed other critters with it.
- Reed Fiber: it is mostly used for Decor, which is a late-game concern and can be safely ignored as long as you don’t overextend your Dupe skills. The low amount required for clothing will be generated with your initial Dreckos, and by just finding Thimble Reed in the wild.
Glossy Dreckos can eat Mealwood or Bristle Blossom. Both work, but Mealwood is easier to setup, since it doesn’t require lighting or irrigation, so we are going to use that, but don’t forget to switch to Bristle Blossom before exhausting your Dirt:
Those rooms allow you to fit 5 Dreckos: while Glossy Dreckos would like to eat more (3 Mealwoods per Glossy), they only need enough not to starve, since we do not care about their Phosphorite output. This means, in practice, you only need 1 Mealwood per Drecko Breeder.
The top of the rooms is filled with Hydrogen, so that Dreckos scales grow when they are there, and the bottom is Oxygen, to allow Mealwood growth and let your Dupes breath. To maximize efficiency, you need to increase the time Glossy Dreckos spend in the Hydrogen part of the room. This simple design isn’t that great in that regard.
Note that you can wait until you have Glossy Dreckos to fill the top with Hydrogen if you don’t care about Reed Fiber. It should be approximately at the same time that you get a SPOM: you can use a bit of Hydrogen from the SPOM to fill your ranch rather than burn it for power, making the Hydrogen collection much easier.
Don’t forget about temperature control! All critters have a fixed spawn temperature. For all Hatch variants, it’s 15°C, which means you don’t need any special care, but Dreckos spawn at 62.5°C and Glossy Dreckos at 42.5°C. Given enough time, ranches will equalize to the temperature of the critters they contain, which is fine if you feed Dreckos Balm Lily or Pincha Peppernut, but will overheat Mealwood and Bristle Blossom. This means you will need cooling. We will get back to that later, for now I suggest replacing one Mealwood by a Wheezewort, and check back from time to time if you need to add a second one.
Maximizing eggs usage: since you will have a lot of excess eggs, rather than making Omelettes or killing Dreckos as soon as they hatch, a better solution is to starvation-ranch them: by wrangling them in a small Hydrogen-filled room with only a Shearing Station, you can get a few Shearing per Drecko before they die of starvation. With that method, you can reduce the number of Breeders that have to be Groomed and Fed.
Here is a more advanced design that fits into a 16×9 room, with 2 starvations room for up to 40 Dreckos, a small Hatchery and a Breeder room that can fit up to 5 Dreckos, though I generally limit it to 2 or 3 to reduce labor (that’s more than enough):
This is a modified version of forums.kleientertainment.com – https://www.reddit.com/r/Oxygennotincluded/comments/ba5787/some_ranching_designs_made_possible_by_the_qol/. It doesn’t fit my own design constraint and is more complicated, but it’s a great design, and the tutorial explains how to build it.
Dusk Cap farm
- Why: stop using Dirt, more Morale, reduce labor
- Prerequisite: None
After Drecko ranching is started, the next order of business is to switch to Dusk Caps for food.
Why now? First, Dirt is valuable, our supply is large but limited, and there isn’t any good way to mass-produce Dirt. Second, Mealwood uses quite a bit of Dupe time, and we can reduce that.
By now, you should have found a few Dusk Caps: those are the perfect mid-game food:
- Dupe time: they require a lot less farming errands than Mealwood.
- Switch from Dirt to Slime: it frees up Dirt for other uses and you should have plenty of Slime from your exploration in Swamp biomes.
- 400kg/cycle of Dirt to 100kg/cycle of Slime: that’s a quarter of materials! This means a lot less trips to gather materials and lower resources usage overall.
- Can be cooked: at the cost of labor, you can lower your usage to 86kg/cycle of Slime, while adding +1 Morale. It might not be the best usage of Dupe time though and it requires a Cook for Electric Grill usage.
Warning: while Dusk Caps are a perfect mid-game food, they are not great late-game: Slime is finite, and while you can generate some with Pufts, there are better late-game foods, which are easier to produce and give more Morale.
This should be the first thing to scale down if you have too much food: with all the ranching we are doing, you shouldn’t need that much Mushrooms in the first place.
This is the design I recommend, which includes Shipping:
There are a few notable things:
- The door is at the top to trap the CO2.
- There is a submerged Storage Bin, set to accept Slime. Submerging it prevents Slime from off-gassing Polluted Oxygen.
- The bottom Auto-Sweepers are able to fertilize the Farm Tiles on top of them, which is why we only have one Storage Bin, but cannot collect Mushrooms on top of them. That’s why there are Auto-Sweepers on top too.
- Airflow Tiles could be anything: those are tiles the bottom Auto-Sweepers cannot fertilize.
By now, I assume you have plenty of CO2 lingering at the bottom of your base: pump some of it in the room until it’s filled with CO2 to speed up the process.
This room is perfect for 8 Dupes: that’s 25 Dusk Caps, which is exactly the number needed if consuming raw Mushrooms. If you are cooking Fried Mushrooms, you only need 22 Dusk Cap.s With your Hatches and now Dreckos, you might not need that much: start by disabling Harvesting, which will remove labor entirely, then dig up Dusk Caps when you don’t need them anymore.
(Optional) Hospital
- Why: heal sick and injured Dupes
- Prerequisite: research Medical Equipment
Since we are going to do a lot of exploration, it might be useful to have a Hospital to cure sick Dupes. It will also help if you accidentally injure your Dupes when doing some tricky constructions or when fighting Critters.
I marked this step optional, because the Hospital see very little actual use, and you can totally forgo it entirely: as an example, I used a grand total of 5 Medical Packs in about 150 cycles.
Diseases cannot kill your Dupes, and heal by themselves anyway. The only debilitating one is Zombie Spore, which gives -10 to all attributes and takes 18 cycles to heal. You will need to pay attention to Zombie Sporechids when you reach the Oil Biome.
Health isn’t much of an issue either, as your Dupes heal a bit when sleeping in a Cot or Comfy Bed: as long as you don’t make them fight too many critters in a row and don’t scald them, they will heal more than enough when sleeping.
If you still decide to build a Hospital, you should build it in a lesser used part of your base. Here is what a basic Hospital looks like:
- Doors: the only tricky part, they are both configured to go right only, so that Dupes are forced to wash their hands when entering the room or anytime they use the Lavatory.
- Lavatory and Mess Table: both are required to make a Hospital.
- Triage Cot: it restores health and revives dupes. This is the most useful building there, and even then it’s not THAT useful, because Dupes can sleep off minor injuries. It’s useful if you send Dupes in very hot places without Atmo Suits (for example, boxing a Cool Steam Vent before you get Atmo Suits), or if you Dupes get attacked by Pokeshells.
- Sick Bay: it cures Slimelung with Medical Packs. In previous versions of the game, Slimelung was said to be a real threat, but currently it poses little threat, making the Sick Bay and Med Packs almost useless.
- Disease Clinic: it cures Zombie Spores with Serum Vial. Not shown there (but there is room for it in the middle), because you need more research and Refined Metals to build it, then Steel and Sun Nymph Egg to create Serum Vials. You won’t have Steel before the next part. Instead of going through that trouble, it’s better to always explore the Oil Biome with Atmo Suits, which we will cover next, and uproot Sporechids as soon as you see them, to prevent a Zombie Spore outbreak.
- Apothecary: craft Medical Packs, Serum Vials and various other less useful Medicine. It doesn’t have to be built there: it can be built anywhere, but there is remaining room, and it makes sense to build it close to Medicine buildings. You could also build a second Triage Cot there if your Dupes get injured a lot.
The remaining room can be used by either a Disease Clinic or a second Triage Cot. You can also build the Apothecary elsewhere to fit both. I prefer to build it on the side of a Hatch Ranch because I have space leftover there.
Note: if you frequently have injured Dupes, it might be worth it to build more Triage Cots outside your Hospital. They don’t need to be in the Hospital to work.
Exploration & preserving Biomes
- Why: find useful items for later
- Prerequisite: None
The next order of business is to start exploring. It’s going to take a while, because a default Terra map is quite large. You should pause the exploration to progress on other steps from time to time.
Your exploration goals are, in order:
- Find Frozen Biomes, to get some Wheezeworts
- Find some Gold Amalgam, to feed your Smooth Hatches, to have Gold. Gold is a great mid-game construction material, and is generally abundant.
- Find a handful of Wild Balm Lily to harvest to create Medical Packs. Building a farm or keeping their atmosphere is not required considered the very low usage.
- Find Geysers/Vents/Volcanoes. Leave them closed off for now, we are just doing recon to plan for later.
- Reach the Oil Biome to find Slicksters and Oil Wells for late-game.
- Reach the Space Biome which is only going to get used during end-game.
What direction to explore first? Since the Oil Biome is below, you should first dig down. Once you reach it, you should then dig up to reach Space Biome. Then, extend on the sides to find remaining Geysers/Vents/Volcanoes.
Note that if you start exploring before getting Atmo Suits (if you need cooling earlier, or if Smooth Hatches aren’t ready yet for example), I advise digging up and on the sides first, in order to avoid digging in CO2/Chlorine, which is very slow because Dupes will stop what they are doing to find Oxygen to breath all the time.
On Terra, unless there is an accident during the map generation, you should have, guaranteed:
- One Cool Steam Vent in a Swamp Biome.
- One Cool Steam Vent in a Caustic Biome.
- One Natural Gas Geyser in a Swamp Biome.
- One Natural Gas GeyserORChlorine Vent in a Caustic Biome.
- One Salt Water Vent in a Tide Pool Biome.
- One Anti Entropy Thermo-Nullifier (AETN) in a Frozen Biome.
- One to Four Oil Reservoir in the Oil Biome.
There are supposed to be 12 other buried Geysers/Vents/Volcanoes, and there might be more AETN as well: you’ll have to work with what’s present on your map.
We will get back to those shortly, when looking for renewable options.
Efficient exploration
You might have noticed that building Ladders straight up or down is slow, as for every tile, there is a digging, supplying and building errand. Then the next step can only be started after the previous tile is digged, and thus isn’t done at the same time.
In order to efficiently explore, a better way is to dig S-shape shafts without ladders. Those shafts are much faster to dig out.
On the other hand, Dupe move speed is greatly reduced there. If you need regular access to those parts, you should add Ladders (and later Fire Poles and Tubes). Since they can supply and build 3 Ladders at the same time, the ladder supplying and building will be much faster too.
Leave the undug tiles for last, in order to avoid Dupes getting stuck on the wrong part of the shaft after digging a tile.
(Optional) Preserving Frozen Biomes
- Why: avoid Frozen biome liquefying and preserve Wild Sleet Wheats
- Prerequisite: None
This part is entirely optional, because you might not care about conserving Frozen Biomes.
When you enter a Frozen Biome, you will have to dig part of the Abyssalite that thermally protects it, as Abyssalite has almost no Thermal Conductivity. That means it will start exchanging heat at the place you dug Abyssalite. It will take a long time, but two things will happen at some point:
- liquefiable tiles will melt: be prepared to handle that liquid to avoid flooding your base and having the Soggy Feet debuff too often.
- Wild Sleet Wheat will stop growing once it reaches 5°C. As we will see later, wild Sleet Wheat cooked in Frost Bun is a good supplemental food that doesn’t require any input and just has to be collected from time to time.
This means you might want to keep the closest Frozen Biomes intact, and only remove Wheezeworts from farther Frozen Biomes if you want to use that food option. It’s even possible to survive only from Wild Sleet Wheat. You need to find and keep alive 10 Wild Sleet Wheat per Dupe if you want to go that way.
On the other hand, since ranching will give a steady supply of food, it might not be worth it to keep them: the choice is up to you.
My opinion on the matter is to not bother, as food is a non-issue when ranching a lot and keeping a low Dupe-count.
If, on the other hand, you want to preserve Frozen Biomes, you need to keep them insulated. To start off, only dig as little Abyssalite as possible, as it’s the best insulator in the game (until you get to space).
You need to lower the heat exchange as little as possible. Credits to Discord user Penthyn for that solution:
Ideally, make the Airlock Doors out of gold, and the Insulated Tiles out of Igneous Rock, and preserve all the Abyssalite you can.
This will drastically slow the heat exchange as gas won’t be able to move much: here is the temperature overlay just after the corridor construction on the left, and 90 cycles later on the right. As you can see, the Sleet Wheat just beside the door is still at a nice -15°C, although some heat definitely leaked.
A better solution, that requires electricity wiring and refined metals, is to use a https://www.reddit.com/r/Oxygennotincluded/comments/cuwn63/three_part_thermo_lock_a_vertifarms_ltd_product/, or one of the two heat-insulated Liquid Airlock presented later. A bit overkill, but those options will conserve the Frozen Biome almost indefinitely.
Boxing exposed Geysers
When exploring, you will encounter Geysers/Vents/Volcanoes.
They will be either buried, which can be spotted by the 4 tiles of Neutronium, or exposed, in which case they are already erupting from time to time.
If you encounter exposed Geysers of any type you don’t intend to use right away, you should proceed to box them: since they are hot (apart from a few exceptions), you don’t want them to heat up around them and spew their content everywhere.
The absolute minimum to do is a single layer of Igneous Rock Insulated Tiles. That’s because Igneous Rock is the best material for Insulated Tiles at this stage, which you want to use to contain the Heat.
You can slightly improve that by adding a second layer of solid Tiles. Any type and any material will do, the goal is to avoid transferring heat to Insulated Tiles via gases (which transfer heat faster than tiles).
This is especially important for gas Geysers, as an unchecked Chlorine/Natural Gas/Hydrogen Vent can wreak havoc in your base by pushing the Oxygen out.
Liquid Airlock
You will need to tame some of the Geysers you will find. We will go over the specifics in a moment, but before that there is an essential concept you must know about: the Liquid Airlock.
You probably already noticed that Airlock Doors perfectly prevent gas movement when they are closed, but not so much when a Dupe goes through them. Unfortunately, building a real Airlock is really complicated, forums.kleientertainment.com – https://forums.kleientertainment.com/forums/topic/119999-real-airlock/
Instead, there is a simple solution: the Liquid Airlock.
The Liquid Airlock exploits the facts that:
- Liquids are sticky and won’t move too much unless they are forced to.
- Gas cannot go through tiles where there is a Liquid.
- On the other hand, Dupes can go through liquids.
Those mechanisms allow building an artificial Airlock that blocks Gases but not Dupes. The main issue with that system is liquid vaporization and freezing points, which must not be crossed, otherwise your airlock will fail.
Early on, you don’t have much choice: it’s better to avoid Polluted Water, because it off-gas Polluted Oxygen, which will mess up your atmosphere on both sides of the Airlock, so all you have available is Water.
After reaching the Oil Biome, you can use Crude Oil, which has a better temperature range, then Petroleum which adds a bit of margin on both sides. The difference between Crude Oil and Petroleum is minimal for most use cases.
Later on, refer to the oxygennotincluded.gamepedia.com – https://oxygennotincluded.gamepedia.com/Liquid to find the perfect liquid for your airlock.
The Liquid Airlock design I showed is the simplest one, and also the most robust. To see various Liquid Airlock designs with different trade-offs, refer to oxygennotincluded.gamepedia.com – https://oxygennotincluded.gamepedia.com/Liquid_Airlock
Heat insulating your airlock
The Liquid Airlock blocks gases, but doesn’t prevent heat transfer: even if it’s made out of Insulated Tiles, heat will transfer through the liquid.
To solve this, you need a vacuum area so that heat cannot transfer through gas.
This is actually very easy to do: build 2 liquid airlocks side by side, and vacuum out the middle portion, either with a Gas Pump, or by filling the area with tiles and deconstructing those tiles.
While this solution is good, your Dupes need to cross 2 Airlocks, which slow them down. Instead, if you don’t mind using a bit of power, you can have a single Airlock solution, by using an Airlock Door (Mechanized or Manual) and a Mini Gas Pump. Credits to Hotep Thunderbolt for this neat design.
Gases will get inside when the door is opened, but will be ejected in no time once the door is closed. It’s a perfect solution for places that only need infrequent access.
Why a Mini Gas Pump and not a regular one? Apart from the obvious smaller size of the Mini Gas Pump, this pump has an advantage compared to the normal Pump: it is able to pump gases from all the tiles it covers, which makes it perfect at vacuuming a small area, where a normal Gas Pump will struggle to vacuum out the last remaining grams of gas at a higher cost.
Generally though, you should not use Mini Pumps: they are less efficient than the regular ones, and being made of plastic means they have a very low Melting Point, as well as a low Overheat temperature.
Atmo Suits
Atmo suits
- Why: Prevent scalding, work in non-breathable gases
- Prerequisite: Hazard Protection
While Dupes can hold their breath for a short time and are generally fine with a wide range of temperature, Atmo suits will considerably improve your exploration speed by shielding your Dupes from the environment.
You should now have at least a small supply of Refined Metal, which means it’s time to build and use your first Atmo Suits!
This step can be delayed until the end of mid-game, as it only starts being mandatory for Space and Oil biomes. On the other hand, it will greatly speed up exploration, and it’s really useful to tame hot water sources and Natural Gas Geysers in order to avoid scalding.
To build your first Atmo Suit and use it, you’ll need quite a bit of Refined Metal:
- Forge: 400kg Build an Exosuit Forge, which is used to craft Atmo Suits.
- Atmo Suit: 300kg Craft an Atmo Suit (or more) in the Forge.
- Checkpoint: 100kg Build an Atmo Suit Checkpoint to force Dupes to wear an Atmo Suit when crossing it.
- Dock: 100kg Build an Atmo Suit Dock (or more) next to the Checkpoint to store Atmo Suits.
That’s a total of 900kg of Refined Metal to have a minimal Atmo Suit infrastructure. If you don’t have that much yet, continue on other projects until you do. You can also speed up Refined Metal acquisition by using an unsustainable Metal Refinery, detailed above.
How do Checkpoints and Docks work? A Checkpoint tells a Dupe they need a Suit to go in the direction the arrow is pointing. For that, the Dupe will take a Suit from a Dock directly adjacent to the Checkpoint, opposite from where the arrow is pointing.
You can have several Docks for a single Checkpoint, if you want to allow several Dupes passing at the same time.
You need to provide Oxygen to Docks: for now, just put a Gas Pump near an Oxygen Diffuser, in an Oxygen-dense atmosphere and be done with it. Occasionally, it might pump another gas, which will damage the Dock. For now, that’s not a huge issue, as this will be solved when we build a SPOM. If you skipped ahead and already have one, great! Connect it right away. You can also build an Automated Vent to filter out other gases and avoid damaging your Docks.
Where do I place Checkpoints? There are 3 main approaches to choose where your Dupes will suit up:
- Right where it’s needed: just before Space Biome, Oil Biome, and any place that is hot or is otherwise troublesome to work in. While this may be your first approach, it’s not recommended: you will need a lot of Suits everywhere, and it’s a lot of setup. If there are several paths, this will cause issues with Dupes leaving Suits everywhere.
- At your base entry: by having a single entry into your base, you can force your Dupes to get suited there. That means a long corridor with only Docks. Since my design incorporates a main corridor, that’s where I advise you to place it. It’s a middle ground between the other 2 approaches. The main drawback is that Dupes might still get suited and unsuited several time sper cycle, which reduces their productivity.
- When leaving the bedroom: this is the best approach, though it will require a redesign of your base if you didn’t plan it from the start. That way, Dupes only get suited up once per cycle, and as a result you only have a very small area that needs to be kept habitable.
While the last approach is the best, there is no issue going for the second, which also works great.
Cooling options
- Why: keep your base and buildings at operating temperature
- Prerequisite: depends on your cooling choice
This game should be called “AC not included”, because Heat is your biggest problem, not Oxygen.
So far, the only way to handle heat was to put high heat-producing buildings out of the base, insulated away, and to avoid creating heat in the first place in our base.
That’s obviously not sustainable in the long term, so let’s get over the main cooling possibilities:
- Ice Maker: the first cooling you can get. It cools a net 4KDTU/s for 60W, which is not great. Its main purpose is to move heat around: it outputs 16KDTU/s, but the Ice created can easily be moved to somewhere you really need cooling by building Ice Tempshift Plates and mopping up the water after they melt. Only use Ice Machines if your crops are failing or buildings are overheating, otherwise use other, better solutions. I’m not going to cover it because it’s not needed if you plan properly.
- Wheezewort: this is a plant that needs Phosphorite (handily provided by your Dreckos), that only breath in gas and output it as colder gas. It can cool up to 12KDTU/s in the best environment, and doesn’t use any power! On the other hand, there is a fixed amount of Wheezeworts per map, and the only way to get more is to get lucky with the Printing Pod. That’s going to be your first cooling, as it is the easiest to setup.
- Anti Entropy Thermo-Nullifier (AETN): those cannot be built and must be found in your map. They can output 80KDTU/s and require 10g/s of Hydrogen (equivalent to 80W of power generated by Hydrogen Generator). Since they cannot be moved and they cool a lot, they can be cumbersome to use, but more importantly there are other uses for Hydrogen: power generation and rocket fuel. Unless you are blessed with a Hydrogen Vent, it might not be the best idea to use your scarce hydrogen on them.
- Steam Turbine (ST): on first glance, it uses Steam, which is hot, and produces electricity, so using it as cooling might seem weird. But you’d be wrong: most uses of the Steam Turbine are centered around cooling and not electricity production. It’s harder to setup and requires plastic, but it’s worth it, as it can mostly be used in a electricity-neutral or electricity-positive fashion. Cooling starts at 221KDTU/s with steam at 125°, but increases sharply the hotter the Steam is. At 200°C you are looking at 785KDTU/s, and it can go up to a ludicrous amount the hotter the Steam is, though it’s not advised. The Steam Turbine will be covered in depth in the late-game part.
- Space Boiling: complicated, also uses power, you need to reach the surface, and it is more effective with Space materials. It’s not a great solution, as you could use that heat with a Steam Turbine to get back some of the power used by the Aquatuner. As such it won’t be covered.
Note: there are other ways to delete heat, but none is currently near as good as those ones: they are either too hard to build, remove too little heat or use too much power. It’s still a good idea to read the “Heat Economy” part of buildings in the Wiki, for example: oxygennotincluded.gamepedia.com – https://oxygennotincluded.gamepedia.com/Electrolyzer
If you want to know how much cooling you need for a specific use-case, use oni-assistant.com – https://oni-assistant.com/tools/coolingcalculator.
First cooling: Wheezeworts
- Why: keep your base and buildings at operating temperature
- Prerequisite: find a few Wheezeworts
What all that means is that Wheezeworts are good for your first cooling setup. You should have already found a few while exploring. If not, continue exploring.
You can also bypass this step by choosing to use a Frozen Biome as a giant radiator and dumping heat in it. This has two main advantages:
- It drastically delays a real cooling setup to focus on other things first.
- It melts the liquefiable tiles instead of digging those, meaning it conserves 100% of their mass instead of 50%, meaning more water that you can also use to delay acquiring a renewable water/oxygen source.
This can be a great move, but it’s not sustainable, and harder asteroids won’t have that option.
To use Wheezeworts, you have two options:
- Surgical cooling: place a Planter Box wherever you need cooling, place a Wheezewort in it, and you are done! Assuming the Wheezewort is in Oxygen, you are only going to get 5KDTU/s per Wheezewort, but it’s enough for a lot of uses.
- Optimal cooling: for that, you need an airlocked room with only Hydrogen, and as many Wheezewort as needed, keeping in mind each one is worth 12KDTU/s. It’s advised to add temperature control to avoid freezing your coolant.
Here is what a cooling room looks like:
The Storage Bin is optional and can be set to accept Phosphorite and/or Wort Seeds. If you add a Storage Bin, an Auto-Sweeper is a good idea to minimize labor.
That also allows controlling the room temperature by locking the Door and hooking the Auto-Sweeper to a Temperature Sensor so that Wheezeworts are only fertilized when the temperature isn’t cold enough. You will need to refill the Storage Bin from time to time, either by periodically opening the door, or by shipping Phosphorite directly from your Drecko ranch to the cooling room. A full Storage Bin will last for 625 cycles for 8 Wheezeworts running all the time, so shipping for that room should be really low on your priority list.
In the background, place pipes for your coolant to circulate. At this stage, the best coolant is Polluted Water, because it has a better temperature range than Water and the highest heat capacity you can get at this point. You could also use Hydrogen if you want another cooling loop with gas, but it’s a lot worse compared to Polluted Water unless you need a better heat range. At this point of the game, you don’t.
Another option is to pass through something you want to cool directly, for example Oxygen from an Electrolyzer, which will be shown shortly.
As for pipes, while Radiant Pipes are better, they use Refined Metals, which might not be abundant just yet. You can safely skimp on it and use Granite Pipes instead. It will be slower to exchange temperature, but with enough time you will get to equilibrium anyway.
How to design a Cooling loop? At this point, just make zig-zagging pipes in the areas that need cooling, feed it water, and make sure it doesn’t clog. I’m not going to show specific examples, it’s time to learn by trial and error. forums.kleientertainment.com – https://forums.kleientertainment.com/forums/topic/94932-a-guide-to-bridges-and-how-they-help-you-achieve-efficiency-and-flow/
My cooling room only cools water by less than a degree! That’s not necessarily an issue! Even if it only cools a little, as long as it cools more than the coolant is heated up, your system as a whole will cool down, given enough time. This is a long-term cooling solution, not an emergency one. If you are in a bind, use an Ice Maker or get some Ice from a Frozen Biome to build Ice Tempshift Plates where you need emergency cooling.
This cooling room will easily cover your Power Plant and Water Treatment cooling needs, as they only run part of the time. At this stage, a single Wheezewort should be more than enough: you will need to scale up as you scale your power usage and industry.
Oxygen options
Before we delve into the Electrolyzer details, let’s have a look at the different Oxygen options, roughly ordered from best to worst:
- Oxygen Diffuser: your very first Oxygen producer. It has served well so far and is the best early game option, but it has a few drawbacks that make it unsuitable after mid-game: it uses Algae, which is hard to produce in a renewable fashion, it needs to be resupplied, which is going to require Dupe labor (unless you already went for a renewable Algae production and use shipping) and it uses some power. You should replace it during mid-game.
- Electrolyzer: it is widely considered as the best option starting mid-game. I’ll detail it further, but it pretty much needs renewable water and a cooling solution, which is why it shouldn’t be used early game (unless you know what you are doing). It’s the natural transition from Oxygen diffuser, as it doesn’t suffer from its flaws: renewable water is abundant once you can tame a Geyser/Vent, it can be operated power-positive, and it doesn’t use any Dupe labor.
- Rust Deoxidizer: Terra doesn’t have a Rust biome, so you cannot use it. But even on asteroids with a Rust biome, it doesn’t hold up to the previous 2 options, as it has the flaws of both: it requires resupply, it uses electricity, Rust isn’t renewable, and in addition to that, the output needs to be cooled just like an Electrolyzer. In addition to that, it produces Chlorine, which is not very useful. It might seem low, but 30g/s is 18kg/cycle, which is 9 full tiles at 2Kg/tiles (or even more if it’s more spread out). The only reason to use one is if you really need Iron Ore (you generally won’t) or if you have an Algae shortage before your Electrolyzer is up and running, which can happen on some asteroids.
- Algae Terrarium: I already pointed it out in the previous part, but it uses a lot of Dupe laborand is thus considered worse than the Oxygen Diffuser. The main reason to use them is if you want a bottled Polluted Water production. This can be useful for processes that require Polluted Oxygen, mainly to Deodorize in order to produce Clay for Ceramic. You could also do a Polluted Oxygen => Puft => Slime production. Both are generally not needed on Terra, but it can be useful on Asteroids without Swamp biomes, which will lack both Clay and Slime.
- Wild Oxyfern: another option not available on Terra, since there is no Forest Biome. While it’s a good supplemental option, especially early game, it is a bit finicky, and it doesn’t scale much: you are going to be limited by the number of Oxyferns you have. Replanting them with pips and providing a CO2 atmosphere is a bit of work too, compared to the Oxygen Diffuser.
- Domesticated Oxyfern: while it doesn’t suffer from the scale limitation of Wild ones, now you need water (about 10% less than an electrolyzer) and Dirt, which means yet another process to create it in a renewable fashion. You also need to have a CO2 atmosphere. Unless you really want to try out a different path, Electrolyzer is simply a better, easier option to setup and run reliably.
Renewable Oxygen/Water
Since we want to stop using Oxygen Diffusers, now is a good time to think about switching to renewables for Oxygen generation.
As said above, the best option starting mid-game is the Electrolyzer/Hydrogen Generator combo, which is generally called a SPOM (acronym for Self-Powered Oxygen Machine). We will get back to that in a moment, for now all we need to know is that a single Electrolyzer converts 1000g/s of Water to 888g/s of Oxygen: that means we need about 1kg/s of water for a colony of 8 Dupes consuming 800g/s of Oxygen.
First, we need to acquire a renewable water source. To make it easy to compare, I’ll express the average output of each possible source as the number of Electrolyzers it can power. Note that it’s the average over active and dormant phases combined: you will need to store part of that during active periods to have enough to last through the dormant periods.
I’ll also list direct renewable Oxygen sources, which, as you’ll see, are really subpar.
For more details, please consult the oxygennotincluded.gamepedia.com – https://oxygennotincluded.gamepedia.com/Geyser.
What to do with the excess water? Since most Geysers provide more than what a single SPOM can use, and you cannot really build more because you would have an Oxygen overproduction, for now, don’t do anything: just let the tank around the Geysers fill so that they stop from overpressure.
You can also use excess water for crops, if you decide to go with crops that require water (don’t forget to cool it down first if it’s hot!). You will also need some for Oil Wells, and to finish researching if your starting water supply wasn’t enough.
Later on, there isn’t that much use for water: as steam, it can be useful as rocket fuel, but the main late-game use is to electrolyse it, keep the Hydrogen for power, and vent the excess Oxygen to space.
So, which geyser should you use? Pick the highest on the list you can find and start with this one.
I’ll only cover Polluted Water Vent and Cool Steam Vent, because you will need new knowledge to tackle those. For the others, I’m sure you can figure out yourself!
Here is the list, from best to worst (in my opinion), for use with a SPOM. Note that some Geysers, while a poor match for SPOM, are great matches for other uses.
Water/Oxygen geysers
Cool Slush Geyser
- Output: Polluted Water at -10°C
- Can power: 1.5 SPOM
- Usage: Dump heat in the water then Sieve it.
This is considered the best Water Geyser: while its output is average, the -10°C makes it a great natural cooling. An easy use case is to run it through your base, which will both cool your base and heat the Polluted Water up to Sieve-able temperature.
Polluted Water Vent
- Output: germy Polluted Water at 30°C
- Can power: 3 SPOM
- Usage: Decontaminate, then Sieve it, optionally dump heat in it
This is considered the second-best Water Geyser as it has a great output and a good temperature right off the bat. Decontamination is easy, I’ll explain it in the next section, and while it cannot be used to cool your base under 30°C, you don’t have to cool it either.
Water Geyser
- Output: Water at 95°C
- Can power: 3 SPOM
- Usage: Use as-is, optionally cool it
While it has a great output and doesn’t require any treatment, it’s quite hot: you will need cooling for some purposes, and you cannot dump heat in the Water.
While being not that great for a SPOM, it’s a perfect match for Oil Wells later on, since they don’t care about temperature, especially since they have a 90°C+ output (meaning you generate heat if you feed them water under 90°C)
Salt Water Geyser
- Output: Salt Water at 95°C
- Can power: 2.8 SPOM
- Usage: Desalinate/boil it, optionally cool it
While the output is great, the temperature and Water type are not.
You will need to convert it to Water: as a comparison, the Desalinator uses 4 times as much electricity as the Water Sieve, needs some Dupe labor from time to time and outputs twice as much heat for the same amount of input water (and the Desalinator will produce 7% less output water because 7% of it becomes Salt).
You can also totally negate the Dupe labor and lower the power draw by using a Salt Boiler. For example, here is forums.kleientertainment.com – https://forums.kleientertainment.com/forums/topic/129278-efficent-st-less-salt-water-boiler/ that doesn’t rely on an external heat source, is 15% more efficient than a Desalinator and 100% automated. I’m not going to cover it there, and I still advise you start with a Desalinator which is much easier and faster to build.
After you get clean water either way, depending on your use, you might need to cool it, and certainly cannot use it as a heat-dump.
Just like the Water Geyser, its temperature means it’s a good match for Oil Wells.
Note that you are guaranteed to have at least one on Terra.
Cool Steam Vent
- Output: Steam at 110°C
- Can power: 1.5 SPOM
- Usage: Cool it down to usable level
It is quite bad compared to the other options as a water generator: the Steam needs to either be condensed to Water or heated to use in a Steam Turbine (which accepts only 125°C+ Steam), and its output is average. Its only redeeming property is that you are guaranteed to have at least two on Terra.
On the other hand it produces ready-to-use Steam for Rockets late-game, if you can safely transport it there.
Even though it’s often the first Geyser you will find, I advise against trying to tame it first, and instead explore more to find a better Geyser to tame first. I will show a low-tech option to tame it, but the high-tech option requires Steel, which will not be available until late-game.
Steam Vent
- Output: Steam at 500°C
- Can power: 0.75 SPOM
- Usage: Cool it down to usable level while producing power
While it has the lowest output of all water-producing geysers, it can directly be used with a Steam Turbine, producing power AND water.
It has two issues though: the volume of water and the Steam temperature.
Depending on your luck, you could either have enough or close to enough water to power a SPOM, or have a vastly insufficient water source for a single SPOM: you really need to analyse them to determine if they are usable. If the output is too low, move on to other geysers.
The Steam Temperature is high enough to make it a bit tricky to tame properly, so I won’t cover it.
Those issues, which makes it a very hard to tame Geyser for a low water output, are why it’s ranked so low.
Hot Polluted Oxygen Vent
- Output: Polluted Oxygen at 500°C
- Can power: 0.12 SPOM (105g/s)
- Usage: Deodorize and cool it
We are entering the Oxygen Vents. They both suffer from the same fatal flaw: disregarding other issues, their output is tiny. Each Vent only outputs enough for a single Dupe.
Considering that the oxygen is also very hot and needs deodorization, it’s simply not worth bothering with those Oxygen Vents for the Oxygen. Their main use is to produce Clay via Deodorizers to make Ceramic.
Infectious Polluted Oxygen Vent
- Output: germy Polluted Oxygen at 60°C
- Can power: 0.12 SPOM (105g/s)
- Usage: Deodorize it, optionally clean and cool it
Same as the other Oxygen Vent, it’s not worth the trouble. This one need less cooling attention, but you should probably let the oxygen naturally decontaminate before using it.
Again, not worth it unless it’s for Clay/Ceramic.
Polluted Water Vent harnessing / Decontamination
Let’s focus on how to tame a Polluted Water Vent.
Its Water output has two issues:
- It’s Polluted. We already went over the Water Sieve: you can build another one to handle that, or re-use your Water Treatment facility. Since the initial Water Treatment facility is designed to run in a closed loop, it might be simpler to use a separate Water Sieve.
- It’s Germy. While it might not be a huge issue to use germy water for some uses, it is very easy to just purify it and be done with it.
To purify it, there are several options, but by far the easiest one is to let it sit in a Chlorine environment. There are some complicated Decontamination Room designs you can find, but if you don’t care about space and have a low enough Water usage, you can do without automation and just build a large room filled with Liquid Reservoirs:
The input goes in top right, the output comes from bottom left.
Find somewhere in your base that has some Chlorine, or use your Chlorine Reservoir to vent Chlorine in there. You might have to use some tricks to get other gas out of the room, but by now you should be able to figure that part out.
By the time the Water/Polluted Water reaches the end of that circuit, it will be free of any germ. Just be sure to block the output for a cycle at the beginning so that the very first Water packets have enough time to be decontaminated.
I chose to purify Polluted Water because you might want to use Polluted Water directly. It also avoids pre-emptively converting everything to Water, which uses electricity and sand.
Note that you can also retro-fit your Water Treatment room to do the same, by moving the 2 reservoirs in a separate Chlorine room. It’s better to use a separate room from the Sieve, since Dupes will need to access the Sieve (until you ship Filtration Medium directly in the room) but will never enter the Reservoirs room. This serves no practical purpose, as bathroom buildings don’t care about germs.
Low-tech Cool Steam Vent harnessing
Let’s look at a simple solution to tame a Cool Steam Vent (CSV): using Wheezeworts you found to cool the steam into water.
This is the part where you will need to start using maths, or oni-assistant.com – https://oni-assistant.com/tools/coolingcalculator. If you plug in the numbers, you can see that cooling 1kg/s of Steam from 110°C to 98.5°C (a bit below steam condensation temperature, 99.4°C) takes 48KDTU/s, which is 4 Wheezeworts.
That’s the amount you need for a single Electrolyser. You then have to cool the Oxygen produced from 98.5°C to a nice temperature for your base, let’s say 25°C. For 888g/s of Oxygen, that takes 5.5 Wheezeworts, which can be rounded to 6 for safety.
Why not cool the water itself? It takes a lot more cooling than cooling Oxygen. That’s why it’s not worth cooling water before feeding it to an Electrolyzer.
If you found 10/15 Wheezeworts and don’t care about tying them only for a single SPOM (explained later), nor about letting the Vent go into overpressure eventually (otherwise, you would have to use more Wheezeworts to cool all its output), that’s a really easy low-tech build to tame a CSV for water.
The easiest way to tame a CSV is to condense the Steam to water by snaking Pipes with cool liquid above it. It’s important to place the pipes at the top, so that it doesn’t cool water more than necessary, and to Vacuum out the area beforehand (when the CSV is dormant) so that heat is not transferred through another gas. To do that, you will need to close off the area and leave a Gas Pump running inside. If you need to access the room later, you will need a Liquid Airlock, which was shown earlier.
The cool liquid should be Polluted Water that goes through the cooling room we saw earlier. That way you don’t run the risk of having it break your pipes even if you under-dimensioned your cooling room.
The Pump must be made out of Gold Amalgam in order to avoid overheating it, and it’s better to link it to a Hydro Sensor configured for any value above 10kg to avoid pumping partial packets.
You will also need to store enough water to cover the dormancy period of your CSV, either with Reservoirs or with an Infinite Storage.
On the right, the whole setup with the cooling room, the CSV condensation room, and just enough reservoirs to cover the dormancy period of this specific CSV. To know how much you need, first compute the average output of the Geyser using oni-assistant.com – https://oni-assistant.com/tools/geysercalculator or https://steamcommunity.com/sharedfiles/filedetails/?id=1706181611, then multiply the average output by the dormancy period. Here for example, there is about 50 cycles of dormancy period for a 1.35kg/s average output, which gives 40t of water to store, which is 8 Reservoirs (one cycle is 600s).
How about a better method? For that, you need Steam Turbines. While you have the Refined Metal and Plastic needed to build it, so far, you lack the Steel required to build a Thermo-Aquatuner that will be able to withstand temperatures above 125°C.
If you still decide you want one, you will need to build an unsustainable Metal Refinery to get your first batches of Steel, and follow another tutorial to build an ATST to tame it. I will explain the ATST is the next part, but not applied to CSVs specifically.
If you do that, there are two methods to tame a CSV: condensing the Steam to water, like shown above, which just mean replacing Wheezewort cooling with ATST cooling, or heating up the Steam to 125°C so that it’s absorbed by a Steam Turbine and ejected as 95°C Water.
The second method is more power-efficient, but is also more finicky. That’s why most tutorials use the condensation method, which is also the one I recommend.
SPOM (Self-Powered Oxygen Machine)
- Why: switch to renewables for Oxygen production
- Prerequisite: water source, Research Air System
After taming a renewable water source, let’s focus on the SPOM.
You can build a SPOM off of non-renewable water, but if you do so, have a plan to switch to a renewable one before the non-renewable dry up.
First the Electrolyzer, which requires water, produces both Oxygen and Hydrogen, meaning you can use Oxygen in your base (or other things, like your Atmo Docks), and Hydrogen to power a Hydrogen Generator: that combo is named a Self Powered Oxygen Machine, or SPOM for short, because generated Hydrogen is enough to power the whole structure.
Before you make the switch to a SPOM, be careful: it’s going to be a large infrastructure project, and it’s harder to get it right than it looks.
How much water does that consume? A single 100% efficient Electrolyzer uses 1kg/s of water, or 600kg/cycle. Roughly, after a few percent of efficiency loss, it will consume a full tile of free-floating water every 2 cycles. If you have a 4×10 tank full of water, it is going to last for about 80 cycles, for example.
Let’s start with a basic design. It should have:
- Electrolyzer the main building of the design.
- Hydrogen Generator for the Powered part.
- Water input, if possible from a renewable source.
- Gas Pump for Hydrogen.
- 2 Gas Pump (optional) for Oxygen, if you don’t free-float it.
- Gas filter (optional) to only pass Hydrogen to your Generator, to avoid damaging it. See the energy-saving tips for the 3 possible filters.
- Cooling (optional) to use Oxygen in your base.
On this sample build, there is a dedicated Hydrogen Pump, 2 Oxygen Pumps and some automation. The automation is there to only activate the Hydrogen Pump when there is Hydrogen with a Gas Element Sensor (Atmo Sensor also works but need more precise structure) and only activate the Oxygen Pumps when pressure is above 1000g.
I decided to link it to the rest of my power plant, thus a battery and transformer, but you can keep it separate if you prefer.
Seems easy right? There are a lot of caveats, and the build I showed will not perform well. You’ll have to choose which trade-offs you want to make and choose a design on the internet accordingly, or design your own:
- Electrolyzer output gases at a minimum of 70° (depending on your water temperature). It’s a good idea to cool Oxygen before venting it into your base. For some, the definition of a SPOM includes cooling. You can go the easy way with Wheezewort, or use more complicated setups, including a self-cooled SPOM. But if you use more power for cooling, it’s no longer self-powered.
- Cool all the Oxygen or not? You can cool all of it, only the part going to your base, or output hot Oxygen in your base and cool the base itself another way. Cooling all the Oxygen means you spend energy cooling some oxygen that doesn’t need to (anything going out of your base or being consumed, like Atmo Docks, Telescope and Oxylite Refinery), while other solutions have different implementation challenges.
- Free-floating or not? Electrolyzer stops if the pressure around it is too high. That limit is rather low, and it’s a real design challenge to keep it at 100% uptime, even with Gas Pumps. Free-floating is worse.
- How many Gas Pumps? Theorically, 2 Gas Pumps match exactly one Electrolyzer output. In practice, it might be easier to have more with automation, like shown above.
- SPOM startup: The system needs at least some electricity to start, so you’ll need to initialize it with a Manual generator (at the risk of the SPOM stalling and having to wait for a Dupe to restart it), or link it to another power plant.
- Actually being self-powered is a challenge. Having a suboptimal design, using Gas Filter or integrating active cooling will get in the way. This is closely tied to the uptime.
- Insulation: Either you keep a door for maintenance, which is going to radiate heat and leak a bit of gas every time it’s opened, or you close off your SPOM and pray you got everything right.
- Upstream water treatment: Also a consideration, depending on your water source: integration with the Geyser/Vent providing water can change which SPOM design you choose. For example, Cool Slush Geyser goes well with base cooling, while Polluted Water Vent goes well with a self-cooling SPOM, in my opinion.
There are tons of SPOM design, but 2 specific designs are well known:
- the Rodriguez, which is a compact setup that uses the “one tile rule” to mechanically filter Hydrogen from Oxygen in the Atmosphere.
- the Hydra, which exploits the fact that liquids over Gas output prevent the Gas output from stopping due to Max Pressure, meaning it lets the Electrolyser continue to work well above 2kg/tile of gas.
Both can be found in the Compendium and are talked extensively over several threads.
I also like the idea of a self-cooling SPOM, which relies on water colder than 70°C and dumps heat in it before Electrolysing it, using the SHC differential between water and oxygen, as it doesn’t use Wheezeworts nor Steel or anything fancy, but it is quite inefficient as it uses a lot of electricity for heat transfer. https://www.reddit.com/r/Oxygennotincluded/comments/crqi1v/simple_self_cooling_spom/. Note that if you use that with the output of a Polluted Water Vent or Cool Slush Geyser, you can cool much more than just the Oxygen (at the cost of electricity).
I advise you to play around with a few designs to understand the trade-offs and limits, and choose what suits best your needs.
As an example, here is the self-made design I use, which does not take advantage of the one tile rule mechanism or max pressure exploit:
Renewable electricity: Natural Gas
So far, we used Dupes in Manual Generators, then Coal Generators to produce electricity. The former is troublesome because it uses Dupes time, while the later uses non-renewable resources.
While you can sustain Coal Generators for a very long term using Hatches to produce Coal from other things, there is a limit to how much that scales (you need 8.5 tame Hatches per Coal Generator at 100%), and the Hatch food is very abundant, but finite (until you start turning Magma into Igneous Rock or use a Regolith Melter, which are very end-game projects).
It’s about time we use renewable alternatives and increase our capacity: we will be needing it during the next part.
Note that it’s a good idea to keep Coal Generators as peak load generators, or in case your renewables somehow stop or are out of fuel.
Which method to choose? You shouldn’t restrict yourself to only one power-producing structure, and instead have a bit of each one. It’s better to have more capacity that’s turned off when not needed than to be limited by your electricity production. Most renewables have a limit on how much they can produce, so it’s better to diversify, and use Smart Batteries to activate from best to worst. Coal Generators should be the last ones to activate.
Natural Gas power
- Why: easy to tame power source
- Prerequisite: finding one, cooling
You are guaranteed at least one Natural Gas Geyser, that can be used as-is to power Natural Gas Generators, without any complicated processing. One average Geyser will roughly power one generator, so that’s an easy 800W per Geyser you find!
Natural Gas doesn’t have a lot of other meaningful uses: it’s only other meaningful use is in the Gas Range, which is not mandatory, and won’t use up all that much Gas since it will be limited by your ingredient production.
At this stage, you don’t have Steel yet: the highest available overheat temperature is 125°C with Gold Amalgam. On the other hand, Natural Gas Geysers output gas at 150°C. This means you will need to cool the Natural Gas before pumping it.
The easiest solution is Wheezeworts: you need roughly one Wheezewort to cool that Gas down from 150°C to 125°C, and to be certain it’s cold enough, I advise you go for at least 2 Wheezeworts, preferably 3. Since Natural Gas has a SHC very similar to Hydrogen, you can leave the Wheezewort in Natural Gas between the Geyser and your pump. It won’t make enough difference to matter, and will simplify the room.
Later on, you will be able to build buildings from Steel and not worry about cooling that.
Right now though, unless you want to manually add and remove Wheezeworts to control the temperature, you need a temperature control system to avoid freezing your Liquid Airlock. There are 2 solutions:
- Plant Wheezeworts in Planter Boxes over Mechanized Airlocks, and open the doors when it’s too cold with a Temperature Sensor: Planter Boxes will be entombed and Wheezeworts will stop working.
- Ship Phosphorite in the room, forbid Dupes from entering the room, and link your Auto-Sweeper to a Temperature Sensor: this will stop Wheezeworts fertilization when it’s too cold.
The second solution doesn’t exploit entombed status, but is very approximative temperature-wise. This isn’t an issue for Natural Gas taming in my opinion.
To cover your Geyser dormancy period, you will need to store Natural Gas somewhere:
- Or not?: you might not care about that if you have other generators or if you are going to burn all the Gas during the active period anyway. At this stage though, I advise you build at least a small reserve.
- The dumb way: just build a vast array of Gas Reservoir to store as much gas as needed. This means a lot of reservoirs, taking a lot of space and requiring time and materials to build.
- The smart, kinda exploit-y way: use an infinite gas storage. This is a design that exploits the fact that placing water in front of a Gas Vent avoids Overpressure. This means you can cram as much gas as you want in a small room and pump it as needed. This also means you will double-pump the gas, using a bit more electricity. At this stage, it doesn’t matter much anymore.
Infinite storage explained, courtesy of ONI Discord bot.
The last detail you need to worry about is your Liquid Airlock (explained in a previous section). I advise you use Crude Oil (or Petroleum if you already have some), and control the temperature inside the room to avoid freezing your Crude Oil: the temperature must not go under -40°C.
Putting all that together, here is what a tamed Natural Gas Geyser looks like. I added an Auto-Sweeper and Storage Bin set on Phosphorite to reduce the number of errands, and the Atmo Sensor should be set Above 1000g (or higher) to avoid pumping partial packets and having enough gas for Wheezeworts to work at full efficiency.
As for the Natural Gas Generator, it isn’t too complicated, you should decide by yourself how to integrate it to your power plant, but here are a few gotchas:
- CO2 is piped, contrary to Coal Generators. You need to dispose of it. We will talk about CO2 disposal later in the Base Atmosphere part.
- Polluted Water is expulsed on the second tile from the right. This means you will need to pump it to use it somewhere, or have a collection tank below. It’s a good idea to put Generators on Mesh Tiles.
- Another Smart Battery should be used to have a higher threshold than Coal, so that Natural Gas Generators activate first.
With that, hopefully your Coal Generator usage should massively drop or perhaps even stop. This should be enough to cover your power needs right now, but we will see about other renewable power sources in the next part.
Power grid upgrade
- Why: run more equipments at the same time
- Prerequisite: lots of Refined Metal
With that new power source, now is a good time to upgrade your grid.
So far, everything except the SPOM is running on a single Wire grid, limited to 1KW. That’s limiting, and you probably had power issues during Atmo Suits production, or when running too many pumps at the same time.
There are three easy things to do to solve those power issues:
- Upgrade to Conductive Wire: this doubles the limit to 2KW, and also avoids the Decor penalty of other wires.
- Run a Heavi-Watt Wire Spine: places far off will use and produce a lot of power, which can be linked directly to your Power Plant.
- Split into several Grids: each Conductive Wire grid can take up to 2KW.
Upgrading to Conductive Wire is simple: just construct Conductive Wire with the least useful Refined Metal you have over existing Wire.
You might want to delay it a bit if you have more urgent needs for the Refined Metal you have so far, especially if you didn’t reach the Oil biome yet: the Oil Biome contains abundant Lead, which is a readily-available Refined Metal. It’s also the worst Refined Metal, because it lowers Overheat and have a very low melting point, making it unsuitable for a lot of uses, but is perfectly fine for Conductive Wire and a lot of other buildings that don’t overheat and won’t be used in high temperature environments.
Once the entire grid is switched to Conductive Wire, you can add a second Transformer to actually start delivering up to 2KW.
Why not a Large Transformer? Large Transformers deliver up to 4KW, which means if your base draws more than 2KW at any time, even for a split second, your Conductive Wire will be damaged and need repair, using more Refined Metal.
Large Transformers should only be used to switch from Heavy-Watt Wire to Conductive Wire in order to power a totally insulated room, where the power draw cannot exceed 2KW. The main use-case for that is a Thermo Aquatuner in a Steambox, which will be presented in the next part.
The advantage of a Large Transformer over 2 Power Transformers is very small: 2 less tiles of space used, 1KDTU/s less heat and a better capacity.
With a 2KW capacity, you should have enough capacity for your base for the foreseeable future.
On the other hand we are soon going to start powering buildings in Oil and Space biome, as well as equipment for tamed Geysers. That’s going to be a lot of power, so it’s a good idea to start investing in a Heavi-Watt Wire spine running from the Space to the Oil biome and going through your Power Plant.
This Heavi-Watt Wire spine is going to be Metal Ore intensive. Be careful about not letting your Smooth Hatches eat all your ore, because, contrary to Refined Metals, Metal Ore is not easily renewable. All you are getting after your asteroid initial Ore is a trickle of Copper Ore and Gold Amalgam from space.
Last but not least, when you need some localized grids, or if your base exceeds 2KW regularly, you can also have several grids, each using separate Transformers.
Renewable food source: Pacus
So far, we relied on Mealwood, then switched to Dusk Cap, while using excess Hatches/Dreckos as a supplemental food source.
It’s now time to switch to a renewable alternative. There are a lot of food options for late-game, so I will just list the main ones:
- Pacus: you can keep a stable population without feeding them anything (after you scale your population with Algae), and they don’t require any Dupe time. It’s the best food source in my opinion. I’ll explain this one.
- Dreckos: by using Balm Lily in a Chlorine atmosphere, you don’t need to provide them anything. If you want, you can also get Reed Fiber by shearing them, which requires a Hydrogen atmosphere.
- Hatches: late game, Igneous Rock is considered renewable as it can be obtained by solidifying, and can be fed to Stone Hatches. In the meantime, it is also very abundant, making Stone Hatches a good long term food source.
- Bristle Blossom: requires water and electricity, both being considered renewable by now and thus become a great option. That would be my food of choice for an industrial playthrough.
- Wild Sleet Wheat: keeping them wild means you don’t need any resources. This means a lot of travel time though, unless you build a gigantic shipping network. Note that if not wild, they require Dirt, which is hard to make renewable.
I didn’t list the options which require 2 different crops, because that’s more things to do. They provide a bit more Morale, but that’s not enough to care.
So, let’s focus on Pacus. They have a number of interesting properties:
- they do not require any food to sustain a stable population (caveat to this explained below)
- They do not require any Dupe time.
- They can be combined with your existing Meat/Barbeque to produce Surf’n’Turf, a very good end-game food.
- They produce a lot more Egg Shells than other critters, apart from Pokeshell, which do not produce food.
That last point is actually the main reason you want to go with Pacus, even if they take a long time to ramp up and probably won’t be your sole food source: Lime is scarce and is generally the limiting factor to Steel production, your main late-game material, which will be covered in the next part.
By starting a Pacu farm right now, you are reducing the Lime bottleneck for late-game Steel.
The main disadvantage of Pacus is that they require a fair amount of starting Algae to scale up the population (or you need to be lucky with the Printing Pod). There is generally way more Algae in your starting map than you’ll need, but you can also use an Algae Distiller to produce it from Slime too. If you don’t have Slime either, you will need to use Pufts to produce it from Polluted Oxygen. I’ll assume you have enough Algae to reach a large enough population.
The caveat to Pacus stable population is that Pacus have a 2% chance of producing a Gulp Fry Egg, which will die in a regular Pacu tank unless steps are taken to prevent that. More details about that in the maths part.
If instead you want to grow Bristle Berries, medium.com – https://medium.com/schematics-not-included/single-ceiling-light-bristle-berry-farm-93c00f4e7177
Pacus math & Gulps handling
Let’s delve a bit more into numbers, which are hard to find.
Food production
- A Pacu starts its life as a Pacu Fry with 450KCal.
- It lives for 5 cycles as a baby, consuming 10KCal/cycle.
- It reaches adulthood at cycle 5, with 400KCal remaining.
- Since it’s Glum, it consumes 20KCal/cycle, allowing it to live for 20 cycles off of its initial calorie supply.
- As an adult, it gains 7% reproduction per cycle: it lays an egg after 14.3 cycles, at age 19 or 20.
This means if they don’t have either Confined or Cramped debuffs, each Pacu will produce exactly one egg, keeping the population stable.
How many Pacus do I need? A Fry Egg requires 5 cycles to hatch, then the Pacu will produce an egg after about 20 cycles: you get 1000KCal worth of Pacu Fillet every 25 cycles, or 1600KCal if cooked.
That’s equivalent to 64KCal/cycle per Pacu when cooked: you need 15 Wild or unfed Pacus per Dupe, or 120 for 8 Dupes. If you were to use it as your only food souce, it would take about 240 cycles and 20 breeders to grow your population that much.
Fortunately, between your existing Hatches and Dreckos, you won’t have to go that high. You can also choose to combine both to cook Surf’n’Turf, to get an extra 4 morale and 400KCal at the cost of labor and Natural Gas. This is a very good trade-off in my opinion.
Details on Gulps
Pacus and their eggs spawn at 30°C. Tropical and Gulps will spawn at different temperatures, but it averages out. This means that, unless you temperature-control your main Pacu tank, it will stabilize to 30°C given enough time.
Unfortunately, since Gulps can only live up to 25°C, they will die out before they even reach adulthood in a 30°C tank (thanks to Discord user Ishamoridin for testing this).
Since your Pacus have a 2% chance of producing a Gulp Egg, this means you will lose 2% of your population every 25 cycles.
Your choices are:
- Keep it simple and accept that loss. That’s my preferred option: unless you want to go for a crazy high number of cycles, you probably won’t even notice it. Even experienced players don’t notice that until it’s pointed out.
- Temperature-control the tank. If it sits between 10°C and 25°C, both your Gulp and Tropical will be able to live in it. That’s the option I would choose for a long term base, since it doesn’t require much cooling. It might still be easier to produce Algae to cover the population loss, that’s up to you to decide.
- Sort Gulps in a different tank. That tank will stabilize at a lower temperature, and your Gulps will be able to live there. This is the hardest to implement, and in my opinion a lot of over-engineering.
Base atmosphere
- Why: Dispose of CO2 to retain a breathable base
- Prerequisite: reach an Oil Biome and/or get Larva Eggs from Printing Pod
At some point, the early solution of digging down to make space for Carbon Dioxide will show its limits, since there is so much produced by your Dupes breathing.
Generally, the other gases are not a problem at this stage, if you properly enclosed all Geysers/Vents you encountered and prevented off-gassing from various objects. The Chlorine and Hydrogen you naturally encounter in the wild are not worth handling since they amount to very little.
The only exception is if you have Flatulent Dupes: you will need to collect the Natural Gas. It’s about 4g/s: that’s not a lot, but it adds up. It’s a nice supplement to your Nat Gas Geysers, though I still advise you to avoid them if you can: it’s not worth the trouble in my opinion, especially as they can break some advanced Liquid Airlocks.
Note that, in theory, 22 Dupes could power a Nat Gas Generator from their farts, if you want to try it for the fun of it. You will likely need mods to reliably get Flatulent Dupes.
This means you will have to do something about the CO2. Luckily, there are quite a few solutions for that.
- Carbon Skimmer: simply hook it to your bathroom loop, and it will delete CO2. This is the simplest, but the output is not very interesting. It’s mainly useful if you need to turn Water (from a renewable source) into Polluted Water for Farming, which is outside of scope of this guide, or if you need Polluted Dirt, to turn into Dirt or to feed Pokeshells.
- Feed CO2 to Slicksters: that’s my favorite solution, as you get a bit of Crude Oil in return. You need about 2 Wild Slicksters to dispose of the output of your 8 Dupes (9.6kg/cycle of CO2), getting 4.8kg/cycle of Crude Oil in return, and about 2.5 Wild Slickster per Coal/Nat Gas generator. It uses about the same amount of electricity as a Carbon Skimmer + Water Sieve if using a Gas Pump to send the CO2 to Slicksters, but doesn’t produce any heat.
- Liquid Airlocks: by placing liquid locks at all your base exits, you can prevent any outside gas from entering, then pump out the top/bottom non-oxygen gas. But you still build pressure outside your base, which delays the problem of CO2 creation further.
- Constant Atmo Suits: when wearing an Atmo Suit, Dupes don’t produce CO2. Some strategies go as far as having 2 Atmo Suits per Dupe: one for sleeping and one for working, so that they are always wearing an Atmo Suit. By doing that, no CO2 is produced and you don’t need to handle it. Or they can just wear an Atmo when going to work and sleep without, meaning only bedrooms need to be climate-controlled.
Note: this last assertion requires more testing. Some players report CO2 being ejected when Dupes remove their Suits, though I’m almost certain it’s less than the regular breathing amount.
Both Carbon Skimmers and Slicksters produce something that can be useful, it’s up to you to decide which one you want to implement. Carbon Skimmers are self-explanatory, so I’ll focus on Slicksters.
To get started, simply find Wild Slicksters (or acquire some Larva Eggs from the Printing Pod) and stick them above a pool of crude oil (or make an empty tank), and dump your CO2 in there.
It’s better to place Slicksters on Mesh Tiles above a Crude Oil tank, as they tend to drown under some conditions.
If you need to dispose of more CO2 than the Wild Slicksters can handle, you will need to ranch some of them to multiply the population. That’s generally not the case until you start using a Petroleum Generator. Here are the CO2 consumptions:
- Tame and Happy: 20Kg/cycle. A single one can handle 16 Dupes breathing or almost 2 Coal/Nat Gas Generators. It’s a lot, but it requires grooming them, and you might not want that. This is a great method if you want to use them as a food source.
- Wild: 5Kg/cycle (25% of happy tame one). A great no-maintenance solution early on, when you have enough Wild ones to handle what you need. Until you build Petroleum Generators, that number is very low.
- Tame and Glum: 4Kg/cycle (20% of happy tame one). A good late-game alternative, when you need a lot of them but don’t want to use Dupes to groom them all the time. You just need to have 5 times as much of them compared to Happy ones.
Right now, we won’t need more than a handful of Wild Slicksters to dispose of our CO2 and relieve the pressure. The amount of Crude Oil you get is tiny (about 0.5% of what a single Oil Well produces, for comparison), but it’s still a nice supplement.
Other Critters
So far, we talked about 4 Critters : Hatches, Dreckos, Pacus and Slicksters. That’s already a lot of work for your ranchers, especially the Dreckos that need to be sheared in addition to the regular grooming.
What about other Critters? They are more niche, and not necessary for this way of playing. All Critters serve a purpose, but if you don’t need what they offer, you are better off leaving them wild or even killing them on sight for certain ones.
Since they are not necessary, I’ll briefly talk about them and why you would want to domesticate each one.
Shine Bug
One of the first Critters you will see, their main purpose is to generate Light and Decor. Since both are basically a non-issue, it doesn’t make much sense to ranch them, in my opinion, apart from a pet project.
A notable use is a Shine Bug reactor, using Shine Bugs to power Solar Panels. On the other hand, it requires a whole lot of them to generate any significant amount of power, since each Shine Bug is around 10W when they are very close to the panels. There are better ways to generate power, especially as they will impact your game performance.
Other uses include producing Sun Nymph Eggs to make Serum Vials against Zombie Spores, which is of little use if you properly handle Sporechids,
Evolving them is also required for an achievement.
Pip
Pips are actually very good, and have two main uses: producing Dirt and Planting. On the other end, they are only found in the Forest Biome, which isn’t available on Terra, which means you need to get them from the Printing Pod.
Since we don’t use much farming anymore, they are not useful since you don’t need the Dirt, but if you are going for Farming food production, they are useful to create Dirt. They can also be used to create Dirt to feed Hatches, for more Coal and Meat, in the unlikely event that you run out of things to feed your Hatches.
They are mostly used for planting though: they can take Seeds and plant them in natural tiles, creating Wild plants. That allows creating artificial Wild plants farm, which don’t require any input material. There are whole guides dedicated to that, forums.kleientertainment.com – https://forums.kleientertainment.com/forums/topic/110299-pip-planting-everything-you-need-to-know/.
Pokeshell
We briefly talked about them when comparing food sources, Pokeshells produce two things: Sand and Pokeshell Molts. While Sand is a non-issue, Pokeshell Molts are great because you can crush them for a lot of Lime, which is generally the bottleneck to Steel production.
On the other hand, feeding them can be troublesome, which is why I advised you to round up all the Wild ones (and those you get from the Printing Pod) in a room, and keep them wild so that you don’t need to feed or groom them but can still get their Molts.
A word of warning: when cramped (there is an egg in the room), they become violent, which is why you should either ensure your Dupes aren’t going in that room by automatically shipping Molts, or have a separate Incubation room (which doesn’t need incubators).
We are going to see how to ranch them in the next section.
Puft
The basic Puft ingest Polluted Oxygen and produce Slime. This Slime can be converted to Algae.
They are a nice solution if you need more Algae for your Pacus, but the main challenge is to create Polluted Oxygen for them. It’s generally considered not worth the trouble: you could get Morbs to produce Polluted Oxygen, but it requires a lot of Morbs (about 4.5 per Puft). The main way to create Polluted Oxygen is to let Polluted Water off-gas, using Algae Terrarium to create bottled Polluted Water (which off-gas faster than free-floating Polluted Water).
Other variants create Oxylite from Oxygen and Bleach Stone from Chlorine, both of which are not very useful except niche applications.
Longhair Slickster
This Slickster variant deserves a mention: it consumes Oxygen and produces nothing but Decor (and Meat, like all other Critters).
Since you will have much more renewable water than you can possibly use late-game, they can serve as a way to dispose of excess Oxygen when adding Electrolysers to use that water and using the Hydrogen as fuel.
For that endeavor, 2 Tame Longhair Slicksters replace 1 Dupe, so you need almost 18 of them to use the output of one single 100% uptime Electrolyzer.
That’s a lot of investment for little, especially as those Slicksters can impact your game performance. The general solution to Oxygen overproduction is to vent excess Oxygen to space.
Shove Vole
Shove Vole can be used two different ways: to create natural tiles, or as a renewable food source.
The main challenge is to contain them: they can roam almost anywhere, and the natural tiles they create will get in the way. Because of this, it is not advised to tame them before late in the game.
There are also other renewable foods that don’t need as much special care, and other ways to create natural tiles, which means you largely don’t need to bother with them.
On the other hand, it’s one of the best Meat Critter, as it produces 5 times as much Meat as other Critters for the same amount of grooming. They can be starvation-ranched, as long as you groom them to renew their population. They only need to be fed to increase the population.
That’s one of the critters you shouldkill on sight if you are not taming or rounding them. You can still get more from the Printing Pod infrequently.
Gassy Moo
They need to be brought to your asteroid through space exploration, as well as their food, Gas Grass. The main challenge is their feeding: plants require Liquid Chlorine, which means taming a Chlorine Geyser and cooling the Chlorine to -40°C.
In return from that and regular space missions to get more Grass, you get Natural Gas you can burn, turning Chlorine Geyser into renewable power.
This can be a fun end-game project, but not one I’m going to cover. Taming them is largely considered a bragging rights project, at it serves no practical purpose.
Morb
Morbs are a very special kind of Critter: they do not produce Eggs and do not occur naturally. Instead, they spawn from dirty Outhouses or other dirty places.
They don’t eat anything and produce Polluted Oxygen. In theory, they can be used as a free Oxygen source when combined with Deodorizers.
In practice, they are hard to spawn, their output is unreliable, and you are better off using a SPOM to generate Oxygen.
(Optional) Dupe time optimization
If you look closely, you will notice some Dupes wandering outside your base for no good reason.
That’s because they are going to some extreme to fulfil some errands that aren’t very useful, as there isn’t a way to tell them to only fulfil some errands inside your base: I’m talking about collecting food and Egg Shells/Molts.
To solve that, I suggest:
- Blocking access to unused parts of your asteroids.
- Rounding Wild critters in starvation ranches.
Let’s start with the easy one: blocking access to unused parts of your asteroid. Identify areas where you don’t want Dupes to go, even if there is a plant that produced some foods, and build doors that are either locked or where you disable Dupes access. For performance reasons, it’s better to lock doors rather than disable access.
If you need some help to identify where your Dupes are going, I suggest the https://steamcommunity.com/sharedfiles/filedetails/?id=2208398090
Wild critters are quite easy to take care of: they won’t starve, and will always produce a single egg in their lifespan if a few conditions are met:
- Obviously, they must stay alive, which means not attacking them and keeping them in their liveable temperature range.
- They must not be cramped or confined, or at least not for a significant part of their adulthood.
To solve that second part, you have two choices: you can make an “open-air” design, so that the “room” is all your base and they don’t get cramped in practice (but that doesn’t work with Dreckos which can escape), or you can make some smaller rooms and keep the eggs out of the ranches.
We are going to see that second solution.
First, for Pacus, you should use the existing Tamed Pacus Ranch and put Wild ones in there. Since I already had a Polluted Water tank, I decided to use that to monitor my Tamed Pacus tank separately, but there is absolutely no difference in concept: Eggs are moved on a room above and live Pacus just flop down the tank.
Any morb you have can be kept there, or really anywhere: since they don’t lay eggs and don’t die of old age, the only special consideration is to have Deodorizers around them (not shown on the screenshot, they are above the doors for the Polluted Water off-gassing).
Pacus can be either taken as Eggs, or with a Fish Trap + Fish Release.
Morbs will need to be captured with a Critter Trap, as they don’t lay eggs and cannot be wrangled.
Note that all Traps are used up when they trigger, and you do not get the materials back.
For wild Hatches, Dreckos and Pokeshells, it’s a bit more complicated. Hatches and Pokeshells could be kept in an open-air room, but Dreckos will escape.
To avoid that, we are going to use the fact that eggs can be moved in an open door, with that door being it’s own room: Critters going inside will get Confined, but that debuff will go away as soon as they exit. They will not spend enough time in that door to prevent them from laying eggs.
As for the shipping part:
- The left Sweeper is able to reach into the door to collect Egg Shells, Molts and Meat that fall there.
- The right Sweeper is able to reach the bottom Loader, so that Eggs are moved inside the door.
- Both Sweepers can reach the top loader, which takes Egg Shells, Molts and Meat to the kitchen.
- The Automated Dispenser is set on sweep-only, and is only useful to move eggs inside the room. You could remove it after finishing critters round-up.
- Same goes for the Critter Drop-Off, which should be disabled or removed once you finish critters round-up, to avoid your Ranchers moving tame critters there. Tamed critters would die of starvation without laying an egg.
You can double that room if you need to house more than 20 critters, as the Critter Drop-Off only goes up to 20 critters. It’s a weird height for my modular design, meaning you can fit a small 2 height corridor above.
Please note that this design is very new and not extensively tested yet. Several experienced players think it will work correctly, but only time will confirm that.
Special thanks to Ishamoridin for helping me perfect this design.
There is another very good reason to do this: improve the game performance. Critters pathing use a fair amount of resources. By restricting their movement, you lower the resources needed for the simulation.
As the game progresses, performance will get worse and worse. Depending on your computer, you might need to adjust your gameplay to do things in a less resource-intensive way.
End of mid-game base state
Your base is now running exclusively on renewables, and should be able to run hundreds, if not thousands of cycles with little to no intervention. You “beat” the survival part of the game, and you are now firmly into the late-game, which is centered around completing the actual objectives, or whatever strikes your fancy.
It should take at least 100 to 200 cycles to do the mid-game part (or more if you had some incidents, don’t sweat it), so you should be somewhere between cycles 150 and 300. At this point, cycle count starts to be really irrelevant anyway.
After several queries, here is my base when following this guide to the letter. First, the whole Asteroid view:
We will be delving into the Oil Biome in the next part, and Space Biome in the last part.
The colony itself looks like that:
I highlighted the rooms for a better understanding:
There is a lot of unused space, which can stay unused, be used to recruit more Dupes, create more farms or whatever project you want to try out.
- In dark blue, all the essential living rooms: Great Hall, Bathroom and Bedrooms. It’s a good idea to upgrade to Bedrooms when you have enough plastic, and I started Decor-bombing living rooms.
- In dark green, a Dusk Cap Farm. It’s already starting to be obsolete, as there are enough Critters to sustain my 8 Dupes with Meat.
- In light green, a Kitchen. For 8 Dupes, one Electric Grill and one Gas Range are more than enough.
- In purple, Hatches, Dreckos and Pacus ranches. Smooth Hatches will soon be obsolete, while the Pacus ranch just got started.
- In light blue, Wild Critter rooms. Dupes don’t need to access those.
- In orange, a Hospital, which is almost never used.
- In yellow, a Suit-up Area, which is the only entry/exit for the entire base. It doesn’t matter on which side of the colony it’s located.
- In red, a Small Scale Refinement room, though those buildings will be moved in a real Industrial Brick later.
- In white, there is an empty space for a Recreation Room near the living room. This won’t be covered in the guide as it’s totally optional, but it can provide more Morale if you want your Dupes to learn more skills.
The shipping is interesting too, let’s have a quick look.
In addition to what’s shown in the Shipping network section, I added the Coal shipping from the Hatch Ranch to the Coal Generators. You will want to place Kilns nearby since they also use Coal.
The phosphorite is not shipped yet: it’s a nice addition if all the Wheezeworts are in a concentrated location (which is currently my case).
Note that I had to add an overflow for the Water Treatment, because both reservoirs were full and pipes started to get backed up.
Thimble Reeds are a nice solution, especially as you will need a ton of Reed Fiber later to produce Insulation.
The Power Plant, CSV Tamer and SPOM got grouped together because my CSV was so close to my base. Note that I used a CSV for the purpose of showing how it’s tamed in this guide, otherwise I would have used an easier Geyser.
Right now, Coal Generators sit unused, but it’s a good idea to keep them as backup generators.
Gas Pipes are nothing too special. I didn’t have to deal with CO2 yet, though I plan to extend the CO2 pipe from Natural Gas Generator to the Oil Biome later.
Last but not least, a small look at the Natural Gas Geyser tamer. I don’t like using Infinite Storage, so I use an array of 25 Gas Reservoirs, which is just enough to cover the dormancy period of this Geyser:
The next challenges will be about industrialisation: Steel and Glass production as well as large-scale electricity production. After that comes Space exploration, which is the current end-game content.
What about the ATST?
You might be surprised to not have seen it yet. I consider Steel as a prerequisite to do it, but don’t think it’s necessary to build one before late-game: if you followed my recommandation, avoided heat and did not build a Metal Refinery, you don’t need one yet. Don’t worry, the concept will be explained in the next part.
That’s why I don’t advise to build one, especially to not tame a Cool Steam Vent if you have other Water options and delay your first Metal Refinery, which pretty much requires a Steam Turbine.
This is all for Oxygen Not Included Colony 101: from livable to self-sufficient colony (mid-game) hope you enjoy the post. If you believe we forget or we should update the post please let us know via comment, we will try our best to fix how fast is possible! Have a great day!
- Check All Oxygen Not Included Posts List


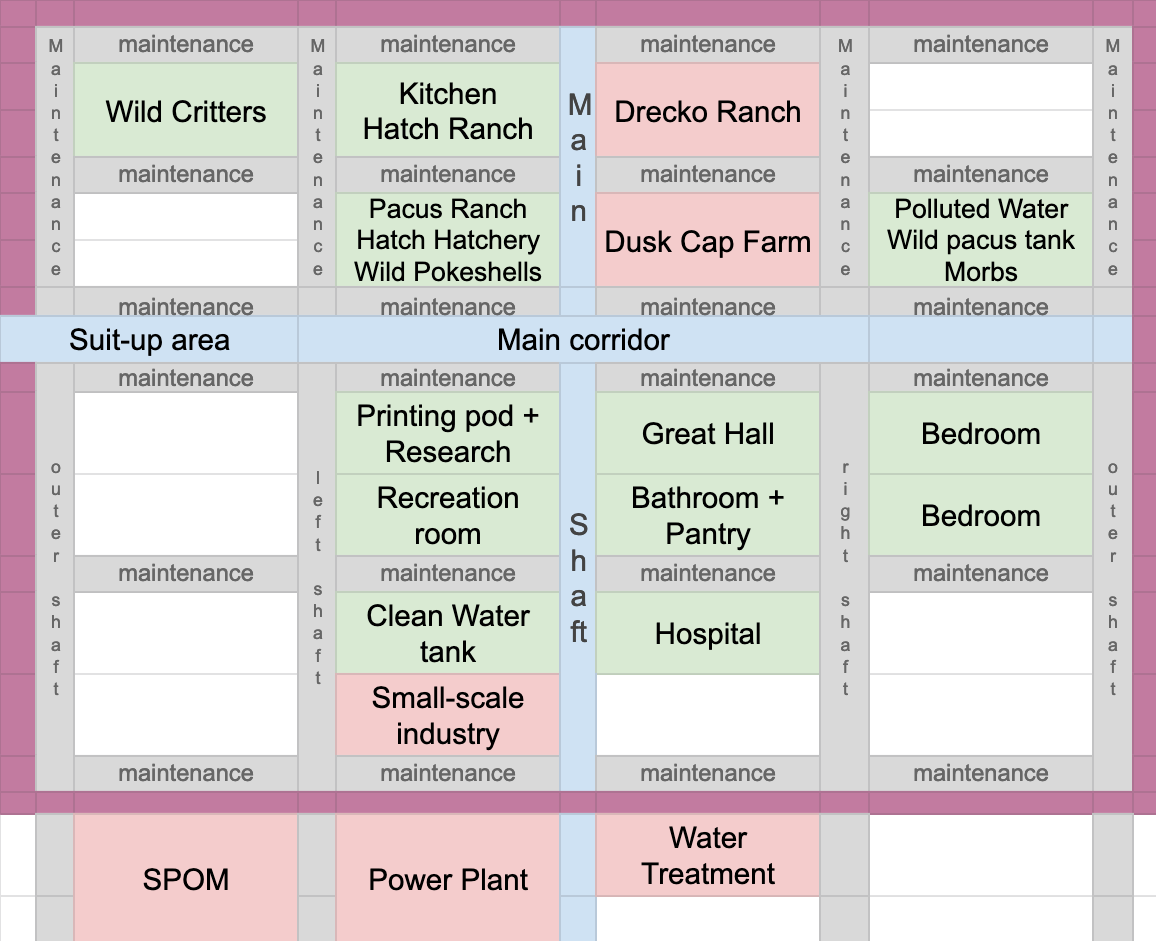


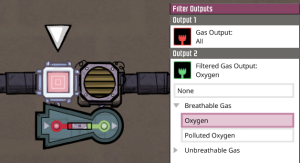
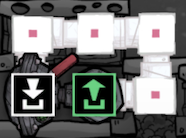
 to build one. They can fail in some conditions, refer to




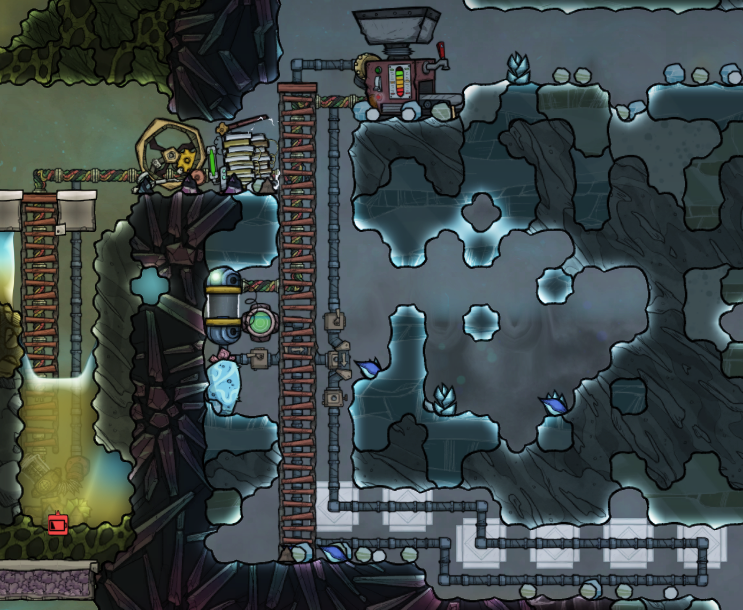
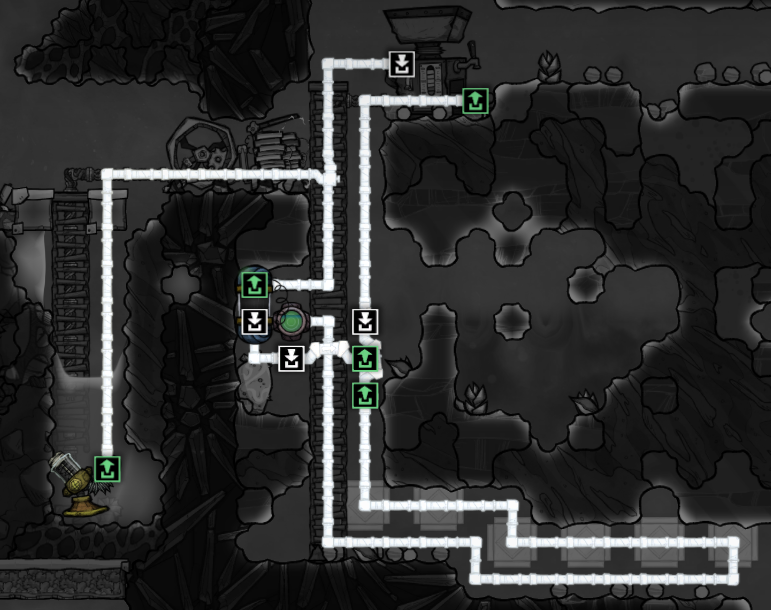
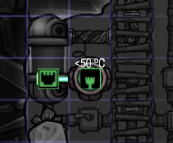

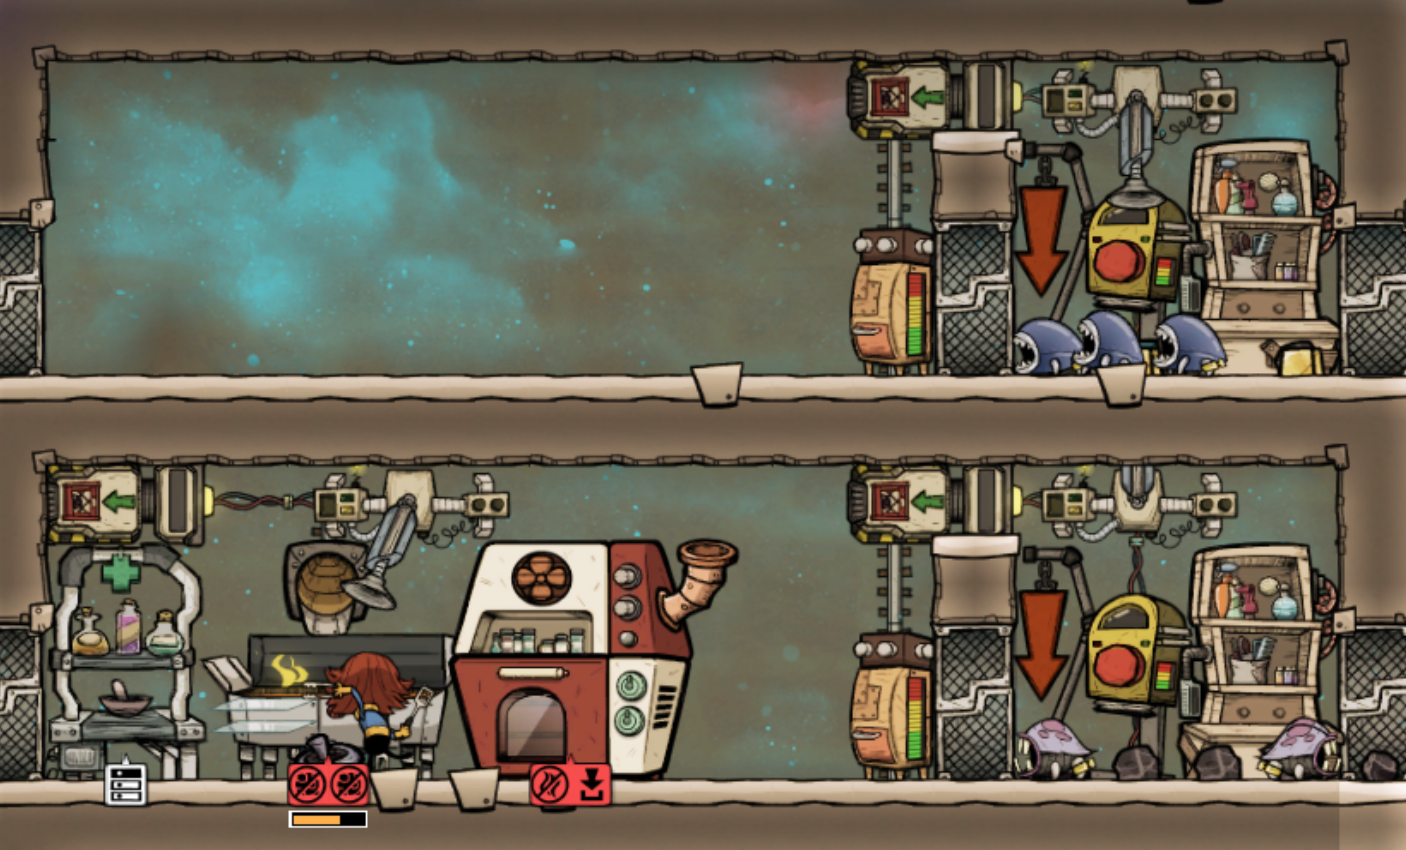
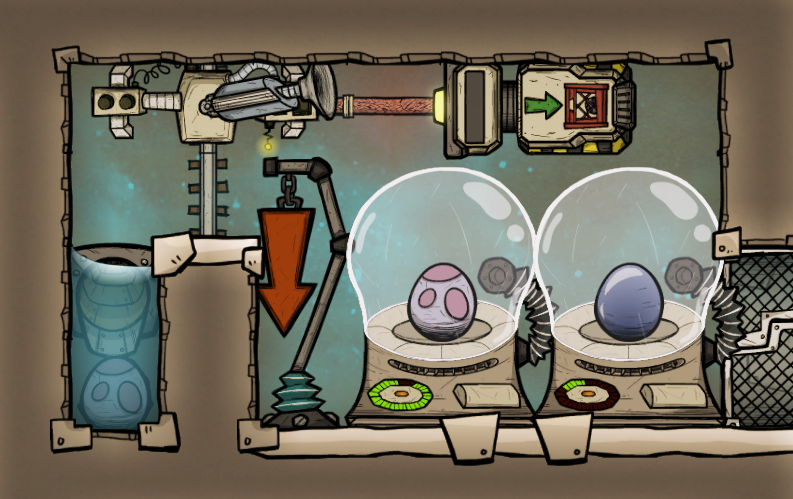
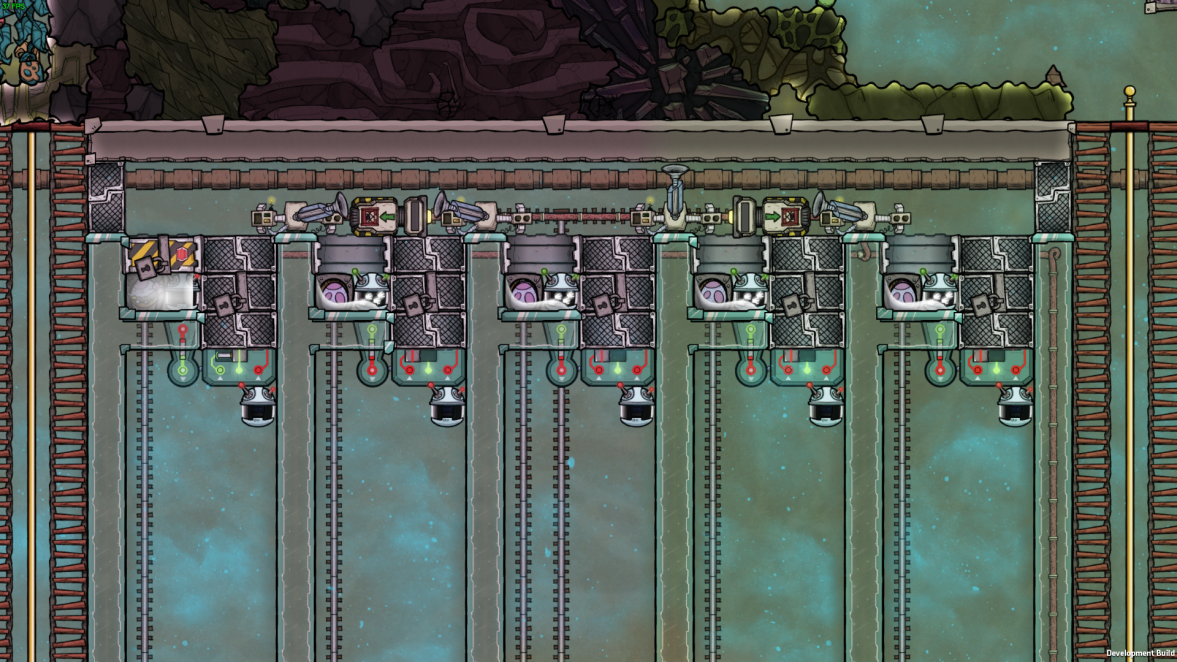
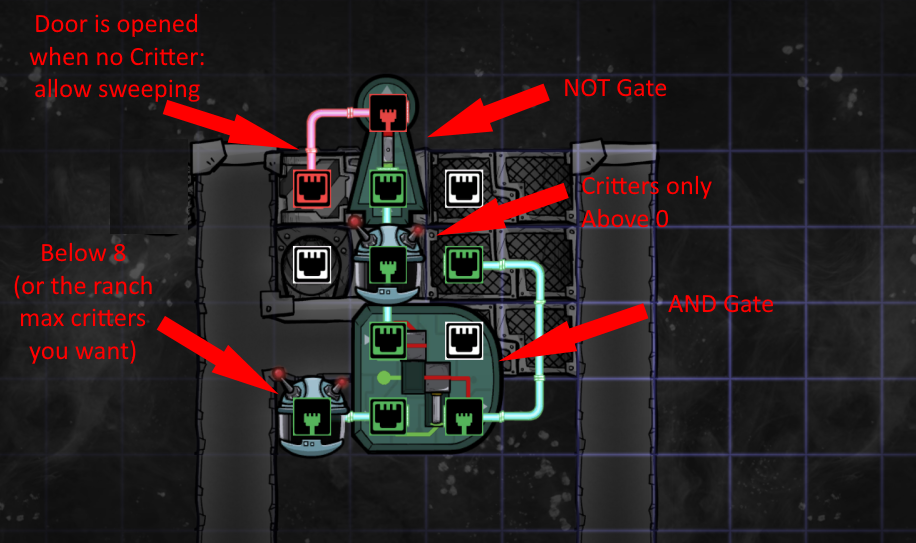

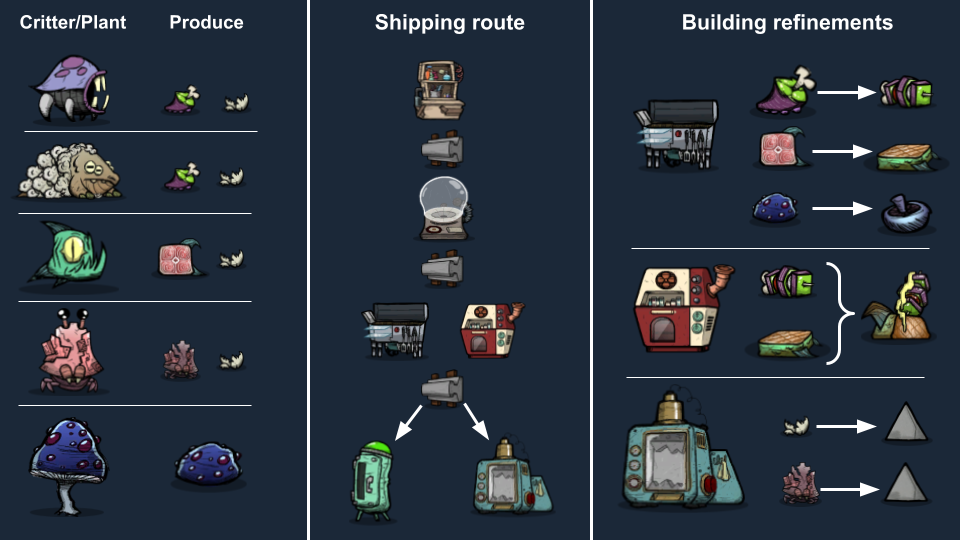
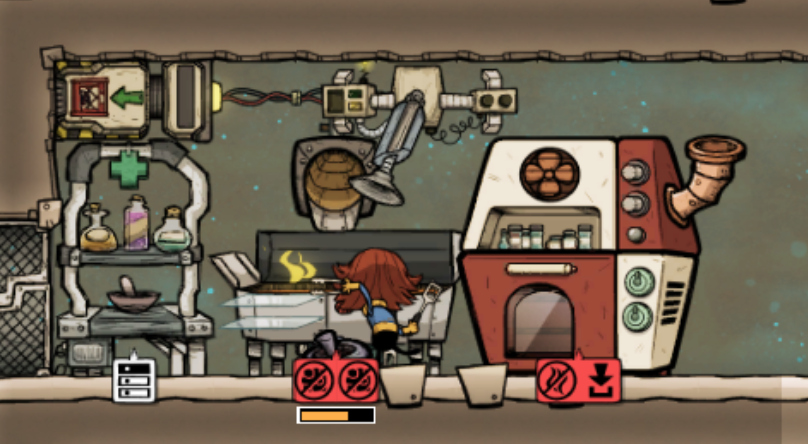



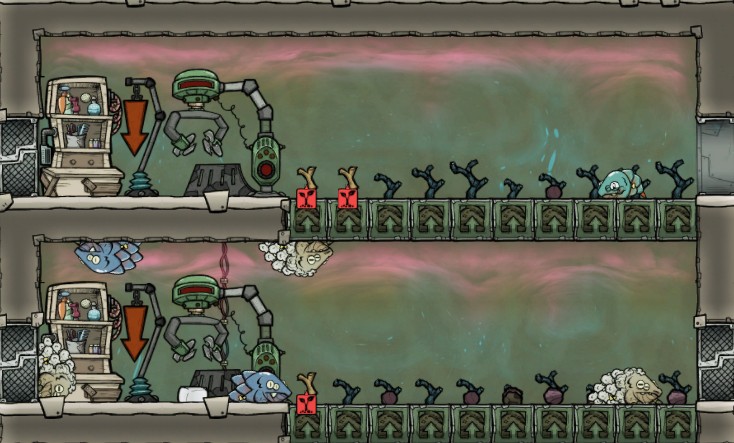

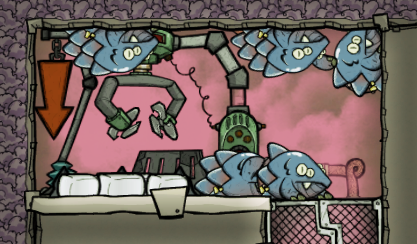
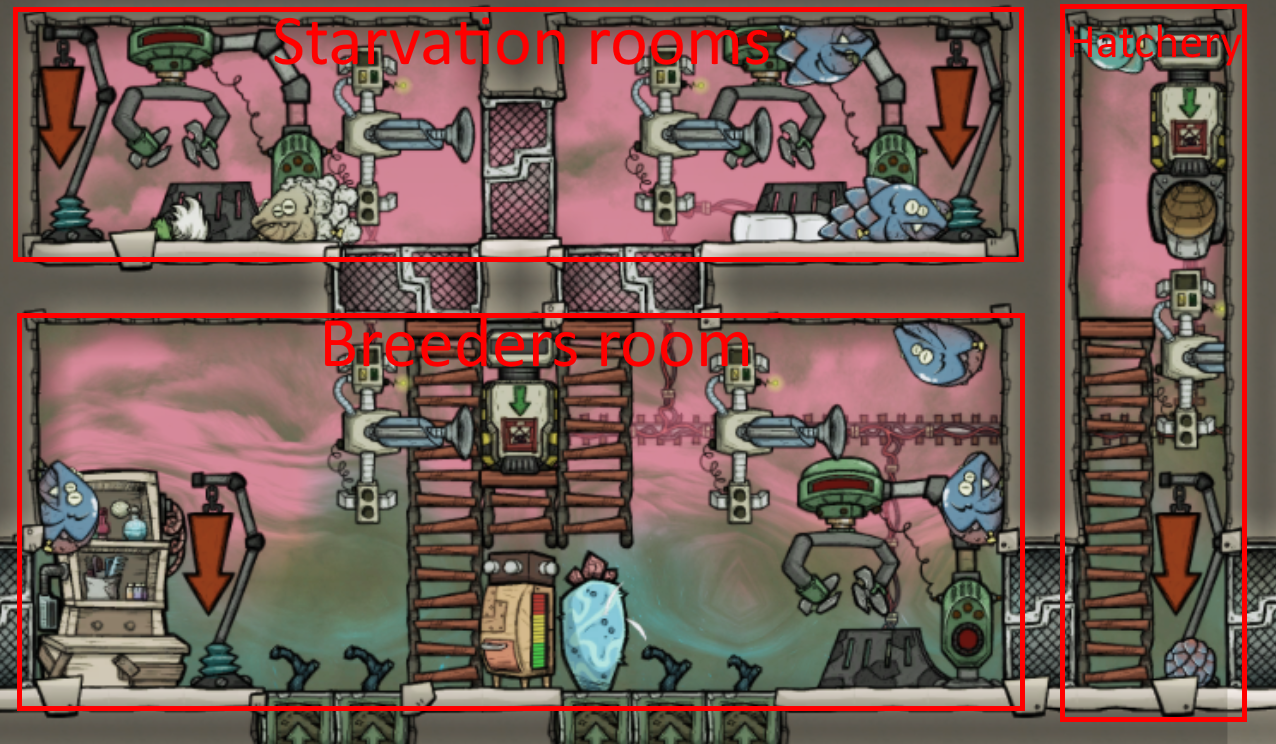

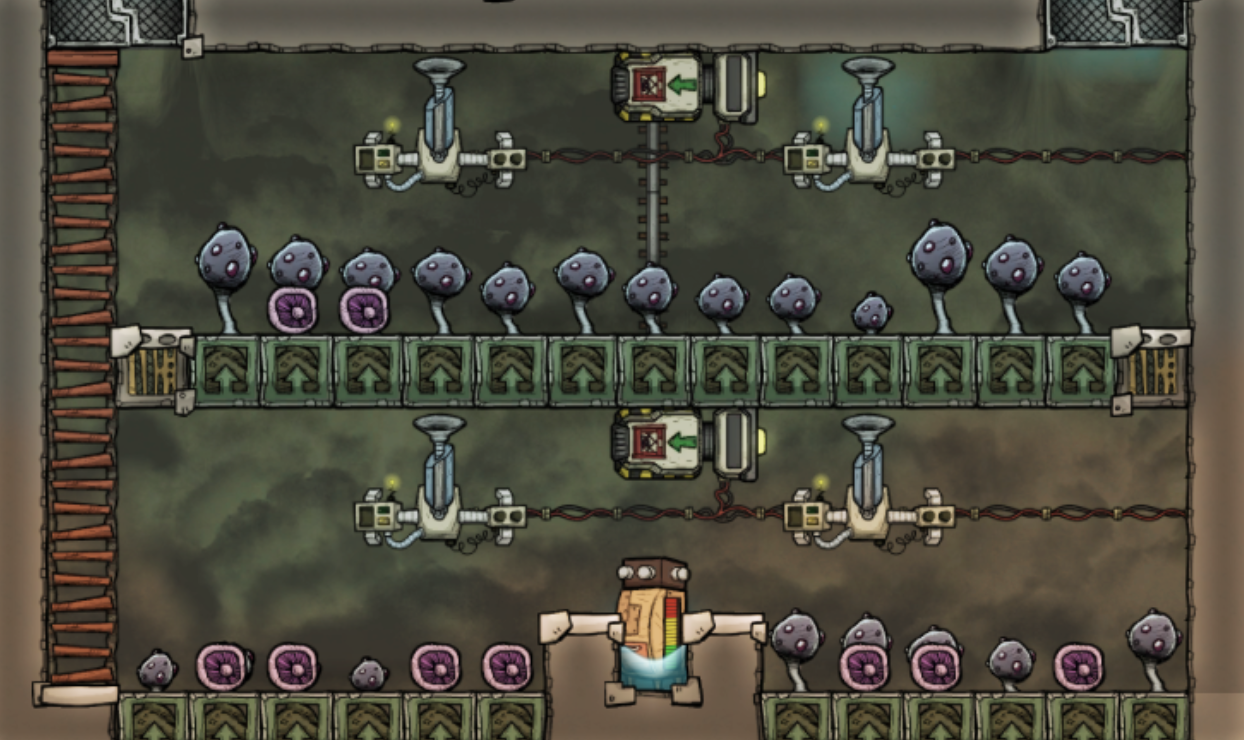




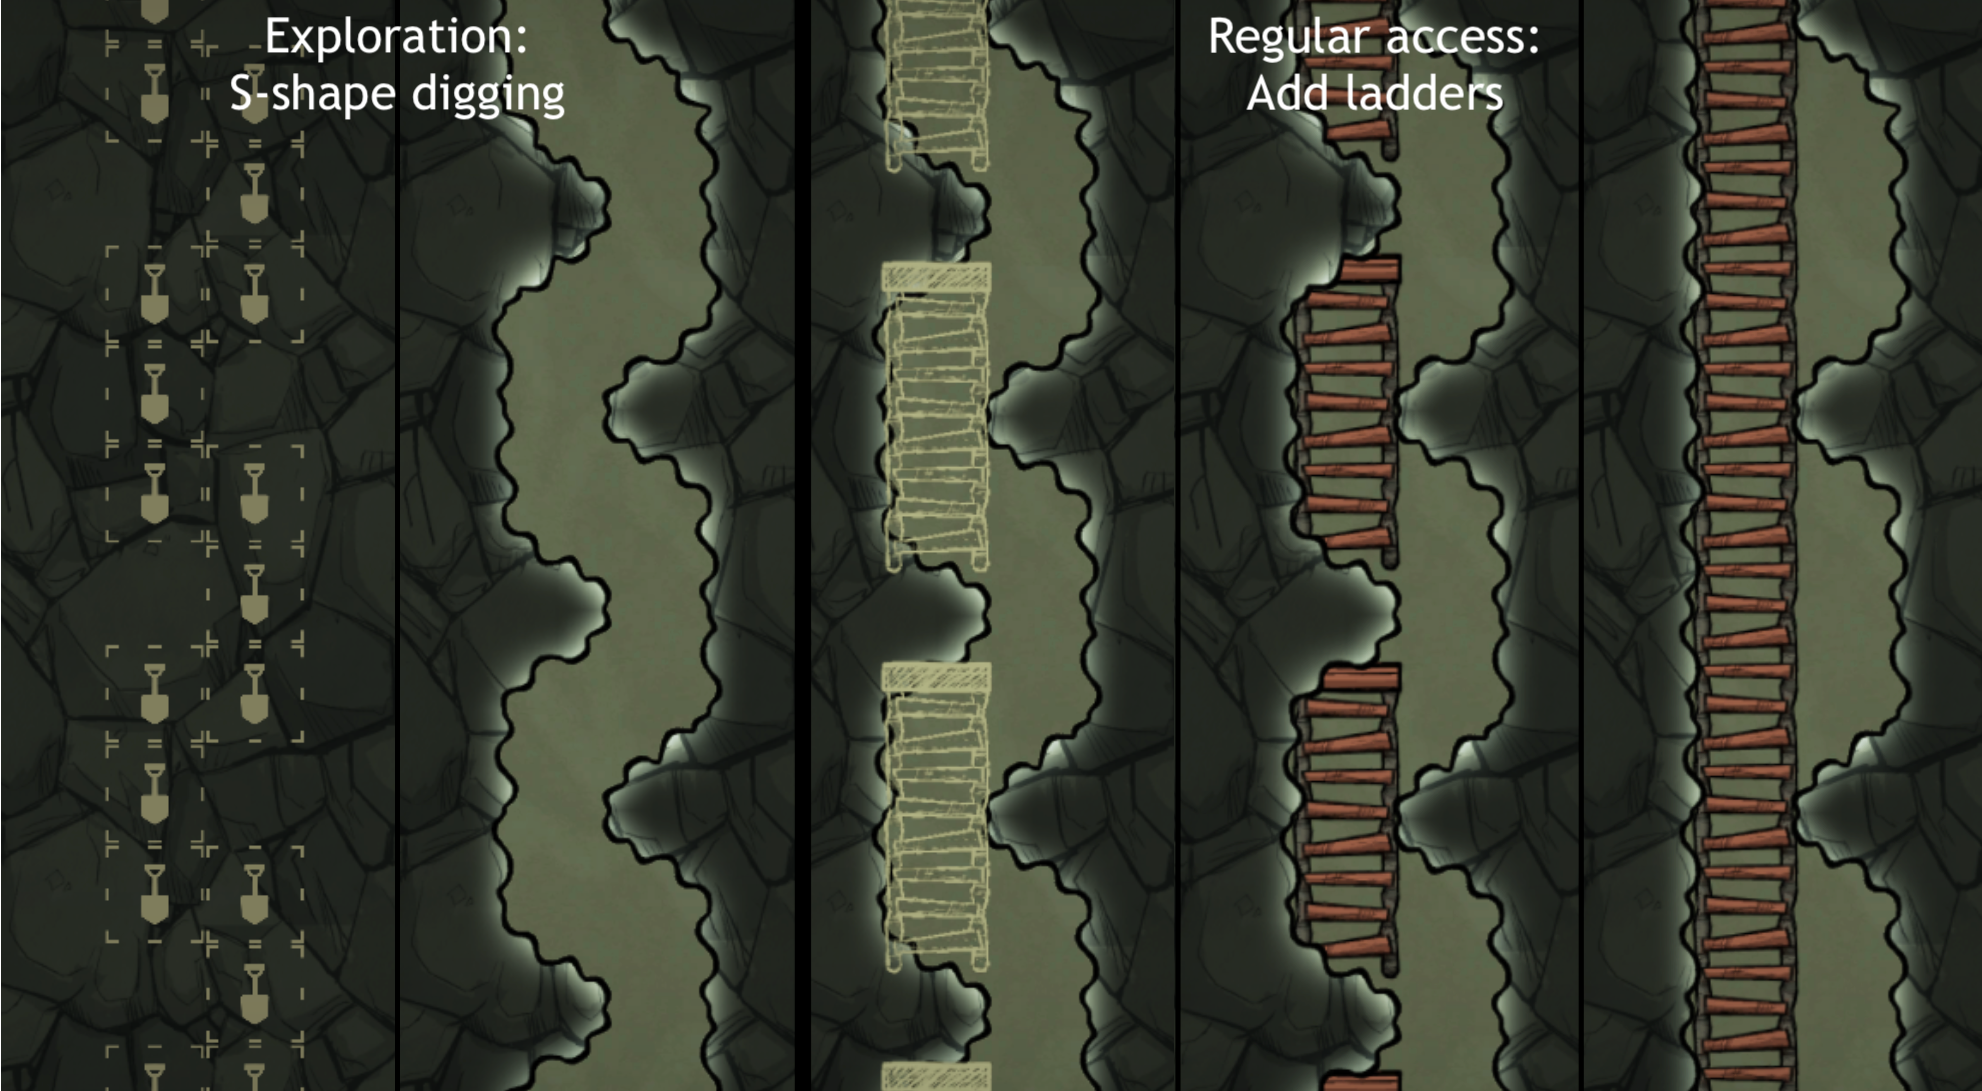

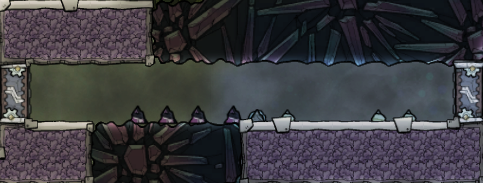
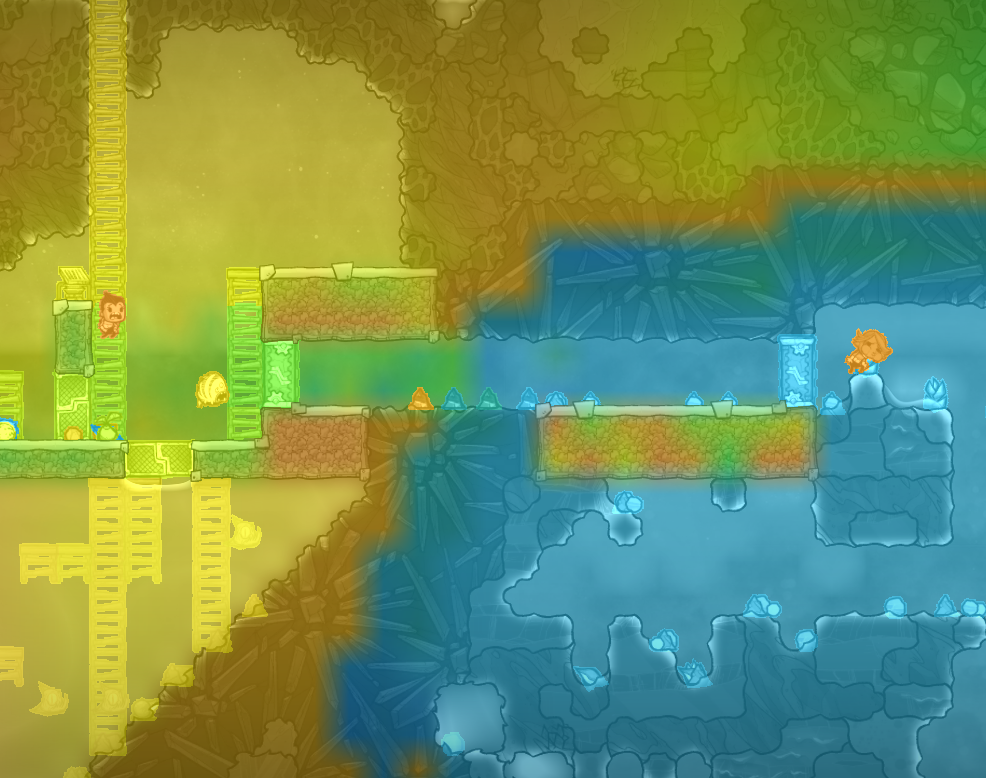
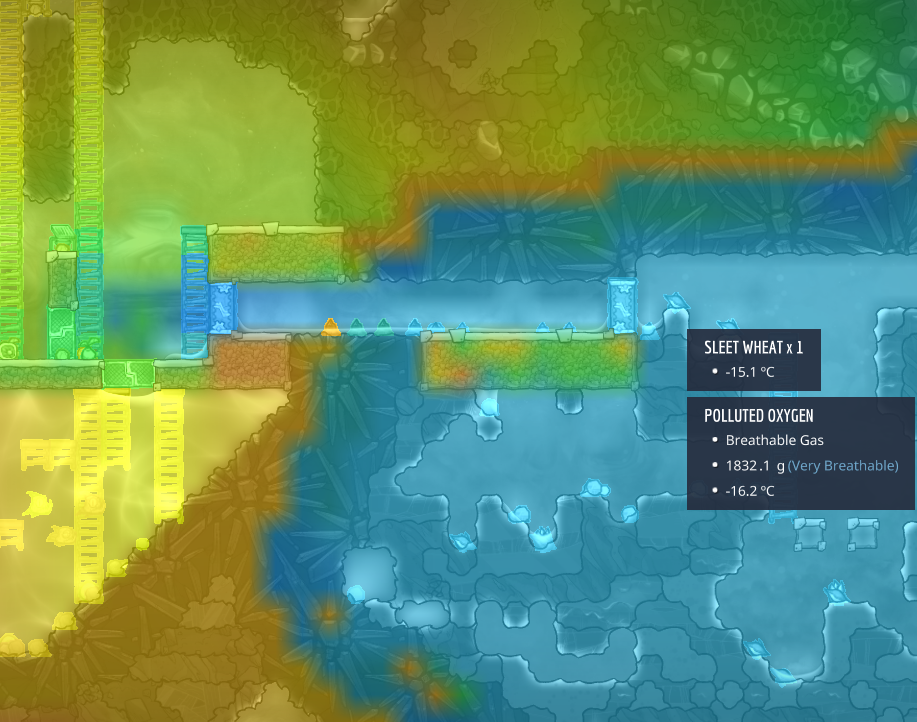
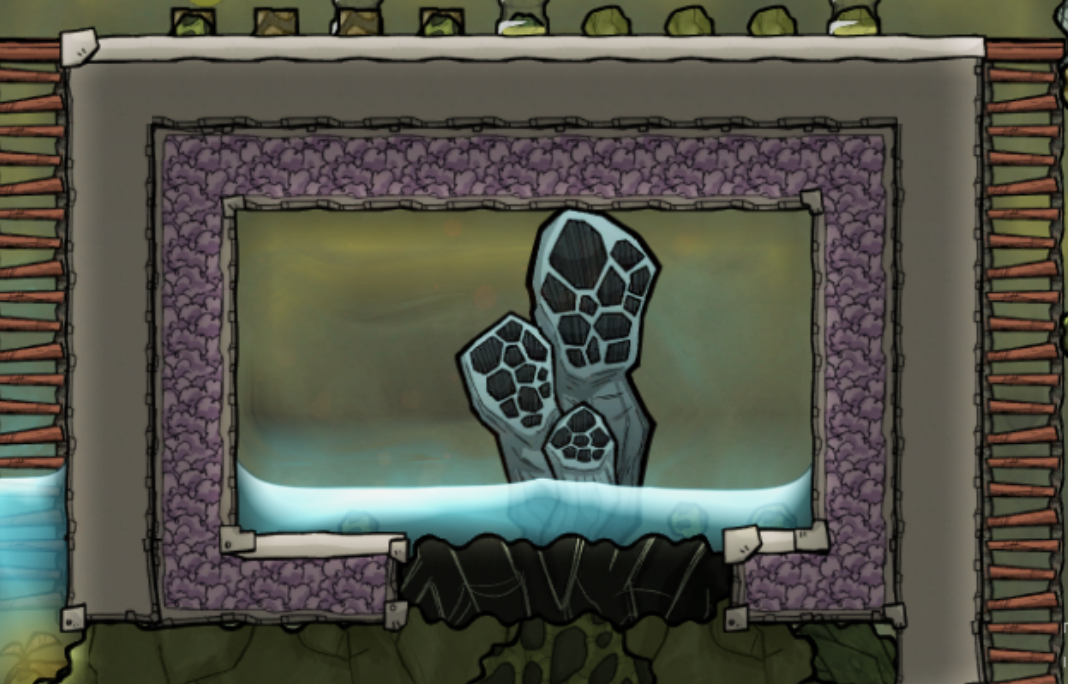

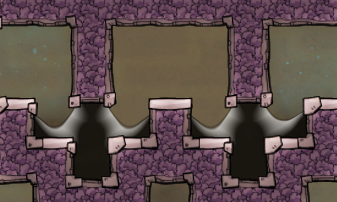
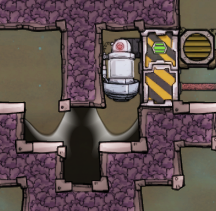

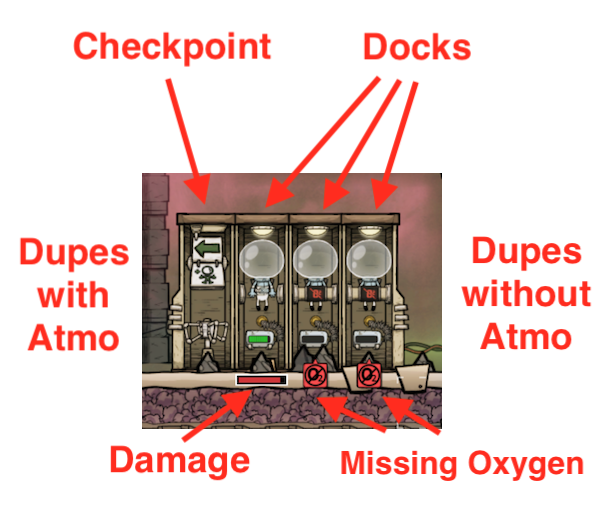


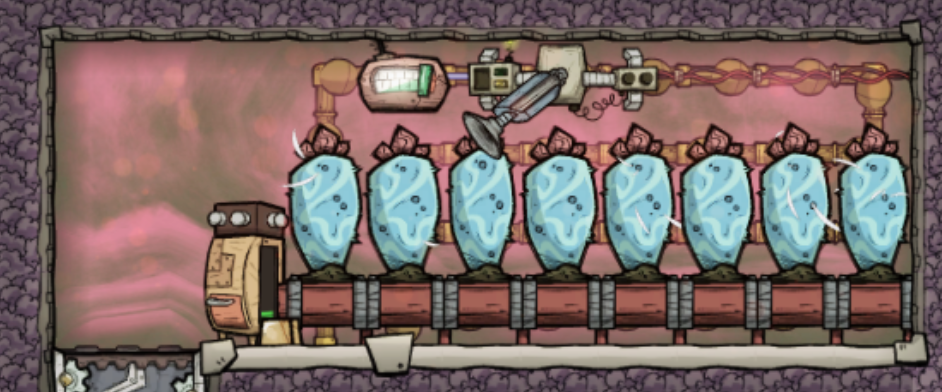


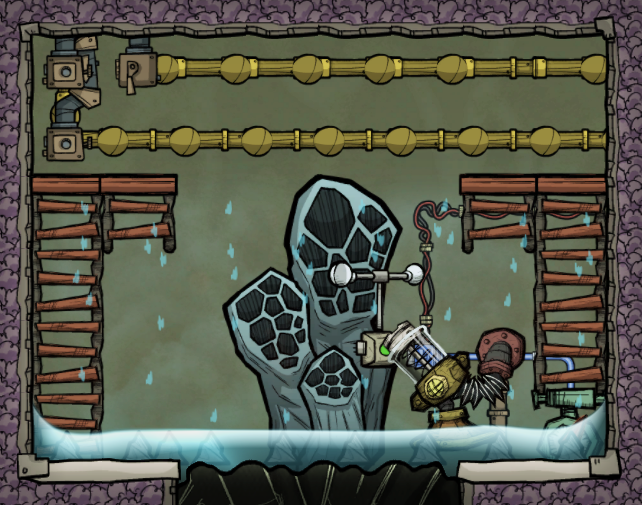
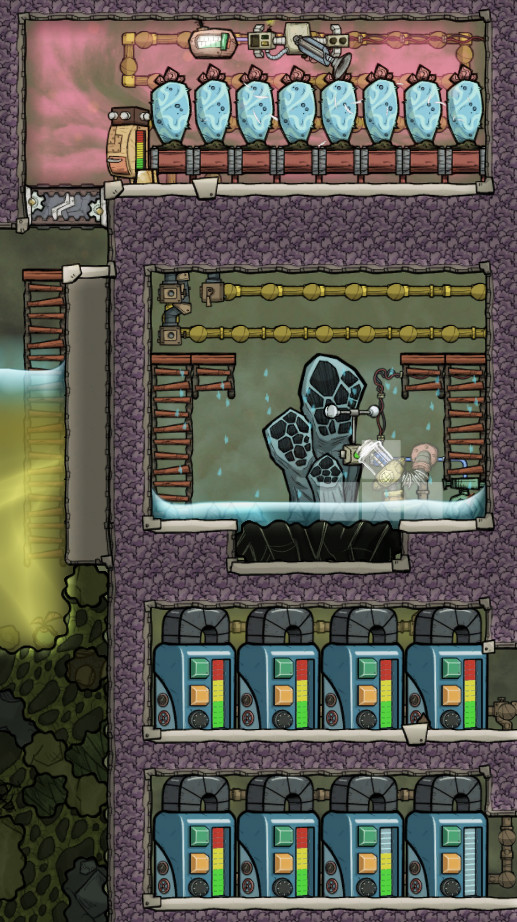

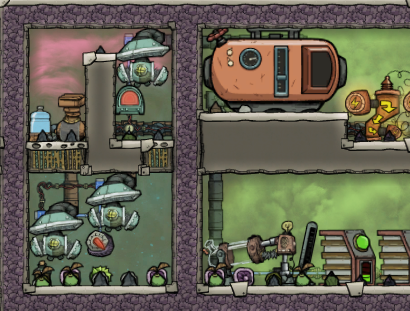
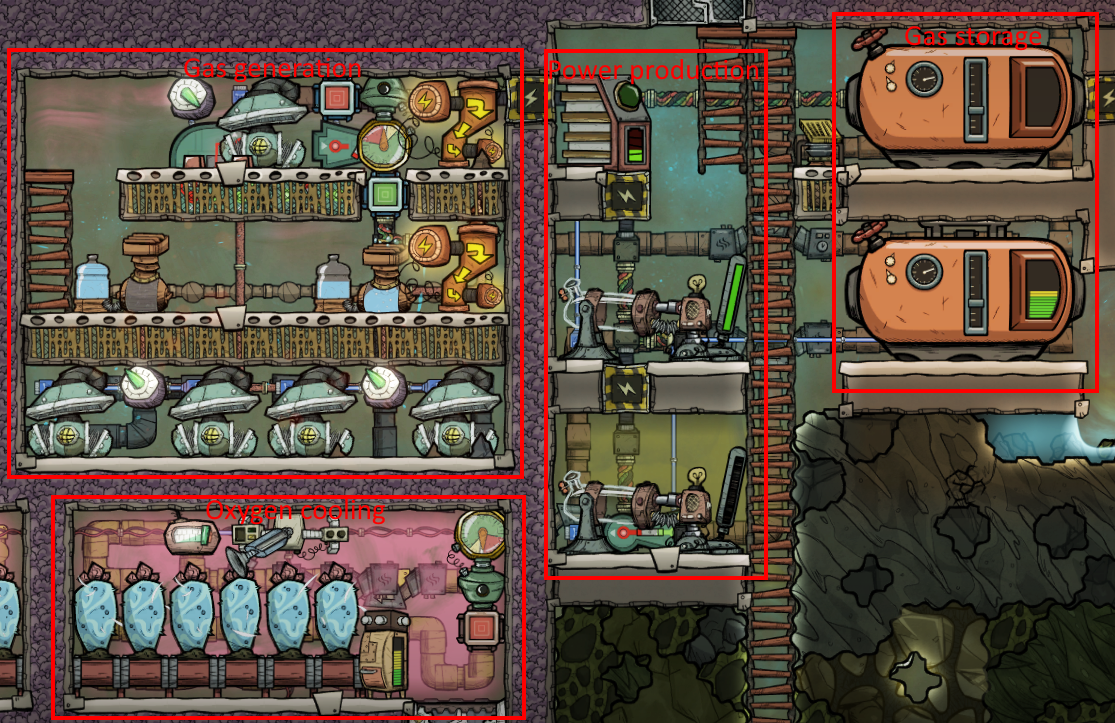
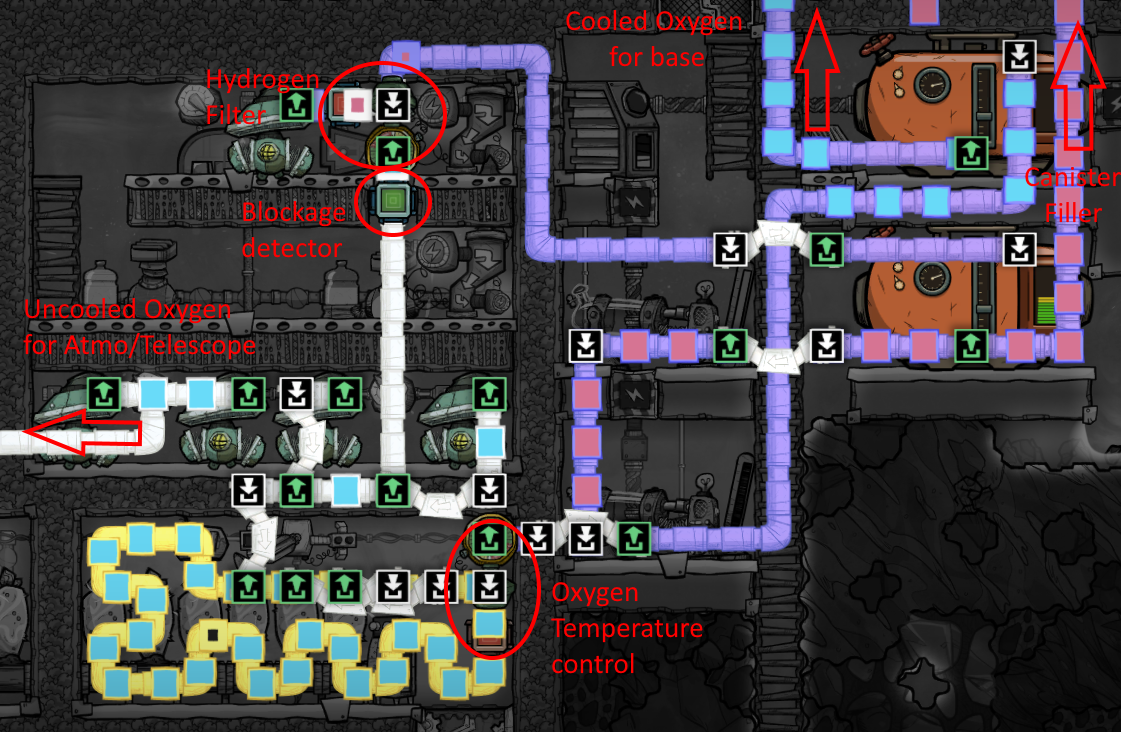
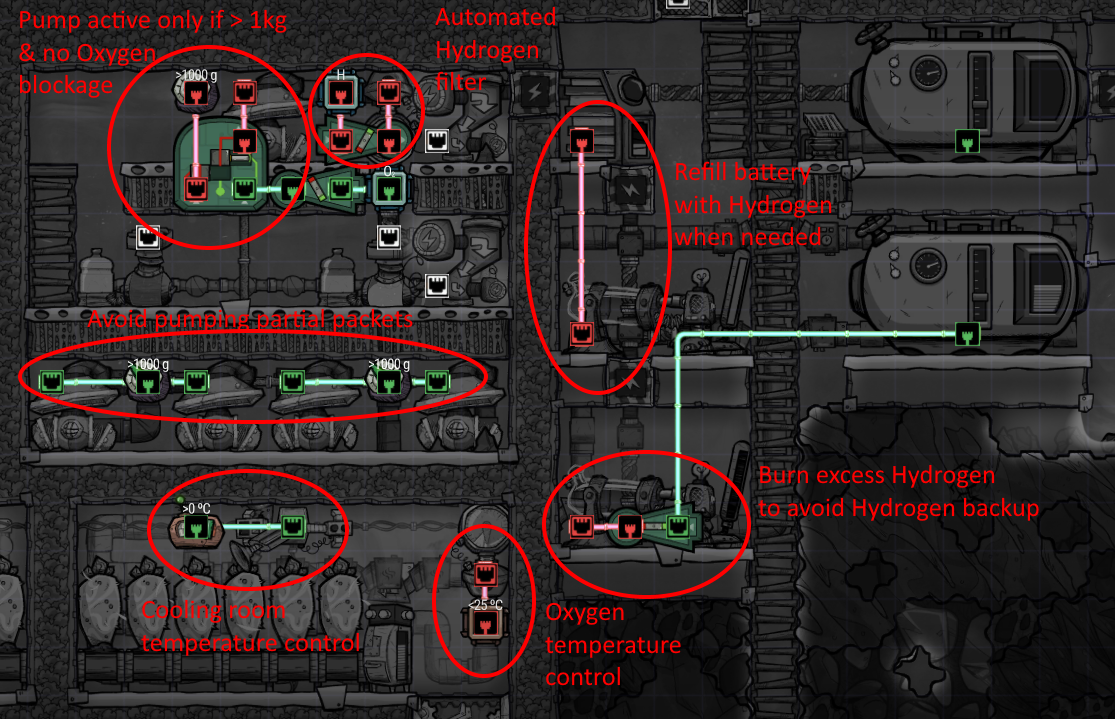



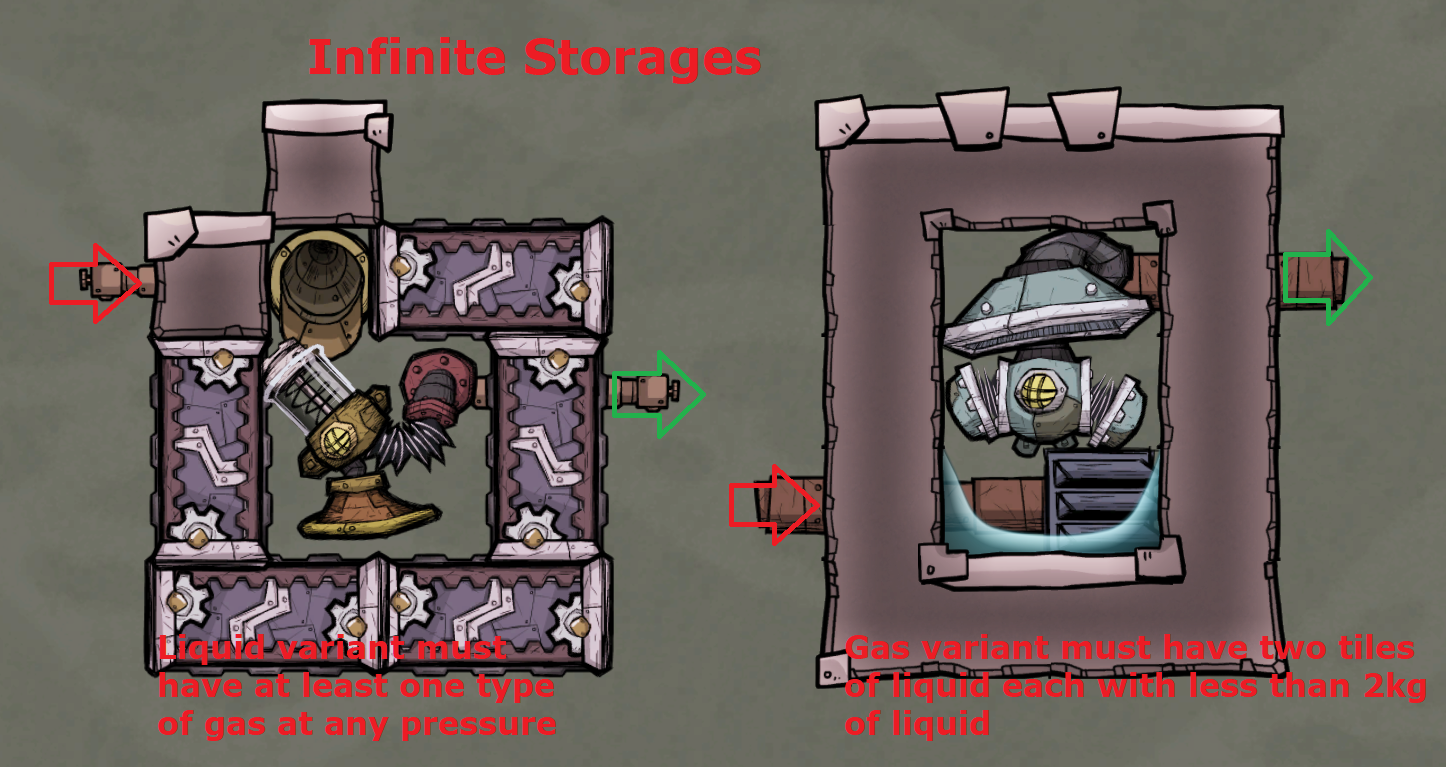
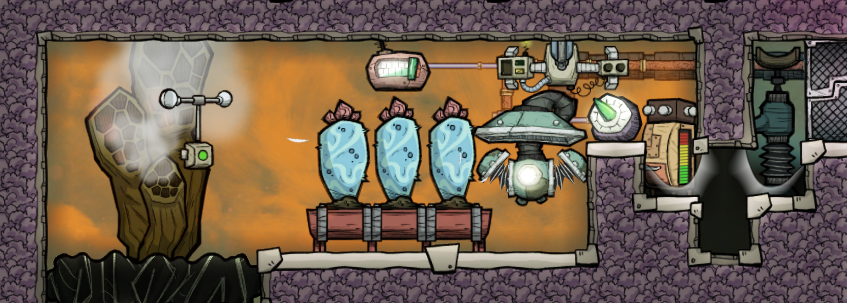





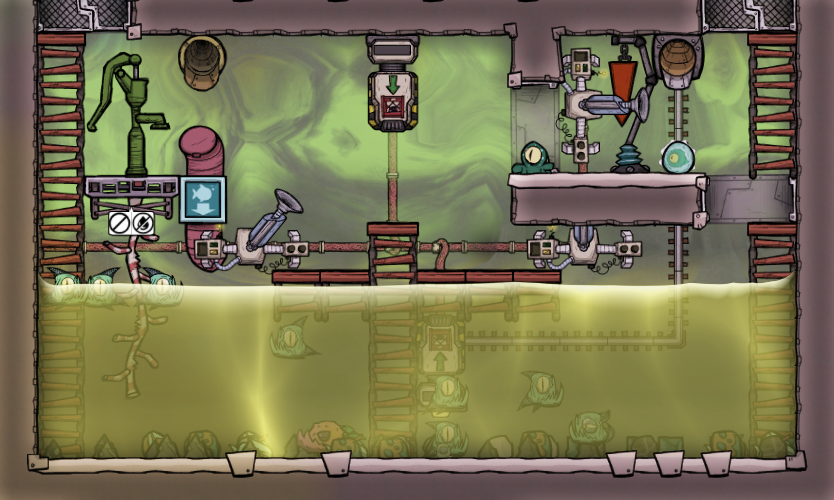
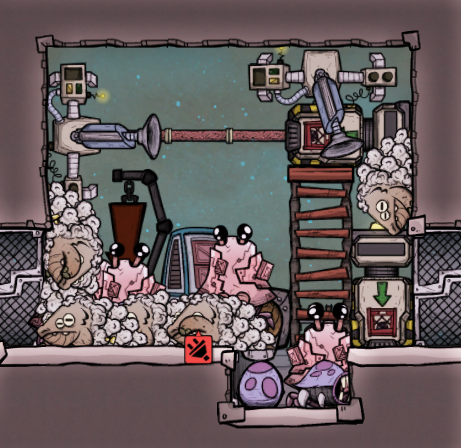
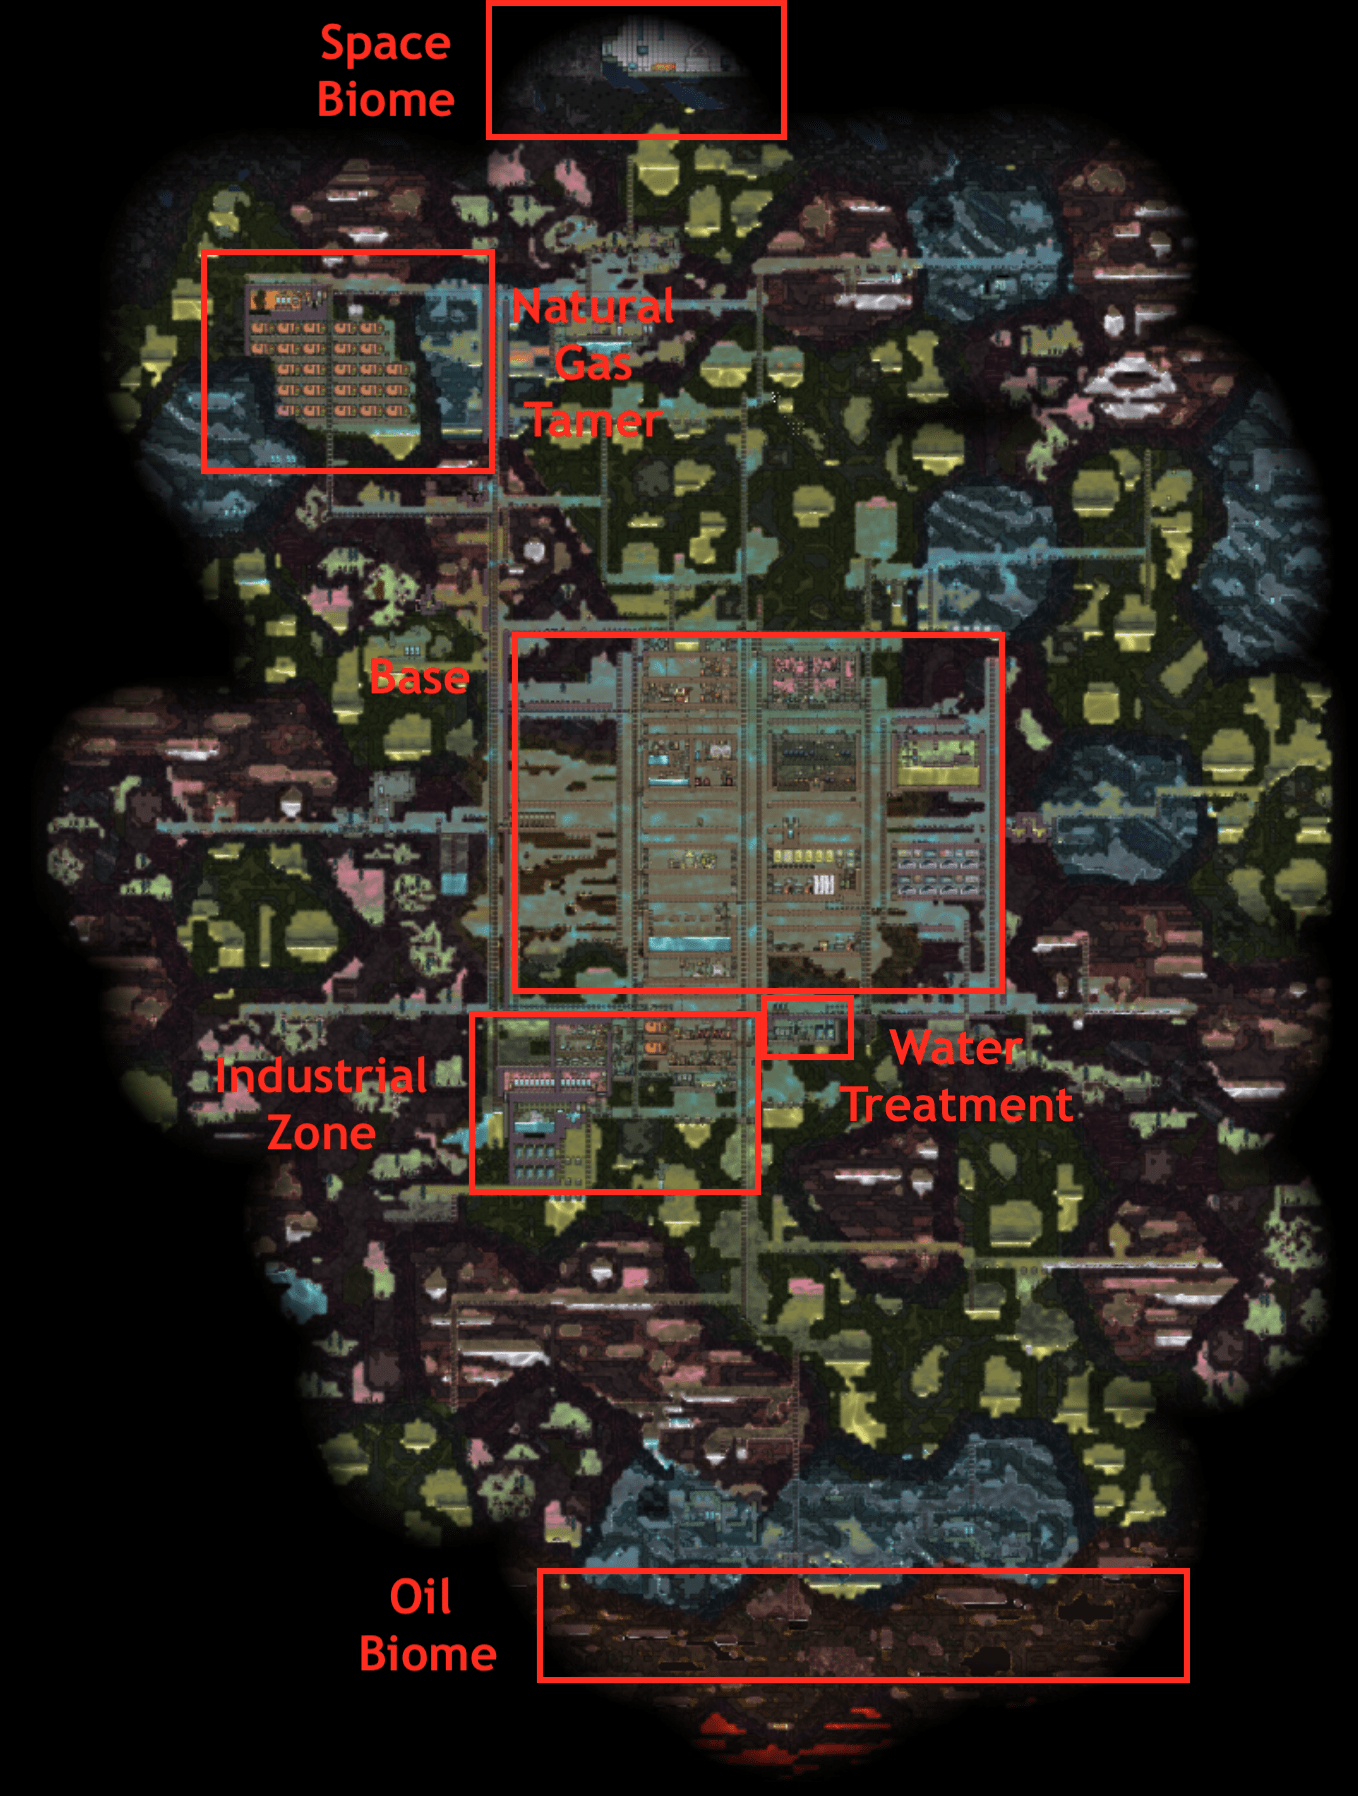
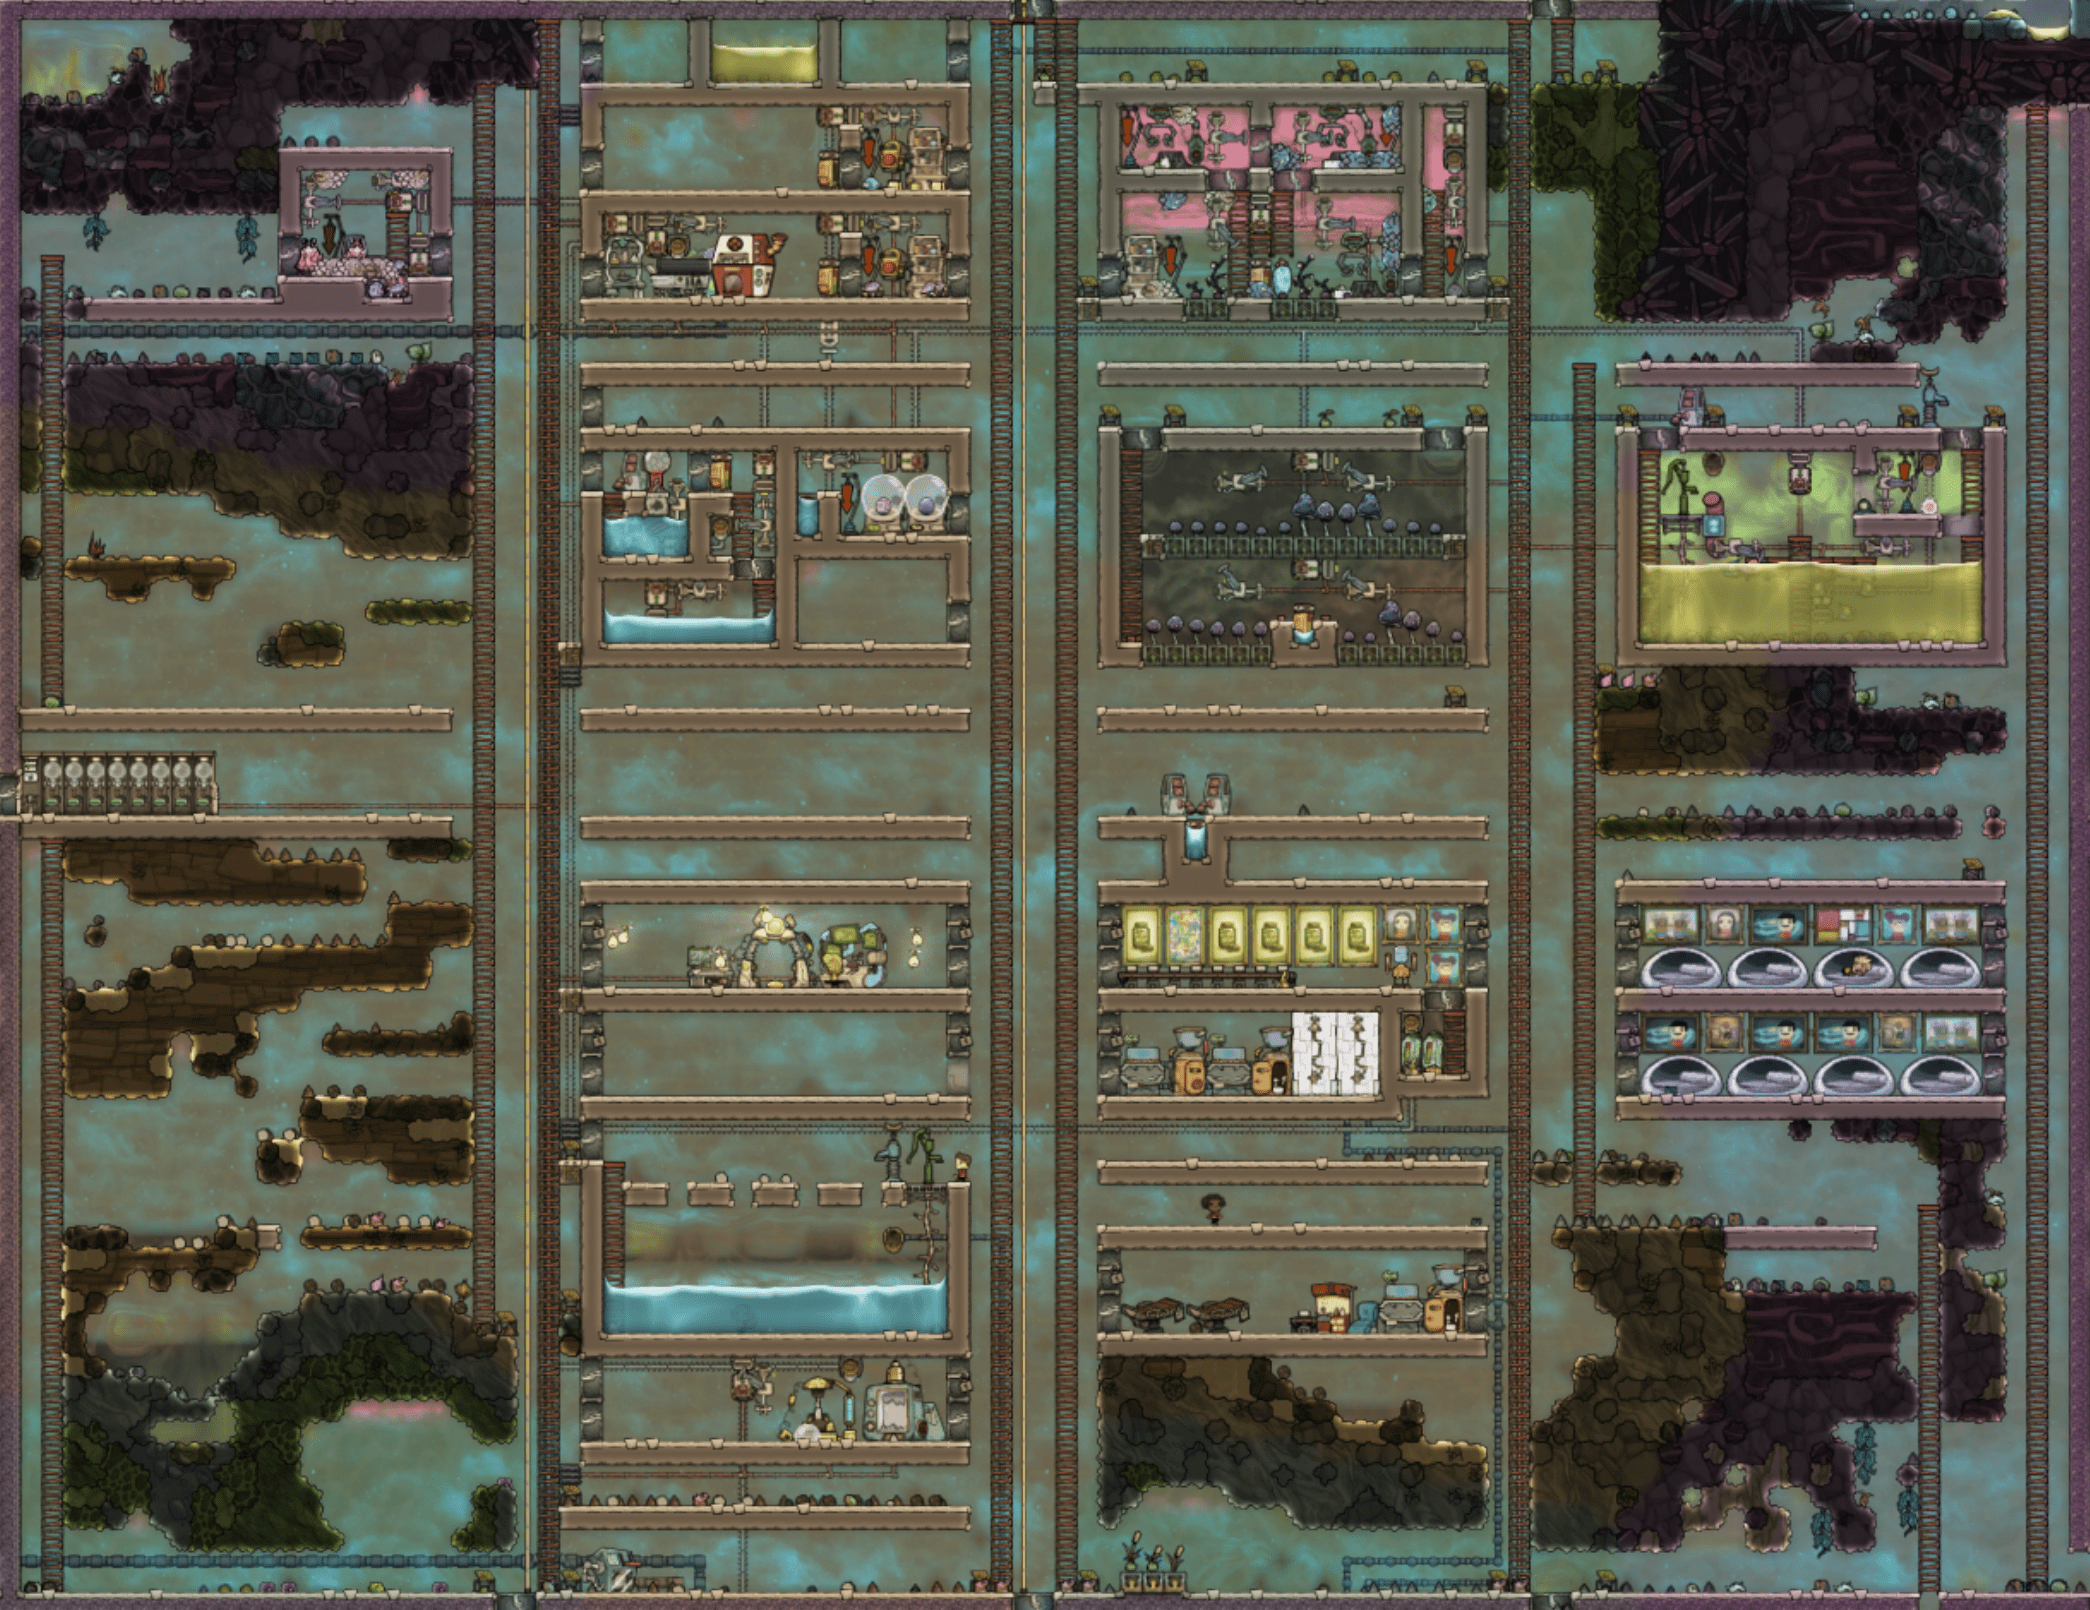
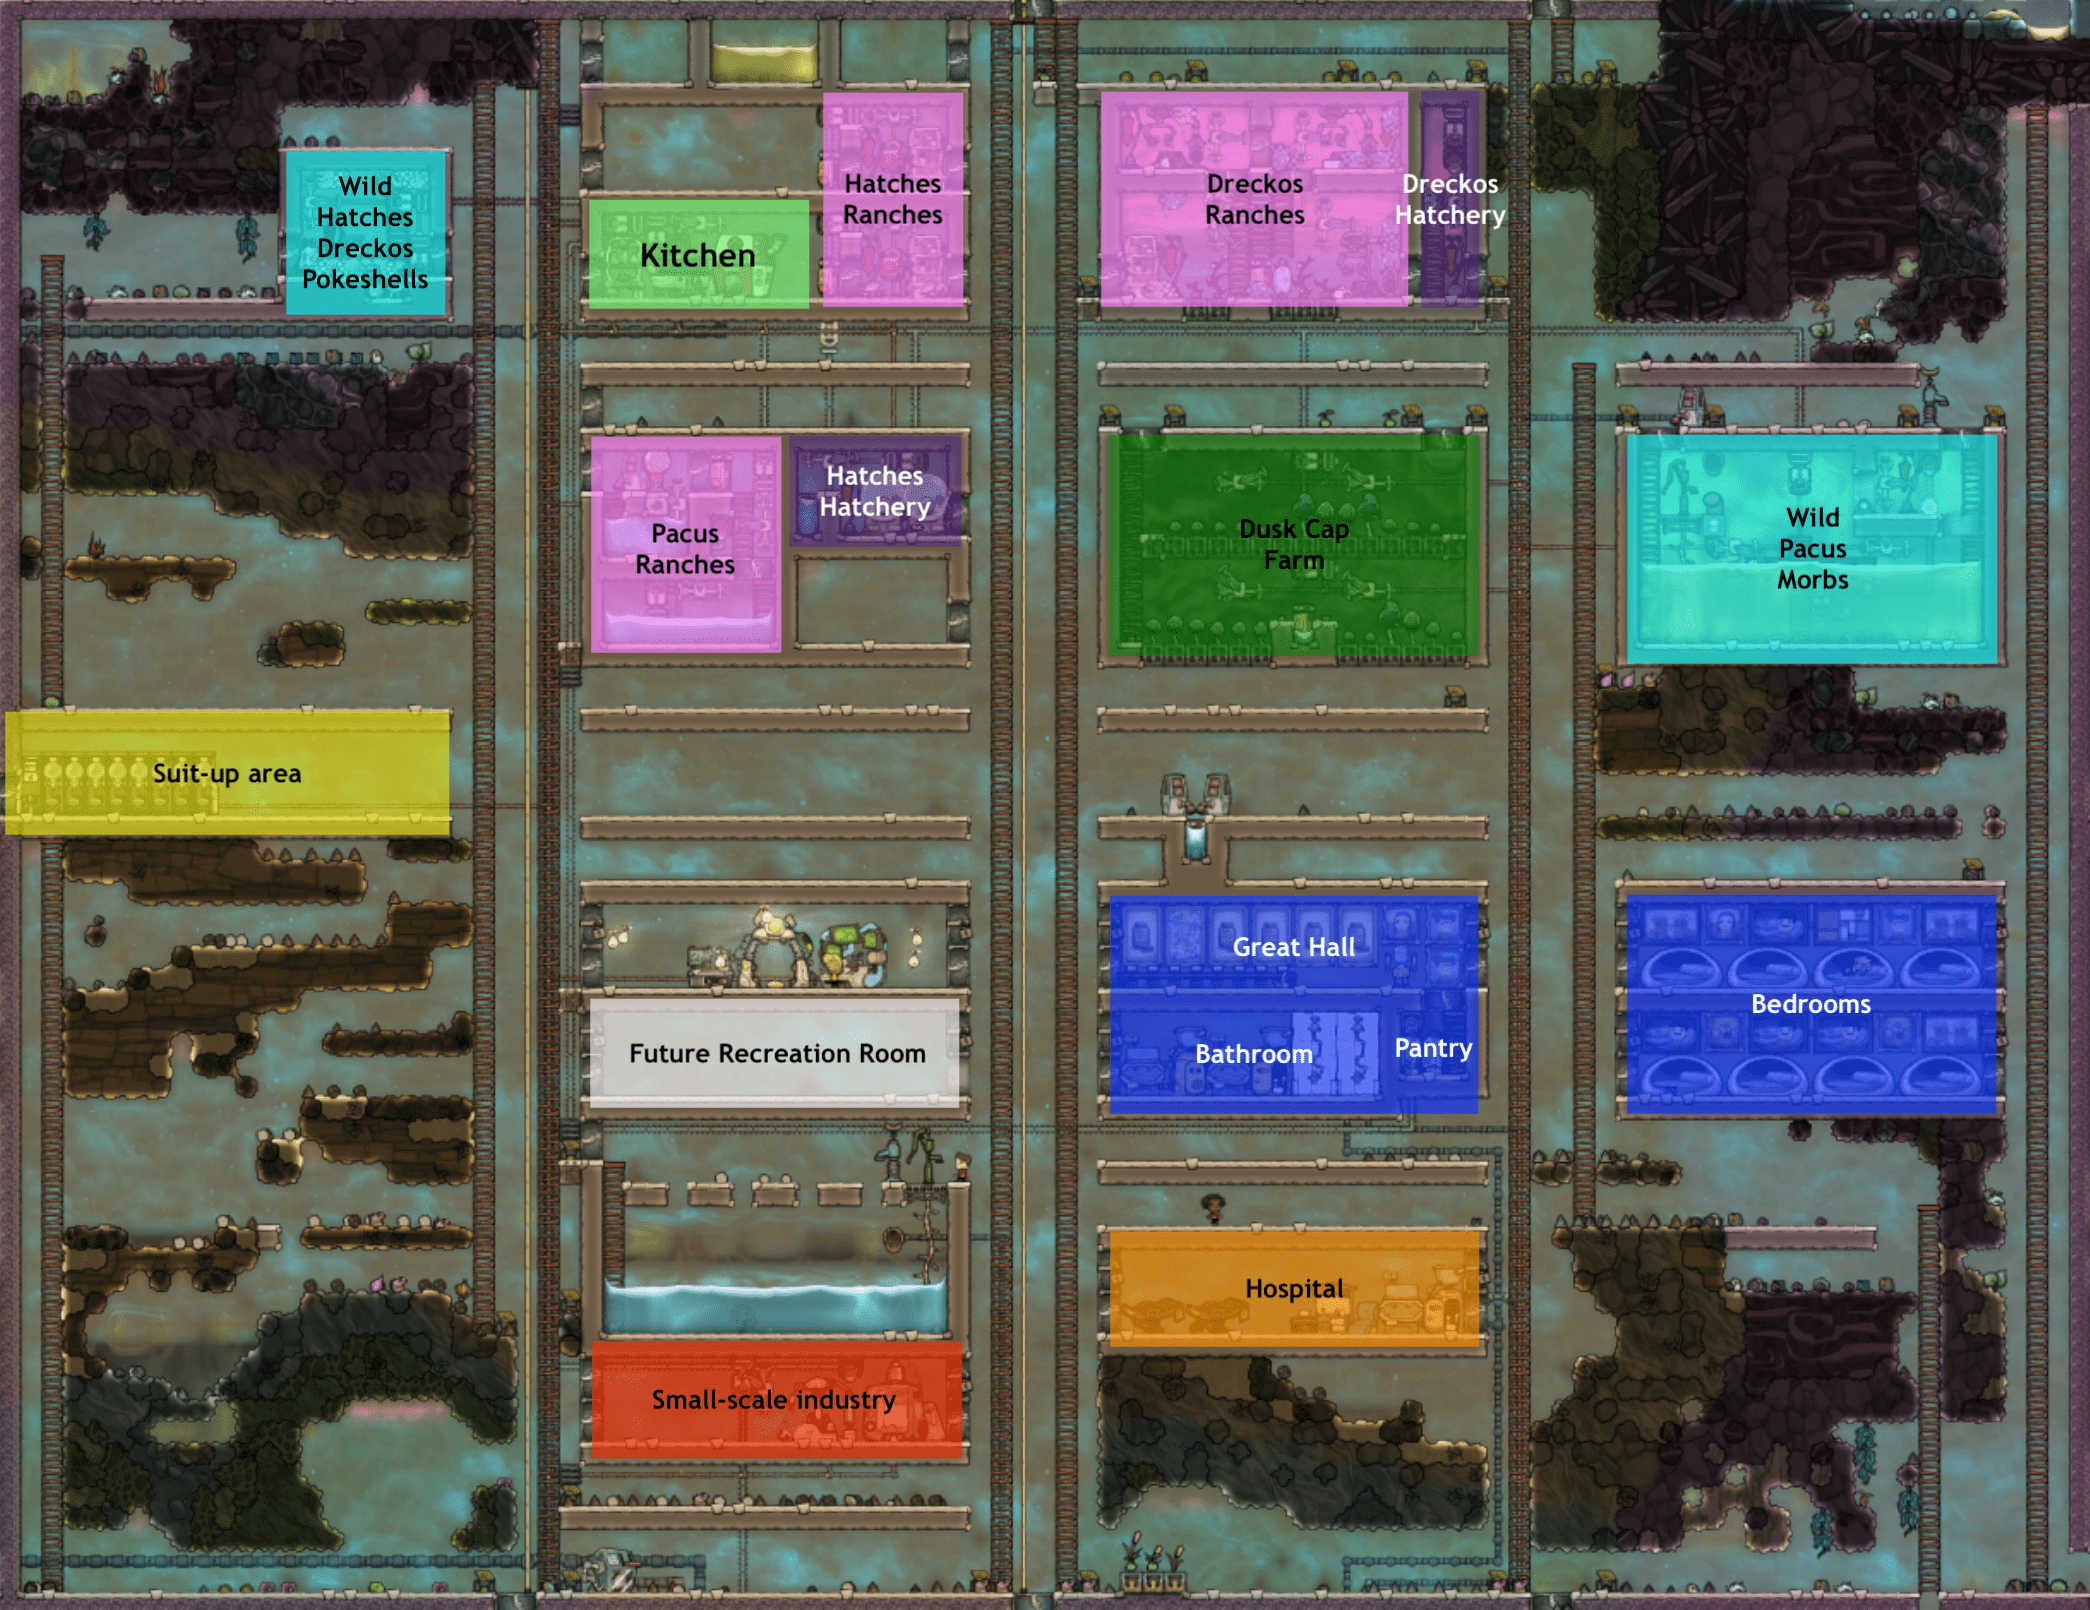
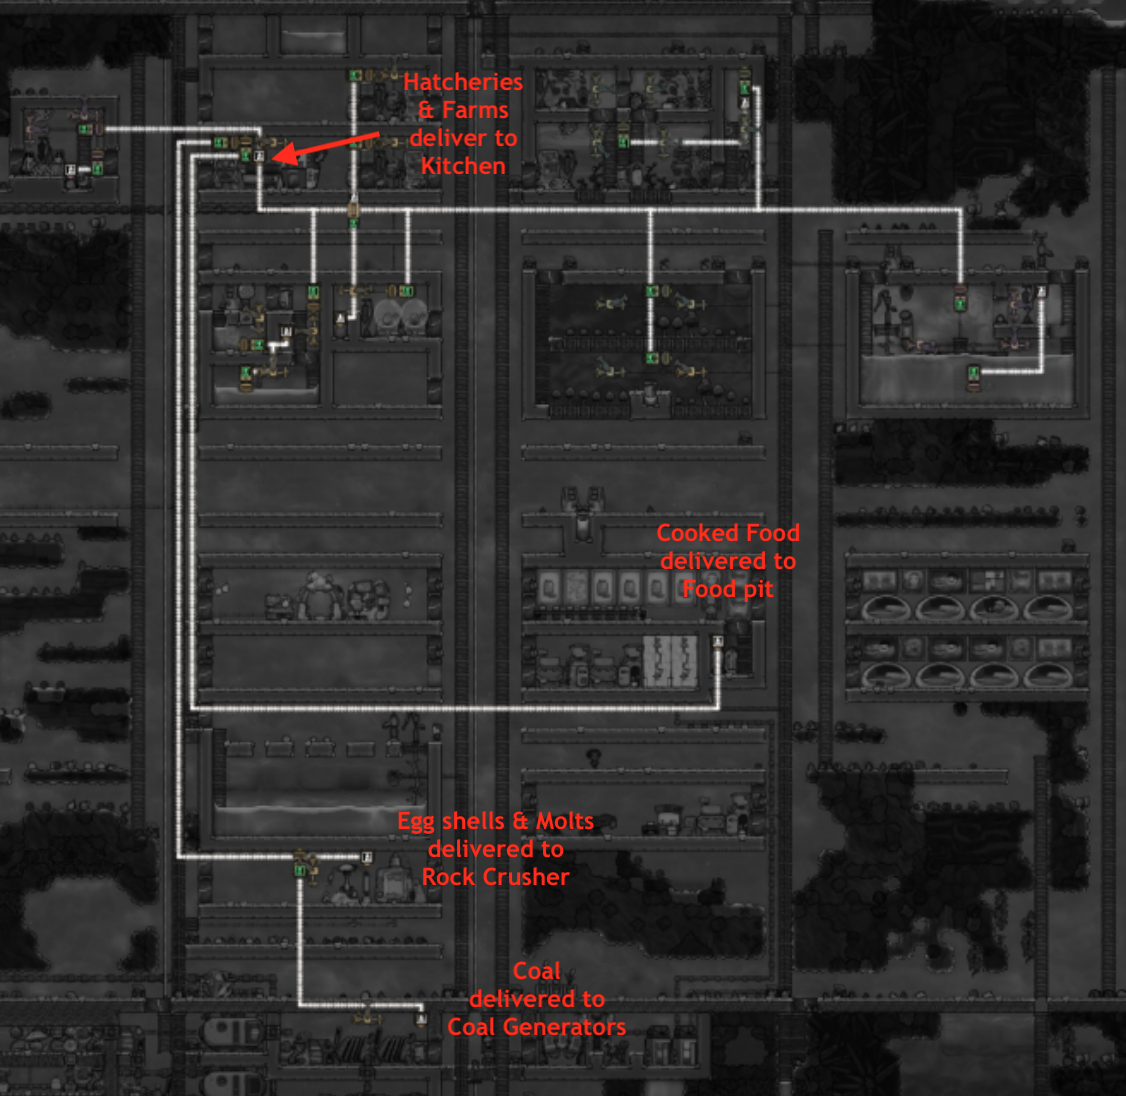
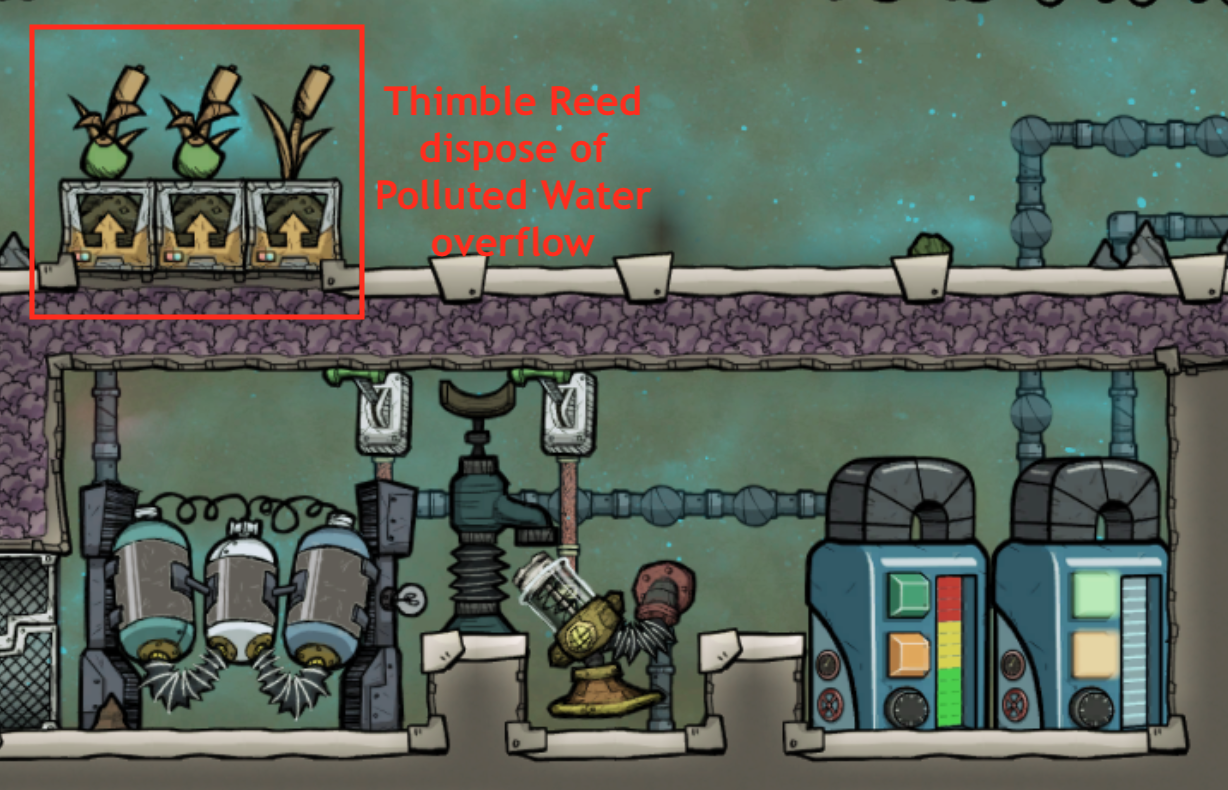
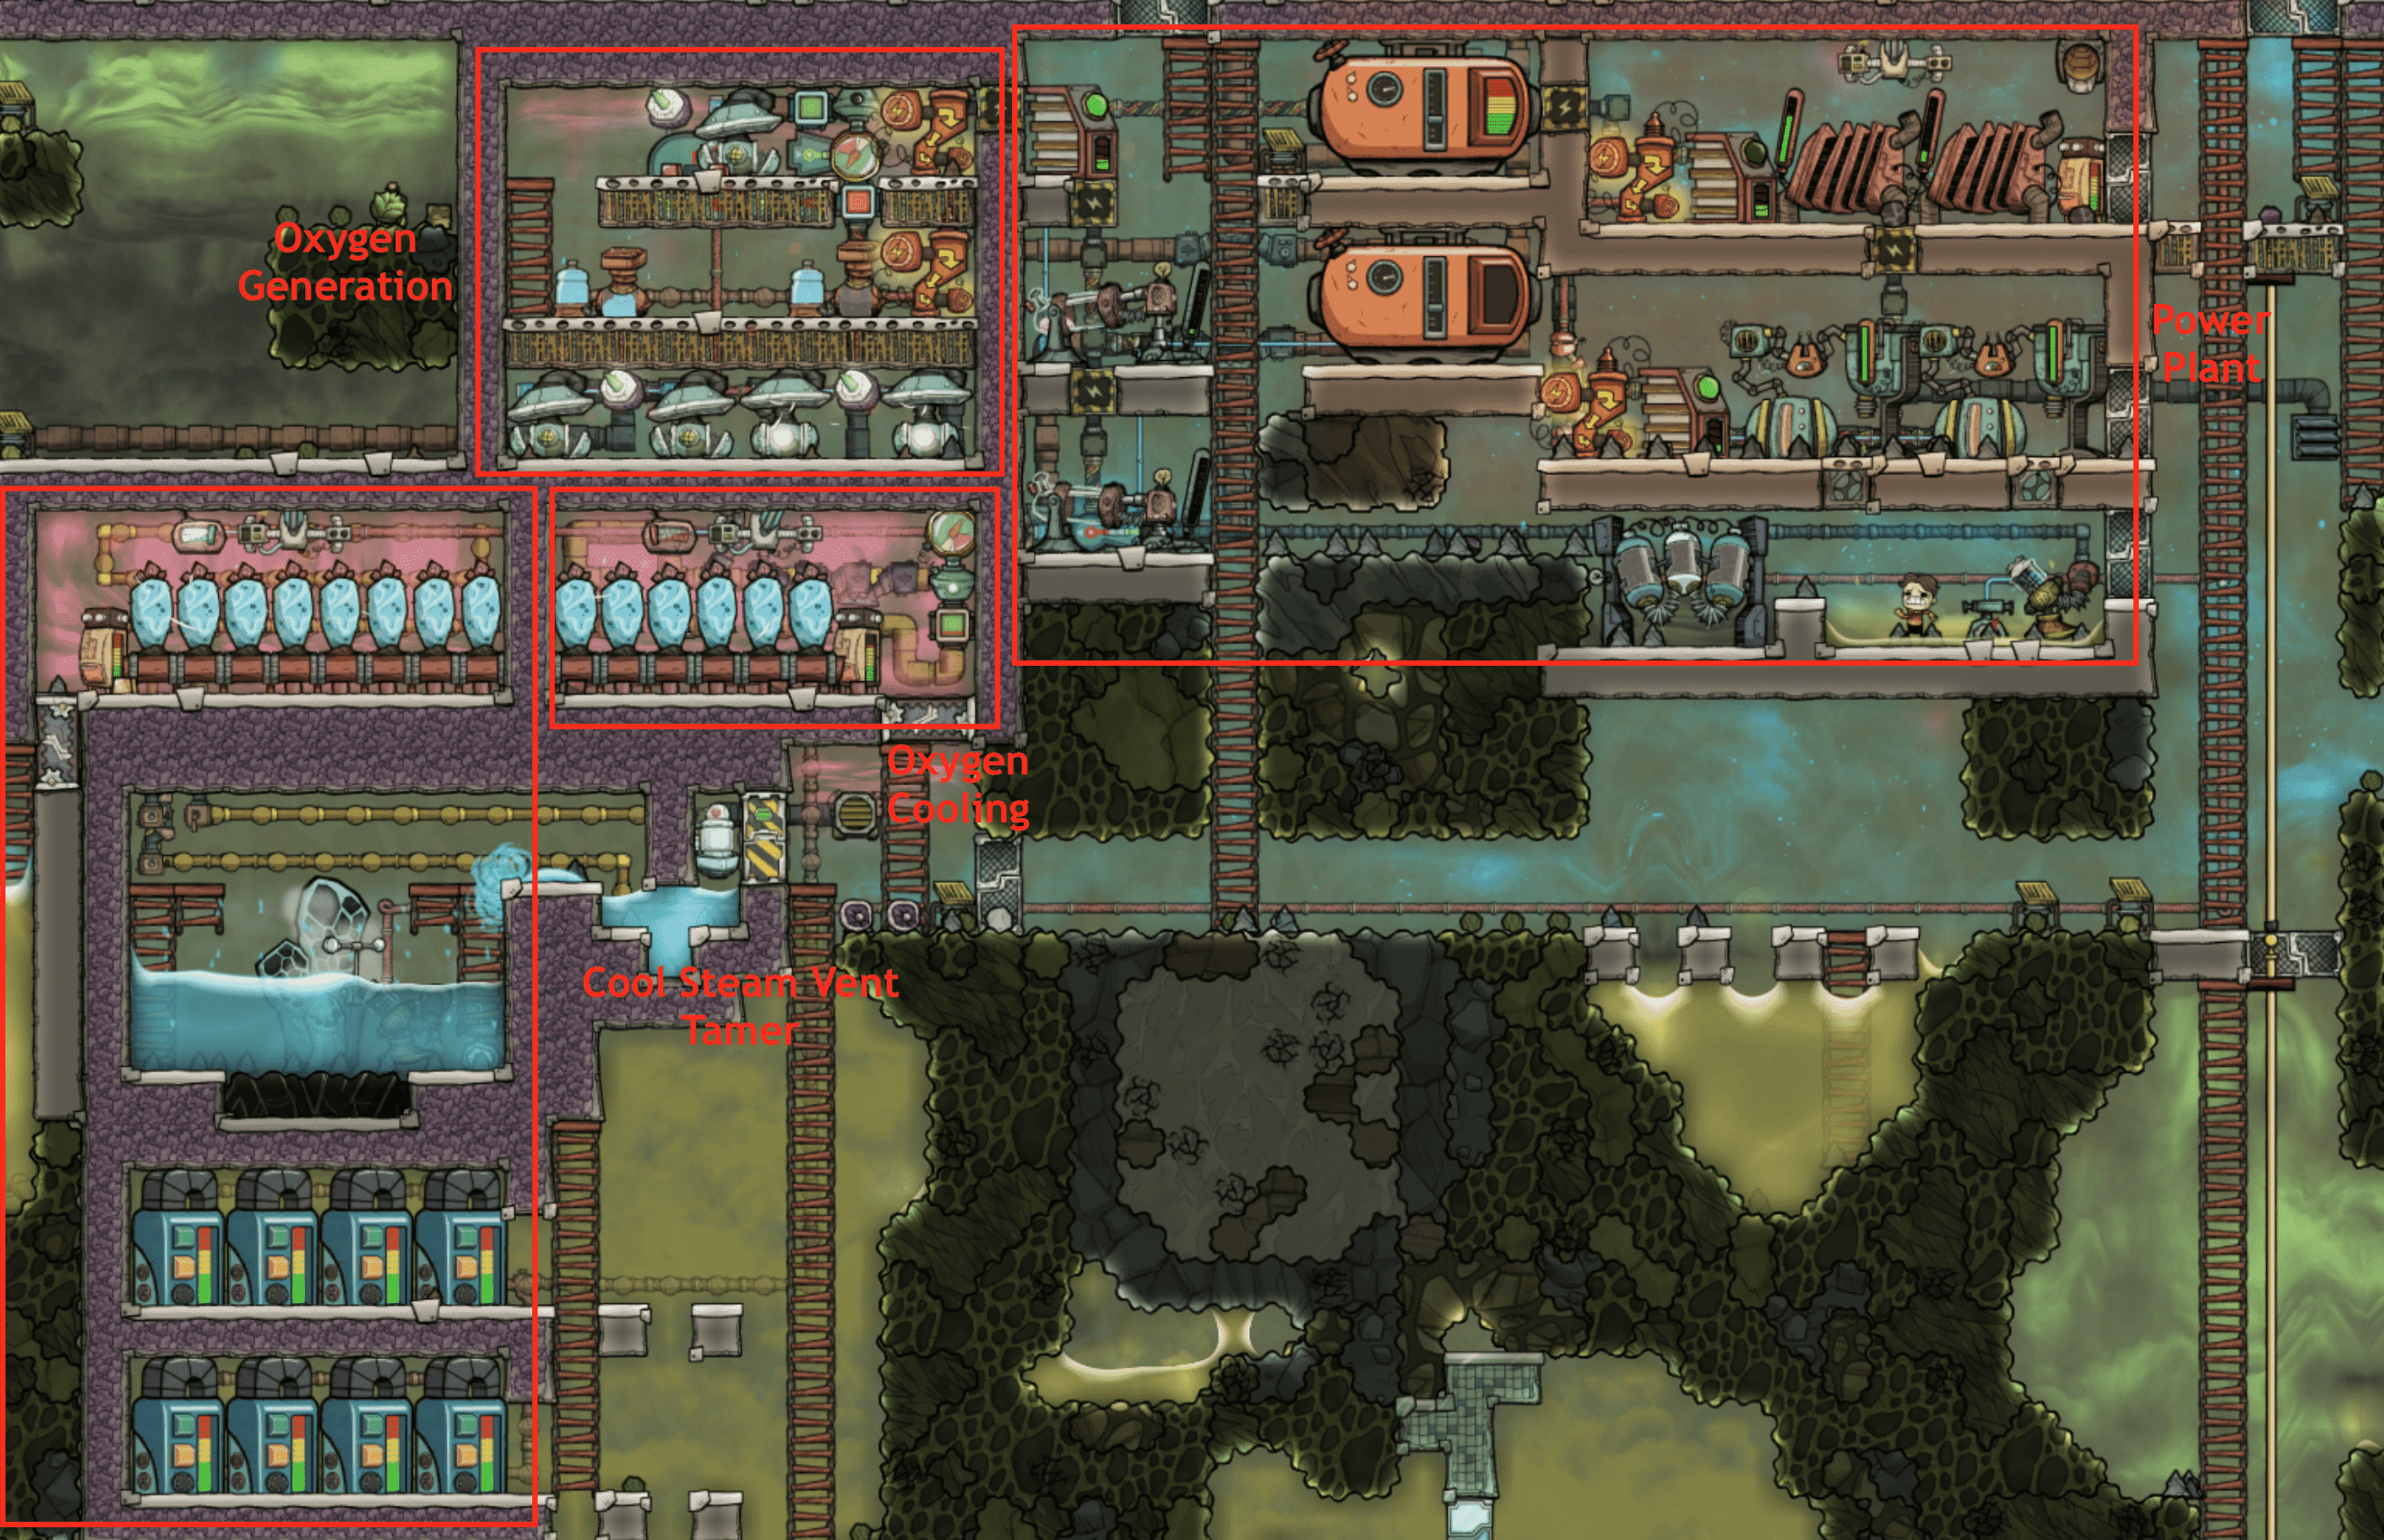
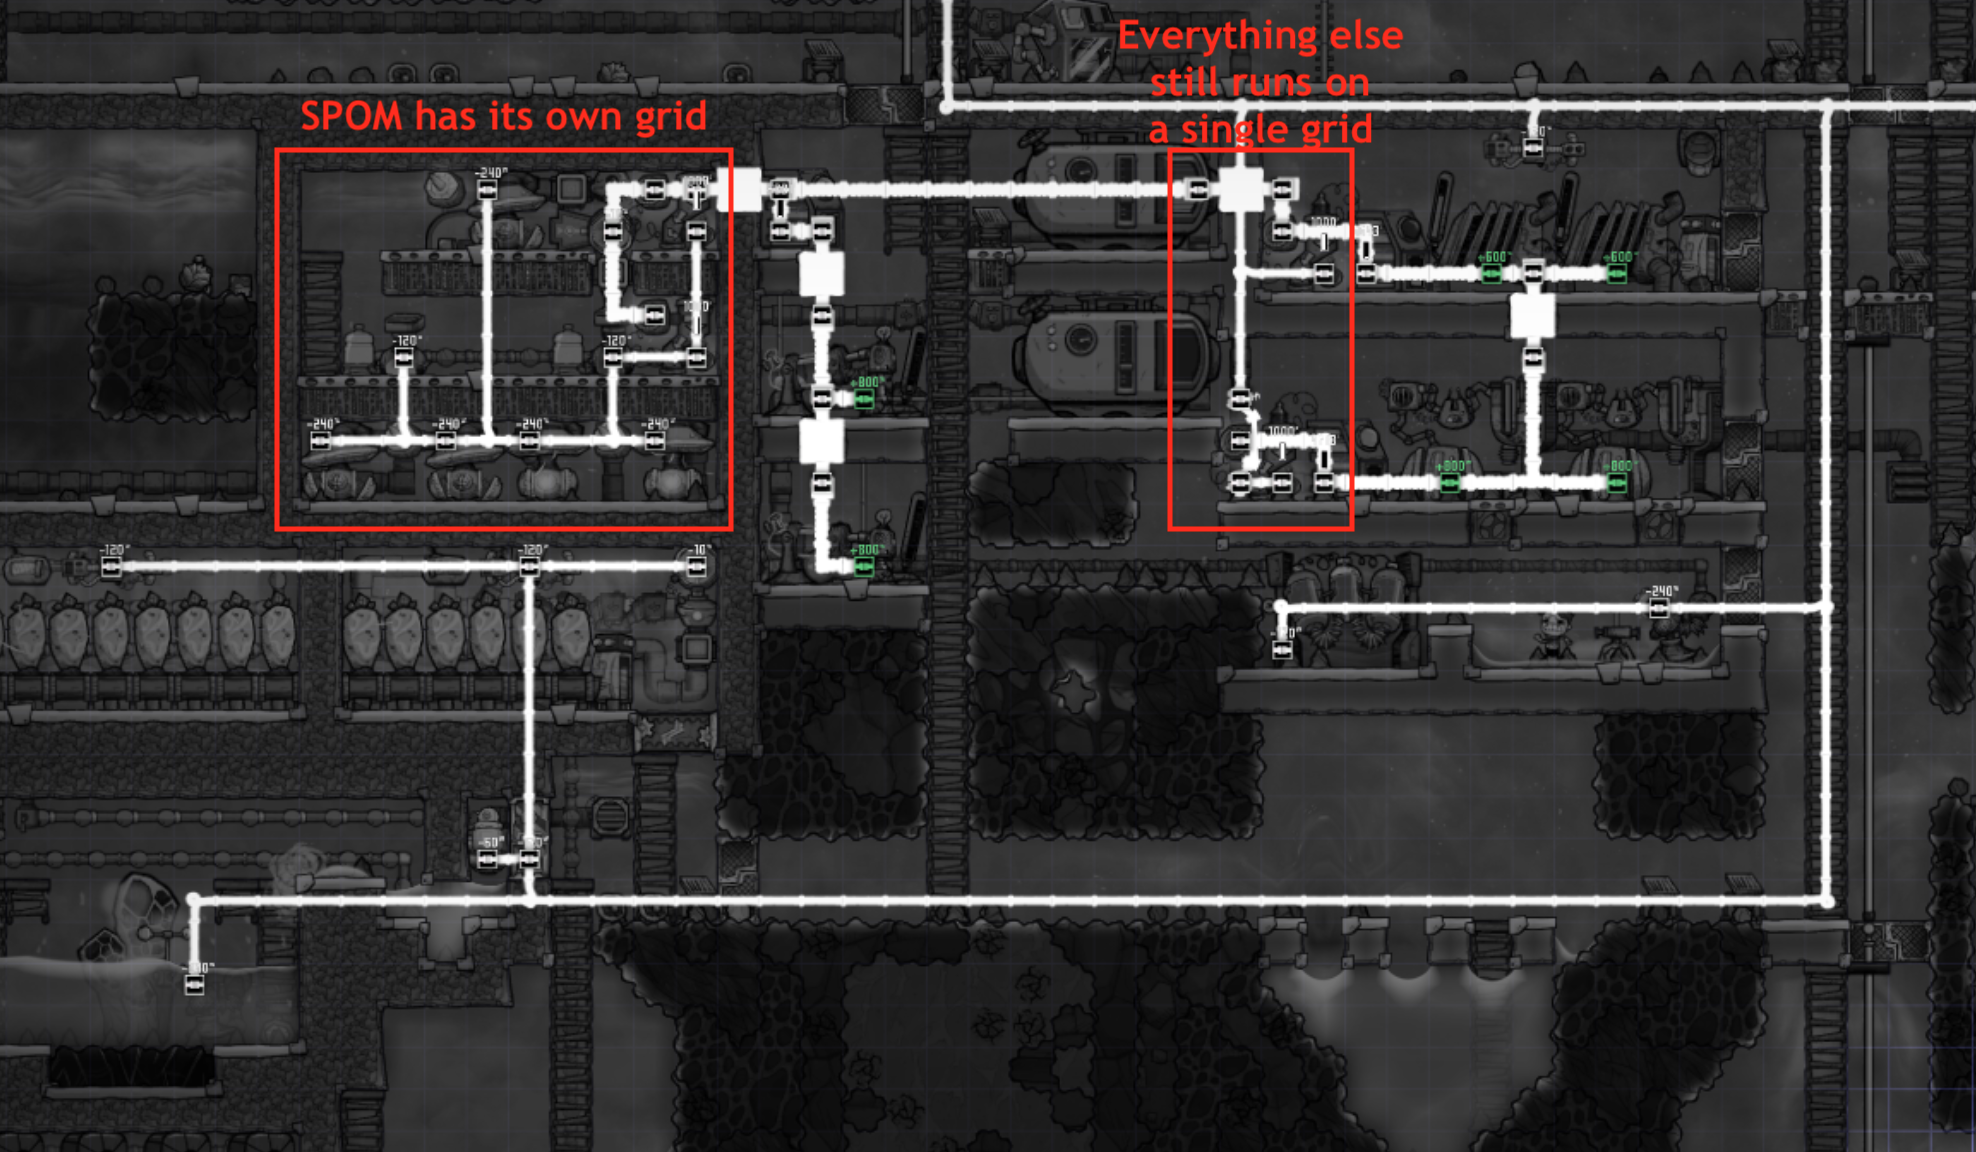
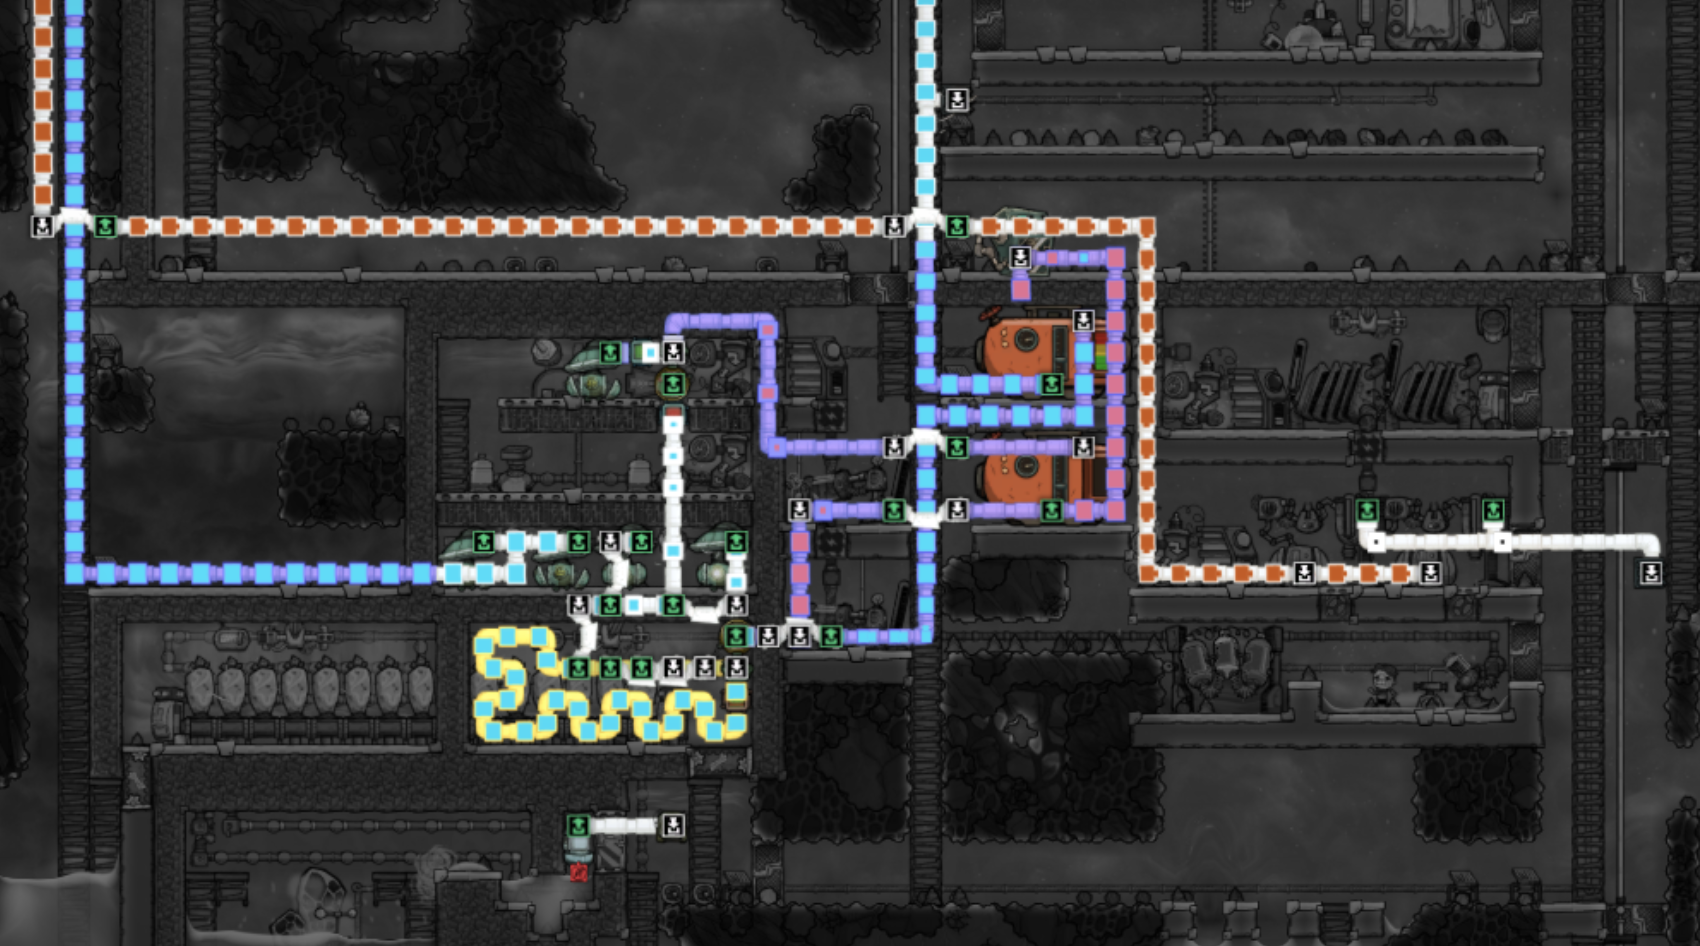
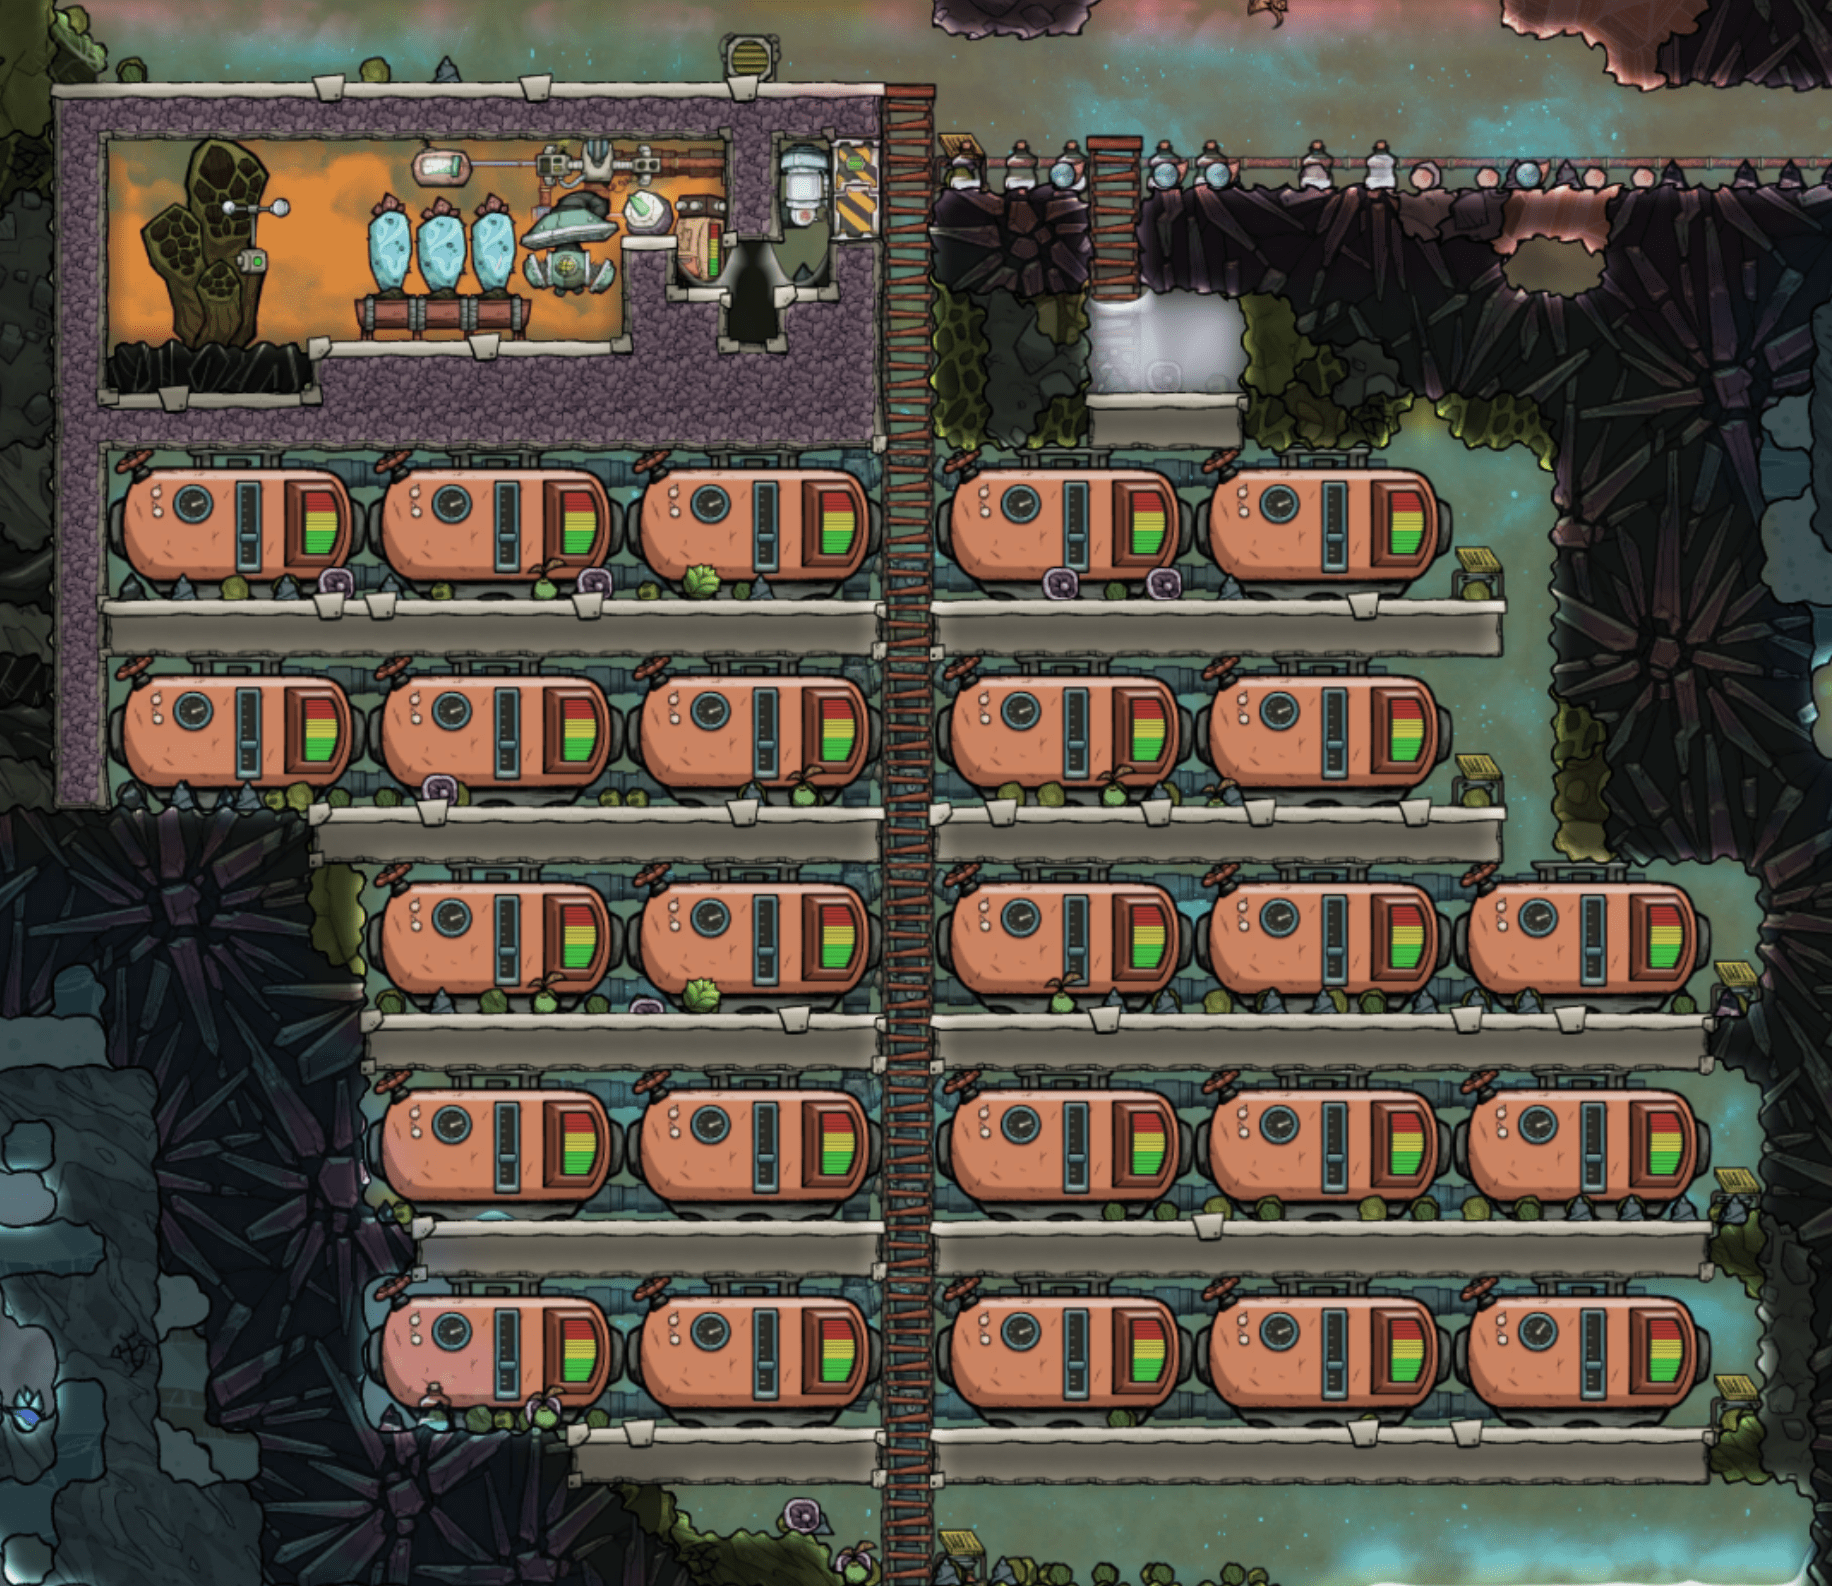
Leave a Reply