How do I raise the perfect monster? What tips do you have regarding drills, errantries and tournaments? How does combining work? How do I unlock more breeds? How can I strive for immortality? Any CDs list? Here’s THE guide!
It’s dangerous to go alone. Take this.

General Training Tips
Where do I start?
First of all, Money. Second of all, Money. Wait, did I say Money already? Good, because you’ll need plenty of that. The first couple of monsters will be your money-makers, and as such there’s little value to spend your hard earned cash on them. It would be counterproductive. Also, if your monster discovers any items that you don’t need – guess what – sell them immediately for quick cash! Just make sure to not sell something you might regret later (check the Item section).
Now let’s cover the actual grind, what will make you earn this shiny ambrosia: battles. Subscribe your monsters to tournaments, always, but be cautious to not raise the ranks too much or else you’ll just lose and stress out your monster. They’re money-makers, but they still have souls.
In essence, you’ll have a few “Working” monsters who will focus on ammassing wealth and a few “Fighting” monsters who will focus on spending said wealth. The former is pure cannon fodder: they’ll fight and eat potatoes. The latter will take part in errantries, expeditions and, later on, in the most difficult tournaments. To further expand on this however, you shouldn’t overdo it, because every tournament takes week(s) off your lifespan. That’s less of an issue when you can mitigate it, but before then, be sure to rotate your Fighters and to treat them well.
What stats should I raise?
It all depends on your play-style and experimentation is advised. To be fair however, you really don’t want to be a jack-of-all-trades in this game. Focus on three stats (for example Intelligence, Skill, Speed / Power, Skill, Life / etc.), then, when you’ve maxxed out all these, go to the next preferred one. This way you’ll have four good stats which will carry you throughout the monster’s lifespan. You can also go to the next ones if you wish to do so, but not only this is time-consuming, lifespan items are also a must. At the end of the day, you really want to take everything one step at a time. Trying to raise your monster to be balanced across the board will probably just result in a monster who doesn’t excel in anything at all and will not be great for battle. Take this into consideration when you do the special training for them to learn new moves, and how you choose to fight overall… Finally, it’s better to choose to raise a high Intelligence monster or a high Power monster from the get go and base your strategy around that (my advice in this regard would be to never underestimate how good Skill is. It stands for Accuracy, so there’s no point in having high POW or INT if you can barely hit an enemy. On the other hand, Defense works in a dumb, tricky way, hence being overrated. DEF points are better spent in SPD).
What’s the best schedule for Drills?
The most efficent training method for the Fighters’ basic training is the no-rest method:
Week 1: Tablets, Nuts Oil, Hard Drill
Week 2: Mint Leaf, Light Drill
Week 3: Nuts Oil, Hard Drill
Week 4: Mint Leaf, Light Drill
If your monster Dislikes Tablets then you can either reroll his character or, if you don’t want to cheese it, have a switch in Week 3 to a Light Drill every other month. The only downside is that the approach takes time and you need 1300G per month (unless you take advantage of sales).
A new efficient method is the following, but it requires Magic Banana to be unlocked. It’s also tedious since you’ll have to reset the game pretty often. It might be a good price to pay depending on your patience, and you’ll see why at a very first glance:
Week 1: Tablets, Nuts Oil, Hard Drill
Week 2: Banana (-10 Stress), Hard Drill
Week 3: Nuts Oil, Hard Drill
Week 4: Mint Leaf, Light Drill
You can get three heavy drills instead of two this way, which really adds up, but the catch is that Banana can have one of three effects. If you don’t get the -10 Stress one, you’ll have to reload.
Should I Praise or Scold my monster?
That’s up to you of course, but keep in mind that if you always scold them you’re much more prone to stressing out your monster, which in return can make him leave the Ranch and leave you dangling around the place and losing precious time – among other things. On the other hand, praising them too much might cause them to cheat more often in Drills, which still upgrades their skills albeit less so. I’m not entirely sure, but that might also make them more lazy in fights, like getting confused, but don’t quote me on that. Overall, you need to strike a fine equilibrium. Personally I scold them on rare occasions (i.e. if they Cheat or I need to change their Nature).
What’s the point of Nature in a monster?
To expand on the previous question, Nature is rated on a scale of -100 (worst) to +100 (best),
0 being neutral. Monsters start out somewhere on the scale, depending on their breed. Your monster’s Nature can be affected by certain items (like the Hero Badge), but is mostly affected by direct response from you. So again, this goes down to the praise/scold thing. By praising your monster for doing well during Training, you can shift its Nature toward good, but if you allow it to cheat without scolding it, it will start to shift towards bad. Some breeders actually want this, not only because they like to watch the world burn, but because certain monsters require a good or bad Nature in order to learn specific techniques.
Why did my monster die prematurely?
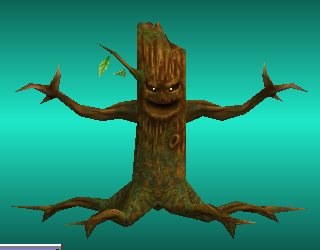
There can be a few reasons. First of all, keep in mind this port is based on the mobile version of Monster Farm 2, meaning every species has -100 weeks shaved off their already brief lifespan no matter what. Now add into the equation how diverse each breed is (for example Plant has one of the longest lifespans in the game with roughly 550 weeks, while on the other end of the spectrum there’s Monol with 350, or hell, even Sueki Suezo with one single week! Therefore, every Plant+X – where X is another monster – is obviously more longevous than your average combination with a Monol). But this is only the big picture. To be more precise, it’s actually your own actions which will largely impact said weeks: if your monster “seems tired”, you’ve already shortened his lifespan. If he goes K.O. on a match, or if he takes part in a match to begin with, the same applies. Even the mere act of existing, under certain conditions, will do that. Not to mention however, that you can do the exact opposite, that is, making his lifespan longer. As good as that sounds, the most popular way to accomplish this is to use certain items that are initially hard to get or otherwise indirectly unfavorable for other criteria (like for example risky expeditions, fatigue, stress, time, money, etc.). I know it’s harsh, but generally speaking you shouldn’t get too attached to a monster anyway. The best thing you can do is to take full advantage of what they can offer in their “brief” time on this world, maybe gift them a few more weeks if you really need it, but all in all, don’t blame yourself if things suddenly end. The wheel of life continues, and there are many breeds to experiment with anyway… All that said, do you still want immortality? Okay then, TL;DR version! Either make good use of combining to perpetrate the lineage, farm those wonderful items which increase lifespan – or – stay at peace with your actions; that’s how you do it! The latter hides a few positive aspects you may be neglecting…
More on that later.
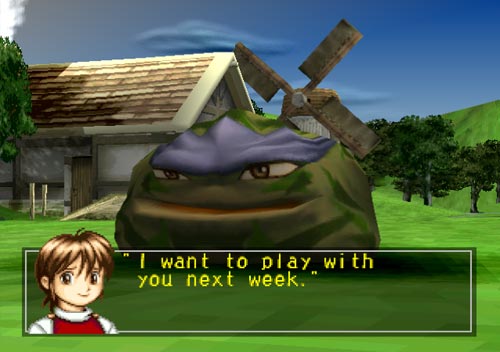
This is how a healthy monster looks like
How do I upgrade the Ranch?
WARNING!!! SPOILERS AHEAD!!!
Some unlocks we’ll discuss later on, revolve around your Ranch upgrades. You must be on the Ranch on Week 4 of May to trigger the events that will make it possible (be at the Ranch on Week 3 and rest/drill into Week 4, for example). However, you must have at least 5.000 Gold + the upgrade cost + a specific rank, otherwise the event won’t trigger.
| Stable | Price | Breeder Rank |
|---|---|---|
| 1st | 15,000 | 4th |
| 2nd | 30,000 | 7th |
| House | Price | Breeder Rank |
|---|---|---|
| 1st | 5,000 | 3rd |
| 2nd | 8,000 | 5th |
| 3rd | 12,000 | 6th |
| 4th | 20,000 | 8th |
| Altar | Price | Breeder Rank |
|---|---|---|
| 1st | 5,000 | Not relevant |
| 2nd | 8,000 | Not relevant |
Sorry pal, but I can’t. Next week is renovation day!
How do I unlock every breed? Any more info you can give me about related topics? (Part 1/2)
- Despite being initially locked, the following monsters as sub-breeds are available right away:
Baku, Dragon, Henger, Gali, Golem, Worm.
- The following monster Main breeds do not have to be unlocked:
Ape, Arrowhead, Colorpandora, Gaboo, Jell, Hare, Hopper, Kato, Mocchi, Monol, Naga, Pixie, Plant, Suezo, Tiger, and Zuum.
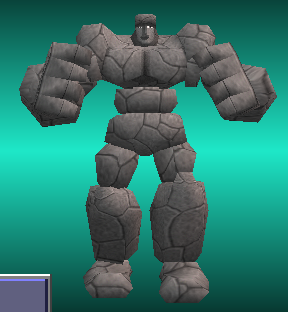
Baku and Golem: Achieve Breeder Rank of 4 (Beat B Rank), and have already purchased the first House upgrade from Binto. If you have 17,000 G or more on May 4th, Binto will arrive again and upgrade your stable for 15,000 G. After this is done, Baku and Golem are unlocked.
Bajarl: Achieve Breeder Rank of 8 (Beat two of the Major 4), and have already purchased all three house upgrades and two stable upgrades from Binto. If you have 22,000 G on May 4th, Binto will arrive again and upgrade the house for the last time. After this is done, you will be given the Bajarl Pot, which is used during combining to unlock the Bajarl.
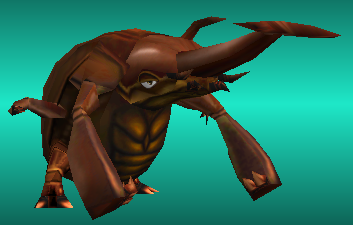
Beaclon: Unlock the Worm, and then raise it while satisfying the following conditions:
The Worm’s rank is C, or lower.
The Worm is at least 4 years old, and less than 5.
The Worm’s loyalty is 80 or more.
The Worm must have been fed 30 or more “Cup Jelly.”
The Worm has 0 fatigue and 7 or less stress on June 4th (Resting on the 3rd required)
If all conditions are satisfied, the Worm will cocoon into a Beaclon with a 100% chance. If the Worm cocoons into a different monster, not enough “Cup Jelly” were fed to it. If the conditions are satisfied it will cocoon/unlock the Beaclon. It will live out the rest of the Worm’s lifespan.
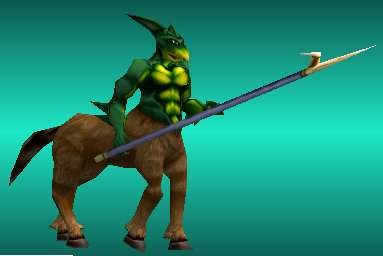
Centaur: Achieve Breeder Rank of 4, and finish the first expedition at Kawrea. Having done this, send a monster that is at least B Rank to the Heavy Errantry (Mandy Desert) between the months of March and August. If the monster is uninjured, it will return with a Spear. Your monster and the Centaur will fight (this will take an entire week so you will lose additional lifespan), and afterwards you may use the Spear in combining to unlock the Centaur. There is no particular penalty for losing this fight – but it is not difficult.
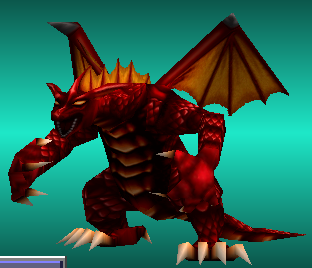
Dragon: Achieve Breeder Rank of 6 (Beat S Rank) or higher, monster must be exactly B rank. Have Binto renovate your stable at least once, and participate in at least one IMa vs. FIMBA meet. Having done these, if you have a B rank monster (exactly B rank, not higher or lower) on the ranch on July 1st, you will be invited to the Dragon Invitational. Attend it on August 2nd and defeat Lagirus to receive the Dragon’s Tusk. Use this Tusk in combining to unlock the Dragon (You may attend this match multiple times to receive more tusks).
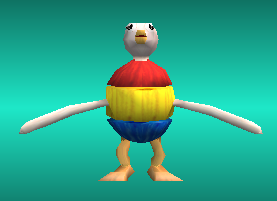
Ducken: Feed your monster enough “Cup Jelly” to receive 5 “Diamond Marks”, and receive the Quack Doll that comes as a reward (You can either sell this doll or give it to your monster). Afterwards, attend the Torles expedition with Rovest [Requires a monster with 210+ LIF, 50+ Fame, having finished the first Kawrea expedition, and C Rank or higher]. Retrieve the Strong Glue from the tree near the beginning of the expedition. If your monster has less than 350 INT, the Glue will NOT appear. Gather another Quack Doll via Cup Jellies, and it will become a Ducken Doll which you can use during combining to unlock the Ducken.
Durahan: Achieve Breeder Rank of 4. Attend the Parepare expedition with Kavaro [Requires a monster with 140+ LIF, 40+ Fame, C Rank or higher, 1st Kawrea Expedition Finished]. Visit the Decaying Palace behind the huge pumpkin, and search for the Old Sheath. If your monster has less than 300 INT, the Sheath will NOT appear. Afterwards, go to the Shop to hear Verde’s rumor. From then on your monster must be A rank, and it will be invited to the Double-Edged Invitational on February 1st, which then takes place on the 4th. Win the invitational to receive the “Double-Edged” which can be used in combining to unlock the Durahan.
Gali, Henger, Mew, Worm: Achieve Breeder Rank of 1 (Beat E Rank). If your D or higher rank monster is on the ranch on July 1st, you’ll be invited to the IMa vs. FIMBA qualifying match at the end of the month. Win this tournament, and you can attend the meet on August 4th. Attend, and whether your team wins or loses the meet, you will unlock all four breeds afterwards. The meet is then held every 4 years after the first one- though you will not receive any special notification.
Ghost: Allow a monster to die. Hold a funeral and build a shrine for it. 140 weeks later, if you have at least 8,000 G on March 3rd, you will be prompted to upgrade the shrine- Do so. Another 140 weeks later, a similar event will occur on March 3rd if you have at least 13,000 G. Do so again. The following year on March 3rd, you will have a brief cutscene and then receive the Stick which can be used during combining to unlock the Ghost. See now? Dying has his own rewards.
Jill: Achieve Breeder Rank 6 (Beat S Rank). Attend the Torles expedition with Rovest [Requires a monster with 210+ LIF, 50+ Fame, having finished the first Kawrea expedition, and C Rank or higher], and acquire the Big Footstep from the Large Snowman at the top right of the map. If your monster has less than 500 INT, the Footstep will NOT appear. Afterwards, send a B or higher rank monster to the Sharp Errantry (Papas Mountains). You will be warned about “Bighand.” Defeat Bighand during the errantry to receive the Big Boots which can be used in combining to unlock the Jill. ` (Getting the Big Footstep has no Breeder Rank requirement, but the rest does)
Joker: Attend the 2nd Kawrea errantry [Requires a monster with 280+ LIF, 50+ Fame, B Rank or higher, 1st Kawrea Expedition Finished]. Visit the Burnt Altar on the upper right side of the map and find the “Joker Mask”. If your monster has less than 300 SKI, the Mask will NOT appear. Head back to the ranch- sit through Pab’s idiocy, and then receive the Mask which can be used during combining to unlock the Joker.
Metalner: Achieve Breeder Rank 8 (Beat two of the Major 4), have the year be at least 1010, and have a B or higher rank monster on the ranch. With these conditions satisfied, on September 1st (it is not guaranteed to occur the first time, as it is weather dependent- which is random), you’ll be visited by “Aliens.” This can continue to happen through November 4th or until the event is finished. Once concluded, you will receive a crystal and be trash talked. Take this crystal to the Shrine in town to unlock the Metalner (no combination item).
Here’s your bonus prize for reading all the way through here ( ͡° ͜ʖ ͡°)
How do I unlock every breed? Any more info you can give me about related topics? (Part 2/2)
Niton and Undine: Achieve Breeder Rank 4. Raise a Hopper to at least B Rank, and have it on the ranch during the Winter months (December to February). Ensure that the Hopper has 0 fatigue and less than 30 stress at the start of a week (resting is mandatory). It will dig up Hot Springs and give you an unpleasant bit with Pabs. Afterwards you will receive the Undine Slate which can be used during combining to unlock the Undine. When the Hot Springs cutscene is over, the Niton is quietly unlocked (no combination item).
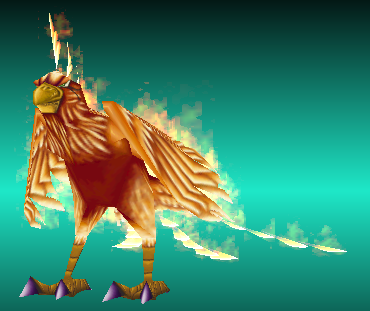
Phoenix: Attend the 1st Kawrea expedition [Requires a monster with 140+ LIF, 40+ Fame, and having beaten E Rank]. Acquire the Phoenix Feather from the only searchable location (If you do not get it here, the Feather can also be obtained during the later Kawrea expedition). Use the Feather during combining to unlock the Phoenix.
Mock: Achieve Breeder Rank 4. Afterwards, visit the Shop on occasion until you receive the “Seeds”. Approximately 10 years later, and after ten brief events, the planted tree from the seeds will die (these events generally seem to occur in April). Allow a monster to die (funeral not required). Afterwards, you will receive a free Mock, and Mock will be unlocked.
Wracky: Achieve Breeder Rank 7 (Beat one of the Major 4), and ensure the year is 1005 or higher. When you have a monster with 90+ Fame on the ranch, you will receive the Doll. Regardless of your options, you will always receive the doll. Colt will ask to throw it away the next week; it doesn’t matter what choice you pick. Allow a monster to die, and afterwards you will receive a free Wracky, and Wracky will be unlocked.
Zilla: Achieve Breeder Rank 6, upgrade the stable once, and complete the requirements to unlock the Niton and Undine. Then, when sending a B or higher rank monster to the Hit Errantry (Torble Coast), you will be warned about a big water creature. Attend the errantry and defeat the “Zilla King.” Like with Bighand, whether or not Zilla King will appear or not at the end of the errantry is random. You will receive a “Zilla Beard”, which can be used during combining to unlock the Zilla.
To be Added: Potential new monsters added in the DX edition(?) Stay tuned.
Useful Links related to Breeds and Training:
1. Purebred stats and growth rate explanation – [google.com]
2. Alternative Raising Methods – [legendcup.com]
3. Stress and Fatigue counter – [google.com]
4. Preferred Foods by Species and their Effects – [google.com]
5. Strategy guide for every monster breed – [gamespot.com]
Do you need a list of songs to evoke monsters from the CD database?
Check out the section named “Is there a list of Disc Stones available?”
He’s coming for you.
What effects do Items have?
Shop Items
Your inventory increases in size with every House upgrade, up to 20 slots
The following items will be unlocked in the shop as the game progresses. The counter which determines this only starts when you first visit the shop, so the year may vary if the initial visit is delayed. Releases are distanced by approximately 200 weeks, but this may vary slightly.
- 1004~: Magic Banana (King Ape can only appear while this is the newest available item)
- 1008~: Nageel
- 1012~: Troron
- 1016~: Kasseitan
- 1020~: Larox
- 1025~: Manseitan
* The following cannot be purchased:
Paradoxine (acquired on errantry in Torles Mountains location 4) and Teromeann.
————–
Monthly Food items
Potato:
Liked: +1 Spoil, -1 Form
Neutral: +4 Stress, +3 Fear, -4 Spoil, -1 Form
Disliked: +16 Stress, +4 Fear, -10 Spoil, -1 Form
Milk:
Liked: -3 Stress, +3 Spoil, +1 Form
Neutral: -2 Stress, +1 Spoil, +1 Form
Disliked: +4 Stress, -4 Spoil, +1 Form
Fish:
Liked: -6 Stress, +3 Spoil, +2 Form
Neutral: -3 Stress, +2 Spoil, +2 Form
Disliked: +2 Stress, +1 Fear, -2 Spoil, +2 Form
Cup Jelly:
Liked: -7 Stress, +1 Fear, +2 Spoil, -3 Form
Neutral: -5 Stress, +1 Fear, +1 Spoil, -3 Form
Disliked: +1 Stress, +1 Fear, -1 Spoil, -3 Form
Meat:
Liked: -8 Stress, +6 Spoil, +6 Form
Neutral: -6 Stress, +4 Spoil, +6 Form
Disliked: +1 Fear, +1 Spoil, +6 Form
Tablets:
Liked: -15 Stress, +2 Fear, +3 Spoil, +3 Form
Neutral: -13 Stress, +2 Fear, +1 Spoil, +3 Form
Disliked: -10 Stress, +2 Fear, -1 Spoil, +3 Form
Tablets are the only worthwhile food, or Cup Jelly on a budget.
Colt’s Cake: +15 Form.
Eat, my child.
———————–
Active Items
- Ape Chips: (+1) on Parepare Jungle Errantry, (sells for 1000 G)
- Arrowhead Chips: Guard Battle Special, (sells for 500 G)
- Bajarl Chips: Vigor Battle Special, (sells for 1000 G)
- Baku Chips: +50 Form, (sells for 500 G)
- Beaclon Chips: (+1) on Pull, (sells for 500 G)
- Big Boots: Generate Jill
- Big Footstep: +10 LIF, +10 DEF
- Centaur Chips: (+1) on Mandy Desert Errantry, (sells for 2000 G)
- Colorpandora Chips: +50 Spoil, (sells for 500 G)
- Crab Claw: +50 SKI, +50 DEF
- Double Edged: Generate Durahan
- Dragon Chips: Fury Battle Special, (sells for 2000 G)
- Dragon Tusk: Generate Dragon
- Ducken Chips: +50 SPD, (sells for 1000 G)
- Ducken Doll: Generate Ducken
- Durahan Chips: (+1) on Domino
- Feather: Generate Phoenix
- Gaboo Chips: Fight Battle Special, (sells for 500 G)
- Gali Chips: +50 Base Nature, (sells for 1000 G)
- Ghost Chips: (+1) on Dodge, (sells for 1000 G)
- Golem Chips: +50 POW, (sells for 500 G)
- Hare Chips: Grit Battle Special, (sells for 500 G)
- Henger Chips: (+1) on Shoot, (sells for 1000 G)
- Hopper Chips: -50 Form, (sells for 500 G)
- Jell Chips: (+1) on Endure, (sells for 500 G)
- Jill Chips: (+1) on Papas Mountain Errantry, (sells for 1500 G)
- Joker Chips: -50 Base Nature, (sells for 1500 G)
- Kato Chips: (+1) on Meditate, (sells for 500 G)
- Mask: Generate Joker
- Metalner Chips: +50 Fear, (sells for 1500 G)
- Mew Chips: Hurry Battle Special, (sells for 1000 G)
- Mocchi Chips: +50 Fame, (sells for 500 G)
- Mock Chips: +10 Lifespan, (sells for 2000 G)
- Monol Chips: +50 DEF, (sells for 500 G)
- Naga Chips: +50 SKI, (sells for 500 G)
- Niton Chips: (+1) on Swim, (sells for 500 G)
- Old Sheath: -10 DEF
- Phoenix Chips: (+1) on Kawrea Volcano Errantry, (sells for 2000 G)
- Pixie Chips: +50 INT, (sells for 1000 G)
- Plant Chips: +10 Lifespan, (sells for 1500 G)
- Pot: Generate Bajarl
- Spear: Generate Centaur
- Stick: Generate Ghost
- Suezo Chips: Ease Battle Special, (sells for 500 G)
- Taurus Horn: Give Centaur heavy combination weight, +25 Nature (if “positive”)
- Tiger Chips: Will Battle Special, (sells for 500 G)
- Undine Chips: (+1) on Study, (sells for 1000 G)
- Undine Slate: Generate Undine
- Worm Chips: +50 LIF, (sells for 500 G)
- Wracky Chips: (+1) on Leap, (sells for 1500 G)
- Zilla Beard: Generate Zilla
- Zilla Chips: (+1) on Torble Coast Errantry, (sells for 1500 G)
- Zuum Chips: (+1) on Run, (sells for 500 G)
How do I git gud in Combat?
If we’re talking exclusively about how combat works structurally, without adding into the mix the plethora of techniques you can unlock, how nuanced are different breeds in this regard, or how gut regeneration and hit% really work, then fighting in this game can be tricky until it’s not.
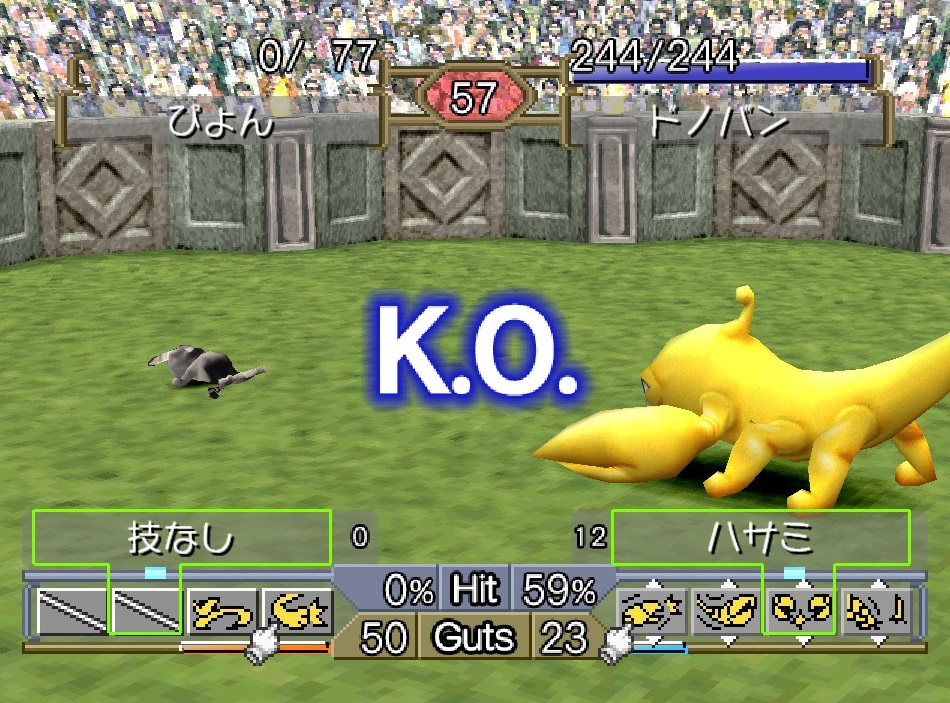
The most common mistake for a beginner is to abuse their best attack(s), mashing the button until the very last drop of their guts are depleted (guts being the bar that regenerates under your skills, to be precise). This is unoptimal, especially later on, and deep down you probably already know the reason: you start hitting less and less, and if not that, then your attacks get gradually more and more weaker. So, what you really want to do, if possible, is to place your monster in a space where the least painful attack from the enemy can be procced. If you’re not there, then try your best to go there! That’s because you’ll force your opponent to use said attack, wasting their reserves of the bar – meanwhile, you’ll be regenerating your own. When you’re full, and only then, you can actually start fighting with your best moves, those that hit hard and hit consistently. How strong they hit, how frequently they hit, is influenced by the guts you have. Not only that, you’ll be more prone to dodging or to take less damage if you’re full – the same applies to the enemy. You see why it’s important to drain the enemy’s reserves and get your own filled up? You may say that this is risky, because who knows if you’ll recover from the initial damages… While this is true on paper, that’s exactly why drills exist. To diminish these scenarios.
Hence the trick is precisely that: make good use of your guts. Have the bar full if you want to take full advantage of your monster. But that’s not to say button mashing isn’t practical; quite the contrary! It may sound counter-intuitive, but after you’ve got yourself a bit of a leeway, then of course it’s a great strategy to waste time with mashing, so hopefully the other monster can’t recover! Granted, these are just the basics, but they’re so useful if you didn’t know it already.
get guts = enemy gets rekt
How do I git gud in Expeditions?
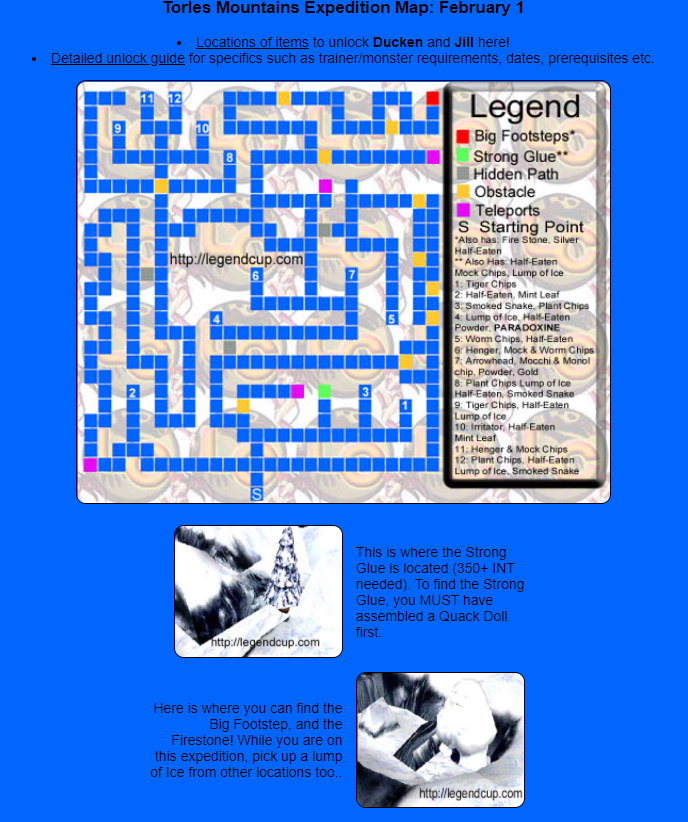
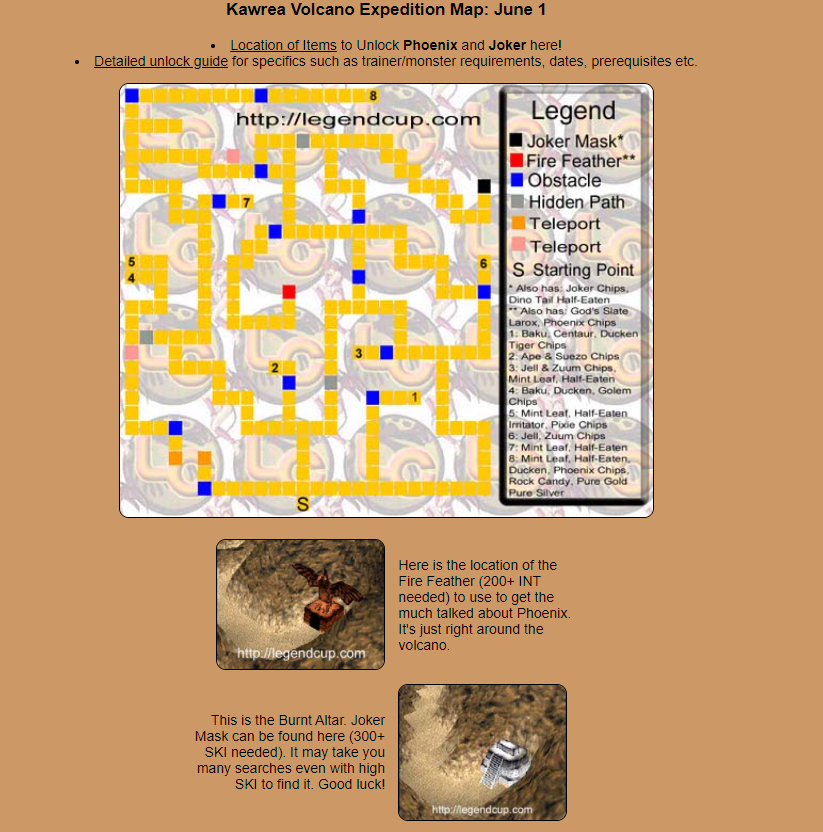
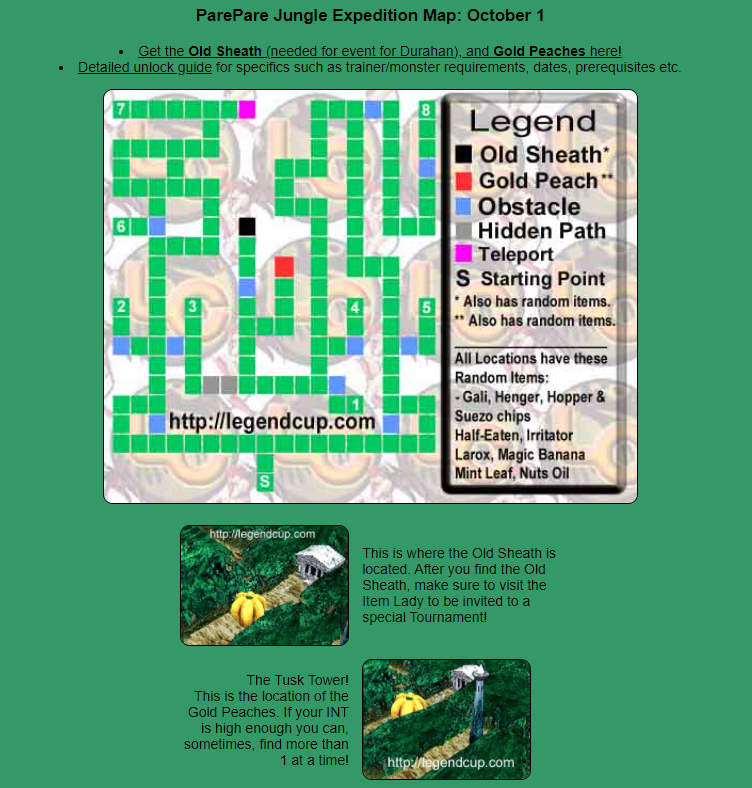
First of all, you may find this set of maps a valuable aid:
Secondly, you may want to check out this link for an in-depth walkthrough. – [google.com]
How do I git gud with Combinations?
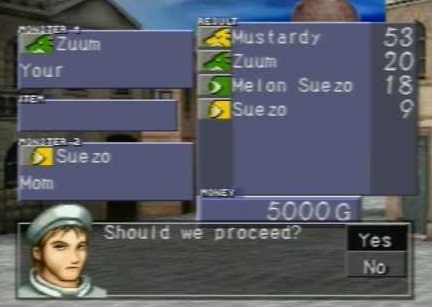
The first chosen monster in combining is the “seed”, the most important one of the two. Technique inheritance and % generation chance are reliant on the first chosen monster.
Things that can be inherited/altered by combining:
– Techniques are inherited at a 2/3 truncated rate from the first parent if the main-breed doesn’t change (that is, 10 non-basic/special techs will become 6 non-basic/special techs on the resulting monster). If the main breed changes, the result will instead inherit up to 4 techs, if the first chosen has one of each type (Heavy, Hit, Withering, Sharp).
– Number of technique uses are inherited from the first parent for the purpose of tech chains (Special Technique uses are not inherited).
– Base Nature of the monster is affected by the parents, with two “Best” monsters raising the base nature, and vice-versa for “Worst”.
– Battle Specials can be inherited at 45-50~% rate for each particular special (Real and Unity cannot be inherited).
– Initial form will tend up or down if the parents are “Plump” or “Skinny”, respectively.
Things that don’t change:
– Stat gains of the offspring
– Guts rate
– Lifespan of the offspring (without combining item)
Compatibility is determined by how many stats align on the two combined monsters, but this doesn’t necessarily mean their “listed” stats. This is what Dadge says about compatibility levels:
No stats match/monsters are identical breed: “This one’s all up to you.”
One stat matches: “The prospect is unsure.”
Two stats match: “This combination doesn’t look so good, I can’t recommend it.”
Three stats match: “The prospect is fine… It will probably work out.”
Four stats match: “The prospect of this combination is good. You can look forward to it.”
All six stats match: “The prospect of this combination is great. It can’t go wrong […]”
If you combine two of the same monster (Zuum/Zuum with Zuum/Zuum), the compatibility will always be the worst possible. Differing in Main or Sub-breed will avoid this. Compatibility relies on the stat ordering of both parents. Dadge’s compatibility is determined this way:
- Growth Level 0 (E) = Stat * 0
- Growth Level 1 (D) = Stat * 0.5
- Growth Level 2 (C) = Stat * 1
- Growth Level 3 (B) = Stat * 1.5
- Growth Level 4 (A) = Stat * 2
You can ignore the usual 999 stat limit when getting correction values. This will then order the stats based on their after-correction values to give them an order, and then compares them. However, this is “Dadge’s Compatibility”, and not necessarily the true compatibility. It’s a great pointer to see if you’ve done everything right, but it’s not the entire extent of things.
For an in-depth guide about combining, check out this link – [google.com] .
Also, if you need a Combine Calculator to make things easier on you, check this – [gitlab.io] .
Ah yes, this combo will give me the best Metalner there is… Right?
How do I read the hidden stats?
For hidden stats I mean Stress, Fatigue, among other things. These are naturally locked away from the player because he isn’t meant to know everything specifically. But if you don’t like that approach and you’re willing to get a bit savvy in order to understand exactly what you’re doing with your monster, you can download a tool for MR2DX named “Advanced Viewer” – [google.com] .
Is there a list of Disc Stones available?
Unfortunately not… Of course there is, what kind of complete guide would this be without it?! First things first, what are Disc Stones? In the original game, you could insert a disk – any disk, even B movies or Christmas songs – into your PlayStation device in order to evoke a new monster from the Shrine. Computers nowadays have the laughable handicap of not having a disc tray, meaning KOEI TECMO had to use something else. Maybe you need to scan your own local files? Like .jpgs? .mp3s? No? Then what’s their innovation? A non-comprehensive music database… Err, ok. We can work with that. Here you’ll find a list of every breed and sub-breed there is, along with the name of the song/artist you can input in the Shrine to summon them – [legendcup.com] .
The most innovative and pioneering prog rock band there is, RUSH (which I try to insert in some form or another in every guide I make – don’t judge, at least now I have the best opportunity to do so), has some truly great monsters. The album Hemispheres, for example, will materialize a powerful Naga with Anger and Hurry as special traits. How awesome and thematic is that?
Sitography and Credits
Of course there’s waaaay more stuff to cover; after all this is a big, big game. But if you feel the need of something specific, I would encourage you to check out this link repository – [google.com]
Last but not least, I’d like to thank the authors who made all of this possible, because without their hard work I couldn’t compile everything in a single page. These are Fenrick, Alchius, SmilingFace96, Tsmuji, me and a few anonymous users. If you have questions, please redirect them on the Monster Rancher discord – [discord.com] . There are tons of experts in there.
This guide’s version is 1.4 ; more stuff might be added in the future. Did I miss an author? Is there some incorrect information? Please tell me in the comments and I’ll add your name among the helpers! Also, if you found this guide helpful, remember to rate it so more people can discover it.
You may also like my Monster Rancher 1 & 2 DX Steam review – [steamcommunity.com]” rel=”nofollow noopener”>Monster Rancher 1 & 2 DX Steam review – [steamcommunity.com] , or my Steam Curator Page – [steampowered.com] .
Hope you enjoy the post for Monster Rancher 1 & 2 DX Basic Full Gameplay Guide, If you think we should update the post or something is wrong please let us know via comment and we will fix it how fast as possible! Thank you and have a great day!
- Check All Monster Rancher 1 & 2 DX Posts List









Leave a Reply