
The Start
The Node Editor is the base element if you want to create things with the Mercury Particle Sandbox.
This introduction should help you to get familiar with this important tool.
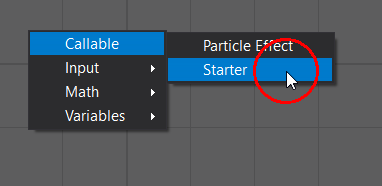
The first node you should always place on the grid is the “Starter” node. It’s obvious why; it starts the execution of the node graph.
So, it is basically your starting point of every creation-routine.
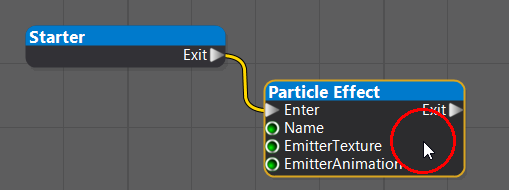
The next node should be the object you want to create. In this case it is a Particle Effect!
Click with your Left Mouse Button on “Exit” of the starter node and hold it. Now drag to the “Enter” socket of the particle effect node and release the mouse button. You should now see a yellow line, which connects both nodes.
This is how you create a connection between various nodes. In this case it is the “Main-Line-Connection”. This means that the node graph will process its nodes in order of the nodes connected by the yellow line – always starting from the “Starter” node.
If you want to revert a connection you just need to hold the “STRG” key and click with your “Left Mouse Button” on one of the sockets. Try it now and then create the connection again!
This is how you typically start your creations.
The Parameters
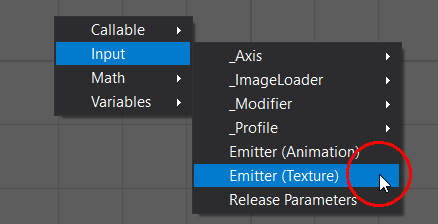
The next step is to fill the green sockets with values. First we need an emitter for the particle effect.
We will place a “Emitter (Texture)” node on the node graph. This node will automatically create a squared 1×1 texture for you, so you don’t need to load your own.
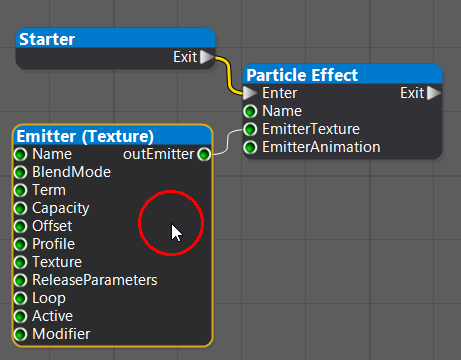
Now connect the “outEmitter” socket with the “EmitterTexture” socket of the particle effect node and click on the new node to show its properties in the Property Grid.
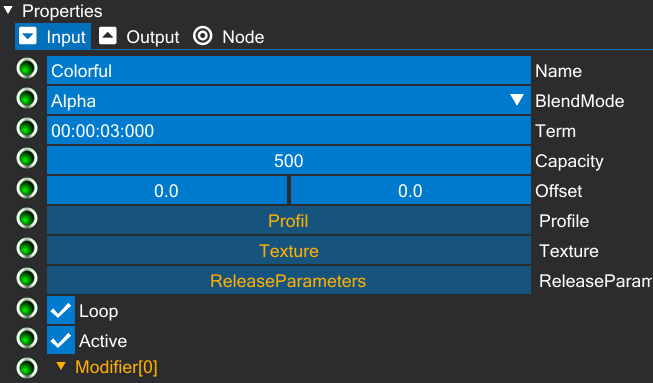
Normally you need to place nodes and connect them to the corresponding sockets to successfully set a new value on the socket (like we did in the last step). But most of the time in the Mercury Particle Sandbox you can directly put a value on a socket by using the property grid.
This is what we are doing now. Try to set the value of each socket to what you are seeing in the screenshot above.
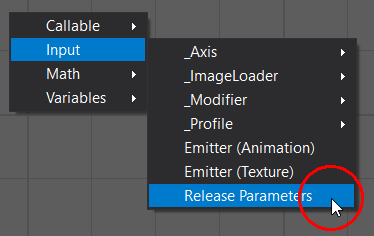
In the next step we need to place a “Release Parameters” node to the node graph:
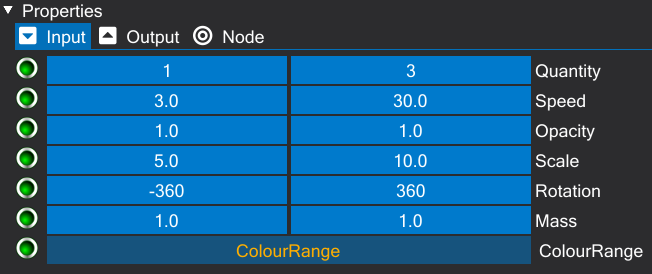
Now set the values of each socket to what you are seeing in the next image. Remember to accept a new value by pressing the return / enter key on your keyboard or click outside of the property grid. It can happen that the min-value will switch with the max-value to make sure that the data stays logical.
Now click on “Process” to let the node graph create the particle effect:

You will now see some random black particles flying around in your sandbox space. We need to set a basic color for our particle effect.
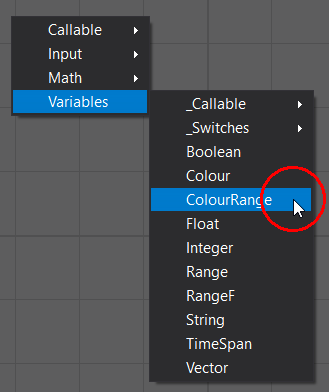
We do that by placing a “Color Range” node on the node graph:
Now set the red value of both sockets to 255 like this:

Note: Red is the default color in the particle engine. This means that you should always prefer red over white or black. On the first sight it seems that this makes no difference at all, but you will see that this comes into play when working with modifier-nodes and creating more advanced particle effects.
Now you should see the same as before, but with red particles flying around – nice!
In the next step we will use a modifier node to manipulate the color output of the emitter. We are doing this by placing a “Hue Interpolator” node:
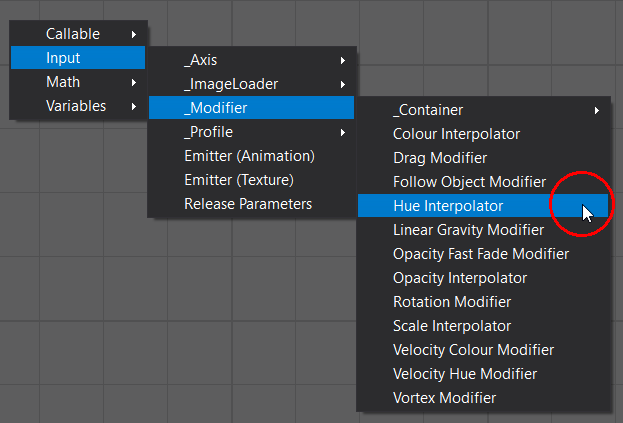
Set the values of the sockets like this:

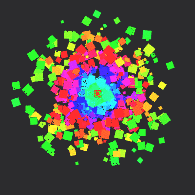
Now you should see a very colorful particle effect:
The Result
Well done!
You created your very first particle effect using the node editor system of the Mercury Particle Sandbox.
This is too easy, right? 🙂
Here is a screenshot of the final node graph:

This is just the tip of the iceberg. There is much more to discover like creating Terrains, Objectsand Factories.
Or using all of those entities to create multiple complex Particle Scenes.
And not to forget all the different integrated tools like creating Sprite Sheets, GIFs & APNGs or Image Compositions…
Your Sandbox. Your World.
Be free and create whatever you want!
-Creativity is the key to success
Hope you enjoy the post for Mercury Particle Sandbox Create a Particle Effect, If you think we should update the post or something is wrong please let us know via comment and we will fix it how fast as possible! Thank you and have a great day!
- Check All Mercury Particle Sandbox Posts List


Leave a Reply