This guide will give you a few builds that you can use and will show you all just how to think about making a charm build of your own for certain situations in battle.
Charm Strategy
Whenever you start modifying your charm load out you want to be certain that charms you have mesh well with each other. Most experienced players tend to stack up on damage charms for builds as they do tend to complement the abilities with one and other well. Simply put think about how you want to play or what strategy you’re gonna be using in a fight and utilize certain charms that could benefit the style of play you’re going for.
For example say you want to focus on your nail for this build. Then you’d focus on charms that give the nail a lot of buffs such as damage, swing speed, or even range. Or what if you’re doing a pure magic set up focusing on dishing out giant destructive energy with your spells. Then you should prioritize charms that buff the damage and charms that either let you get soul fast and or lower the cost of casting them. Simple to understand.
Potential Beginner Mistakes
There are many common mistakes a newbie player to this game can and possibly will make when creating a build. However if you’d like to avoid accidentally making a build that doesn’t exactly help you win any major encounters then we should go over some common mistakes people make.
Prioritizing defensive charms over offensive ones
This one tends to be the one that can seriously hurt you in the long run. Simply put you want to prioritize offensive options over defensive ones for one reason. And that’s the soul mechanic. Each time you hit an enemy with your nail you gain soul to use for spells, and healing. Using defensive options will cause you to play less aggressively thus leaving you with less soul to use to heal. so ironically by playing more defensively your ultimately hindering your ability to survive the enemies who want to tear you apart. So prioritize offense options first, if ya got room after all the offensive charms you need are equipped you can place some misc charms if you really want to.
Using charms that only activate upon getting hit
Do not use these charms at all. It’s not even me just saying for you not to get hit, it’s just that most of these charms save for 1 aren’t good at all. Stalwart Shell’s extra invuln frames aren’t really good enough to warrant using 2 slots for it, Carefree Melody literally rely’s on you getting hit as well as rng so consistent damage negation Isn’t gonna happen with this one, and Thorns of Agony literally leaves you with less invincibility frames due to it’s animation. The only okay-ish one is grub song as just getting a bunch of soul is kind of useful, however only use it if you have no better option to slap into your build. It’s basically just a slot filler that’s perfectly ok in any build. However just try not to use any of the other ones I listed
Not using the fragile charms out of fear of breaking them
Trust me when I say I get the fear of breaking a potentially great charm and just not being able to use it anymore but relax ok. if it get’s broken you can just bring it back to the vendor you got it from and he’ll repair it good as new for a small fee. Don’t be like me when I first played the game and just didn’t use them cause those fragile charms are REALLY good when you use them correctly. Not to mention you can also get upgraded unbreakable forms of the charms later on so don’t be afraid to get more used to them
Using Charms With more slots because you assume that means they’re really good
Trust me when I say that a lot of charms are not made equal and most of the heavy cost charms are not worth it. So if you see a 4 cost charm you should just ignore it. Save for Soul Eater that one you can consider heavily when running a pure spell build, any other 4 cost charm however you can safely ignore ever using.
Using heavy blow
It’s a bad charm, only reason i’m telling you this is so you know to never use it. Trust me that charm is hot garbage.
Having the compass charm on at all times
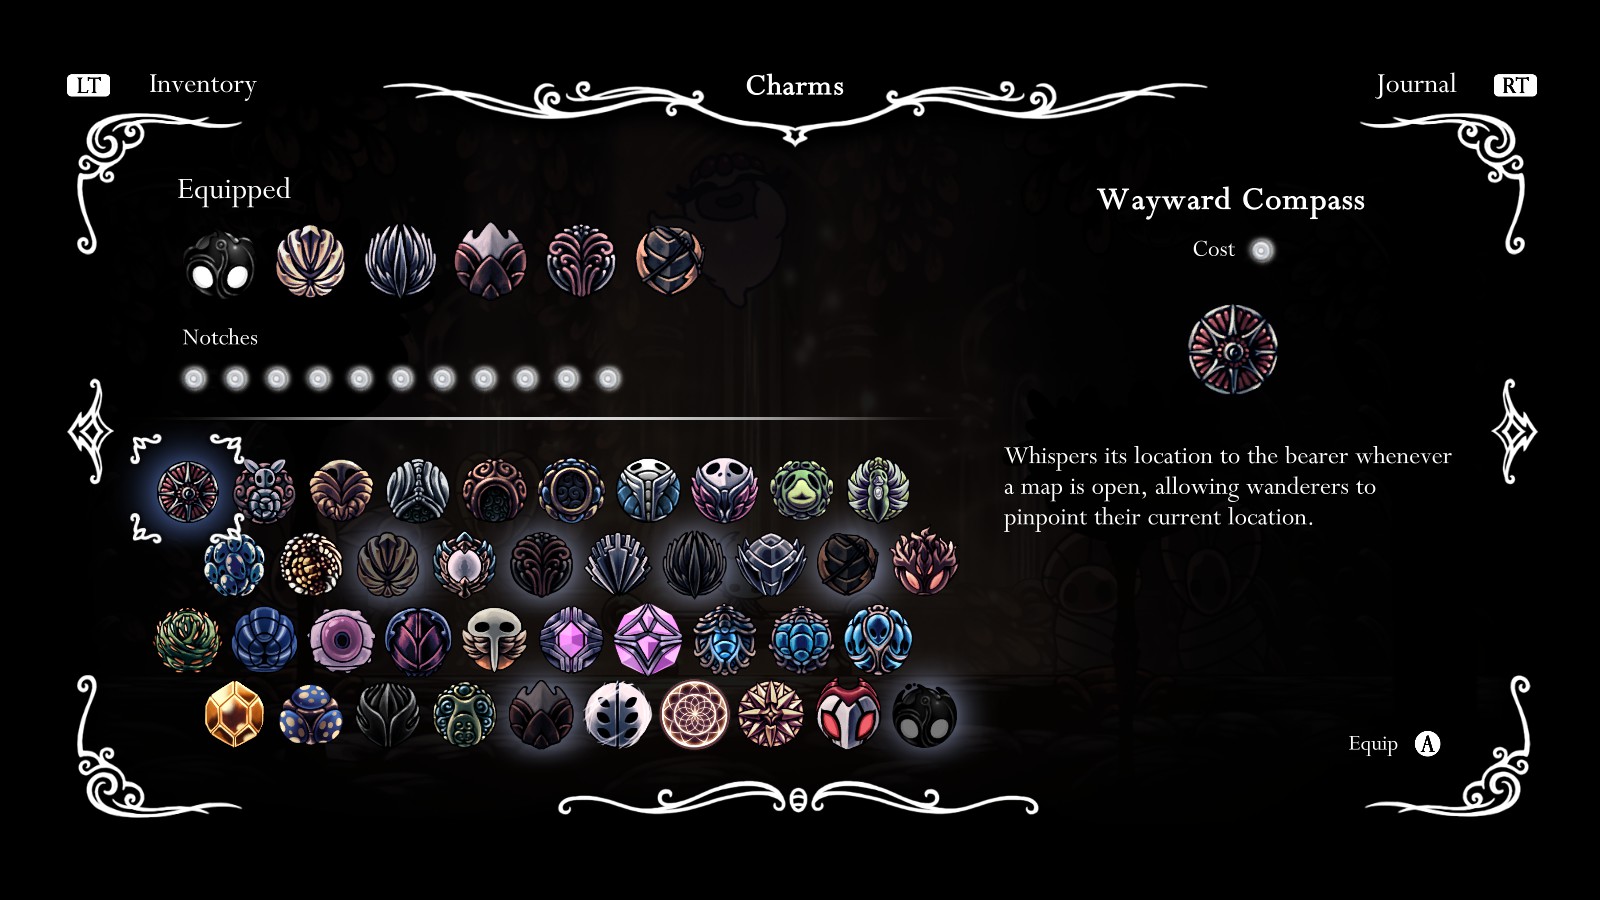
Look if you know a boss fight is coming take off the compass. Trust me one free charm notch for a boss can, AND will help you immensely if you got some good charms to put in it’s place. Not to mention hollow nest’s layout is surprisingly memorable so it’s rather easy to familiarize yourself with the map so you won’t even need the compass on at all.
Charm Synergies
Charm Synergies are certain charms that change visually or mechanically in some way when paired with one and other acting as an indicator that they work well with one and other or they add a special buff ontop of their default bonuses. I’ll show you all of the Charm Synergies that are in the game.
Baldur Shell + Shape of Uun + Spore Shroom + Quick Focus
While this Charm Synergy isn’t exactly a practical I will admit it looks hella cute being a little speedy mushroom snail. But it’s ultimately a bit too gimicky to be practical. Think of this guy as the least worth while combo to do. But hey someone might get a kick out of it so go nuts. I just thought it was worth mentioning to say the least.
Sharp Shadow + Dash master
Sharp shadow’s damage on it’s own is equal to a single nail hit. Which is okay on it’s own, but when paired with dash master it’s damage gets a great 50% increase. Also allowing for more frequent dashes is still a good little bonus.
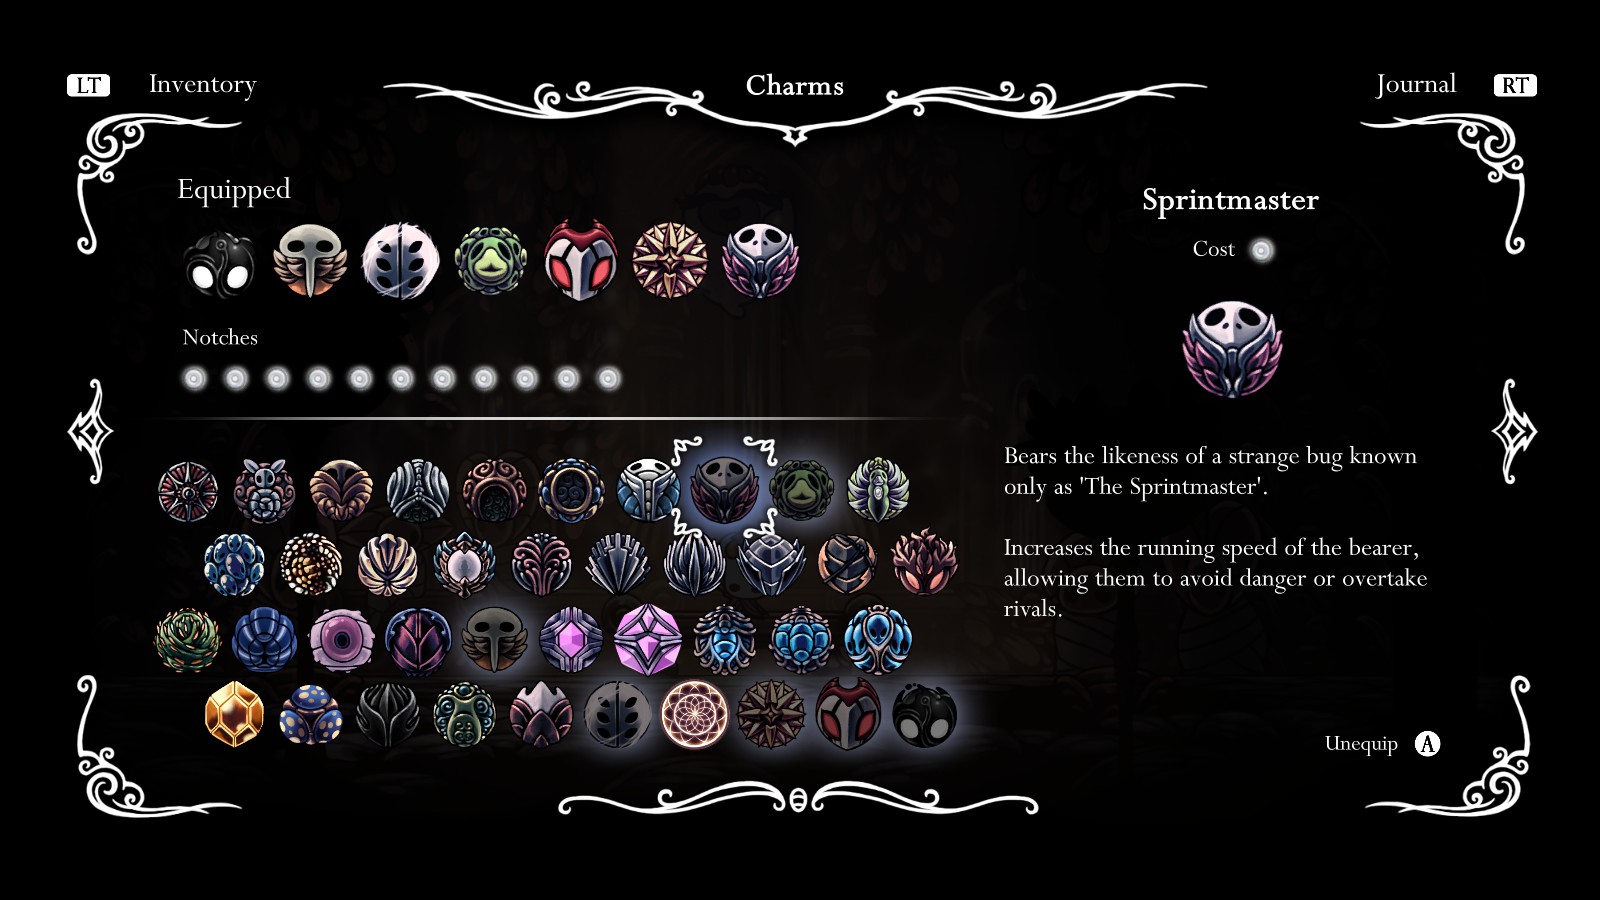
Dash master + Sprint Master
The both of these charms combined increases your walking speed by a noteworthy amount. While not a boss fight combo it helps when traversing hollow nest
Defender’s crest + 3 other charms
It’s honestly surprising just how many charms actually combo with being smelly. I’ll let these three just have there own little mini section here for you all.
- Spore Shroom: Increases it’s damage to 38-42 damage while still lasting just about 4 seconds.
- Flukenest: Turns the many little flukes you spit out into a large stink bomb projectile dealing 20-23 damage (26-30 with Shaman Stone).
- Glowing Womb: It lowers their contact damage by 5 but turns them into stink bombs that leave a dung cloud for a short period of time
Stalwart Shell + Thorns of agony
This Charm Synergy decreases the time taken for thorns to activate after being hit. It also Increases the animation speed and gives you extra invincibility frames after the ones consumed by the animation. Though the problem with this one is you’ll only reap the benefits upon taking damage.
Fury of the Fallen + Glowing womb
Yeah all this one does is Increases any spawned hatchlings’ contact damage by 5 when at 1 Mask. Truth be told not really much of a buff but… hey it can help I suppose.
Fury of the Fallen + Grubberfly’s Elegy
Whilst at 1 mask of hp you can Fire red projectiles dealing ~67.5% Nail damage per projectile. It essentially just allows you to use a more powerful version of the Grubberfly’s Elegy beam when you’re at 1 hp.
Joni’s Blessing + Hiveblood
This synergy allows you to regenerates the Lifeblood health gained from Joni’s Blessing, though taking twice as long in comparison to if you were using just hiveblood going from 10s to 20s). It also turns the blue Lifeblood Masks into Lifeblood combs which is visually kind of cute. It’s not as practical but if you can just avoid taking damage every 20 seconds you have a semi recoverable health pool that’s double the maximum masks you can usually have.
Grubberfly’s Eledgy + Grubsong
This buffs the soul gained from damage from 10 to 25. Not an optimal charm combo due to the 4 notch investment and the buff only being present when taking damage but hey it’s note worthy at least.
Dreamwielder and dream shield
This synergy increases the shield’s size by 15 percent. Whilst dream wielder is a great charm you’re never gonna use this combo as the dream shield charm isn’t too helpful in most builds.
Weaver song + grubsong
It allows the weavers to gain soul upon each attack… a whopping 3 soul per hit. for context your basic soul vessel carries 99 maximum. kinda underwhelming but hey it’s a thing if your going for a passive build.
Weaver song + Sprint Master
This synergy buffs the weaverlings by allowing them to move 50% faster and jump further. again useful in a passive build running these little spiders.
Spore Shroom + Deep focus
It Increases the spore cloud radius by 35%. If your looking for a way to make deep focus viable this isn’t a synergy you should be focusing on.
Example builds
Now for this one I’m gonna show you some example builds to demon-straight how to make builds to help you get an idea on how to create a build.
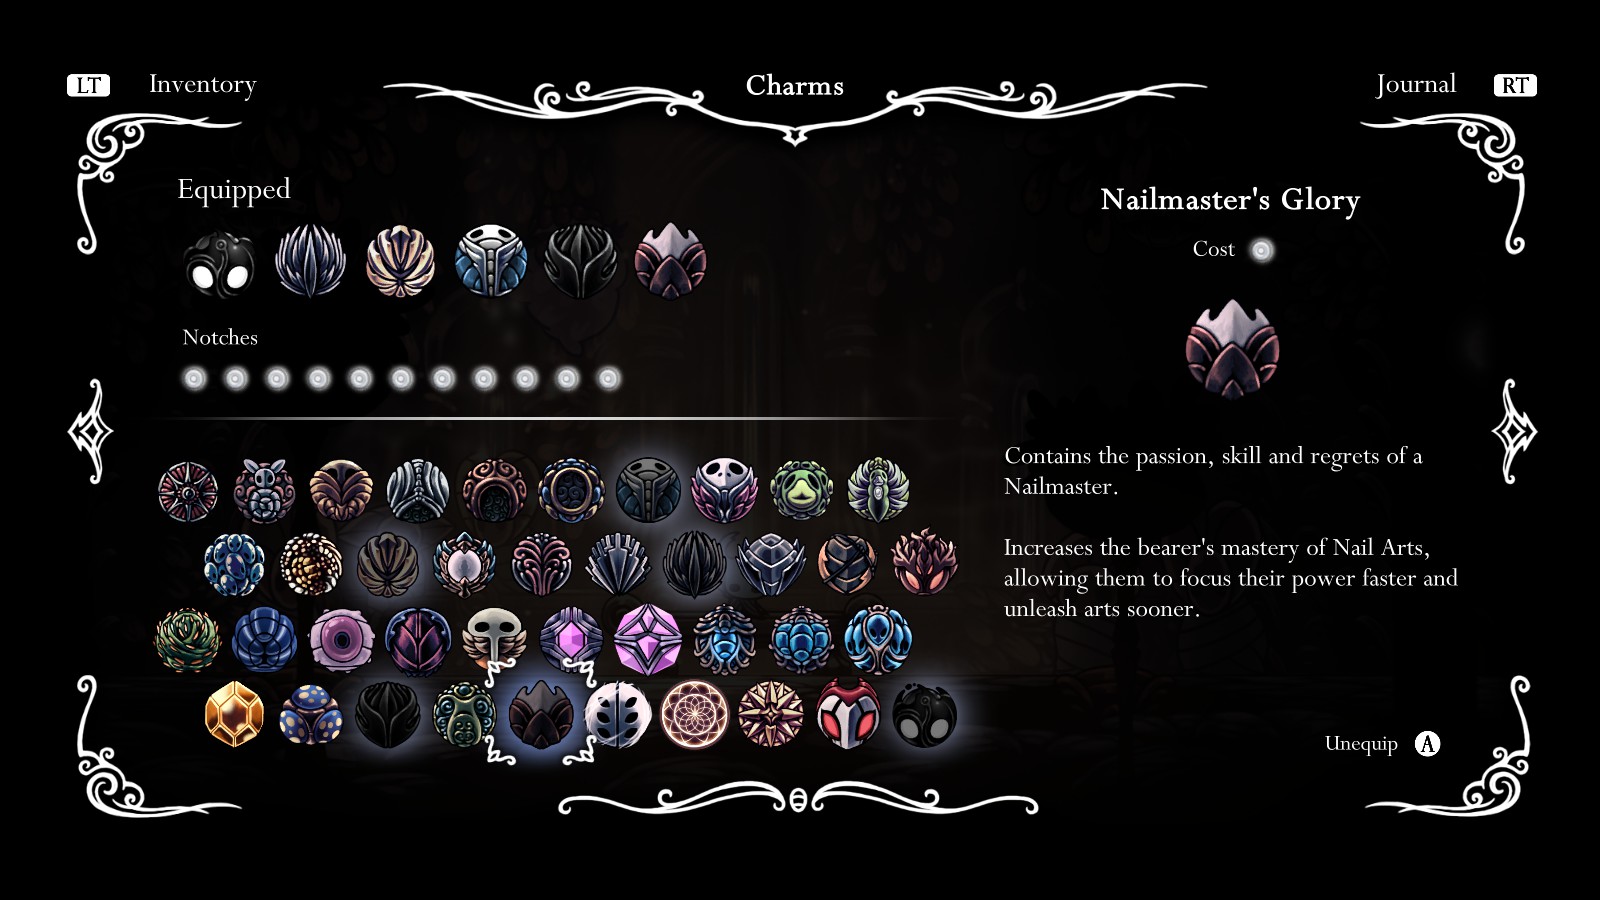
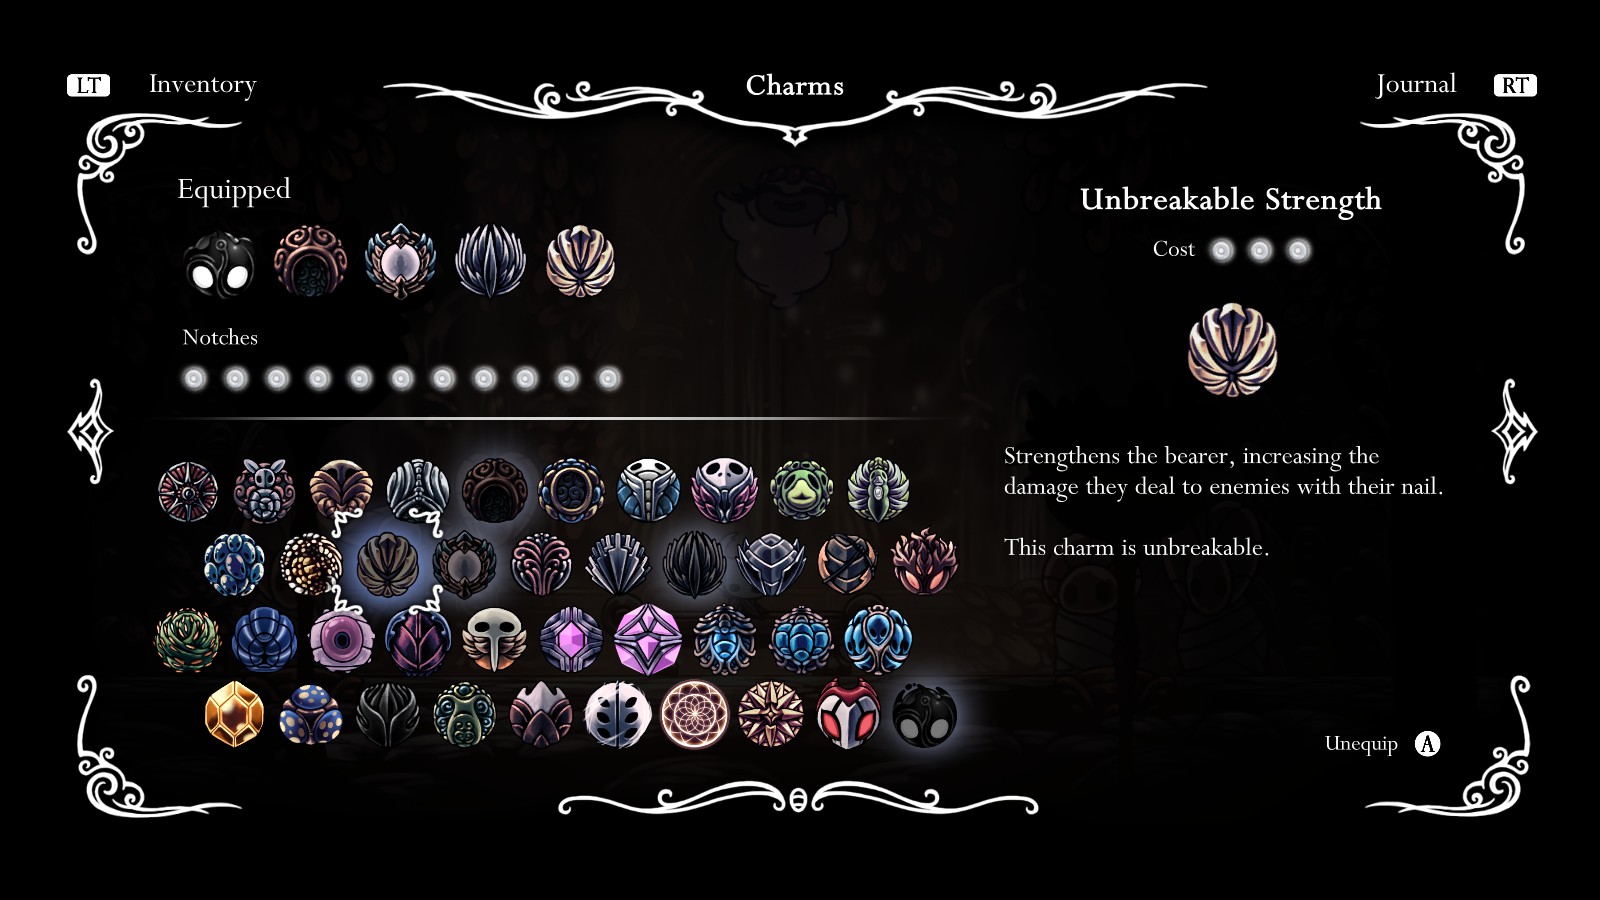
BUILD 1: Nail mastery
This build uses exclusively the nail and nail arts, creating a nail that even gods will kneel against. Who needs spells or shades when your old trusty nail has dps equivalent to a full powered abyss shriek! Needless to say it will take some getting used to thanks to steady body but you will be dishing out a TON of damage which will make boss fights all the easier.
BUILD 2: Counter attack!
Simply put this build focuses on using sharp shadow and nail arts do dish out massive counter damages. It prioritizes dishing out massive counter damage and being able to avoid massive blows and dishing out a ton of damage to compensate.
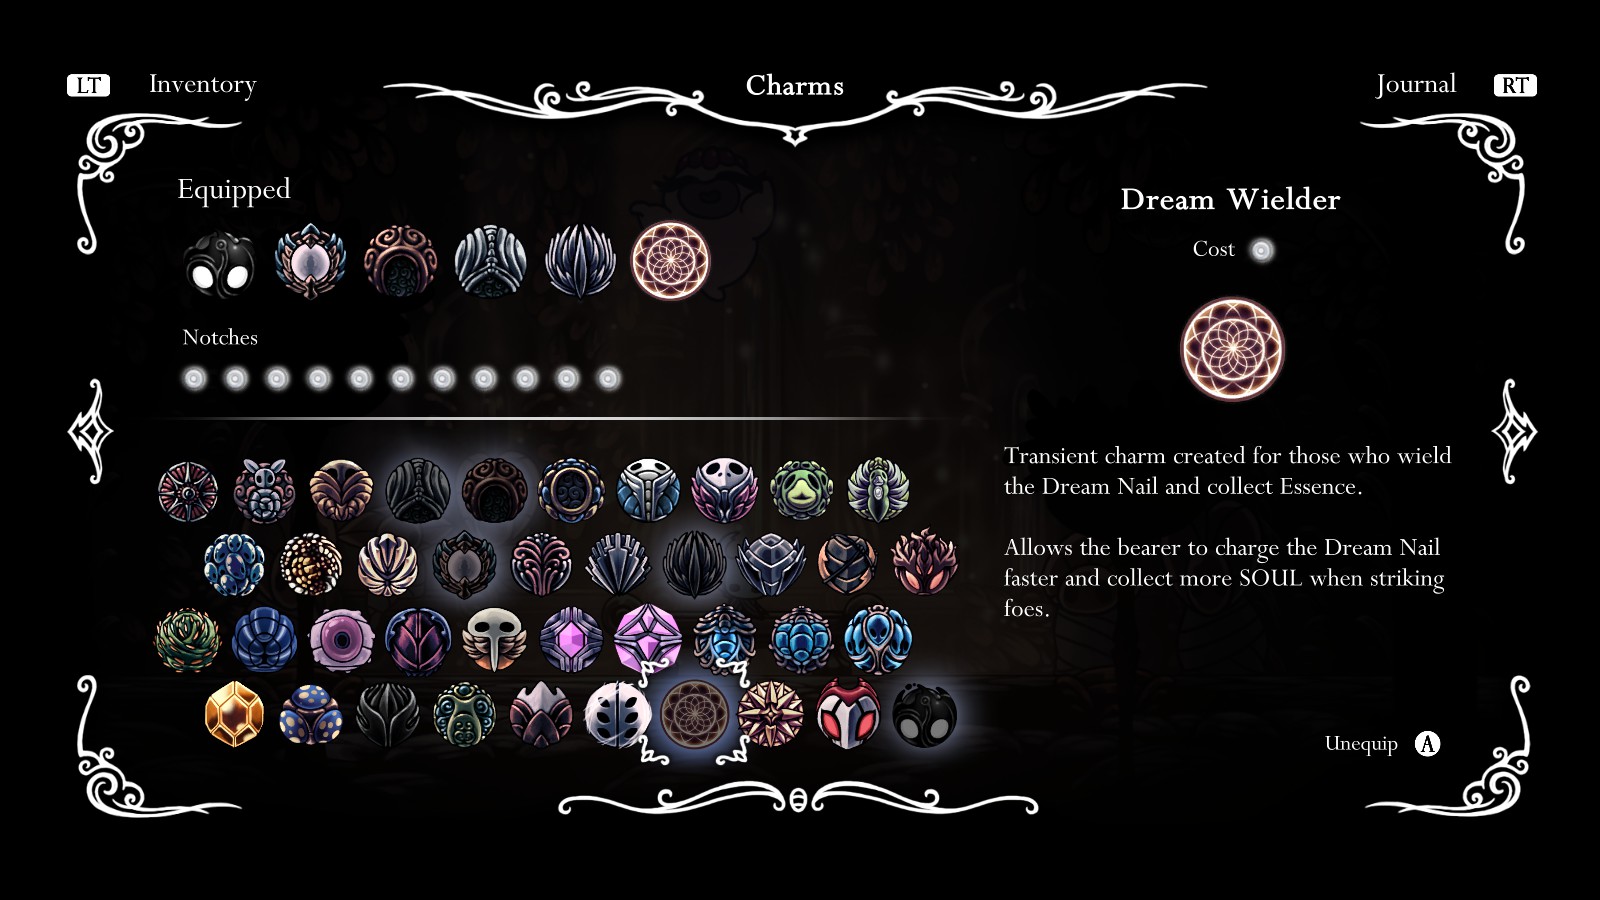
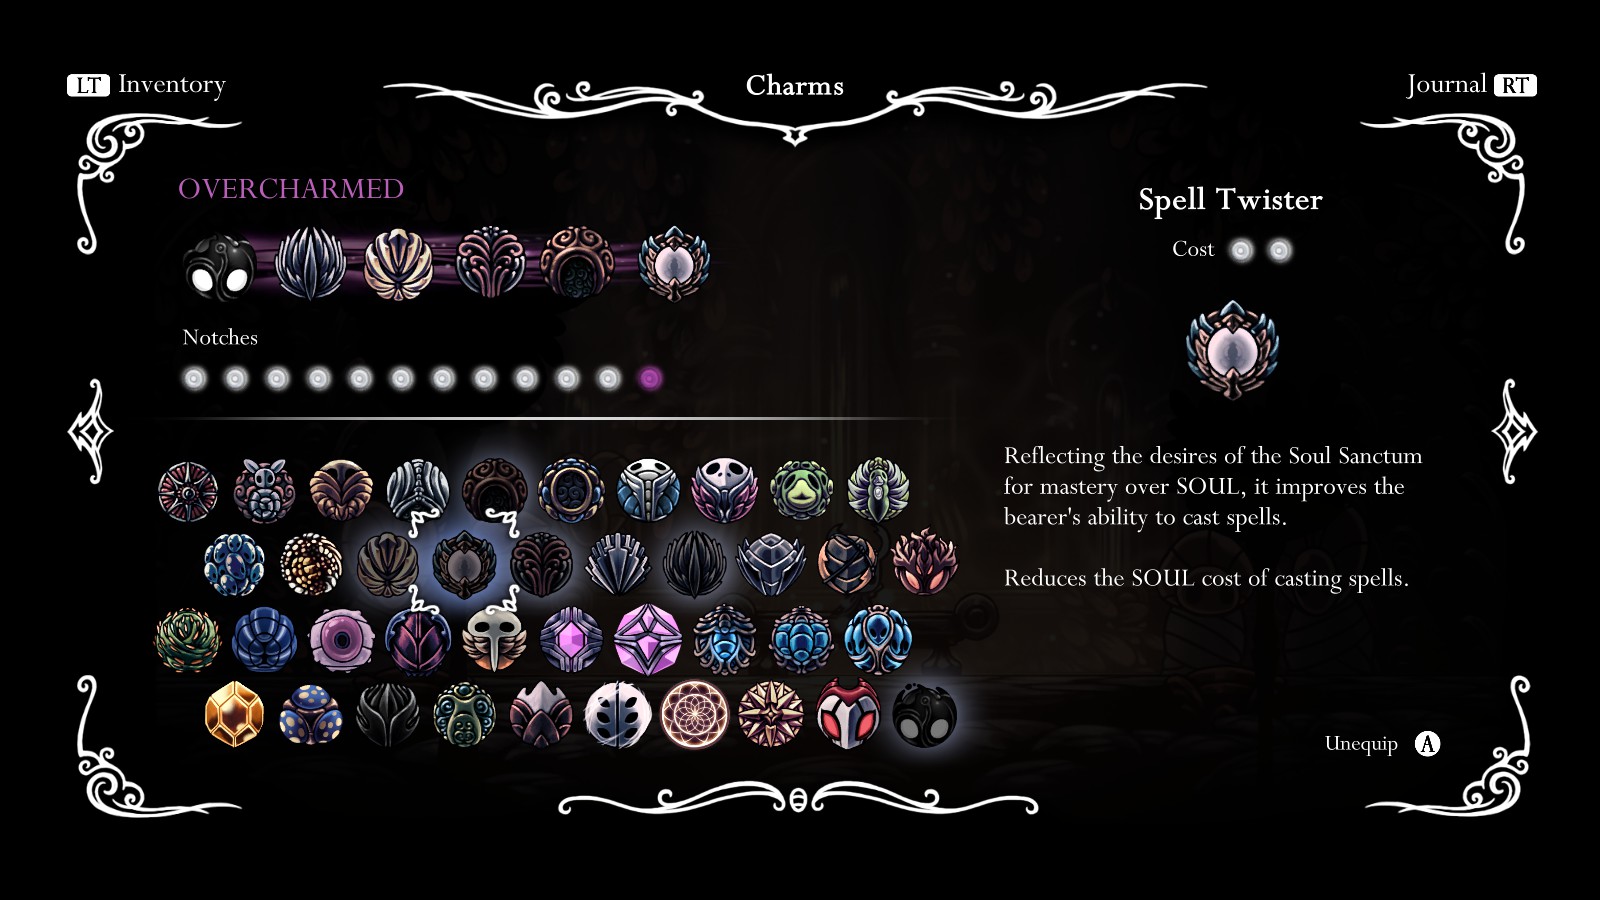
BUILD 3: Dreamy Shaman
This build prioritizes maximizing your spells damage and soul income. Dream wielder speeds up the dream nail and grants you 66 SOUL PER HIT! allowing for multiple spell casts easily dishing out shotgun bursts of damage. And of course with quick slash and soul catcher to make your nail able to get some more soul then normal. And of course spell twister and shaman stone to make your spells do MASSIVE DAMAGE!
BUILD 4: Me and the boys
Yeah this one is one hell of a gimicky build but if your intrested in having a bunch of creatures fight your own battles this is your build. Grimchild for consistent summon damage, glowing womb for more little fly’s, and both synergy’s for weaverlings to make more of the little knights. and uhh… dream shield can be swapped out if ya like it’s just the last summon charm I could fit into this but hey if you wanna use it i won’t stop you
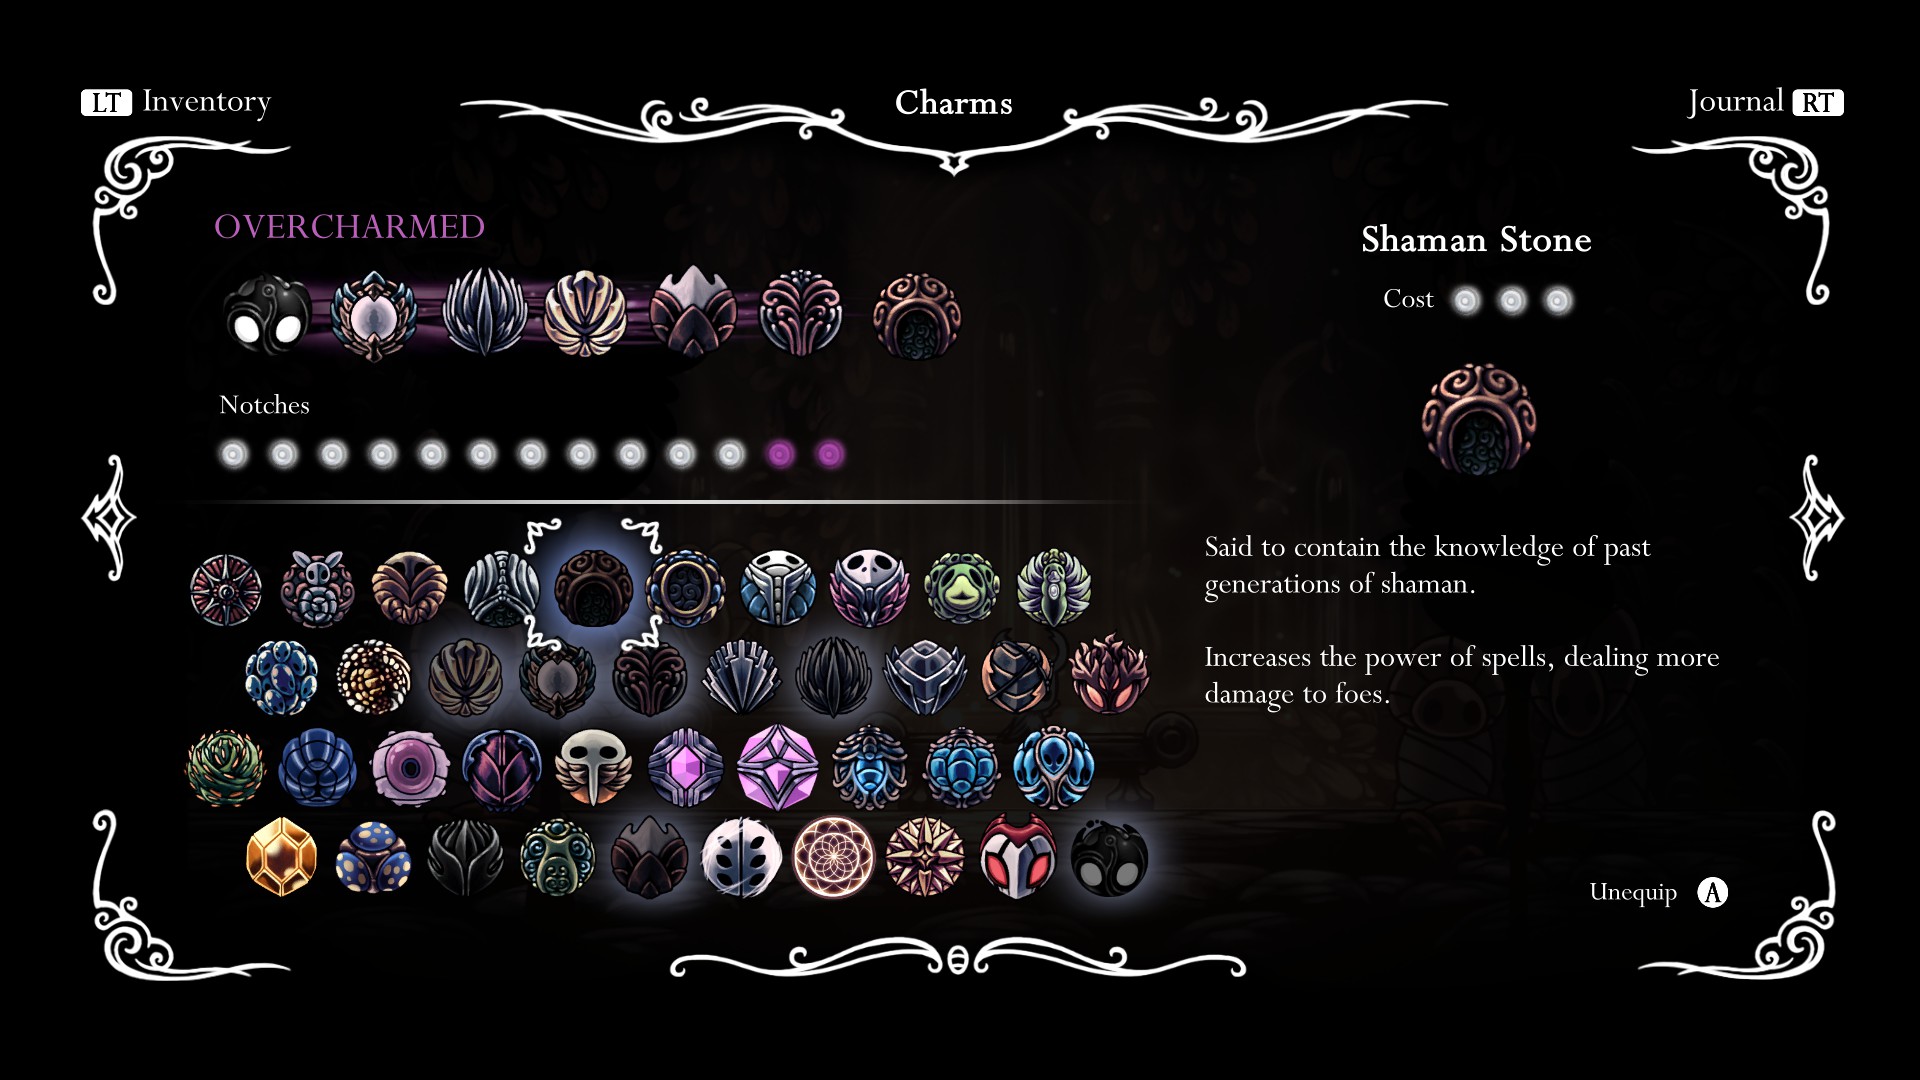
BUILD 5: Spell Sword
Maximizes nail’s dps and spell damage without unfortunately without the use of steady body which certainly can boost the damage further.
Overcharming
Being over charmed
Not many people do this unless your a pro who’s 100% confident in their dodging abilities, doing hit less a radiant boss run, or are just doing a challenge run where you go through the game without taking damage. But being over charmed does give major benefits. Being over charmed allows you to add an extra one or two charms to your build despite not having enough notches, the trade off being you take double damage. Simply put over charming does have it’s utility should you know how to utilize it. For example adding steady body onto our spell sword build allowing us to dish out MAXIMUM DAMAGE at the cost of taking more turning our build from a high dps build to more of a glass cannon build.
However this is actually the sub-optimal way to overcharm I could also add one more one slot charm by un-equipping shaman stone and adding a one slot charm and then reequipping it.
No matter how many notches you go over, the damage increase is always the same so it’s best to get as many notches filled as you can. You still need one charm notch free to place the final charm into so make sure to be smart when creating an over charmed build
While it’s not always recommended especially not for beginners but if you’re confident in avoiding anything from the easy to avoid nosk attacks to the most annoying of primal aspid’s almost homing like accuracy. Then I say it’s good option should you want to really lay down some damage or get some extra utility with another charm.
Also when you reach the area with the boss rush modes this very mechanic comes in handy when radianting bosses, AKA beating a boss without taking a single hit. You’re trying to not take any damage at all anyway so might as well equip it for some extra efficiency.
Conclusion
And that’s all I can really teach about the process of making a charm build. There’s perhaps some things more experienced players know about the process more then I do, but these tips should help you make your builds as powerful as they can be. Now go out there and kick some bug a*s!
Hope you enjoy the post for Hollow Knight Charms Strategy & Builds Guide, If you think we should update the post or something is wrong please let us know via comment and we will fix it how fast as possible! Thank you and have a great day!
- Check All Hollow Knight Posts List


Leave a Reply