Quick and easy tips for beginners / intermediates to try out!
Preparations
In this phase, we want to make sure we do as much work as we can before getting to the real meat of the process!
Console commands
These commands are important for defining the outlines of your shadows and basically making them sharper. Garry’s Mod’s default shadows can look pretty bad some times:
mat_slopescaledepthbias_shadowmap 2
mat_depthbias_shadowmap 0.00001
r_projectedtexture_filter 0.2
r_flashlightdepthres 2048/4096
and if you want to: mat_antialias 8
The Scene
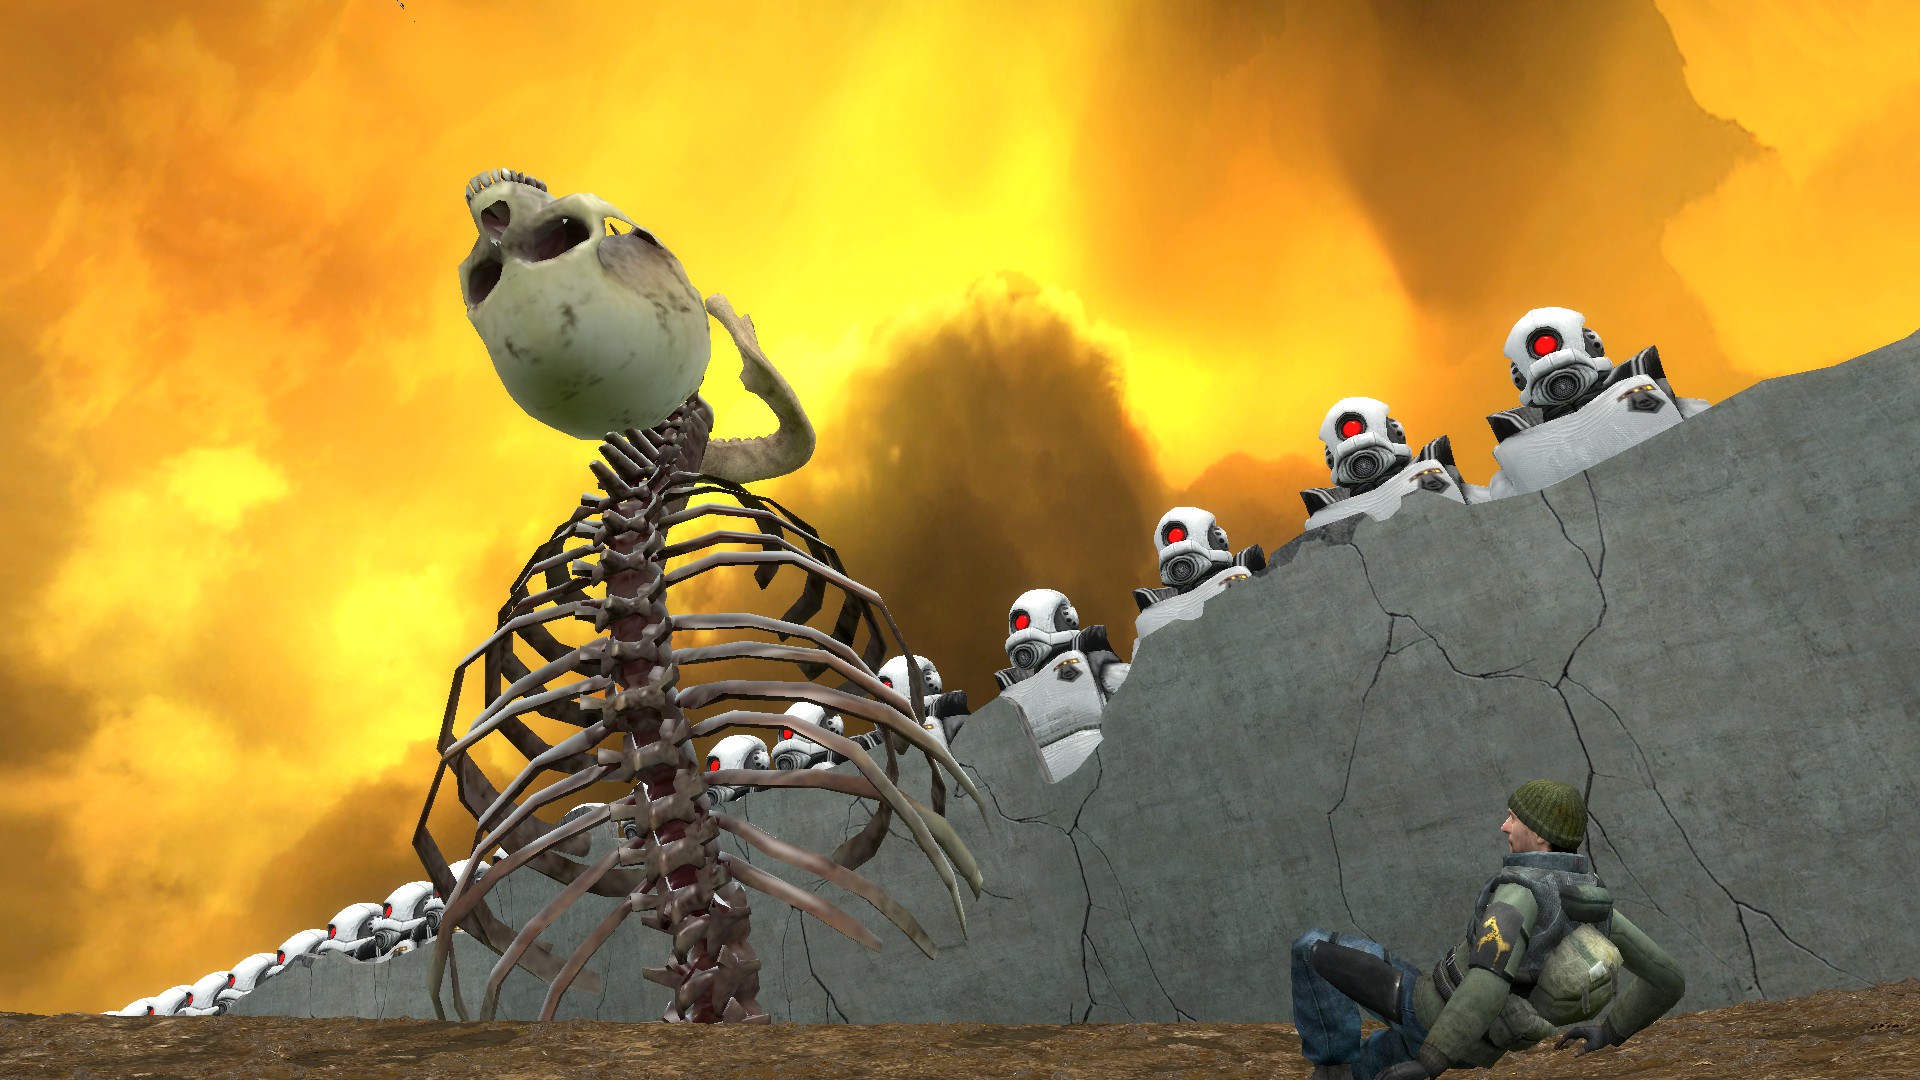
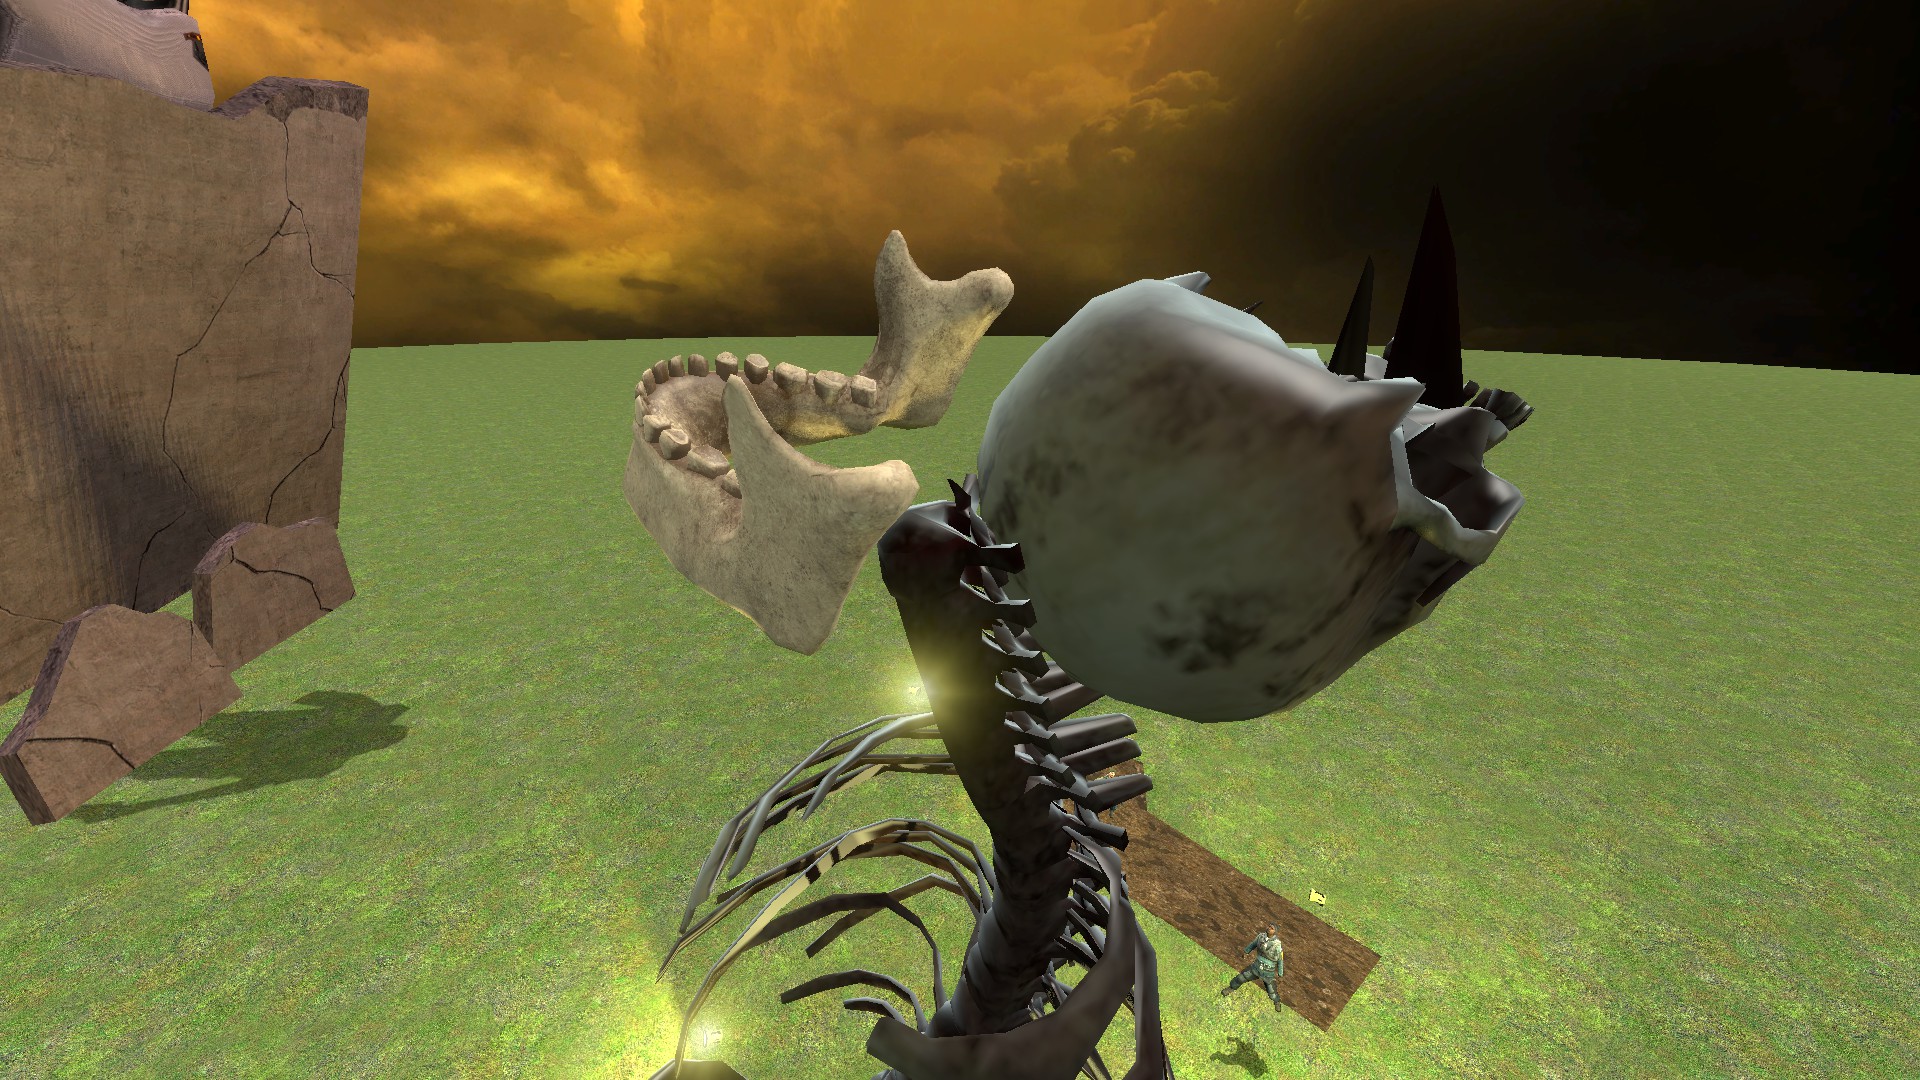
Here I’ve built a pretty neat scene. It’s supposed to be a spin on a chapter of the manga Attack on Titan but instead of Titans or any of the other characters, I’ve replaced them with Combine Soldiers and Rebels from Half Life 2.
The Camera Shot and Angle matters a lot when building your scene. This shot is taken from the Frog Perspective to really emphasize the height of these huge Titans. Make sure that you use the zoom function on your camera a lot. Your screenshot is going to look 100 times better by just simply backing of a bit (even noclipping into the ground if necessary) and zooming in with the camera.
Perspective is Key!
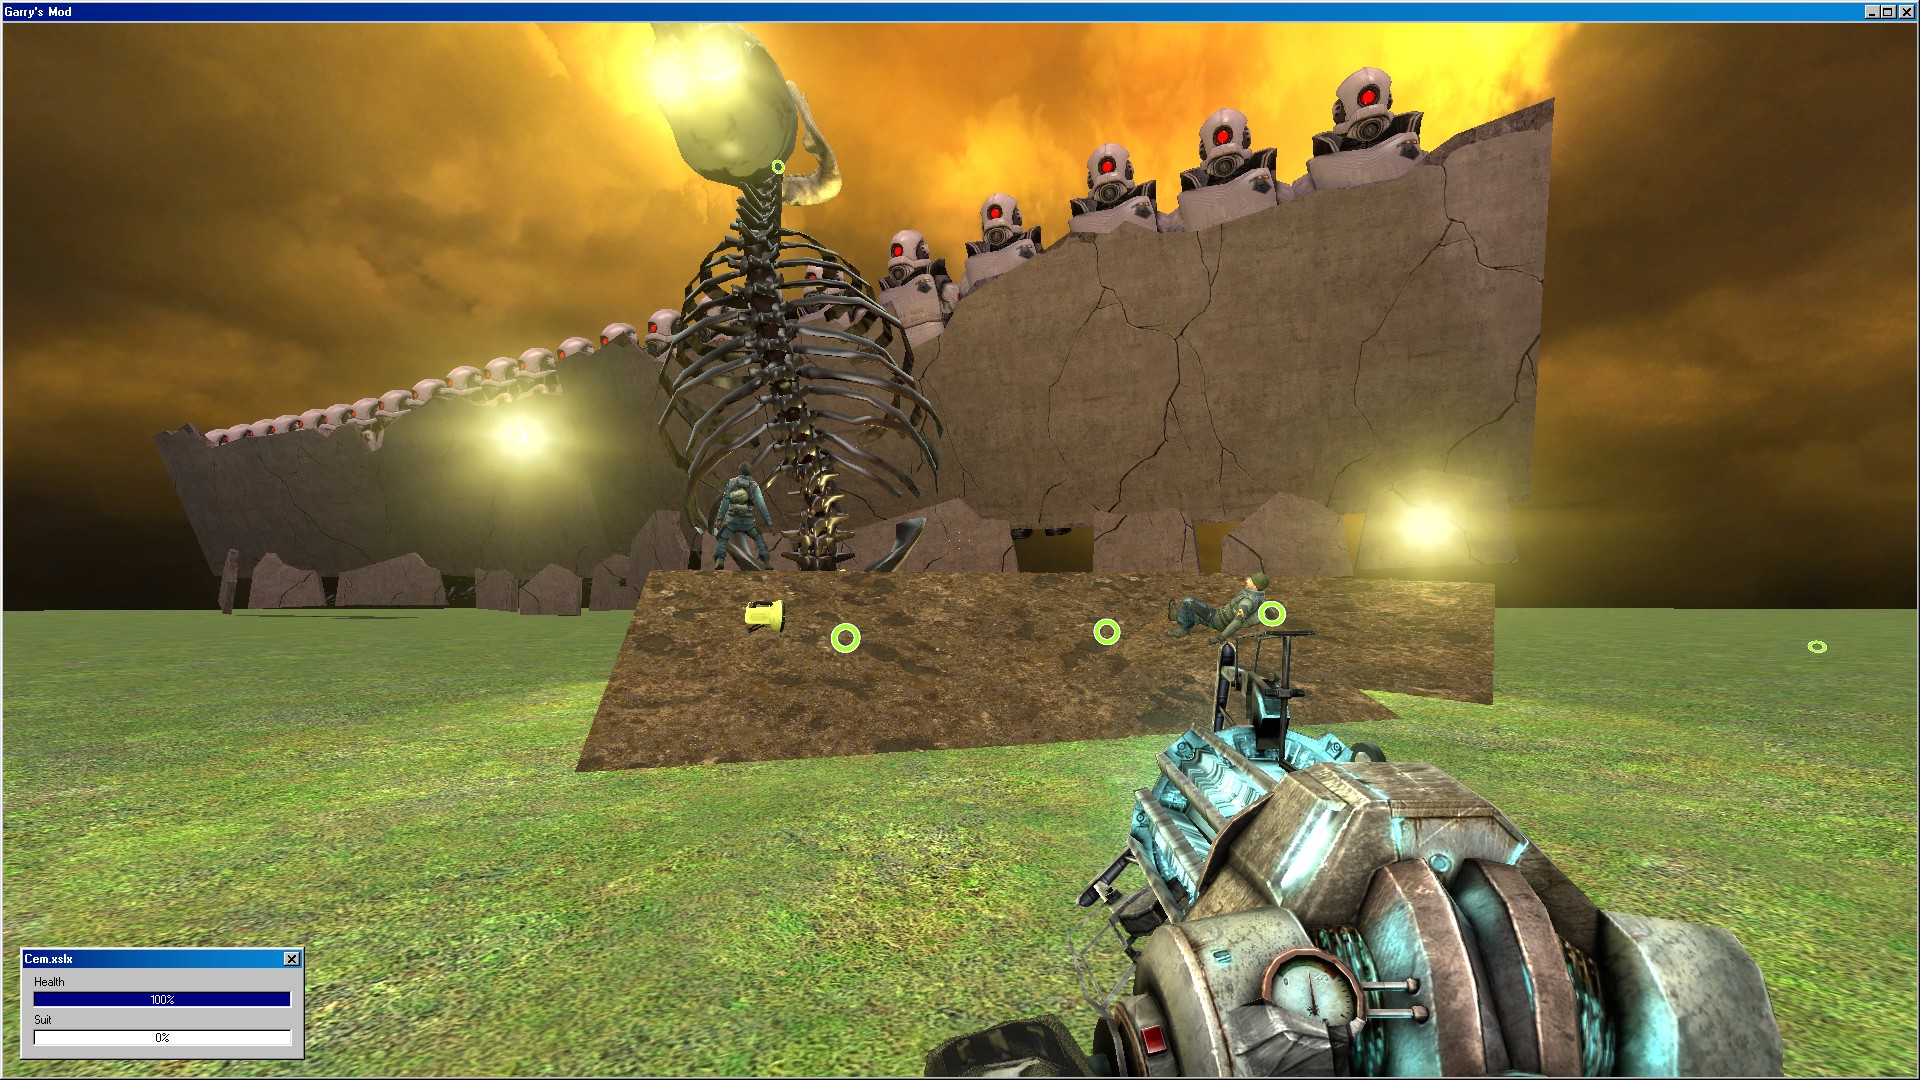
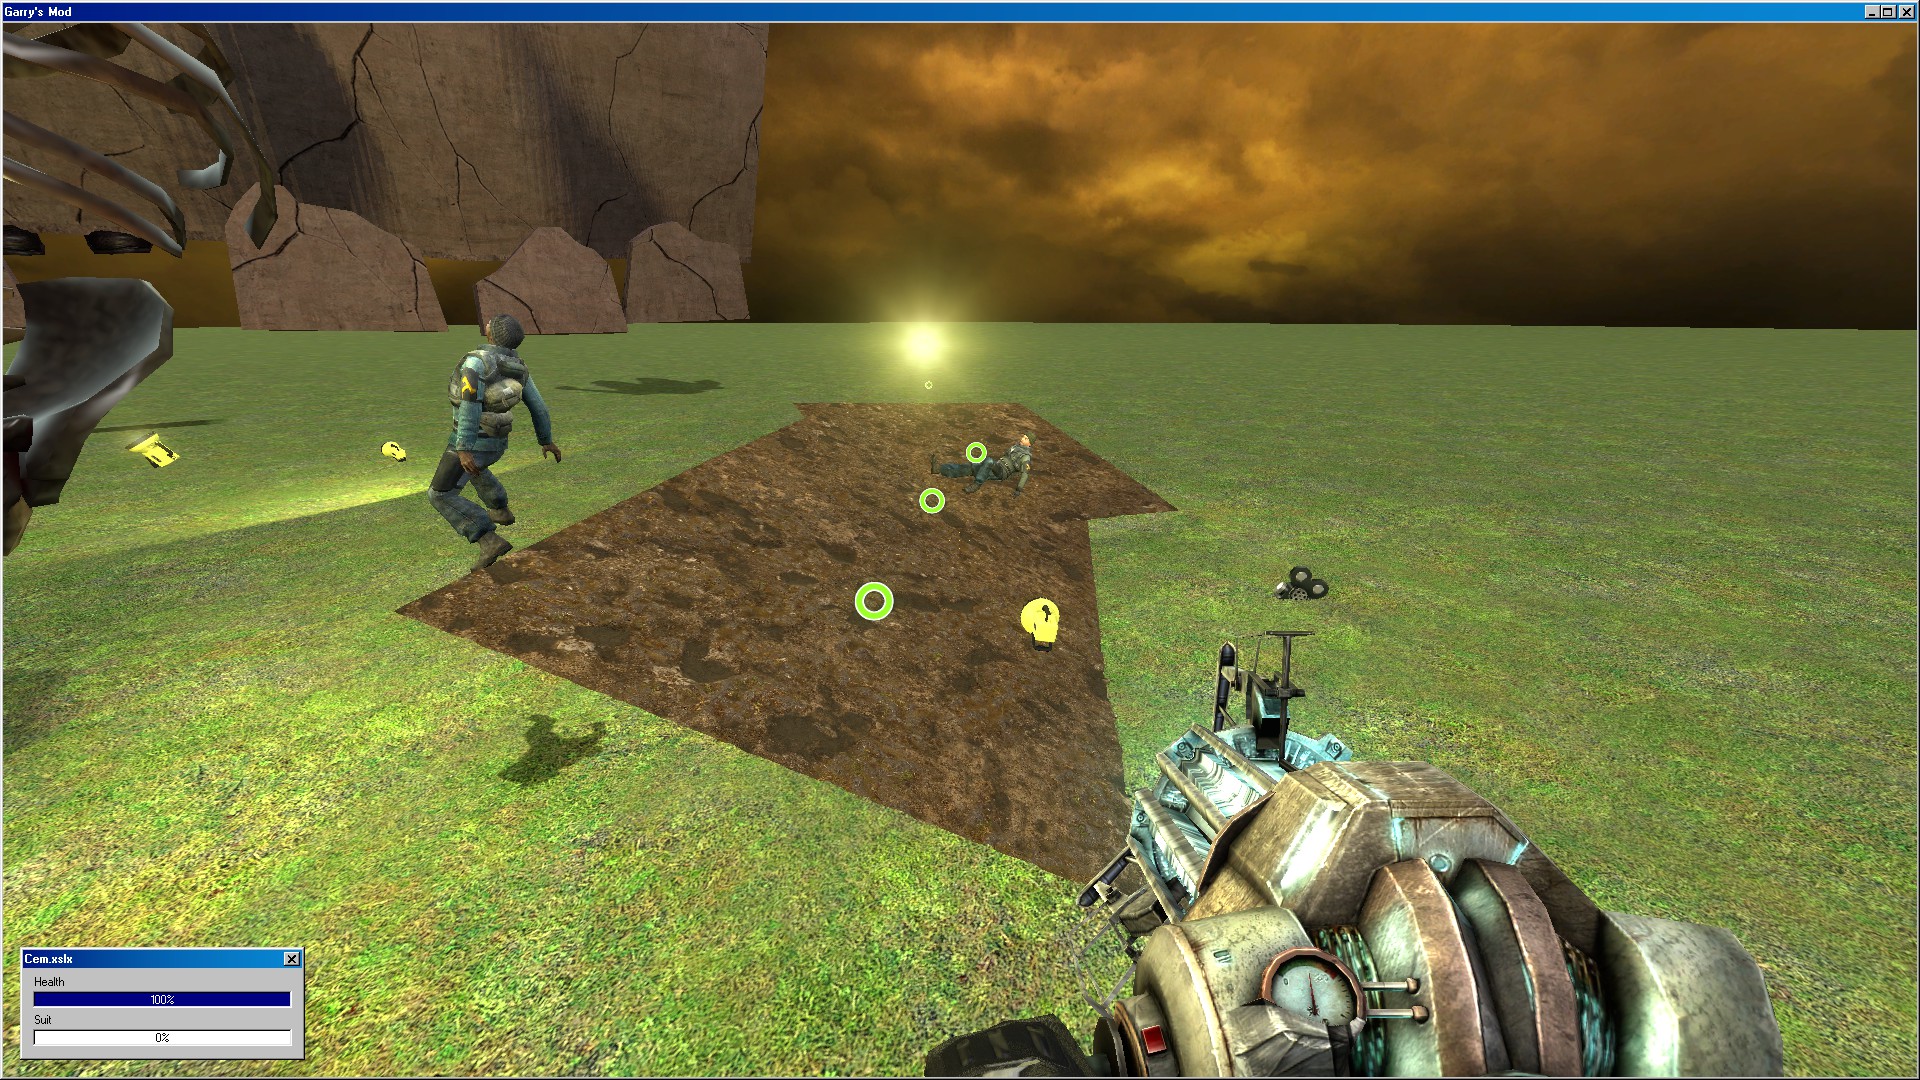
This is probably the most important thing I want you to take away from this guide. No matter how many props or entities you decide to use in your scene, camera perspective can save you in a lot of situations. Here you can see that Instead of a Workshop map, I’ve simply booted up gm_flatgrass and made the floor myself. I downloaded high res ground textures and made a makeshift ground out of dirt.
The characters aren’t even really touching the ground, and yet it still looks convincing. The wall is much smaller and the Titans are way less than the image might make you feel.
The jaw of my skeleton isn’t even attached to the skull! and yet once we’re done, you wouldn’t even be able to tell.
Let there be light!
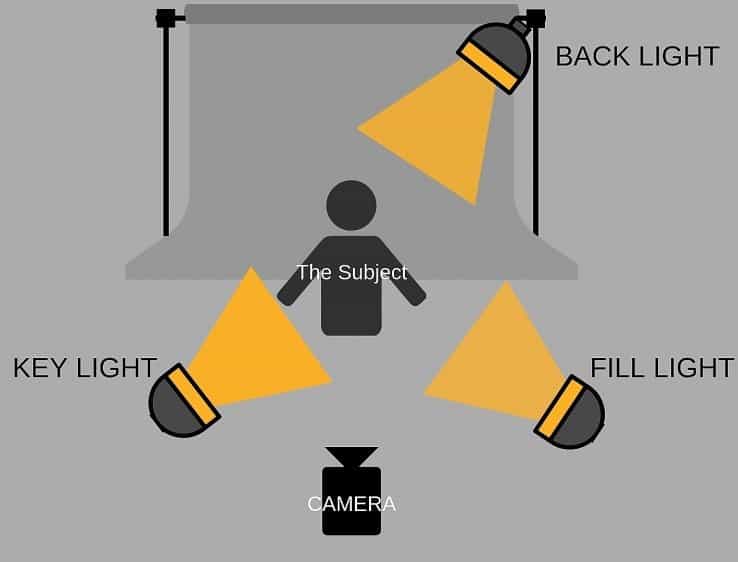
The Three-point lighting system
Okay, now to get a bit more technical; the Three-point lighting is a foundational lighting technique that you can learn to master over time. However, its easy and anyone can learn how to do it.
The Key Light
The first and most important source of light used in photography and cinematography, the key light illuminates the subject.
The key is normally the most intense light and is used to highlight the dimension and form of the subject in 3-point lighting.
Typically, the key is the first light and most important light in the screenshot.
By lighting your subject at an angle you’re providing a 3D appearance, whereas lighting placed in front of your subject will make them appear more flat.
The Fill Light
If your goal is a more natural look rather than style, then you’ll need a fill light.
While the key light is the primary source of light on your subject, the fill light is what is used to control the shadows on your subject’s face. The fill provides balance to the key light by filling in the rest of the subject’s face with light that is softer and less bright than the key.
The fill light is the secondary light source for your screenshot opposite your key light. The fill light softens and extends the illumination provided by the key light.
The Backlight
The backlight creates a glowing rim of light around your subject’s head and frame by illuminating it from the back.
This light is placed behind and above your subject’s head and helps to visually separate it from the background.
Some people shy away from using a backlight as people don’t walk around with a halo on their head. However, I love using backlights as I love the final product.
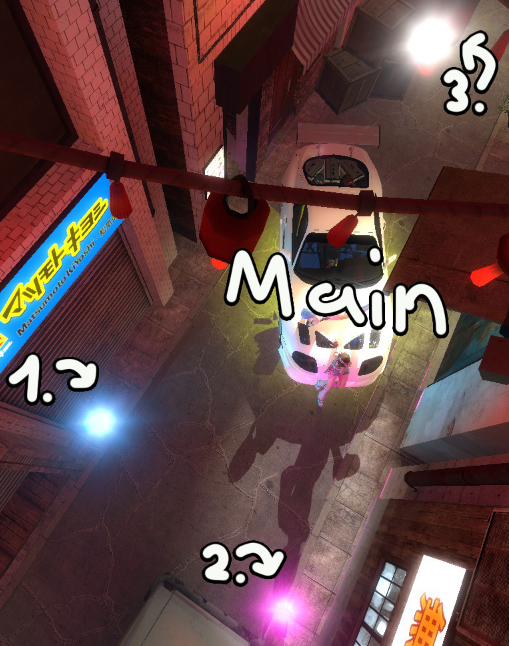
Example:
Fill your scene.
You have unlimited budget
Well, unless your PC can’t handle the ammount of entities on screen 🙂
Your scene can look bleak or boring without any entities / props / ragdolls to decorate it
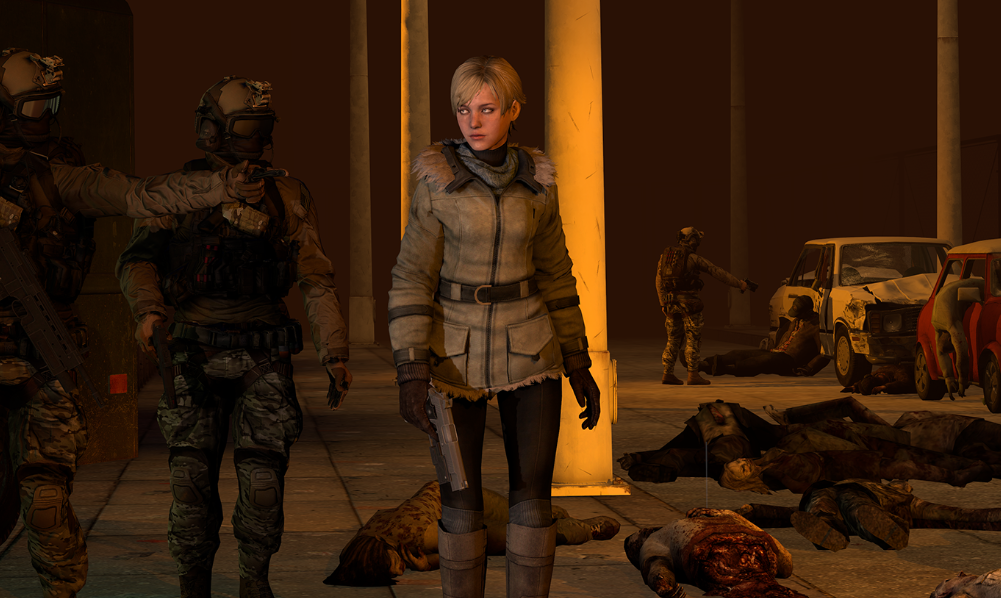
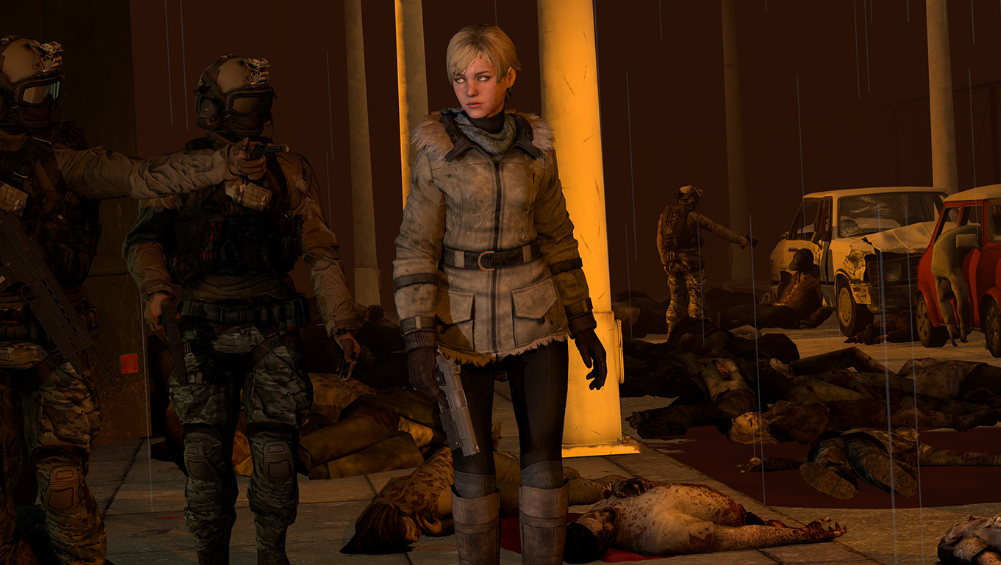
In this scene, I was wondering if I was done or not. Most of the time you won’t notice just how empty a space is until you’ve filled it.
This was the original ‘finished’ scene I had in mind until I started looking closer and seeing more empty space that could be filled.
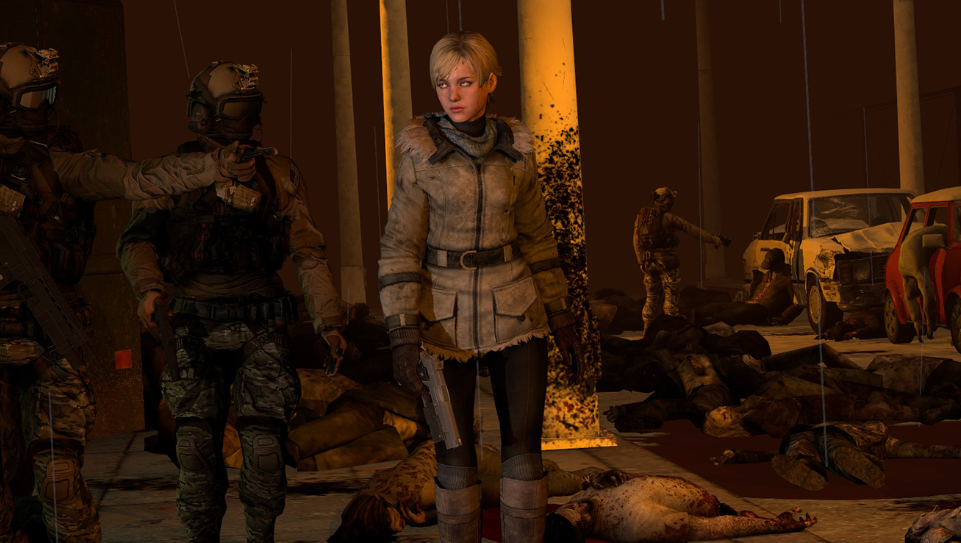
I added more zombie corpses from L4D2 to make it appear like Sherry and her team have been killing a lot more zombies than previously. What I think is pretty cool about this is that you can basically give every scene some sort of backstory, or think about how the characters portrayed in it even got to the point they are in right now.
Staying faithful to the backstory I made up in my mind, I dirtied Sherry’s clothing and added blood decals around the scene to add to the realism (just like in the image above this one).
Done? Good.
So, you’re happy with how your scene looks like. You set up a great camera angle, added really good looking lighting, filled the scene with many props and made it looks naturalistic. Now we’re ready to take the shot:
This method I’m about to show you is not very professional and is rather unorthodox but It has worked for me just fine and I have always gotten the results I’ve wanted. No complaining from me.
In order for Garry’s Mod to render your shot in 4K, you want to enter “poster 2” in your console, meaning 2 times the resolution you’re using at the moment.
After you’ve done that, the console will tell you that it worked.
Make sure to also take a normal screenshot by pressing F12, this is important for later.
Leaving Gmod
Now we’re going to close Steam completely (IMPORTANT) and navigate to our two screenshot folder
Your low-res image that you took with F12 is going to be at:
C:\Program Files (x86)\Steam\userdata\253846117\760\remote\4000\screenshots
Your high-res image that you took with poster 2 is going to be at:
C:\Program Files (x86)\Steam\steamapps\common\GarrysMod\garrysmod\screenshots
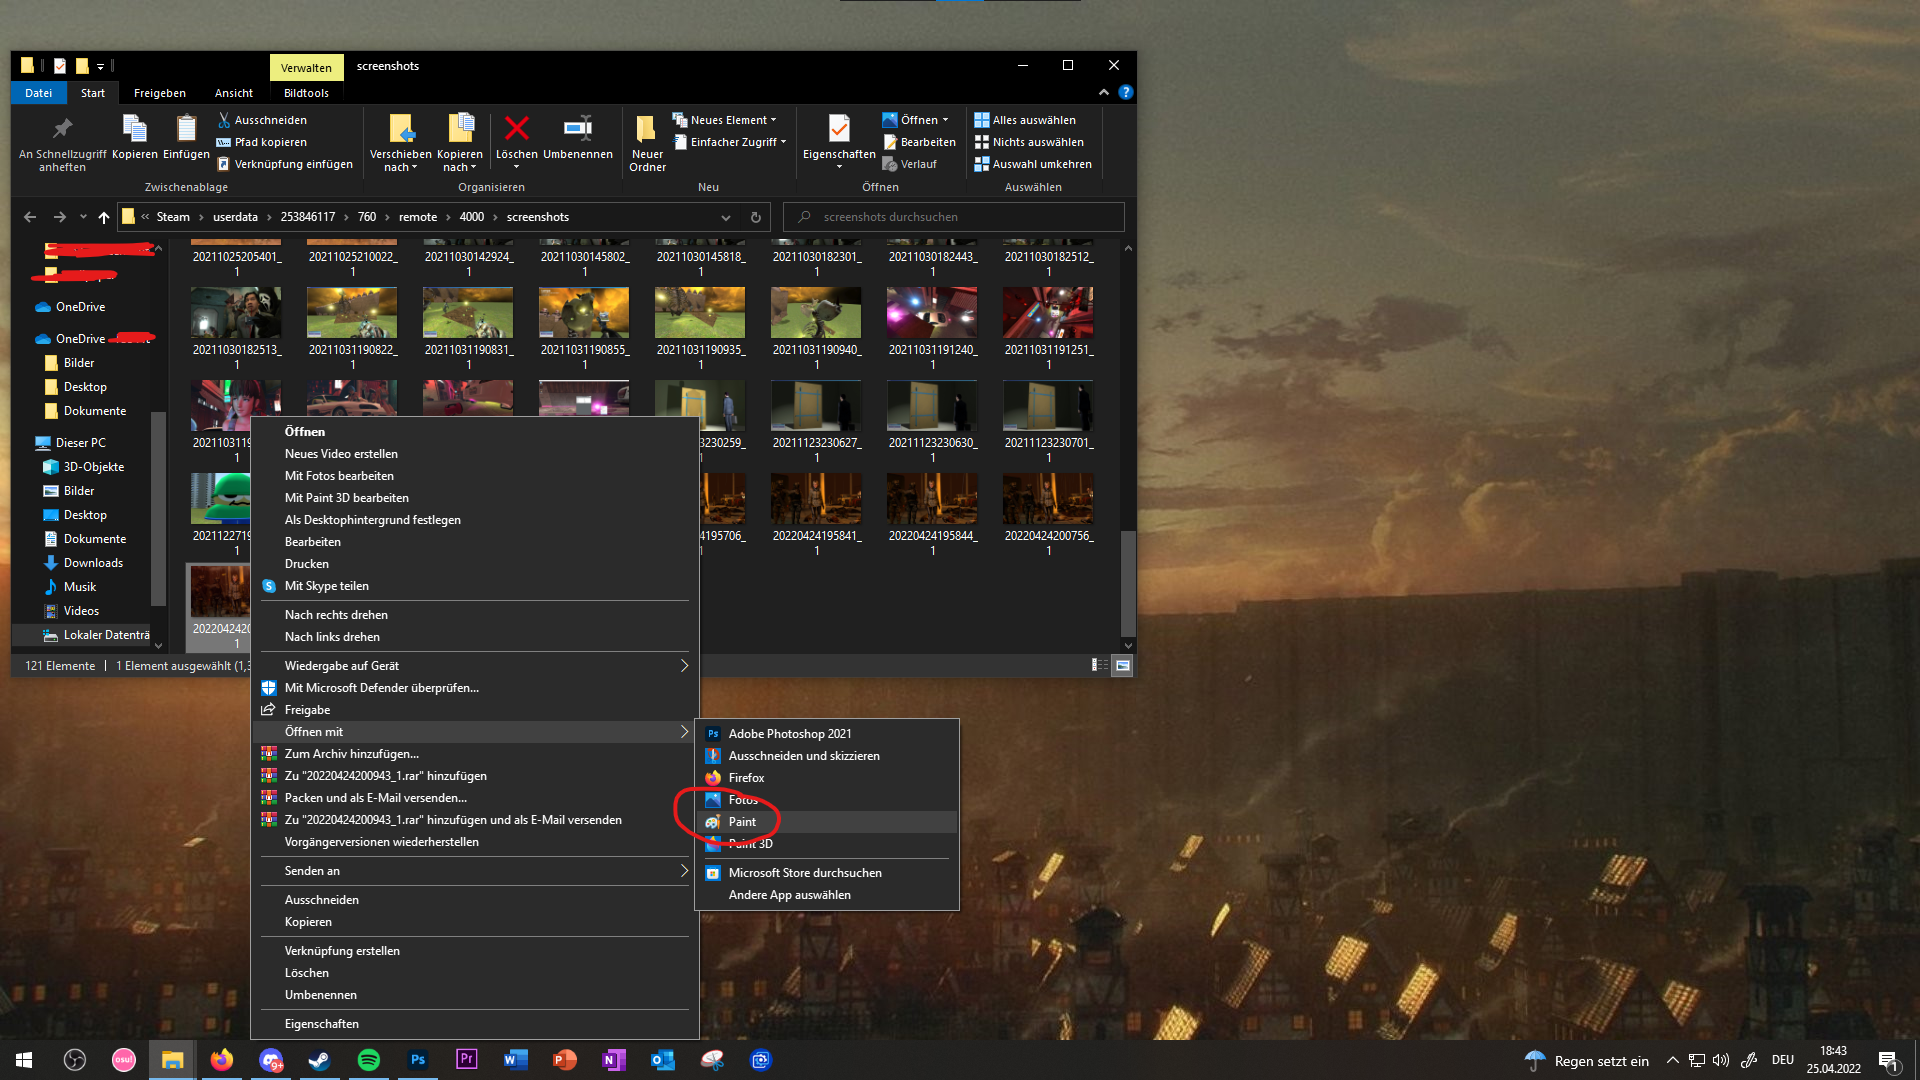
Now we’re going to navigate to the high-res image and open it in paint:
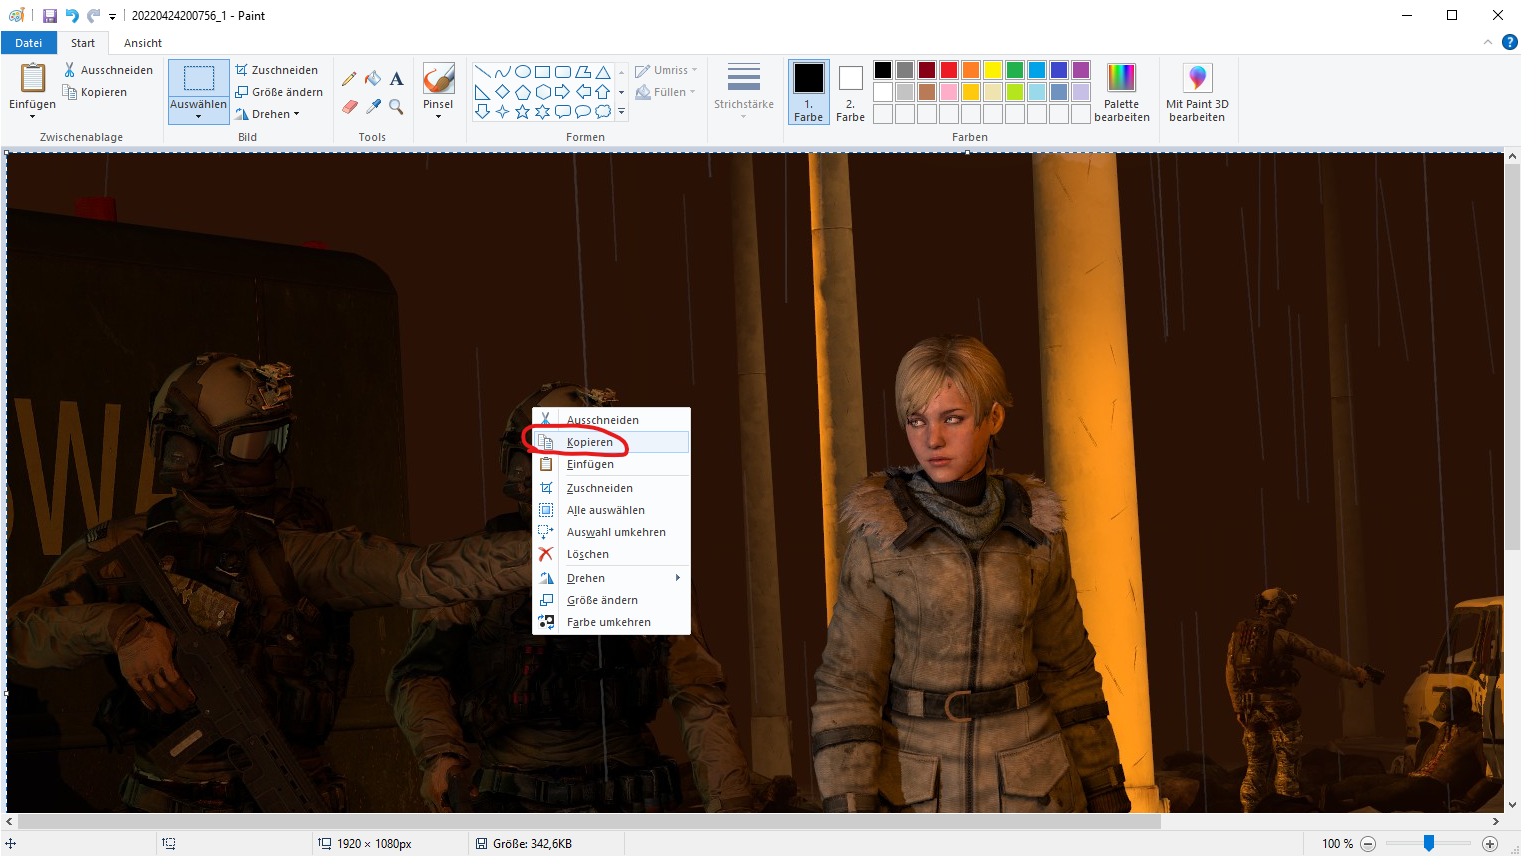
In paint, press Ctrl + A or right click copy to select the image and then Ctrl + C to copy it:
Close paint and navigate to the low-res image you took in the other folder. Open that image with paint aswell but instead of copying it, you’re going to press Ctrl + V to paste your high-res image over it. After you have done that, you can save it and close paint.
Starting up Steam
Start Steam again and go to your screenshots where you’re going to see you’re newly pasted image. Proceed to upload it with the caption of your liking. You won’t instantly notice a difference in quality, but once you open the image in original and zoom in, you will be able to tell just how much higher the resolution is.
Hope you enjoy the post for Garry’s Mod Quick and easy tips for beginners / intermediates to try out good-looking Artwork, If you think we should update the post or something is wrong please let us know via comment and we will fix it how fast as possible! Thank you and have a great day!
- Check All Garry's Mod Posts List


Leave a Reply