
It is no secret that the driller struggles the most with the majority of the mechanical enemies in the game. This build is tailored to eliminating robots with extreme prejudice, making the driller one of if not the strongest class for search and destroy missions or rival presence warnings.
Overview
It is no secret that the driller struggles the most with the majority of the mechanical enemies in the game. this build aims to help alleviate these struggles, without compromising the driller’s ability to deal with non-robotic threats.
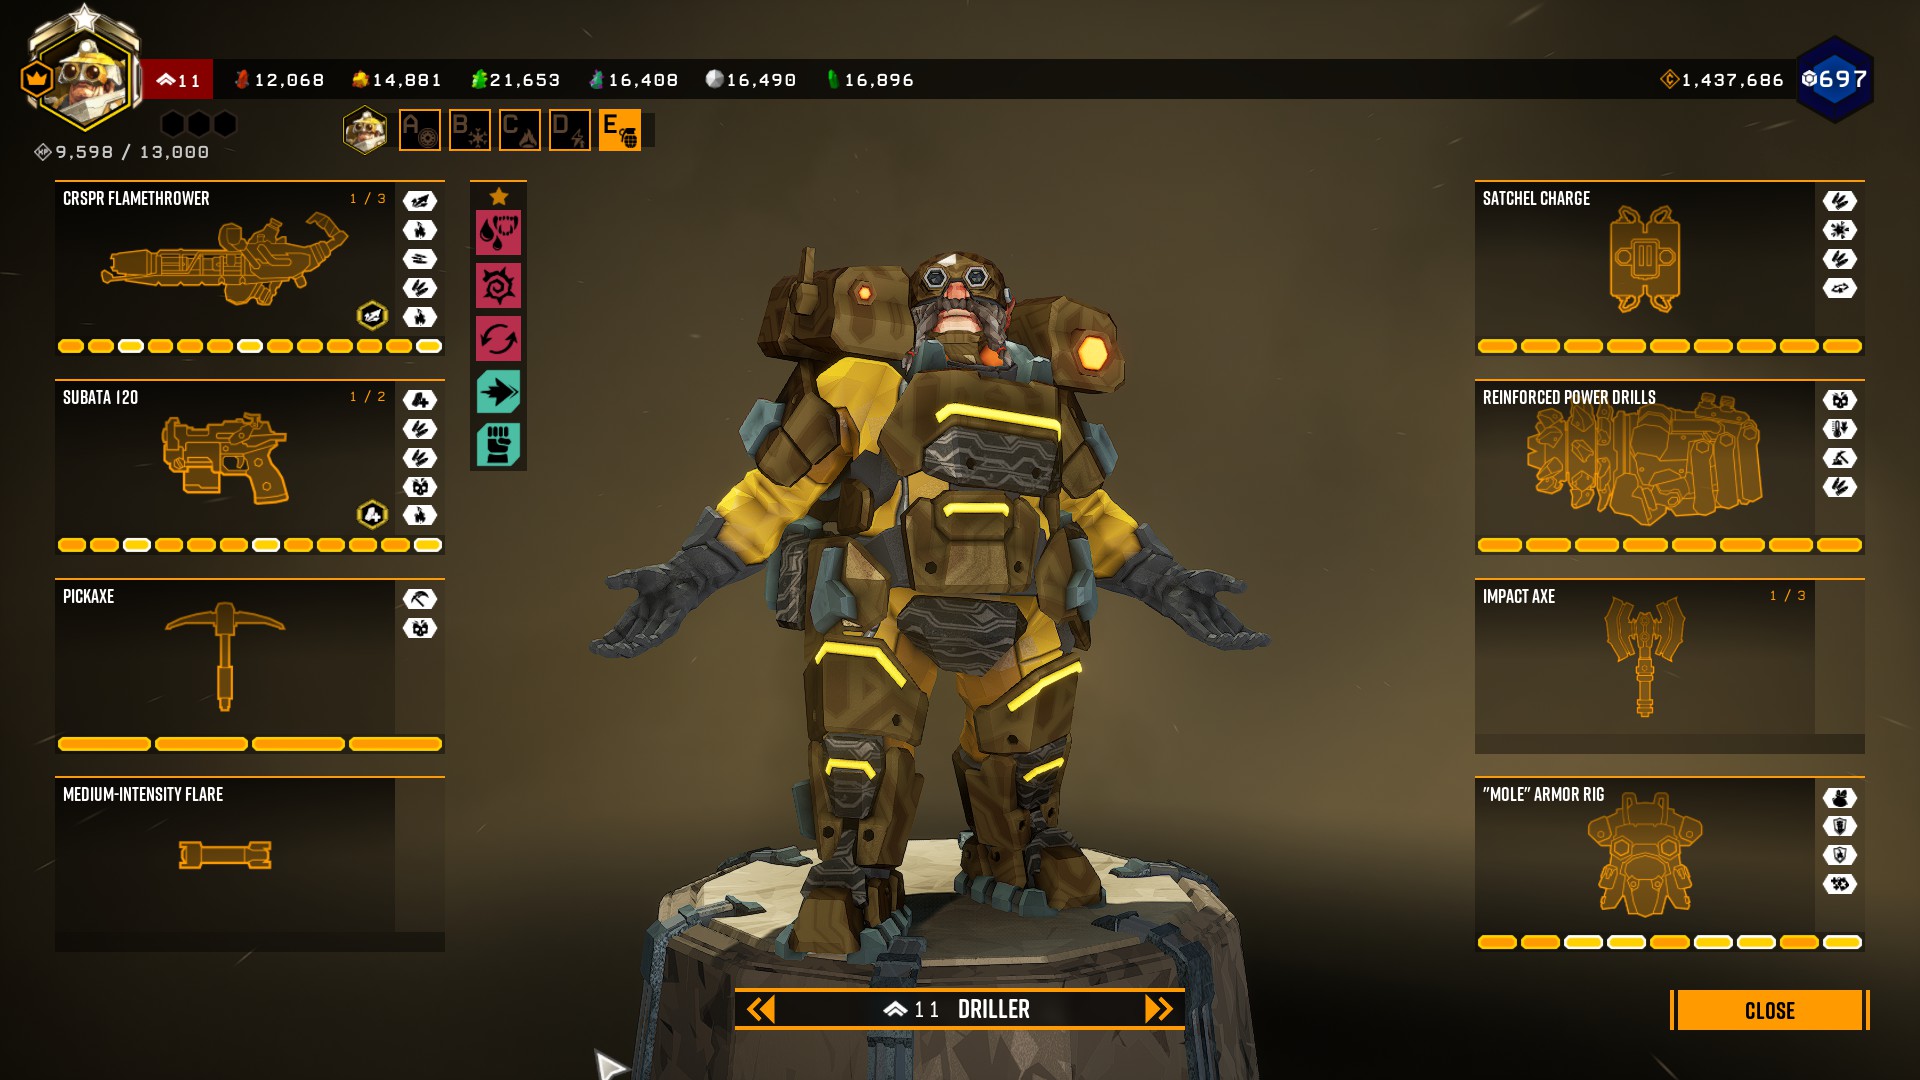
In addition to weapon terminal screenshots this guide uses strings of numbers for weapon builds, in the format (12321). This is what most of the DRG community uses when discussing builds, and makes communicating them over chat much easier. the number’s position in the string refers to what tier of modification, while the value represents which mod within the tier is selected, left to right. (12321) would correspond to the leftmost mod in tier 1, the middle mod in tier 2, and the rightmost mod in tier 3. with the 4th tier mod in the middle again and the leftmost for tier 5.
If a choice of mods is conveyed as ambiguous or up to the player in a tier, a star * is placed in that tier’s position in the string. (123*1) indicates that tier 4 is any of the available mods.
This build is also available on karl.gg for easy reference, or if long numerical rambles are not your thing: https://karl.gg/preview/9872#/ – [karl.gg]
This build primarily exploits the effect heat has on nearly every robot in the game; they explode and die instantly when they reach their ignition temperature, Only the caretaker’s main body (but not its arms) and the prospector drone are unaffected by this, due to their immunity to fire damage.
Additionally, the ignition temperature for all* the (non-immune) robots is 100 degrees or lower, making them as easy to ignite as a praetorian. Unfortunately while praetorians are big, slow, and easy to hit or lead into sticky flames, robots are not; using shields, ranged attacks, and sporadic flying movements to avoid or nullify all then things that make the driller good against things like a praetorian.
*the nemesis has a much higher and as of writing unknown burn temperature, however it will still explode when its limit is reached.
The flamethrower in this build is tailored to robot destruction; the other weapons are built for everything else, with one or two adaptations for helping against robots.
The Flamethrower
The flamethrower for this build is based around 2 key ideas: reaching far away enemies, and quickly lighting things on fire.

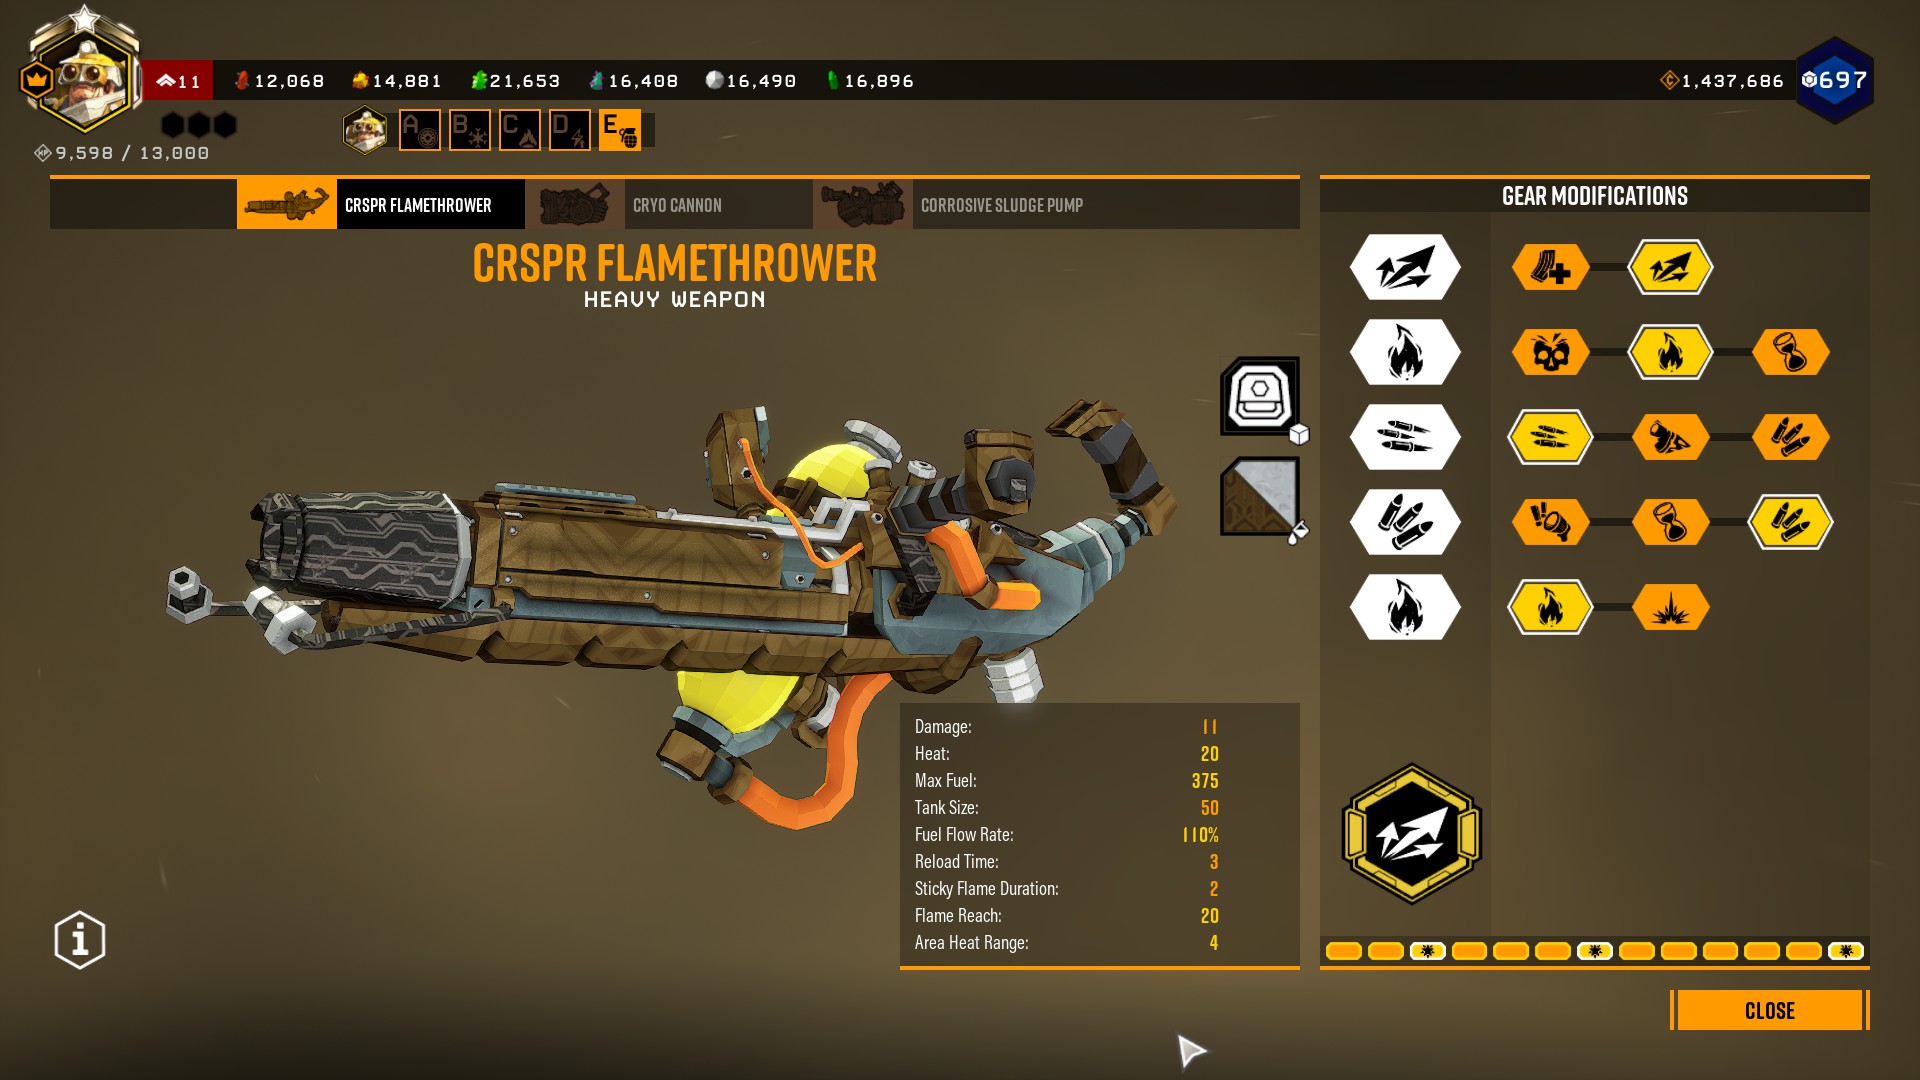
The mod configuration I chose to facilitate these ideas is 22131
T1: High pressure Ejector;
This in conjunction with the chosen overclock doubles the flamethrowers effective range, allowing it to reach and ignite all but the most secluded sniper turrets.
While a higher capacity tank would be nice, as running out of capacity and being forced to reload when your target is nearly ignited is never a good feeling, this can be mitigated by good tank management.T2: Triple Filtered Fuel;
The keystone mod of the build, this doubles how much heat direct flames build up on their target. Crucial, as this means halving the required time spent tracking the patrol bot which has decided to take up aerial ballet.
Direct damage is less important for this build, as nearly every enemy will be dying from lighting on fire rather than running out of health.Sticky flames are good against turrets, but are completely useless against patrol bots and shredders.T3: Oversized Valves;
Faster flow rate means more flame particles exerting their heat on the target which leads to faster ignition times. this mod also more than compensates for the reduced flow rate introduced by the overclock, leaving a flamethrower with a 10% faster fire rate.
More Fuel is always welcome in any build, but we can take it in the next tier. Sticky flame slowdown is completely useless against robots; they are either immobile already, or fly, and therefore won’t be in contact with the sticky flames for more than an instant.T4: More Fuel;
This pick is more of a “what is the least bad” mod in the tier. Ammunition is always useful, and taking at least 1 ammo mod on any build ups its reliability quite a bit.
Sticky flames duration is of little utility for the same reasons as in tier 2, and robots don’t feel fear, that’s reserved for those of use with flesh.T5: Heat Radiance;
A must take for nearly every flamethrower build. the heat buildup on this is incredible, and it stacks with any heat being applied by direct flames as well. This allows for ammo conservation by getting close to a turret before shooting it, or strafing around one turret while shooting another 20 meters away and getting a 2 for one deal. fun fact; shredders circle within 3-4 meters, and ignite nearly instantly when heat radiance is up.
The explosions created by the other mod have a very small range and are inconsistent to trigger, making it very unreliable outside of direct damage builds, such as this one.
The Subata
While the subata is generally seen as inferior compared to the other driller secondaries, it has many useful qualities that compliment the flamethrower build in this guide, which are hard to come by in the other secondary weapons.
The subata is the only weapon driller has which can reliably benefit from weakpoint damage, which is essential against the fire immune robots. It even comes with a 20% weakpoint damage bonus baked in.

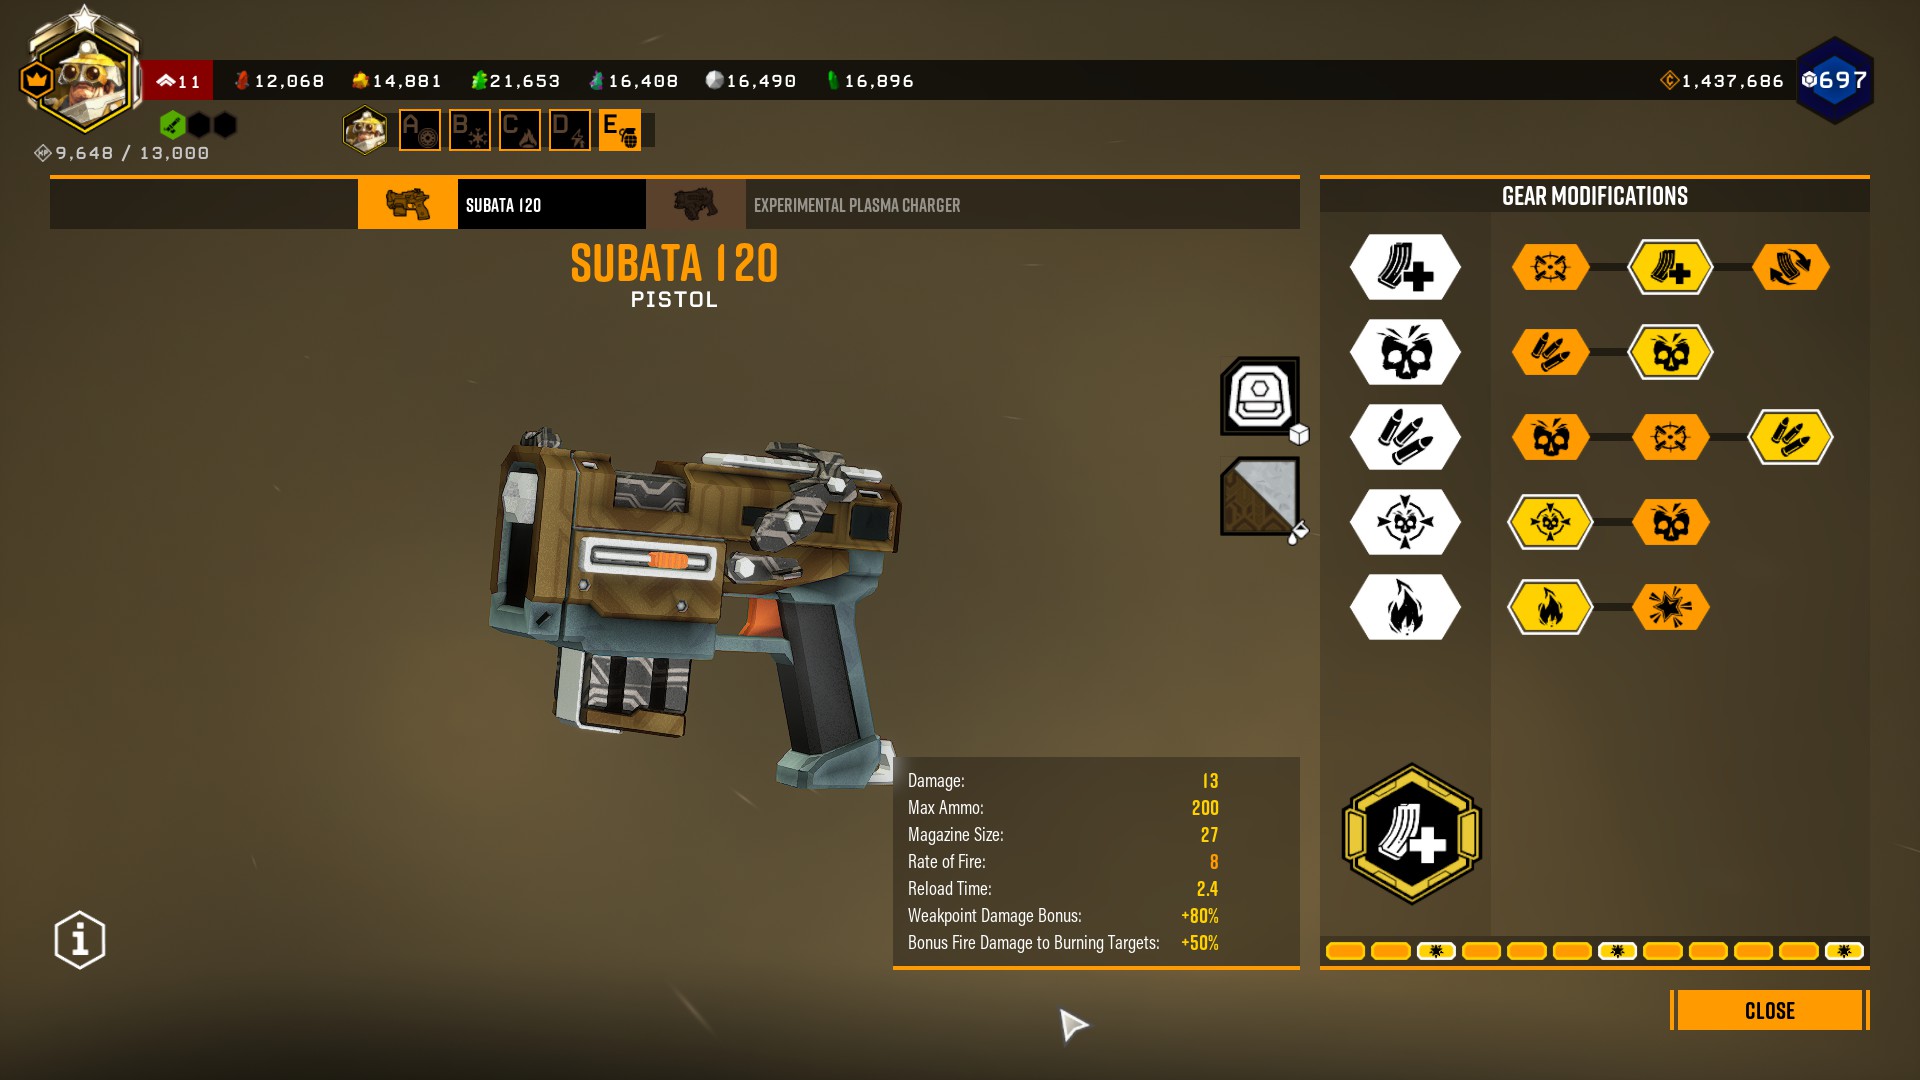
The weapon mod build I gravitate towards is 22311, but realistically and variation of 2*3*1 works incredibly well.
T1: High Capacity Magazine;
In combination with the overclock this mod more than doubles the magazine capacity of the gun, making it surprisingly comparable to the scout’s Deepcore GK2.
The “pin point” accuracy of improved alignment is theoretically helpful, but does nothing when moving about, and is really only noticeable when shooting extreme (30m+) distances, as the base gun already has excellent accuracy. The faster reloading mod is only marginally useful when animation cancelling, and completely useless when using born ready.T2: Increased Caliber Rounds;
While +1 damage does not seem like much, over 27 bullets against targets with other multipliers in play such as volatile bullets and weakpoint damage it can be substantial.
The base weapon already has a solid amount of ammunition, but more is never unwelcome.T3: Expanded Ammo Bags;
Same as tier 2, but this time with a third option! unfortunately any utility with the recoil compensator is only found when running full auto, as the base gun has very little recoil and a fast spread recovery already when tap fired. Seeing as this tier is functionally another T2, taking the opposite of whatever was chosen there is generally the best idea for any well balanced sidearm.T4: Hollow-Point Bullets;
While the extra 3 damage is very tempting, the subata will primarily be used against targets with easy to hit weakpoints, making hollow point overall more useful. One notable exception however is sniper turrets, as they have no weakpoints, and can be positioned outside of flamethrower range. Thankfully with the greatly extended range on the flamethrower in this build, completely unreachable snipers are few and far between.T5: Volitile Bullets;
The extra damage v burning enemies is useless against robots, however it provides potent burst damage against every other type of enemy. the +50% damage alone of volatile bullets is far superior to the +20% damage against mactera, especially considering how easily the flamethrower in this build can ignite flying enemies. Additionally the extra heat volatile bullets applies on hit against burning enemies prevents them from self extinguishing, prolonging the window for landing more shots.
Drills and Satchel Charge
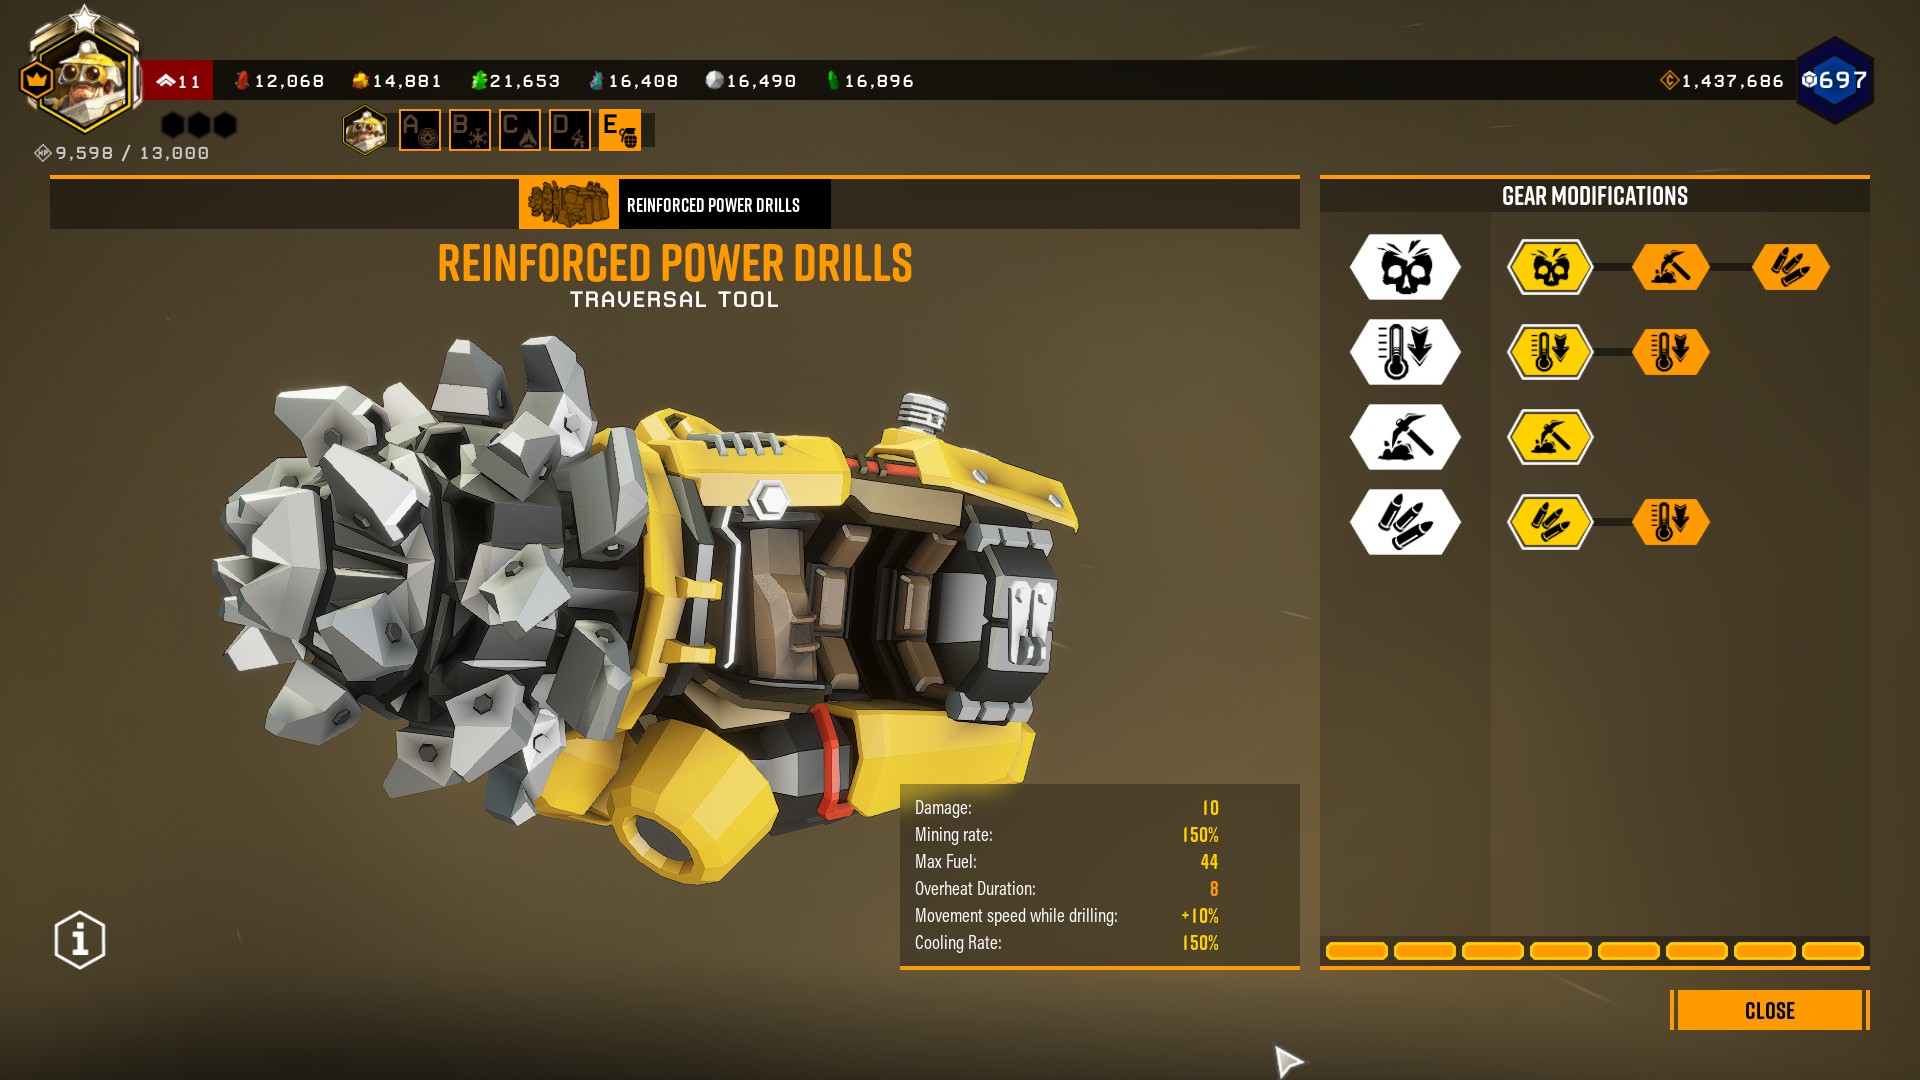
there is not much to be said about the power drills, besides the fact that by taking barbed drills makes shredder drones die is 2 hits rather than 3. but considering how fast drill hits trigger, this is a small optimisation at best. if surrounded by shredders, take out the drills and wave about like crazy.
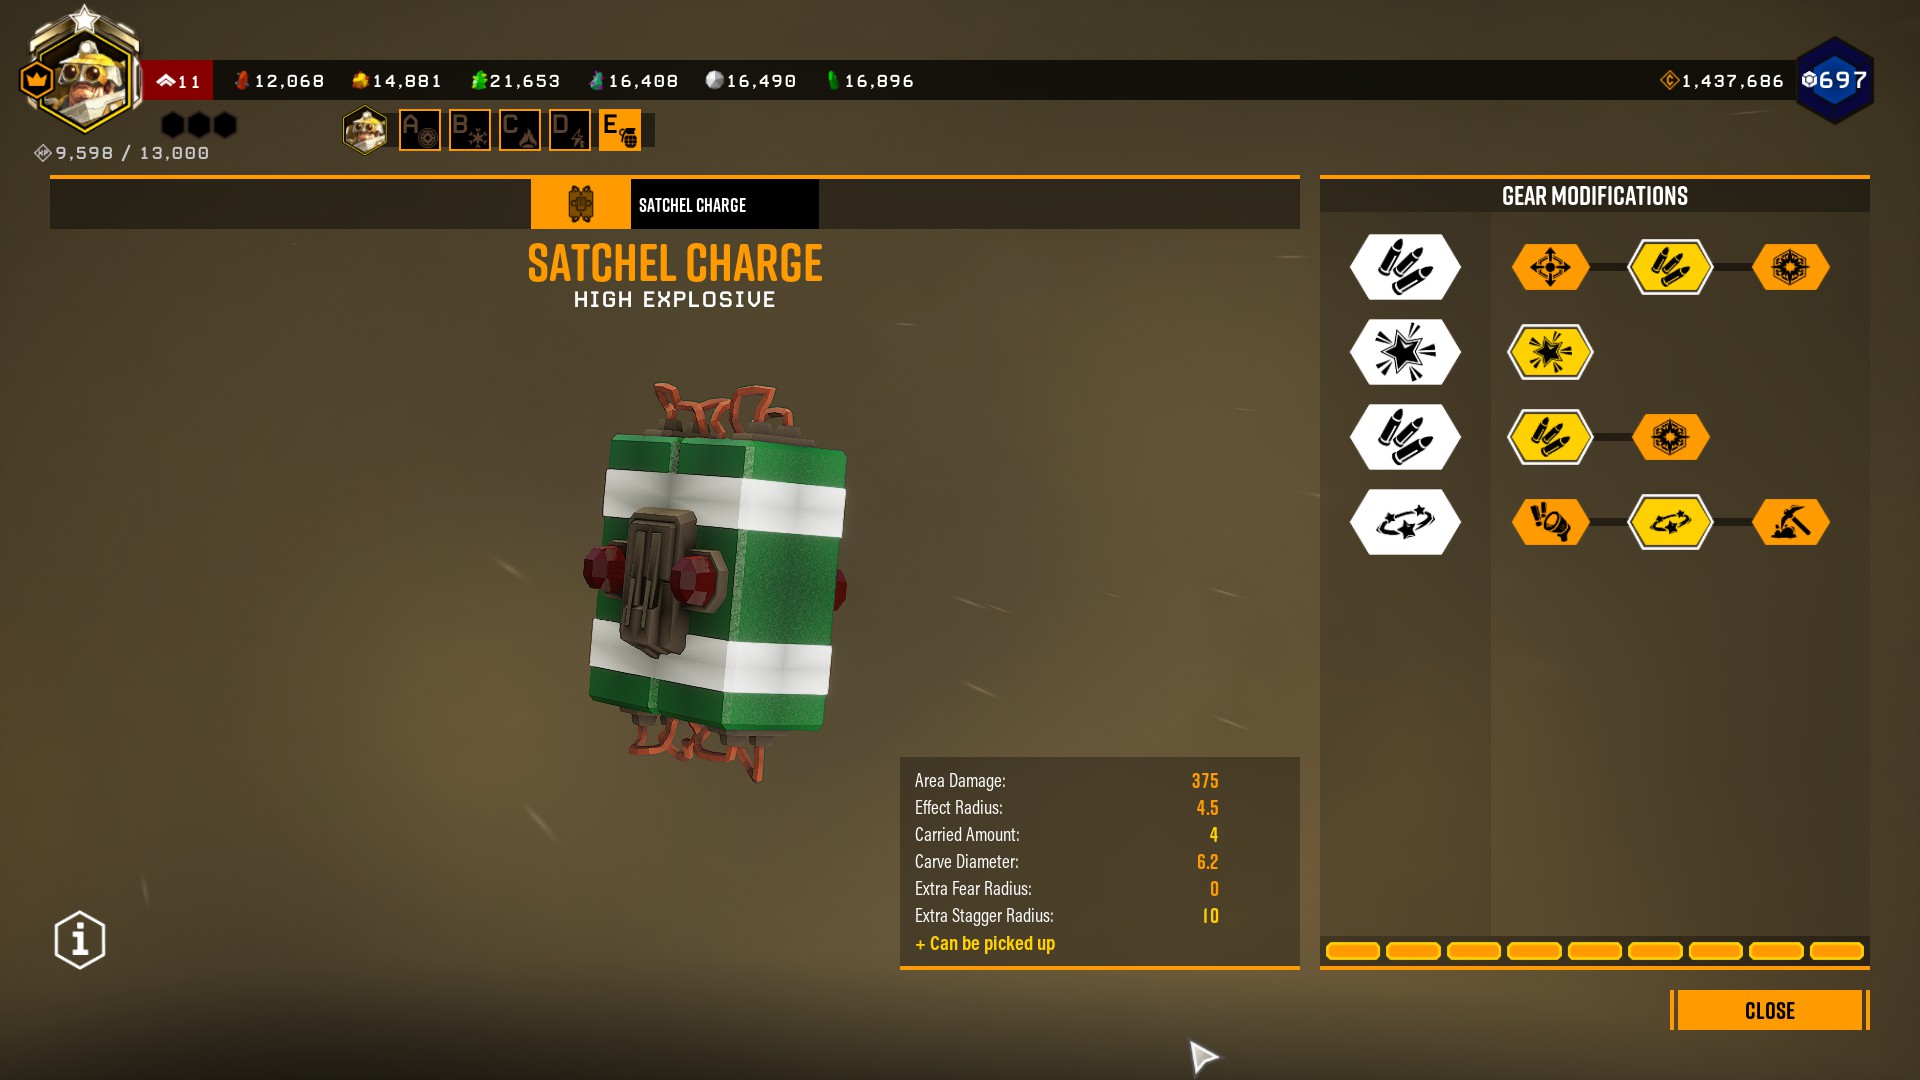
This satchel charge is built for wave clearing, with both ammo mods taken so that 2 satchels are received every resupply, and stun for crowd control. fear would work too, but stun is somewhat more reliable against creature that have a high fear resistance like praetorians.
Other gear (Armour, Grenades, Pickaxe, notable Perks)
Armour is completely up to player preference, although I recommend bigger mineral bags, healthy, fire resistance, and breathing room. (3213)
the driller has one spectacular grenade slot item, one decent, and one less decent option for grenades. this build takes the Impact axe, as robots have a 3x weakness to melee damage, and a 2x weakness to explosive damage, both of which the impact axe provides.
for the pickaxe extra power attack damage is taken, as with the damage bump it can one shot repulsor turrets. extra effect radius may be useful against shredders, but the driller has many other tools for dealing with them. (11)
Perks:
- Born ready is an excellent choice for this build, as it will reload the subata automatically, and with the extended magazine on the secondary, it will often be out and in use long enough to get a free reload on the flamethrower as well.
- Vampire is a good choice for any driller build, especially ones running axes and barbed drills. it will trigger off of robots strangely enough, besides shredders.
- resupplier is nice, as especially in high hazard levels caretaker fights quickly resupplying and getting back out to the fight is difficult, and the extra health gain is very nice.
- Dash is arguably the best active perk on every dwarf save the scout, as the burst of mobility it provides can save a lot of health. it also has a ridiculously low cooldown compared to other active perks.
- Iron will has snatched many a mission from the jaws of defeat, and in combination with vampire and resupplier, the driller has a much easier time than other classes gaining a bit of life and preventing the automatic down when the perk runs out.
Enemies and their breakpoints
All enemies in DRG have an unchanging base health total, and an effective health total which is calculated from the base health and the hazard difficulty of the mission. The HP values included below are all hazard 5 with 4 players, which is what was used for calculating the breakpoints.
Heat resistance and burn temperatures do not scale with hazard level whatsoever.
Robots:
-
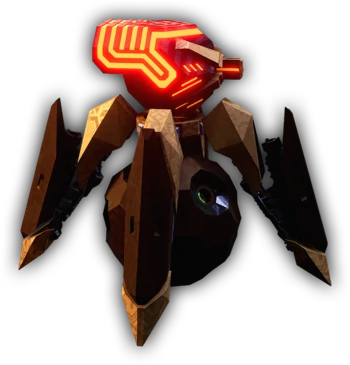
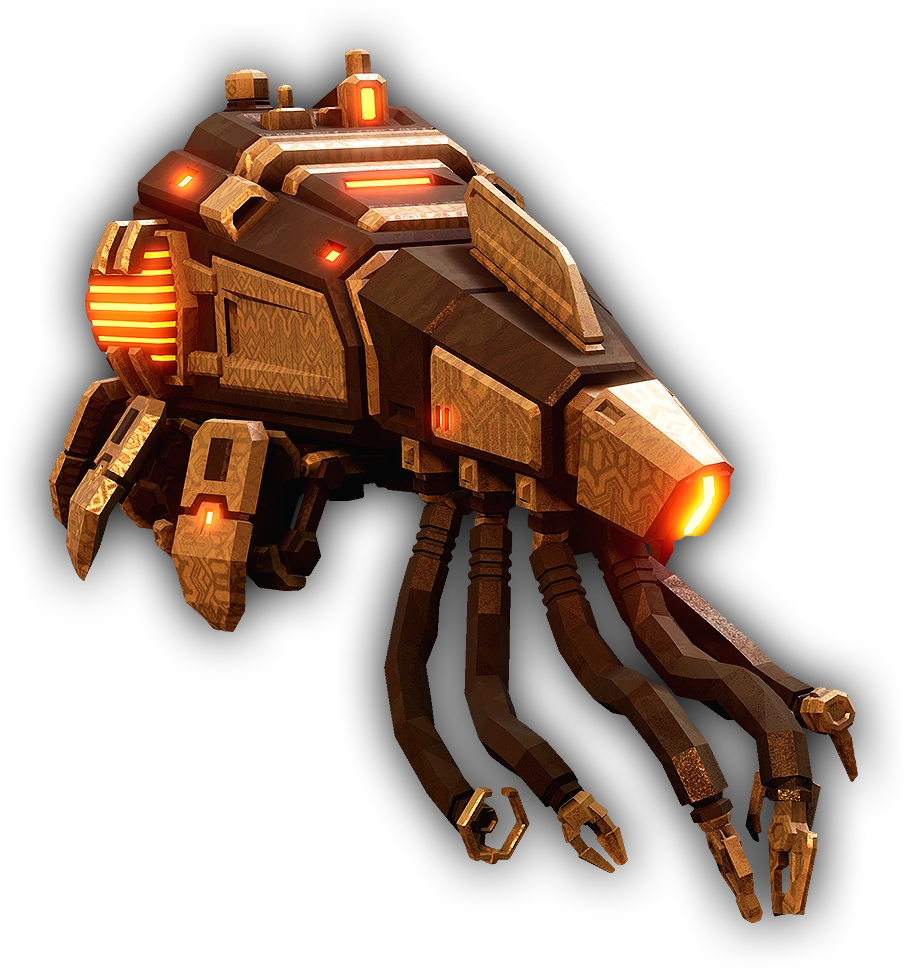
Patrol Bot
1350 EHP, 100 burn Temp.
Despite their absurdly high health and frustrating mobility, patrol bots can be ignited without too much difficulty. Tracking them while they hover slowly is easy with the extended range of the flamethrower, and typically results in a kill by overheat in around 2 seconds, slightly faster if in range of heat radiance. They can be difficult to hit when rolling around, so targeting them first right after they spawn is a high priority. -
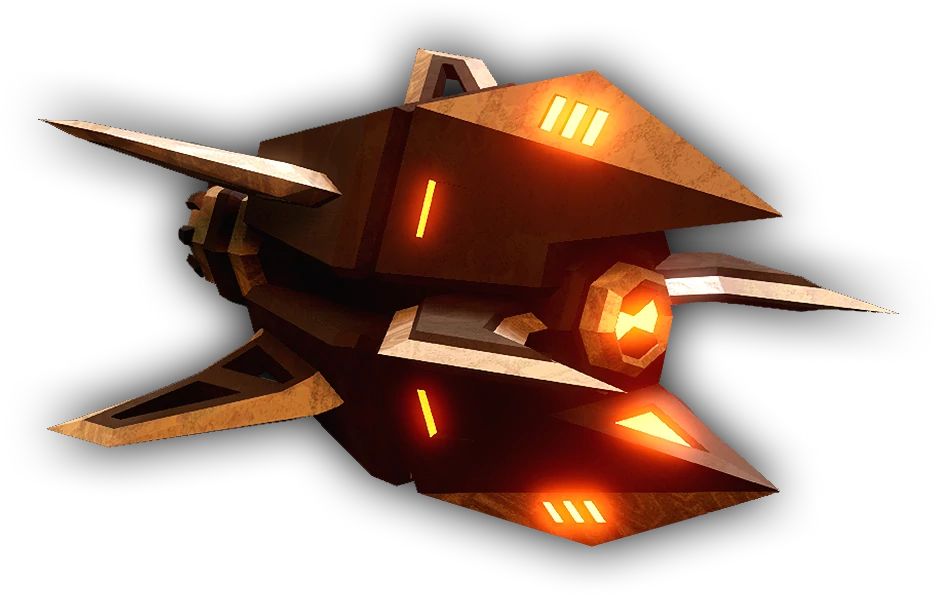
Shredder
42 EHP 30 Burn Temp.
Deceptively resistant to conventional attack, singular shredders can be eliminated at no cost by waiting for them to get close and start spinning for an attack, then hitting them with a single tap from a pickaxe. Swarms are more difficult, but the reinforced power drills can eliminate them in 2 hits, and can hit many shredders in very quick succession. If another, more important target is present however, using the flamethrower against it will proc heat radiance, igniting and killing all nearby shredders. -
Burst Turret
1125 EHP 100 Burn Temp.
These turrets have the same health value as a praetorian, but they burn just as easily too. Then they explode! These turrets are easy to strafe as walking perpendicular to their incoming shots is enough to avoid them at any range. Getting close enough to trigger heat radiance is not hard due to their immobility, and saves a lot of ammunition, but can be risky if there are other enemies nearby. -
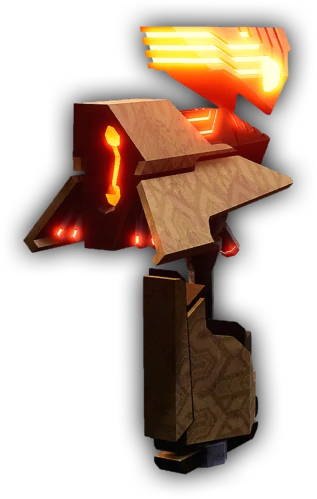
Repulsor Turret
600 EHP 100 Burn Temp.
Much more annoying to deal with, Repulsor turrets will block direct flames periodically with their shields. Their lower health and multitude of weaknesses and weakpoints are exploitable however, any direct hit from a thrown axe will destroy them outright, and arcing an axe over their shields is surprisingly easy. Of course they burn just as fast as everything else too, which is a perfectly acceptable way to deal with them. -
Sniper Turret
360 EHP 50 Burn Temp.
Thanks to the extended range of the flamethrower reaching these has never been easier for the driller. Direct flames will eliminate them long before they can get a shot off, however if they are somehow out of range completely, ducking in and out of cover with the subata will eventually work. -
Caretaker
4125-9350 EHP 999 Burn Temp. (cannot ignite)
The lower listed health value is for solo hazard 5 missions, while the higher is for a full part of 4. When solo, a full resupply pod’s worth of axes and subata ammunition is just barely enough to take out the main body. The subata is best for taking out the vents, while axes provide solid damage to the eyes, 5 axes per phase with the subata making up the difference for the phase change. Ideally with other dwarves present the driller will have to deal a lesser amount to keep up their share of damage to the boss, and can primarily focus on playing wack-a-mole with the arms instead. -
Caretaker Arm
675 EHP ??? Burn Temp.
While the Wiki does not list an ignition temperature for the arms, testing myself with the flamethrower leans towards a burn temperature of 100, just like most of the other robots of similar health values. These appendages can be dealt with similarly to the burst turrets, wither staying at a range or getting up close to their base and firing straight up at their heads to maximise flame particle contact. Additionally due to their lower health, a single power attack to their head is enough to destroy them, so watch carefully; When they stop shooting and put their claws together they are about to lunge, strafe to one side and turn around to deliver a powerattack once their head is stuck in the ground. -
Prospector
5100 EHP 999 Burn Temp. (cannot ignite)
Theoretically killable with just 8 axes due to its melee and explosive vulnerability, the 2 immunity phases it initiates at 2/3rds and 1/3rd health make this impossible in 4-dwarf hazard 4 and 5 missions, despite being easily achievable in any lower hazard, or less populated mission. Opening the fight with a power attack fixes this issue, allowing the driller to solo the prospector while the rest of the team deals with the rest of the mission. If hitting the prospector with axes is proving difficult, the exhaust ports in its sides are 3x weakpoints, and very easy to hit with the subata. -
Nemisis
??? EHP ??? Burn Temp.
It can burn, and it will die when it does so. however without additional heat from another source, it is very hard to ignite when alone. Stay back to avoid its grab attack and poke its weak points with the subata, and it will eventually go down.
while not the main point of the build, I have found some easy to use breakpoints and strategies for other, non-robot creatures as well.
Others:
-
Praetorian
1125 EHP 100 Burn Temp.
The classic punching bag, every high hazard build should have some good answer to this creature. for this one, ignition from the flamethrower followed by a single axe or power attack an entire magazine of subata ammunition in the weakpoint will cleanly eliminate one from full health. The subata does not stun creatures, so saving the axe for after and getting behind it instead while it does its roar will make landing shots much easier. -
Warden
1200 EHP 50 burn Temp.
Exact same strategy as with praetorians, ignite with the flamethrower, axe or power attack, and finish with the subata. but hitting it with the axe right after ignition but before using to subata to stabilise its glowing bauble. A full magazine is hardly necessary if enough shots hit either the bauble or its mouth, as they have 3x and 2x damage multipliers respectively. -
Oppressor
1350 EHP 100 burn Temp.
Again same strategy as with praetorians, ignite then full subata in the weak spot, but this time a power attack is preferable to axes, as the Oppressor’s explosive resistance would necessitate using 2 axes to get the kill. -
More coming soon!
Conclusion
I hope this build could provide some helpful information and strategies as season 2 begins, I hear a lot of griping about the robot enemies in lobbies which is what pushed me to make this guide.
I am still working on formatting, as this is the first steam guide I have ever made, so please let me know how I could improve it, I want to start making more of these with other builds I have designed in the future.
all images are from DRG promotional material, my own in game screenshots, or from the DRG fandom wiki.
Rock and Stone!
This is all for Deep Rock Galactic Driller Build Overview hope you enjoy the post. If you believe we forget or we should update the post please let us know via comment, we will try our best to fix how fast is possible! Have a great day!
- Check All Deep Rock Galactic Posts List



 T1: High pressure Ejector;
 T2: Triple Filtered Fuel;
 T3: Oversized Valves;
 T4: More Fuel;
 T1: High Capacity Magazine;
 T2: Increased Caliber Rounds;
 T4: Hollow-Point Bullets;



Leave a Reply