Experiencing micro stutter in Dead Space 2 after forcing vsync through your GPU control panel? This guide aims to solve the micro stutter issue while also introducing a vsync solution for those who hate screen tearing!
Introduction
Like many people, I have disabled the in-game vsync in Dead Space 2 and forced it through my GPU control panel. Unlike many people, I’m pretty sensitive to micro stutter, and if you are too, you’ve probably noticed that the game stutters in certain areas and certain rooms. I’ve tried a multitude of fixes, including: forcing vsync through the GPU control panel, forcing fast sync through the GPU control panel + enforcing a frame rate limit of 120 FPS (2x my current monitor refresh rate), and setting core affinity. None of them work for me. Until finally I found a fix using GeDoSaTo. This pretty much completely mitigates the micro stutter.
Required Downloads
You’re going to need GeDoSaTo, which you can download here:
https://github.com/PeterTh/gedosato – [github.com]
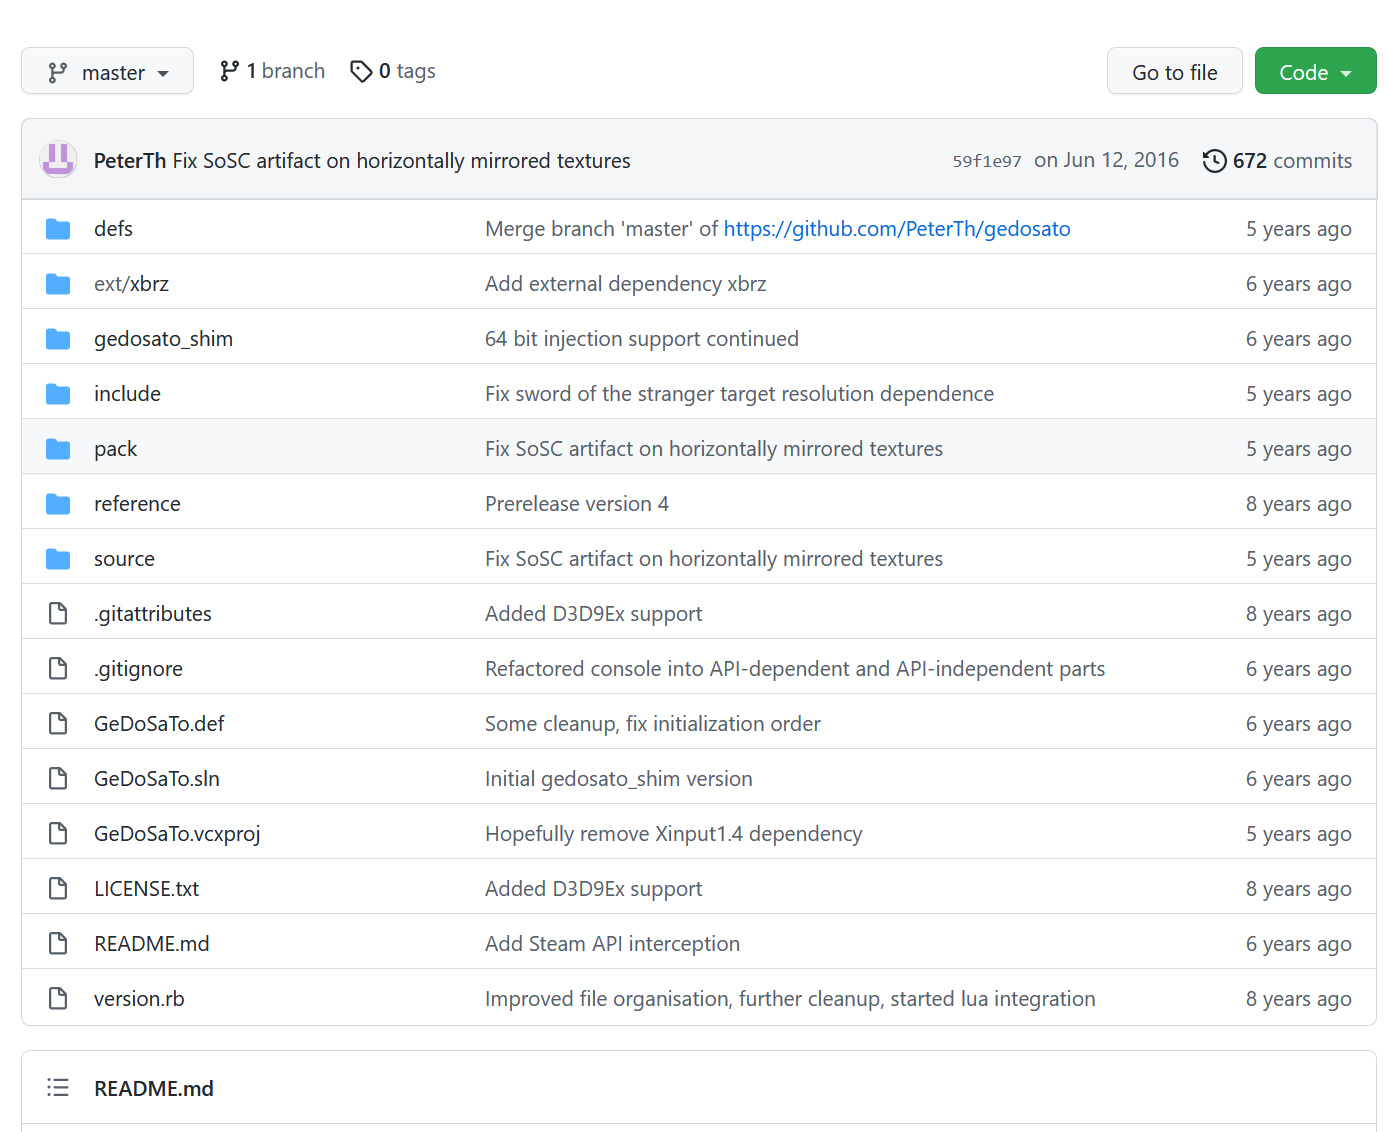
To download the tool, click the green “Code” button shown below and select “Download ZIP.”
Setting Up GeDoSaTo
- If you previously forced vsync/fast sync in your GPU control panel, make sure to return that option to its default setting (“use the 3D application setting,” typically).
- Create a folder that you can easily find on your computer. You can name it anything you like, this is where your installation of GeDoSaTo will be, so you might want to name it after the tool.
- Open GeDoSaTo ZIP, open gedosato-master, then copy the folder labeled “pack,” this is the only one you’ll need. Copy the “pack” folder to the folder you created in Step 2. You can now delete the ZIP file.
- In the newly extracted pack folder, you’ll find “GeDoSaToTool.exe,” double click this to open it. If it asks you for permission, say yes.
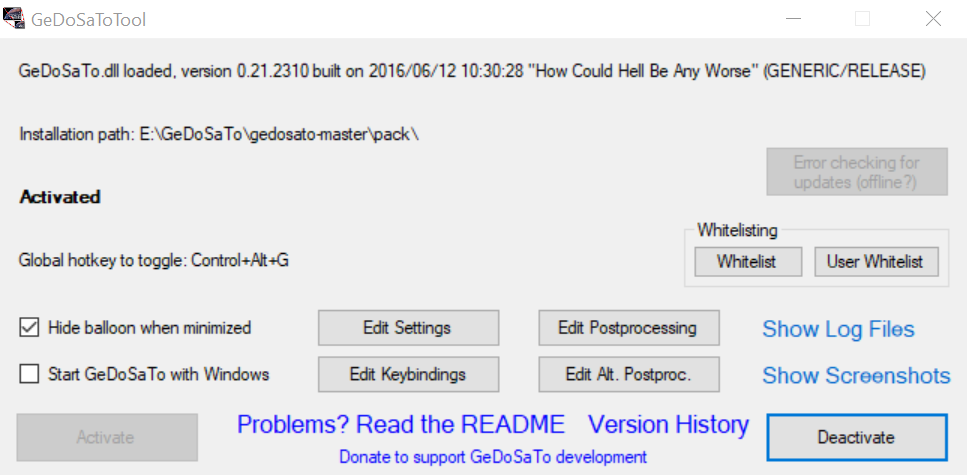
- The tool should now open and the “Activate” button should be greyed out, as shown below, indicating that the program is active. If it isn’t, click to activate the program.
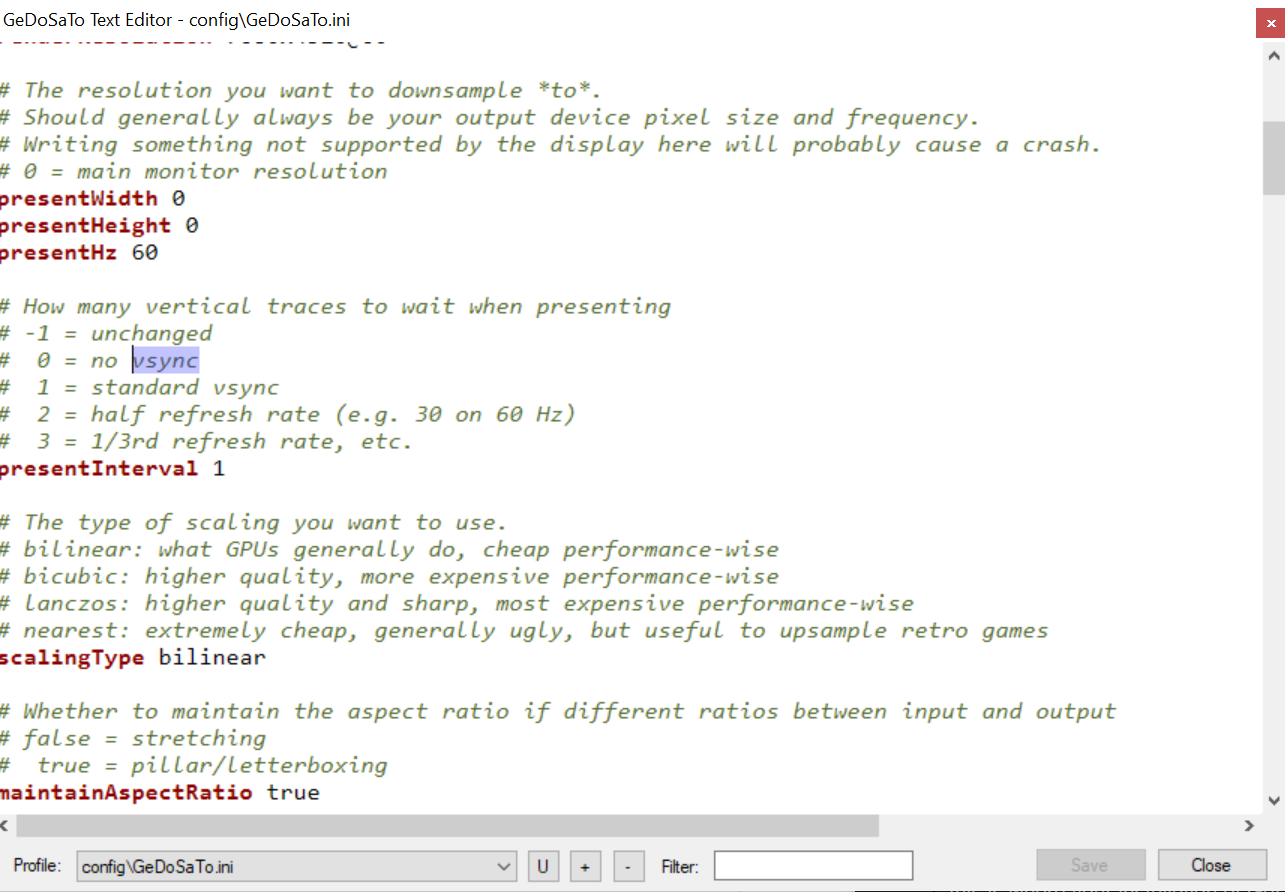
- Now click the “Edit Settings” button, and it’ll open up a secondary window. Navigate to vsync (you can find by using CTRL + F to search) and change “presentInterval” to 1 as shown below:
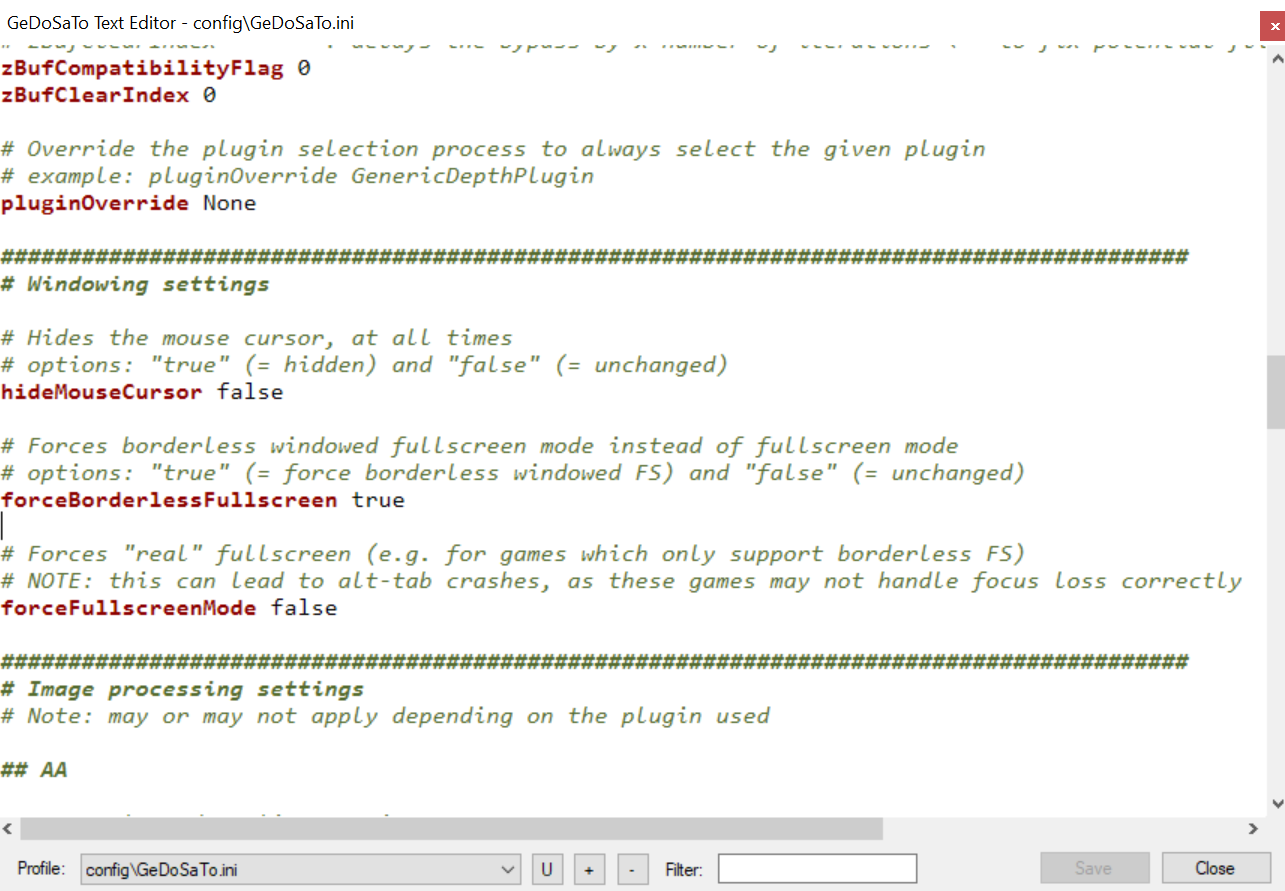
- Now, search for “forceBorderlessFullscreen” and change it to true, as shown below:
Note that if you choose not to do this, you may still experience the stutter, or worse, frame rate drops. Doing this will also disable the in-game brightness slider, but if your monitor is decently calibrated, this shouldn’t really be an issue. - Click Save, then Close.
- Make sure to run GeDoSaTo before starting the game each time you play, it must be running while you play as well.
You’re Done!
That’s it, enjoy the game! If you have any questions or something doesn’t seem to be working for you, feel free to comment below and let me know.
Here we come to an end for Dead Space 2 How to Fix Micro Stutter & VSYNC – Game Optimization hope you enjoy it. If you think we forget something to include or we should make an update to the post let us know via comment, and we will fix it asap! Thanks and have a great day!
- Check All Dead Space 2 Posts List


Leave a Reply