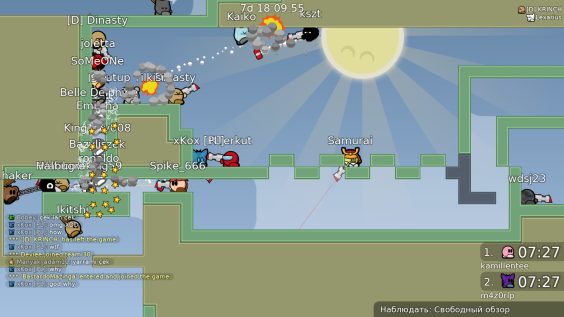
Preamble
The following instructions will guide you through setting up your very own local server to play on.
There are a few bits of information which are essential to running an online server.
You must know how to:
- 1. Port Foward
- 2. Configure server config files
- 3. Navigate your way through your operating system
I’ll try to explain every step throughout the entire guide as clear as possible so you wont get lost.
===========================================================================
Ways of starting the server
Method 1:
The easiest way to start a server is by starting the game and clicking the “Run server” button right at the main menu screen. However, closing the game will also close the server. If you don’t like this then try Method 2.
Method 2:
In order to start a server outside a game instance you have to navigate to your game directory.
On Steam: Right click DDRaceNetwork > Properties > Local Files > Browse…
This should open the ddnet directory. Open the ddnet directory and double click the “DDNet-Server.exe”, which starts the server terminal.
============================================================================
Before starting the server, we should configure the server to your liking which will be explained in the next section.
===========================================================================
Configuration
There is one key file that you can edit & configure before running the server.
The file can be found in your ddnet/data directory and is called autoexec_server.cfg which can be edited manually with Nano, Notepad or any other plain-text editor.
===========================================================================
# Let’s go over the some of the options which you can edit.
# This will edit the server name
sv_name “My DDNet server”
# Password for JOINING the server, leaving this option blank will remove the password
password “Test123”
# RCON (F2) passwords for admin. If you don’t set one, a random one will be created and shown in the terminal window of the server
sv_rcon_password “Test123”
# Map to start the server with
sv_map “Sunny Side Up”
# Register server, this option will make the server accessable for others (which requires port-fowarding) or just for people within the same Network.
sv_register 0
# When an option can be enabled or disabled, it’s enabled with 1, disabled with 0.
# All possible server settings can be found ddnet.tw – https://ddnet.tw/settingscommands/#server-settings
===========================================================================
Port Fowarding for Online play
1. Configure your router
The default port for a ddnet server is 8303 UDP. If you specify an alternate port when creating the server, forward that port instead. You can alter the port in the autoexec_server.cfg with the sv_portoption.
2. (optional)
In same cases you may have to configure your firewall if you run something like a AV software which also has a custom firewall. You will need to set the firewall to allow unsolicited incoming connections for the server. If you are unsure how to do this, please refer to the manual or contact the support provider for your firewall software, or (not recommended) temporarily disable your firewall for the duration that you host the server.
3.
Start the game and create a local server (after you’re done configuring the autoexec_server.cfg)
===========================================================================
Joining the server
Players or yourself wishing to join the newly created server may do so in multiple ways:
- Joining by directly inputting a public IP and port into server address bar and then connect. (If the server is set to public)
- Typing localhost into the server address bar and then connect (Yourself only)
- Selecting the server from the LAN Tab.
Easiest method, using the LAN Tab:
If you have friends on the same network as you or you’re running the server from the same machine, you may join the server via the LAN Tab.
Joining by using the public ip address:
To join by IP, you will need to know your own personal public IP. You can find your own public ip address by googling services like http://www.whatismyip.com. After acquiring the IP, simply click play and type in your public ip address and server port into the server address bar down at the button, then click connect. If the server has been set up correctly to accept public connections, you should be able to join the game.
Localhost method: (Yourself only)
Similar to the public ip method, you use “Localhost” as the address and then click connect.
===========================================================================
Managing your server
You can manage your server by using the admin password to login to the server using the rcon console (F2). If you didn’t set a default rcon password in the autoexec_server.cfg, a random one will be created and shown in the terminal window of the server.
The generated password shown in the terminal will look similar to this:
+—————————+
| rcon password: ‘GZ8a4V’ |
+—————————+
You can set the Admin/Moderator/Helper rcon password in the autoexec_server.cfg.
All available server/rcon commands can be found ddnet.tw – https://ddnet.tw/settingscommands/#server-commands
===========================================================================
Q&A – Questions and Answers
- Q: I still didn’t manage to create a server, is there an alternative?
A: If this doesn’t work out for you, then I’d advice you to use the Trashmap servers which tamikro provides. Visit forum.ddnet.tw – https://trashmap.ddnet.tw/
Then join our discord.gg – https://discord.gg/22sqGcB and read through the information given in channel: discord.com – https://discord.com/channels/252358080522747904/455392314173554688/458735596588892160
===========================================================================
Closure
That’s about it. If there is something missing or still way to confusing, write a comment down below.
I’ll try to help you as best as I can. Also, I’ll add more Q&A points to the guide on a later date.
Thanks for reading ❤️
===========================================================================
This is all for DDraceNetwork How to create your own server (Local/Online) hope you enjoy the post. If you believe we forget or we should update the post please let us know via comment, we will try our best to fix how fast is possible! Have a great day!
- Check All DDraceNetwork Posts List


Leave a Reply