Introduction
Why?
> I’ve seen a lot of people complaining about a lack of a detailed tutorial concerning the various blocks and tools, so I’ve taken it upon myself to try and help alleviate the issue with this guide.
Who?
> This guide will be directed at beginner players to Besiege, not new gamers or advanced players. I will be assuming that you have played video games before and have a basic idea of how a video game conveys ideas and directs you through the game, meaning that I will skip explaining what the game means when it says “activate the machine” or some such, as that is just part of playing the game, not how to play it.
What?
> (This will basically be a recap of the guide description) This guide will cover User Interfaces (UIs), tools, and blocks. This guide will not be covering mods, hacks, solutions, skins, multiplayer (multiverse), or Steam workshop integration beyond the in-game menus.
BE WARNED
> This guide is long. Very long. Most of the length comes from my liberal use of images, but scrolling through the entire thing can take a while.
> I highly recommend using the section navigation menu on the right if you are looking for something specific.
> The Block Compendium is split up by the block categories, so you can click through the different parts using the nav menu and look for the category the block you’re searching for is in.
DISCLAIMER
> I am not perfect, nor am I Shakespeare, if I mess something up whether it be grammatical or factual, please inform me through a reply, comment, or angry email. I would also appreciate feedback on any items you believe should be covered here that are not (other than the items I explicitly state I don’t cover here).
> I consider the images I use throughout this guide to be supplemental to the text descriptions, however the text description often refers to the terms used in the images. If you think an image would help where there is none, please do tell.
> This guide is not to make me a teacher, but I am not against helping people 1 on 1. If you want some extra help or explanation, you are welcome to reach out to me. There is also the discussions and chat in the community hub if I am unavailable.
Extra Notes
> All images here are created by myself. Feel free to distribute these images as you wish, you don’t need to credit me.
> I will be referring to the default controls in this guide, but know that you can change almost all of the bound keys.
> When I say a block is breakable, I mean that it can be broken into pieces, not that it can be broken off of other blocks. All non-breakable blocks can be broken off of other blocks, but they simply disconnect rather than changing shape by breaking into pieces.
> This guide is a side project that I have worked to complete on and off for well over a year, so if the writing style or grammar/word choice changes through the course of the guide, feel free to point it out if it’s too distracting.
Also
https://steamcommunity.com/sharedfiles/filedetails/?id=2334814313
> This linked guide explains more about the actual playing and troubleshooting of Besiege. Thanks to baconcats for the guide!
– – – – –
In-Game Mechanics
FREEZING
- Freezing occurs when you fly your machine too far out of bounds.
> Freezing breaks all breakable blocks, effectively rendering your machine unusable.
FIRE
- Fire from any source will ignite any flammable objects or blocks that get close to it.
> Fire burns and chars flammable blocks. Entities and objects set on fire simply die or break. Charred blocks are effectively broken and unusable.
NON-SOLID BLOCKS AND OBJECTS
- Non-solid blocks and objects exist in the game space but do not interact with other blocks and objects.
HEATING
- Heat is generated by fire from any source.
> Heat only affects certain non-flammable blocks. Cannons fire when heated, water cannons fire steam when heated, and so on (heatable blocks are distinguished in the Block Compendium as “heatable” under the flammable section of the table).
BREAKAGE
- Breakable blocks will break when they take too much damage. This is different from when blocks are pulled or bent away from each other too hard and their connection is broken, splitting them.
BREAKING STONE
- Stone is the hardest material in the game to break.
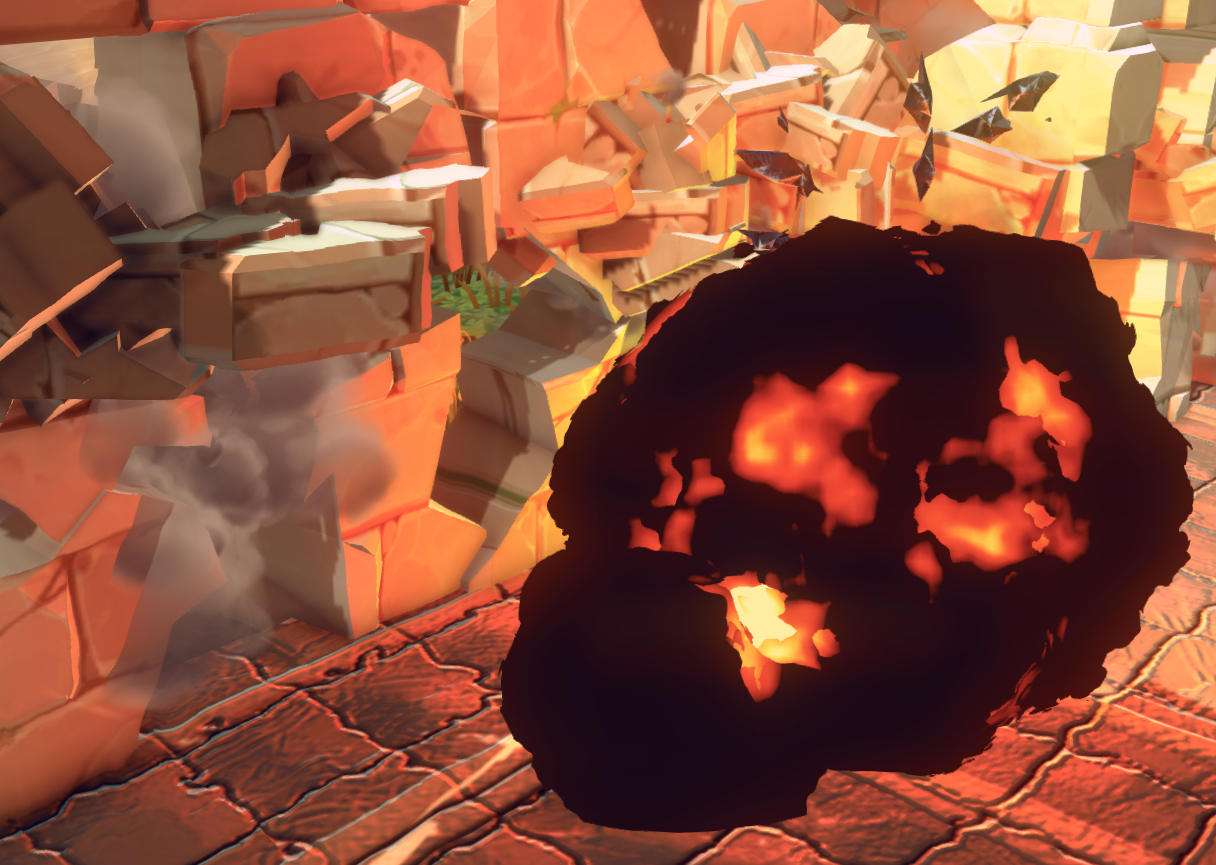
> Although there are some blocks in the game that are marked as the only blocks that can destroy stone, there are many more ways. > The main method of destroying stone is explosives.
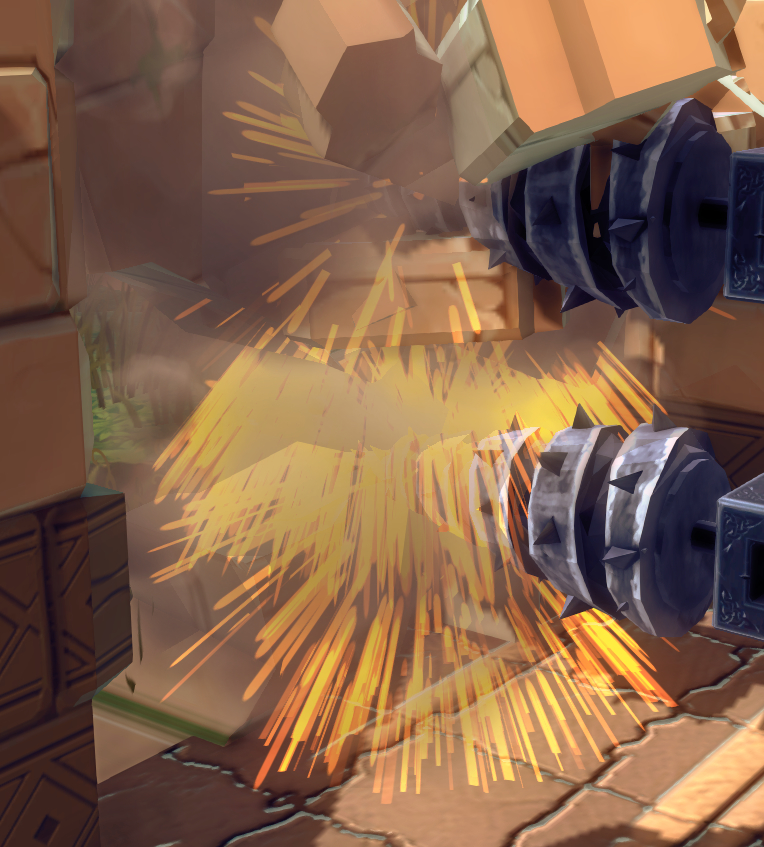
> Drills are your second best method of destroying stone.
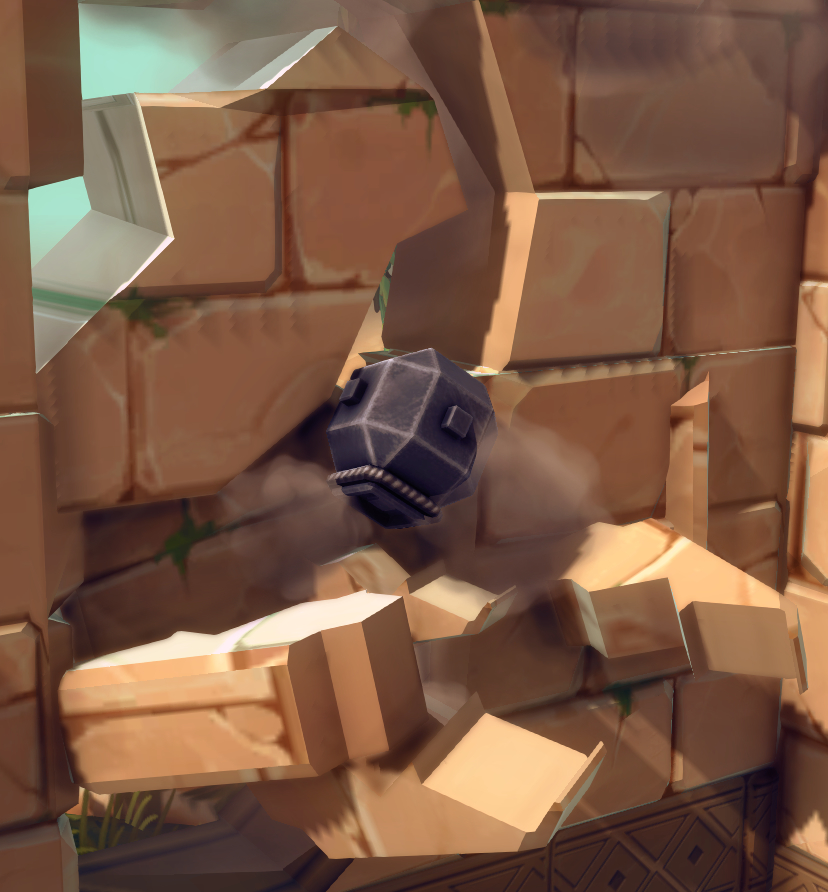
> If all else fails, you can destroy stone by hitting it hard enough.
Propeller Aerodynamic Properties
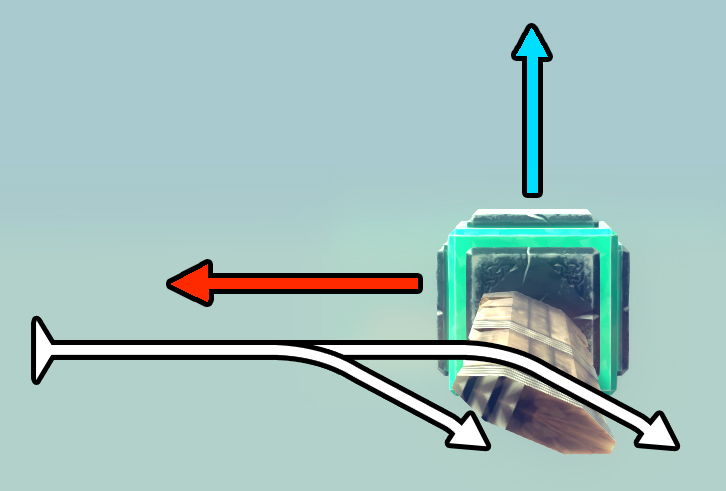
> When the Core Block moves forward along the Red arrow, the air/wind moves around the Propeller along the White arrow, and the Core Block and Propeller moves up along the Blue arrow. This property of movement applies to Propellers in all orientations, relative to the Propeller. Note that the lift generated along the blue arrow is actually applied to the propeller itself, so symmetrical use of them on your machines is vital in creating stable flight.
– – – – –
Menus : The Search Bar
( Inspection Menus have there own section. )
> The Search Bar can be used to find specific blocks by name. This is helpful if you know the name of a block but can’t seem to find it in the categories. You can only search by name, not category or other such keywords. (Available keywords are likely subject to change if/when the game is updated.)
Menus : Main Menus
( Inspection Menus have there own section. )
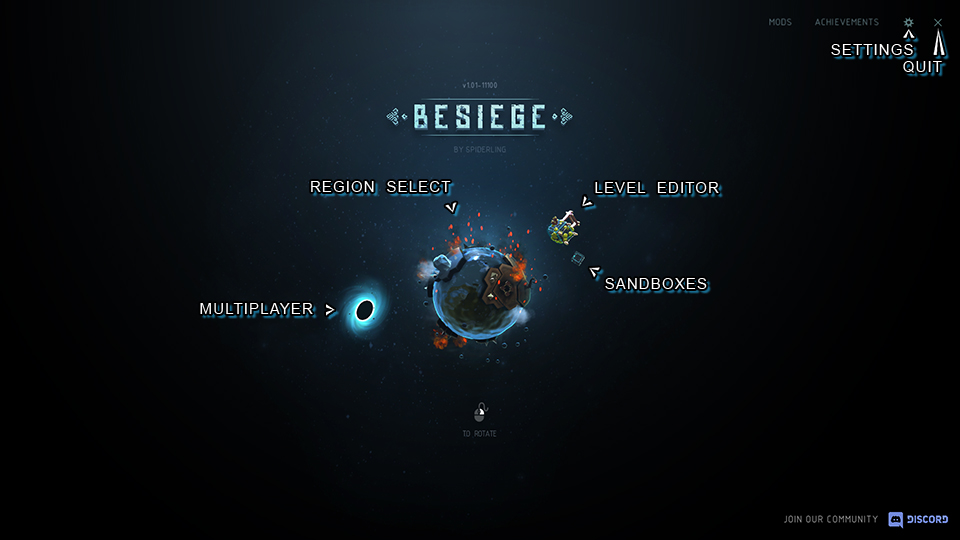
MAIN MENU
- Region Select :
> The planet in the center has different landmasses on its surface. Each landmass is a different region to be explored and kingdom to be conquered. Click and drag with right click to rotate the planet, simply click on a landmass to enter the region. - Level Editor :
> The tree-and-structure-covered cube orbiting the planet leads to the level editor. I will not be covering the level editor, but it allows you to create your own levels. - Sandboxes :
> The tiny cube orbiting the planet close to the level editor cube leads to the sandbox selection menu. These sandboxes provide you with an open area to test machines. With no objective, you can play with the god tools and unlimited machine size as much as you want. The screen for these will be further below. - Multiplayer :
> The black hole orbiting around the planet leads to the multiplayer section. I won’t be covering this in this guide.
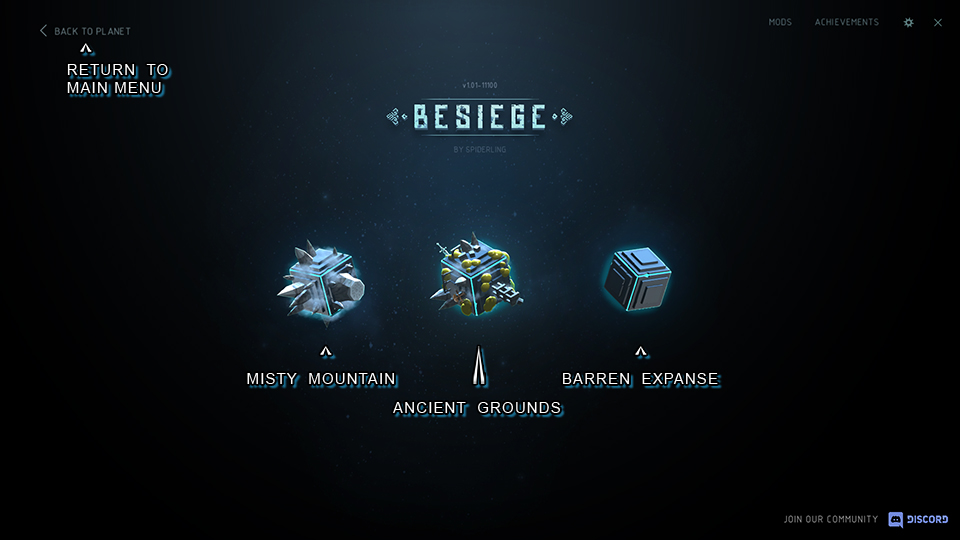
SANDBOXES MENU
- Misty Mountain :
> This sandbox sets you atop a flat mountain in a high altitude void, making it very good for flying machines. - Ancient Grounds :
> This sandbox is the closest to a normal level, including enemies, structures, terrain, and more. This will be your general purpose testing ground. - Barren Expanse :
> This is basically just a void with a floor. You can use this if you’re having performance issues in the other sandboxes, or if you want a lot of space to drive around.
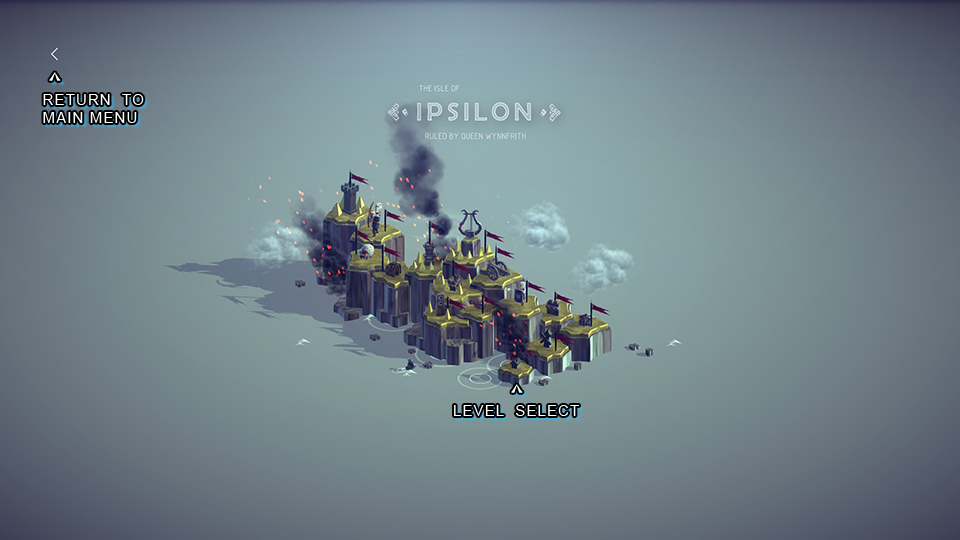
REGION MENU
- Level Select :
> The sections of land that highlight blue when you mouse over them are individual levels. Simply click one to enter the level.
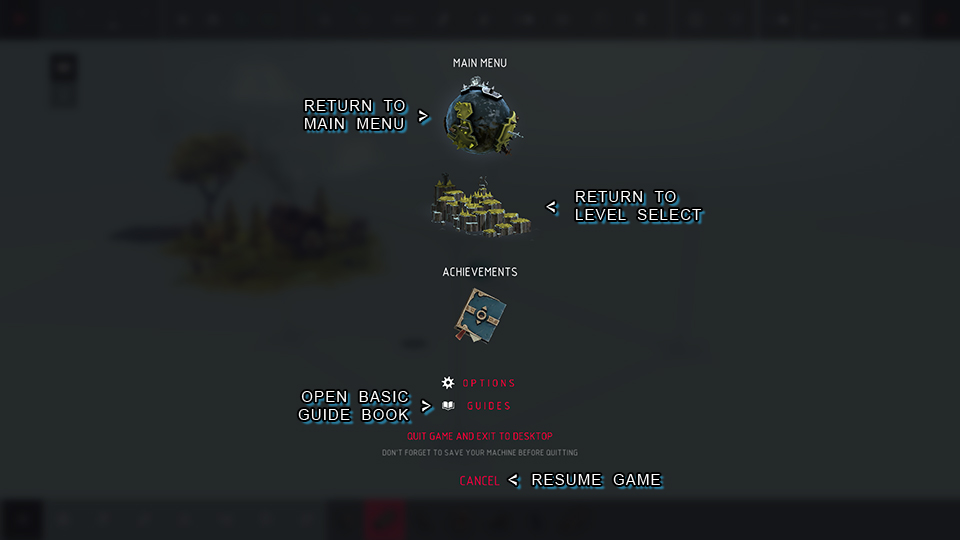
PAUSE MENU
- Return to Main Menu :
> Click the planet to return to the main menu. - Return to Level Select :
> Click the region to return to the level select. - Open Basic Guide Book :
> The “guides” button opens an in-game menu with some basic building guides.
Menus : Machine Editor
( Inspection Menus have there own section. )
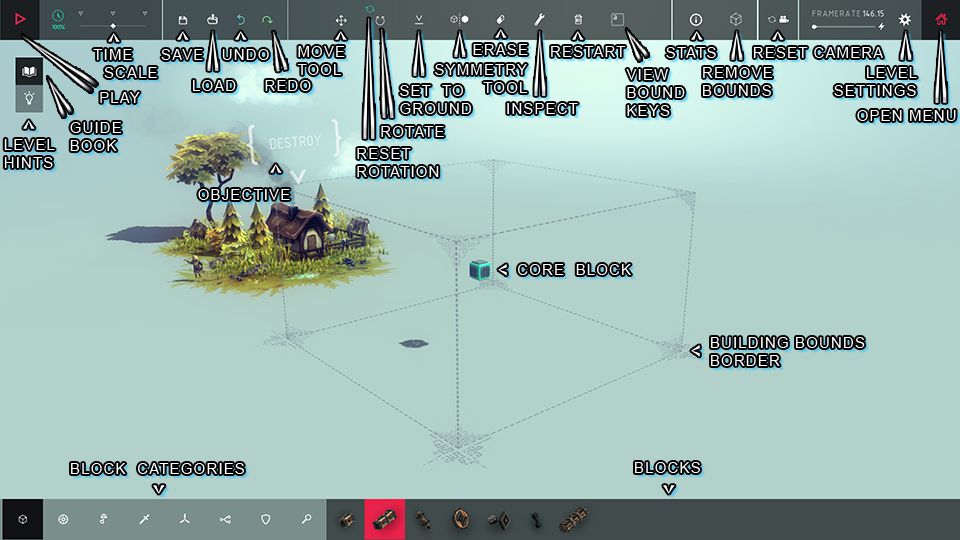
MAIN SCREEN
- Level Hints :
> Clicking the light-bulb opens a small menu detailing tips specific to the current level. These tips are only present on some levels. - Guide Book :
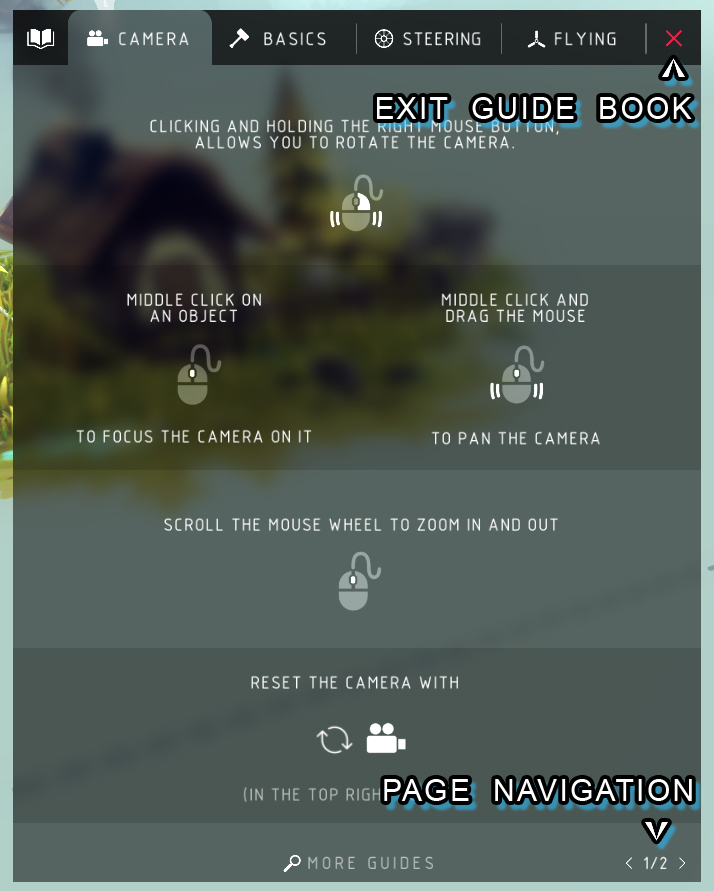
> Clicking the open book opens a medium sized menu with various basic building tips and instructions. This is available on all levels and is not specific to any one. Note that the instructions inside are just to get you started, they are not the rule, feel free to experiment and change the designs. - Play :
> The sideways triangle in the top-left corner begins the level, enabling physics, enemies, and level functions. During play, click the same location to stop the level. You can also press space to start and stop the level. - Time Scale :
> This slider controls how fast the game runs. You drag the white dot on the line left and right to decrease and increase the speed. You can also click the arrows above the line to jump to specific speeds. The arrow on the left is 0%, the arrow in the middle is 100%, and the arrow on the right is 200%. Decrease the speed of the game if you are experiencing lag even after adjusting your graphics settings. - Save :
> The button shaped like a floppy disk leads to the save menu where you can save your current machine for later or for sharing. This menu can be found in the Menus section. - Load :
> The button shaped like a folder with and arrow coming out of it leads to the load menu where you can load a saved machine into the current level. This menu can be found in the Menus section. - Undo :
> The blue button shaped like an arrow curving up and behind undoes your previous action. - Redo :
> The green button shaped like an arrow curving right and down redoes an action you’ve undone with the undo button. - Move Tool :
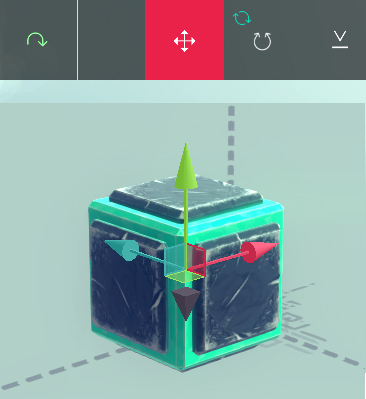
> The cross of four arrows is the move tool. This allows you to move your machine along the x, y, and z axis. This tool will be detailed further below. - Rotate :
> The circular double-headed arrow is the rotate tool. This allows you to rotate your machine along the x, y, and z axis. This tool will be detailed further below. - Reset Rotation :
> The blue double arrow circle above and to the left of the rotate tool resets your machine’s rotation to its original rotation. - Set to Ground :
> The arrow pointing at a line sets your machine on to the ground. - Symmetry Tool :
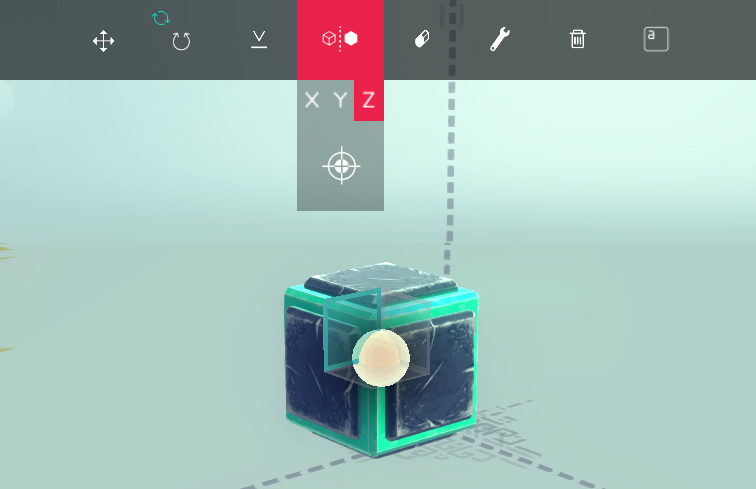
> The two cube drawings on either side of a line is the symmetry tool. This copies everything you build relative to the center point, across the selected planes. Images and further explanation are available in the Machine Editor Pt. 2 section. - Erase :
> The eraser allows you to delete blocks just by clicking on them. Know that you can also press “x” on blocks to delete them even without the erase tool. - Inspect :
> The wrench allows you to inspect and change block details and controls. This tool will be detailed further below. - Restart :
> The trash can deletes all blocks and resets the core block to its default position and rotation. - View Bound Keys :
> The keyboard key opens a medium sized scrolling menu that lists all keyboard keys being used in your machine as well as what key does what. This is helpful when you use machines from the Steam community and don’t know the controls. - Stats :
> The “i” in a circle opens a small menu detailing the block count, cluster count, and center of mass for your machine. This will be explored further below. - Remove Bounds :
> The cube outline drawing removes the building boundaries, allowing you to build massive machines. Note that this disallows you from completing levels, so it only has use outside of level progression. - Reset Camera :
> The camera drawing with the double arrow circle resets your camera to its default position. - Level Settings :
> The gear drawing opens a medium sized menu with various level settings. This is explored below. - Open Menu :
> The house drawing opens the pause menu. This menu can be found in the Menus section. - Block Categories :
> The icons with a light background are categories separating all the blocks into type groups. Clicking an icon will show only the blocks in that category. - Blocks :
> The pictures with a dark background are individual blocks. Clicking a picture will select that block and allow you to place unlimited numbers of it. Each block is detailed in the Blocks section. - Core Block :
> The blue and gray block in the center of the building bounds is the core block. This block acts as the starting point and common center of your machines. It is detailed in the Blocks section. - Building Bounds Border :
> The dotted lines and detailed corners forming a rectangular prism outline your building area. You cannot build outside of these bounds without using the “remove bounds” button. Note that using this button will disallow you from completing levels.
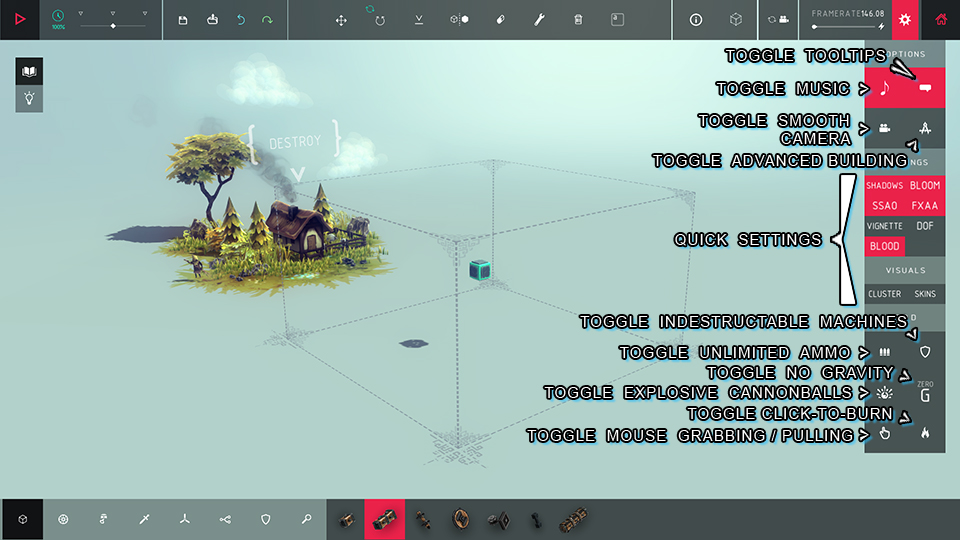
MAIN SCREEN SETTINGS
- Toggle Tooltips :
> The text bubble button toggles all tooltips. Tooltips are the text bubbles that appear when you mouse over menu items. I recommend keeping this on at all times. - Toggle Music :
> The music note button toggles the in-game music. - Toggle Smooth Camera :
> The camera-drawing button toggles smooth mode for your game camera. Smooth camera mode smooths out your camera movements by adding acceleration so the camera begins and ends moving by speeding up and slowing down over time. - Toggle Advanced Building :
> The drawing compass button enables advanced building mode. This mode is covered in the Advanced Building section. - Quick Settings :
> The “Settings” and “Visuals” groups contain game settings made more available.- The “Shadows” button toggles all shadows.
- The “Bloom” button toggles all bloom. Bloom is basically making bright things look correctly bright by changing how it looks on your screen.
- The “SSAO” button toggles all screen space ambient occlusion. SSAO basically adds small shadows to the surfaces of objects to give them depth and make them look more real.
- The “FXAA” button toggles all fast approximate anti-aliasing. FXAA basically smooths out jagged pixels that show when objects have lines that go diagonally across the screen.
- The “Vignette” button toggles a screen vignette. The vignette is a dark fade line around the whole screen and corners.
- The “DOF” button toggles depth of field for your camera. Depth of field makes things farther away from the camera blurrier when something else is closer to the camera.
- The “Blood” button toggles blood effects that come from creatures.
- The “Cluster” button toggles cluster visuals. Cluster visuals colors all blocks into their respective clusters. Clusters are covered in the Mechanics section.
- The “Skins” button toggles skins on all blocks. I won’t be covering skins in this guide but basically they change the look and shape of your blocks.
Menus : Machine Editor Cont.
( Inspection Menus have there own section. )
- God Powers :
> The “God” group contains special powers that change how the game works. Using any god powers disallows you from completing any level.- The shield button toggles indestructible machines. As the name implies, it makes your machines unbreakable.
- The three-bullets button toggles infinite ammo. This means that all weapons that have limited shots, now have unlimited shots.
- The “Zero G” button toggles zero gravity. This disables all gravity in the level.
- The hazard class explosive symbol button toggles explosive cannon balls. This makes all cannon shots explosive.
- The fire button toggles click-to-burn. This means during gameplay you create fire wherever you click with your mouse.
- The finger-pointing cursor button toggles mouse pulling. This means during gameplay you can pull things by clicking and dragging them with your mouse.
STATS
- Block Number Count :
> This is the total number of blocks placed in your machine. This number also includes the core block. - Block Cluster Count :
> This is the total number of clusters in your machine. Clusters are groups of blocks that the game automatically assigns to be together. The game does this for a number of reasons, but basically is helps performance. You can see these clusters by using the “Cluster” visual tool in the main screen settings menu seen above. - Toggle Center of Mass Visual :
> This button toggles a visual marking the center of mass of your machine. This tool is helpful for keeping things balanced / counterbalanced. Note that this is the center of mass for all built blocks, so if you have several machines in one, it won’t treat them as separate.
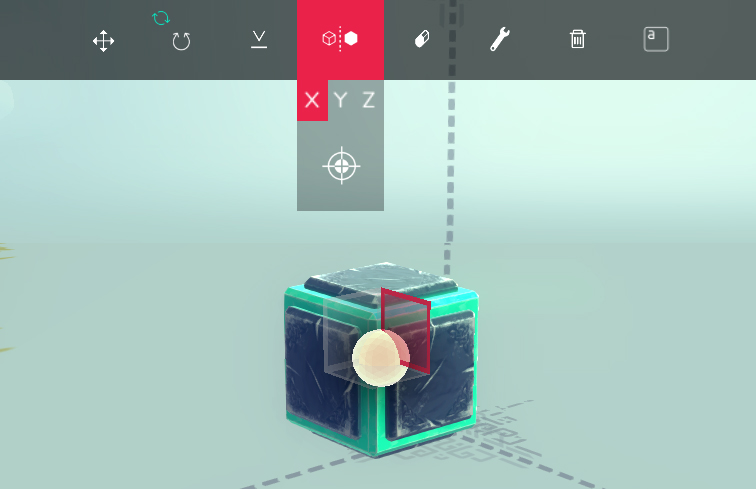
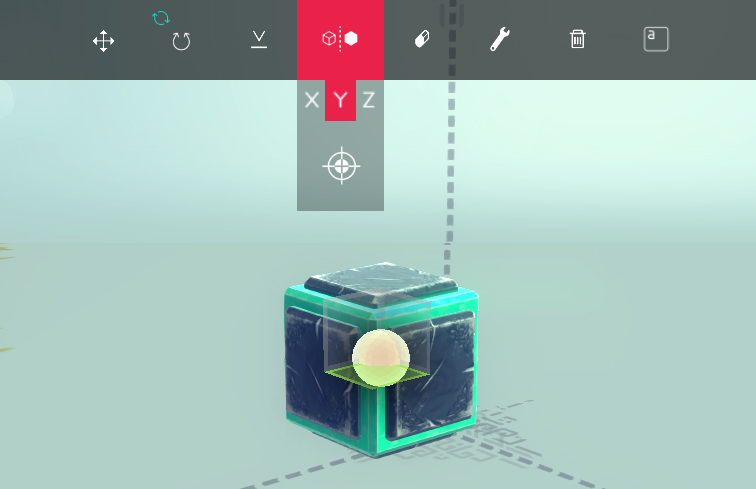
SYMMETRY TOOL
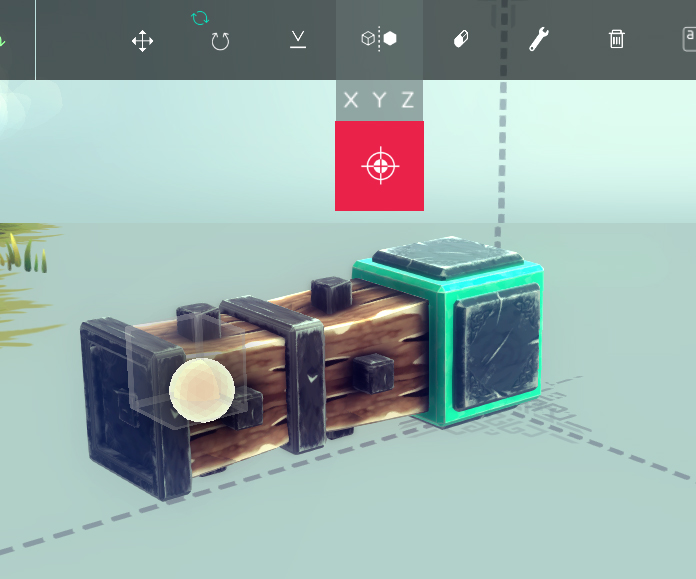
- > The symmetry tool copies the blocks you place on the opposite side of a point that you can move. Click the X, Y, Z buttons to change what planes your blocks copy across. Click the larger square button with the circles to reposition the symmetry point onto another block. It sounds complicated, but it’s not.
- The red plane is the X axis.
- The green plane is the Y axis.
- The blue plane is the Z axis.
- The yellow sphere is the symmetry point.
MOVE TOOL
- The blue arrow moves your machine in the Z axis direction.
- The red arrow moves your machine in the X axis direction.
- The green arrow moves your machine up and down, in the y axis direction.
- The black arrow puts your machine onto the ground. It works the same as the UI button.
GUIDE BOOK
- > The guide book contains some basic information and instructions. Use the tabs on the top of the window and the arrows at the bottom right to navigate the guide book.
TIPS
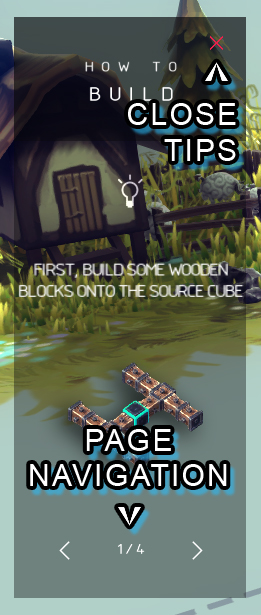
- > The tips window contains information specific to the level you’re playing. This isn’t present on all levels, but is on most of the beginning ones. Use the arrows at the bottom to navigate the tip pages.
SAVE MENU
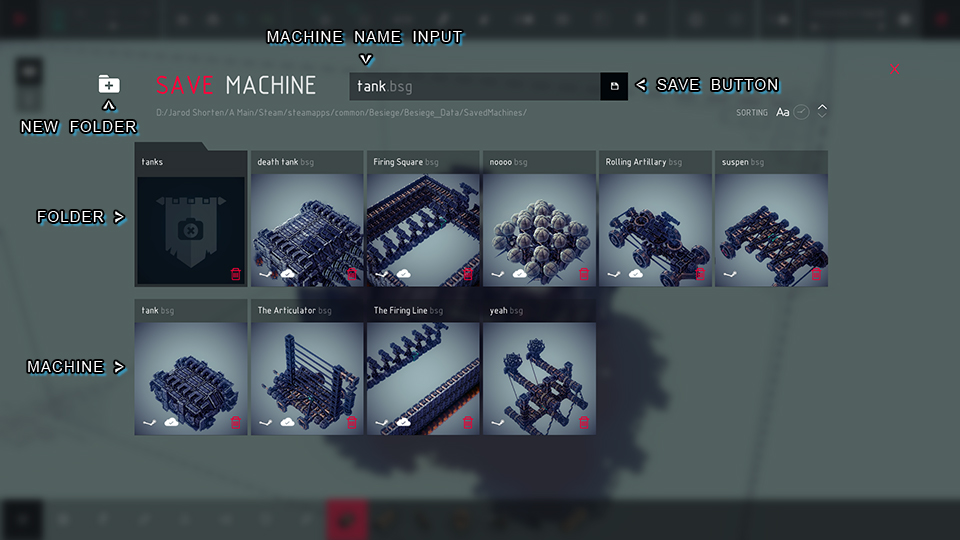
- Machine Name Input :
> This text box is where you enter the name of your machine. This is the name that you will look for when you load a machine. This is also the name of the file in the game files that stores your machines’ information. - Save Button :
> Use this button with an icon of a floppy disk to save your machine. - New Folder :
> Use the folder icon to create a new folder. The screen for creating a new folder is below. - Machine :
> Each machine has a small image showing a preview of the machine along with its name. Double click the image to load the machine. - Folder :
> Folders look like a machines but darker and with a tab on top, making it look like a folder. Double click folders to enter them.
NEW FOLDER MENU
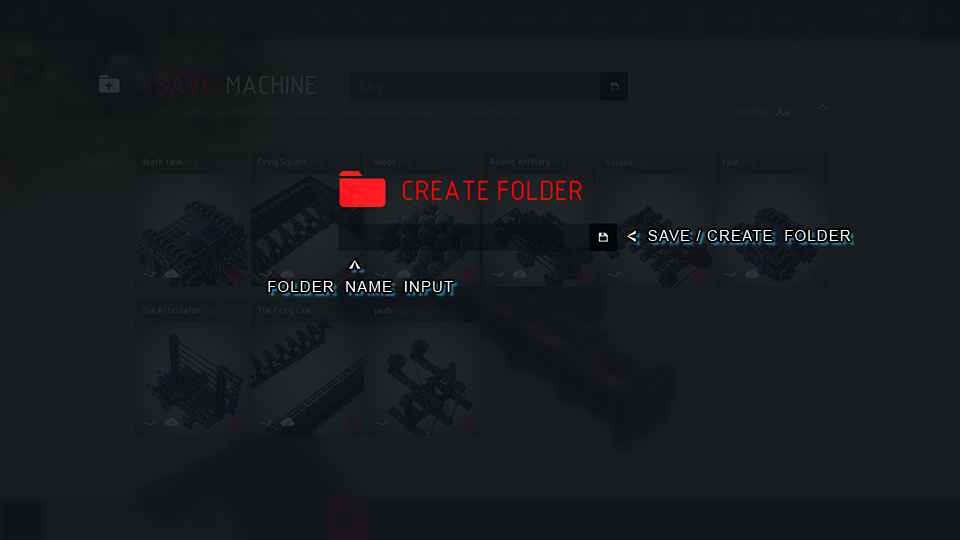
- Folder Name Input :
> This text box is where you enter the name of the folder you want to create. This is the name that you will look for when you load a machine that is inside a folder. Machines inside folders will only be visible when you enter the folder. This is also the name of the folder in the game files that separates your machines. - Save / Create Folder :
> Use this button with an icon of a floppy disk to save / create your new folder.
LOAD MENU
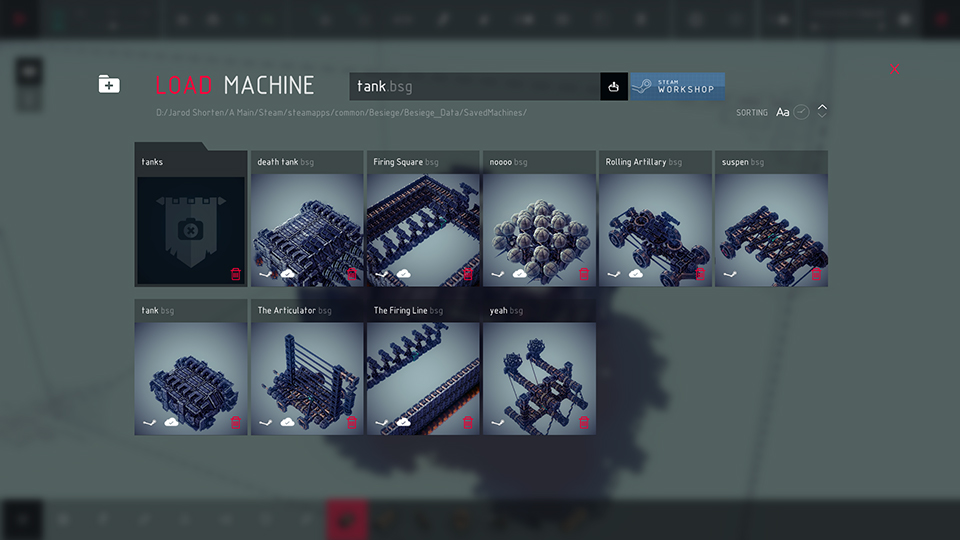
- Steam Workshop :
> Click the “Steam Workshop” button to open the load menu for community machines you’re subscribed to. This menu is below.
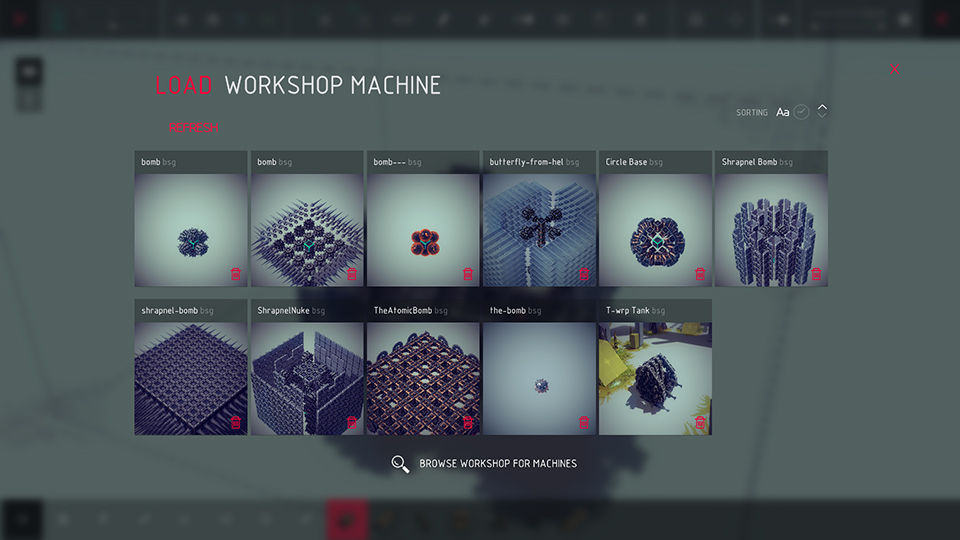
WORKSHOP LOAD MENU
- Subscribed Machines :
> The machines seen in this menu work the same as your own, double click their image to load them. - Browse Workshop for Machines :
> Click the text reading “browse workshop for machines” to open Steam’s overlay browser to subscribe to machines. - Refresh :
> Click the text reading “refresh” to reload the machines after subscribing to new ones so the new ones show up.
– – – – –
Advanced Editor Mode : Menus
ADVANCED EDITING MENU
- Set Machine on Ground :
> The button resembling a downward arrow pointing at a horizontal line has the same function as the button available in the basic editor menu, setting the machine on the ground. - Mirror Tool :
> The button resembling two arrows pointing away from each other on either side of a vertical dotted line is the mirror tool, allowing you to mirror placed blocks across an axis. - Allow Intersecting Blocks :
> The button resembling two cubes intersecting allow you to place blocks in places that would otherwise be counted as intersecting and not a valid build location.
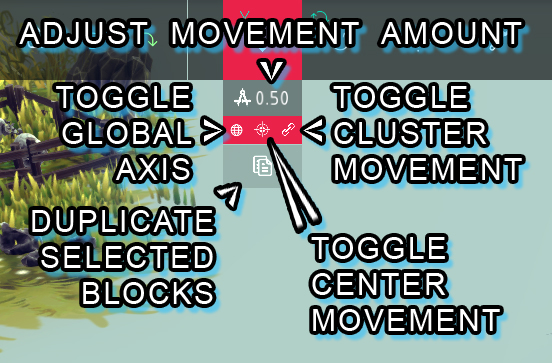
ADVANCED EDITING MOVE TOOL MENU
- Adjust Movement Amount :
> The number input space next to the icon resembling a drawing compass changes the distance the selected block(s) moves in increments. The default is 0.50, or 0.5 blocks. - Toggle Global Axis :
> The button resembling a circle with a grid toggles the movement tool between using the local axis and the global axis. - Duplicated Selected Blocks :
> The button on the bottom resembling two pieces of paper/documents duplicates the selected block(s). The duplicated block(s) are spawned in the same positions as the originals, so you have to move them after duplicating them. - Toggle Cluster Movement :
> The button resembling a chain linkage toggles the movement tool to move blocks in their clusters, visible using the cluster button under the quick settings. - Toggle Center Movement :
> The button resembling crosshairs toggles the movement tool to move the block(s) from their center instead of their attachment point.
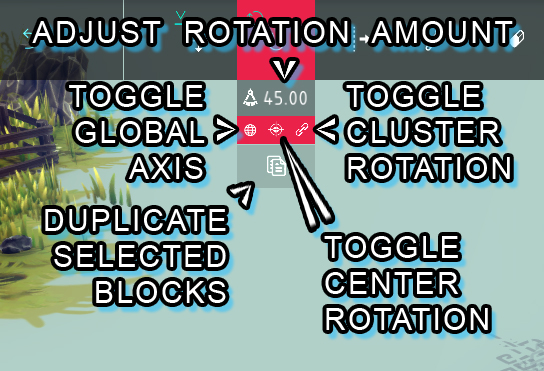
ADVANCED EDITING ROTATE TOOL MENU
- Adjust Rotation Amount :
> The number input space next to the icon resembling a drawing compass changes the degree amount the selected block(s) rotate in increments. The default is 45.00, or 45 degrees. - Toggle Global Axis :
> The button resembling a circle with a grid toggles the rotation tool between using the local axis and the global axis. - Duplicated Selected Blocks :
> The button on the bottom resembling two pieces of paper/documents duplicates the selected block(s). The duplicated block(s) are spawned in the same positions as the originals, so you have to move them after duplicating them. - Toggle Cluster Rotation :
> The button resembling a chain linkage toggles the rotation tool to rotate blocks in their clusters, visible using the cluster button under the quick settings. - Toggle Center Rotation :
> The button resembling crosshairs toggles the rotation tool to rotate the block(s) from their center instead of their attachment point.
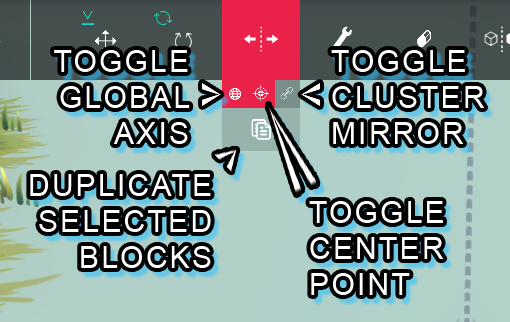
ADVANCED EDITING MIRROR TOOL MENU
- Toggle Global Axis :
> The button resembling a circle with a grid toggles the mirror tool between using the local axis and the global axis. - Duplicate Selected Blocks :
> The button on the bottom resembling two pieces of paper/documents duplicates the selected block(s). The duplicated block(s) are spawned in the same positions as the originals, so you have to move them after duplicating them. - Toggle Cluster Mirror :
> The button resembling a chain linkage toggles the mirror tool to mirror blocks in their clusters, visible using the cluster button under the quick settings. - Toggle Center Point :
> The button resembling crosshairs toggles the mirror tool to mirror the block(s) from their center instead of their attachment point.
Advanced Editor Mode : Tools
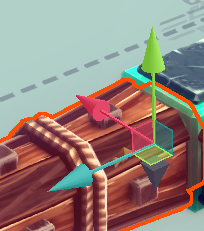
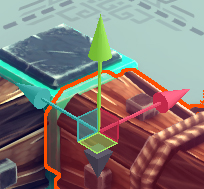
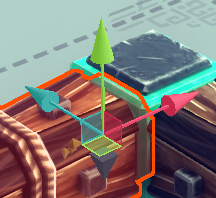
MOVE TOOL
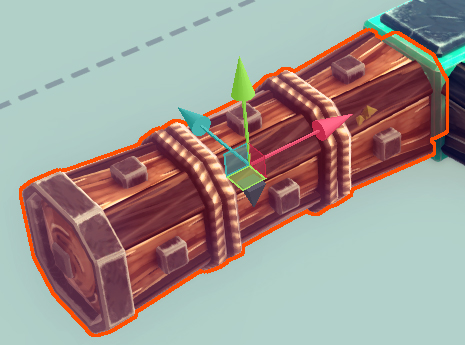 |
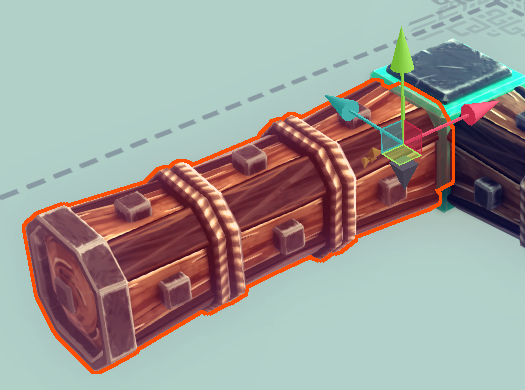 |
| ^ Center Point Toggled On | ^ Center Point Toggled Off |
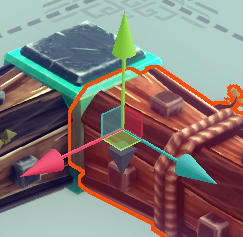 |
 |
| ^ Block ‘A’ With Global Axis Toggled Off | ^ Block ‘B’ With Global Axis Toggled Off |
 |
 |
| ^ Block ‘A’ With Global Axis Toggled On | ^ Block ‘B’ With Global Axis Toggled On |
- The move tool allows you to move a block or blocks in a straight line along 3 different axis. This includes the ability to move a block or blocks around on a plane.
> Simply click and drag the arrows to move the block or blocks in a straight line. You can also click and drag the squares in the center to move the block or blocks along that plane. The black/gray arrow underneath the other arrows will set the machine on the ground when clicked.
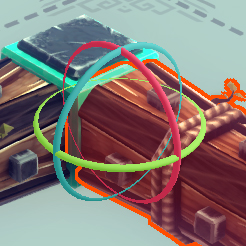
ROTATE TOOL
 |
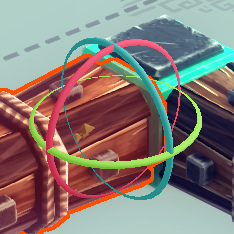 |
| ^ Block ‘A’ With Global Axis Toggled Off | ^ Block ‘B’ With Global Axis Toggled Off |
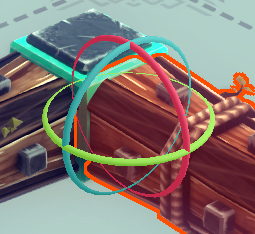 |
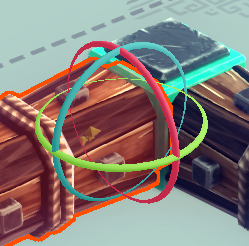 |
| ^ Block ‘A’ With Global Axis Toggled On | ^ Block ‘B’ With Global Axis Toggled On |
- The rotate tool allows you to rotate the selected block or blocks around 3 different axis.
> Simply click and drag the colored rings to rotate the block or blocks.MIRROR TOOL
Before After - The mirror tool allows you to mirror the selected block or blocks across a plane.
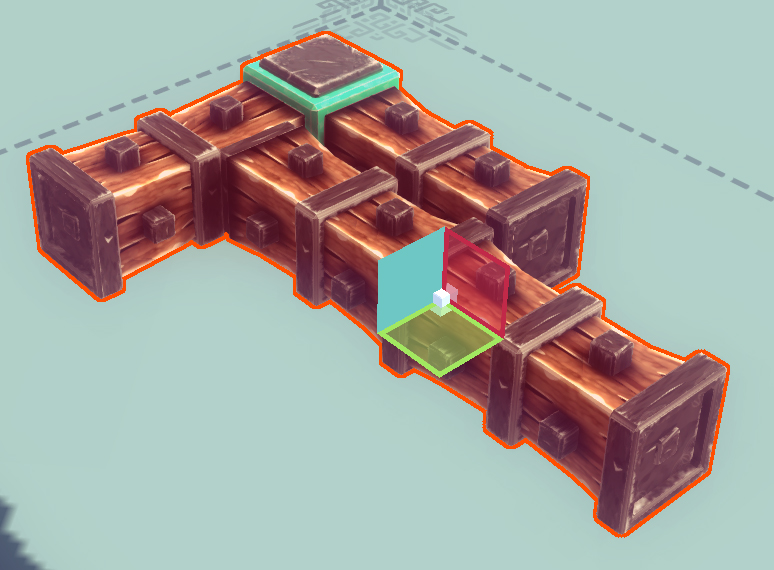
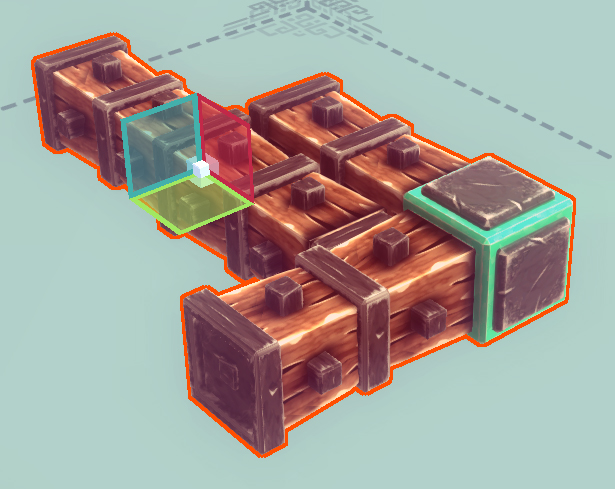
> The colored squares around the white cube are the planes along each axis that you can mirror the blocks across. If you toggle the global axis button on the tool, the planes will follow the global axis instead of your local view axis. Simply click a plane square to mirror the block or blocks across that axis. In the before and after images, the whole machine is mirrored across the blue axis. You can use the center point button to toggle the white cube between the center of the block or blocks and their attachment point.
- The mirror tool allows you to mirror the selected block or blocks across a plane.
– – – – –
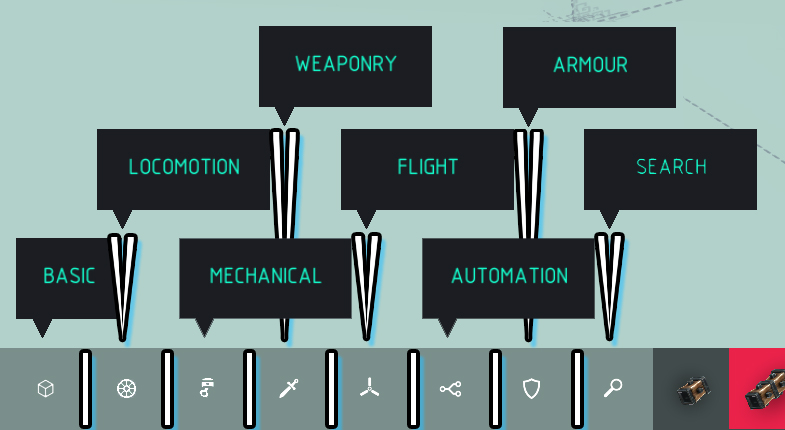
Block Categories
Basic :
> The “Basic” category contains the most basic blocks that you will likely use the most.
Locomotion :
> The “Locomotion” category contains all things land travel.
Mechanical :
> The “Mechanical” category contains (surprise) mechanical blocks. These are blocks that push, pull, and swivel in various forms.
Weaponry :
> The “Weaponry” category contains weapons and destructive tools.
Flight :
> The “Flight” category contains blocks used in flying machines of all kinds as well as the useful ballast block that is detailed below.
Automation :
> The “Automation” category contains blocks that allow you create automated key presses or even fully automated machines.
Armour :
> The “Armour” category contains armor as well as some unique metal blocks and a spike ball.
Search :
> The “Search” ‘category’ allows you to search all blocks by their name.
Block Compendium : The Core Block
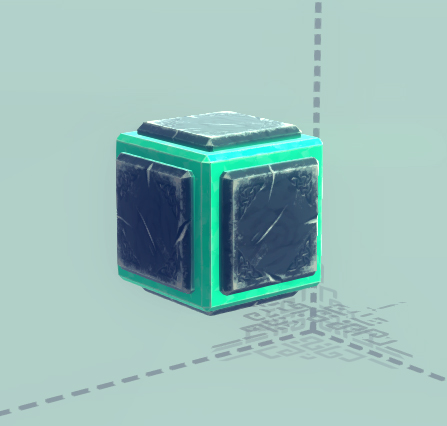
> The “Core Block” is a very special block. It is the core of your machine, the first block you build from for any new machine. It is indestructible by all means. You can’t delete it, and you can’t place more of it. It isn’t necessary for your machine to function and can be ignored entirely if you so choose.
Block Compendium : Basic Blocks
Basic Blocks :-
Name
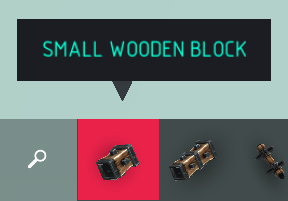
Small Wooden Block Size 1x1x1 Breakable? Yes Flammable? Yes > The “Small Wooden Block” is the most basic block.
-
Name
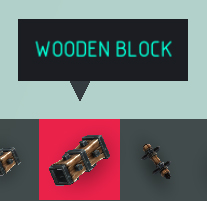
Wooden Block Size 2x1x1 Breakable? Yes Flammable? Yes > The “Wooden Block” is basically two “Small Wooden Block”s put together as one. This block is just as useful as the small wooden block and is used for saving time when building long strings of small wooden blocks.
-
Name
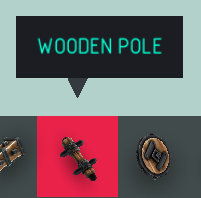
Wooden Pole Size 2x1x1 Breakable? Yes Flammable? Yes > The “Wooden Pole” is a thinner, weaker version of the “Wooden Block”. This block is useless as a replacement for the “Wooden Block” in most cases, however it can be very useful in advanced building and in unique, creative building.
-
Name
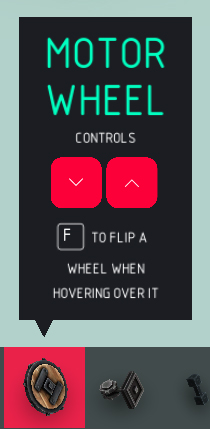
Motor Wheel Size 2x2x0.5 Breakable? Yes Flammable? Yes > The “Motor Wheel” is the most basic powered wheel.
-
Name
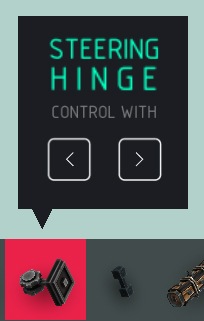
Steering Hinge Size 1x1x1 Breakable? No Flammable? No > The “Steering Hinge” is a motorized hinge that can be used as a basic form of steering. This block is also useful for articulating crane arms, cannon mounts, and more.
-
Name
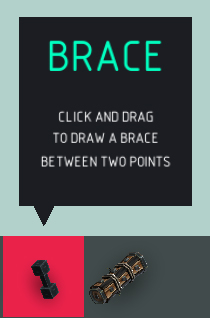
Brace Size Variable Breakable? No Flammable? No >The “Brace” is one of the most useful blocks in the game. This block is one of few that requires you to click and hold from one place to another in order to place it.
It braces two blocks together to create a strong, stable bond. Note that this ‘block’ is actually two blocks with the bracing bar between them. The bracing bar is purely cosmetic, meaning that it has no collision so that blocks, enemies, structures, and etc can pass through it.
The blocks on either end of the bracing bar don’t simply connect to a single block, rather they connect to any connection point that is within their cube shape. This means that if you place a wheel on top of a brace, the wheel will be braced too, and won’t spin.
-
Name
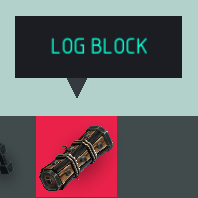
Log Block Size 3x1x1 Breakable? Yes Flammable? Yes > The “Log Block” is basically three “Small Wooden Block”s put together as one. This block is just as useful as the small wooden block and is used for saving time when building long strings of small wooden blocks.
-
Block Compendium : Locomotion Blocks
Locomotion :-
Name
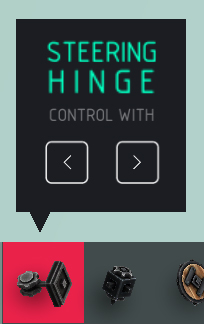
Steering Hinge Size 1x1x1 Breakable? No Flammable? No > The “Steering Hinge” is a motorized hinge that can be used as a basic form of steering. This block is also useful for articulating crane arms, cannon mounts, and more.
-
Name
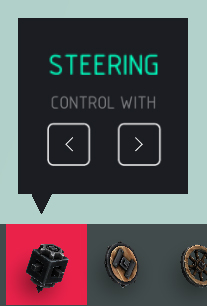
Steering Size 1x1x1 Breakable? No Flammable? No > The “Steering” block is a motorized block that spins in place. Despite its name, it is not very useful for steering without getting creative with it.
-
Name
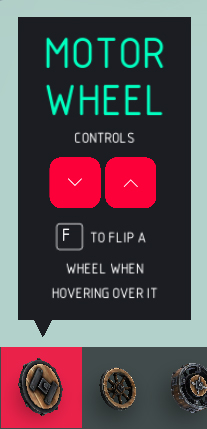
Motor Wheel Size 2x2x0.5 Breakable? Yes Flammable? Yes > The “Motor Wheel” is the most basic powered wheel.
-
Name
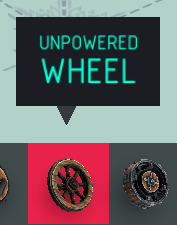
Unpowered Wheel Size 2x2x0.5 Breakable? Yes Flammable? Yes > The “Unpowered Wheel” is the “Motor Wheel” except it isn’t motorized, it spins freely.
-
Name
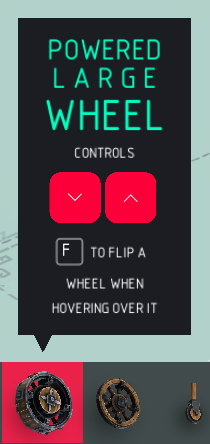
Powered Large Wheel Size 3x3x1 Breakable? Yes Flammable? Yes > The “Powered Large Wheel” is a larger version of the “Motor Wheel”. Unlike the motor wheel, the “Powered Large Wheel” has attachment points in four points on the outer rim of the wheel as well as in four points on the face of the wheel.
-
Name
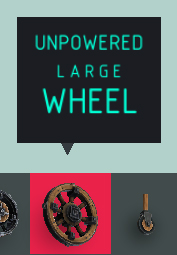
Unpowered Large Wheel Size 3x3x1 Breakable? Yes Flammable? Yes > The “Unpowered Large Wheel” is the “Powered Large Wheel” except it isn’t motorized, it spins freely.
-
Name
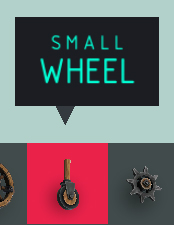
Small Wheel Size 1×1.5×1 Breakable? No Flammable? Yes > The “Small Wheel” is a small, swiveling wheel useful in limited situations.
-
Name
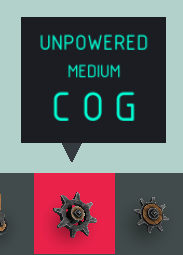
Unpowered Medium Cog Size 2x2x1 Breakable? Yes Flammable? Yes > The “Unpowered Medium Cog” is a cog with the same function as the “Unpowered Wheel” except it has teeth, allowing it to interlock with other gears or blocks. Gears are useful for creating large scale rotating or hinging mechanisms. Note that despite it being called a “Medium” cog, there is only one other size of cog.
-
Name
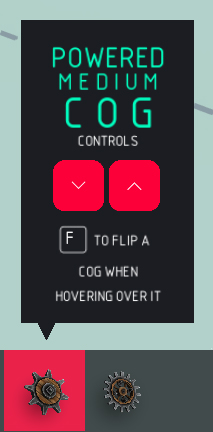
Powered Medium Cog Size 2x2x1 Breakable? Yes Flammable? Yes > The “Powered Medium Cog” is a cog with the same function as the “Motor Wheel” except it has teeth, allowing it to interlock with other gears or blocks. Gears are useful for creating large scale rotating or hinging mechanisms. Note that despite it being called a “Medium” cog, there is only one other size of cog.
-
Name
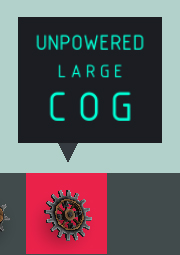
Unpowered Large Cog Size 3x3x1 Breakable? Yes Flammable? Yes > The “Unpowered Large Cog” is a cog with the same size and function as the “Powered Large Wheel” except it has teeth, allowing it to interlock with other gears or blocks. Gears are useful for creating large scale rotating or hinging mechanisms. Note that there is no large powered cog.
-
Block Compendium : Mechanical Blocks
Mechanical Blocks :-
Name
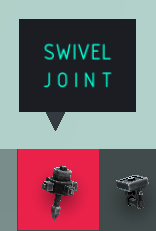
Swivel Joint Size 1x1x2 Breakable? No Flammable? No > The “Swivel Joint” is a 1x1x1 connection block with a swiveling 1x1x1 pole coming out of the bottom. The swiveling pole portion is similar to the brace mechanics wherein there’s a sweet spot portion of it where it will grab to anything. Also, similar to wheels, attaching a brace at the base of the swiveling base will lock it in place and prevent it from spinning.
-
Name
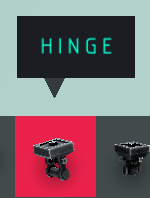
Hinge Size 1x1x1 Breakable? No Flammable? No > The “Hinge” allows movement in two directions, perpendicular to the bar on the bottom. The same bar works as the main connection point. You can also attach blocks to all other sides of the hinge block, though they may appear to be floating.
-
Name
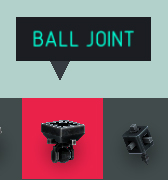
Ball Joint Size 1x1x1 Breakable? No Flammable? No > The “Ball Joint” is an omnidirectional version of the hinge, mixed with the swivel joint. The connection point on the bottom allows for the rest of the ball joint to move in all directions, as well as spin. The ball joint also allows the attaching of blocks to all other sides similar to the hinge block.
-
Name
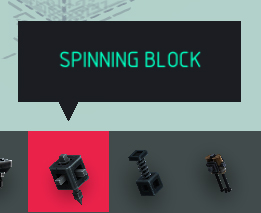
Spinning Block Size 1x1x1 Breakable? No Flammable? No > The “Spinning Block” is a block similar to the steering block, except that it constantly spins at a set speed.
-
Name
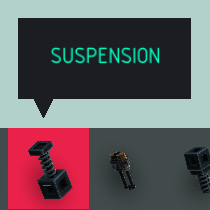
Suspension Size 3.25x1x1 Breakable? No Flammable? No > The “Suspension” block is technically one solid block linked to another solid block that has a non-solid spring column coming from the bottom of it. The two blocks are held together very strongly, though they can be pulled apart temporarily. The block with the spring can be pushed towards the other block, offering constant resistance. This block is very useful when you don’t want to destroy or kill something, as most destruction and kill mechanics in this game are based on impact forces, or the speed something comes to a stop.
-
Name
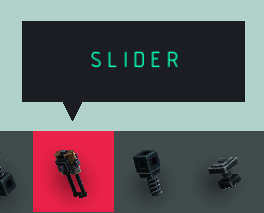
Slider Size 2x1x1 Breakable? No Flammable? Yes > The “Slider” block is like the suspension block, except it doesn’t resist being pushed in and out. It has a main block from which two rods extend. The main block slides up and down the rods, extending to two blocks in length or contracting to one block in length. This block can be a helpful stabilizer for pistons, as pistons are more prone to wobble than sliders.
-
Name
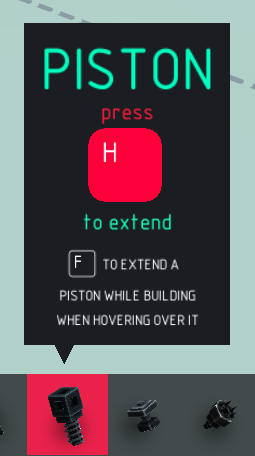
Piston Size 1x1x1 Breakable? No Flammable? No > The “Piston” block is a solid block with a non-solid spring column coming from the bottom of it. When placed on a block, the spring column isn’t inside the piston, but rather the block it’s placed on. When the piston extends, the solid block simply raises one block off of its mounting block, exposing the spring column. The piston is very useful for many different situations. It can be placed in the extended mode or the compressed mode.
-
Name
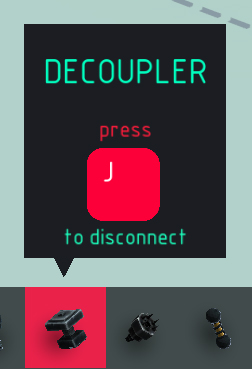
Decoupler Size 1x1x1 Breakable? No Flammable? No >The “Decoupler” block is unique in that it is the only block that allows you to disconnect blocks using a control key (other than the grabber, which is its own beast). When the control key is pressed, the smaller end of the decoupler disconnects from the block it is connected to. Blocks connected to the sides and larger end of the decoupler are connected in the same way as they would be to any other block. The disconnection causes force between the decoupler and its block as well, pushing them away from each other.
-
Block Compendium : Mechanical Blocks Cont.
-
-
Name
Grabber Size 1x1x1 Breakable? No Flammable? No > The “Grabber” block is a very special and helpful block. It allows you to latch onto other blocks, world objects, entities, and world terrain. It also prevents impact damage such as fall damage to any thing it latches onto, such as preventing a bomb from exploding or preventing a sheep from dying. Although the grabber has a solid collision box around its base, the spikey grabbing bits on the end have no collision. The grabber can latch onto anything within a half block distance from its spikey end. The temporary connection it makes with grabbed objects, blocks, etc. is unbreakable outside of disconnecting it using a control key, meaning the connection will survive everything that the blocks and objects around it will not.
-
Name
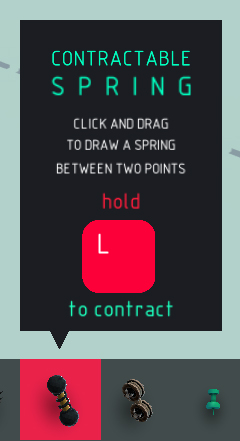
Contractable Spring Size Variable Breakable? No Flammable? No > The “Contractable Spring” is a non-solid spring line similar to the “Brace.” The contractable spring pulls its two ends together with a variable strength. Activating the spring pulls the two ends together with greater strength and speed.
-
Name
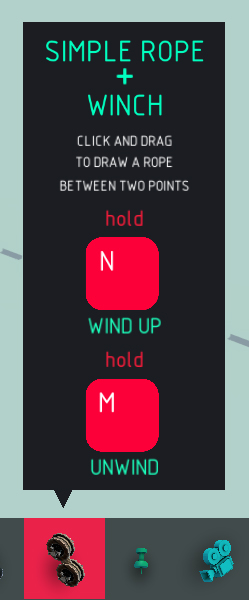
Simple Rope + Winch Size Variable Breakable? Slicable Flammable? Yes > The “Simple Rope + Winch” is a non-solid rope line similar to the “Brace.” The rope + winch winds and unwinds its rope using a control key, effectively lengthening and shortening the rope. Similar to the “Contractable Spring” and “Brace,” the rope + winch stays a straight line between its two ends, no matter where the ends are or what state the rope between is in.
-
Name
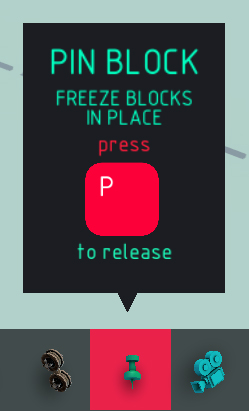
Pin Block Size N/A Breakable? No Flammable? No > The “Pin Block” is a very special ‘block’ that is borderline cheating. It pins any block in space, not allowing it to move by any means until it is unpinned by the control key. It is less of a block and more of a toggle state, as it isn’t a thing that exists in the game space but rather a marker you apply to a block.
-
Name
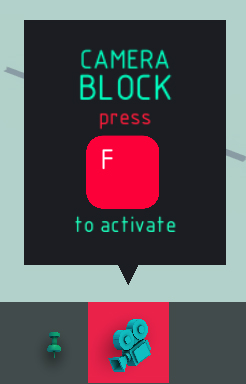
Camera Block Size N/A Breakable? No Flammable? No > The “Camera Block” is similar to the “Pin Block” in that it is not really a block and doesn’t exist in the game space. It works as a customizable camera angle that you attach to a block or leave in floating in the air. You can have several of these at once, switching between them using their control keys. This is a nice alternative to the default camera physics.
-
Block Compendium : Weaponry Blocks
Weaponry :-
Name
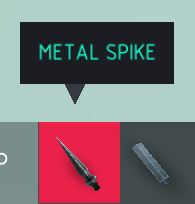
Metal Spike Size 0.5×0.5×0.25 Breakable? No Flammable? No > The “Metal Spike” is effective for poking things. It deals damage at its point with enough force.
-
Name
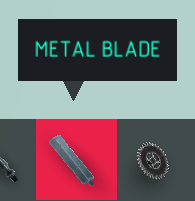
Metal Blade Size 1×0.33×3.75 Breakable? No Flammable? No > The “Metal Blade” is good at slicing and chopping things. It deals damage along the length of its edges with enough force.
-
Name
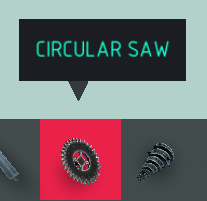
Circular Saw Size 2.5×2.5×0.5 Breakable? No Flammable? No > The “Circular Saw” is similar to the “Spinning Block” in that it spins without input, except it’s a saw and is effective at murder. Due to it generating its own force, the edge need only be touched to something for it to deal damage. The circular saw is also effective as an uncontrollable, extremely fast, and inflammable wheel.
-
Name
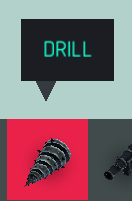
Drill Size 1.5×1.5×3 Breakable? No Flammable? No > The “Drill” is a combination of the “Metal Spike” and “Circular Saw” in that it spins on its own and deals damage at its tip without the need for additional force. The drill is especially useful for destroying destructible walls, blocks, buildings, and etc. as it is one of the few blocks that can do so.
-
Name
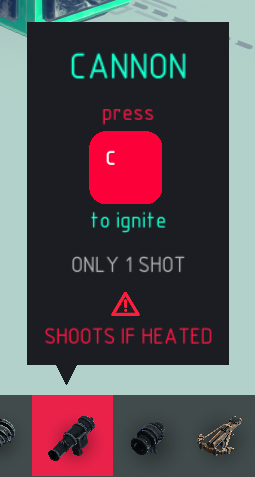
Cannon Size 1x1x3 Breakable? No Flammable? Heatable > The “Cannon” is your main weapon for most things. It is effective at destroying buildings, airships, and entities, although it only shoots one cannon ball. Firing the cannon causes a good deal of force backwards from the firing direction. The cannon can be heated to cause it to fire as well.
-
Name
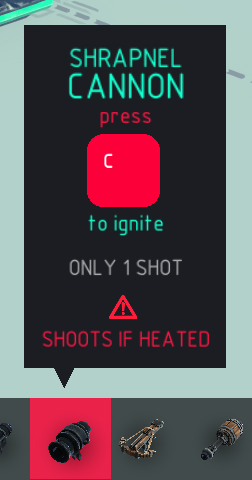
Shrapnel Cannon Size 1x1x2 Breakable? No Flammable? Heatable > The “Shrapnel Cannon” is a stronger, close-range version of the “Cannon,” though it doesn’t actually shoot anything physical. It blasts everything in a wide cone in front of it with ‘shrapnel.’ Firing the shrapnel cannon causes a lot of force backwards from the firing direction, even more than the “Cannon.” The shrapnel cannon can be heated to cause it to fire as well.
-
Name
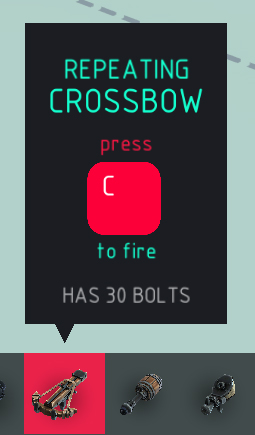
Repeating Crossbow Size 2×0.75×3 Breakable? No Flammable? Yes > The “Repeating Crossbow” is a rapid-fire crossbow that is useful for killing entities. It has 30 shots but is not 100% accurate. The bolts can also be lit on fire, spreading fire to whatever it hits.
-
Name
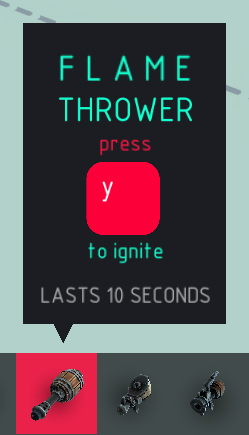
Flame Thrower Size 1x1x2 Breakable? No Flammable? No > The “Flame Thrower” throws flames 5 blocks out from its tip. Flames are good at dealing with entities and wooden structures, although a lot of your own building blocks are flammable so beware the flaming objects coming back at you.
-
Name
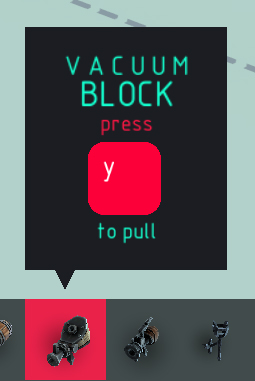
Vacuum Block Size 1x1x2 Breakable? No Flammable? No > The “Vacuum Block” is a specialized block that sucks things towards it.
-
Block Compendium : Weaponry Blocks Cont.
-
-
Name
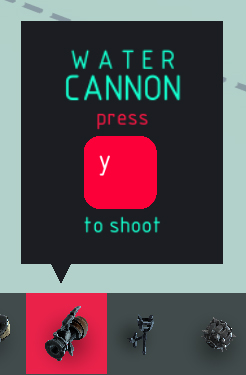
Water Cannon Size 1×1.5×2 Breakable? No Flammable? Heatable > The “Water Cannon” spews water forward that can put out fire and push back objects and entities. When heated, it spews steam instead that is much more powerful at pushing away things but cannot put out fire.
-
Name
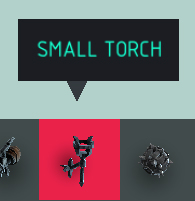
Small Torch Size 1x1x1.5 Breakable? No Flammable? No > The “Small Torch” is a minimally useful block that acts as a portable source of fire, although it can only light things on fire when they are extremely close to its top. The torch can be used to light blocks or crossbow bolts on fire to be used as flaming projectile weapons.
-
Name
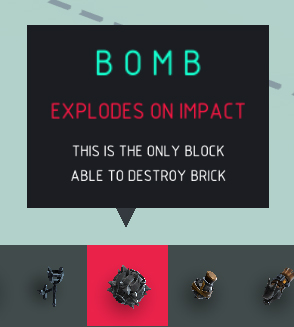
Bomb Size 2x2x2 Breakable? Explosive Flammable? Heatable > The “Bomb” is a highly explosive bomb that detonates on impact. It also lights on fire whatever it does or doesn’t explode. It is best for destroying structures and large groupings of entities. It is harder to use than other weapons, however. Due to its explosive and fiery power, it much be heaved, launched, or rolled away from your main machine (given it’s not a suicide mission of course). The bomb also detonates when heated.
-
Name
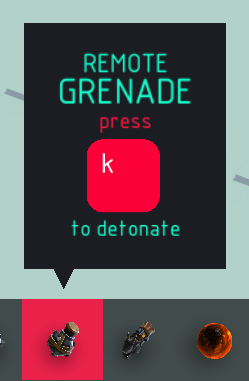
Remote Grenade Size 1.25×1.25×1.5 Breakable? Explosive Flammable? Heatable > The “Remote Grenade” is a lesser explosive that only detonates when activated or heated. Due to it not exploding on impact, its delivery system can be much cruder, not worrying about drops, smacks, or throws.
-
Name
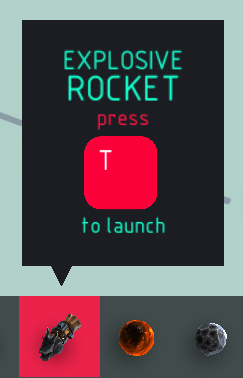
Explosive Rocket Size 1x1x2 Breakable? Explosive Flammable? Heatable > The “Explosive Rocket” is a fireworks rocket that launches itself away and explodes after a set time or when heated. The rocket is very inaccurate however, so hitting things far away is near impossible without piecing something together such as attaching flight propellers to spin the rocket.
-
Name
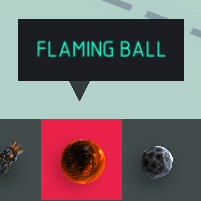
Flaming Ball Size 2x2x2 Breakable? No Flammable? No > The “Flaming Ball” is a flaming boulder. Using it is dangerous due to its fire range being fairly high. It can be extinguished using water, though it just acts like a normal boulder afterwards outside of being able to be reignited.
-
Name
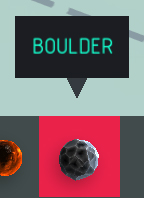
Boulder Size 2x2x2 Breakable? Yes Flammable? No > The “Boulder” is a big rock. It can be used all the ways you might imagine a big rock might be used. It’s notable, however, that it can be broken using explosives or other methods that can destroy stone.
-
Block Compendium : Flight Blocks
Flight Blocks :-
Name
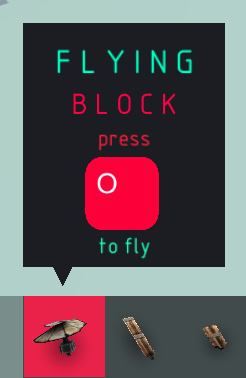
Flying Block Size 2x2x1 Breakable? No Flammable? Yes > The “Flying Block” is the main air propulsion block. When activated, it spins clockwise or counterclockwise, causing force up or down relative to the flying block.
-
Name
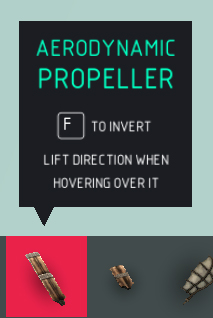
Aerodynamic Propeller Size 3x1x0.33 Breakable? No Flammable? Yes > The “Aerodynamic Propeller” generates lift when it moves forward, relative to the propeller. If spun on its side it will act more like a propeller, driving the machine forward. Being longer than the “Small Aerodynamic Propeller,” this propeller is more usable as a wing to generate lift rather than forward force.
-
Name
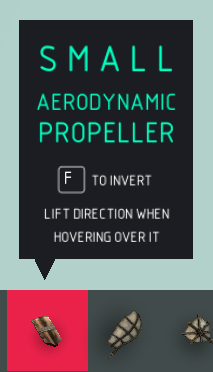
Small Aerodynamic Propeller Size 2x1x0.33 Breakable? No Flammable? Yes > The “Small Aerodynamic Propeller” is a shorter version of the “Aerodynamic Propeller.” It generates lift when it moves forward, relative to the propeller. If spun on its side it will act more like a propeller, driving the machine forward. Being the smaller propeller of the two, it is more usable as a spinning propeller rather than upwards lift.
-
Name
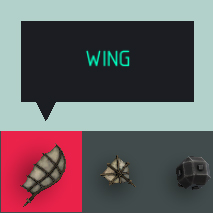
Wing Size 6x3x0.33 Breakable? No Flammable? Yes > The “Wing” allows air to pass across it and resists air going against its sides, encouraging it to fly horizontally when mounted as such. These wings are used to maintain altitude more than to gain it, although they can be angled to aid in doing so.
-
Name
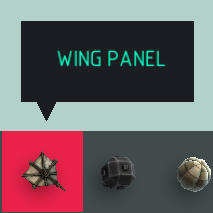
Wing Panel Size 3x3x0.5 Breakable? No Flammable? Yes > The “Wing Panel” is very similar to the “Wing.” It allows air to pass across it and resists air going against its sides, encouraging it to fly horizontally when mounted as such. These wing panels are used to maintain altitude more than to gain it, although they can be angled to aid in doing so. However, the wing panel is special in that it has mounting points on all its sides.
-
Name
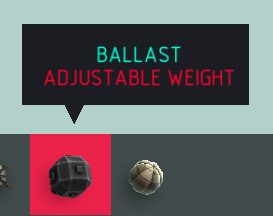
Ballast Size 1x1x1 Breakable? No Flammable? No > The “Ballast” is the only block whose only function is to affect the weight and weight distribution of your machine. It is mundane as a building block, but its weight can be changed within a certain range. This block is useful for keeping things on the ground or balancing out flying machines to keep them stable. Since it’s inflammable, unbreakable, and only takes up one block of space, it can be useful as a building block in extreme circumstances.
-
Name
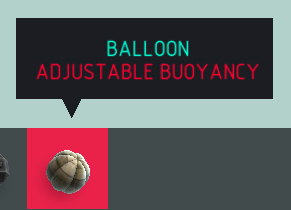
Balloon Size 2x2x2 Breakable? Poppable Flammable? Yes > The “Balloon” is a useful but dangerous way of lightening your machine. It generates upwards force passively regardless of its orientation, making it a favorable alternative for flying blocks or propellers in flying machines due to flying machines being very likely to spin or roll, inverting the helpfulness of flying blocks and propellers. The balloon can be popped using minimal damage or fire, and the rope attaching it can be cut, so using the balloon can be a risk.
-
Block Compendium : Automation Blocks
Automation Blocks :-
Name
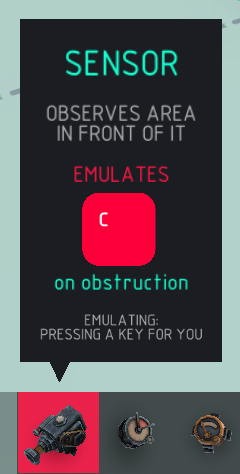
Sensor Size 1x1x1.75 Breakable? No Flammable? No > The “Sensor” block emulates a key press when something enters its detection area.
-
Name
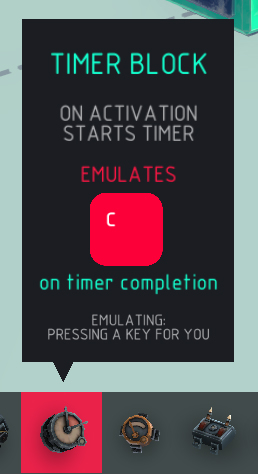
Timer Block Size 1x1x0.75 Breakable? No Flammable? No > The “Timer Block” emulates a key press for a set time after a set time has passed. The timer starts when you hit play or use a control key.
-
Name
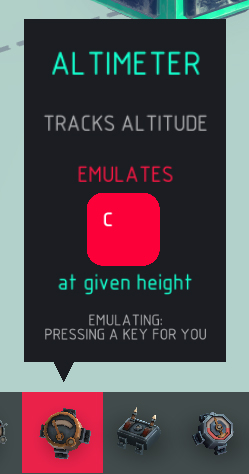
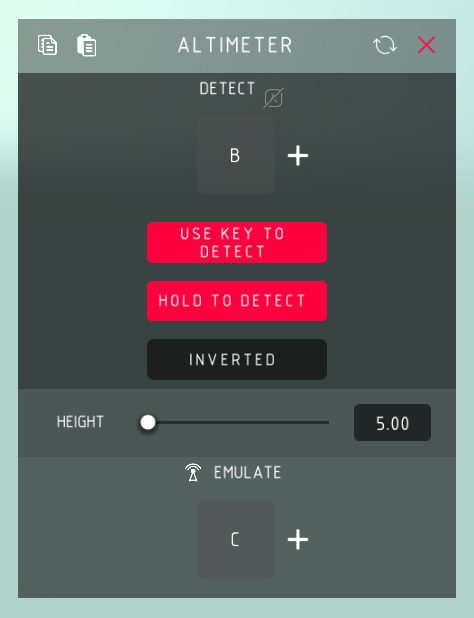
Altimeter Size 1x1x0.5 Breakable? No Flammable? No > The “Altimeter” block emulates a key press when it reaches a set altitude.
-
Name
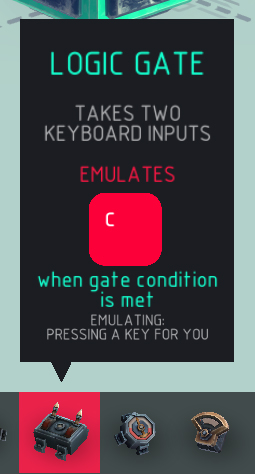
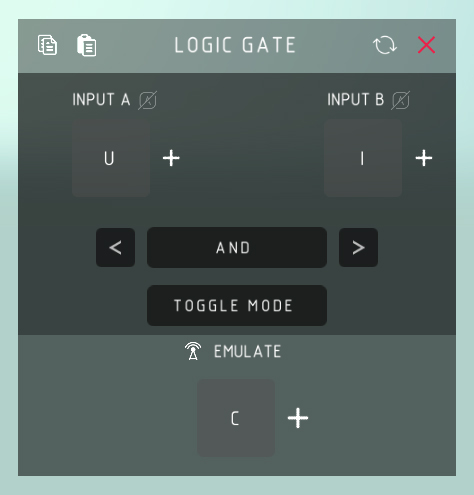
Logic Gate Size 1x1x0.5 Breakable? No Flammable? No > The “Logic Gate” block emulates a key press when a set logical argument based on 1 or 2 control keys reads true.
-
Name
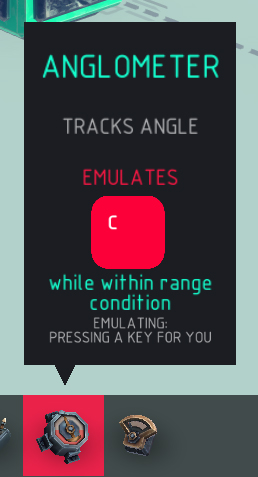
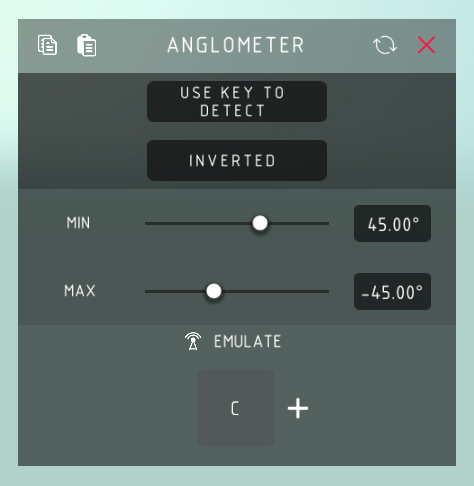
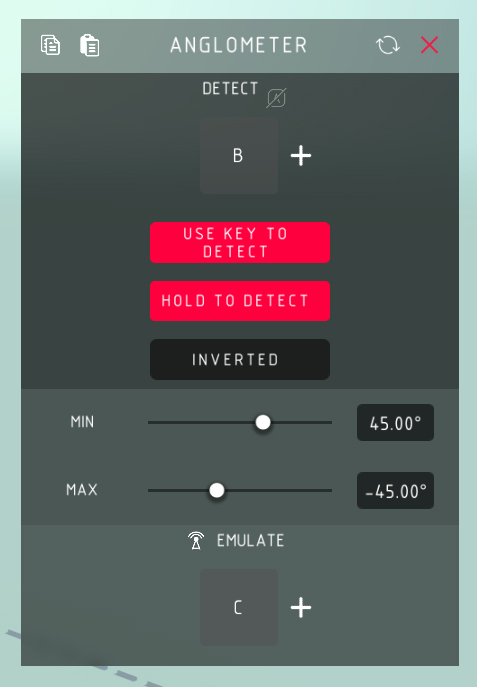
Anglometer Size 1x1x0.5 Breakable? No Flammable? No > The “Anglometer” block emulates a key press when it is tilted within a set angle range. It only reads its angle from side to side from its initial position, regardless if it’s placed sideways or upside down. The anglometer also works when placed facing up or down, detecting its rotation as angles.
-
Name
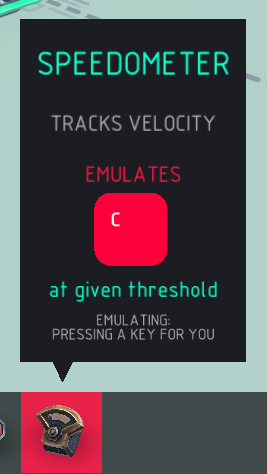
Speedometer Size 1x1x0.5 Breakable? No Flammable? No > The “Speedometer” block emulates a key press when it is moving within a set speed range.
-
Block Compendium : Armour Blocks
Armour Blocks :-
Name
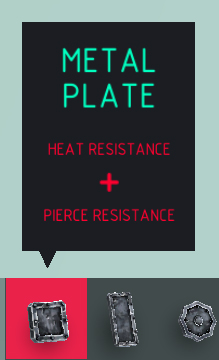
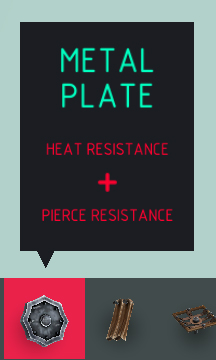
Metal Plate (Small) Size 1x1x0.33 Breakable? No Flammable? No > The small “Metal Plate” is your main armor block. It protects your machine from arrows, axes, swords, spears, and etc. Although the metal plate is invulnerable to fire, it does not block fire, meaning fire can still light the blocks underneath on fire.
-
Name
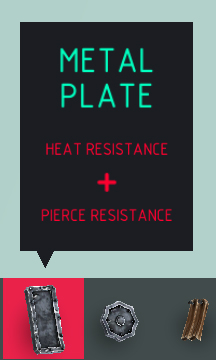
Metal Plate (Large) Size 1x2x0.33 Breakable? No Flammable? No > The large “Metal Plate” is your larger main armor block. It protects your machine from arrows, axes, swords, spears, and etc. Although the metal plate is invulnerable to fire, it does not block fire, meaning fire can still light the blocks underneath on fire.
-
Name
Metal Plate (Round) Size 2x2x0.33 Breakable? No Flammable? No > The round “Metal Plate” is your round main armor block. It protects your machine from arrows, axes, swords, spears, and etc. Although the metal plate is invulnerable to fire, it does not block fire, meaning fire can still light the blocks underneath on fire. Due to its round shape this version is less useful than its counterparts, however it can be used on the sides of wheels to cover most of the surface.
-
Name
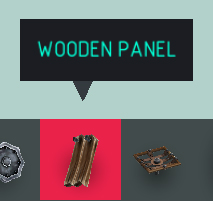
Wooden Panel Size 1x2x0.25 Breakable? No Flammable? Yes > The “Wooden Panel” is useless as a defense. Arrows, swords, and etc. simply pass through it. Its only noteworthy defense attribute is that enemies ignore it, choosing to rather walk into it trying to reach other blocks than to hit it. This block is really only useful for aesthetics.
-
Name
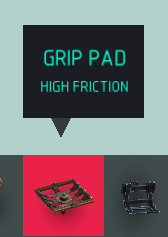
Grip Pad Size 1x1x0.33 Breakable? No Flammable? No > The “Grip Pad” block has more friction than other blocks. It can be used to slow down things that slide against it, or slow down a machine by rubbing against its wheels or the ground.
-
Name
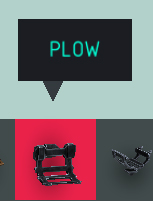
Plow Size 3×2.25×1.75 Breakable? No Flammable? No > The “Plow” block is a plow. It can be used to plow through objects, entities, and the like.
-
Name
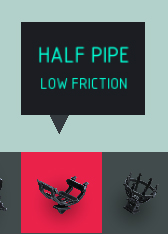
Half Pipe Size 3x2x1.5 Breakable? No Flammable? No > The “Half Pipe” block is useful for funneling things such as bombs from point A to point B.
-
Name
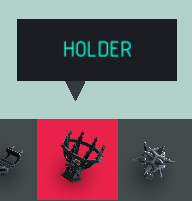
Holder Size 3x3x2.5 Breakable? No Flammable? No > The “Holder” block is useful for holding things such as bombs for transportation, safe-keeping, launching, and etc.
-
Name
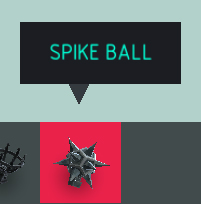
Spike Ball Size 2x2x2 Breakable? No Flammable? No > The “Spike Ball” block is more a weapon than an armor. It attaches to a block and can be used as a flail, club, or such.
-
– – – – –
Inspection Menus : General Menu
THE INSPECTION MENU
- Control Keys :
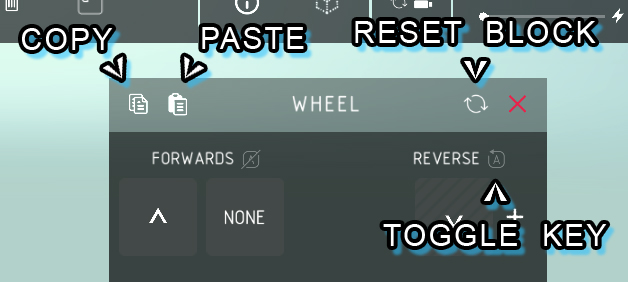
> The text above the large squares is the Control Key Label. The Label describes what the Control Key does. The letter or symbol inside of the large squares is the Control Key assigned to the function described in the Control Key Label. You can also click the large plus sign next to the Control Key to enable a second Control Key to activate the same function. Simply click the Control Key and then your key of choice to reassign the key. - Copy :
> The button in the top left that resembles 2 pieces of paper/documents will copy all of your settings for the currently selected block. - Paste :
> The button in the top left, to the right of the Copy button, that resembles a clipboard and a piece of paper/document will paste all applicable settings you have copied from another block into the currently selected block. - Reset Block :
> The button in the top right, to the left of the Close button, that resembles 2 arrows chasing each other in a circle will reset all the settings of the currently selected block to the default settings that come with a newly placed block. - Toggle Key :
> The button to the right of the Control Key Label resembling either the letter A with a line through it or the letter A circled by an arrow toggles the control key on or off. When a control key is toggled off it ignores any of the keys being pressed, disabling the function of the block.
Inspection Menus : Basic Blocks
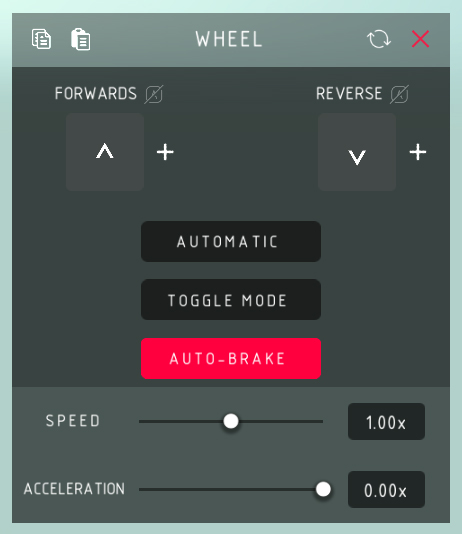
Basic Blocks :Wheel
- Forwards :
> Spins the wheel forward, indicated by the arrow on the side while editing. - Reverse :
> Spins the wheel backwards, indicated by the arrow on the side while editing. - Automatic :
> Spins the wheel automatically, without the need for a control key. - Toggle Mode :
> The control keys toggles the wheel on and off. - Auto-Brake :
> The wheel reduces its speed to 0 automatically after the control key is deactivated. - Speed :
> The maximum speed the wheel spins at. - Acceleration :
> How fast the wheel reaches its maximum speed.
- Forwards :
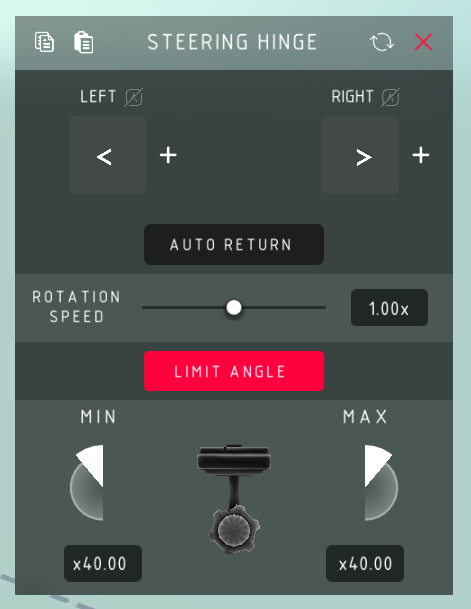
Steering Hinge
- Left :
> Turns the hinge left, indicated by the arrow on the top while editing. Left is with the arrow. - Right :
> Turns the hinge right, indicated by the arrow on the top while editing. Right is with the arrow. - Auto Return :
> The hinge automatically returns to its starting position after the control key is deactivated. - Rotation Speed :
> The speed at which the hinge turns. - Limit Angle :
> Allows you to limit how far the hinge can turn before it stops itself, preventing damage as the hinge can otherwise turn all the way around into the block it is attached to. - Min :
> The maximum angle in degrees that the hinge can turn left before it stops itself. - Max :
> The maximum angle in degrees that the hinge can turn right before it stops itself.
- Left :
Inspection Menus : Locomotion Blocks
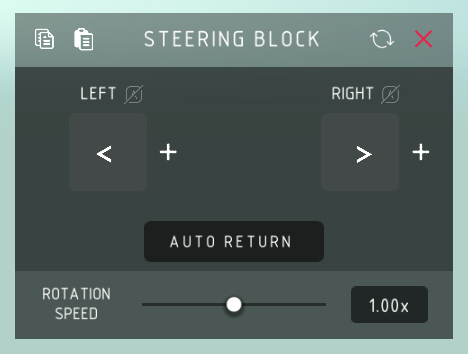
Locomotion :Steering Block
- Left :
> Turns the steering block left, indicated by the arrow on the top while editing. Left is with the arrow. - Right :
> Turns the steering block right, indicated by the arrow on the top while editing. Right is against the arrow. - Auto Return :
> The steering block automatically returns to its stating position after the control key is deactivated. - Rotation Speed :
> The speed at which the steering block turns.
- Left :
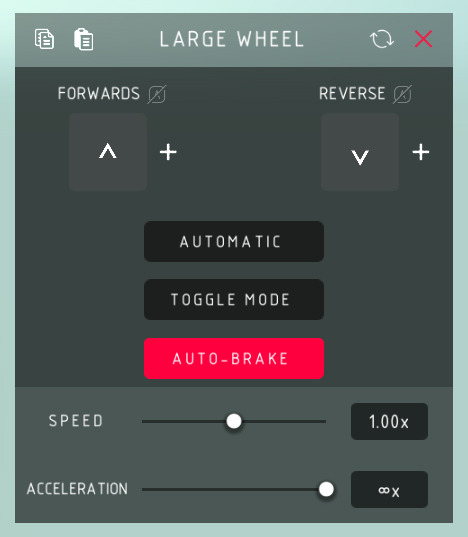
Large Wheel
- Forwards :
> Spins the wheel forward, indicated by the arrow on the side while editing. - Reverse :
> Spins the wheel backwards, indicated by the arrow on the side while editing. - Automatic :
> Spins the wheel automatically, without the need for a control key. - Toggle Mode :
> The control keys toggles the wheel on and off. - Auto-Brake :
> The wheel reduces its speed to 0 automatically after the control key is deactivated. - Speed :
> The maximum speed the wheel spins at. - Acceleration :
> How fast the wheel reaches its maximum speed.
- Forwards :
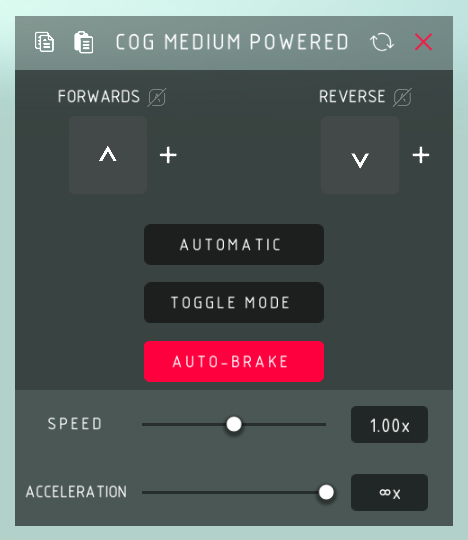
Medium Powered Cog
- Forwards :
> Spins the cog forward, indicated by the arrow on the side while editing. - Reverse :
> Spins the cog backwards, indicated by the arrow on the side while editing. - Automatic :
> Spins the cog automatically, without the need for a control key. - Toggle Mode :
> The control keys toggles the cog on and off. - Auto-Brake :
> The cog reduces its speed to 0 automatically after the control key is deactivated. - Speed :
> The maximum speed the cog spins at. - Acceleration :
> How fast the cog reaches its maximum speed.
- Forwards :
Inspection Menus : Mechanical Blocks
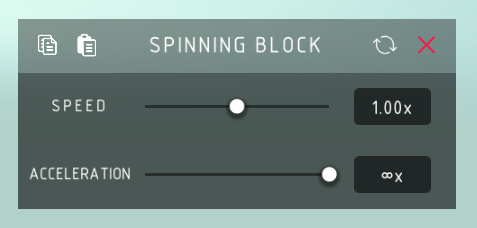
Mechanical Blocks :Spinning Block
- Speed :
> The speed at which the spinning block spins. - Acceleration :
> How fast the spinning block reaches its speed.
- Speed :
Suspension
- Spring :
> The amount of force required to compress the spring, and the amount of force the spring produces to expand.
- Spring :
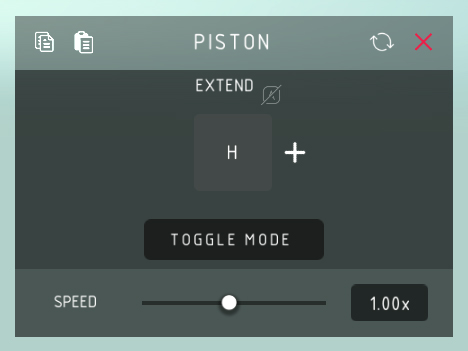
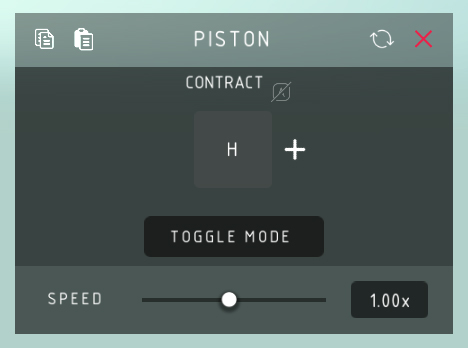
Piston
- Extend :
> Extends the piston. - Contract :
> Contracts the piston. - Toggle Mode :
> Toggles the piston between contracted and extended. - Speed :
> The speed and force with which the piston extends and contracts.
- Extend :
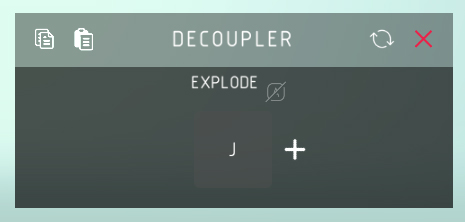
Decoupler
- Explode :
> Disconnects the decoupler from its block. The disconnection causes force between the decoupler and its block as well, pushing them away from each other.
- Explode :
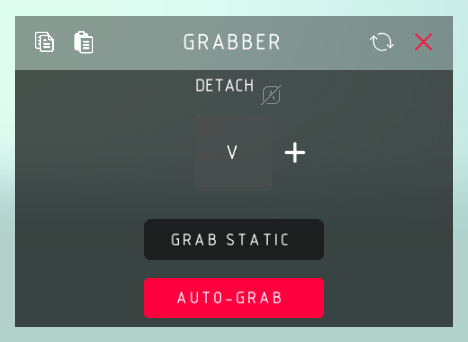
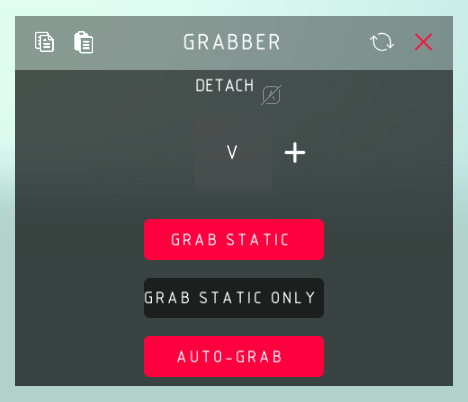
Grabber
- Detach :
> Releases the grabbed object. - Grab Static :
> Toggles the ability for the grabber to grab static objects, including level geometry, as well. - Grab Static Only :
> Toggles the grabber to only grab static objects, including level geometry. - Auto-Grab :
> Toggles the grabber’s ability to automatically grab objects. The detach control key now controls grabbing as well as detaching.
- Detach :
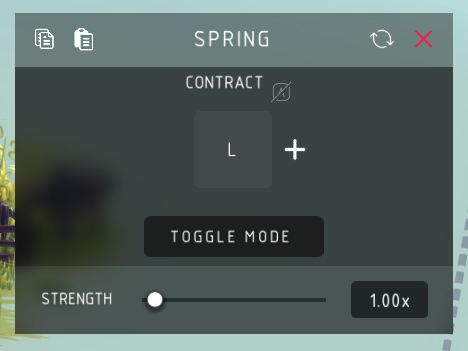
Spring
- Contract :
> Pulls the ends of the spring towards each other. - Toggle Mode :
> Toggles the spring between contracting and neutral. - Strength :
> The speed and force the ends of the spring pull towards each other with.
- Contract :
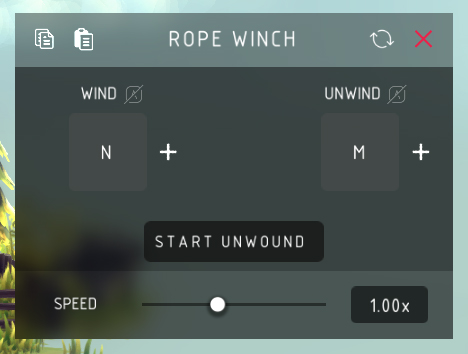
Rope Winch
- Wind :
> Winds up the rope, shortening its length. - Unwind :
> Unwinds the rope, lengthening it. - Start Unwound :
> Allows the rope to start in play mode at its maximum length. - Speed :
> The speed and force with which the rope winds and unwinds.
- Wind :
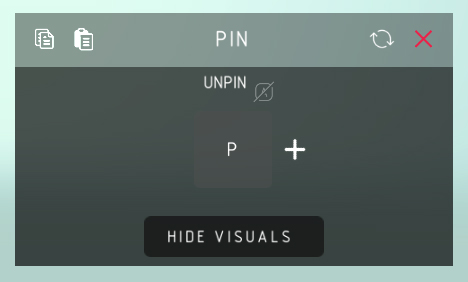
Pin
- Unpin :
> Releases the pinned block, effectively removing the pin. - Hide Visuals :
> Hides the visible pin during play mode.
- Unpin :
Camera Block
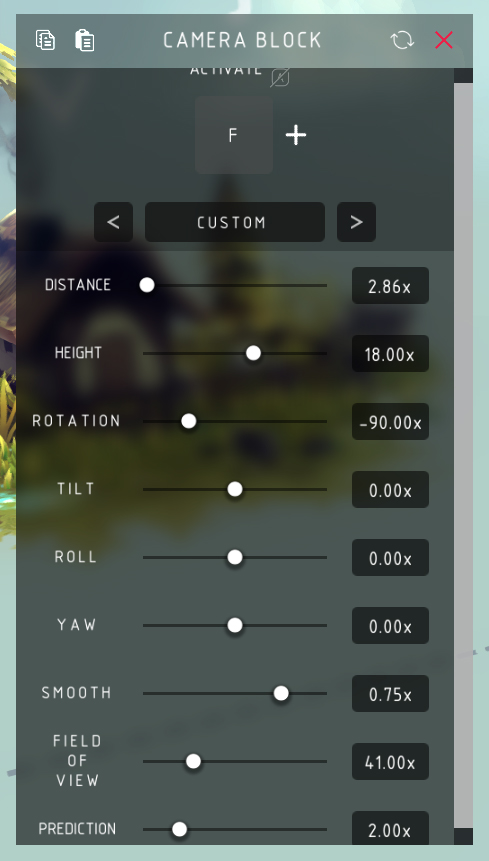
- Activate :
> Switches to the camera view. If more than one camera block is set to the same control key, the control key will cycle through them. - Presets :
- Upright :
> A basic following camera view with distance, height, rotation, tilt, roll, yaw, and smoothing. - True Tracking :
> A basic following camera view that follows the machine around turns tighter with distance, height, tilt, roll, yaw, and smoothing. - First Person :
> A camera that sits directly above the camera block and turns with the machine exactly and immediately with distance, height, rotation, tilt, roll, yaw, and field of view. - Custom :
> The upright camera with distance, height, rotation, tilt, roll, yaw, smoothing, field of view, and prediction.
- Upright :
- Advanced Options :
> Toggles the ability to edit the roll, yaw, and smoothing. - Distance :
> The distance from the camera to the camera block. - Height :
> Rotates the camera around the camera block on a vertical axis relative to the camera block. - Rotation :
> Rotates the camera around the camera block on a horizontal axis relative to the camera block. - Tilt :
> Tilts the camera up and down relative to the camera. - Roll :
> Rolls the camera from side to side relative to the camera. - Yaw :
> Turns the camera from side to side on a horizontal axis relative to the camera. - Smooth :
> Smooths out the movements of the camera, preventing jolts, bumps, and snaps. - Field of View :
> The field of view from the camera view. You can decrease this to zoom in to distant targets from a closer camera. - Prediction :
> I have tried to test this setting in game, but I have no clue what it does.
- Activate :
Inspection Menus : Weaponry Blocks
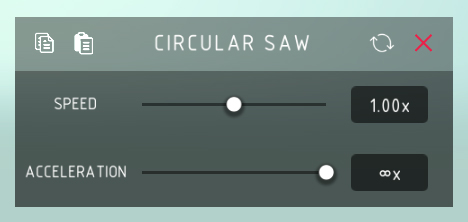
Weaponry :Circular Saw
- Speed :
> The speed at which the saw spins. - Acceleration :
> How fast the saw reaches its speed.
- Speed :
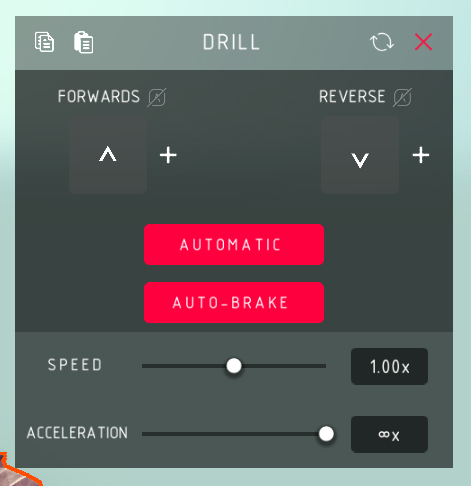
Drill
- Forwards :
> Spins the drill forwards, indicated by the arrow in editor mode. - Reverse :
> Spins the drill backwards, indicated by the arrow in editor mode. - Automatic :
> Spins the drill automatically. This is on by default. - Auto-Brake :
> Automatically slows the drill’s speed to 0 when the control key is deactivated. - Speed :
> The speed and force at which the drill spins. - Acceleration :
> How fast the drill reaches its maximum speed.
- Forwards :
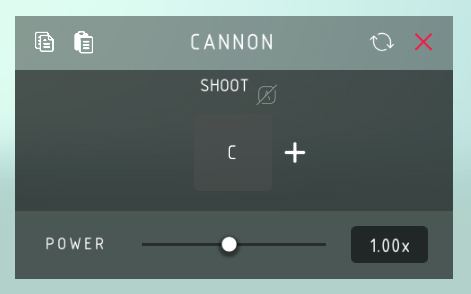
Cannon
- Shoot :
> Shoots the cannon. - Power :
> How much force and speed the cannon shoots with.
- Shoot :
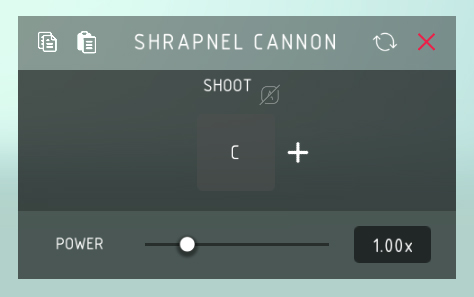
Shrapnel Cannon
- Shoot :
> Shoots the shrapnel cannon. - Power :
> How much force the shrapnel cannon shoots with.
- Shoot :
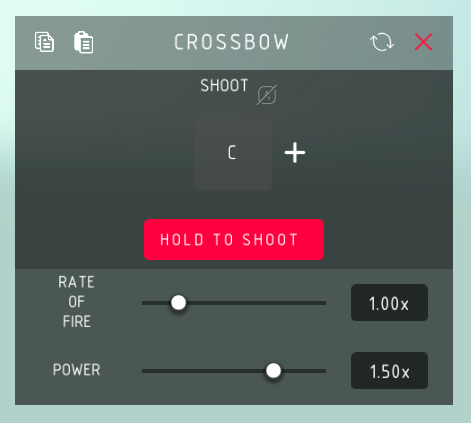
Crossbow
- Shoot :
> Shoots the crossbow. - Hold to Shoot :
> Toggles the ability to hold down the control key to automatically shoot the crossbow as fast as the rate of fire. - Rate of Fire :
> How long you have to wait between firing crossbow bolts. - Power :
> How much force and speed the crossbow fires with.
- Shoot :
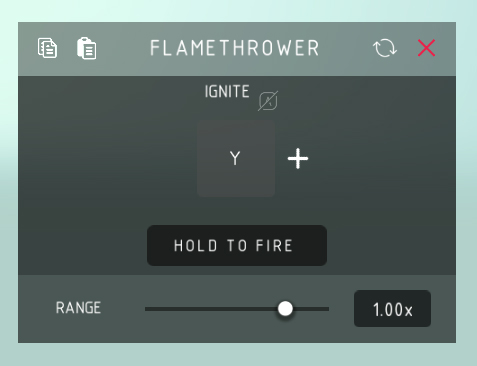
Flamethrower
- Ignite :
> Lights the flamethrower on fire. - Hold to Fire :
> The ability to hold the control key down to fire or for the control key to toggle the flamethrower on and off. - Range :
> How far the flamethrower can reach with its flames.
- Ignite :
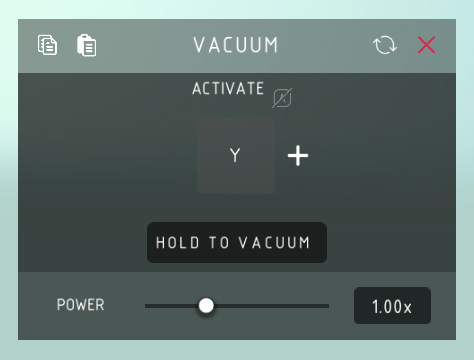
Vacuum
- Activate :
> Turns on the vacuum. - Hold to Vacuum :
> The ability to hold the control key down to fire or for the control key to toggle the vacuum on and off. - Power :
> The force with which the vacuum sucks things towards it.
- Activate :
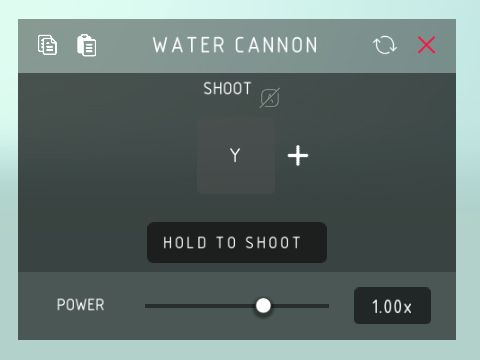
Water Cannon
- Shoot :
> Shoot water. - Hold to Shoot :
> The ability to hold the control key down to fire or for the control key to toggle the water cannon on and off. - Power :
> The force with which the water cannon pushes things away, as well as how far it can shoot water.
- Shoot :
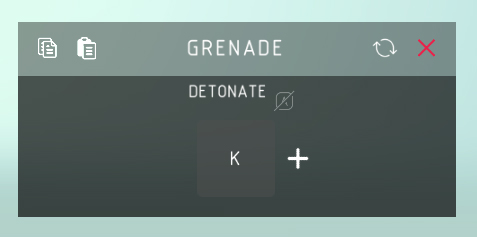
Grenade
- Detonate :
> Explodes the grenade.
- Detonate :
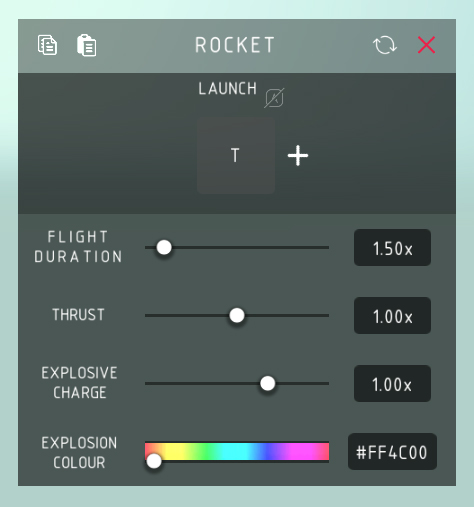
Rocket
- Launch :
> Launches the rocket. - Flight Duration :
> How long the rocket stays active after launching before it explodes. - Thrust :
> How much force and speed the rocket launches with. - Explosive Charge :
> How large and damaging the explosion is. - Explosion Colour :
> The color of the explosion.
- Launch :
Inspection Menus : Flight Blocks
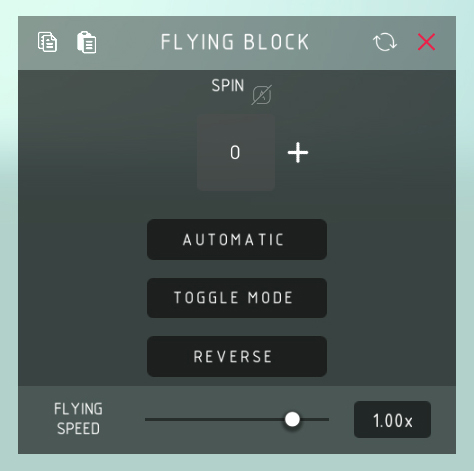
Flight Blocks :Flying Block
- Spin :
> Spins the flying block. - Automatic :
> Automatically spins the flying block. - Toggle Mode :
> Allows you to toggle the flying block on and off. - Reverse :
> Reverses the spin, inverting the flying direction. - Flying Speed :
> The speed at which the flying block spins, and the speed and force at which the flying block flies.
- Spin :
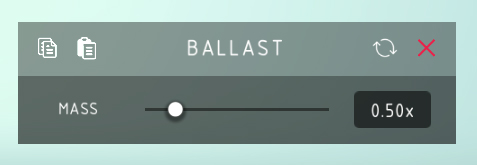
Ballast
- Mass :
> Changes the mass and weight of the ballast.
- Mass :
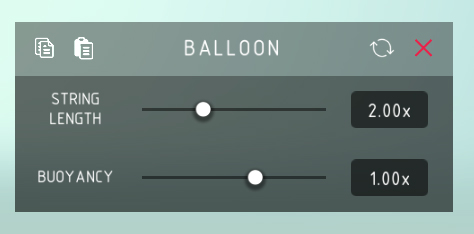
Balloon
- String Length :
> The length of the string that attaches the balloon to the block. - Buoyancy :
> How much force and speed the balloon flies upwards with.
- String Length :
Inspection Menus : Automation Blocks
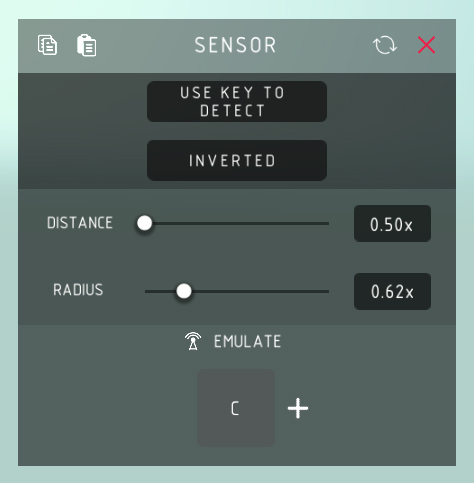
Automation Blocks :Sensor
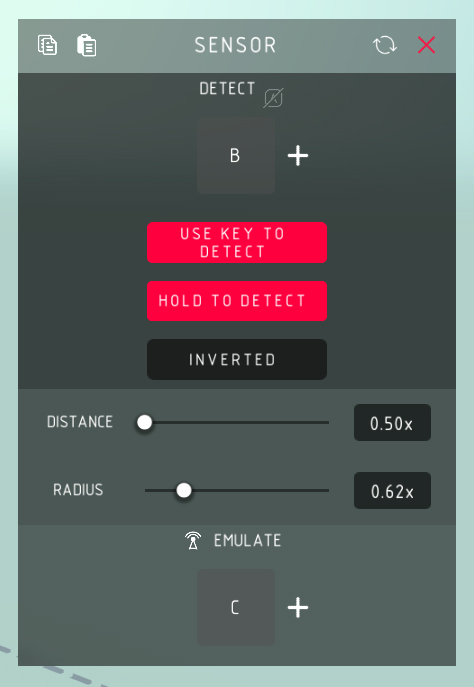
- Detect :
> Enables the sensor to detect objects. - Use Key to Detect :
> Toggles the ability to activate the sensor with a control key. - Hold to Detect :
> The ability to hold down the control key to detect, the control key toggles the sensor otherwise. - Inverted :
> Inverts the sensor’s emulation requirements, emulating the control key only when nothing is being detected. - Distance :
> How far away the sensor can sense objects. - Radius :
> How wide the detection radius is for the sensor’s detection cylinder. - Emulate :
> Emulates a key press, effectively pressing a control key for you.
- Detect :
Timer Block
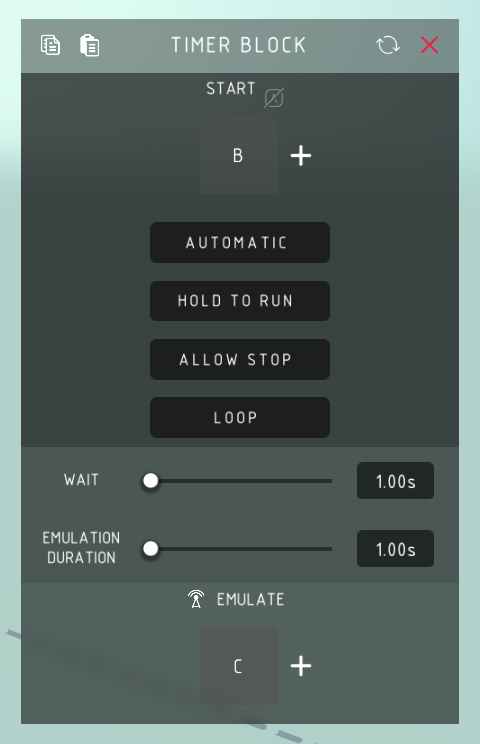
- Start :
> Starts the timer. - Automatic :
> Automatically starts the timer when you enter play mode. - Hold to Run :
> Changes the timer to only count down when you hold the control key. - Allow Stop :
> Changes the control key to toggle the timer on and off. By default, pressing the control key more than once before the timer finishes simply resets the timer. - Loop :
> Changes the timer to automatically repeat itself after it finishes. - Wait :
> The length of the timer. - Emulation Duration :
> How long the emulated key press is “held down.” - Emulate :
> Emulates a key press, effectively pressing a control key for you.
- Start :
Altimeter
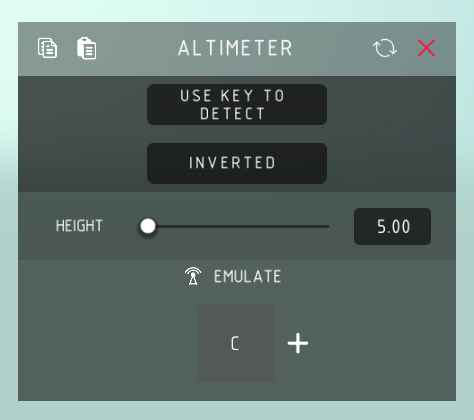
- Detect :
> Checks the altitude. - Use Key to Detect :
> Changes the altimeter to only detect the altitude when the control key is activated. - Hold to Detect :
> Allows you to hold the control key down to continually detect the altitude. - Inverted :
> Inverts the altimeter’s emulation requirements, emulating the control key only when not in the set height range. - Height :
> The altitude the altimeter detects for. - Emulate :
> Emulates a key press, effectively pressing a control key for you.
- Detect :
Logic Gate
- Input A :
> Control key A. - Input B :
> Control key B. - Logic Options :
- And :
> Activates when both A and B are detected. - Or :
> Activates when either A or B is detected. - Nor :
> Activates when neither A nor B is detected. - Nand :
> Opposite of And, Activates when neither A nor B is detected, and when A or B is detected, but not when A and B are detected. - Xor :
> Also known as exclusive Or, activates when only A or only B is detected. - Xnor :
> Activates when neither A nor B is detected and when both A and B are detected. - Not :
> The only logic option that uses a single control key, activates when the control key is not detected.
- And :
- Toggle Mode :
> Changes the logic gate to toggle the emulation key on and off instead of only being on when the logic option is activated. - Emulate :
> Emulates a key press, effectively pressing a control key for you.
- Input A :
Anglometer
- Detect :
> Control key to detect the current angle. - Use Key to Detect :
> Enables the use of the control key to detect the angle instead of the anglometer constantly detecting its angle automatically. - Hold to Detect :
> Allows you to hold down the control key to constantly detect the angle. - Inverted :
> Inverts the anglometer’s requirements, emulating the control key when the anglometer is not in the set angle range. - Min :
> The maximum angle in degrees the anglometer has to tilt counterclockwise to activate its emulation key. - Max :
> The maximum angle in degrees the anglometer has to tilt clockwise to activate its emulation key. - Emulate :
> Emulates a key press, effectively pressing a control key for you.
- Detect :
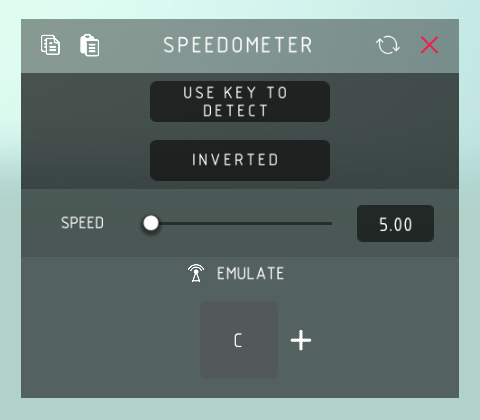
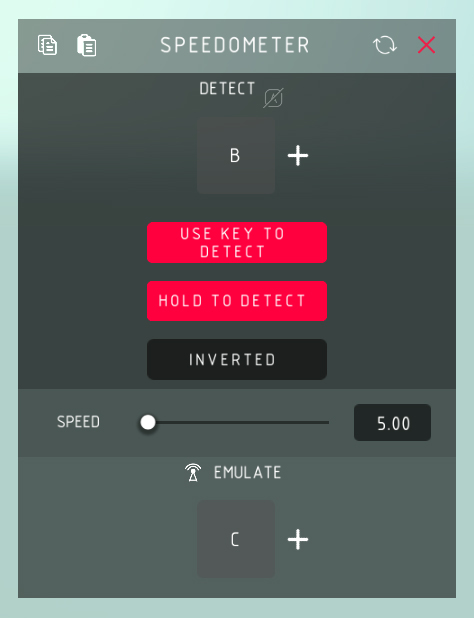
Speedometer
- Detect :
> Control key to detect the current speed. - Use Key to Detect :
> Enables the use of the control key to detect the speed instead of the speedometer constantly detecting its speed automatically. - Hold to Detect :
> Allows you to hold down the control key to constantly detect the speed. - Inverted :
> Inverts the speedometer’s requirements, emulating the control key when the speedometer is not going the set speed. - Speed :
> How fast the speedometer has to be going to activate. - Emulate :
> Emulates a key press, effectively pressing a control key for you.
- Detect :
– – – – –
Conclusion
Thanks for reading my guide!
Please consider giving it a like or even a favorite! I’d also appreciate any comments you leave! Make sure to hit that bell- wait wrong platform.
Credits
- Me, MGBucket
- You, the viewer
- Spiderling Studios
Quick last note : If you are fluent in another language, feel free to release a translated version of this guide. I am willing to provide my images and resources as needed. All I would request is that I am appropriately credited as the original creator.
This is all for Besiege Sieging for Dummies (The Ultimate Reference Guide for Beginners) hope you enjoy the post. If you believe we forget or we should update the post please let us know via comment, we will try our best to fix how fast is possible! Have a great day!
- Check All Besiege Posts List









Leave a Reply