
Who Are the Butcher Gang?
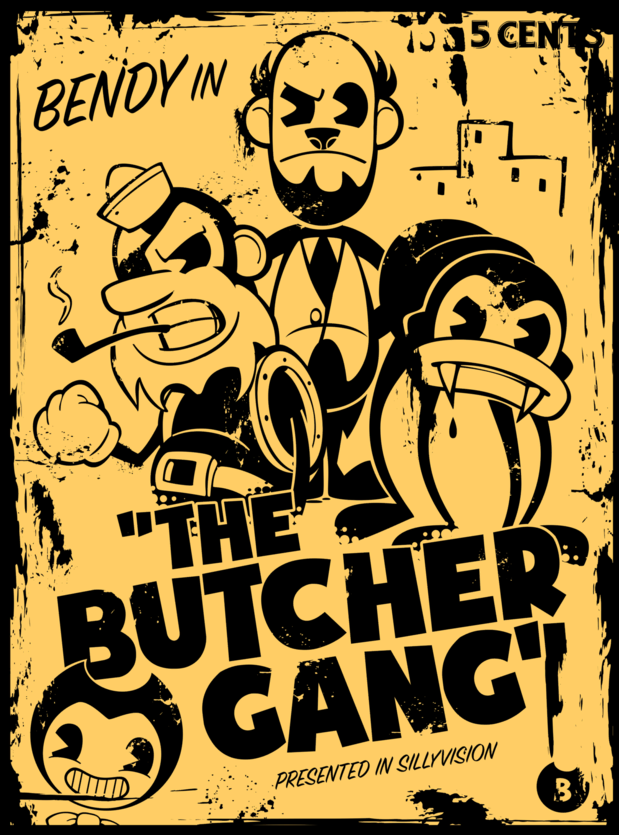
If you’ve booted up “Bendy and the Ink Machine”, you likely know who the Butcher Gang is at this point- they’re a trio of enemies from the original Bendy cartoons who have been spawned into this hellscape by Joey Drew’s ink machine as soulless husks hellbent on your destruction! There are three members you’ll have to concern yourself with:
-Charley, known in-game as Piper
-Barley, known in-game as Fisher
-Edgar, known in-game as Striker
Although they all lack a personality but flourish with a substitute of an indiscriminate thirst for blood, each Butcher Gang member has a unique attack style and a set speed for you to overcome, but, in essence, are very similar. Despite that, I still spent way too much time creating this guide for you to be able to defeat each of them individually. 😀
Where Can You Find the Butcher Gang?

Every appearance of the Butcher Gang members are preset, so don’t worry- no future playthroughs will bring with them any surprises. Here are the locations you’ll have to face off with them:
Chapters 1 & 2
None of the Butcher Gang members are in either beginning chapter. The only enemies in these levels you need to concern yourself with are Bendy and the Searchers.
Chapter 3
- Your first Butcher Gang enemy will be Piper in the beginning of Chapter 3. When opening the door with Boris by simultaneously using the two switches, you’ll need to walk down a hallway where the lever is on one of the back walls, right next to a Butcher Gang poster- the first one seen in the game. When approaching too close (which you will have to to progress through the game), Piper will tear through the poster, fall flat on his face, and promptly chase after you once recovering.
- During each of Alice Angel’s tasks, there will be one of each Butcher Gang member waiting for you on the different levels:
- Piper will be a threat during both Level K tasks (finding the gears and then destroying the Bendy cutouts). During the gear task, he will be right in the doorway upstairs and will immediately lumber towards you, so make sure not to leave your game unattended until he’s been taken care of. He also carries what will most likely be your first gear, making him a quest essential kill. During the Bendy task, he’s not far off, but is still further away. He’ll be in the general area of the first hallway you find after passing the desk room, but could also be as far back as in the back of the toy room nearby.
- Fisher will be on Level 11, but won’t attack until you walk further back into the area. He, much like Piper, is an essential kill to collect all of the ink, just more subtly. He resides in the back hallway with the second ink beast and will attack as soon as you walk through the doorway.
- Striker waits on Level P and, much like Piper during the Bendy cutout quest, will be in a general area rather than one set location. Most times I’ve found him right in the entrance hallway, but I’ve also had a game where he wandered into the workshop rooms.
- After finishing the Bendy cutout mission, all three of the Butcher Gang members will attack you and Alice’s hideout, along with a gang of Searchers. Defeating these enemies are the task for this mission.
- If you take the Path of the Angel and use the special axe in Grant Cohen’s office to break down the boards at Heavenly Toys and activate the secret boss, the second phase/lever prompts multiple of each Butcher Gang member to appear. This is the only time that you will ever fight more than one of each at the same time.
Chapter 4
Throughout your journey through Bendy Land, the Butcher Gang is hanging out in the Research and Design department of the amusement park. All three members are facing a campfire away from Henry and aren’t a threat until he approaches too closely on the floor level. No matter how much noise you make upstairs, it makes no difference- they won’t notice.
Chapter 5
The Butcher Gang in this chapter are hiding out in a maze in the offices of Joey Drew Studios. They wander the hallways as Henry has to gather ink in order to fix the pipes that will allow him to traverse further towards the ink machine, and can be dealt with multiple ways, which will be elaborated on further in this guide.
Piper

The Piper- or lesser known as his stage name, Charley- is the very first Butcher Gang member you encounter in Chapter 3. With a moderate speed/difficulty, Piper’s definitely not the worst enemy you face, but he can be a bit of a challenge at times. Be vigilant, and don’t let your guard down when he’s around.
Appearances: A Review
- Chapter 3: Level K- During door puzzle with Boris, gear task for Alice, and destroying the Bendy cutouts for Alice; Level 9 during the Angel’s Wrath; in Heavenly Toys during the Lever Challenge boss fight
- Chapter 4: Research and Design- Huddled around a fire with other Butcher Gang members
- Chapter 5: Administrative Maze- Wandering the hallways with other Butcher Gang members
Statistics
Courtesy of the Bendy and the Ink Machine Wiki: https://bendy.fandom.com/wiki/Piper
- Attack Power: 5 (Low)
- Speed: Moderate
- Health: Medium-Low
- Hits to Kill:
- Axe: 1
- Tommy Gun/Empty Bacon Soup Can/Pipe Wrench: 2
- Gent Pipe: 3-9, Depending on the Level
Attacks
Piper has only one short-range attack, in which he swings a Gent pipe at you. This is convenient in that, should Henry need to run away, he can’t attack long-range; however, he makes up for what he lacks in range in attack speed.
The way Piper’s attacks are structured is that he swings his pipe quickly, and almost immediately returns to pursuit mode, which lets him them return to attack mode at a quickened pace. Although there is a very, very short grace spell between attacks, he can still attack quicker and do some real damage if you’re not careful.
Strategy
Like many villains you’ll find in video games, Piper is a character that often requires you to attack while refreshing after an attack of his own. However, as previously stated, this can be harder than originally thought, albeit not much more difficult. Piper has a more moderate speed than that of Striker, making it easier to run away, but his attack speed and recovery time is quicker. So, be careful when getting close, and make sure to back up when the going gets rough.
Because of his speed, getting recovery time isn’t difficult as long as you keep moving- obstacles and crowded areas can make this more difficult, however. But if your health is low and/or remains low, it’s likely best not to continue attacking until you get a moment, seeing as Piper can deal a lot of damage if given the chance and one hit, if your health is bad enough, can be curtains.
The best method, as stating, is letting him attack, retreating, then attacking quickly before he can go back into pursuit mode.
Fisher

Fisher, or Barley, easily makes up for what he lacks in speed for strength and attack power, wielding two attacks, unlike his counterparts. It’s easy to run, but be careful when fighting him face-to-face, or else you might just find this dog has some bite to his bark.
Appearances: A Review
- Chapter 3: Level 11 during Alice’s ink task, Level 9 during the Angel’s Wrath; main room of Heavenly Toys during the Lever Challenge secret boss
- Chapter 4: Research and Design- Huddled around a fire with other Butcher Gang members
- Chapter 5: Administrative Maze- Wandering the hallways with other Butcher Gang members
Statistics
Courtesy of the Bendy and the Ink Machine Wiki: https://bendy.fandom.com/wiki/Fisher
- Attack Power: 3 (High)
- Speed: Slow
- Health: 5
- Hits to Kill:
- Syringe, Gent Pipe: 5
- Tommy Gun: 4
- Axe: 3
- Empty Bacon Soup Can: 2
Attacks
Unlike the other members of the Butcher Gang, Fisher has two attacks. Both are low in range, but can deal some damage:
- His initial attack is swinging at Henry with a wrench, in a manner similar to the other members of the Butcher Gang.
- His secondary attack has him swinging his head and is prompted if Henry is too close to Fisher. This attack can hit more than once due to its length.[/list[\]
Strategy
Admittedly, my experience with Fisher is limited, despite playing through Chapter 3 multiple times. Although his attacks can be difficult to dodge, I never had much trouble defeating him easily- I actually didn’t know that his attack power was amped up until reading the wiki to double-check for attacks and statistics.
When fighting Fisher, I always tend to keep moving, usually by backing up so I can avoid any attacks since his speed his slower and it’s easier to move away. This way, I would jump in and hit him a few times before the animation ended, but still have time to recover before he attacked again. This strategy is both similar to the other Butcher Gang members and to what the Wiki and other players have stated.
Striker

Striker, also known as Edgar, is the third Butcher Gang enemy you encounter in the game, his first appearance being in Level P during the valve core task for Alice Angel. Striker is quick on his feet but slow on his attack, so don’t hesitate to strike this Striker where it hurts.
Appearances: A Review
- Chapter 3: Level P during Alice’s valve cores task and Level 9 during the Angel’s Wrath; main room of Heavenly Toys during the Level Challenge boss fight
- Chapter 4: Research and Design- Huddled around a fire with other Butcher Gang members
- Chapter 5: Administrative Maze- Wandering the hallways with other Butcher Gang members
Statistics
Courtesy of the Bendy and the Ink Machine Wiki: https://bendy.fandom.com/wiki/Striker
- Attack Power: 5 (Low)
- Speed: Fast
- Health: 5
- Hits to Kill:
- Plunger, Syringe, Tommy Gun: 5
- Gent Pipe: 3-4
- Axe, Empty Bacon Soup Can: 2
Attacks
Striker has one long-range attack in his arsenal, in which he punches using his left arm, which has been created into some sort of extension device. Due to the nature of the device, it takes a second for him to recover and go back into pursuit mode after attacking.
[/list]
Strategy
Much like Piper, your best bet with Striker is to let him, well, strike, by baiting him towards you, and then going for the hit once he’s taken a moment to recover. This is easier than with Piper, since although Striker is the fastest of the Butcher Gang, he tends to take longer when returning to pursuit, even if it may not seem like it.
For the best results, as I stated: step forward, as Striker rears back, back away, and right after he’s punched, go in for the hit. This shouldn’t take long, since Striker’s health is on the low end and he attacks consistently. On multiple occasions, I’ve killed him without fail using this strategy.
The Angel’s Wrath

One of the most notable in-game events surrounding the Butcher Gang is Henry’s first time facing off with each one of them, in which Alice commands you to kill them before they can make it to her door. This can be a tough task to tackle, especially with the implementation of Searchers fighting alongside them. We’ve already covered ways to defeat the gang members individually, but what about collectively?
Face-to-Face
Naturally, someone’s strategy for the first time playing through the task would be to face the Butcher Gang head-on if you don’t know the terrain. This can be a recipe for trouble- with all three members trying to delete you from this life and the Searchers with the same goal in mind, it can be nigh impossible to fire them from the cartoon’s cast. However, in keeping information about their individual selves in mind, it can become less of a hassle in the end.
Note: This strategy is NOT foolproof in any way. This is the way I defeated them in my first playthrough and I still got killed multiple times. However, it’s a strategy that, once I executed it properly, got me a win.
If you’ll remember, each Butcher Gang member moves at a different pace from the others. They should be descending the stairs in the following order if you don’t pursue them first:
- Striker
- Piper
- Fisher
This is the first thing to remember in the following strategy:
- Unless it’s to kill Searchers in the small pathway to the stairwell, don’t ever leave Alice’s gated platform. This not only allows the Butcher Gang to approach Henry individually and let him deal with them one at a time, but it also removes the concern of fighting the Searchers. They don’t attack you unless you pass their puddles and prompt them to spawn, which won’t happen if you never walk by. Not only that, but once you’ve defeated the Butcher Gang, all Searchers die immediately whether they’ve been spawned or not.
- None of the Butcher Gang members are very quick- even Striker, who has the fastest walk speed out of the three of them. Therefore, when each approaches, it gives you apt time to fight them and have a recovery spell before having to fight the next one. As long as you don’t waste too much time and execute them quickly, you shouldn’t have an issue being swamped.
- Of course, when dealing with each individually, there’s the individual strategies.
- Striker is quick, but his attack has a brief recovery spell before he can attack again. It’s also rather easy to dodge because it takes a second for him to swing. Therefore, you have some grace spells both before and after. So, the strategy that always keeps me from taking damage is to let him walk towards me and then quickly step back so his attack misses, swoop in, get in a hit of my own, and repeat the process until he’s dead. Because of this, he’s the only Butcher Gang member I manage to fight without ever getting hit.
- Piper is next, and he’s more difficult- his attack is quick, and he immediately returns to pursuit mode after attacking, which allows him to attack again. Usually, you can try to dodge like with Striker, but because he’s quicker, it runs the risk of getting hit and taking too much damage, either dying or needing more time before fighting Fisher. You can also walk backwards as you fight him to avoid some damage, but you’ll still need to step forward at one point because he’s slower than Henry is.
- Fisher isn’t much of an issue, especially since you know you don’t have to be concerned about any other Butcher Gang members (because they’re dead). His attack has a longer range, so be on the lookout for that, but if you continue moving- be it walking backwards or walking in circles- he shouldn’t do enough damage to actually kill you.
- Striker is quick, but his attack has a brief recovery spell before he can attack again. It’s also rather easy to dodge because it takes a second for him to swing. Therefore, you have some grace spells both before and after. So, the strategy that always keeps me from taking damage is to let him walk towards me and then quickly step back so his attack misses, swoop in, get in a hit of my own, and repeat the process until he’s dead. Because of this, he’s the only Butcher Gang member I manage to fight without ever getting hit.
And remember! Once the Butcher Gang members have been defeated, you no longer have to concern yourself with the Searchers- all of them will despawn/die, meaning they should always be your main focus.
Hiding
But let’s say you’re trying for the Tommy gun and don’t trust this strategy or yourself enough to not die before the task is finished. Or maybe you just don’t trust this enough to not take forever on one task. Never fear, there’s no shortage of “cheating” (for lack of a better word) ways to defeat them:
- There are a collection of barrels underneath the stairwell that leads back up to the elevator. It’s possible for Henry to jump up on one of these barrels and if he succeeds, he’ll be a level above the Butcher Gang and out of attack range- or at least far enough away that having all three members there won’t kill you.
- Pros: Keeps Henry out of attack range and isn’t too far away from Alice’s gate that you’ll fight through too many enemies. It’s also possible for you to beat the Butcher Gang over there.
- Cons: You’ll definitely have to fight through some Searchers to get there, which can slow you down; it’s also not guaranteed you’ll be able to jump on the barrel in one attempt, so it’s possible that you’ll be caught by enemies and swamped. Practicing this strategy before activating the task is recommended.
- Pros: Keeps Henry out of attack range and isn’t too far away from Alice’s gate that you’ll fight through too many enemies. It’s also possible for you to beat the Butcher Gang over there.
- The boarded up room on the upper stairwell can be accessed by breaking the boards down with the axe given to you for the Bendy cutouts task. Do this and open the door so you have access to it once the Angel’s Wrath task is prompted- you can’t break the boards with the Gent pipe inside. There are crates in the back of the office that Henry can jump on to be out of reach, much like with the barrels.
- Pros: It’s much easier to land on the crates than the barrel, and if you’re taking the Path of the Angel and have yet to die, you can also equip the axe leaning against the crate to kill off the Butcher Gang members quicker. Because of the spawn points of the gang members, you also don’t have to wait as long for them to approach.
- Cons: Because the room is on the upper level, you have to fight through even more enemies to make it there, and if you’ve forgotten to break the boards, you’re out of luck. Not only this, but the Butcher Gang members are nearer by if you’re having trouble with the task.
- Pros: It’s much easier to land on the crates than the barrel, and if you’re taking the Path of the Angel and have yet to die, you can also equip the axe leaning against the crate to kill off the Butcher Gang members quicker. Because of the spawn points of the gang members, you also don’t have to wait as long for them to approach.
- Next to the gate leading to Alice’s lair, there’s a set of pipes to the left that connects to the receptacle in which you receive your tools for the different tasks. There’s a gap above the floor pipe, which Henry can easily jump over, allowing him to hide behind the container and out of harm’s way.
- Pros: Because of the way the hiding spot is structured, if you’re not too close to the entrance, you can attack the Butcher Gang members with absolutely no risk of being hit, especially because the gang members don’t attack- they’re stuck in a perpetual walk cycle. I’ve used this without fail.
- Cons: Although you can’t be hit by the Butcher Gang, it can be inconvenient to choose this method because it takes more time. It takes longer for them to approach the top of the stairs and on the Steam version, they have a tendency to walk in circles, making you take timed swings in order to defeat them. This usually isn’t an issue on the PS4 release.
- Pros: Because of the way the hiding spot is structured, if you’re not too close to the entrance, you can attack the Butcher Gang members with absolutely no risk of being hit, especially because the gang members don’t attack- they’re stuck in a perpetual walk cycle. I’ve used this without fail.
These video guides are where I got the ideas for the different hiding spots, and they’re what helped me get the Tommy gun when I was terrified I wouldn’t make it through the Angel’s Wrath. Check them out!


Secret Boss Level
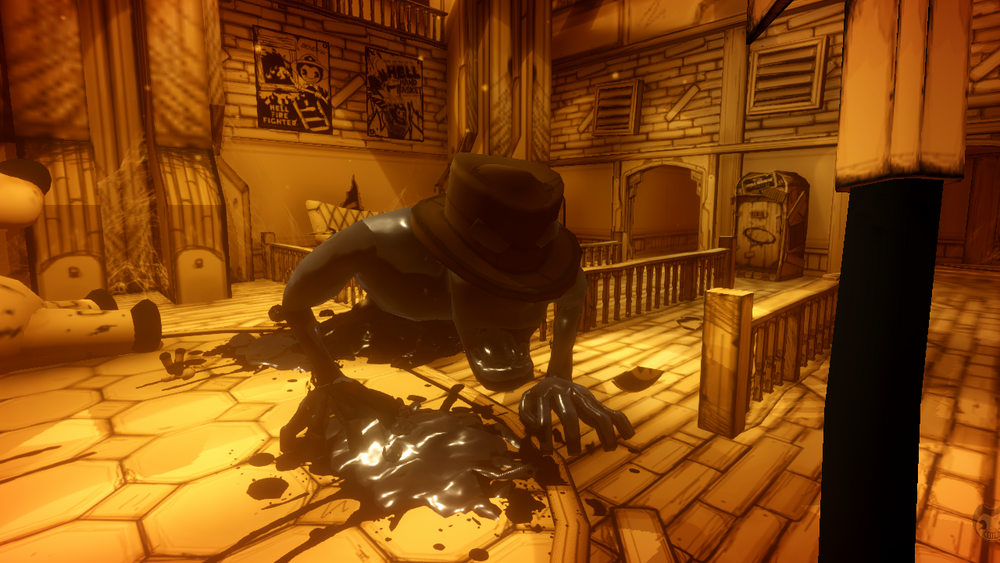
Despite the issues with the prior levels, the secret bosses in Chapter 3 might just give them all a run for their money. If you thought fighting a single Butcher Gang was hard then, just wait until you’re face-to-face with an entire horde of them. But they’re not the only ones you’ll have to worry about. Once you activate the switches, be ready for some fright.
Finding the Boss
Of course, in order to access the Butcher Gang level of the boss fight, you have to first find the boss fight. It’s discovered much like the Tommy gun secret found throughout the Path of the Demon, just with some tweaks and some extra steps.
- On the desk next to Shawn Flynn’s audio log, there should be an ink blot that you can shape into different forms. Change it to the shape of Boris before progressing in the story.
- Don’t die at any point before the Butcher Gang task on Level 9.
- Once you have the axe for the task to destroy the Bendy cutouts, go upstairs on Level 9 and approach the door that’s boarded up. You can now use this weapon to break down the boards and enter Grant Cohen’s office.
- There’s another axe leaning on one of the crates that you can pick up once the Butcher Gang task has been prompted and after. However, once you pick this weapon up, don’t continue and prompt any task/interact with any weapons that could switch what you have equipped. You WILL NOT be able to get the axe back once you’ve lost it.
- Return to Level K and the toy workshop that has Shawn Flynn’s audio log. Next to the lever that makes the shelves move, there should be a boarded up wall segment that you couldn’t get into with the normal axe. You can now chop it down with the new weapon.
- Each of the levers you see activates a different phase of the secret boss fight in the midst of Heavenly Toys, which goes as follows:
First Phase: Searcher Minibosses
The first phase of bosses you find are a variety of Searchers that aren’t significantly different from the usual Searcher, but are larger and have more strength. You also have to fight these Searchers, since hiding from them will only cause them to stand in one place until Henry returns to the Heavenly Toys arena.
Second Phase: The Butcher Gang
As stated previously, this is yet another Chapter 3 appearance of the Butcher Gang, but this time, it’s even more amped up. A collection of gang members, including multiple duplicates, will attack, more Butcher Gang members than you have ever faced before or will ever face again in this game. Use both what you have already learned and a strategic approach in order to defeat this crowd without losing your hard work. The only amped up difficulty with this phase of the fight is the number of enemies present; otherwise, their stats are all the same.
Third Phase: Searcher Boss
The Searcher Boss is one of the most powerful enemies in the game, with the appearance of your usual Searcher, save for the addition of a hat, much like with Jack Fain. However, this boss is also significantly larger, with the strength to match: if you’re not careful, this boss can kill you with ease, so it takes a lot of strategic movement and planning to fight it.
Since I haven’t played the secret boss myself just yet, I had to use some external sources in order to make this section of the guide, so please check out these resources for more information!
Searcher Minibosses: https://bendy.fandom.com/wiki/Searcher_Minibosses
Searcher Boss: https://bendy.fandom.com/wiki/Searcher_Boss
And for the same reason, I don’t have any tips and tricks available for defeating the enemies besides using what you’ve already learned about the Butcher Gang, so check out this guide on defeating the bosses! It’s really neat!

Research and Design

Research and Design is the location/level at which you see the Butcher Gang for the first and last time during Chapter 4. This time, however, you have no line of defense- you’re entirely reliant on the empty bacon soup cans around the area, which you have to use to distract them in order to restore the power to the haunted house.
Distracting the Butcher Gang
You have an unlimited supply of soup cans to distract them with, as on the upper level of the room, the cans will always respawn after a brief time so you can pick them up again if you happen to run out. Therefore, there’s not really any harm in testing the waters and seeing where the Butcher Gang goes when you toss cans at one place or another, not unless you’re on the floor level and risking them seeing you.
Note that the soup cans will always cause the gang to travel where they first land, not where they bounce- so if you can’t get a can to a safe place without bouncing it, it may be time to rethink your strategy.
The best way to do it- and possibly the only way, as I couldn’t run fast enough using other landings, is to turn to the right in the hallway from the entrance to the room and stand over the bannister to the one hallway below that extends out from the rest of the room. Drop one of the cans in there, as far away from the main room as you can, which will give you extra time since the gang doesn’t move fast. Also note that the gang members arrive and depart from the distraction at different times- Striker is always the first to get to the can and the first to walk back to the fire, so gauge your timing based on what he does.
Don’t worry about the time it takes to get from the end of the hallway to the stairwell; you can run across the upper landing and down the stairs and none of the Butcher Gang members will notice. It’s once you’re on the floor level with them that you don’t want to run, just make sure you’re walking directly to your destination- to the repair room on the other side of the room- and don’t hesitate.
Now, this is the point where you’ll think that you can leave and the door’s open and it’s safe, right? Wrong. You have a second lever to flip this time around, which is in a room down the hallway where you just sent the Butcher Gang. To do that, you can send a can careening straight ahead so you can sneak behind the gang, just make sure that you’re still hidden when you go to throw it.
Once you’ve snuck and pulled the lever, you have one of three options:
- Throw another can to distract them again and sneak past, knowing you made it through the level as it was designed.
- Run like a bat out of Hell and hope you make it to the Little Miracle station outside before you’re caught.
- Look them in the dead eyes and make the executive decision to let them tear you limb from limb because you know death is actually painless at this point and you’ll just respawn on the balcony with your progress saved.
Killing the Butcher Gang
Now, that title is slightly misleading- you can’t actually solve this level by killing the Butcher Gang, since there’s no weaponry around to fight with. However, once you’ve made it through, you can unlock a secret weapon that allows you to fight back- in the structure room, weapon-grade empty bacon soup cans can be found, with Piper, Fisher, and Striker’s names written all over them. It takes two for each Butcher Gang member, so be strategic, especially since the weapon is limited: you have 30 in total and you need every single one of them.
You need to use them sparingly because killing the Butcher Gang with the bacon soup cans is one of the requirements to find all of the horror visions in the game, this one being used to prompt the second one in this chapter (the first being the automatic one in the Archives). To do this, you also have to kill the Projectionist, Brute Boris, and Bertrum with the cans (it takes 5, 3, and 16 cans respectively) and the scene will occur after defeating Boris. This is also a requirement to unlock the secret enemy, Sammy Searcher.
I needed some help with the second section of this guide, so please check out the resources I used below!
https://bendy.fandom.com/wiki/Empty_Bacon_Soup_Can
Epilepsy warning for the video linked below!

The Butcher Gang Maze

Of course, our collective favorite moment in all of “Bendy and the Ink Machine” has to be the Butcher Gang maze in Chapter 5, right?… Right?
Alright, that was 100% sarcasm, because I’m sure most of you agree that the maze is one of the biggest pains to face in the entire game because it takes strategizing due to its noticeable lack of weaponry. But I’m here to help you out by showing you some of the ways in which people have managed to say goodbye to this level forever! Or, well, until their next playthrough.
The “Run Like Hell” Strategy
This strategy is very simple and is probably the one you’ve already tried or have seen other people try. The basis of it is, well, take off running and don’t stop.
This will garner the attention of numerous Butcher Gang members unless you’re incredibly fortunate and there’s a good chance you’ll die multiple times, but note that once you have an ink blot, even death won’t make Henry lose it- you’ll have it on hand until you use the machine. And since you’re even considering this strategy tells me that you’re not really worried about the “Valuable Employee” achievement, you can take the same route- go right and keep staying in that direction until you find Joey’s office, where the ink well will be just to the left. If you’re not afraid of dodging the gang at every turn and if you’re not concerned with dying or any achievement hunting, this might be the strategy for you.
Killing the Butcher Gang
Although you may not be equipped with a weapon throughout this segment, it’s still possible to kill the Butcher Gang without ever hitting them. Once you have an ink blot and you’ve created your first pipe, Bendy is always scripted to appear- he’ll never attack you because he’s standing on a balcony upstairs, so don’t worry about dodging more than one enemy type. It’s likely you haven’t figured it out via gameplay yet because it only happens by chance, but the ink that’s seen to indicate Bendy’s presence will always kill any Butcher Gang members standing over it.
Through this strategy, it requires you getting all three Butcher Gang members to attack you and since they won’t stop until you find a miracle station or die, garnering their attention is permanent. However, in doing this, you also have to have an ink blot and the ability to quickly create one of the pipes- so have the machine set to the correct setting before you go.
As long as you’re not killed, as stated, any Butcher Gang members you pass should continue attacking, so you can either get their attention from the get-go and quickly run back to the ink well, or you can sneak to get the ink and then run through the halls like a madman until all three of them have broken their route. You have only one chance to get this right, so be careful which strategy you pick and pay attention to who is with you when you approach the machine.
Because they continuously attack, Piper, Striker, and Fisher should all be with you when you make the pipe. You can decide to hide in the station, but make sure they’re all well enough into the room that they won’t return to the hallway before Bendy is there. And again, since Bendy isn’t a legitimate threat, you can just run around the room to make sure they won’t hit you before they die.
But know that if you decide to take this route, you can safely traverse the Administrative Offices for collectibles and even for lack of fear without worry that they’ll respawn.
Valued Employee
Now, this strategy is a complete turn in a different direction because this has its basis around an achievement. The requirement for such is to “take a longer walk”- fix the pipes, but don’t get caught by any of the Butcher Gang. This is an achievement that can be done a number of ways, as long as the base requirement is met. However, I’m more of a “run like Hell” person and at the time of writing this guide, have yet to gain the trophy on either platform I’ve played the game on. So, here’s a guide that I plan on using when I get the guts to finally go through with it:

Generic Strategies
This is a list of generic strategies and scenarios that could help you defeat the Butcher Gang at any given time. Some of these have already been stated, but will be restated for the purpose of the guide:
- If you enter the elevator and close the doors while a Butcher Gang member is pursuing Henry, it’s possible to trap them in a run cycle on the other side of the gate while you remain inside, unable to be harmed. This allows you to indiscriminately attack them, killing them easily. However, there have been times where I’ve accidentally cornered myself in an elevator with someone and almost died, so be wary and be prepared to hit a button as soon as possible.
- The ink seen when Bendy is around will always kill Butcher Gang members if they stand over it, which can especially be beneficial if he shows up during phase two of the Lever Challenge. However, this is left to happenstance and when Bendy is coded to appear depending on your gameplay.
- Although a known and basic gameplay mechanic, Butcher Gang members will always lose interest if Henry hides in a Little Miracle station. This is especially helpful during the maze or you’re found when leaving Research and Design.
Image Sources and Credits

https://bendy.fandom.com/wiki/The_Butcher_Gang

https://www.naguide.com/bendy-and-the-ink-machine-chapter-5-the-last-reel-walkthrough/

https://gamesmobilepc.com/bendy-and-the-ink-machine-chapter3/

https://bendy.fandom.com/wiki/Administration_Maze

https://bendy.fandom.com/wiki/Searcher_Boss

https://bendy.fandom.com/wiki/Piper

https://bendy.fandom.com/wiki/Fisher

https://bendy.fandom.com/wiki/Striker

https://bendy.fandom.com/wiki/Research_and_Design
Here we come to an end for Bendy and the Ink Machine How To Defeat The Butcher Gang hope you enjoy it. If you think we forget something to include or we should make an update to the post let us know via comment, and we will fix it asap! Thanks and have a great day!
- Check All Bendy and the Ink Machine Posts List


Leave a Reply