All-purpose guide for general purposes that I will hopefully do better than the last time.
Your home base
This is where you'll go after a bit more travel to gain stats, make weapons, rest, or deposit resources in the event of your untimely death.
The following are key features:
Smithy
It has four key parts. These unassuming boxes (1 – are the first.
These can be destroyed with a little bit of wood.
Next is the design table (2 – This allows you create completely new weapons or at the very least, the plans. To actually make the weapons you have created, you need to take your materials.
The anvil (3- You can view your plans here and, with the right materials make them.
Fourth, the furnace (4 ) – This allows 2 rocks to be turned into 1 metal. It is generally much more practical. Although you won't need it for your first visit, it'll be a valuable stop if you return alive.
Storage
This room is very simple. Interact with the right and left boxes to deposit the resource. To withdraw it, you need to interact with the left and right boxes. This is the primary way to ensure lives 2/3 have weapons other than a wooden quill.
Telescope
These are available in your base as well as after boss fights. You can assign full levels of exp to receive perks.
Shrines
There are shrines for everyone (?) of gods allows you to spend experience in the home base to gain stats. You can also gain favor by giving resources, but I suggest that you do not do this until you are happy with your lowest stats.
Spellbook
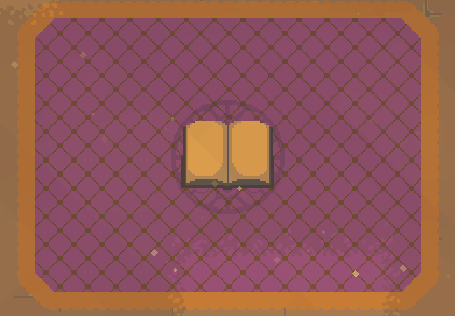
These spells can sometimes be found out in nature, much like telescopes. They allow you to access your entire collection of spells, and let you choose which ones to bring. Although you start with only one spell, they can be difficult to find. However, you will soon get more.
Tent
These are the best sights. They let you recover a surge and heal you a little. The extra one will also heal you if your surge limit is exceeded. They can only be used one time per day and cannot advance the time of your day.
Travel Flags
These flags mark exits from a given map. The side they are on will determine where you go on the global map grid. You can't use a flag from the same map if you've used one of these. For example, you cannot just turn around and go straight east if you exit west.
Important to note is that they cannot be used when there is something hostile within the vicinity.
Whatever these pillars may be
I'm not sure what these are for, but I'll admit it. They're right in front of some shrines. You can stick your weapon in there with 100% odds. To find out, I'll be playing around with them.
UI
The upper left corner of the screen contains a lot information so I'll just summarize it.
Health
If this bar is no longer containing any red, it is dead.
You will see yellow in your health for a short time after being hit. A surge during this time can restore the yellow area of your health bar.
Armor
Each piece has its own durability. Here, both pieces of armor that I have equipped are damaged but not completely destroyed. They cease to work when they reach zero but can still function through other means.
I know two people who offer metal at a shrine and pick up special steely drops.
Stamina
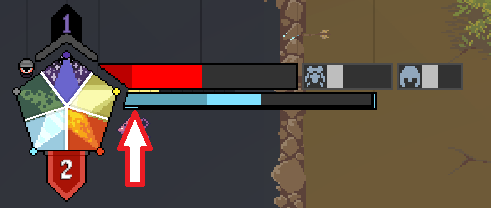
This is what you use for attack, dodge and run. If it hits the darkblue, you can't move and you are also at risk of being stunned by any incoming damage.
This thin bar is under the larger bar. It indicates how much time it takes for stamina recovery to start. This empties completely when you use stamina. Once it fills back up stamina begins filling up.
Experience
Here you can see your experience and spendable levels. Even if you don't have any experience, you can still use stats to get it. You lose a spendable level if you spend more than what is in the bar.
Surges
This little banner keeps track of your surges. It is your all-purpose emergency heal and destructive shockwave. One can be used to heal and release a powerful blast that damages or destroys most things and pushes away all enemies.
Noise
The thin yellow bar that runs between your stamina and health is an indicator of how loud you are making. This can be reduced by walking slower or on different terrain.
Speed
The stamina bar's cap indicates your speed, which is a sign that you are walking slower. You can adjust your speed using the scroll wheel.
Statuses
This star is, to my knowledge, an indicator of how close you're to having a status trigger placed on you. The centered lines move towards a point whenever you take elemental damages. Bad things happen to you when it reaches that point.
Mana
These little purple pips are your mana. When you cast a spell, you must use the amount indicated on the spell. If it isn't there, you can take some serious damage.
Unsorted advice
Switch weapons if your weapon sets itself ablaze.
Do not dodge when attacking. You'll lose your weapon.
Hope you enjoy the post for A Violent Revelry Gameplay Basics Guide, If you think we should update the post or something is wrong please let us know via comment and we will fix it how fast as possible! Thank you and have a great day!
- Check All A Violent Revelry Posts List


Leave a Reply